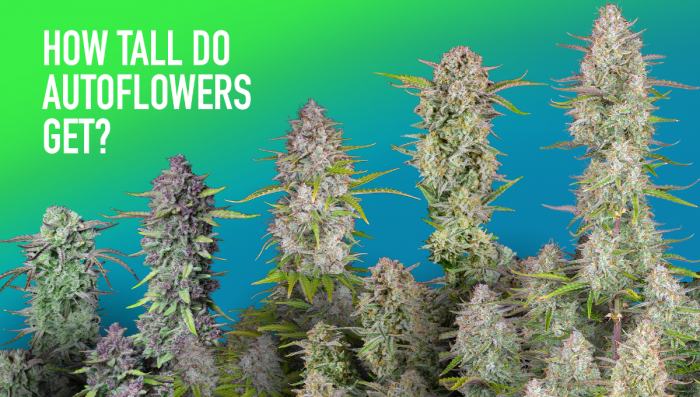
The Lifecycle of the Autoflowering Cannabis Plant
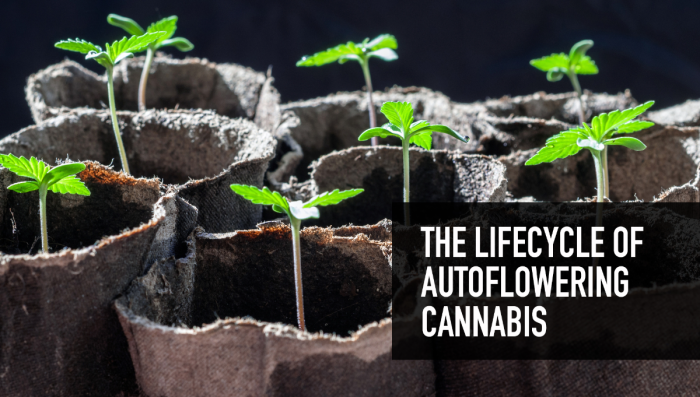
- 1. Germination
- 2. Seedling stage
- 3. Week 1 to week 3
- 4. Week 4 to week 6
- 5. Week 7 to week 9
- 6. Week 10 to week 11
- 7. Harvest
- 8. Drying and curing
- 9. In conclusion
Growing cannabis is an art that requires patience. Only growers that understand the science and lifecycle of the plant will succeed. The rest either fail miserably or simply give up. It’s not uncommon for beginners to fail. And since practice makes a man perfect, keep at it until you finally harvest a big bunch of nugs that remind you of all the hard work.
I promise that it’s all worth it in the end. But first, you must understand how the plant grows. Not only will this help you save time, but you’ll also be able to bounce back even if you face setbacks. So, let’s take a look at the lifecycle of the autoflowering cannabis plant to make it a little easier for you.
Germination
The first step of the plant’s cycle starts with germination. Now that you’ve grabbed your favorite seeds, it’s time to plant them. People use different ways to germinate the seeds, but it’s important to stick to a method that works for you. Ideally, the seeds should be soaked in a glass of water for at least 24 hours. Some growers use a nail file to scratch the seeds gently before soaking them.

This ensures that the seeds soak in more water, but you shouldn’t attempt this if you’re a beginner. The seeds can then be transferred to a wet paper towel and stored in a zip-lock plastic bag. Within 1-2 days, the taproot emerges and the seeds are ready to be planted. Note that many growers simply stick their seeds in the soil, and you can follow the same route if you prefer.

Seedling Stage
The seeds can be transferred to the soil at this point. It may take another day or two for the seeds to emerge from the soil and break their hull. Be patient and stop messing with the plants. You might be tempted to assist the seedling since it looks so fragile, but it will do fine without you. Also, remember to regulate the pH as it’s very important.

The seedling stage is the most important stage. The plant will take a long time to recover if there’s a mishap at this stage, so be very careful. If growing indoors, hang the lights at least 17-20 inches above the seedling. Reduce the distance as the plant grows bigger. CFLs, LEDs, MH, and HIDs will do as long as the seedlings are comfortable.
Week 1 to Week 3
The seedlings begin with only two true leaves. After a couple of days, a third leaf will appear. The plants don’t need any nutrients on the very first week if you’re growing in soil. For those growing in hydroponic setups, reduce the strength of the nutrients by half to allow the seedlings to adjust to them. You can kill the plants faster by overwatering them. Not a myth; it’s a fact. So, go easy on watering. And, make sure that you supply enough water to keep the soil moist. Moist, not dripping wet or dry. As the process of photosynthesis goes on, new sets of leaves will appear.
The seedlings become a little stronger during week 2. You can now introduce nutrients unless you’re using premade organic potting soil. Again, the nutes should be mild as the plants are still fragile. The distance between the lights and the seedlings should be reduced if the seedlings grow lanky.

By week 3, the seedlings show more leaves popping up. Some autoflowers may display their sex at this stage, but if you’ve planted only feminized seeds, you don’t need to worry at all. If using regular seeds, however, it’s important to distinguish between male and female plants. While female plants show their pistils, the males will produce little pollen sacs. It’s a good idea to remove the males since sensimilla buds are preferred. Nutrients can be used at regular strength now, but be cautious to check the plants for any nutrient burn. The seedlings will suffer a bit with low doses of fertilizer or nutrients, but they don’t recover quickly from an overdose or nutrient burn.

Week 4 to Week 6
This is the phase that determines how big the plants grow. You can use several training techniques including LST, Topping and FIMing to increase yields. Many growers make the mistake of introducing bloom nutrients as soon as the plant produces a few pistils, but that’s not how you do it.
Note that some plants may still be in the vegetative stage and nutrients must be provided at full strength based on autoflower feeding schedule recommendations. Also, this depends on the type of fertilizer you’re using. For instance, if you’re growing organically, use organic nutrients according to the manufacturer’s instructions, but make sure that it contains more nitrogen. If you’re using a brand that has two parts of Growth and Bloom fertilizers, use only the “Grow” part during week 4. Most brands of fertilizers provide the numbering of N-P-K to make it easy for you.
For example, if you’re using General Hydroponics, only FloraGro and FloraMicro (micronutrients) should be used during this stage. Remember to regulate the pH constantly when using nutrients, but if you’re using something like the pH Perfect from Advanced nutrients, for instance, pH can take a back seat.

Week 5 begins with the plants producing lush leaves with a few buds appearing slowly. Continue with the “Grow” nutrients even at this stage lest you want the plants to stop growing vertically. This is the stage where an explosion of growth occurs and you need to support it with nitrogen. Using more phosphorous or potassium at this point will force the plant to focus more on the buds rather than growing.
Many growers use bloom nutrients as soon as they enter the 5th week because they are satisfied with the growth of the plants. Some plants like Green Crack and Gorilla Glue have the tendency to grow very large, so you might be tempted to use flowering or bloom nutes. However, the yields can reduce significantly if the plant isn’t allowed to grow to its full potential.
As you enter week 6, the appearance of buds is even more apparent. A little defoliation doesn’t hurt now. Defoliation is the process of removing extra leaves to provide more light to the lower parts of the plant. Don’t overdo it, though, because the plant relies on the leaves to receive nutrients. Continue with nutrients meant for the vegetative stage as the plant will shoot up vertically.
Week 7 to Week 9
The plant is all geared up for its flowering stage and bloom nutrients can be used at full strength. The buds will begin to swell and the unmistakable aroma of sweet cannabis will fill up your tent. The pistils will slowly change colors from white to a light brown or red, depending on the strain.

It’s also a good idea to use nutrients to boost buds to improve the quality. Organic soil growers can use dried and powdered banana peels to introduce more potassium to the soil. The vertical growth stops sometime during week 7 but the plant does everything in its power to increase the size of the buds.
As you enter week 8, the leaves start yellowing a bit, but there’s nothing to be alarmed. This is just a natural way of the plant indicating that it’s nearing the end of its cycle. Continue to use flowering nutrients even as you step into week 9. Don’t forget micronutrients that are added right from week 2. Defoliate the plants again if the bottom parts of the plants display small buds.

Week 10 to Week 11
The plant is almost at the end of its lifecycle. Stop using nutrients and use plain water to remove any chemical buildup. This practice is known as flushing, and it’s very important if inorganic nutrients are used. Flushing also ensures that your buds don’t taste or smell like chemicals and improves the quality of smoke dramatically.

By week 11, all the leaves start turning yellow. Most of the pistils turn amber, indicating that it’s almost time to harvest. Admittedly, many seed companies including Fast Buds tell you that the plant will finish its cycle in 8-9 weeks. And yes, they do finish in 9 weeks if you grow in a good growing environment. However, your plants may take a little bit longer depending on the growing conditions you provide.
Harvest
You can harvest the plants now by chopping them all one by one. Use sharp sterilized scissors to prevent infecting the buds. Don’t forget to use gloves, especially if you’re harvesting buds of the Gorilla Glue as they are notorious for oozing resin all over.
Drying and Curing
This is the last stage where the buds are dried and then stored in mason jars. They will last a long time if you take care of the humidity. Curing comes at the last stage, but it’s the most important one if you want top-quality buds. Do not skip this process because all your hard work will be for naught if you skip this one. Last but not least, wait for at least 2 weeks to cure the buds even if you’re tempted to smoke them immediately. Doing so will reduce the harshness of the flower and your lungs will certainly thank you for it!

In Conclusion
The lifecycle of autoflowering cannabis plants is basically the same as photoperiods. There are a couple of differences in how fast they develop and how they grow but most cannabis growers with a couple of grow cycles under the belt can definitely grow autos without any problem at all.
If you've grown autoflowers before feel free to share your experience with fellow growers by leaving a comment in the comment section below!