Foliar Feeding Guide for Cannabis Plants

- 1. What is foliar feeding and foliar spraying?
- 2. When is the best time to foliar spray or foliar feed?
- 3. When you should foliar spray
- 4. The limitations of foliar spraying
- 5. What type of sprayer should i use?
- 6. Homemade foliar spray recipes
- 7. Top tips to improve the efficiency of foliar spraying
- 8. Conventional watering explained
- 8. a. Foliar feeding vs conventional watering
- 8. b. What is the solution? combine the two!
- 9. Foliar feeding quick faqs
- 10. In conclusion
Not to be confused with foliar spraying which is basically the same but refers to any solution that can be sprayed, generally used to deal with bug-infested plants by applying an insecticide or fungicide via foliar spray, foliar feeding consists of delivering macro and micronutrients to your plants by spraying the nutrient solution directly onto the leaves, resulting in healthier leaves and allowing you to fix nutrient deficiencies faster. Now, a lot of growers believe that foliar feeding can be better than regular feeding your cannabis seeds, but is it true?
1. What is Foliar Feeding and Foliar Spraying?
Foliar feeding involves spraying the leaves, instead of watering the soil, with a nutrient solution and it’s a quick and effective way to deal with nutrient deficiencies, this happens because the leaves can absorb nutrients much faster than the roots, although they’re limited by the size of the stomata, unlike the roots. Foliar feeding became popular in the 1950s when researchers at Michigan State University found that the leaves are a super-efficient organ of absorption; While the amounts they can absorb are relatively small when compared to watering the substrate, the efficiency is higher, reaching about 95%.
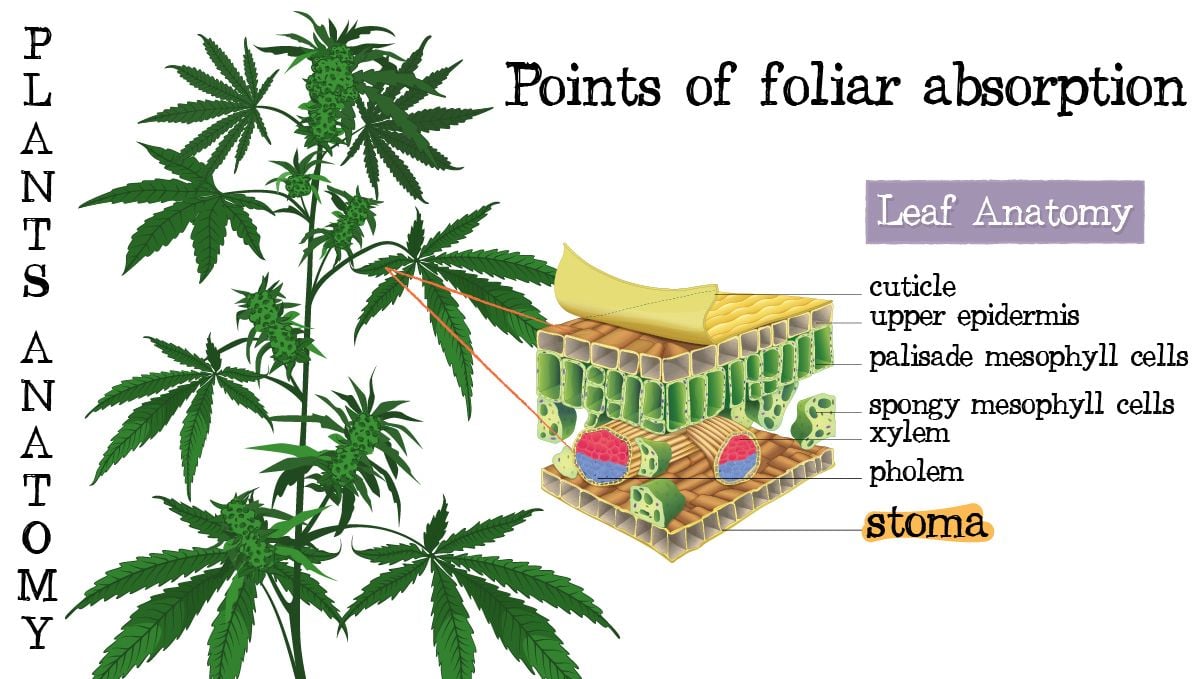
Despite what the scientists found, not all growers agree, in fact, cultivators have found that most products designed to be used as a foliar spray don’t include a surfactant to help the solution hold on to the leaves so the nutrient solution drips off the leaves almost immediately and when this happens, the leaves cannot absorb the nutrient solution properly but the solution still drips onto the substrate and is then absorbed by the roots. This means that foliar feeding can help you deal with nutrient deficiencies and may be used a couple of times to maintain the leaves healthy but should not substitute regular feeding.
Foliar Spraying
Apart from foliar feeding, there’s also foliar spraying which is basically the same method as foliar feeding but it’s used to apply fungicides or insecticides to combat mold, bugs or diseases. There isn’t really a difference between foliar feeding and foliar spraying besides why you’re using it and the frequency you should apply the solution, both of them are basically foliar sprays but one is used to feed your plants while the other is used to combat bugs or mold.
2. When is The Best Time To Foliar Spray Or Foliar Feed?
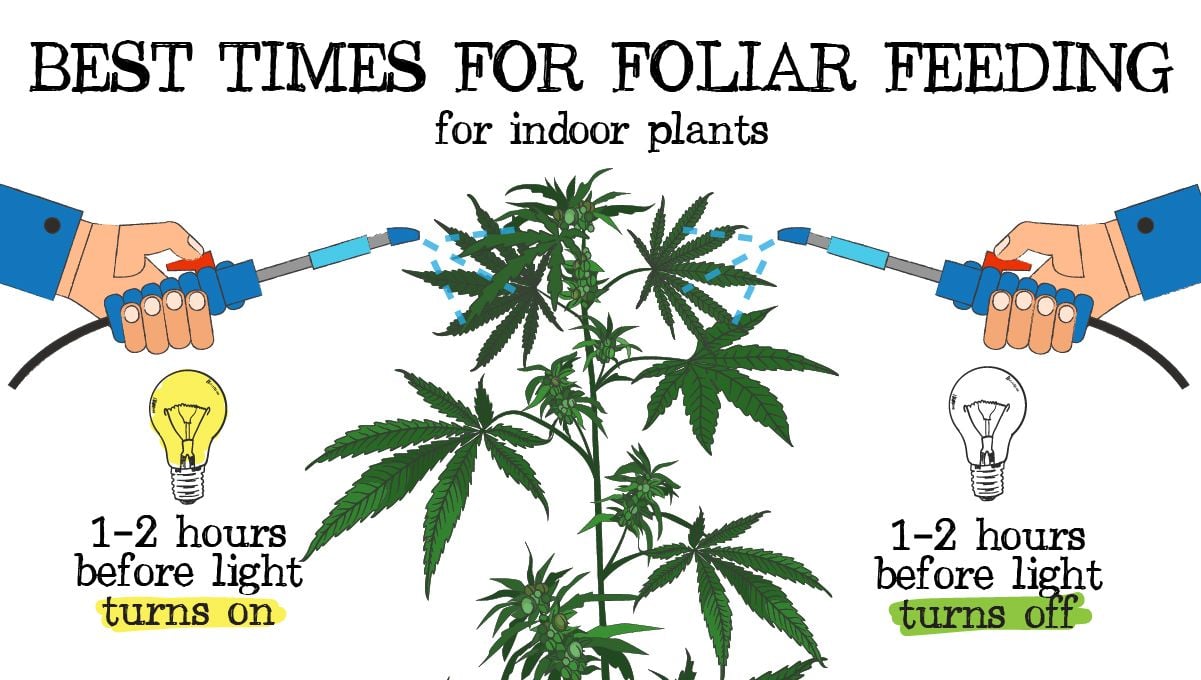
If you’re growing outdoors, the best time for foliar spraying or feeding is early in the morning or late in the evening because this is when the plant’s spores are fully open; If you’re growing indoors, the best time to spray your plants is 1-2 hrs before the lights turn off or 1-2 hrs before the lights turn on, this is due because at this time the plant’s pores are fully open, which allows for a quicker absorption when compared to spraying during the day (or when the lights are on).
Keep in mind that it’s not recommended to foliar spray when your plants are getting direct sunlight because, due to the “lens effect” caused by the water droplets, the light can end up burning the leaves and may degrade the nutrients or substances in the solution.
3. When You Should Foliar Spray
As mentioned, foliar feeding cannot substitute soil applications but under certain conditions, it may have an advantage over regular feeding and there are three main scenarios.
Limited Nutrient Absorption
Foliar feeding is recommended when something is limiting nutrient absorption by the roots, this may happen when the soil’s pH is high or low, temperature stress, high or low soil moisture, root diseases or a pest infestation that can affect nutrient uptake.
For example, nutrient availability in the soil is reduced when the soil’s pH is too high or too low, so under this condition, foliar feeding might be the best way to deal with this until you can fix the pH.
Nutrient Deficiencies
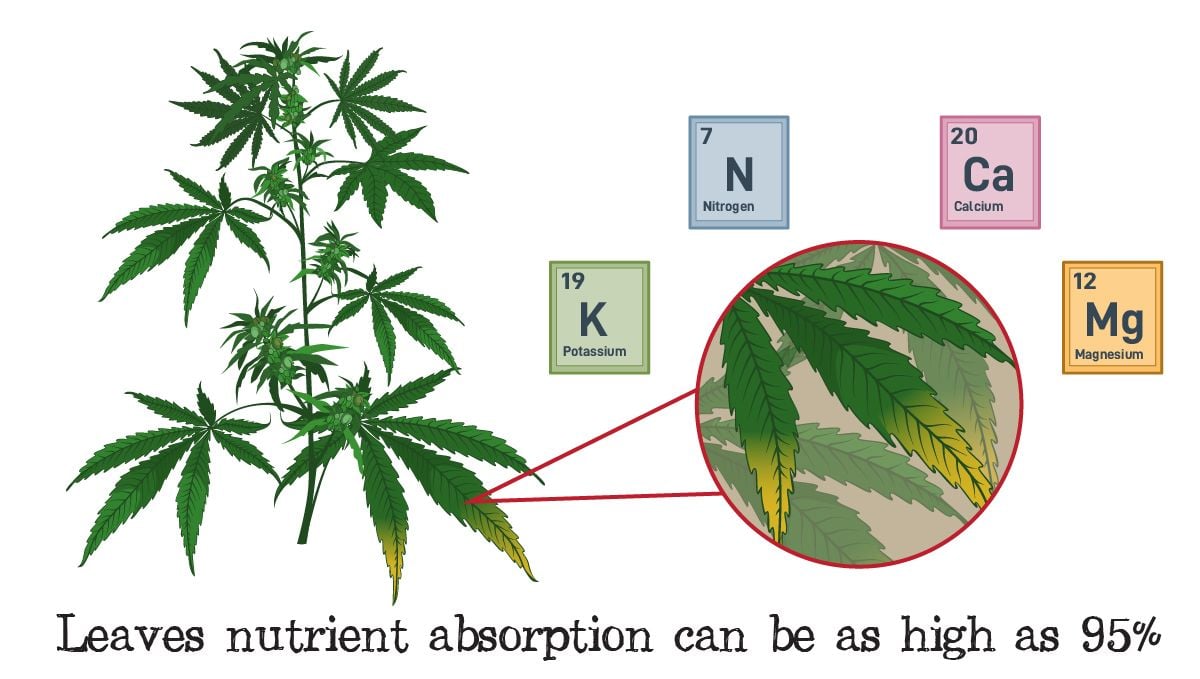
Foliar spraying is a great way to deal with nutrient deficiencies due to the fast absorption, as mentioned, the leave’s nutrient absorption can be as high as 95% which is 8-9 times higher than the root’s absorption efficiency, making it a quick (but temporary) way to deal with nutrient-deficient plants.
Foliar Feeding Stimulants And Growth Boosters
As mentioned, foliar feeding should not substitute regular feeding but due to the fast absorption, it’s a fast and effective way to provide your plants with specific nutrients or vitamins in the form of growth boosters or stimulants for each growth stage. Besides providing macro and micronutrients, stimulants and growth boosters will also help the leaves and branches grow healthier, and provide the extra boost your plants need which can improve plant strength, yield, and quality.
Foliar Spraying Against Insects and Mold
Foliar sprays are the best way to deal or prevent pests and diseases such as spider mites and powdery mildew. One of the most popular substances used is neem oil which acts both as treatment and prevention while having the advantage of being 100% natural and also having anti-fungicidal properties.
A lot of growers use neem oil or similar products and sometimes mix it with aloe vera juice and an emulsifier like potassium silicate to dissolve the oil and make it easier for the plants to absorb; By applying a solution like this one week during the vegetative stage can result in stronger plants and increase resistance against diseases and pests, but its use it’s not recommended during the flowering stage because it can affect the flavor and aroma of the buds.
Also, a foliar spray made with insecticidal soap such as potassium soap is an excellent way to take care of harmful bugs, and it’s particularly effective against aphids which are very common against aphids. This means that mixing different products can result in an even more effective solution, for example, mixing neem oil and potassium soap can get rid of bugs and also prevent future attacks.
Have in mind that you’re not limited to just neem oil and potassium soap, there are a lot of natural ingredients such as cayenne pepper, cinnamon oil, and garlic which can combat pathogens and insects without harming your plants and, if you don’t want to make your own mix, you can definitely find a natural solution in your local grow shop.
4. The Limitations Of Foliar Spraying
Now that you know the best time to foliar spray and when to do it, it’s time to know its limitations because despite the high efficiency and quick absorption, foliar spraying has its downsides too and they are:
Limited Nutrient Dose
Nutrients applied via foliar spray will not provide the entire nutrient dose your plants need so you will have to water the substrate with a nutrient solution in order to meet the entire nutrient requirements.
Leaf burn (aka phytotoxicity)
Applying a strong nutrient solution via foliar spray can result in leaf burn due to the water evaporating and leaving the nutrients on the leaves.
Cost and applications
In order to avoid leaf burn, for example, you will have to foliar spray smaller nutrient doses more often which is impractical and can cost more than regular feeding.
5. What Type Of Sprayer Should I Use?
There are two main types of sprayers used for foliar spraying and both are useful depending on the situation. The first type is the regular hand sprayer that you can easily find everywhere, this type can take between 500 ml to 11 L of solution and are small yet handy sprayers that will work great if you need to spray just a couple of plants or need to be more precise and not spray the buds.
The second type is pump sprayers which can be a bit harder to find but are super convenient because it usually comes with a “sprayer wand” which allows you to spray your plants from all sides without much effort.
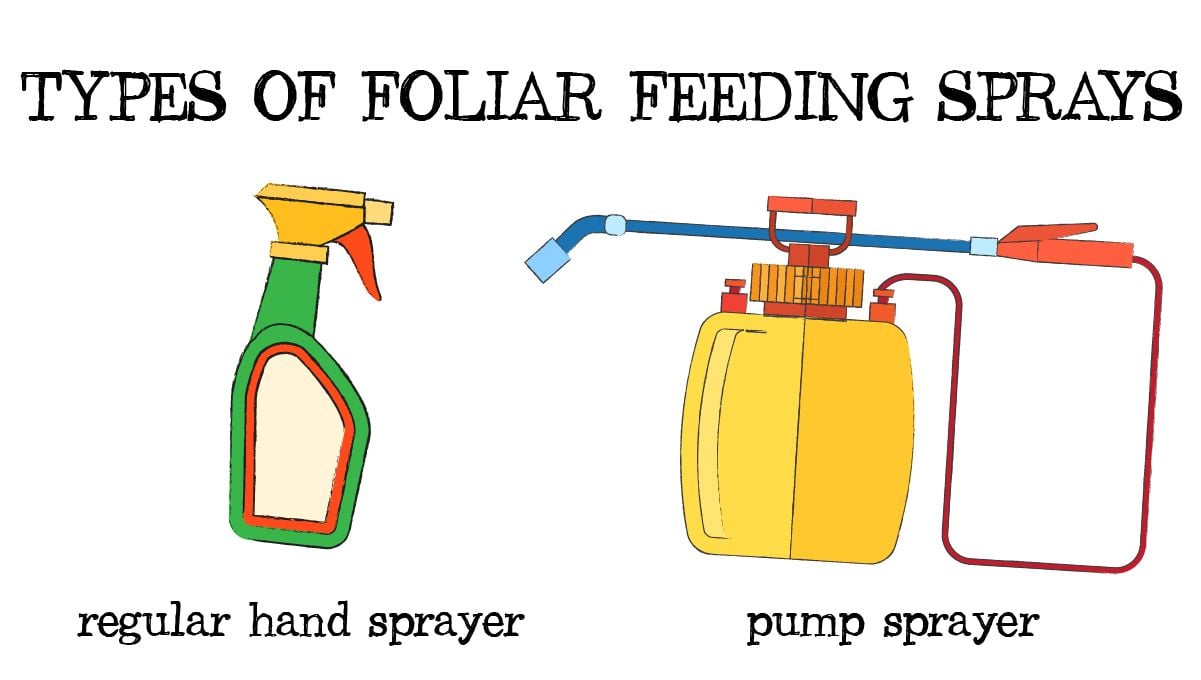
Now, there isn’t something as the best sprayer because the best thing would be to get both types and use them as you need to; This is because sometimes you will need a bigger sprayer such as the pump sprayer to foliar spray all your plants more easily but sometimes you need to be more precise and spray just a couple, in this situation the small hand-sprayer would be better so the best thing would be to have both of them available.
After a couple of years of using different types of sprayers for foliar applications, we can now confidently say that in almost every single circumstance a pump sprayer will do a better job and just make a grower’s life easier. These types of sprayers can be easily sourced from any garden supply store, hardware store, online, or at a specialized hydroponics store. They cost next to nothing and make any sort of foliar application so much easier. Do yourself a favor and go and grab one, and make sure it has one of the spray wands (makes full plant coverage a breeze). Trust us when we say you will definitely not regret it.
6. Homemade Foliar Spray Recipes
In case you don’t want to spend but still want to take advantage of the benefits of foliar spraying and foliar feeding, here are a couple of natural homemade recipes to help you get the best results:
Natural Growth Stimulant Recipe
For this natural growth stimulant you will need:
| Ingredients | |
|---|---|
| 10 g of Kelp meal | 0.5 g of liquid Silica (optional) |
| 5 g of Aloe Vera juice | 5-10 g of Alfalfa meal (optional) |
Soak 10 grams of Kelp meal in 1 liter of water for around 3-5 days; Kelp meal contains almost every macro and micronutrient your plants need as well as organic PGR’s (plant growth regulators). Once 3-5 days pass, add 5 grams of Aloe Vera juice which works as a surfactant and also contains many micronutrients, mix well and the foliar spray is ready for use.
You can also add 0.5 grams of liquid silica to the spray which will help strengthen the cell walls, resulting in stronger branches and increasing resistance to pests and diseases. Alfalfa meal is another great option because it contains Triacontanol which is another growth stimulant. Keep in mind that this recipe should be used when the lights turn off and you should stop using it 2-3 weeks before your plants enter the pre-flowering stage.
Natural Insecticide Recipe
If you’re dealing with a bug infestation or want to prevent one, here’s a great recipe; You’ll need:
- 100% natural Neem oil;
- Peppermint castile soap or any type of organic insecticidal soap;
- And warm water.
Fill a sprayer with 1 L of warm water, add 0.6-1 ml of castile soap and gently mix the solution. Once the solution is properly mixed, add 1 teaspoon of Neem oil, then close the sprayer and shake until the neem oil is combined. Once the soap and oil are properly combined the mixture is ready for use, just remember to always shake the bottle before spraying. If you’re dealing with a bug infestation, spray once a week until the bugs are gone and if you’re using it as a prevention measure, spray every 2 weeks, remember that you should not spray the buds!
Natural Fungicide Recipe
If instead of dealing with bugs (or preventing them) your goal is to get rid of mold, here’s what you’ll need:
| Ingredients | ||
|---|---|---|
| 1 L of warm water | 1 ml of Rosemary oil | 3.5 ml of 100% natural Neem oil |
| 0.6-1 ml of castile soap | 1 ml of Peppermint oil | 3.5 ml of olive or almond oil |
The process is basically the same as the recipe mentioned before with the exception of the extra ingredients. So first of all, fill the sprayer with warm water then add the castile soap and gently stir. Once the soap is mixed in, add the rosemary oil, peppermint oil, neem oil, and olive or almond oil and shake until everything is well combined and the spray is ready.
This foliar spray’s use is the same as the one mentioned before, so remember, spray once every 7 days if you’re fighting mold and once every 14 days as a preventive measure but never apply this foliar spray on the buds because it will alter their taste and aroma. Don’t worry if you do not have access to rosemary or peppermint essential oils, or olive or almond oil. These extra ingredients do help when using a fungicidal foliar spray, but they are not 100% necessary or needed. You can use the same basic insecticide recipe above and you should still see great results.
7. Top Tips To Improve The Efficiency of Foliar Spraying
There are several factors that can affect the effectiveness of foliar feeding or foliar spraying, so it’s important you keep the following factors in mind in order to foliar spray more effectively:
Don’t Forget About Surfactants
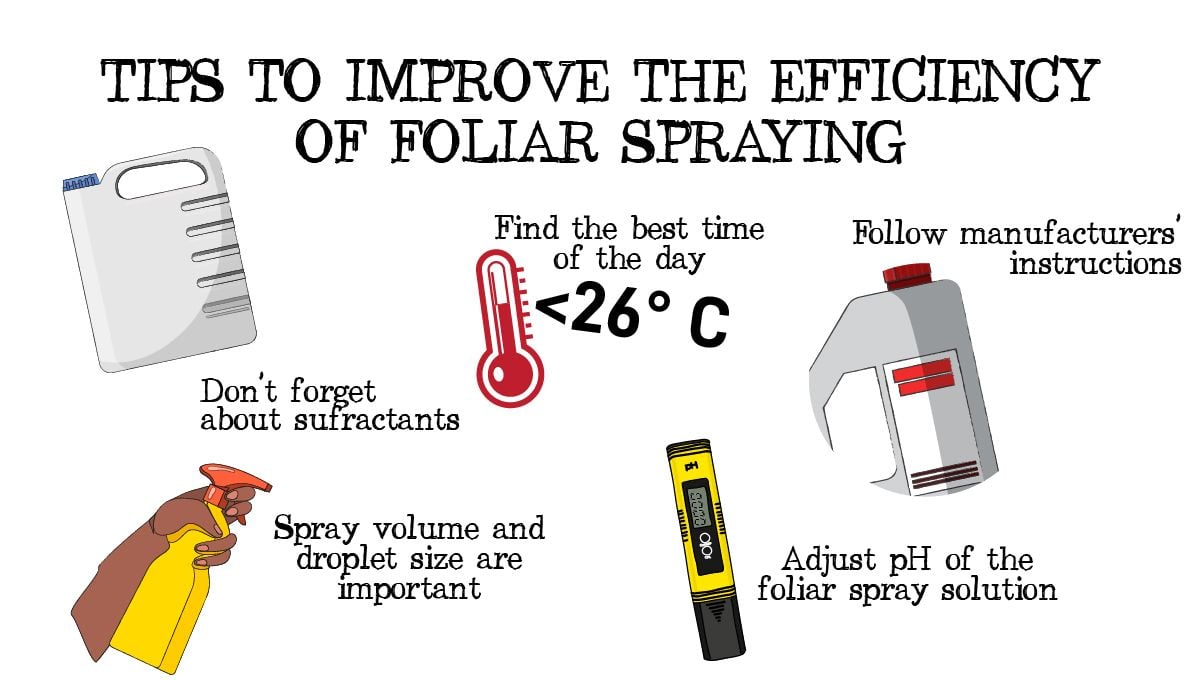
Surfactants, or "wetters", are compounds that can act as wetting agents that help a liquid spread more easily and when talking about foliar sprays, they contribute to a more uniform coverage of the leaves while also increasing the retention so, in order to avoid wasting any product that you wish to apply as a foliar spray, it’s highly recommended to mix a surfactant into the solution. The surfactant that we normally choose to use with cannabis foliar sprays is insecticidal soap. (never use other types of soap like dishwashing liquid or laundry soap. These will have a negative impact on your crop).
But, what exactly is insecticidal soap? Insecticidal soap is either a store-bought or homemade solution that can be added to foliar sprays to help prevent or treat insect and pest infestations. They help with controlling and killing many of the common pests that can affect a cannabis crop such as spider mites, mealybugs, aphids, and whiteflies. Insecticidal soaps work by penetrating the exoskeleton of the insects and effectively drying them out, which causes dehydration and cell collapse. Although finding organic insecticidal soaps is easy and budget-friendly these days, many cultivators like to make their own homemade options. All you need is a pure soap with fatty acids (unfragranced is best). Liquid Castille soap works perfectly here (we recommend Dr. Bronners). Mix 3 tablespoons of the soap with 1 gallon of distilled or RO water and 1 tablespoon of vegetable oil. Give a good stir or shake up and hey presto you have yourself your very own, homemade, insecticidal soap.
Find The Best Time Of The Day
Avoid spraying when it’s too hold or too cold; As mentioned, it’s not recommended to foliar spray when the plants are getting direct sunlight but you also have to have the temperature in mind, so never spray when the temperature is above 26°C.
In hot temperatures the pores on the leaves will be almost closed, making foliar sprays less effective and, when it’s too cold, foliar sprays may promote mold so it’s recommended that you spray a couple of hours before the lights are on or a couple of hours before the lights are off; It can also be a good idea to turn off the fans for an hour or two for your plant to better absorbs the solution.
When growing outdoors, do not spray if you’re expecting rain or strong wind because it can wash away the spray solution, so make sure the weather is fine or wait for the stormy weather to pass to avoid any major disturbances.
Spray With The Appropriate Droplet size
You should use a nozzle that sprays medium-sized droplets to cover a larger area and increase efficiency, this means that if you want to improve efficiency, the droplets should not be smaller than 100 microns or bigger than 175 microns. One of the main upsides of buying a high-quality garden sprayer is the control you have over the droplet size. Head over to your closest garden supply store or hardware big box and check out the range they have on offer. We recommend splashing out just slightly here. You don't need to buy the most expensive option, but it's best to grab one with adjustable droplet size. WIth $20 or so dollars you should be able to grab a gallon-sized sprayer with an extender wand (also super handy) and an adjustable droplet size.
Spray Volume Is Important
Spray volume can affect nutrient absorption efficiency so you should foliar spray until the whole canopy is covered, making sure you spray both sides of the leaves; Just remember that you shouldn't spray too much, making sure that the nutrient solution does not drip off the leaves.
Always Follow The Manufacturer's Instructions
Some commercial products may be safer to use than others so always follow the guidelines to avoid harming your plants. Also, make sure that you use protection such as gloves, mask, and eye gear if needed. You should also make sure that the product is safe for consumption because some products may be safe for ornamental plants but may not be safe for consumption.
Adjust The pH Of The Foliar Spray Solution
Nutrients in the foliar spray must be in their soluble form for the plant to be able to absorb them and the pH not only affects the nutrients’ solubility but also their interaction with other components of the water, so it’s essential you adjust the pH of the solution. According to the nutrients or substances, it contains. Canna bis like a different pH range depending on the method of cultivation. If you are growing in soil or a soil mix then keep the pH of any feed water and foliar spray inside the range of 6.0 to 7.0. For coco-coir cultivation, it should sit between 5.5 to 6.5, and for pure hydro, it should be somewhere between 5.8 to 6.2. These ranges also change slightly depending on the stage of growth the crop is at, so for all the relevant info take a look at the guide below.
8. Conventional Watering Explained
So, there we have it. Absolutely everything there is to know about foliar feeding (and foliar pesticide application for pest reduction and prevention). But how about just your normal, everyday feeding? You know, the old watering can method? Should you always feed with a foliar application, or should you be looking at using a combination of the two? Or even just cutting out the foliar feeding altogether, and going with the conventional watering method?
Foliar Feeding vs Conventional Watering
To say that you need to pick one style of feeding and stick to it religiously is certainly untrue, and thinking in that way would be considered unwise. Every grower should be taking the time to assess their own situation and work out what’s best for their plants, and for their particular circumstances.
That said, when it comes to conventional watering vs foliar feeding there’s certainly an argument to be made that both options are the better alternative when it comes to cannabis plants. They both come with some pretty major pros and cons, so let's dive in and have a look at what you need to consider when choosing the right path for your crop.
Conventional Watering: The Pros
Before we go any further, let's just state the obvious. No matter how effective your foliar feeding routine is, you are going to have to provide the root zone with water. There is just no way around this, as it's essential for providing the plant with its nutrition. This is where conventional watering comes in, and why it should always be a part of your feeding regime. It's the easier option out of the two, and it’s definitely the least time-consuming. In fact, you can easily set up an automatic feeding system for root watering for next to nothing.
Conventional watering is definitely the more common option of the two, and it stands to reason why most growers choose this method. Firstly, it’s incredibly simple. All you need is some water and a watering can (or another suitable container). Secondly, it can be done quickly and doesn’t require the same level of precision as foliar feeding. Conventional watering is incredibly easy to control and monitor. You can easily keep an eye on how much water your plants are getting, and if the soil is too dry you can simply add more. This can be incredibly useful for beginners, as it provides an easy way to keep track of water levels without the need to learn any fancy techniques. And that's just for organic, soil-grown crops. When we start to look at slightly more complicated cultivation techniques, root watering can provide some major benefits. Hydroponic growers, for example, take advantage of the ability to apply nutrients directly to the roots via a nutrient solution. This is something you just can’t do with foliar feeding.
Conventional Watering: The Cons
Unfortunately, conventional watering isn't all sunshine and lollipops. It is the simpler of the two options and is 100% necessary for optimal plant health and growth, but it does come with some drawbacks. The biggest issue is the fact that it can be difficult to make sure your plants are getting the correct amount of water and nutrients, and this issue is compounded for new growers who don't yet fully understand the process. It can be a bit of a guessing game, as plants will only show signs of distress when they've already been deprived of vital nutes for some time.
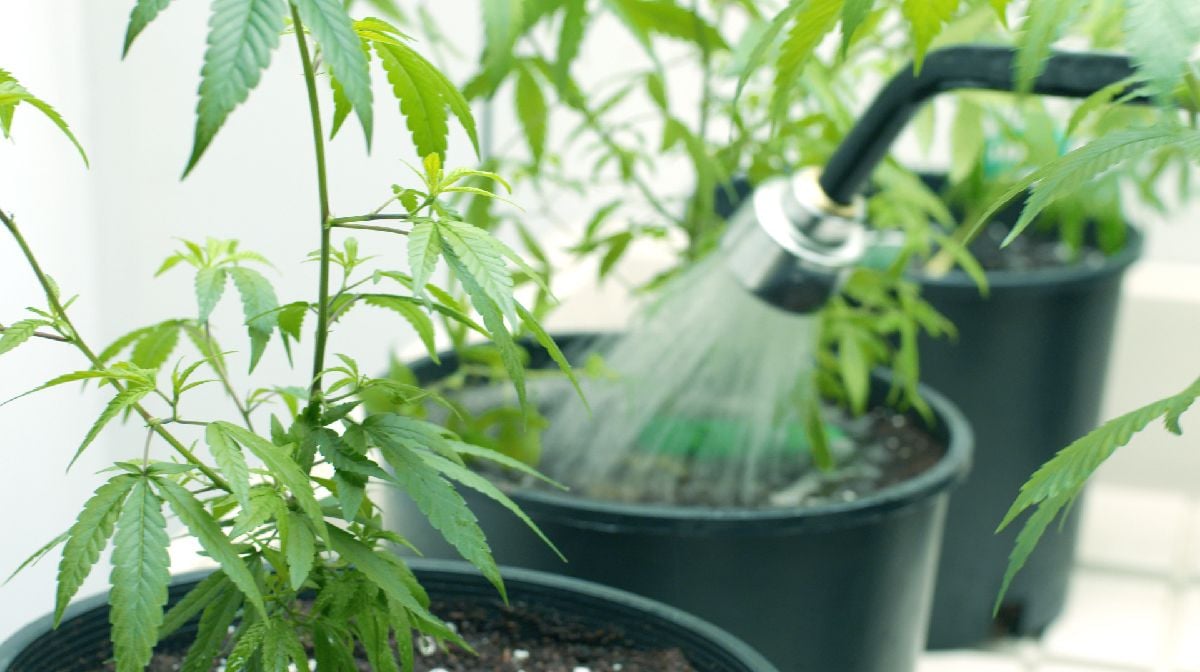
Another issue is that conventional watering can be inefficient when it comes to nutrient uptake. Overwatering can rinse the soil of essential nutrients, and the excess water can actually drown out your roots by restricting the oxygen level in the medium. This is especially true for soil-less growing techniques like hydroponics but is easier to control also as you have direct access to the roots, which makes fixing any issues much simpler. Finally, conventional watering takes more time and effort if you want to ensure the highest possible quality of produce. It can be automated easily and cheaply, but for your first few crops (at least), look to keep the plant numbers down (we recommend no more than around 6 plants per crop to begin with), and get as hands-on as possible.
Cannabis cultivation is a fickle beast, and even if you are an everyday green thumb who has had great success with gardening in general, you will want to take the time to really get to know how weed works and what it needs. Also, don’t be afraid to experiment a bit and find out what works best for you.
What is The Solution? Combine The Two!
If you want to get the best results possible, with huge yields and off-the-charts potency, then the best path to travel down is a combination of both foliar and root watering. This way, you’ll be able to give your plants the best of both worlds - a steady supply of nutrients from the root zone and an even distribution of nutrients from the leaves. A good combination strategy is to use conventional root feeding for the vast majority of your feeding schedule, with some foliar spraying thrown in from time to time. Let's say you have a new crop on the go, and you aren't super happy with the growth rates. You have dialed in all of the environmental controls, and the light spectrum and strength is where you want it to be.

Time to get that foliar spray out! A few pumps of your trusty nutrient solution, and you'll be ready to go. Not only will this give your plants an extra boost, but it will also help to ensure that all of the leaves are getting freshly applied nutrients, helping them stay at their best. You should also grab the spray bottle anytime you see signs of a deficiency. A few days of foliar spraying could help you correct any deficiencies quickly and easily, and should be part of your regular maintenance routine.
Does One Style of Cultivation Lend Itself More Heavily to Foliar Feeding Than Another?
No, not really. But if you are just starting out on your cultivation journey, then we heavily recommend staying away from pure hydroponic techniques, to begin with. The setup process can be tricky and costly, and it's easy to make mistakes.
If you are a fan of organic produce then, by all means, grab a bag of cannabis-specific soil (or make a super soil at home) and get cracking. But if you are looking for a good balance between soil and hydro techniques, check out coco-coir. Not only is coco-coir super easy to work with, extremely forgiving for new growers, and pretty cheap too - but it is also perfect for both root and foliar feeding. By providing the roots with a supporting structure (just like soil), coco-coir permeates the nutrient solution easily and quickly, giving your plants all the essential minerals they need. And at the same time, its airy structure allows for much higher rates of root zone oxygenation, and much better drainage than a pure soil blend. This means you can not only feed the roots efficiently but also give your plants extra nutrients via a foliar feeding solution.
9. Foliar Feeding Quick FAQs
What Does it Mean to Foliar Feed a Cannabis Crop?
In layman's terms, it means to feed the crop the nutrient it needs to survive and thrive through a spray form directly to the leaves. The stomata (the leaf pores) open and allow for the plant to get direct nutrient nourishment rather than indirectly from the root zone.
What Are The Advantages of Feeding Through Foliar Spraying Over Root Zone Watering?
There are a couple of marked advantages of foliar feed when compared to regular watering. This does not mean that you should stop regular watering and switch totally to foliar feeding, but there are some situations where foliar can give an advantage to the crop. If a singular plant, or the entire crop, is displaying signs of a nutrient deficiency then foliar feeding can make a huge difference. A nutrient lockout can be caused by a few different issues at the root zone, meaning any feed water added to the roots may not provide the correct nutrient balance. If the growing medium pH balance is off, or if there has been a buildup of salts then the plant can suffer.
With foliar feeding, we are able to bypass the root zone and apply the feed directly to the plant's leaves where it can be absorbed. This can be done at the same time as flushing the medium to bring it back to a good baseline. Waste is reduced as foliar feeding is much more efficient than root watering. Runoff is cut down, which not only saves you money but is also great for the environment. It's much easier for the plant to access the nutrient, and the plant uses much less energy
Can Foliar Feeding Replace Regular Root Feeding?
In theory, yes there is nothing stopping you from going the whole hog and just using foliar feeding at all times for the nutrition of your crop. But, there is a reason why commercial growers do not use foliar feeding at all times. It is simply not very practical and takes a lot more work than regular root zone watering and feeding. So, while there is a time and place for foliar feeding, it should be used in conjunction with root zone watering and not exclusively.
When is The Right Time To Foliar Feed?
There are certain times when you should and should not foliar feed your plants. For outdoor cultivators, early morning or late evening is perfect. For indoor growers, the 30 mins just after the lights turn OFF, or around 1 to 2 hours before the lights come ON is perfect. You want the plant to suck up all the feed water before the lights turn on. If you feed during the hottest part of the day (or when the lights have been on for a while) you run the risk of burning the plants, stunting the growth of the plants, and ultimately reducing the yield and potency.
What is The Proper Technique For Foliar Feeding?
Three main points here:
- Cover the whole plant, but don't leave it dripping.
- Use as fine a mist as possible (buy a good quality garden sprayer)
- If possible, move your plants outside of the tent or grow area.
Are There Any “DO NOTS” When it Comes To Foliar Feeding?
We have run through a couple already, like feeding with the lights ON, and using a cheap sprayer. But, there are a few other “do not's” you should keep in mind when foliar feeding.
- Do not use foliar feeding in the last 3 weeks of the flowering period. This can lead to issues with proper flushing and could have an impact on the final flavor of your buds. If you do decide to foliar feed at any time during the flowering period, be very careful not to spray the budding sites. Keep them protected, it's where the gold grows!
- Be very careful with the strength of your feed spray. Remember, the companies that produce the nutrients that we add to the feed water are businesses, and they make their money by selling as many of the nutrient bottles as possible. This means that they are prone to over recommending the strength of the solution. If your plants are very young, I would stick to 25% of the stated dose, and only move up to 50% when they are fully in the vegetative growth stage.
- Foliar feeding can dramatically and quickly raise the relative humidity of your growing space. Keep a hygrometer near at hand and stay vigilant, as high relative humidity can lead to all sorts of issues. If possible, remove your plants from the grow space to spray them.
10. In Conclusion
Foliar spraying your cannabis plants can be a great way to combat mold, bugs and pathogens, and it’s also a great way to correct minor nutrient deficiencies. Just keep in mind that the best way to feed your plants is by watering the soil, foliar feeding should be used as a complement or give that extra boost your plants need to produce dense and super resinous buds.
If you have any foliar spray homemade recipes feel free to help fellow growers by leaving a comment in the comment section below!


