Can I grow Autoflowering Cannabis Outdoors?
- 1. Plan everything from the beginning
- 2. What season is best to plant autoflowers outdoors?
- 3. How to grow autoflowers outdoors?
- 3. a. Germination
- 3. b. Prepare a good potting mix
- 3. c. Transplanting
- 4. Flushing
- 5. Want the best of both worlds? build a greenhouse
- 6. In conclusion
Growing autoflowers anywhere is pretty easy. Whether it’s indoors or outdoors, it doesn’t take a lot to achieve a decent harvest. But, who wants a “decent” harvest? Experienced growers usually expect humongous harvests that last a long time. Don’t fret if you’re a beginner, though. It will take time, but a few harvests later, you’ll remember your ‘silly’ beginner days when you were just a noob! While it takes some knowledge, patience, and experience to grow outstanding buds that can make your tongue sweep the floor, it is indeed possible to get good yields from autoflowering cannabis even if you’re a beginner.
And your chances of getting good yields go up a notch as soon as you decide to grow them outdoors. The autoflowers released a decade ago were no match to photoperiod plants. But, things have changed, and it’s more advantageous to grow autoflowers compared to photoperiod plants now. Autoflowers grown indoors produce great yields, but they are unbelievably stupendous when grown outdoors. You’ll seriously not know what to do with all the yields! So, if you want to know how to grow autoflowers outside like a pro, follow along, and you’ll soon have your friends asking you to spill some secrets.
1. Plan everything from the beginning
Autoflowers are very quick. So quick that you won’t have time to plan things at the last minute. Do you want to grow in soil or containers? Are the plants going to be on a balcony or terrace? How many hours of good sunlight do plants receive in your location? What nutrients are you going to use? Is it hydroponic or organic?
As you can see, there are several things to consider. Therefore, it’s important to have a plan at the very start. And this starts right from selecting good seeds because not every seed might suit your climate. Autoflowers don’t need a lot of light and grow alright even if they receive just five hours, but if you want your plants to thrive, a good amount of sunlight for at least 12 hours is mandatory. So, if you reside in a location prone to very cold temperatures, it becomes especially important to select seeds meant for colder climates like the California Snow Auto, for example.
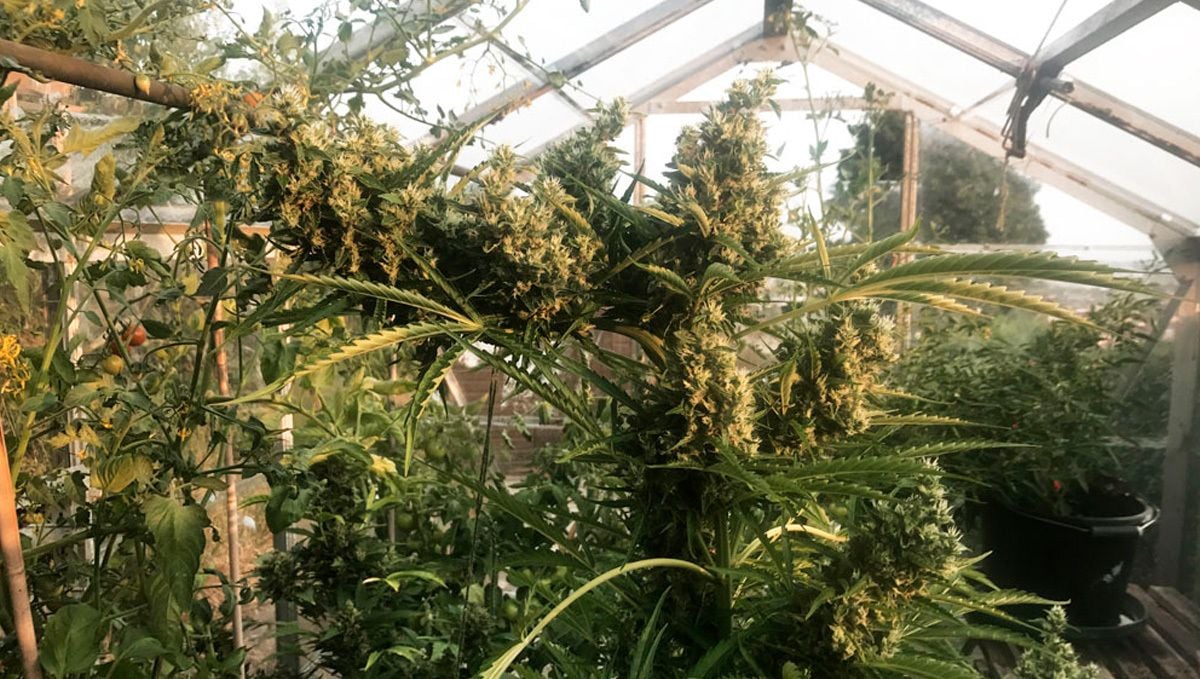
You should also spend a bit of time in your garden or guerrilla growing location during different bouts of weather. Assess which direction the strong winds mostly arrive from, and check online for average rainfall maps—especially during the flowering months. Position your plants in a relatively sheltered location if strong winds and storms are a regular occurrence. If you live in a region of high rainfall, you’ll decrease the odds of ruining flowers by raising them in a greenhouse or polytunnel. Autoflowers are typically resistant to a lot of diseases, but they aren’t completely immune.
And, selecting a strong variety with good genetics will help you in this area. Depending on where you reside, it helps to do a bit of research and buy seeds that are more likely to grow in your area. You can also take several steps early on in the growing season to help to buffer against the onset of fungal pathogens.
During germination, treat your seeds with lactic acid bacteria in order to defend them against diseases and increase their germination rate. Upon sowing or transplanting, you should also inoculate with mycorrhizal fungi. Not only do these microbes help to defend against bad fungi, but they boost water and nutrient uptake into plants. Next, you should amend your soil in a way that helps to increase drainage, as waterlogging can suffocate roots and also provide an ideal habitat for pathogens. Add plenty of organic matter into your medium to prevent water from building up in excess.
2. What season is best to plant autoflowers outdoors?
Again, the answer to this question depends on where you live. Growers planting photoperiod strains need to pay special attention to this. For example, if you live in the northern hemisphere, seeds can be planted in March and harvested in September. But for autoflowers, it’s not necessary to plan a lot unless you experience extreme temperatures. Even if you’re growing autoflowers that are easy to grow, it’s important to not plant the seeds when the ground is about to freeze. If you grow in containers, though, you can get the plants inside your home every day to protect them from the bitter cold.
Similarly, if you live in a location where days are exceptionally hot exceeding 40°C or 104°F, it’s best to protect the plant from drought or heat by providing a lot of water. If everything fails, a greenhouse is your best option. Typically, autoflowers grow best when they have sufficient sunlight for at least 10-12 hours. It’s even better if you get more than 16 hours. Therefore, growers usually choose to plant seeds in spring and harvest it when the plant matures. Basically, just plan ahead and avoid planting seeds if extreme changes in weather are expected and you can still harvest at least 4-5 times a year. If you reside in locations close to the Equator, you’re in luck because you can grow autoflowers throughout the year. In simple terms, just remember to skip either summer or winter when it’s extreme and you’ll be able to grow and harvest buds in the remaining seasons.
If you’re growing further north (or south), you can get a good idea for planting times by looking at gardening calendars for your local area. These tools will inform you of the average times that the last and first frosts of the season occur. As long as you transplant your autos earlier enough within this period, they are more than likely to thrive outdoors. To eliminate the risk of late frosts damaging your plants, you can always initially transplant them under row covers or within a greenhouse or polytunnels.
3. How to grow autoflowers outdoors?
Assuming that you’ve selected seeds that are meant for your climate, here’s what you can do to grow autoflowers outdoors.
Germination
There’s no difference in germinating any cannabis seed. Whether it’s autoflowering or photoperiod or regular or feminized seeds, it’s all the same. Many growers with years of experience growing several types of plants are comfortable just throwing the seeds in the soil and waiting patiently. But, not all of us are like that, are we? Beginners need something easy and fast. And that’s why it’s recommended that you sow the seeds in water for at least 24 hours to moisten the seed coat. The seeds can then be shifted to moist paper towels for at least a day or two to allow the taproot to emerge. You can also use Jiffy pellets that expand when soaked in water to sow seeds. Whatever method you choose, the seeds can be planted in containers or soil once the tap root breaks out of the seed.
Prepare a good potting mix
You need a good potting mix no matter where you grow autoflowers. Whether the plants grow in a balcony or terrace or in a garden, good soil is a must. Autoflowers, like other cannabis strains, love aerated soil mixed with a lot of nutrients, especially if you’re not growing hydroponically. Hydroponics allows you to provide an exact mix of nutrients, but there’s a bit of work involved if you’re growing in soil. A good potting mix usually consists of peat moss, coco peat or coconut fiber, perlite, compost, and regular gardening soil. Soil generally provides all micro and macronutrients required for the plant to grow. However, you need to grow like a pro, remember? Thus, mixing in some kelp meal, blood meal, bone meal, seaweed extracts, and humic acid will definitely help.
Remember that you need to prepare a potting mix only if you’re growing in containers. For those growing in the garden or open space, you can till the soil and mix in some fresh compost and aged manure to do the job for you. Nothing beats natural sunlight and good ol’ soil, and you’ll notice that your plants agree too! Another important factor when growing in containers is to select the right size. If the container is too small, the growth will slow down because there’s no space for roots. Conversely, if the container is too big for a small plant, it will take quite a while to grow. A good rule of thumb is to select pots with the ability to hold at least 5-6 gallons. For bigger plants like the Zkittlez Auto or Gorilla Glue, however, a good range would be anything between 10-15 gallons.
Transplanting
Most growers will tell you that it’s a horrible idea to transplant autoflowers. While a part of that is true, it’s not impossible. Growers with a lot of experience transplant autoflowers pretty easily without any hassles. But it’s a different ball game for beginners since autos are very fast and there’s little room to screw up.
If you’re a beginner, keep it simple and use only one container for the entire cycle from seed to harvest. However, if you absolutely have to transplant, make sure that you know the basics of transplanting well. For starters, the soil must be moist, and the roots must have grown adequately to prevent transplant shock. In other words, the plant shouldn’t be too young or too mature because the timing matters a great deal.
Water wisely
Beginners tend to love their plants. So much that they can kill them! Whether you’re overwatering or under-watering the plants, it’s easy to kill them. This is especially true if you’re growing in containers. Overwatering kills the plants quicker than you can imagine. You water the plants as usual and within a few hours, the leaves begin to droop. You supply more water assuming they need more and the plants simply die. To prevent this mistake, you avoid watering the plants only to find them dead due to under-watering!
It’s tricky, and I get it, but it’s not that complex either. Simply lift the pots to check if the soil is dry or wet. If the pot is too heavy, stop watering, and if it’s too light, then it’s time to supply a little water. It’s best to start with just a liter of water to understand how your plant reacts. You can adjust the amount later once you gain experience.
4. Flushing
If you’re growing autoflowers in containers, it’s important to flush out all the nutrients you used to help the plant thrive. Whether it’s inorganic or organic, a good flush with clean plain water about a week before the harvest will certainly help. Flushing improves the taste and removes the harshness of the buds dramatically.
No matter where you grow autoflowers, the rules are pretty much the same. As long as you buy strains that are meant for your climate, you don’t need to worry. Unlike photoperiod plants, autoflowers don’t have extra hassles such as light leaks and uninterrupted darkness, so they adjust well anywhere. More growers are shifting to autoflowers since they are easy to grow and yield good buds with high THC levels. If it’s your first time, take a look at our seed catalog to check what suits you the best and get growing today!
5. Want the Best of Both Worlds? Build a Greenhouse
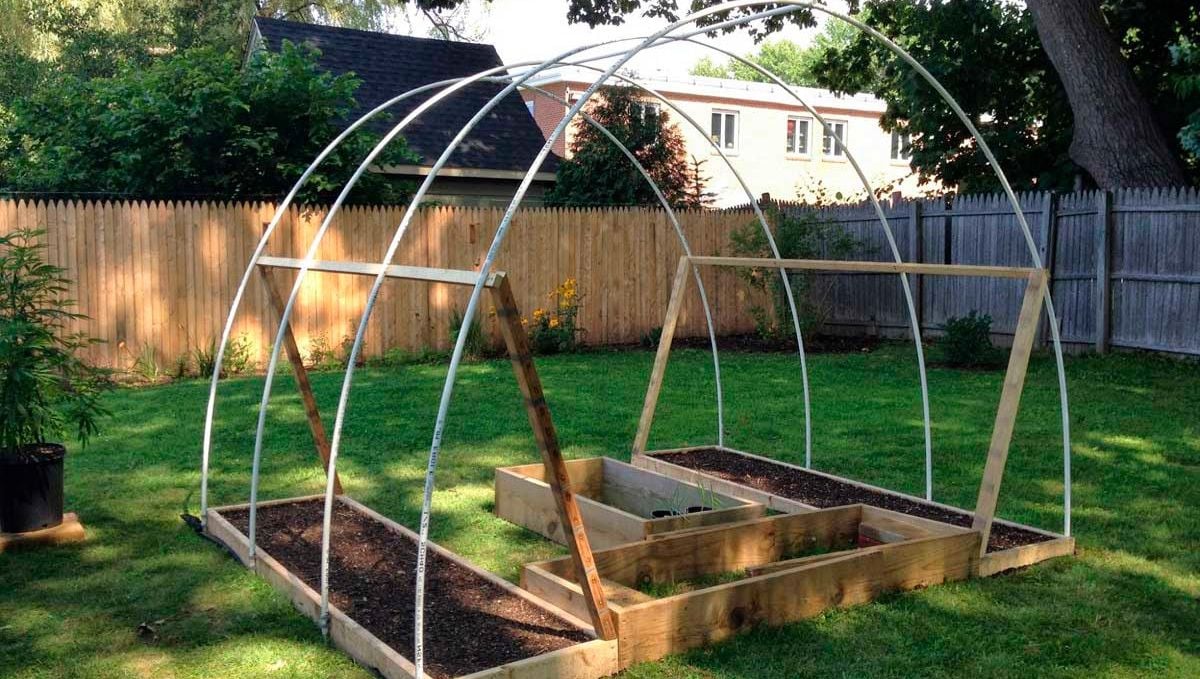
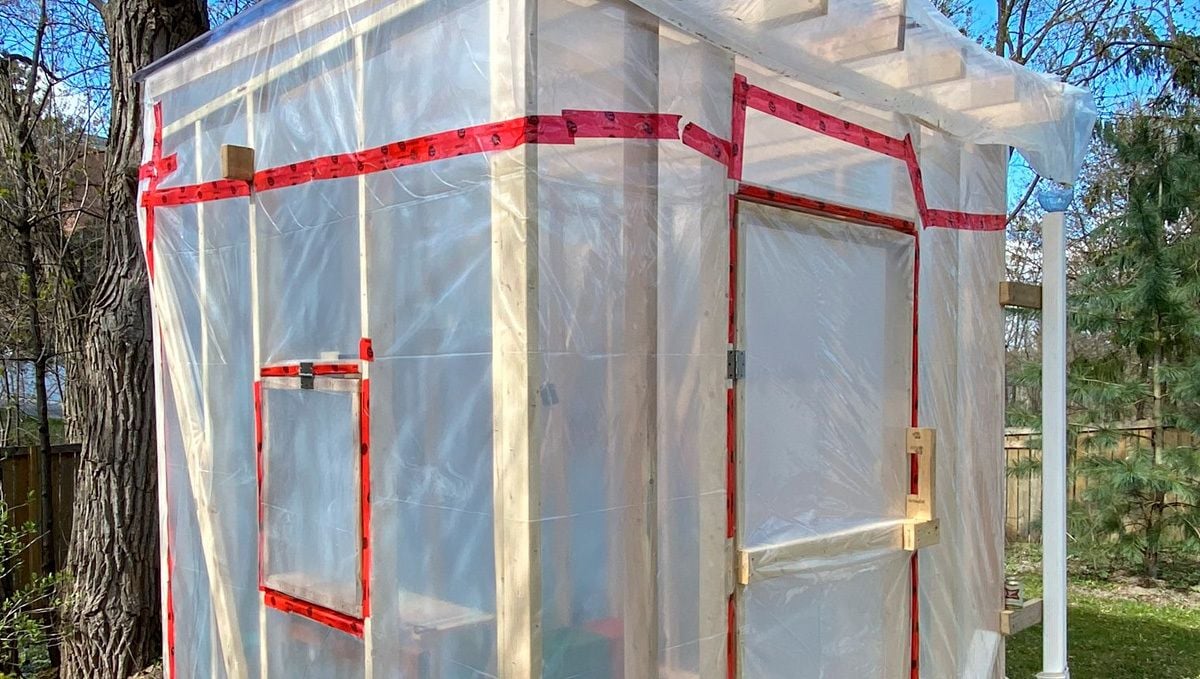
The very best way to ensure you can control the environment in certain and specific ways when cultivating autos outdoors is to build yourself a greenhouse. It doesn’t have to be anything big or fancy (although if you have the space and the spare cash then why not?). Even a quickly thrown-together greenhouse made from scrap can have a hugely positive effect on the final yield, so let’s have a quick look at exactly what you need. To build a basic greenhouse for outdoor cannabis cultivation you need to grab:
- Some PVC piping can be bent into horseshoe shapes to provide the tunnel structure.
- Polyethylene plastic sheeting
- 4 x 4 timber lengths
- Metallic rebar lengths - 50 cm or so
- A staple gun and gaffer tape
You should have already chosen the perfect spot in your garden to build your DIY greenhouse. A spot with the most sunlight possible, where you can build the tunnel in a north-south orientation, and where there is easy drainage. When building your greenhouse it’s always better to opt for a raised base as this allows for better drainage, and will help protect the crop from pests and disease. The base can be anything, but we usually go with wooden boards that can be swapped out easily and cheaply year to year. Next up, hammer in the rebar at each corner and each meter or so down both sides.
They should be hammered in deep enough until only 20cm is left above ground. Next up, grab the PVC lengths, place one end over the rebar and bend until it creates a semi-circle and secures the other end on the rebar opposite. Do this all the way down until you have the outline of a tunnel. Use the other PVC lengths to secure these semi-circles in place. Finally, cover the whole thing in the plastic sheeting and go ham with that stable gun. The more staples the better.
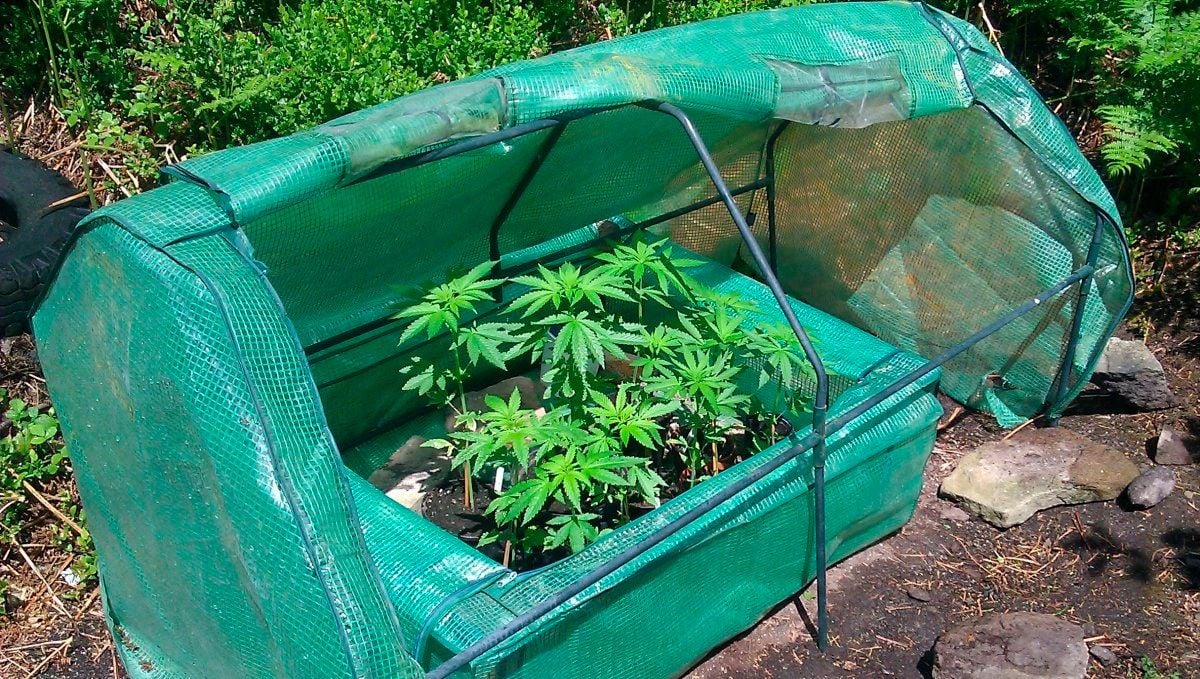
Hey presto, you’ve got yourself a greenhouse! This should help protect the crop from the heavy winds and rain, and will also allow you to heat the area up if needed. You can also beef up the lighting with LED panels during the wintertime to guarantee successful yields during winter and ward off any frost with some sort of heating. The greenhouse will also protect against larger scavengers and will provide much higher levels of discreetness. Even if you live in a fully legal country or state, you should still grow weed with as much care and discreetness as possible. You never know when those pesky, nosey neighbors might decide that they deserve those juicy buds more than you do!
6. In Conclusion
So, there you have it. Quite obviously autoflowering strains can be grown outdoors and can flourish with the right care. As with photoperiod plants, there are some strains that are more suitable for outdoor cultivation so always “read the box” before you decide and be sure to follow the best possible nutrient routine to get the best results. So what are you waiting for? Head over to our autoflowering seed section right now. Happy growing!



Comments