Plant Training Techniques: The Tie-Down Method

- 1. The tie-down method: a lst technique
- 2. The tie-down method
- 2. a. The tie-down method on autoflowers
- 3. Starting training
- 3. a. What material should i use?
- 3. b. Where do i tie-down?
- 3. c. Step 1: bend the stem or branches
- 3. d. Step 2: tie the highest branch
- 3. e. Step 3: organize the canopy
- 3. f. Step 4: watch, wait and repeat
- 3. g. Flowering
- 4. Fast buds strains that work well with the tie-down technique
- 5. In conclusion
The tie-down method consists of tying down the branches and leveling the canopy so that all flowering sites get equal amounts of light, thus increasing yields. This low-stress training (LST) method basically consists of gently bending stems and tying them in place to drastically change the shape of the plant. This is done to create multiple bud sites, even out the canopy, and overall help you use light more efficiently. Using LST techniques like the tie-down method can drastically increase your yields without changing your setup.
So, what makes this training method worth trying when growing cannabis seeds? And how does it differ from other techniques? Well, the tie-down method benefits plants and yields in several different ways. It helps to create a more uniform canopy and boost aeration. The latter helps to defend against devastating mould during the flowering phase of the growing cycle. One of the main benefits of this method is that it doesn’t take much of a physical toll on plants. In fact, your plant will hardly detect that it’s even happening! In contrast, other training techniques aimed at achieving better yields involve direct stress and damage to plant tissues, which can result in periods of decreased growth—making them unsuitable when growing autoflowering cultivars.
1. The Tie-Down Method: A LST Technique
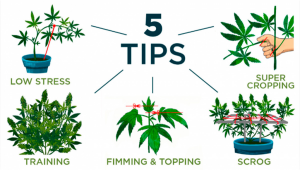
Low-stress training is used to form a relatively flat, even canopy. This exposes all the bud sites to equal direct light instead of just the top main bud or just the top flowering sites. As a result, trained plants can naturally produce more and bigger buds in the same grow space than untrained plants. There are other cannabis plant training techniques that are called high-stress techniques (HST) but they may stress your plant or slow down growth.
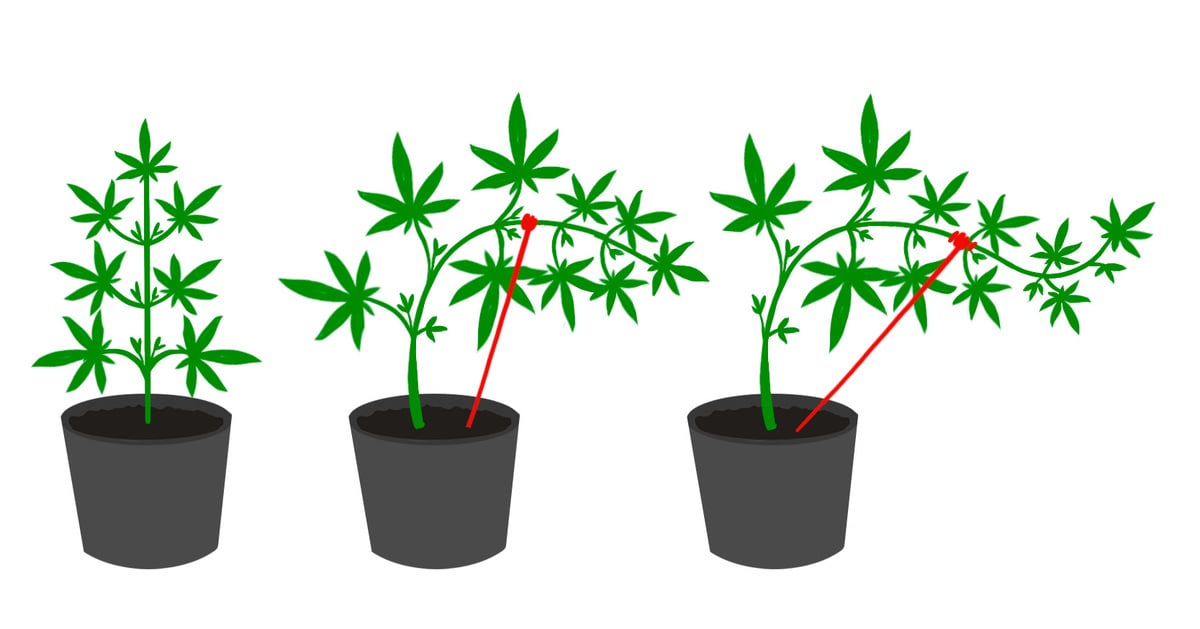
This technique benefits growers in a range of different cultivation situations. For example, it helps indoor and outdoor growers that have no choice but to raise plants in small and cramped spaces. When left to their own devices, cannabis plants grow in a quintessential “Christmas tree-like” fashion and produce one main central cola. Using the tie-down techniques helps to dramatically reduce the overall height of a plant. This means you can happily grow many autoflowering strains in the most covert of environments, from small grow tents to converted cupboards and boxes.
| Main Pros and Cons of Plant Training Methods | ||
|---|---|---|
| Training Method | Pros | Cons |
| Scrog | Well-developed buds on all bud sites. | Need to train each branch. |
| Mainlining | More main colas and better yields. | May stunt growth. |
| Tie Down | Shorter plants with better yields. | Need to train branches every couple of days. |
| Topping | More main colas and better quality buds. | Slow growth due to recovery time. |
2. The Tie-Down Method
The tie-down method lets you train your plants to grow in the exact shape and size you want, giving indoor growers the ability to make the most out of their grow space. The idea behind the tie-down technique is to bend and gently tie-down your plant’s branches and leaves so they develop into an even canopy. This will promote multiple bud sites and all will get equally as much light as possible to all your plants, resulting in much bigger yields from the same grow lights compared to plants that were not trained. It can also be used to reduce the height of your plants that are getting too tall for your grow tent or are growing taller than your other plants and leaving them in shadow.
But this cannabis plant training technique helps with much more than just structure and shape. By spreading out the canopy and promoting lateral growth, plants become less dense. Throw in some light defoliation at different stages of the growing cycle, and you can create a balanced and even canopy that isn’t overcrowded. This strategy helps to promote adequate airflow which is highly important when it comes to preventing mould. Fungal pathogens thrive in moist environments with stagnant air. The tie-down method helps to morph the canopy into an environment that simply doesn’t support their growth, especially when fans and dehumidifiers are also part of the growing equation.
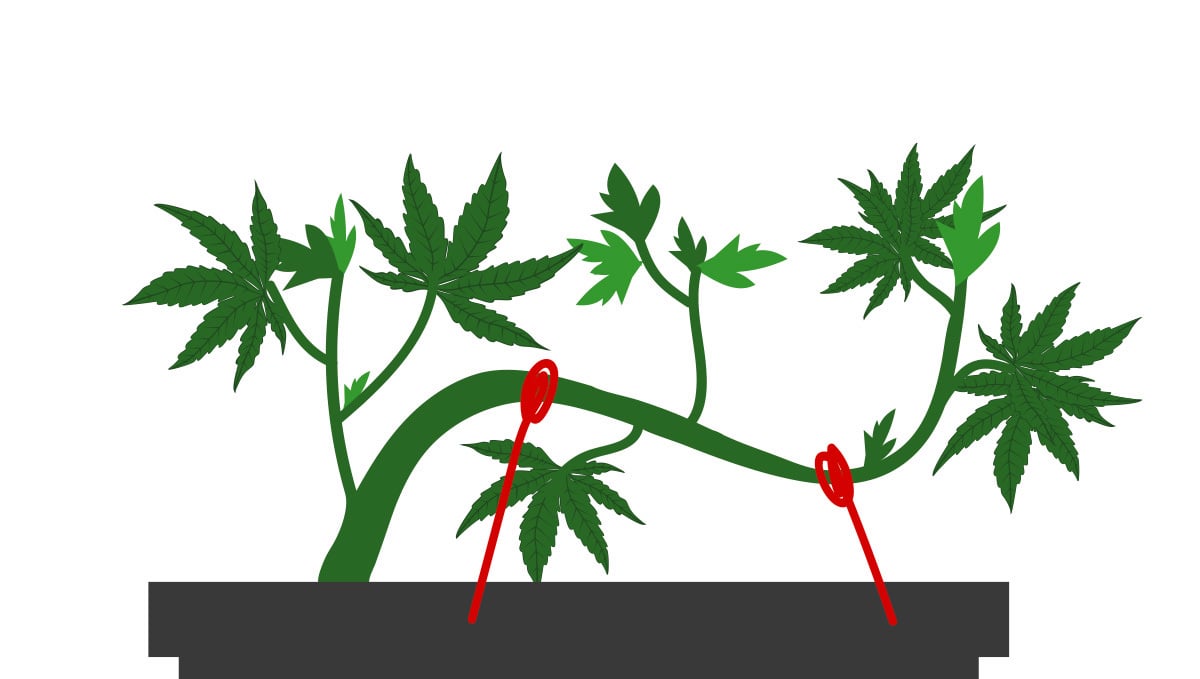
This LST method is also the easiest to do and it doesn’t require planning, you just have to try and level all branches by tying them down, nothing else. You will most definitely get the best results if you start from training from when the plant has grown the third or fourth pair of true leaves up to the first weeks of flowering.
Pros:
- Bigger yields from the exact same grow lights and setup (compared to plants grown normally).
- Complete control over height, shape, and size of the plant (especially helpful indoors).
- Plants produce many big buds instead of just a single main bud and a lot of tiny ones (prevents pop-corn buds).
Cons:
- You’ll need to perform this technique up to 2 times per week depending on the strain (can result in a lot of work).
- There is no exact guide, you have to tie-down according to the structure of your plant and all plants are different.
The Tie-Down Method on Autoflowers
Autoflowers are usually bushy and they don’t produce big enough side branches for them to get enough light and develop well. Even though the tie-down method stresses your plant significantly less than other HST methods, you can prevent stress by growing a strain that takes training well, like our Z Auto. The tie-down technique is also a perfect approach when growing autos because of the way in which they grow. Unlike photoperiod strains, autos cruise from seed to harvest in a linear fashion that cannot be influenced by the grower. They go into flowers based on an internal genetic clock. In contrast, photoperiod varieties require a reduction in the light cycle in order to start flowering.
Indoors, growers can conduct high-stress training on photoperiod plants and keep them in the vegetative phase until they have fully recovered. However, growers of autoflowering varieties do not have this option, making high-stress training unsuitable for these strains.
If you train the stem downwards then the lower branches will start growing more rapidly and soon they will be on the same level as the stem, this will allow the side branches to receive more light thus producing denser buds.
3. Starting Training
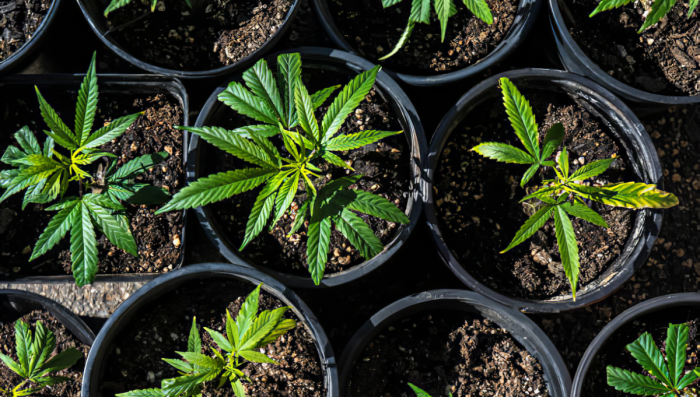
First of all, have in mind that this is a general guide. The way you perform this technique may change according to the strain you grow and the way it grows. Training usually begins once the plant has three or four pairs of true leaves (or is big enough to allow you to do it) and is most effective when the plant is young. The goal is to have all new growth even. Training needs to continue as the plants grow and become bushier. Low-stress training isn’t something that you can do once and then forget about, it’s an ongoing process.
What Material Should I Use?
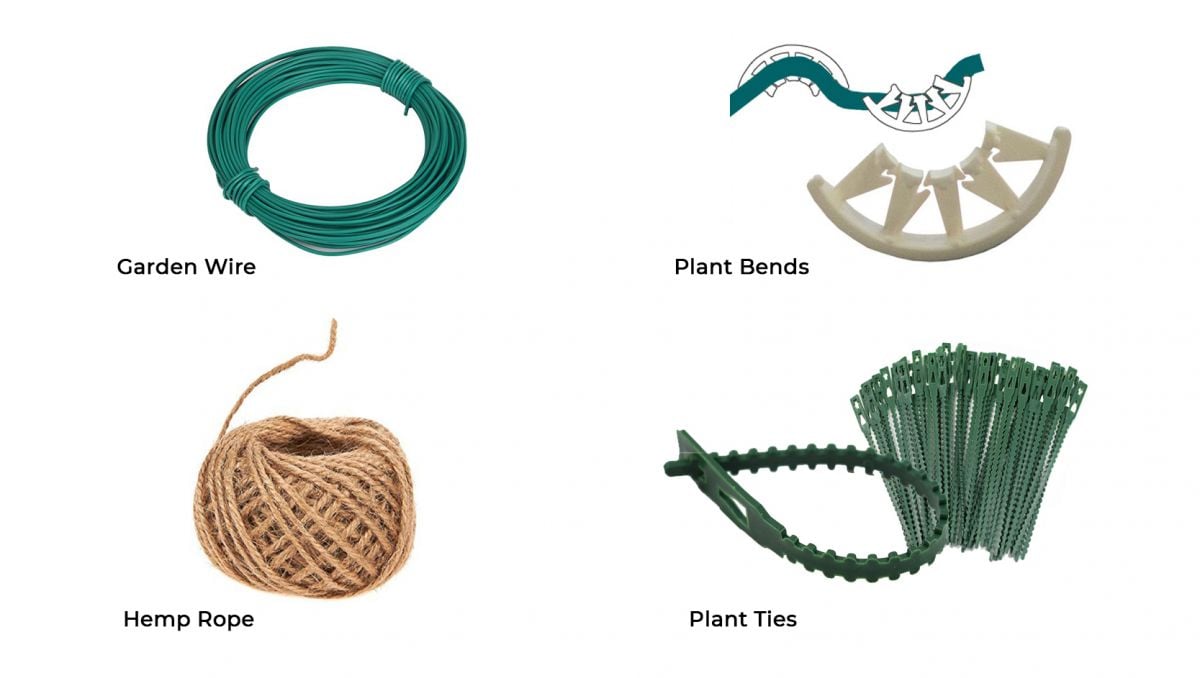
The goal of tying down is to manipulate the plant to our liking without stressing it. This means you have to use materials that are not too sharp like rubber-coated metal wire, clothing hangers, or even pipe cleaners, or if you don’t have any of those, here’s what we recommend:
Garden Wire
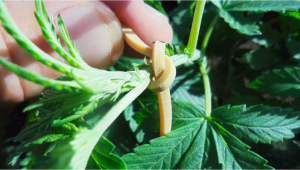
Garden wire is a rubber-coated wire, usually available in green. This flexible wire is what most growers use to train and provide support to plants of all types without harming them. Gardeners use garden wires on a wide variety of plants, year after year, without any detrimental effects. They are superb at controlling the growth of tomatoes, cucumbers, and even melons. Likewise, they also work fantastically when growing weed. The soft coating means that they do not inflict damage on soft vegetative tissue. You can also cut them to the desired size as and when needed. Keep in mind that your branches will continue to grow in diameter as the growing cycle progresses, so don’t loop garden wire too tightly around them.
Plant Bends
Plant bends are small plastic arrangements that allow you to train the branches without much effort, allowing all the flowering sites to get as much light as possible. This product is quite flexible and continues to bend as the branches grow, allowing you to use them in any stage of plant growth and bending along with the branches so you don’t have to force the branches too much.
Hemp Rope
Hemp rope, as the name says, is a type of rope made from the fibers of the hemp plant, believed to be one of the strongest ropes out there. This is a very good and cheap option for LST due to being not only strong but also durable and resistant to mold. Despite not being as simple to use as plant bends, for example, because you will have to tie the branches over and over, it still is a very cheap and effective way to LST cannabis plants.
Plant Ties
Plant ties are similar to garden wire but do not have a metal wire inside, this product is similar to string in a way, but it has a rubber coat that makes them quite resistant to weather conditions, allowing you to adjust and reuse them as you go. Thinner materials like string and chicken wire are usually too sharp and can cut through your cannabis plant.
Avoid using string because the fibers can get stuck on the trichomes and will result in your flowers being full of string residue.
Where do I Tie-down?
Depending on the type of material you are using, there are different ways of holding your plant down. If you’re using strings, pipe cleaners, or rubber-coated wire you can make small holes around the pot so you can hold the plant down after tying. If you’re using metal materials like thick wire or something similar, you can stick it in the medium.
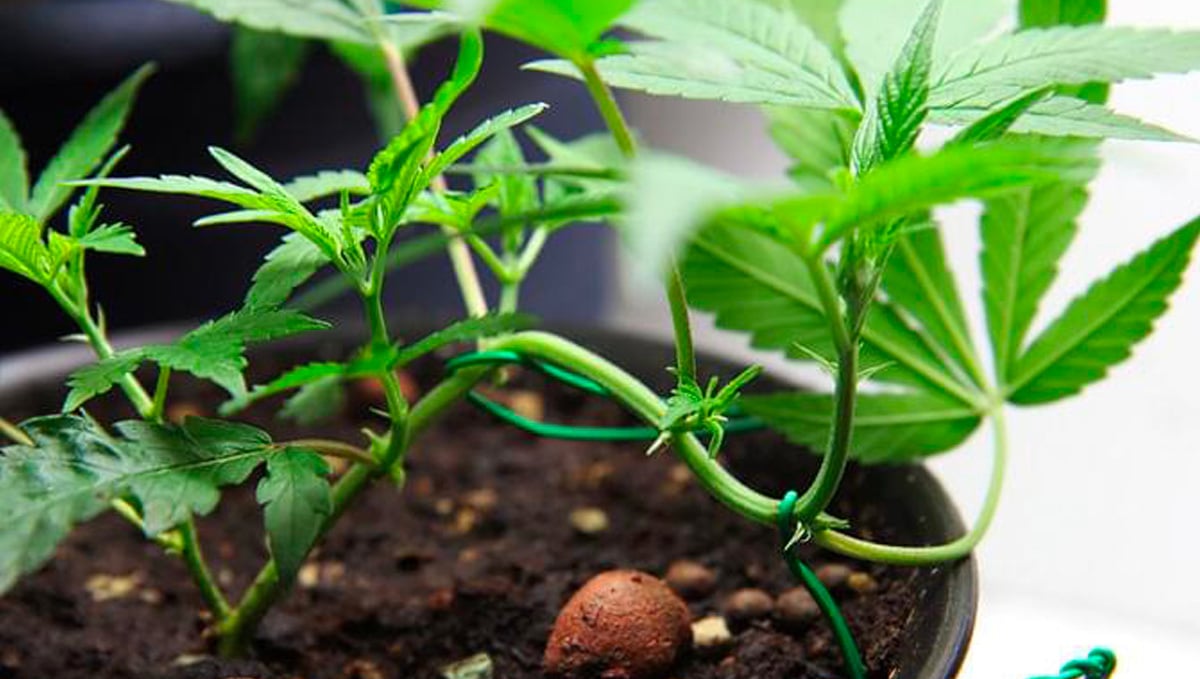
Be aware that depending on the material it can oxidize and can harm your plant, the best type of materials are rubber-coated wire or plastic strings.
If you still have doubts about what to use or where to buy, look for an old electronic in your house and cut the wire off. If you think the wire will get wet when watering, remove the wire inside, and use the rubber coating it to tie your plant.
Step 1: Bend The Stem or Branches
You can train seeds or clones, it really doesn’t matter how you started because you will have to wait until your plant grows a bit and completely grows at least 3 pairs of true leaves, some growers wait until 5 pairs of leaves have developed but, with most cannabis plants, the main stem starts to harden after the third node (3 pairs of leaves), this is obviously up to you but it’s better to start before the stem hardens.
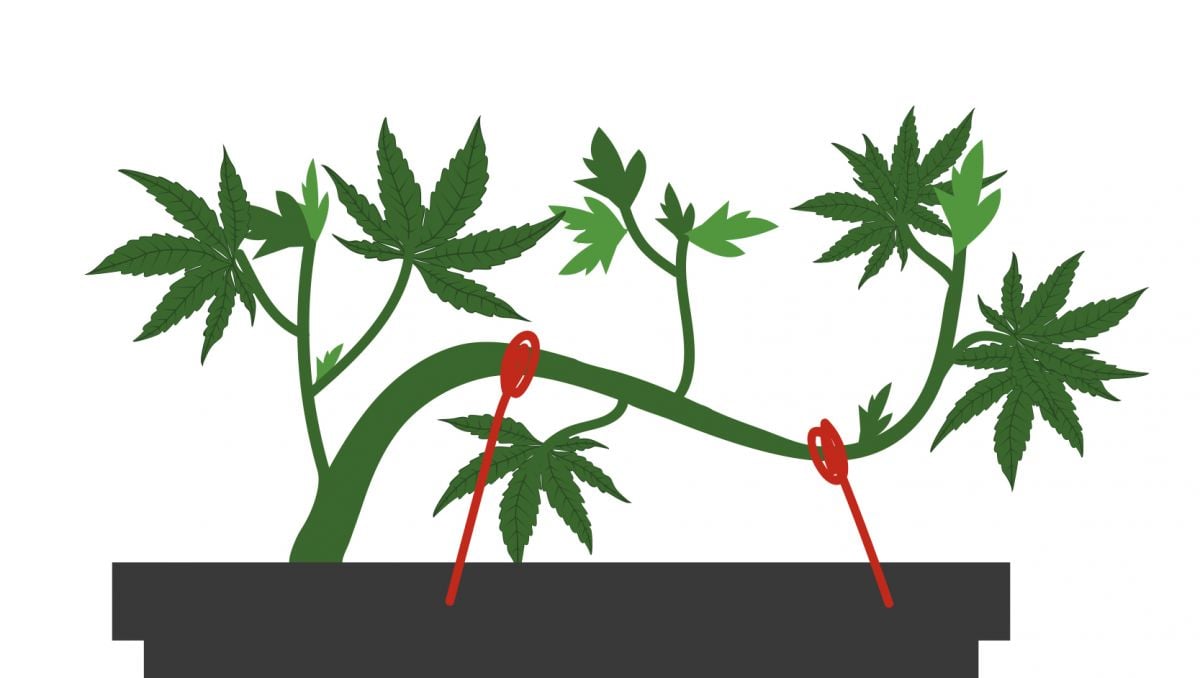
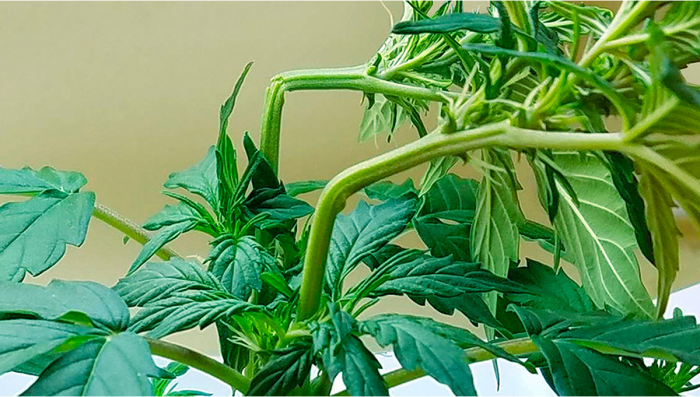
So start by carefully feeling how flexible the stem or branch is that you want to bend, so you know if you can work with it without problems. If you suspect it might break then you should slightly bend it before tying it down to reduce the chances of snapping. Using your material of choice, bend your plant at the last internode and tie it down, depending on what you’re using and the type of pot, you will have to drill a hole in the pot or tie it to the handles. Then it’s just a matter of waiting until the top of the plant that was bent on grows upwards, which can take a couple of hours or a couple of days depending on the growing conditions.
Step 2: Tie The Highest Branch
The top will continue to grow and as it grows you will see side branching growing too, so tie the highest branch so that the former top is at a lower level than the rest of the plant. Look carefully to see if the stem bends smoothly and not force it.
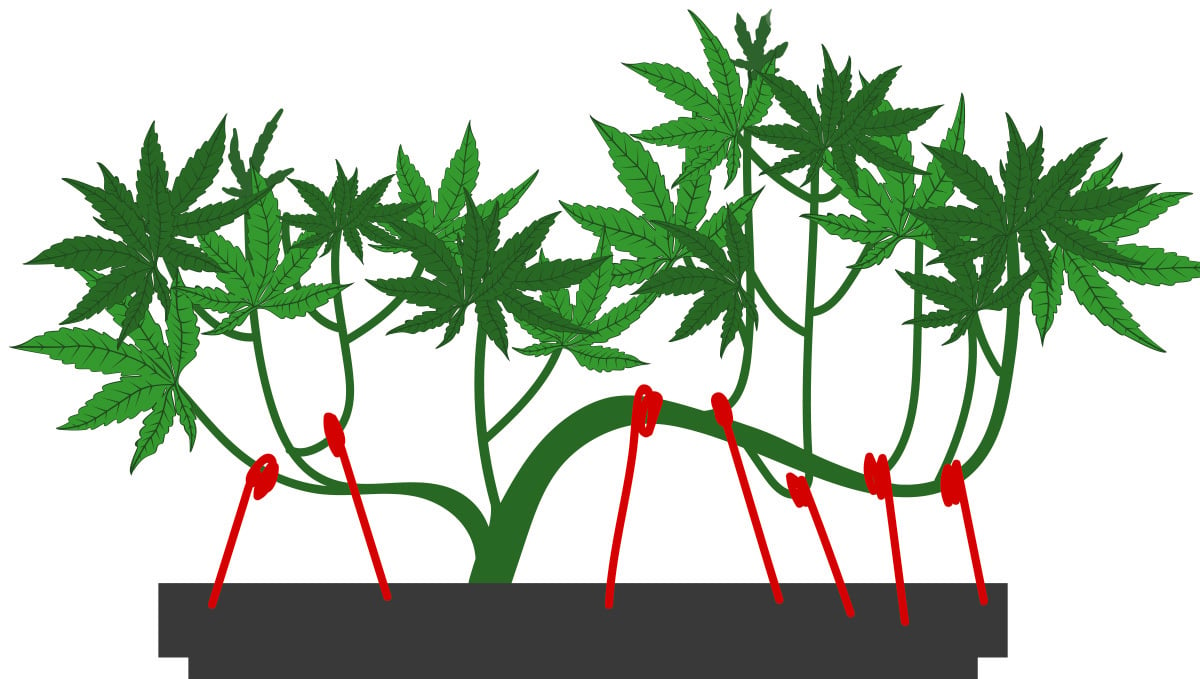
It is essential that you start any low-stress training as soon as possible. It’s best to start when your plant is very young (three to four pairs of leaves). Although if you decide to tie-down midway through the vegetating phase it is also going to work. Once the top part is bent, tie it to the pot using the material of your choice, use the material of your choice to secure it gently but firmly in the desired position. Sometimes it is also a good idea to remove some of the larger fan leaves that are blocking light even after training, this is up to you and is not recommended for beginners. The main idea is to keep all the stems about the same distance from the light.
Step 3: Organize the canopy
After you’ve done the initial tie-downs, your plant will continue growing and will develop newly grown branches so depending on how fast your plant grows, just one tie may not be enough. Ideally, you want to continue to bend the tallest stems down and tie-down the new branches to avoid vertical growth.
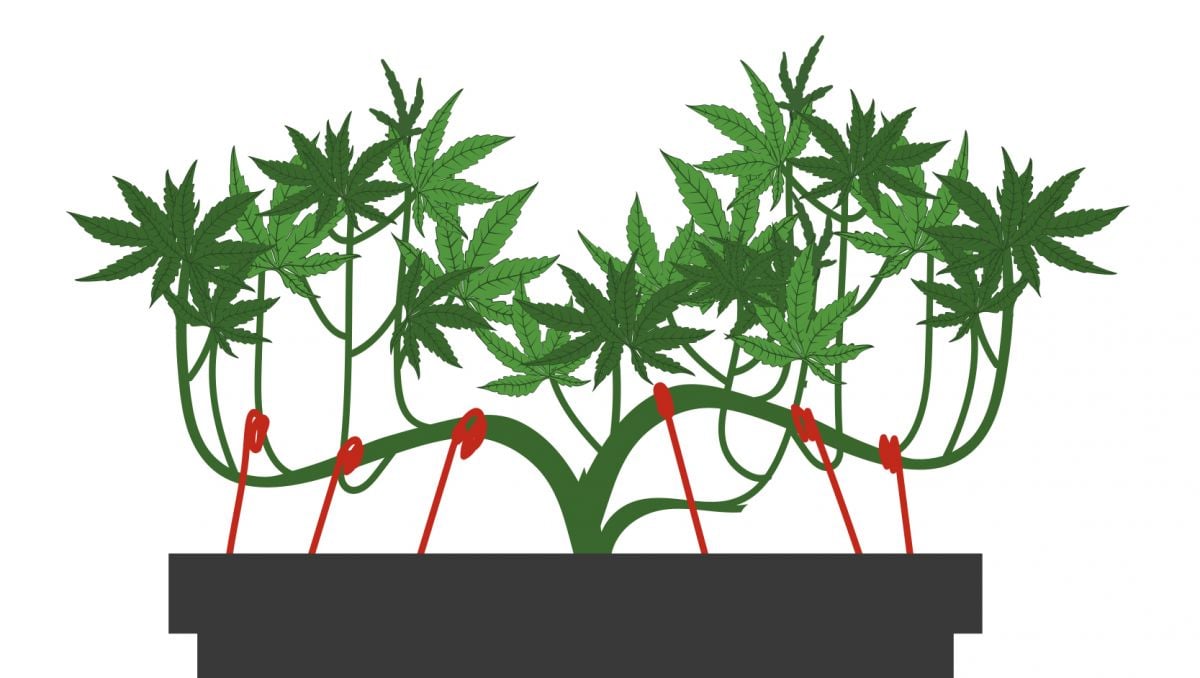
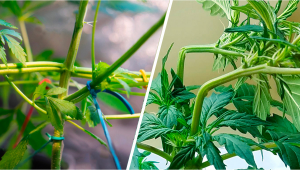
As your plant grows you’ll see you will have to continue tying the main stem horizontally around the edge of the pot or as you wish, there's no guideline for the shape you need to achieve, so go for whatever suits you better but make sure the canopy is leveled.
Step 4: Watch, Wait And Repeat
Around 24 hours after bending the branches will start to grow up again and after a couple of days, there will be new branches growing. You will have to continue to tie branches and level your canopy slowly, day by day, especially the small new side branches that are growing vertically. The branches that are already tied down will start growing up after they’ve grown enough, you will also have to move the tie to the tip of the branches so they continue to grow horizontally. Don’t worry about the initial messy appearance of your plants when you first tie them. After a couple of days, it will start coming into the shape you want, so continue repeating steps 2 and 3 making sure you also tie the side branches so they don’t grow too close together.
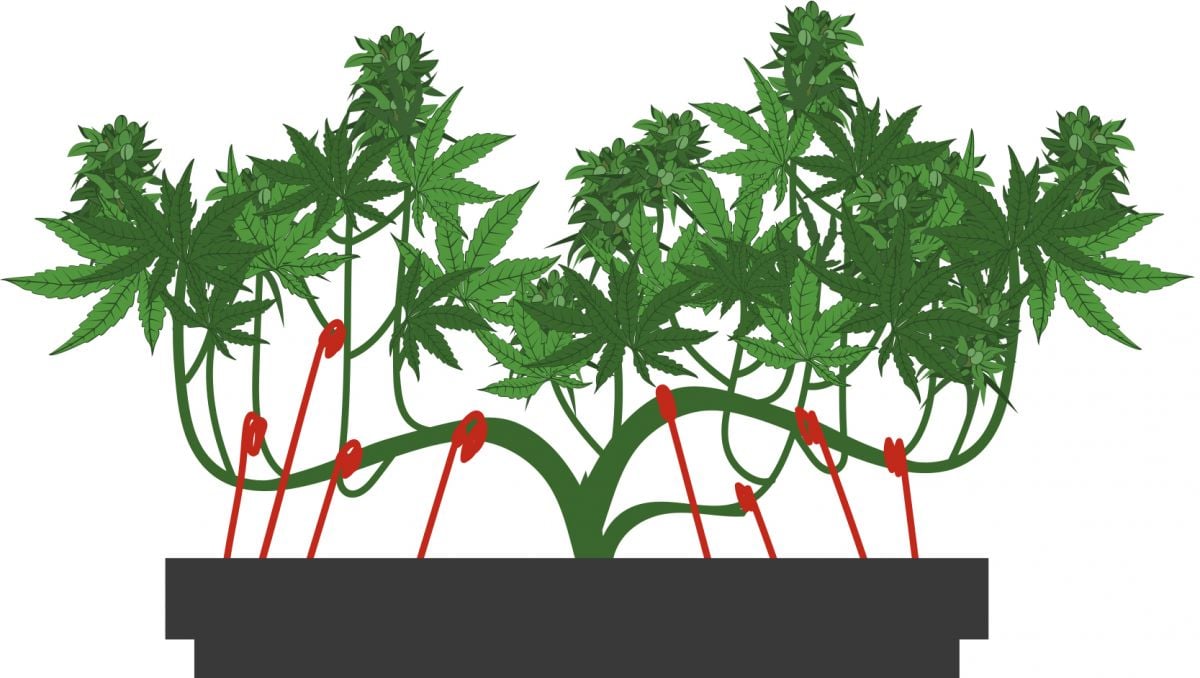
For this method to work as it should, you have to always tie the top of the plant down because it will continue growing day after day, the goal is to reduce the height of the plant while leveling the canopy so all the flowering sites get equal amounts of light. Have in mind that the process will be the same for both photoperiodic and autoflowering cannabis plants, the main difference being that with autoflowers you only have 4-5 weeks to train your plant while with photos you can train as long as it wants because your plants will only flower once you change the light cycle. Once your autoflowers start transitioning into the flowering stage or you’ve reached the desired structure and you’re ready to flip your photoperiodic plants to 12/12, there’s no need to continue plant training because your plants won’t grow as much. It’s possible that your plants grow a bit due to the flowering stretch but you can deal with this by maintaining the ties in place, making sure they’re not too tight and, if necessary, maybe adding a couple of ties but make sure you don’t do it aggressively to avoid stressing your plants.
Flowering
If done correctly, you will seed your plant developing various bud sites and thanks to your training they will receive the amount of light they need to grow big and dense. As mentioned before, it is recommended that the tie-down method is performed until the first weeks of flowering (pre-flowering stage). After your plant stops growing and is focused on fattening the buds you should stop, continuing this can stress her and she can end up turning into a hermaphrodite.
4. Fast Buds Strains That Work Well With the Tie-Down Technique
There is somewhat of a misconception floating around that you should never, ever try to train autoflowering strains of cannabis. And while this is somewhat true, there are a bunch of strains that actually really benefit from careful low-stress techniques such as the tie-down method.
Here at FastBuds, we have worked tirelessly for more than a decade refining and improving our autoflowering strains. At the point where we can now confidently say that we produce some of the very top autoflowering genetics the world has ever seen. Our top picks for this method are:
For tying down, you want a strain that grows long and tall, and that has some extra time to deal with the slight stress involved. For these reasons, we recommend these Sativa-dominant strains for this technique. All of these autoflowers develop long branches that make them great for the tie-down method.
5. In Conclusion
The tie-down method is the way to grow if you want to use the maximum out of your growing equipment. Performing it correctly will guarantee better buds and a higher yield than growing your plant normally (in your setup). A good option to avoid stress from this technique is by using strains like our Orange Sherbet Auto that not only takes it well but it’s recommended.
Try to tie the branches slowly and steadily to never overdo it, this way avoiding stress and prevent your plant to become hermaphrodite, now, if you're looking for how to top a marijuana plant, make sure you take a look at this article.



Comments