Sour Diesel Auto Cannabis Strain Week-by-Week Guide

- 1. History
- 2. Specifications
- 3. Week-by-week guide
- 3. a. Week 1 - germination
- 3. b. Week 2 - vegetative stage
- 3. c. Week 3 - vegetative stage
- 3. d. Week 4 - vegetative stage
- 3. e. Week 5 - pre-flowering stage
- 3. f. Week 6 - flowering stage
- 3. g. Week 7 - flowering stage
- 3. h. Week 8 - flowering stage
- 3. i. Week 9 - harvesting
- 4. What to expect?
- 5. Drying, trimming, and curing your sour diesel harvest
- 6. In conclusion
1. History
There’s no much info about the origins of this super sour strain because Sour Diesel dates back to the ‘90s and back then, cannabis wasn’t regulated and most of the breeders didn’t keep track of their crosses.
Sour Diesel’s history begins at the beginning of the 1990s, despite no one knowing where it all started, it’s agreed that it was on the West Coast, in the US.
Back then, Chemdawg was really popular and was being grown by a group of friends which discovered a phenotype that stood out, this phenotype quickly got everyone’s attention and soon became almost impossible to get because this group of growers would never sell seeds or clones, only flowers.
As soon as the word spread, everyone was trying to get their hands on this Chemdawg phenotype, especially A.J. who was a skillful breeder and wanted to get those genetics to make it available to the public.
A.J. was an experienced breeder who wanted to get those genetics to smoke but also wanted to sell the flowers, as time got by, A.J. bought flowers every day to see if, by a chance, he could get a couple of seeds in the buds and after a couple of months, he was fortunate enough to find five seeds, and all of them sprouted.
What he didn’t know is that those seeds weren’t what he thought because the group of growers had crossed them with another plant, so the seeds A.J. were quite good, although not what he was looking for so in an attempt to make the most out of them, he crossed his plants to a Super Skunk, which resulted in the Sour Diesel we know.
Have in mind that this theory hasn’t been confirmed because it’s not possible to track exactly where this strain came from but what we all know is that Sour Diesel became a classic for its unique blend of citrus adn gas, giving birth to several famous strains.
2. Specifications
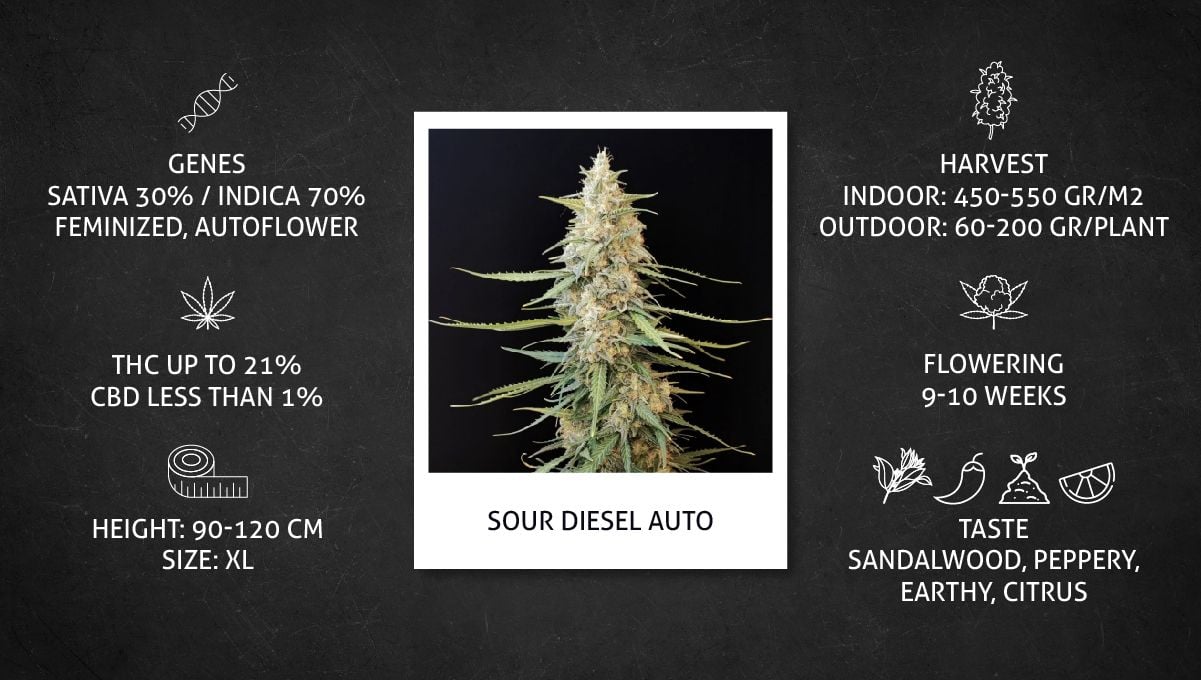
Fast Buds’ version of this super-strong Sativa is really easy to grow, taking 9-10 weeks from seed to harvest and growing up to 120cm, you can expect yields of up to 550gr/m2 and beautiful buds with 21% THC. The flowers develop very dense, large, and come with an extremely strong aroma that truly represents gassy cultivars, thanks to the delicious mix of fuel, citrus, pine, and sandalwood.
The buds also develop a thick layer of trichomes all over, and if you think the aroma is strong, wait until you feel the effect. Despite the Kushy aroma, Sour Diesel Auto offers a Sativa-like effect that will keep you flying all day long, with a cerebral effect that keeps you energized and motivated, perfect for gaming, drawing, writing, or just enjoying with friends.
3. Week-by-Week Guide
This article serves as a guideline, this way you know what to expect when growing the auto version of this classic strain, here you can see the conditions kept throughout this grow report and the results obtained by several growers.
| Grow Specifications |
|---|
| Light Fixture: LED |
| Light Cycle: 20/4 |
| Humidity: 45-65% |
| Temperature: 22-30°C |
| Grow Space: Indoor |
| Nutrients: Synthetic |
| PH level: 5.5-6.2 |
| Seed to Harvest: 9-10 weeks |
Have in mind that this written timeline was made to aid you when growing this strain, even though you’ll be able to grow your plants in most conditions, you should adjust your growing setup depending on the conditions and the specific strain, our Sour Diesel Auto in this case.
Week 1 - Germination
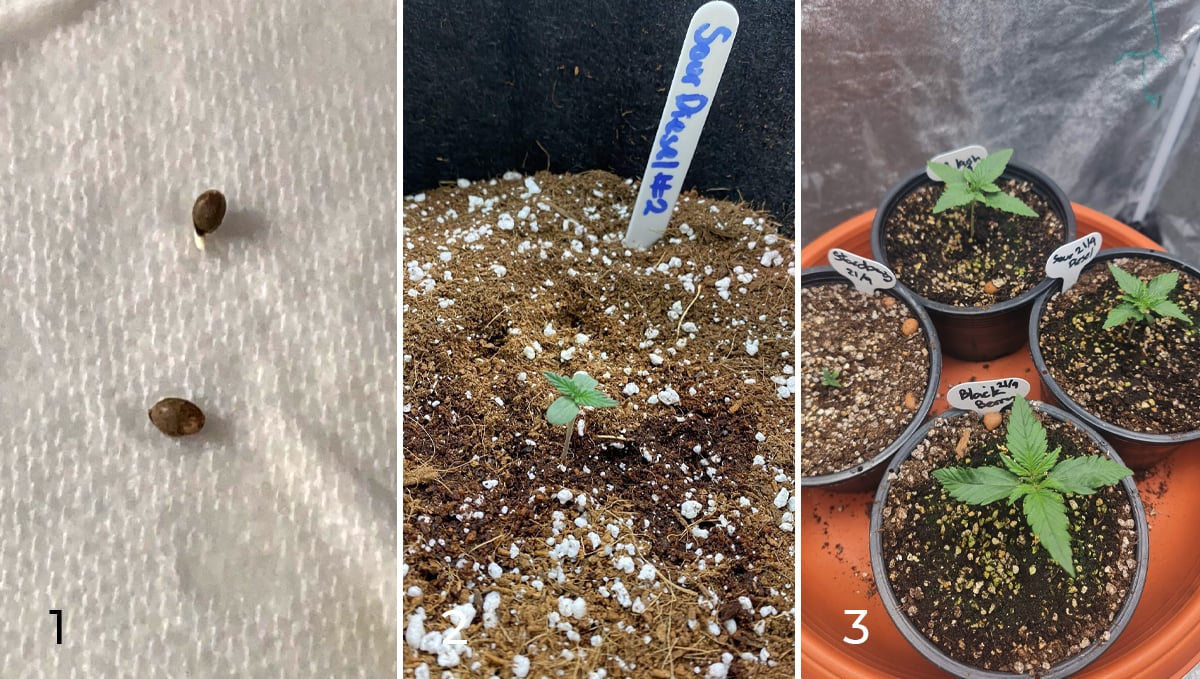
As always, this is the first week and it’s when this Sour Diesel Auto week-by-week guide starts. This grow cycle starts by germinating a couple of seeds using the paper towel method and then transferring them to the medium of choice. Remember that we usually recommend soaking the seeds in water for up to 48hs, this will help soften the seed’s shell and will make it easier for the water to reach the embryo, increasing the chances of germination.
| Height: 3cm |
|---|
| pH: 5.8 |
| Humidity: 65% |
| Temperature: 30°C |
| Watering: 100ml |
Have in mind that cannabis seeds germinate under certain conditions so even though we recommend soaking them in water, you can germinate them however you want, and as long as you keep them under certain conditions, you will successfully germinate them.
Started 4 new seeds out in a paper towel, getting ready to plant into pots as soon as they have germinated. -GrowBuv
So, if it’s your first time growing cannabis, you should keep the relative humidity around 90% and the temperature between 18-25°C, once your seedling has come out of the soil, you can keep the same temperature and the humidity a bit lower, around 65-70%.
Remember that if you don’t have the proper equipment to adjust and maintain proper conditions, you can buy a plastic dome at your local grow-shop or make one with a plastic bottle or any other type of plastic container. This will help keep the proper humidity level, helping your seedling thrive, although have in mind that it will get harder and harder to improvise as your plant grows so it’s better to invest a bit to avoid having problems further down the grow cycle.
Week 2 - Vegetative stage
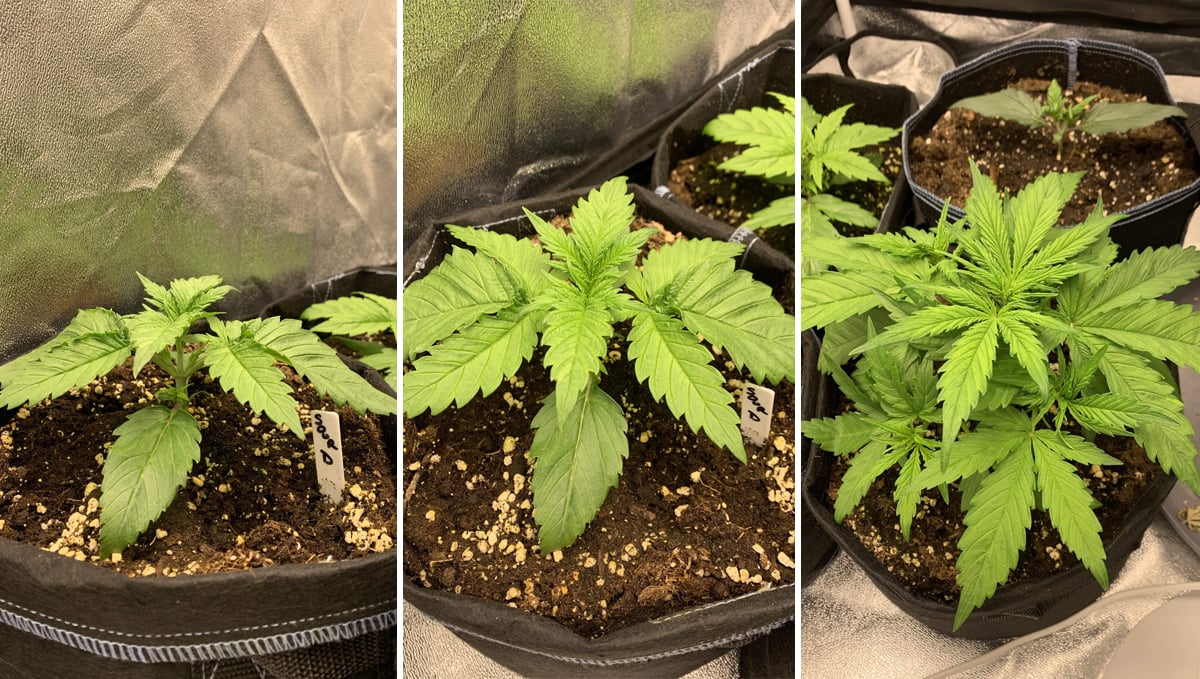
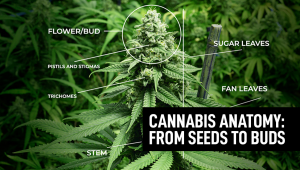
If everything goes as it should, your plant should have come out of the soil and started growing true leaves, each of these fingers is known as “apex” and is a characteristic that plants heir from their parents. The number of apexes won’t influence your plant in any way, but the first 3-fingered leaves are the “true leaves” and as soon as 2-3 pairs of true leaves have completely developed, you can start training your plant slowly. At this point, you can rest easy knowing that your delicate seedling has successfully made it through to the vegetative stage, one of the two primary phases of the cannabis growing cycle. If you’re new to growing weed, know that the vegetative phase is the period in which plants start to grow vertically and pump out lots of large leaves known as “fan leaves”. You won’t see any flowers forming during this time. Instead, plants are hard at work getting as big as they possibly can, in order to form more bud sites, thereby increasing their chances of reproductive success.
| Height: 10cm |
|---|
| pH: 6.3 |
| Humidity: 50% |
| Temperature: 23°C |
| Watering: 150ml |
During the vegetative phase, cannabis plants require a wide spectrum of nutrients, especially the three macronutrients: Nitrogen, phosphorus, and potassium. However, they need more nitrogen than anything else during this time. For this reason, you’ll see higher nitrogen numbers in any bottled nutrient product that you buy. Why? Because nitrogen forms the basis of amino acids—the molecular building blocks that plants need in order to make larger proteins. These important proteins are used for structural reasons, as well as to make vital enzymes.
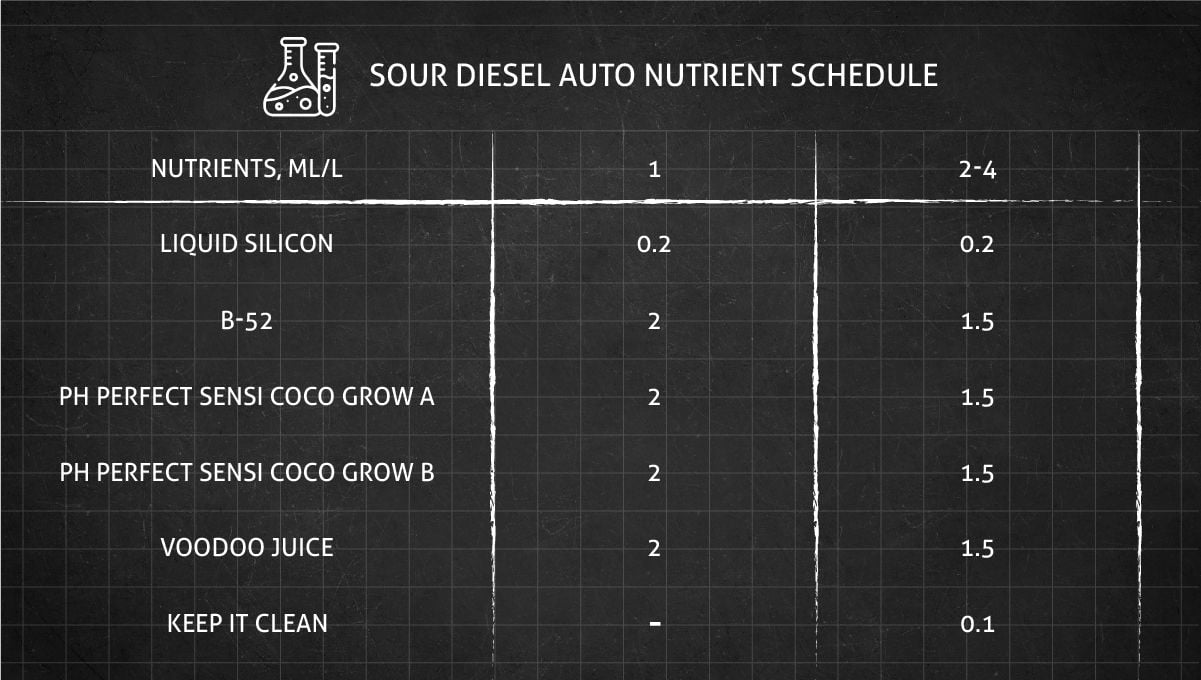
Depending on the way you prefer to grow, there are many different approaches you can take to ensure a healthy plant during the vegetative phase. Some growers prefer to take the strictly synthetic approach by using bottled ionic nutrients. Others, however, prefer an organic living soil approach. If you want to try the latter, know that your vegging plants will benefit greatly from either a living or dead mulch, especially in warm areas when growing outdoors. Dead mulches, such as hay and straw, help to lock in valuable moisture and protect the microbes in the soil from UV rays. They also serve as a food source for worms and isopods. These lifeforms eventually break mulches down and make the soil more fertile. In contrast, living mulches involve sowing beneficial plants in high densities close to cannabis plants. They also help to lock in moisture and shelter the soil. Some species, such as those of the legume family, also help to fix atmospheric nitrogen in the soil.
There are various other inputs that can help your cannabis plants thrive during the vegetative phase. Top dressing with worm castings, or applying them as a tea, will help to inoculate the soil with beneficial microbes. Furthermore, they contain good amounts of the vital nutrients that plants need during this time. Some KNF preparations, including fermented plant juice (FPJ) made from weeds and nettles, also help to deliver nitrogen to the root system.
So, as soon as you see three pairs of leaves, you can start plant training, it doesn’t matter if it’s LST or HST, as long as you do it properly you will reap the benefits, although we don’t recommend beginner growers to perform HST techniques because it can end up stressing your plants too much. Just remember that if you don’t have experience with plant training you can wait a couple of days more to make sure you don’t have problems. Also, as soon as you see the first true leaves, you can start feeding a low dose of Grow nutrients in a 3-1-2 ratio, meaning your plant will get more Nitrogen which is the mineral it needs to develop plant matter but will also get lower doses of the other macronutrients and micronutrients.
Remember that depending on the type of nutrient and medium you’re using, you will have to check and adjust the nutrient solution’s pH because the water’s pH is what will allow your plant to absorbs certain nutrients, even though you’re providing the nutrients your plant needs, your plant won’t be able to feed if the pH level isn’t within the proper range.
Week 3 - Vegetative stage
Around week 3 (if everything goes as planned), your plant will have already established the roots and you’ll see an explosion in plant growth. By now, your plant should have developed quite a lot of foliage and should have grown quite a bit.
| Height: 30cm |
|---|
| pH: 5.5 |
| Humidity: 50% |
| Temperature: 26°C |
| Watering: 400ml |
Even though you could start plant training before, week 3 is when most plants have a nice structure that will make it easy for you to tie down the branches, for example.
Depending on what type of plant training you want to perform, you have to wait until 3 pairs of leaves are completely developed or once the internodal space is good enough to suit what you’re aiming for.
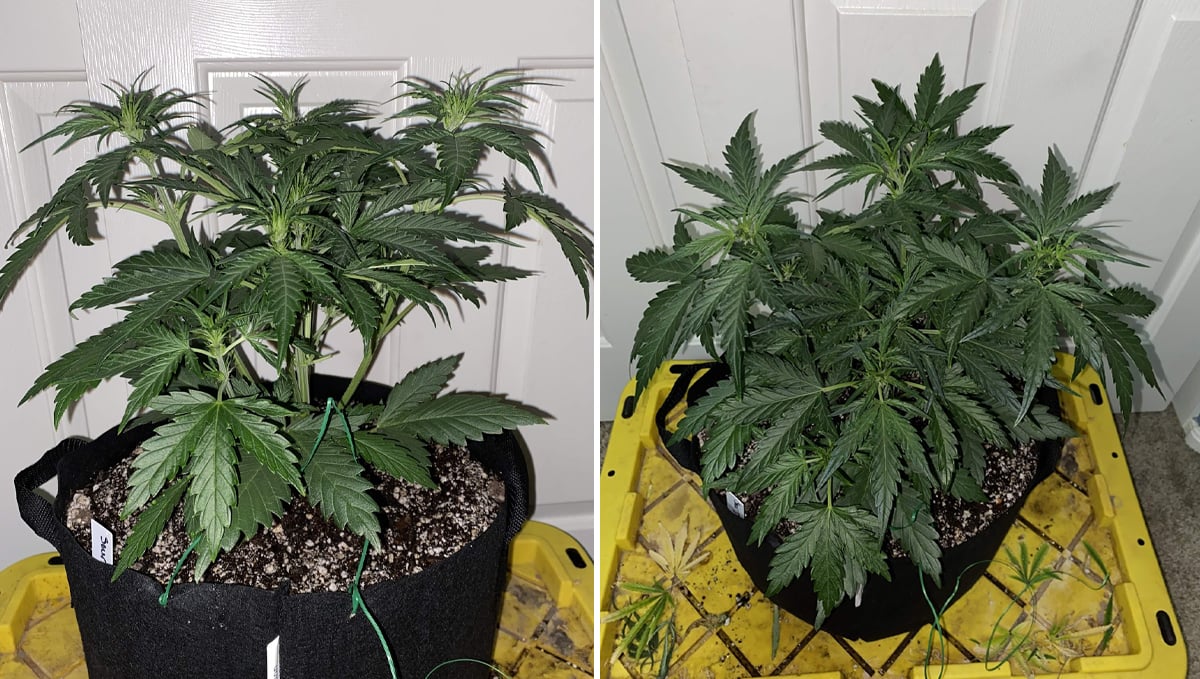
You can have similar results when performing both LST and HST techniques, but usually, LST takes more time because you have to do it gradually, day-after-day but will stress your plants way less than HST techniques such as topping or dimming. So you should have in mind what you aim for and know how to do it, always checking and adjusting your growing environment to allow your plant to recover as fast as it can because when plants are stressed, they can take a couple of days to fully recover and continue growing.
Week 4 - Vegetative stage
Week 4 marks the week before the pre-flowering stage, as your plant slowly nears the pre-flowering stage, you will see the flowering sites turning light green and as soon as your plant is sexually mature, it will start developing stigmas which are the white hairs that sign the beginning of the flowering stage.
| Height: 50cm |
|---|
| pH: 5.5 |
| Humidity: 65% |
| Temperature: 25°C |
| Watering: 500ml |
Usually, male cannabis plants show signs of their sex a couple of weeks before the female plants, so if you’re growing other non-feminized strains you should keep a close eye on the pollen sacs.
This happens because pollen sacs contain pollen which can end up pollinating your female plants, thus producing seeds and ruining your harvest so make sure you keep an eye on all of your plants to avoid this.
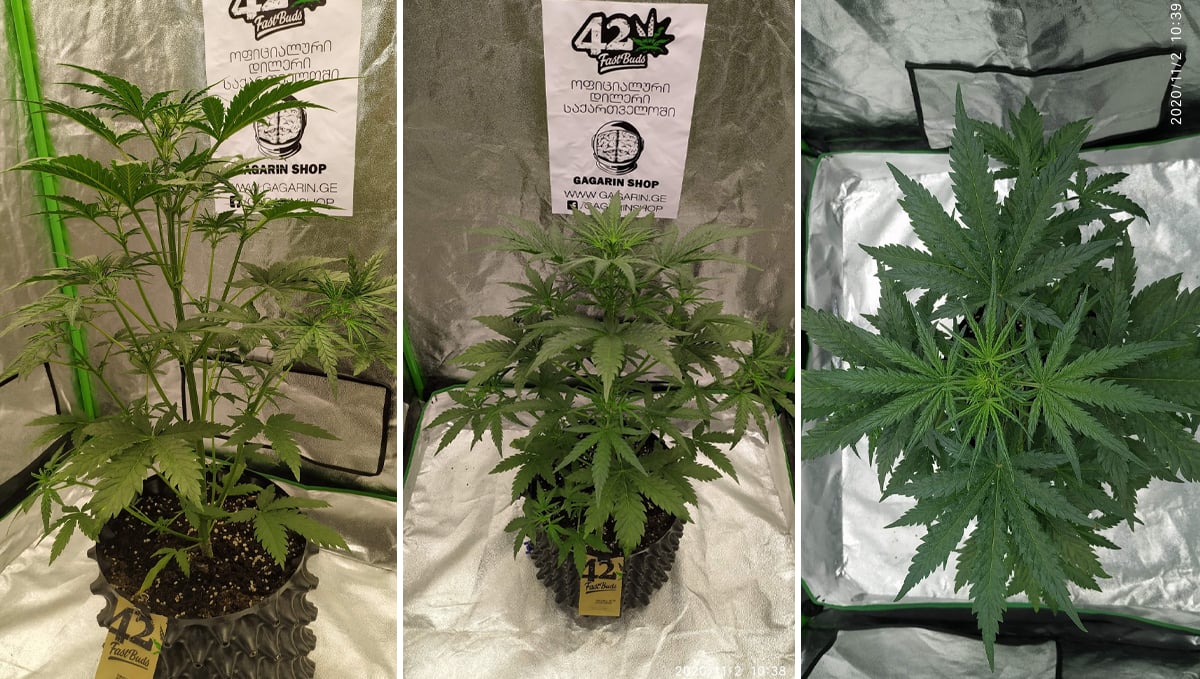
As always, our seeds are feminized so you won’t have to worry about this but despite not having male plants, it’s essential you check on your plants every day to prevent bugs or mold which can end up attacking your plants and you won’t even see them due to their small size.
Week 5 - Pre-flowering stage
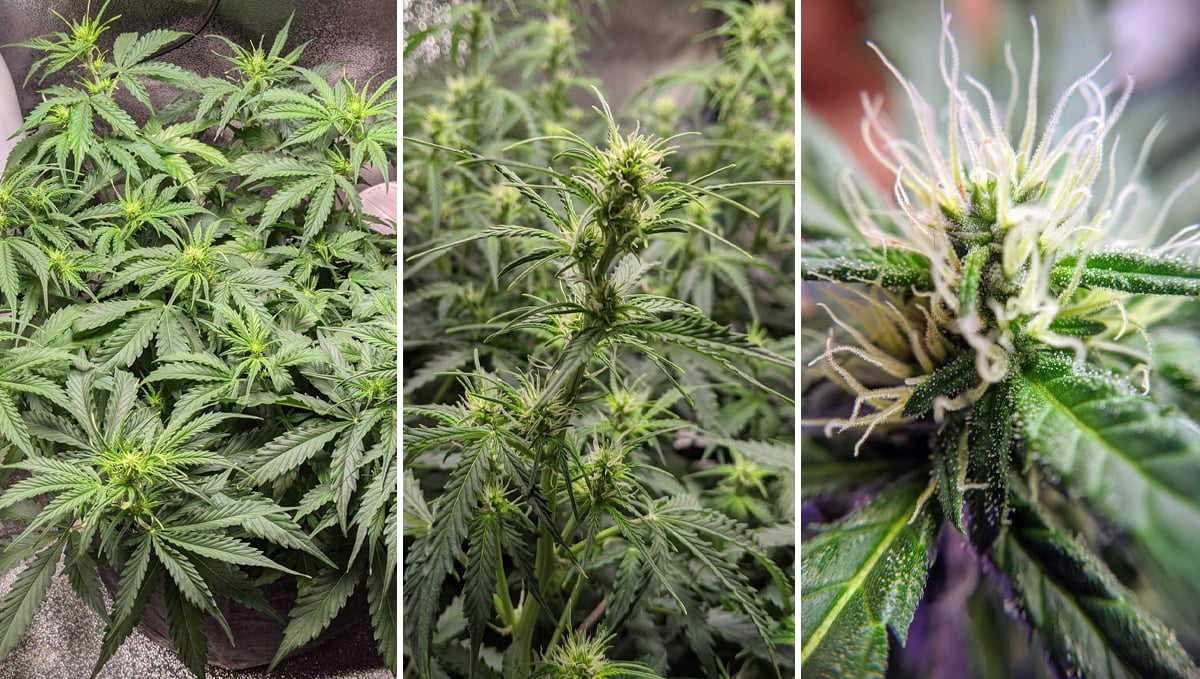
The fifth week marks the beginning of the pre-flowering stage, as you can see in the photos below, the plant will start to show signs of its sex and it’s also a sign that your plant is sexually mature.
When your plant is starting to show white hairs, it will also start developing trichomes so if it hasn’t started smelling now, it will in the following days so be careful and watch out because you will need a way of masking or eliminating the smell further along.
| Height: 60cm |
|---|
| pH: 6.5 |
| Humidity: 55% |
| Temperature: 28°C |
| Watering: 700ml |
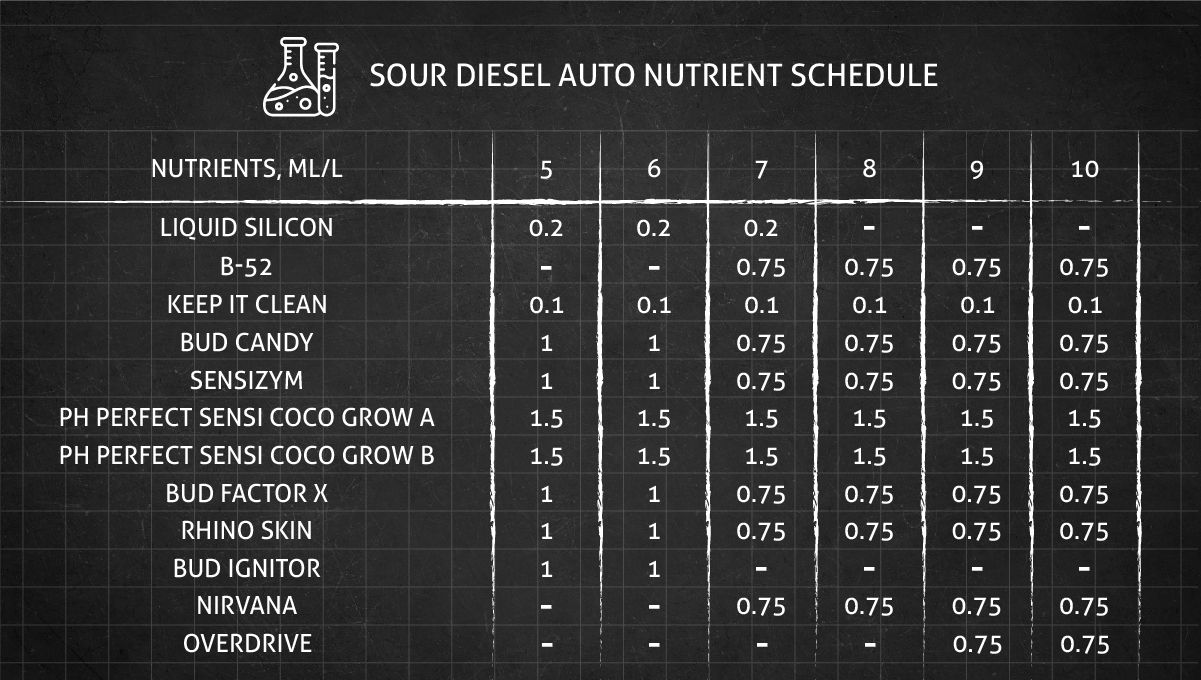
As you may know, cannabis plants need more phosphorus and potassium to develop the buds so as soon as you see the white hairs, you should slowly start feeding Bloom nutrients in a 1-2-3 ratio and, depending on the type of medium you’re growing in, you will have to provide calcium, magnesium and other trace elements that cannabis plants need to thrive.
As said above, cannabis plants thrive in certain conditions so it’s essential you check them every day and adjust it if necessary, during the pre-flowering stage you should keep the temperature between 18-25°C and in a relative humidity of around 55-60%.
Also, if you were performing any kind of plant training, you should stop once the buds start to form, this is to avoid stressing your plants because stressing them during the flowering stage can end up affecting the yields and quality of your harvest, so by now, you should have reached the desired structure and size.
Week 6 - Flowering stage
Week 6 marks the first half of the flowering stage, by now your plants should be in full-flowering mode and as the week passes, your grow space will start to reek of a delicious cannabis smell. If you haven’t installed it yet, make sure you install a carbon filter and exhaust to help eliminate the smell because this plant will leave your whole plant smelling like straight diesel.
| Height: 65cm |
|---|
| pH: 6.5 |
| Humidity: 45% |
| Temperature: 28°C |
| Watering: 1000ml |
Now, if you can’t afford a good carbon filter, you can buy odor neutralizers that will mask the smell a bit, just have in mind that it won’t eliminate the smell, so it won’t be as effective as a carbon filter. Also, this is the stage when most growers suffer from bugs, so you should keep an eye on your plants and act as soon as you see signs of any type of bugs.
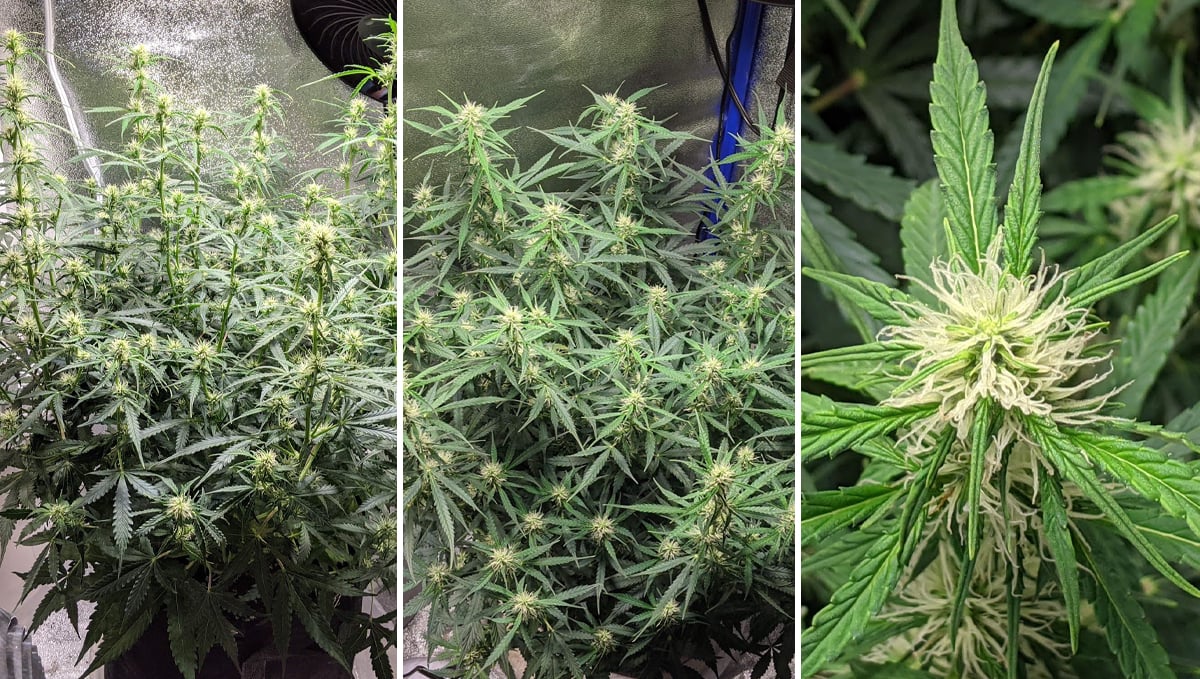
As the flowers take form, it’s most likely you get mold if you don’t control the environment, especially the humidity levels. This happens because mold thrives in slightly warm and humid climates and it can be hard to get rid of it because sometimes they will get bud rot and eat your buds inside out, so make sure you have complete control over your grow tent.
Week 7 - Flowering stage
The seventh week is when you should start feeding a full dose of Bloom nutrients, by now your plant needs just a couple of weeks for the buds to fatten up so you should make sure you provide everything your plant needs to develop the buds properly, just make sure you don’t overfeed because it could really stunt growth and end up affecting the yields.
| Height: 65cm |
|---|
| pH: 6.5 |
| Humidity: 45% |
| Temperature: 28°C |
| Watering: 1100ml |
As your grow cycle continues and you get near harvest week, you should make sure the conditions are proper to avoid bugs, mold, and stressing your plants so nearing the second half of the flowering stage, you should keep the humidity around 50% and the temperatures between 18-25°C.
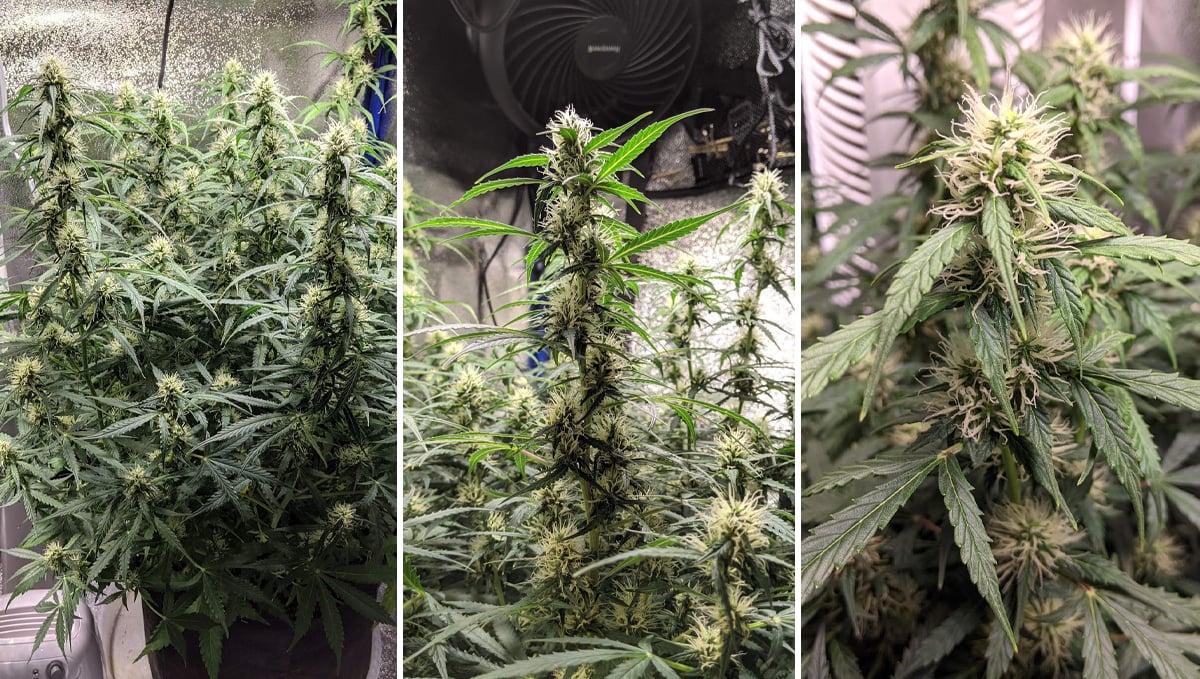
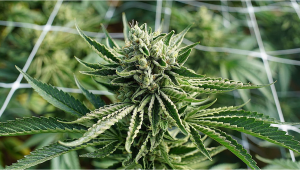
As you can see in the photos above, the buds have taken form but still need more time to fatten up, even if you see some pistils turning brown, don’t worry, let them develop and keep up the good work, you’ll be harvesting your buds in no time!
Week 8 - Flowering stage
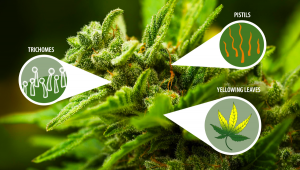
Week 8 marks the second half of the flowering stage, by now the smell should be super loud and the trichomes should be visible from afar. You’ll be harvesting your plants in the next week but don’t get confused, even if the trichomes begin turning cloudy and some of the pistils are brown, you shouldn’t harvest yet, pay attention to the calyxes.
| Height: 65cm |
|---|
| pH: 6.5 |
| Humidity: 50% |
| Temperature: 24°C |
| Watering: 1200ml |
Even though it may seem that your plant is ready for harvest, you should use a jeweler’s loupe or a microscope to take a look at the trichomes and see them clearly, by doing this, you’ll know exactly when to harvest your plants. Also, depending on the type of nutrients you should start flushing, this will remove the built-up salt on the medium and the roots, enhancing the aroma and flavor.
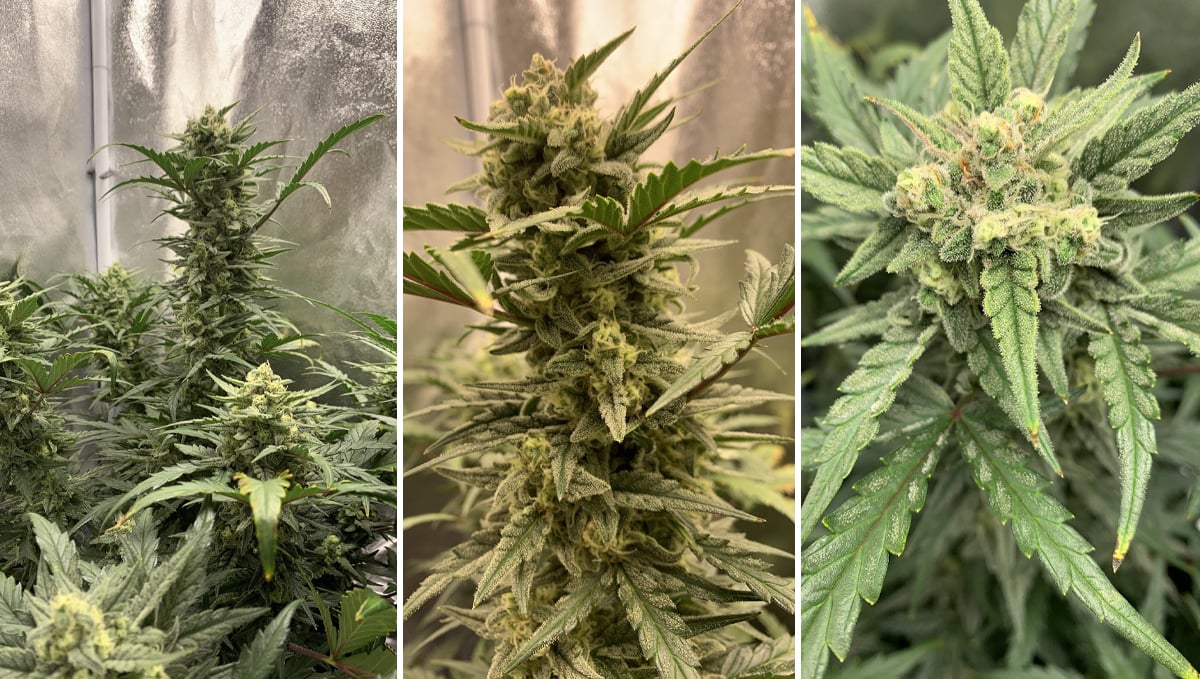
Remember that depending on how you’re growing and your water source, you should also check and adjust the pH and PPM because water can contain trace elements and will still be adding minerals to the soil instead of completely washing them off.
Week 9 - Harvesting
Week 9 marks the last week of this grow cycle, our Sour Diesel Auto may take up to 10 weeks but in this case, it took a week less. If you have already started flushing, you will see the leaves starting to yellow, this is a sign that you’re flushing correctly, have in mind that if you see yellowing in any other stage it could be a nutrient deficiency but if it happens when flushing it’s completely normal.
| Height: 65cm |
|---|
| pH: 6.5 |
| Humidity: 60% |
| Temperature: 23°C |
| Watering: 1300ml |
As you should know by now, after harvesting you still need to dry and cure your buds so before cutting the branches, make sure you have your drying room ready to hang them as soon as you harvest them. A good tip is to leave your plants in complete darkness for up to 48hs before harvesting, it’s said that this will boost trichome production and your buds will get even frostier, so try different techniques and reach your own conclusions.
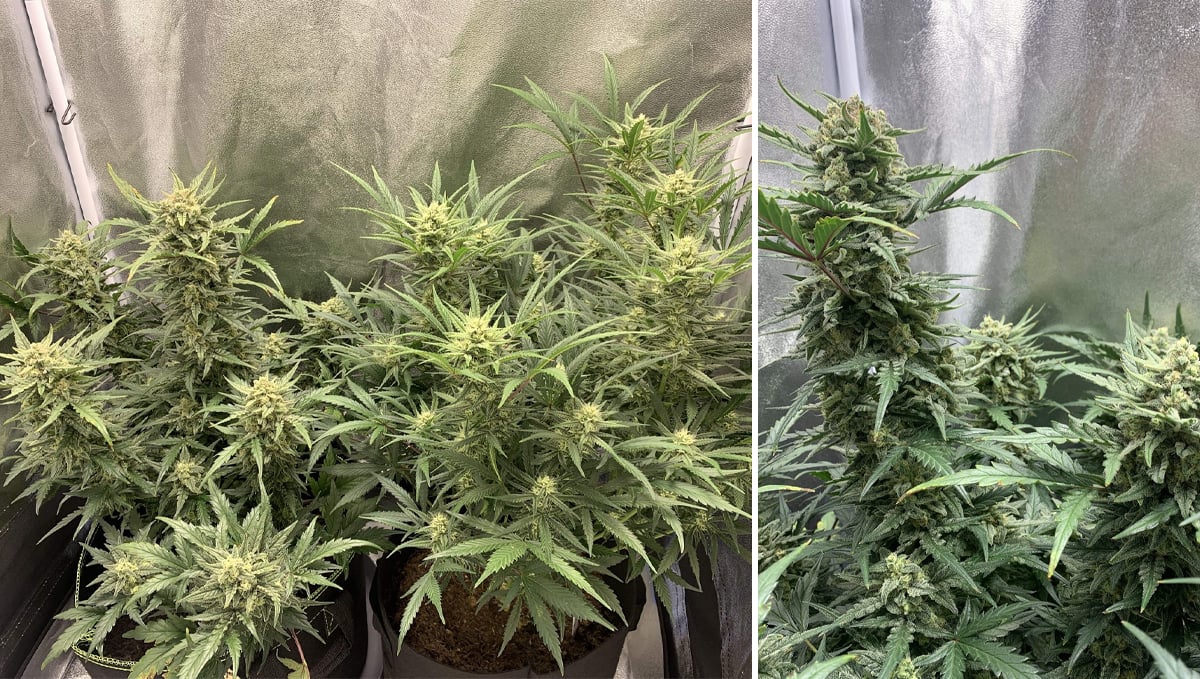
Remember that during the drying process, the smell can be even stronger than during the flowering stage so make sure you have a way to mask the smell such as an odor neutralizer or a carbon filter with an exhaust fan on low, this way you don’t risk getting in trouble.
4. What to expect?
Now that your plants are already drying, you have to wait around 15 days before you can start the curing process which lasts a minimum of 2 weeks so if you’re eager to know exactly how your buds will smell, here’s what our growers have reported. You can expect the old-school blend of sandalwood, pepper, and earthy terpenes with hints of gas, sour, and citrus which is a true representation of gassy strains, and consists of the following main terpenes:
- Pinene
- Caryophyllene
- Humulene
- Myrcene
The main terpenes in combination with the secondary terpenes that you will see in the chart below provide a very Sativa-like high that will keep you energized and motivated throughout the whole day.
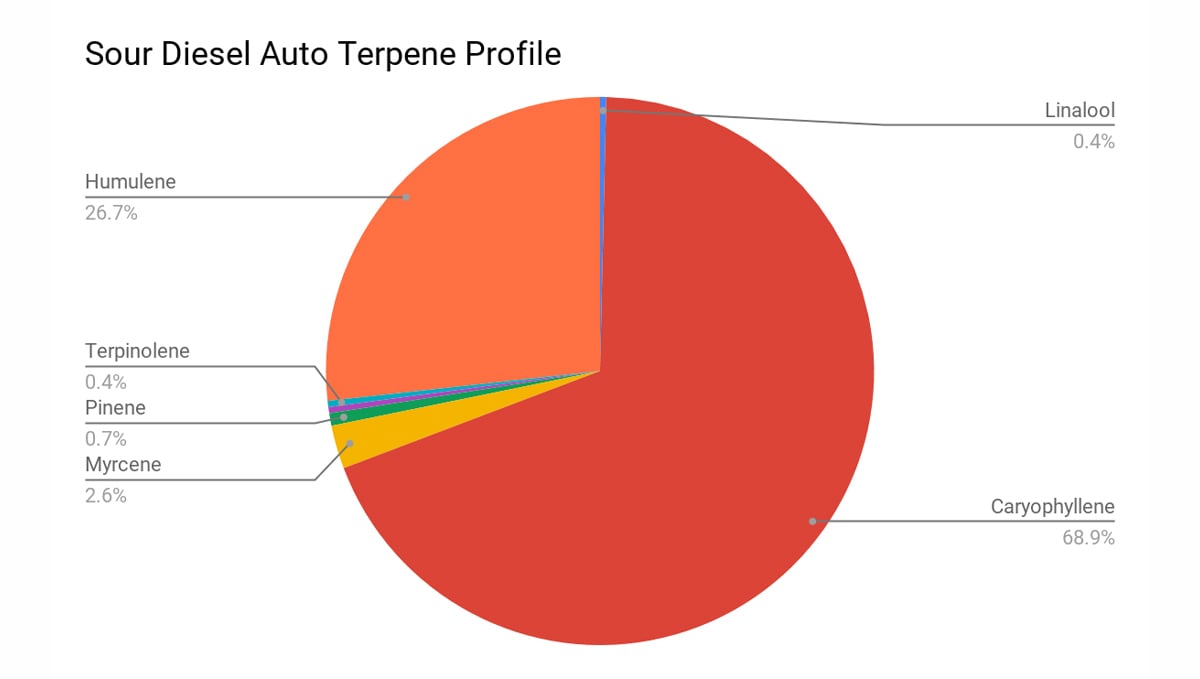
This terpene profile offers an extremely gassy flavor that results in a 65% Sativa and 35% Indica that will enhance your creativity and keep you sky-high all day long, making it perfect to play videogames, watch movies, or just hanging out with friends.
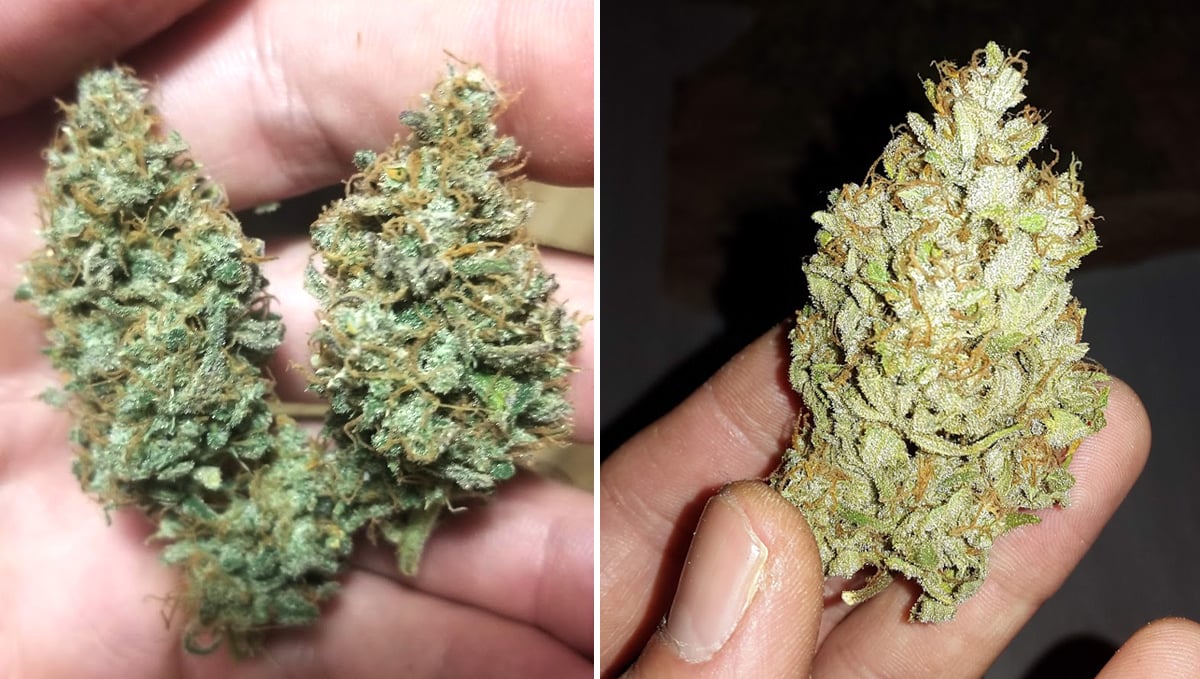
Growers have reported feeling happy, creative, and energetic but also that it can be too much for those who are not used to strong Sativa effects, other than that, no negative effects have been reported.
5. Drying, Trimming, and Curing Your Sour Diesel Harvest
We have briefly mentioned the drying and curing process above, but let’s have a bit of a deeper dive into exactly how you should go about it. How long should you leave the buds to dry? That’s the one million dollar question, and if you ask 100 weed growers you will likely get 50 or so different answers. The most important factor for drying cannabis is environmental control. Unless you are really able to control the temperature and the humidity levels in your dry space the drying process is kind of left in the hands of God.
Drying Cannabis
Anywhere between 10 to 14 days is the perfect time period for proper slow drying when the plant has not been wet trimmed. For most circumstances, we recommend dry trimming over wet trimming. To achieve this, you need to be able to keep the temps between 60-70°F (that’s 15-22°C) with a relative humidity level of 55-65%. You might have lucked out and live in an area where the ambient environment falls perfectly within this range, but if you’re not so lucky then you are going to need a few pieces of equipment. First up, you should already have a temperature and humidity gauge for your grow space. Grab that and check where the levels are at. If they are out of range then you may need to grab a humidifier (or a dehumidifier) to bring the moisture levels into range, and an AC unit may also be needed to control the temperature.
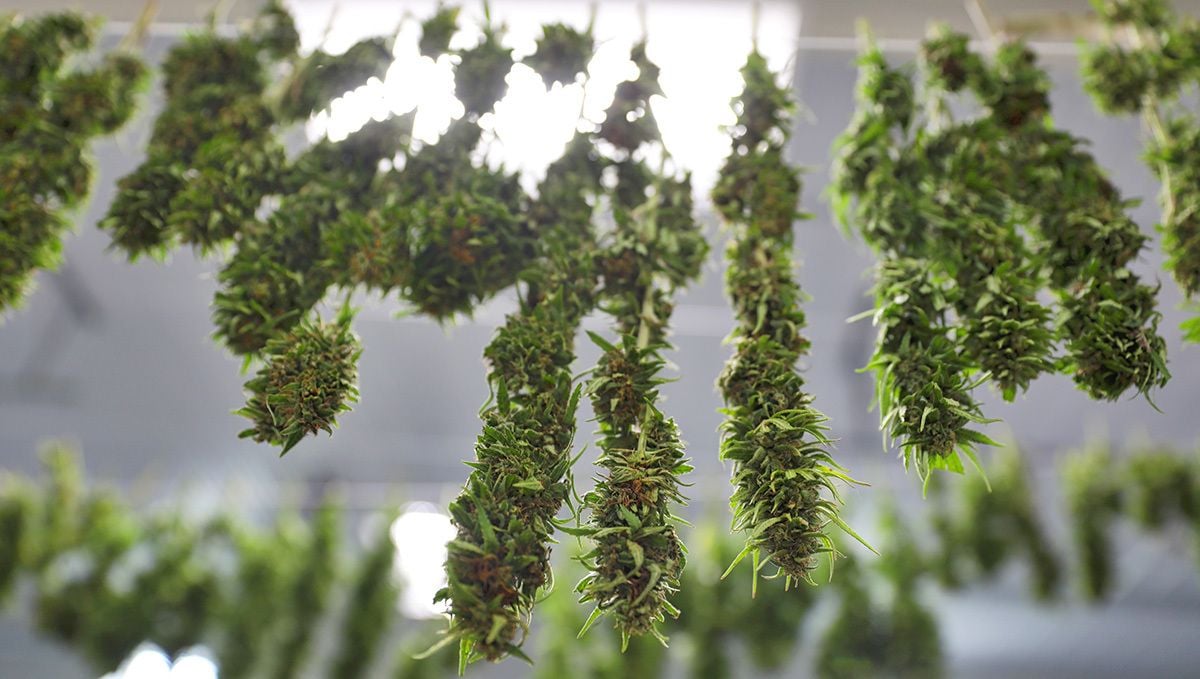
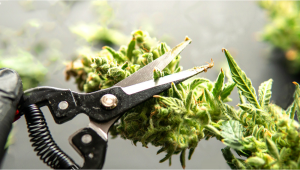
Remember to space out the buds so they dry evenly, and try not to have any fans or ac units blowing directly onto the flowers themselves as this can cause inconsistencies in the drying rates and cause the terpenes to degrade. Ok, 10 to 14 days have passed and the nugs have all dried nicely. What’s next? As long as you didn’t wet trim (again, we almost always recommend dry trimming) then it’s time to grab those scissors and trim tray, and get to snipping! If this is your first time trimming then no doubt you are probably quite excited. If this is not your first rodeo, then you are probably much less thrilled.
Trimming Cannabis
Trimming is the most tedious part of growing weed. It’s slow, sticky, messy, and terrible for people with pollen allergies. But again, if you want to end up with a quality product then it's a job that must be done well. Try not to shave the bud, instead use the tips of the shears or scissors to dig into the flowers and only snip at the sugar leaves, leaving the rest of the flower untouched. Now comes the time to cure. Perfect, more waiting time! Curing cannabis flowers is an often overlooked, but vital part of any grow. If you live in a country where medical or recreational cannabis has not yet become the norm, you may have never even seen a properly cured bud. Why is that? Well, because it is quite time-consuming and most commercial-scale black market cultivators see it as pretty unnecessary.
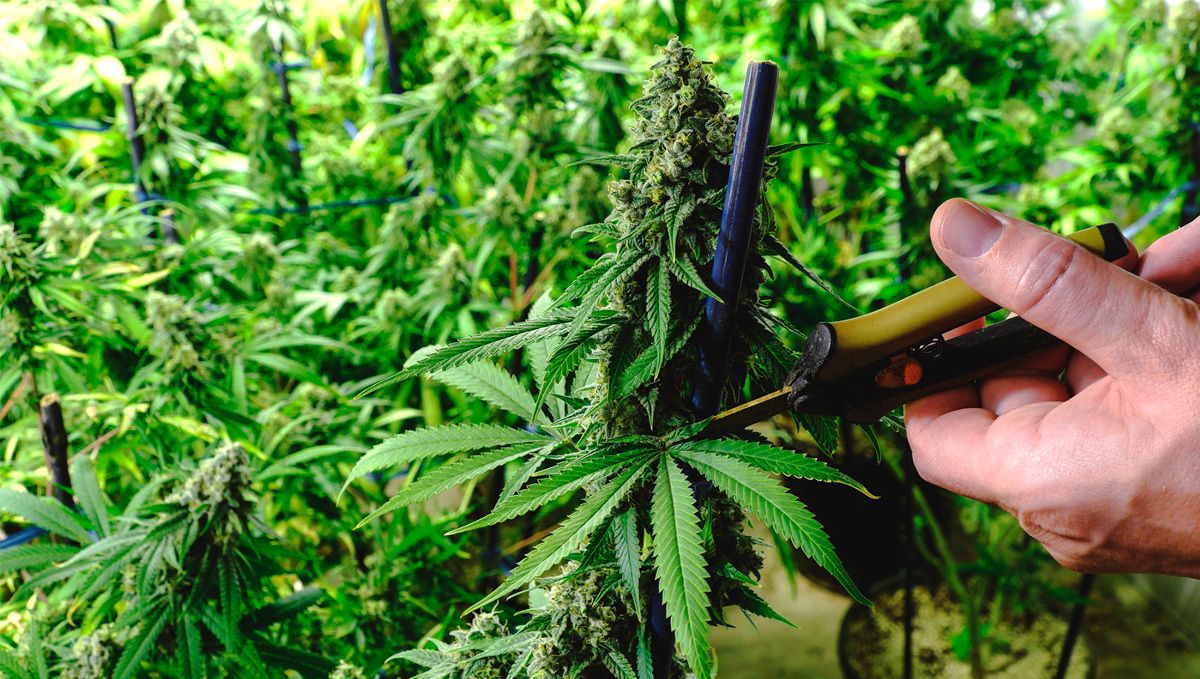
Why would they bother waiting for weeks to months after the first drying process has been completed when they can offload the harvest and start all over again? But, talk to anyone in the know and they will tell you that growing the weed and drying it out is really only half the battle. Sure, bud that has finished the drying period is fine to smoke, better than fine actually. As long as you have dried the harvest slowly and properly, It will have some great terpene development, and the cannabinoid levels will be good. So, why then is curing so important?
To put it as simply as possible, curing weed directly impacts the quality of the flavor and the smoke itself. Terpenes are sensitive little SOBs and will degrade pretty quickly if you try to dry or cure your weed at the wrong temperature or with the wrong relative humidity levels.
Curing Cannabis
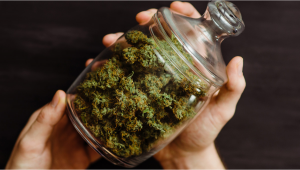
How do you properly cure weed? In terms of equipment, all you need are some airtight containers and a hygrometer for each jar. Before you ask, yes they are kind of necessary for each jar, as the moisture level will be different in every jar. Any airtight container will do, but most people use mason jars. Loosely pack the buds inside without overfilling past the three-quarter mark as they need some air and room to breathe. Seal the container and leave it in a dark, dry spot to cure.
For curing, the perfect temperature is around 70°F (22°C) with a humidity level of 60-65%. Don’t be concerned if the buds feel a little moister during the first few days of curing. That’s just the hidden internal moisture leaking out and rehydrating the outer layers. You should actually be concerned if this doesn’t happen, as this is a sign that you over-dried your weed before curing began.
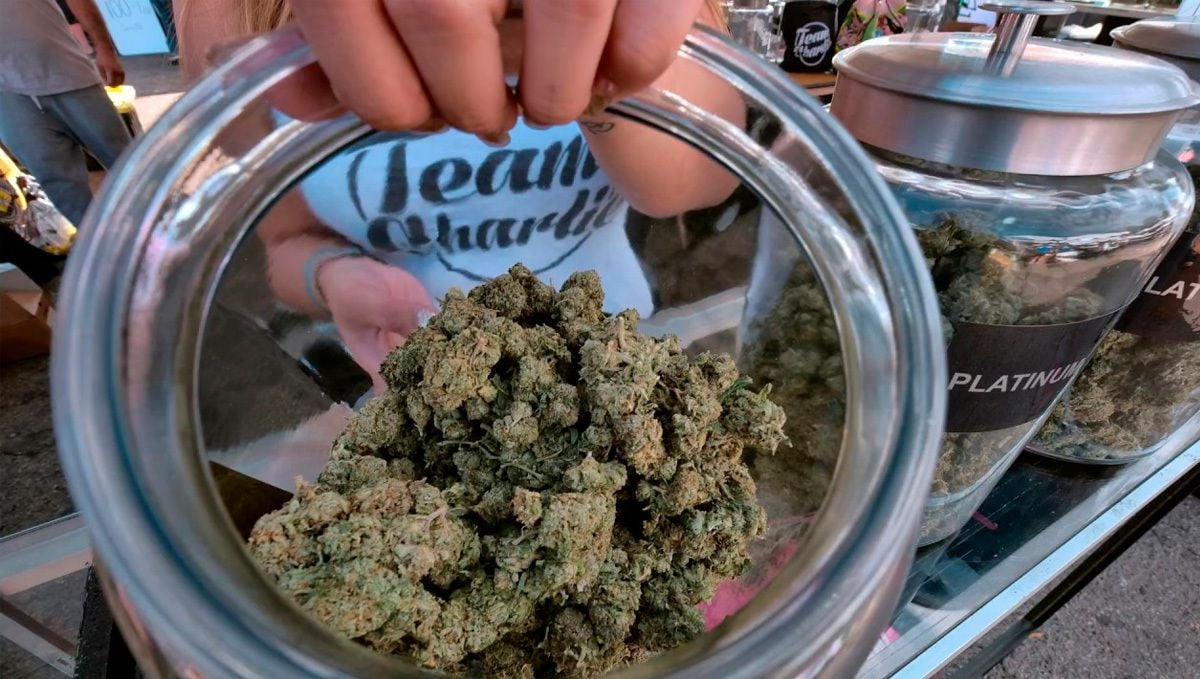
If you are worried that your buds are too dry, simply grab a few rehydration packs. There are a couple of companies that produce specific cannabis rehydration packs and you can easily find them with a quick Google search, but we recommend Integra or Boveda packs.
If the buds are too wet just leave the lid cracked for a day or two and place the jars back in the drying room. Once you are happy with the moisture levels, it’s time to cure. You need to burp each curing jar once or twice per day for the first week to allow the moisture to escape. After the first week, you only need to burp twice a week. If you smell an ammonia-like aroma at any point you must leave the jars open for at least a day, as this is a sign of mold eating your hard-earned nuggets!
How long does the curing process take?
Anywhere between 2 weeks to 6 months, depending on the strain and who you ask. For us, a month has always been long enough for the terps to fully mature but if you’re not in a rush and can leave it longer then why not? Once the buds are cured, it's time to store them. Just like a good wine or whiskey, cannabis is best kept in a cool, dark place. This lowers the chances of any mold issues down the line.
6. In conclusion
If you’re looking to grow some classic Sativa genetics, you must try this one. This Sativa-dominant delivers a strong effect that will give you an energy boost and allow you to go through the day and doing your chores without a problem. If you have grown this strain before, please help fellow growers with a couple of tips to improve their growing skills, leave a comment in the comment section below!
External references
- Stomata and Trichome Development. - V, Vadivel. (2020).
- Terpene Synthases and Terpene Variation in Cannabis sativa. Plant Physiology. - Booth, Judith & Yuen, Mack & Jancsik, Sharon & Madilao, Lina & Page, Jonathan & Bohlmann, Joerg. (2020).




Comments