




Fattening Up Your Buds For Your Best Harvest Yet

- 1. Light intensity
- 1. a. Light spectrum
- 2. Temperature, humidity and airflow
- 2. a. Optimal airflow ensures the best bud density
- 3. Nutrients
- 3. a. Macronutrients
- 3. b. Micronutrients
- 3. c. Ph level
- 3. d. Synthetic nutrients
- 3. e. Organic nutrients
- 3. f. Density boosting additives and supplements
- 4. Plant training
- 4. a. Low-stress training
- 4. b. The tie-down method
- 4. c. The screen of green (scrog) method
- 4. d. High-stress training
- 5. Harvesting at the right time
- 5. a. Stigmas
- 5. b. Yellowing leaves
- 5. c. State of the trichomes
- 6. The right genetics
- 6. a. Indica-dominant vs sativa-dominant
- 6. b. Bud limits
- 7. How to grow big buds?
- 8. In conclusion
Many variables can determine how fat and trichome-rich your nugs will be. In this 2026 article, we explain how to grow bigger buds during flower, what to consider, and how to avoid smaller, low-producing popcorn buds.
The quality of your flowers depends on nutrients, light, the quality of the cannabis seeds, and growing conditions, let’s go through everything and make sure you have everything on point to get denser and chunkier buds on your next grow cycle.
1. Light intensity
Light is the most important factor when trying to get denser cannabis flowers because lights help cannabis plants produce sugars through the photosynthesis process, which makes them grow. Have in mind that not any light will do. Weed needs an optimal light intensity to produce big fat buds.
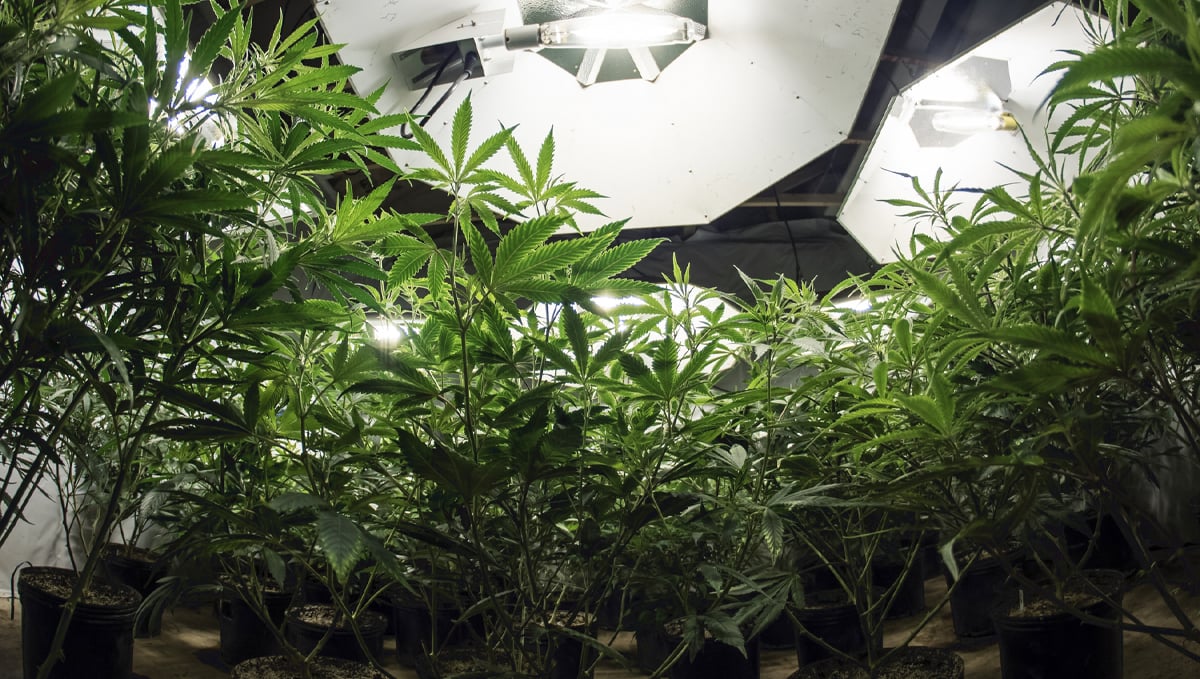
Outdoor growers don’t have to worry that much because they’re growing under the sun, which is the best light possible for plants. Obviously, the number of light hours the plants get outdoors will influence the quality, but as long as you are growing in the outdoor season, you’ll be fine.
| Optimal wattage to get denser flowers | ||
|---|---|---|
| Number of plants | HPS wattage | LED wattage |
| 1 | 100w | 120w |
| 2 | 250w | 200w |
| 4 | 400w | 280w |
| 6 | 600w | 350w |
However, with LEDs, wattage is not the best way to measure how much light your plants are getting. That is why we recommend using a PAR meter to reach the following PPFD levels for each stage of plant growth:
* Seedling Stage: 100-300 μmol/s
* Vegetative Stage: 400 - 700 μmol/s
* Flowering Stage: 800 - 1000 μmol/s
Indoor growers have to choose between different light fixtures, nowadays you can easily find light bulbs and LEDs suited for every grow tent and grower, each one with its pros and cons, so that’s why you should research a lot before buying expensive equipment. Either way, professional indoor growers provide approximately 1000w per m2 to have the best results. Obviously, not all home growers can afford this, but make sure you provide at least 100w per plant to increase bud density.

Light spectrum
Not only the light intensity but also the light spectrum emitted by your light will affect how dense your buds get. Each wavelength in the light spectrum plays an important role in a cannabis plant’s growth process.
As you may know, light bulbs (like MH and HPS) don’t emit a full spectrum. MH emits the blue spectrum, and HPS emits the red spectrum. That’s why Metal halide bulbs are used in the vegetative stage while HPS bulbs are used in the flowering stage.
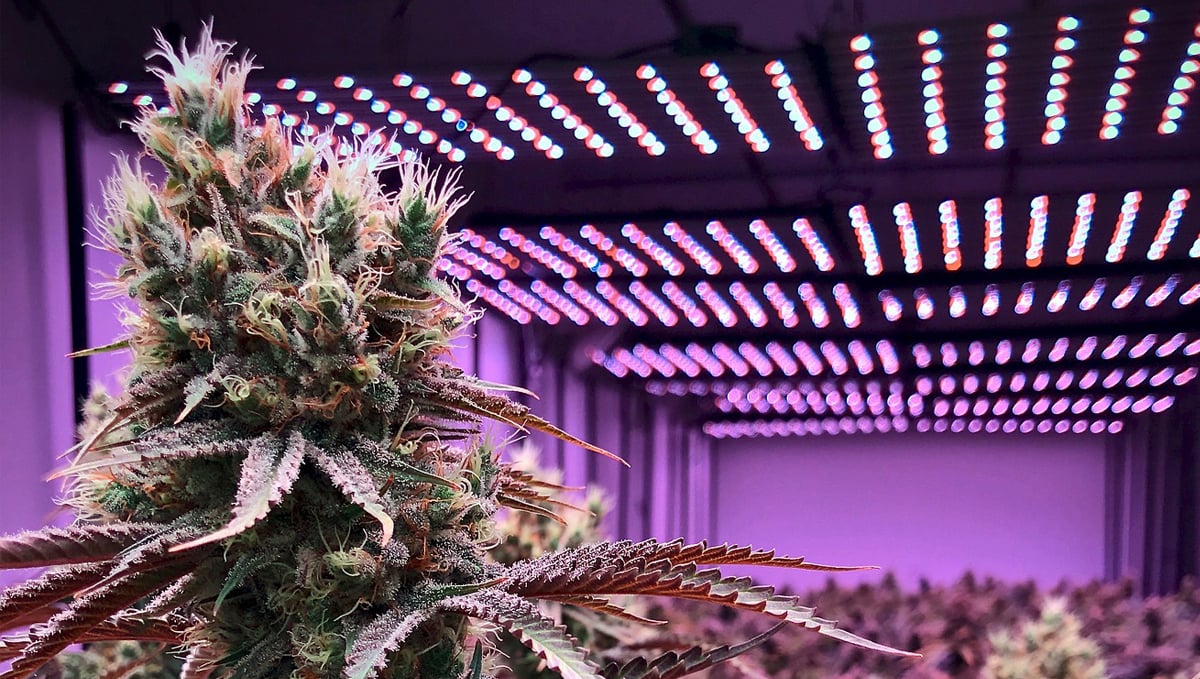
Now, with LEDs, you don’t have this problem because most LEDs emit almost the whole spectrum, which is crucial to harvest denser flowers because each wavelength is responsible for a certain aspect of a plant’s growth.
Green/blue wavelength (490-570nm)
These wavelengths are critical in the vegetative stage because growth and water absorption are boosted.
Yellow wavelength (570-585nm)
These wavelengths encourage plants to stretch and start budding; plants use them to encourage photoreceptors to absorb more light and get denser buds, increasing yields.
Red wavelength (520-720nm)
These wavelengths signal to your marijuana plant that autumn is near, and this not only increases resin production but also helps increase bud size.
2. Temperature, humidity and Airflow
The growing conditions also have a huge influence on bud density; cannabis plants thrive between 18-29°C and in relative humidity that starts at 80% and slowly decreases until it reaches around 30% during the last weeks of flowering. However, these conditions should be adjusted for every stage of plant growth, as shown below.
| Optimal Humidity and temperature to get denser flowers | ||||
|---|---|---|---|---|
| Plant stage | Week | Day Temp. | Night Temp. | Relative humidity |
| Seedling | 0 | 23-29°C | 18-24°C | 75-85% |
| Vegetative | 1 | 21-29°C | 16-24°C | 60-70% |
| 2 | 21-29°C | 16-24°C | 60-70% | |
| 3 | 21-29°C | 16-24°C | 60-70% | |
| 4 | 21-29°C | 16-24°C | 60-70% | |
| Pre-flowering | 5 | 21-26°C | 16-21°C | 55-65% |
| Flowering | 6 | 15-24°C | 10-19°C | 40-50% |
| 7 | 15-24°C | 10-19°C | 40-50% | |
| 8 | 15-24°C | 10-19°C | 40-50% | |
| 9 | 15-24°C | 10-19°C | 40-50% | |
| Ripening | 10 | 15-21°C | 10-16°C | 30-40% |
If you fail to maintain optimal conditions, the buds will end up airy, just like popcorn buds, so make sure the growing conditions are constant and, if you need to, use equipment such as fans, heaters, or AC units to be able to do so. Unlike indoor growers, outdoor growers have less control over the conditions, so it’s essential you plan when you’re germinating your seeds to have the best conditions possible, and if needed, build a greenhouse or, if you already have a greenhouse, install fans in it.
Optimal Airflow Ensures the Best Bud Density
In nature, cannabis is a wind-pollinated plant. This means that the plant is genetically disposed to expend more energy on budding sites that are exposed to optimal airflow and light. There are a couple of ways that we, as cultivators, can ensure that the plant has the best chance of producing dense, juicy nuggets by simply maximizing the air exchange in the canopy and the entire grow area. If you are growing outdoors, this may be as simple as spacing your plants correctly and removing some of the fan leaves to allow for better airflow. You can also help your outdoor grow by making sure the crop is placed in an area that will receive a high amount of natural wind. This, along with other external stimuli, will also help the overall strength of your plants and allow the branches to grow thick enough to support those huge buds. It is just like us going to the gym and lifting weights. The more we strain our muscles, the bigger they grow - the same goes for cannabis plants moving in the wind.
When growing weed indoors, we want to try and replicate the outdoor environment in certain ways. Along with lighting, airflow is hugely important. There are two main types of airflow that we want to create in any growing space:
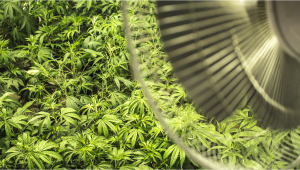
Air exchange exhaust system
A constant supply of fresh air is one of the most important aspects to consider when designing any grow space. For air exchange, you want to have the incoming vent placed near the bottom for the grow area and the outgoing near the top. This is because heat rises, so this design helps with keeping the grow room nice and cool. Exhaust fans come with a CFM (cubic feet per minute) rating.
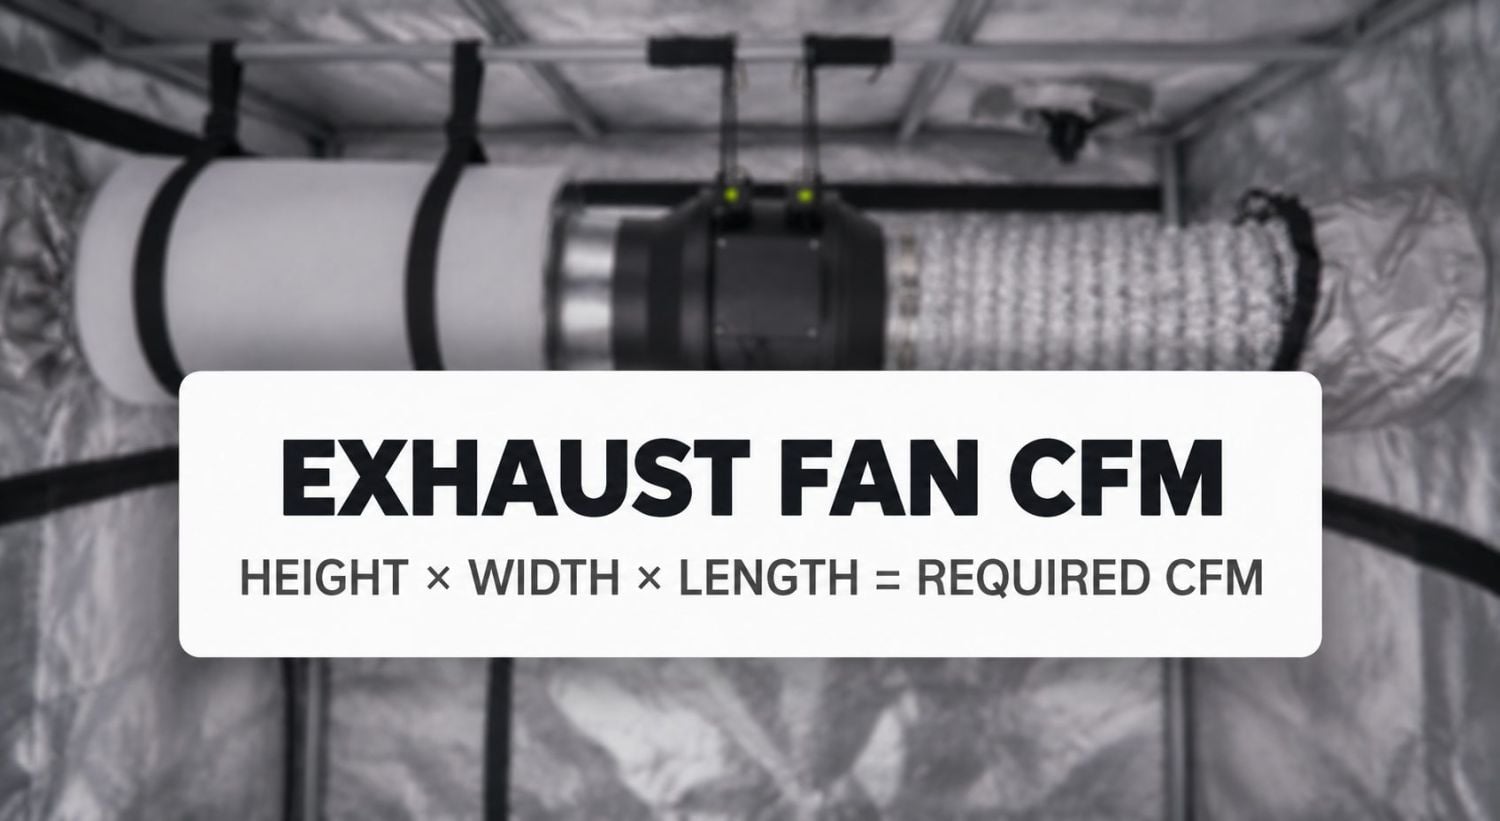
By multiplying the height, width, and length dimensions of your grow room, you will be able to easily calculate the exhaust fan requirements. If possible, it is great to have the fresh air circulated into your grow space every 1–3 minutes.
Canopy airflow
The easiest and most budget-friendly option for creating airflow within the canopy is by placing a few small (depending on the size of your grow room) oscillating fans aimed at the canopy itself. You want to grab fans that have a few speed settings, as a nice strong breeze is great for mature plants, but maybe too forceful for developing seedlings. If the only option at your disposal is too strong, face it away from the canopy. As long as it is at canopy height, then the air will still be exchanged. You also want to place the fans so the breeze is coming from a range of different directions. If you can work out how to set a few up so there is one aimed from above, one from below, and one or two at canopy level, then do so. If you only have space for one in your grow area, then so be it. One is better than none!
This setup will not only help the buds fatten right up but also help you control the canopy temp and humidity, and fight against mold and pest issues.
3. Nutrients
The nutrients make a huge difference. Even though you may be able to harvest buds without feeding your plants, providing the right minerals at the proper ratio will result in denser flowers. Marijuana plants need different nutrients that are divided into macronutrients and micronutrients, which should be given at the correct time. And to know exactly how much and when to provide them, you need to know your plant's life cycle. So by knowing approximately how long your auto will grow and how many weeks of flowering before harvest, you'll get an idea of what to give and when.
For example, if you are growing an autoflower that takes around 10 weeks from seed to harvest, you'll know that it will take approximately 4-5 weeks for your plant to vegetate and another 5-6 for it to flower. Knowing this, you'll be able to plan and calculate the nutrient doses because, as you may know, you should start with a lower dose and increase it gradually when growing autoflowers.
Macronutrients
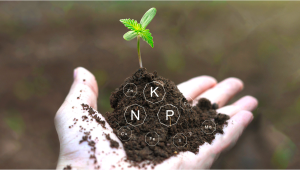
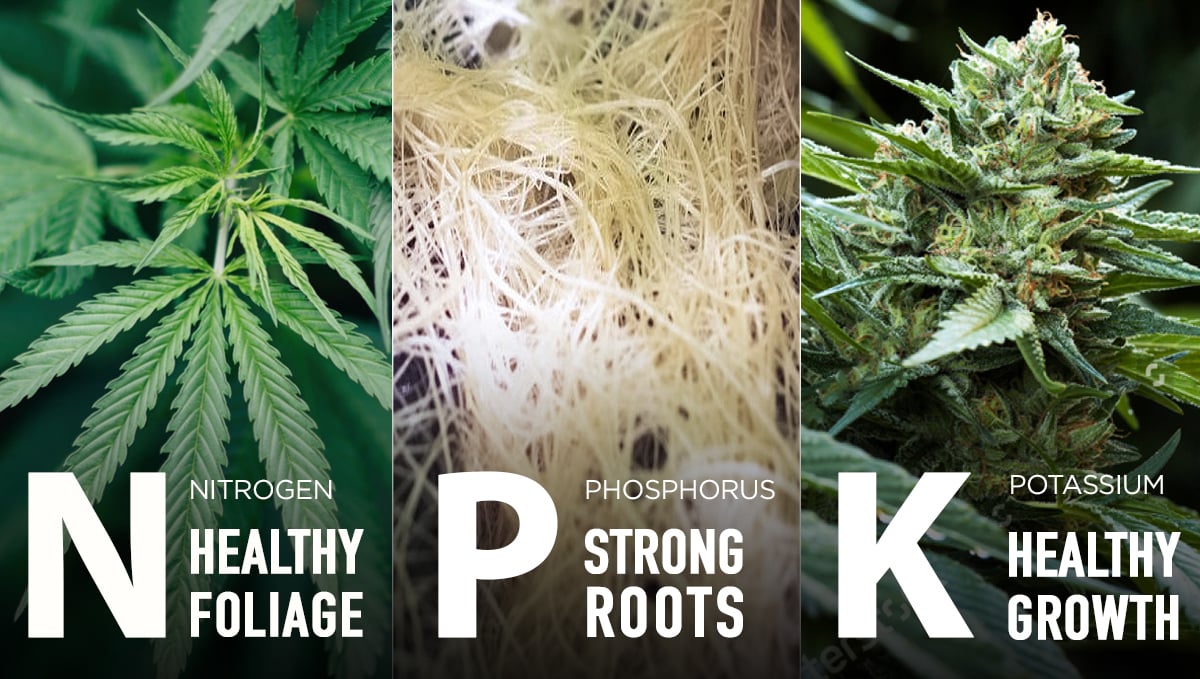
Macronutrients are the widely known NPK and are the minerals cannabis plants use the most. NPK refers to Nitrogen, Phosphorus, and Potassium. Nitrogen is responsible for plant growth in the vegetative stage, Phosphorus helps in photosynthesis, and Potassium is essential in bud and terpene production, so it’s essential that you provide these nutrients if you want to have good results.
Micronutrients
Micronutrients are minerals used in lower quantities, but they’re also essential for a cannabis plant's growth; failing to provide them will also result in signs of deficiencies even though they’re needed 10x less than macronutrients. These are mainly trace elements such as Boron, Copper, Calcium, and Magnesium, among others, and all of them play a role in helping your plant achieve the needed structure and preparing it to successfully go through flowering.
Now, plants depend on the pH level to be able to absorb nutrients properly, so it’s essential that you check and adjust it, but it’s vital that you provide just what your plants need, nothing less, nothing more. It’s recommended you start with a lower dose than recommended because you may end up burning your plants, which will have the opposite effect from what you were looking for; Instead of denser buds, your plant will show symptoms of deficiencies.
| Light nutrient solution cannabis feeding schedule | ||
|---|---|---|
| Week | Stage | Nutrients |
| 1 | Seedling | Plain water |
| 2 | Vegetative | 1/2 grow nutrients |
| 3 | Vegetative | 1/2 grow nutrients |
| 4 | Vegetative | 3/4 grow nutrients |
| 5 | Pre-flowering | 1/2 grow nutrients |
| 6 | Flowering | 1/2 bloom nutrients |
| 7 | Flowering | 3/4 bloom nutrients |
| 8 | Flowering & ripening | 1/2 bloom nutrients |
| 9 | Ripening & harvest | Plain water |
To avoid this, you should feed your plants with a 2-1-3 ratio in the vegetative stage and 1-2-3 in the flowering, this means you have to feed more nitrogen while your plants are growing and more phosphorus and potassium when the flowers are developing. Just have in mind that different nutrient brands have different feeding schedules, and there are several different fertilizers for cannabis which can be quite different.
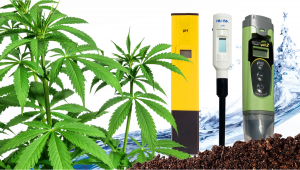
pH level
Checking and adjusting the pH level is essential if you really want to harvest great buds. PH ranges from 1 to 14 and is a way to measure how alkaline or acidic a liquid solution is. Pure water has a neutral pH of 7. Depending on the medium you’re growing in, the pH should be a bit lower but shouldn’t differ too much; for example, in soil the pH should range between 6.0-7.0, and in soilless medium (such as coco, clay pellets, or hydro) it should range between 5.5-6.5.
| PH range for cannabis in different mediums | |
|---|---|
| Medium | pH range |
|
Soil |
6.0-7.0 |
|
Hydro and soilless (like coco or clay pellets) |
5.5-6.5 |
Maintaining these pH levels is essential if you want your plants to absorb nutrients properly because marijuana plants depend on certain pH levels to absorb nutrients properly.
Synthetic nutrients
Synthetic nutrients are the most common cannabis fertilizers available. These bottled nutrients contain salts that feed your plant’s roots directly. This type of feeding is usually simpler and cheaper than organic nutrients, but as you may know by now, because you’re feeding the roots directly, it’s super easy to overfeed and may bring more deficiencies if you haven’t grown weed before.
Organic nutrients
Organic nutrients, unlike synthetic nutrients, consist of maintaining a healthy medium that is filled with beneficial microorganisms that have a symbiotic relationship with your marijuana plants.
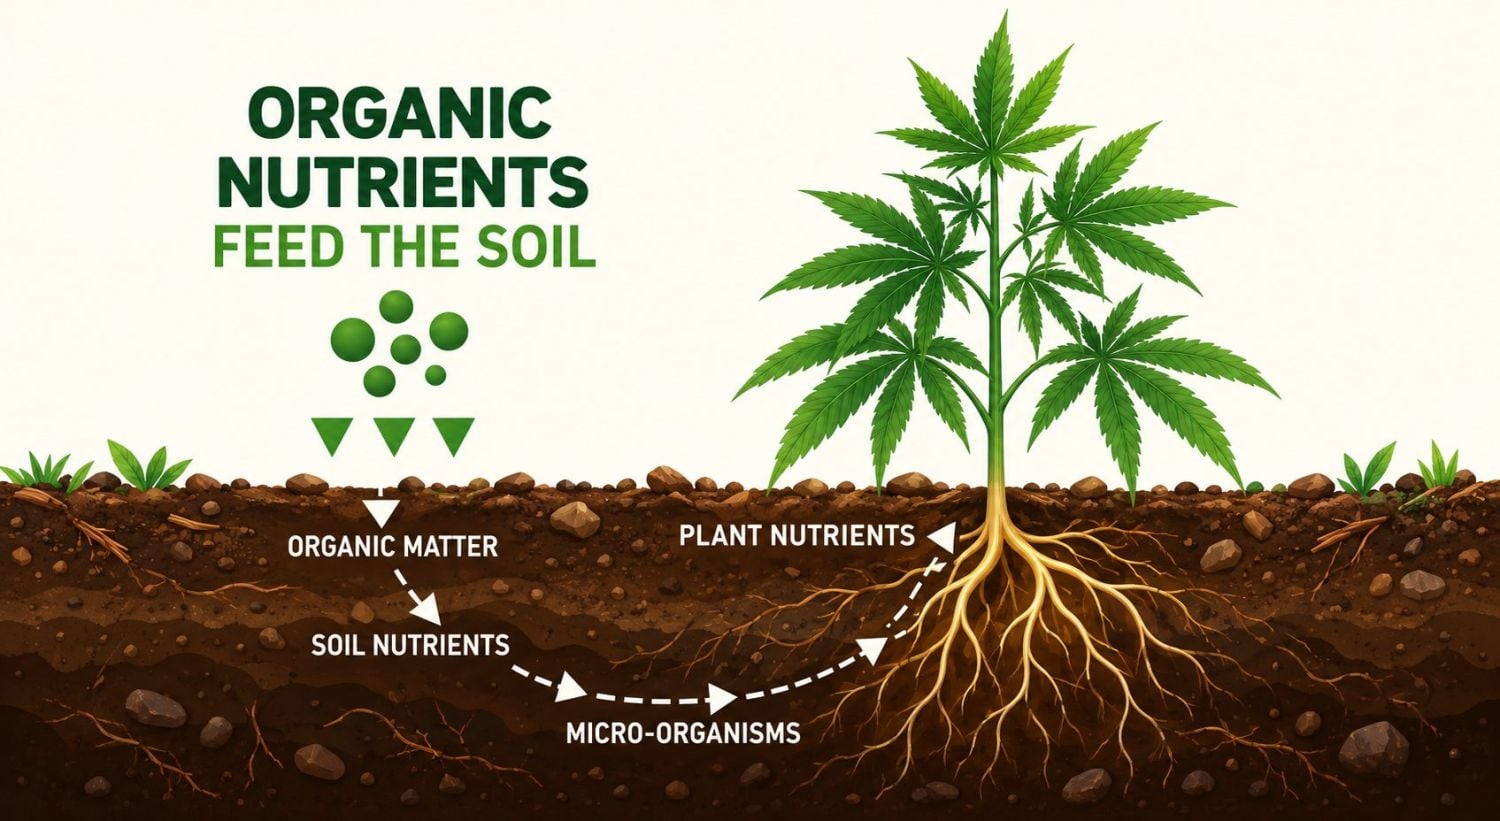
Organic feeding is usually more expensive, but there are several ways to make your own super soil, KNF, or compost at home where you can customize it to your own needs. This way, you are not feeding the roots directly, but making the nutrients available in the medium for the microorganisms to break them down and making it easier for your plants to absorb them when they want and need to, decreasing the chances of overfeeding and other deficiencies.
Density Boosting Additives and Supplements
Once you have your feed schedule of the base nutrients dialed in it’s time to think about cannabis supplements. While the jury is still out in terms of hard scientific facts, most experienced cannabis growers agree that using some form of bloom supplementation will result in better quality buds and increased yields. These supplements usually contain a mix of vitamins, humic acids, trace minerals, amino acids, and complex carbohydrates. Most important of all, though, is Phosphorous (P), one of the three main macros. This nutrient is responsible for energy transportation, which has a huge impact on bud development. Look for a booster that contains these.
Almost every single cannabis nutrient company produces a bloom booster, but here is a couple of the most popular ones preferred by growers.
- Cannabiogen Delta 9
- Advanced Nutrients Bud Ignitor
- Grotek Blossom Blaster
- Top Crop Big One
- CANNABOOST by Canna
Another option favored by many growers, and a much more wallet-friendly option, is to use unsulphured blackstrap molasses. This wonder product contains a bunch of complex sugars, and also a range of nutrients that aid in plant development and soil health. Along with the carbohydrates, it contains iron, selenium, copper, magnesium, and calcium, which all help boost bud development. There are 2 main accepted ways to implement blackstrap molasses into your feeding schedule:
1- It can be added to the feedwater at a rate of 5 ml per liter of water twice a week during the vegetative growth period, and 8 to 10 ml per liter during the flowering stage as potassium demands increase.
2- You can use blackstrap molasses as a foliar spray. Add half a teaspoon to one liter of lukewarm into a spray bottle, give it a good shake, and apply liberally to the entire plant. Once every 10 to 14 days will be more than sufficient. Molasses foliar spray also works fantastically as an effective pest repellent and will help in the treatment of infestations. This can be mixed with some neem oil and insecticidal soap to boost the effectiveness.
4. Plant training
Cannabis plants usually grow one main cola and several side branches. Depending on your grow space, it may not be a problem, but this growth pattern isn’t ideal for a lot of growers who want to make the most out of their equipment. Plant training techniques such as LST and HST can be used to re-shape how a marijuana plant grows. This way, growers can open up the branches and canopy, and when done correctly, the flower sites will receive more light and airflow, resulting in denser flowers and ultimately better yields.
Low-stress training
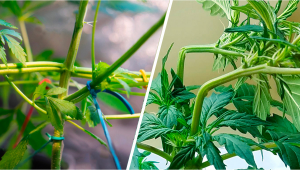
Low-stress training (aka LST) is a plant training method that does not mutilate, cut, or hurt your plant. The idea behind this technique is to bend the branches and stem horizontally to improve light usage, which results in bigger buds and better yields.
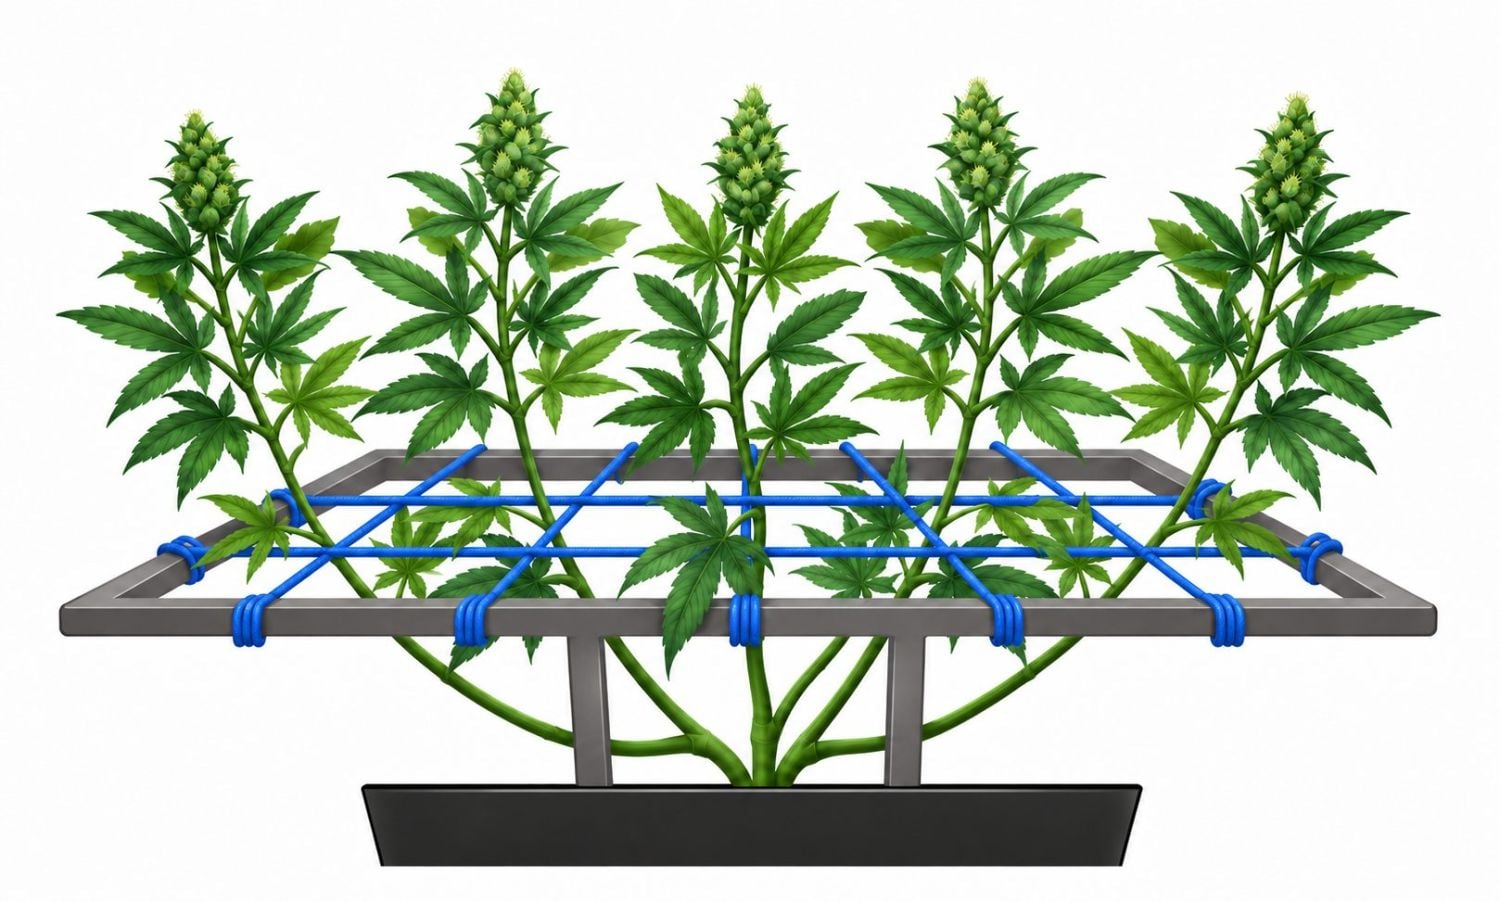
These low-stress techniques include the tie-down method, SCRoG, and SoG, which are different methods that are better suited to different scenarios but end up having the same results.
As you can see in the video above, our grower not only tied the branches but also topped his autoflower. When done properly, you will be able to reach the desired plant structure that can improve yields and the overall quality of your harvest. Low-Stress Training (LST) works great with autoflowering cannabis strains, and for a key reason:
Autoflowers mature quickly. This means that if you don’t time it right, they may not have time to bounce back from the level of stress that HST techniques inflict. HST can stunt growth for up to 10 days, and while this is fine for photoperiod strains (you just keep them in veg for longer to cover the lost time), autos will switch to flower no matter what we do. This can lead to smaller plants and lower yields.
So, how does low-stress training work exactly? Let's break down the two most common techniques and explain how they work.
The Tie-Down Method
The tie-down method is one of the most common and easiest ways to train your autoflowering cannabis plants. Simply take some thin rope or string, and tie the main stem down at intervals along its length. As the plant grows, the stem will bend in the direction you’ve tied it, resulting in a more horizontal plant. To do this, you will need:
- thin rope, string, twine, or garden ties
- scissors
Instructions:
1. Choose a part of the main stem to tie down, and make sure it’s at least 6 inches long. If the stem is too short, it won’t be able to bend without breaking. We usually wait until the plant has at least 3 nodes fully developed, and tie above.
2. Tie one end of the rope or string around the stem, making sure it’s nice and tight but not so tight that it cuts into the stem, and tie the other end to the top edge of the pot. You can use a drill on plastic pots to make handy little holes to tie off, or if the pot has handles, you can simply tie the other end to that.
3. Repeat step 2 at intervals along the length of the stem, until you reach the desired height. The idea is to slowly and carefully bend the main stem until it grows on a horizontal plane.
4. As larger branches take shape, continue tying them down, and try to keep them around the same height at the main stem.
The Screen of Green (SCROG) Method
The SCROG method is a lot like the tie-down method, but rather than using rope or string, you use a net or screen. This allows you to ‘train’ multiple stems at once and results in an even more horizontal plant.

The only downside is that it can be a bit more work to set up, but it's also the method that offers the most consistent results. To do this, you will need:
- A net or screen, or some twine
- PVC piping
- 4 PVC elbow joints
- Scissors
- Duct tape
Instructions:
1. Start by setting up your net or screen. Grab the PVC piping and cut it into 4 lengths. Connect them with the elbow joints to make a square or rectangle. The size is totally dependent on the size of your pot and plant, but we usually make ours around 2 ft by 2 ft.
2. The next step is to cover the PVC frame with your net, screen, or twine. You want to use a net or screen with gaps that measure about one-inch squares. If you are using the twine, you will need to manually make this netting. It can be as neat or messy as you like. It just needs to hold the branches and buds in place.
3. Cut four more lengths of PVC for the legs, and use duct tape to connect them to the PVC frame. Tape the whole thing to the pot, leaving a gap of about 50 to 70 centimeters between the soil and the SCROG net.
4. Now you can start training your plant. Take the main stem and gently guide it through the netting or screen, being careful not to break any branches. You want the plant to grow horizontally, so keep adjusting the position of the stems until they are all lying flat against the SCROG.
5. Once the plant is in position, you can consider doing a little defoliation. Fan leaves are, of course, very important to plant development - but they can also cause some diminished yields if they are throwing shade at all of the budding sites. So, you may want to consider snipping off any leaves that are casting a shadow on the buds. Just don't go overboard, and never prune more than around 20% of the fan leaves at any one time.
6. Once your plant is in the desired position, simply sit back and let it do its thing! Keep an eye on the SCROG, making sure no branches are drooping or breaking - but other than that, there's not much else to do. Enjoy your abundant harvest!
High-stress training
High-stress training (aka HST) is a plant training methods that consist of mutilating your cannabis plants. Techniques like Topping or Fimming consist of cutting your plant in a certain way, ending up with results similar to what LST offers but taking less time while also being more stressful to your plants. Although it's not recommended to perform HST on autoflowers if you're not experienced enough, you can get away with it and have great results. Also, it's common among growers to perform LST in combination with HST to get the results you desire.
5. Harvesting at the right time
Beginner growers tend to harvest sooner either because they are anxious and want to smoke their buds or simply don’t know when the right time to harvest is. As you may know, buds develop really fast during flowering, and even just a couple of days may make a big difference in the quality of your flowers.
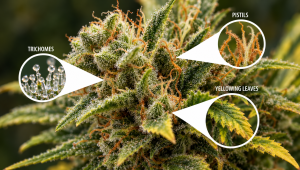
Stigmas
Stigmas (pistils) are the white hairs that you start seeing in the pre-flowering stage. These hairs come out of the calyxes, and when marijuana plants are getting ready to be harvested, these hairs will start browning and wilting.
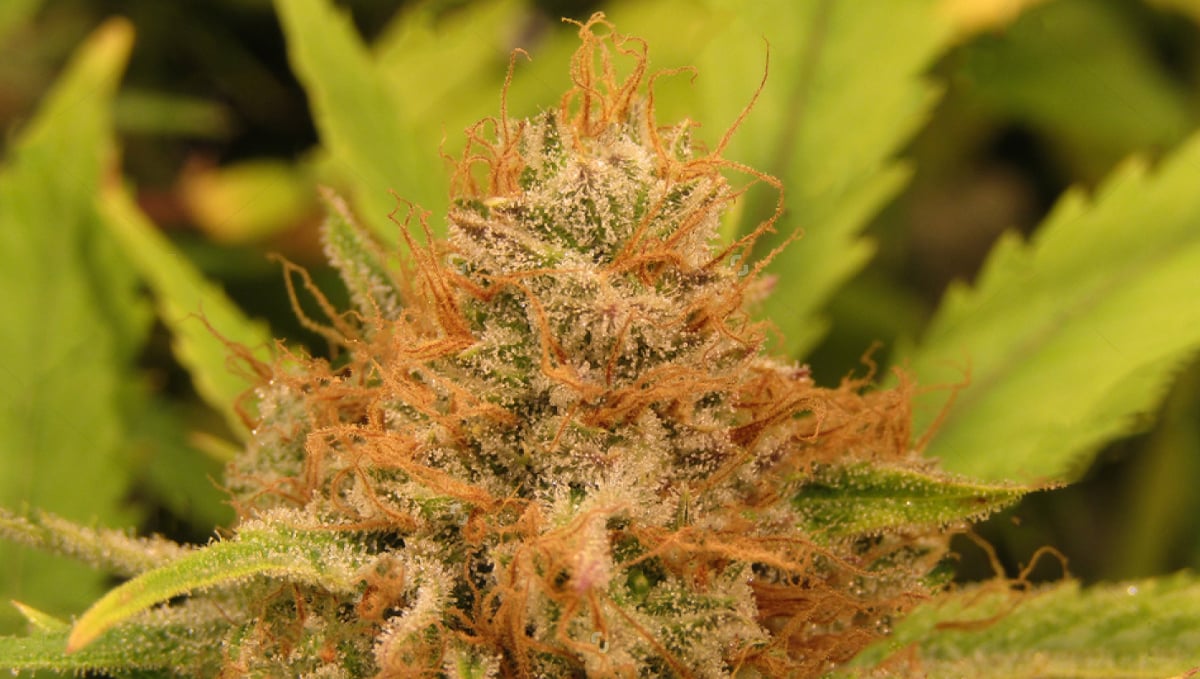
Have in mind that in some strains these hairs start browning earlier, and in others, the majority doesn’t even brown, so you should not harvest based just on the stigmas.
Yellowing leaves
At the end of your growing cycle, you will see the big fan leaves yellowing. This could be a big problem if it happens in other stages, but when nearing harvest it’s completely normal and a sign that your plant is getting ready to be harvested.
State of the trichomes
Apart from the other factors that will help you know when the right time to chop down your plant, the standard practice is to look at the state of the trichomes, so you shouldn’t harvest your plants based on the other factors until you take a look at the trichomes.
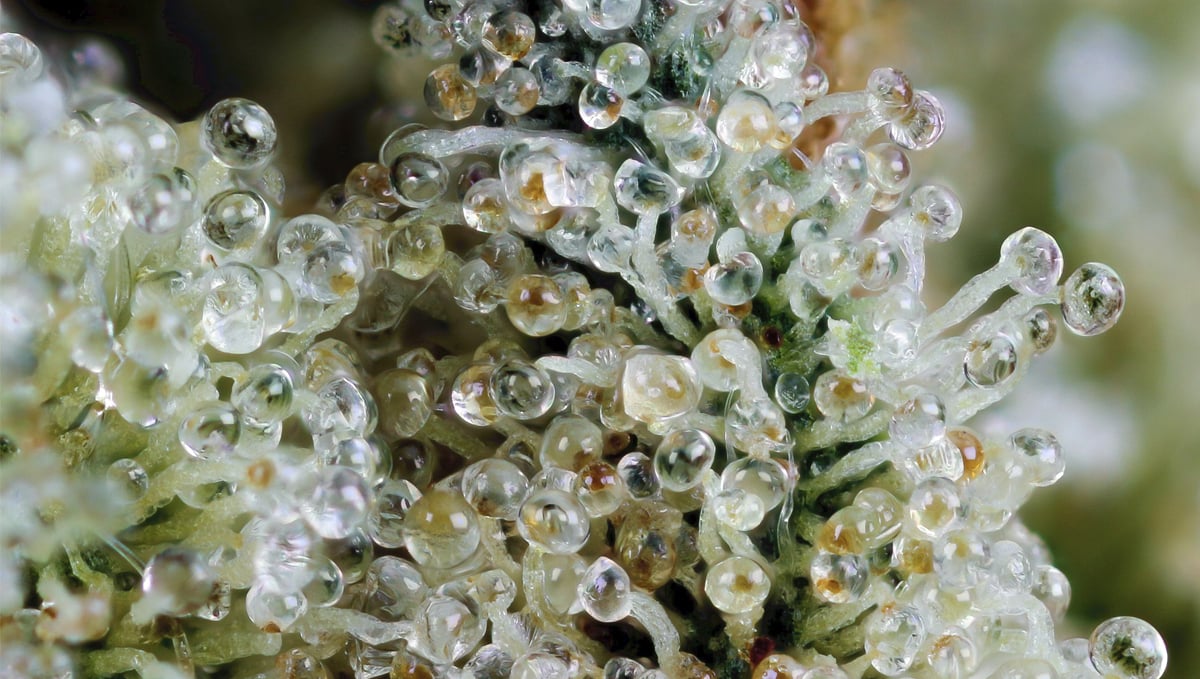
Depending on the type of effect you prefer, you shouldn’t harvest unless most of the trichomes are cloudy (cerebral effect) or amber (corporal effect). Harvesting at just the right time will result in not only denser flowers but also a more potent effect. Remember that patience is essential.
6. The right genetics
Genetics is a crucial factor if you are looking to grow dense buds. Nowadays there are lots of strains that have different characteristics. These characteristics influence the type of effect, aroma, flavor, plant structure, and bud density as well.
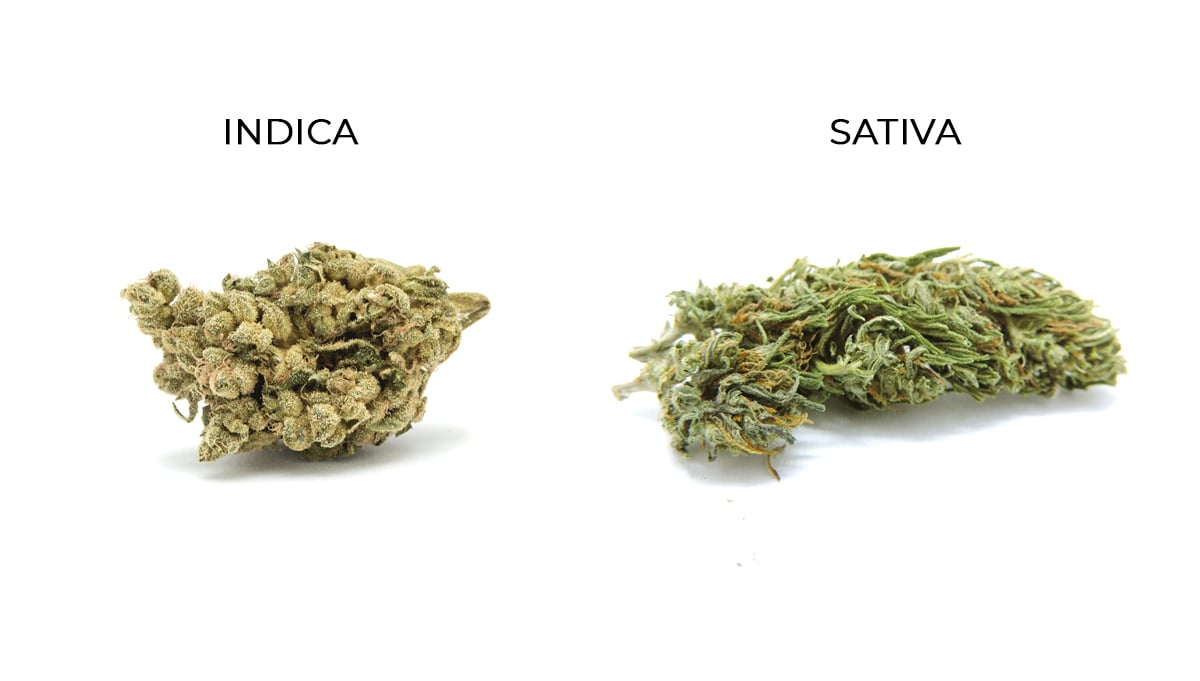
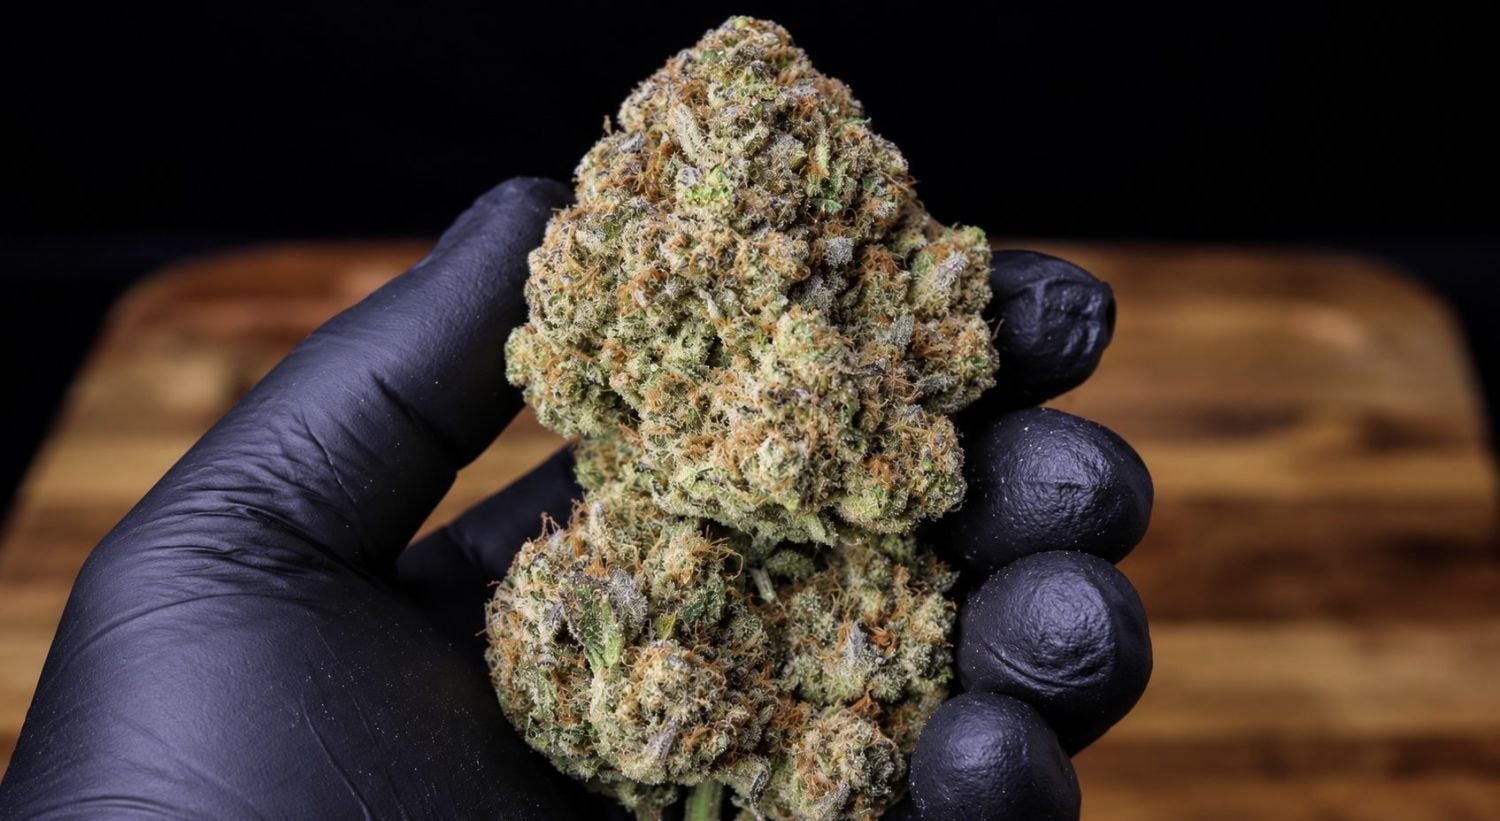
Some strains (usually Sativa-dominant) produce airy and fluffy buds, but this doesn’t mean they’re not strong. Lighter buds are a characteristic of Sativa strains, while Indicas produce thicker and denser flowers. So keep in mind that some strains won’t produce dense flowers even in optimal conditions, but it doesn’t mean they lack quality.
Luckily, you can find hybrids that contain a fine genetic mix and offer the best of both worlds, like our Frostbanger Auto, which is a 40% Sativa / 60% Indica, resulting in super big and dense buds.
Indica-dominant vs Sativa-dominant
Cannabis plants have nodes along their stems. These nodes are where the leaves grow from and are where buds form. This is the same for all marijuana plants, but Indica-dominant strains tend to have shorter internodal spaces and denser buds, while Sativa-dominant has longer internodal spaces and longer, more airy buds.
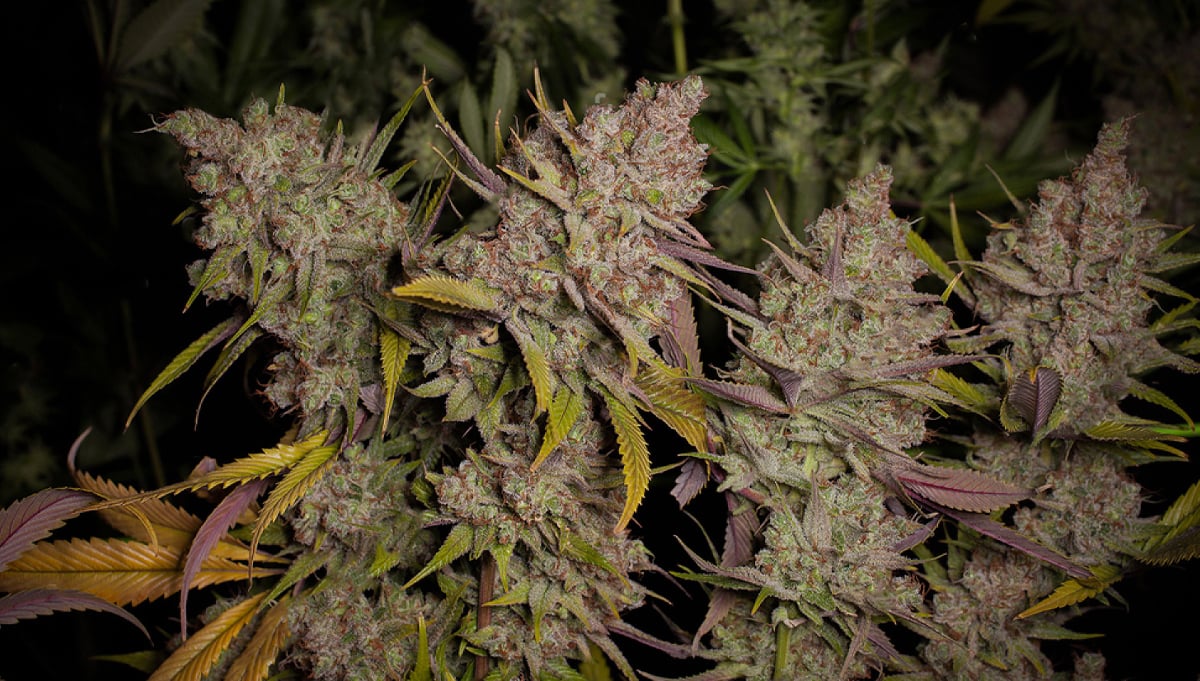
Even in the same conditions, cannabis Indica flowers usually grow denser and in clusters around the nodes of the stem and branches, with short internodal spaces between them. Now, Sativa buds usually grow larger than Indica buds, but instead of the nodes being all together, they develop along the whole branch, so the buds tend to weigh less due to their lower density.
Bud limits
As said above, some strains have certain characteristics that will not change even in optimal conditions. This means that even if you have the best-growing tent in the world, an Indica strain will have denser buds than a Sativa strain in the same conditions, and you won’t be able to change that even if you provide the best light fixture, growing conditions, and nutrients.
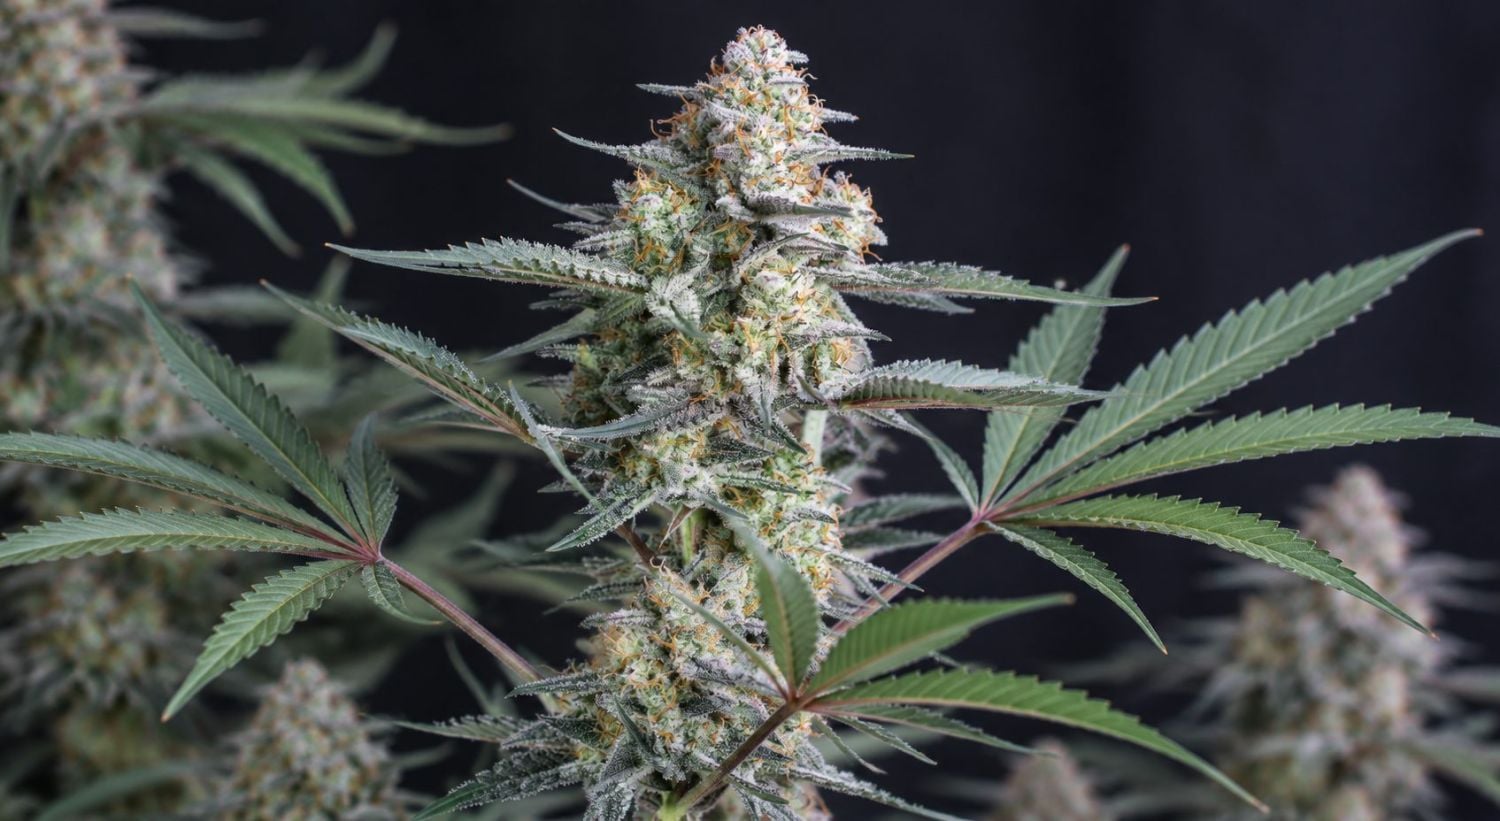
That’s why you should choose the strains carefully: first, have in mind what your grow tent can handle, and, second, choose what you prefer. We recommend going for balanced hybrids because they will provide the best of both worlds when talking about effect, density, flavor, and yields.
7. How to grow big buds?
If you're following everything said above, and you're still getting popcorn buds, here are some extra tips to help you get the bud density you desire.
Feed properly during the flowering stage
Cannabis plants are usually more forgiving in the vegetative stage. You can feed slightly more or less, and it won’t matter that much because your plants will still grow green and healthy. Obviously, feeding a lot more will stress your plant, but you have a minimal margin for error. Once you’re in the flowering stage and the buds are developing, things change. When your cannabis plants are blooming, you have to be more careful because the nutrients you provide will affect the quality and density of the buds.
Avoid too much nitrogen when the flowers are forming
Watering with high levels of nitrogen in the vegetative stage will cause nutrient burn, which will make the leaves yellow and, in more serious cases, dry and die, but these symptoms are basically cosmetic and won’t affect your flowers because they haven’t started forming yet. Now, in the flowering stage, giving too much Nitrogen can affect bud development and end up affecting their density. Luckily for you, Nitrogen toxicity is super easy to fix. Just lower the dose, and your plant will recover.
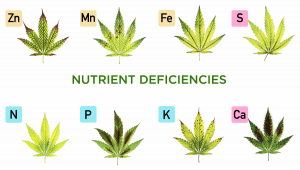
Don’t ignore nutrient deficiencies
As you may know, flowering cannabis plants need more Phosphorus, Potassium, and less Nitrogen, so when the buds are forming, you should feed Bloom nutrients at the right amount. Feeding properly will ensure your buds develop properly.
8. In Conclusion
Some cannabis cultivars are bigger yielding than others. That's the case of Sativa-dominant hybrids that grow stacked flowers and will naturally produce big yields. Indica-dominant strains are also good candidates because most hybrids end up being heavy feeders and are well known for producing big fat buds.
So if you were wondering how to increase cannabis yield, you need to know that there is a balancing act when it comes to boosting your plants during flowering. Adding too many nutrients during flowering can cause plants to burn, show deficiencies, and, in the worst case, ruin your yields.
If you're an experienced grower, feel free to leave your tips and tricks to help beginner growers get bigger buds!
External References:
- Improving Cannabis Bud Quality and Yield with Subcanopy Lighting. HortScience. - Hawley, Dave & Graham, Thomas & Stasiak, Michael & Dixon, Mike. (2018).
- Apical bud removal increased seed yield in hemp ( Cannabis sativa L.). - Ačko, Darja & Flajšman, Marko & Trdan, Stanislav. (2019).
FAQ
This can vary depending on the light type and brand, but generally, you should provide at least 75W per plant for good results. However, the only way to be 100% sure your plants are getting enough light is with a PAR meter.
It is possible to grow bigger buds with top-notch LEDs, but you can have similar results with light bulbs; it’s just a matter of knowing how to use and adapt your grow space to the different types of lighting.
In the last 5 years, though, we have seen the title of best grow lighting option switch from HIDs to LEDs. LEDs now offer the same, or better, light penetration, spread, and intensity than HIDs. Plus, they come with a range of benefits over traditional lights.
Temperature and humidity can affect how your plant photosynthesizes and produces sugars, so in less-than-ideal conditions, your plant may grow slower or produce less, which can make it harder to get big buds.
They probably won’t hurt your plant when used correctly, but have in mind that most flower boosters just provide phosphorus and potassium, which any good-quality fertilizer designed for the flowering stage will too. If you’re looking to maximize your yields and create the biggest, densest buds possible, we recommend using a high-quality fertilizer designed for the flowering stage, along with a good flower enhancer or booster.
Nitrogen Excess: Leaves become darker green, stems and foliage weaken, and water uptake decreases & Nitrogen Deficiency: Leaves turn yellow, remain small, and may curl or drop.
Phosphorus Excess: Leaves develop blade-like shapes, burned tips, and spots & Phosphorus Deficiency: Stems turn purple, leaves develop brown spots, and growth slows.
Potassium Excess: Leaf tips burn, and spots appear on the leaves & Potassium Deficiency: Stems weaken, leaves become pale or rusty, and flowering slows.
Unfortunately, nutrients alone won’t be enough to get you big buds of weed. To grow bigger buds, you will need the right combination of good-quality nutrients, enough light, and the proper growing conditions. If you're already providing these elements and feel like you can still improve your harvest, you should take a look at plant training techniques.
If you’re looking to get bigger buds, both will have similar results. The main difference is that low-stress training consists of shaping your plant little by little without mutilating it, while high-stress training consists of mutilating your cannabis plant to shape it.
No, both are good training techniques and will result in similar results. It’s just a matter of knowing how to apply them properly and when to do it.
Trichomes do not change color per se; what happens is that the cannabinoids react to temperature and humidity, so THC will turn into CBN in oxidizing environments. This process gives them an amber coloration. This is why you need to control the relative humidity and sometimes oxygen levels when curing cannabis buds.
No, autoflowers don’t depend on a light cycle to trigger flowering, so you can grow them from seed to harvest under 18/6, while fast-flowering strains are photoperiodic, so you still have to provide 18/6 for veg and 12/12 for flowering, but they flower faster than regular photoperiods.
This depends on the genetics and phenotype you get, but most autoflowers will start flowering 4-5 weeks from seed.
Comments