Mold On Cannabis Plants: All You Need To Know
- 1. What is mold?
- 2. Ideal conditions to prevent mold
- 3. Mold on cannabis
- 4. Botrytis
- 4. a. Identification
- 4. b. Prevention
- 4. c. Treatment
- 5. Powdery mildew
- 5. a. Identification
- 5. b. Prevention
- 5. c. Treatment
- 6. Root rot
- 6. a. Identification
- 6. b. Treatment
- 7. Mold on harvested cannabis buds
- 8. Health concerns relating to moldy cannabis
- 9. The best mold-resistant cannabis strains
- 10. In conclusion
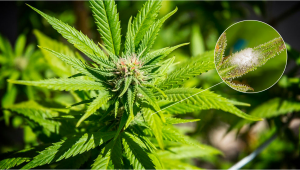
If you want to have a smooth growth cycle without any headaches, it’s essential you do everything you can to avoid moldy weed. From checking and adjusting the growing conditions to applying fungicides as prevention. Mold can happen during veg, flower, and even after harvest, making buds unsafe to smoke, infecting surrounding plants, and even killing your cannabis seeds. So here’s everything you need to know about mold on cannabis plants, from identification to prevention, to treatment.
1. What Is Mold?
Mold is a fungus that grows in multicellular filaments (aka hyphae) and there are several different types of fungi species that grow from hyphae, resulting in a fuzzy appearance, almost always being white but sometimes grey in coloration, which is due to the mycelium (which is the mass that forms from a mass of hyphae).
The fluffy or dusty texture you often see not only in cannabis plants but in all types of plants and foods is caused by the spores formed at the ends of the hyphae, and these spores are what you see when your plant has been infected with mold.
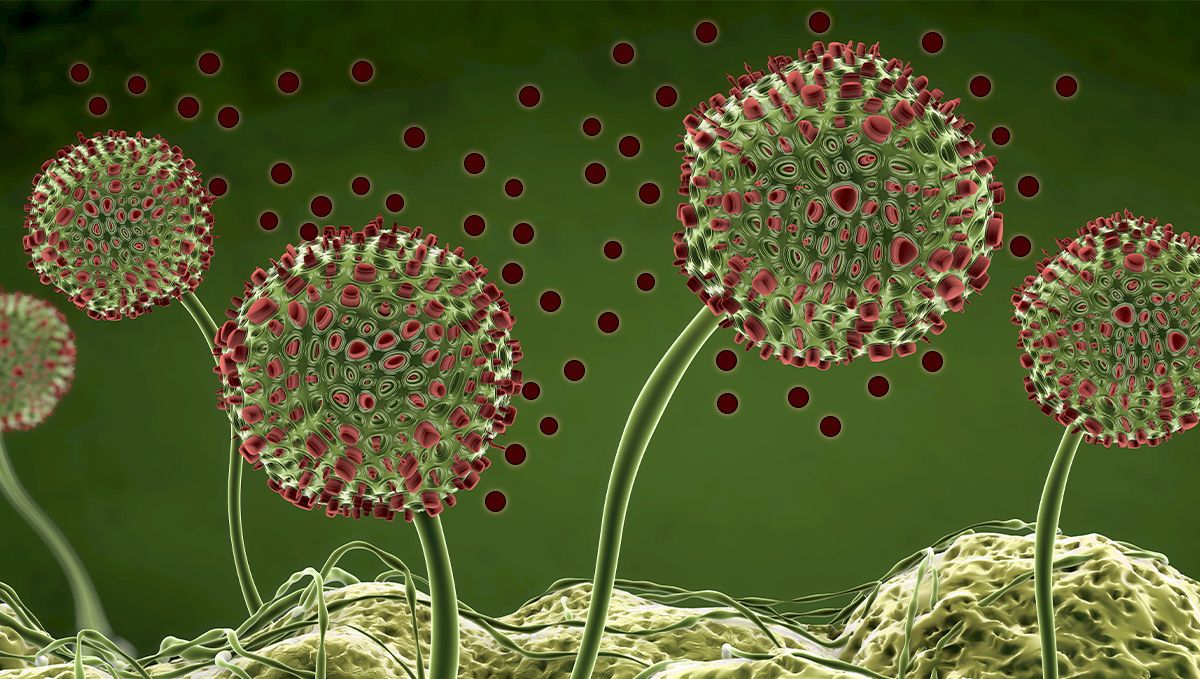
Dealing with mold on cannabis is a grower's nightmare because the spores are so light that even a light breeze can carry them from one plant to the other, contaminating your whole crop in just a couple of days or hours. As mentioned, mold refers to several fungi species but, when talking about cannabis, there are a couple that you should be aware of, they’re:
| Common Types Of Mold In Cannabis | ||
|---|---|---|
| Known as | Scientific name | Affects |
| Bud Rot | Botrytis cinerea | Buds |
| Root Rot | Fusarium oxysporum | Roots |
| Powdery Mildew | Golovinomyces orontii | Leaves |
There are several ways to treat and prevent these types of mold but the best way is to maintain good growing conditions. These conditions will vary according to the stage your plant is in, this is why it’s highly recommended to have a thermo hygrometer to keep an eye on the humidity levels and temperature. So, what conditions should you keep to avoid mold?
2. Ideal Conditions To Prevent Mold
Checking and adjusting the growing conditions is the best way to prevent mold in your grow space, this may be hard to do without the right equipment. If you don’t have the equipment needed, there’s no need to worry, as long as your growing conditions are as close as possible to 20-24°C and 55-60% relative humidity, there shouldn’t be a problem. Now, growing outside of the ranges mentioned doesn’t mean that your plants will get mold but it’s a guideline to know where the growing conditions should be, approximately.
Apart from the growing conditions, here are a couple of tips that will help you achieve the ideal growing conditions.
Tips To Prevent Mold Indoors
- Oscillating fans help circulate the air, preventing air from becoming stagnant and reducing the chances of mold spores landing on your plants.
- If you’re having trouble maintaining the humidity levels within range, make sure you buy a dehumidifier!
- Keep your grow room clean! Cleaning up dead leaves and other waste reduces the possibility of fungi growing around your plants.
- Having an exhaust fan allows air exchange, removing mold spores if there are any.
Tips To Prevent Mold Outdoors
- A greenhouse provides an enclosed environment, giving you the ability to control the growing conditions with fans and heaters.
- Grow strains with high resistance to pests and mold, this will allow you to identify and deal with mold before it’s too late.
- Grow in pots because this allows you to move the plants around if you’re expecting bad weather.
- If you’re growing directly in the ground, cover your plants with a plastic sheet to protect them from heavy rain.
- Mold loves humid conditions so place your plants where they get as much sunlight as possible.
3. Mold On Cannabis
It is possible to get mold at any stage of the growing cycle, even in the drying and curing process. This is because fungi need a specific condition to develop. Mold is a fungus that can affect cannabis plants when they’re kept in humid and warm conditions. It can be treated with fungicides or other homemade remedies and can be prevented by controlling the environment but because it rots the leaves, roots, or buds it can be untreatable or very hard to treat.
Also, mold produces spores (and there’s a good amount of spores in the air anywhere you go). Mold spores can stick on your clothes and can be brought into your growing room. They need only humidity and a slightly warmer condition to start developing. We recommend keeping a clean growing environment, even if you never got mold or fungi, it is a great way to prevent it.
4. Botrytis
Botrytis (also known as bud rot or grey mold) is a type of fungus that affects plants in general. In cannabis, it develops inside the buds and slowly starts to grow outwards, making it difficult to spot in the early stages. So if you were wondering what does mold look line on weed, here's an example.
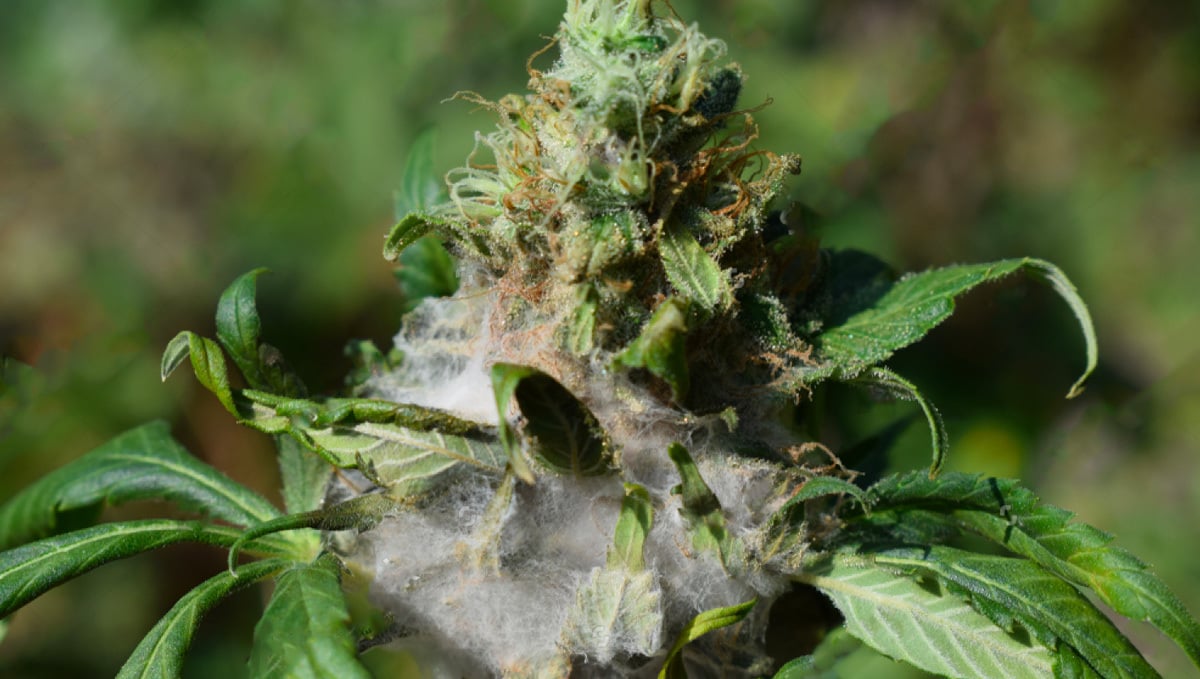
Bud rot is easier to get when growing outdoors but can affect indoor growers if the temperature and humidity are not controlled. It can also happen when drying and when curing. If the buds haven’t dried properly they can still hold water, increasing the humidity in the curing jar and ultimately developing mold.
Identification
If you can’t see signs of mold but you notice the leaves drying or if you think the buds are not growing properly it can be a fungus starting to develop in your buds.
If you spot any of these symptoms, you should try to take a look inside the buds. The inside of the buds should be the same color as the outside, if you see brown or grey spots, it will most likely be bud rot.
Prevention
This kind of fungus develops in humid and warm places, to avoid this, it’s crucial to have a good growing space. This means you need to provide good airflow, adjust the humidity level for each growth stage, avoid aggressive temperature changes, and keep your growing space clean.
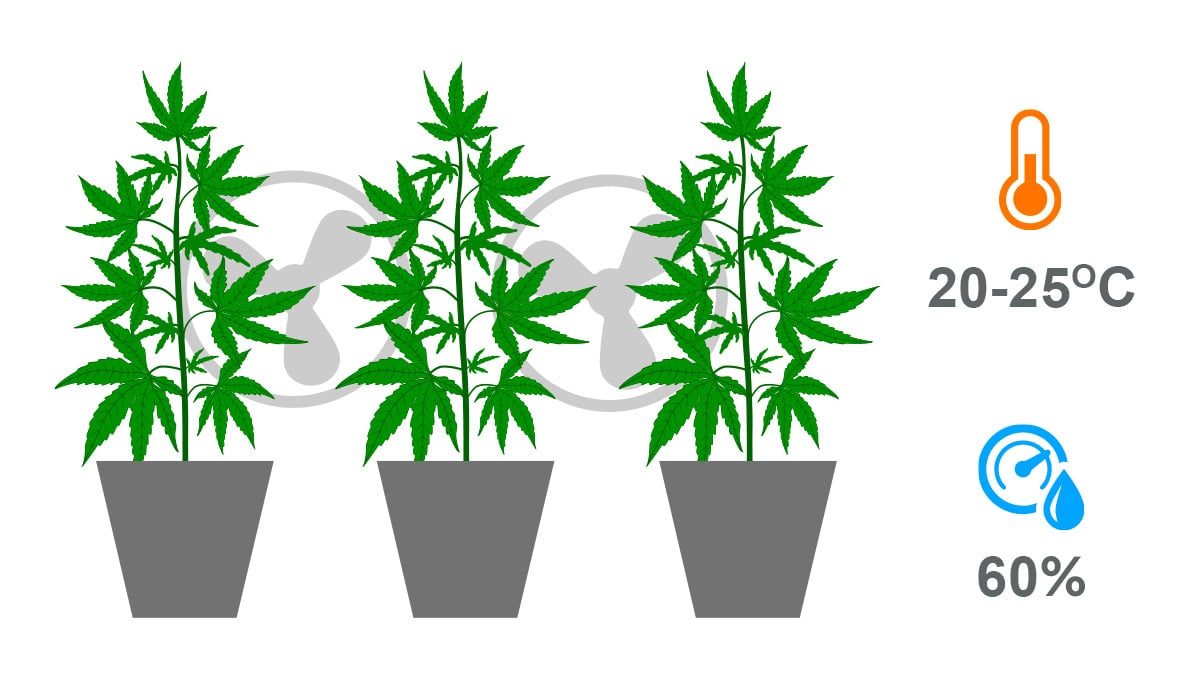
For your drying room, in order to prevent bud rot, it is recommended to have a relative humidity of 60% and a temperature of around 20-25°C. This can be achieved not only by controlling the environment but also by pruning or performing LST techniques to keep the branches spaced. By having these elements on point, you can guarantee a healthy plant all throughout the growing cycle.
Treatment
If your buds are heavily affected you can still treat them, although you should know that this is a way of allowing the plant to finish the growing cycle and it will not get rid of bud rot. The general recommendation is to dispose of the moldy plant to avoid contaminating the other plants in your grow room.
If you still want to save the infected plant, you should start by decreasing the humidity level and temperature, this will cause the mold to grow slowly. After doing this, you’ll need to spray the affected buds with a mold spray. If you see the mold continue to grow, your buds will get mushy and completely gray. At this point, you should remove the buds and if it’s really bad you should consider removing it from the growing space or disposing of it.
Have in mind that the affected buds can be toxic and should not be smoked!
5. Powdery Mildew
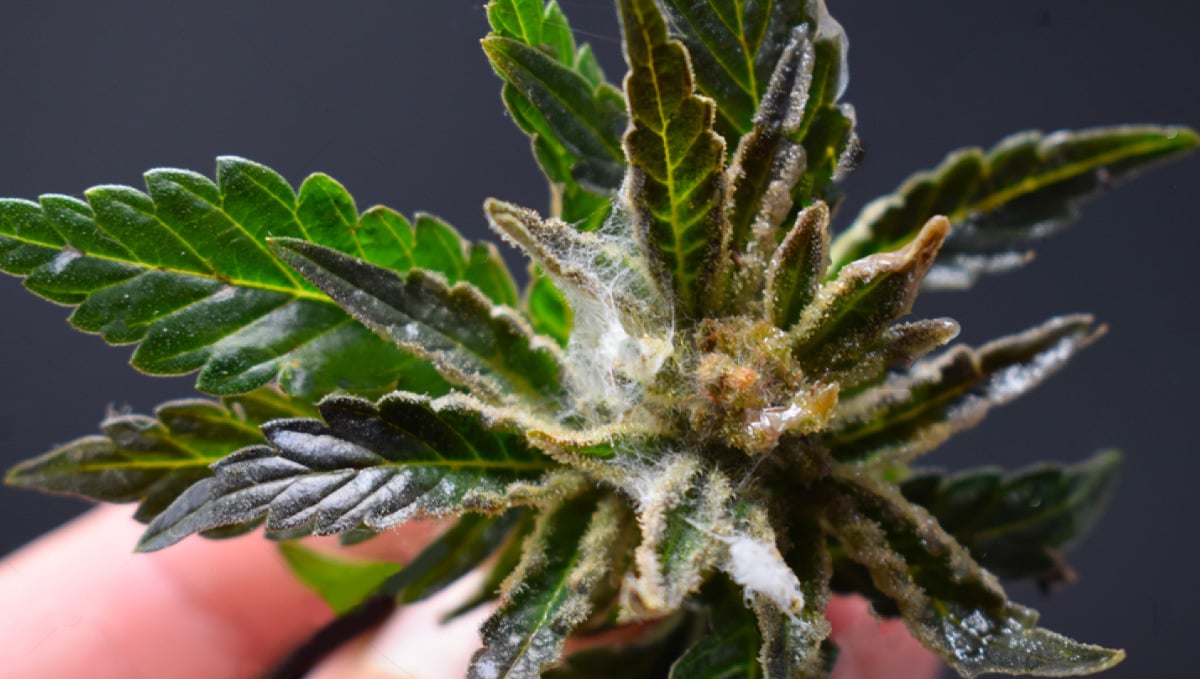
Powdery mildew is a kind of fungus that develops on top of the leaves at first. It may look like trichomes to the new growers but it will continue to spread all over your plant.
This fungus is a white powder that can completely cover your plant, especially the leaves, not allowing your plant to perform photosynthesis and ultimately dying it from the lack of energy.
Just like bud rot, powdery mildew produces spores that can easily spread indoors and outdoors and need very specific conditions to develop.
Identification
When powdery mildew first starts growing, it can be hard to spot it. You may see small bumps on the leaves, but because they are so subtle, you’ll most likely know you got powdery mildew when white powder starts appearing on your leaves.
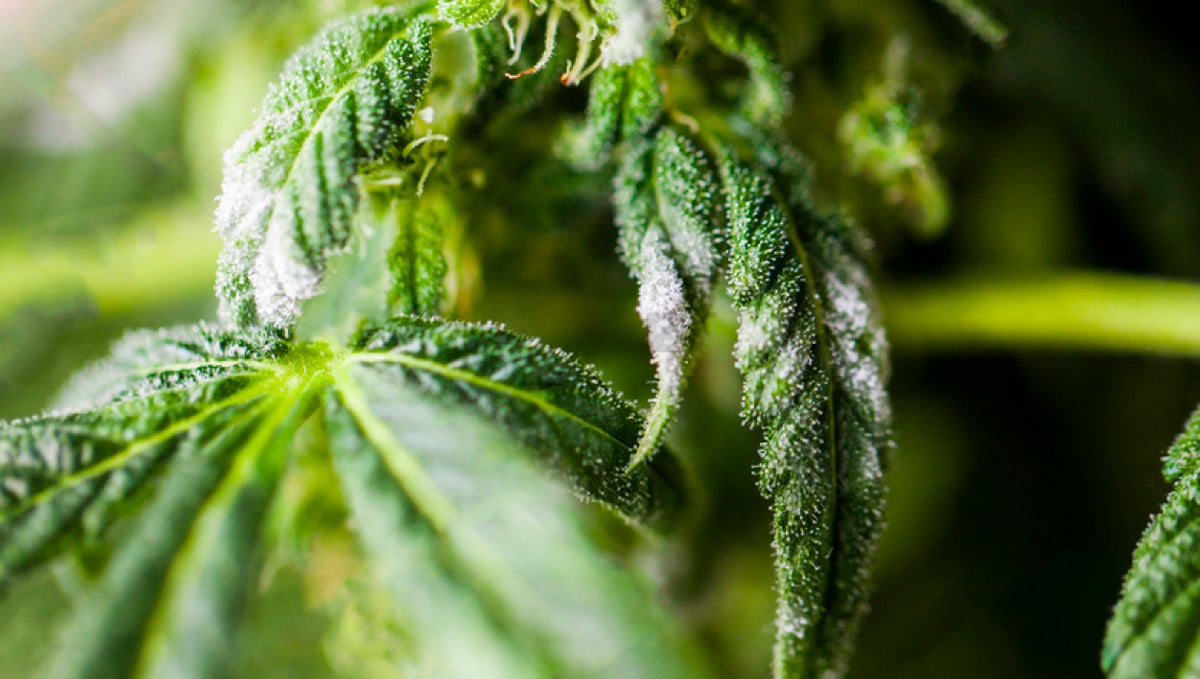
The white powder will start covering the leaves until they’re unable to absorb light, if it gets to this point, the leaves will wrinkle up, start yellowing, brown, and die. Powdery mildew starts growing slowly but it can completely take over your plant real fast, so if you fail to spot it before, be sure to take action as soon as you see the leaves starting to be covered by a white powder.
Prevention
As said above, fungi grow in very specific conditions, so the best way to prevent it is to maintain a good growing environment. This combined with minimal pruning or LST techniques will effectively prevent it. Growers who foliar feed should be especially careful, leaving drops of water on top of the leaves can easily cause powdery mildew.
Treatment
Powdery mildew can be a little bit easier to treat. First of all, you should adjust the temperature and humidity in your growing space, and remove affected plants from it. You should also check the other plants, as spores can easily spread to all the plants around. If your plant’s condition is too grave, you should start by removing the affected leaves and buds, and spray with any fungicide of your choice.
Remember, anything you spray on your plant will affect the smell, flavor, and quality of the buds, so you should opt for organic products or even try making your own at home.
Mix 35ml of apple cider vinegar to 1L of water or mix 400ml with 600ml of milk and spray your plant to treat powdery mildew. Have in mind these methods can fail sometimes and are usually recommended if the fungi infection is in its early stages.
6. Root Rot
Root rot is similar to bud rot, although it happens on the roots. This happens in soil when you get fungus gnats or when you overwater for a long time but it is more common in hydroponic setups.
Root rot is also hard to spot when growing in soil because the roots aren’t visible. Even experienced growers might notice it only when the plant can no longer be saved.
Identification
Root rot is easy to identify, as bud rot, you will see the roots start to turn brown and mushy. Have in mind that you will only see the roots if you completely remove your plant from the soil.
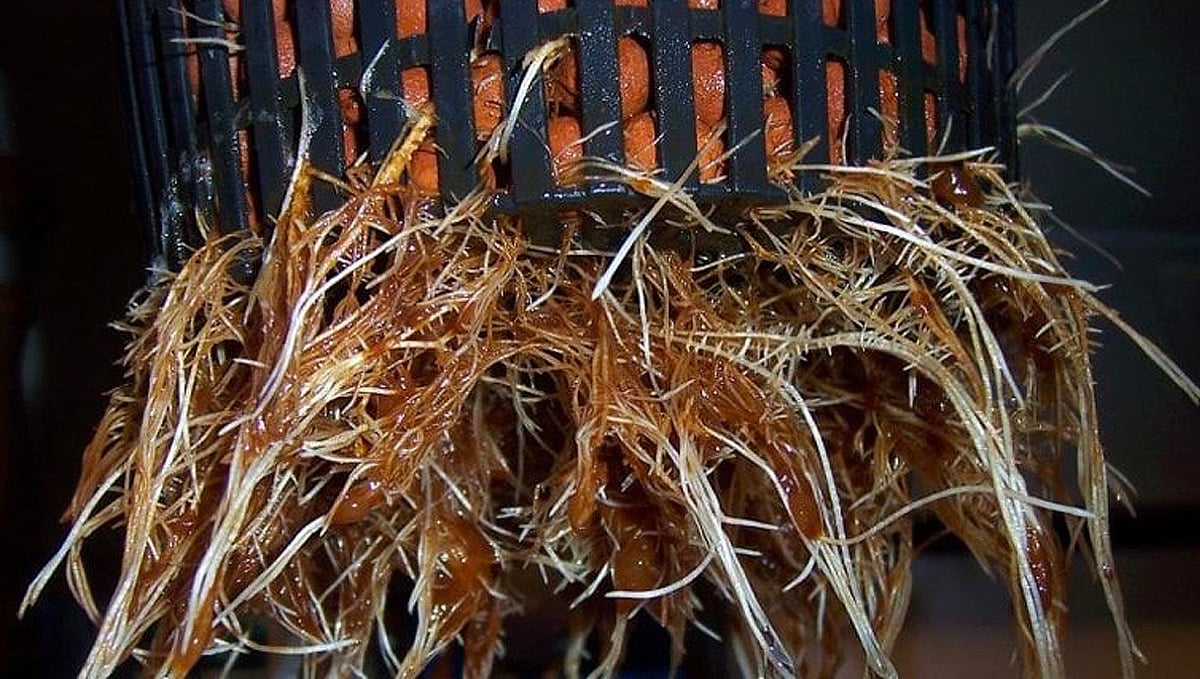
When the roots start rotting, your plant will start showing (what looks like) symptoms of overwatering, deficiencies, curling of leaves, or other symptoms that may confuse you into thinking it is something else. Prevention To prevent this fungus, you should not only keep a good growing environment but also make sure to not overwater your plants, as this can attract bugs like fungus gnats and also drown your roots, causing root rot.
Treatment
Root rot is something that’s not treated in most cases because it will certainly affect your plants' growth, so when growing in soil most growers will dispose of the plant. It is commonly agreed that a plant with severe root rot is not worth it because the roots will not recover to 100%. If you still want to treat it you can clean the roots with a mix of 5-10ml of baking soda or 10ml of bleach with 1L of water.
7. Mold on Harvested Cannabis Buds
So, you've made it all the way through the grow, and have managed to dodge all the mold issues that can pop up during the cultivation period. Well done! Honestly, preventing mold on your crop is a real achievement. Even the most experienced cultivators can sometimes make mistakes, and some of those blunders can lead to whole crops being taken down by root or bud rot.
But just because you’ve made it through cultivation doesn’t mean you can be complacent. Mold on cannabis plants can still occur after harvest, so it’s important to take proper storage precautions to avoid this kind of problem. The first thing you need to consider after cutting the plants down is whether you are going to wet trim or dry trim.
What's the difference between wet and dry trimming?
Wet trimming is when you remove as much of the plant material as possible as soon as you cut those big girls down. There are a few reasons why a cultivator may wet trim -
- Wet trimming can heavily reduce the chances of your buds developing any mold issues while going through the drying process.
- Thanks to the reduced amount of plant material, the buds dry more quickly than if all the leaves have been left to dry alongside the buds.
- Most cultivators will wet trim if they are struggling to control the ambient temperature and humidity levels in the dry room.
Wet trimming does come with some downsides though -
- Wet trimming is a messy affair and takes a lot longer than dry trimming.
- This is due to the fact that the wet plant material, and the fresh trichomes, are much stickier than when they have been dried.
- This leads to scissors becoming clogged with resin much faster.
Dry trimming is when the grower leaves most of the plant material on the plant during the dry process and then trims once the plants have dried right out. There are a few key reasons why a cultivator may choose to dry trim -
- The slower a cannabis flower drys, the more potent and flavorful it will be (to a certain extent).
- As mentioned above, dry trimming is easier than wet trimming.
- It can be easier to collect all of the trimmed sugar leaves for processing if they have been allowed to dry before the trim takes place.
- There is less chance of your trim tray becoming gunked up with wet trichomes when dry trimming.
What should the temperature and humidity be at for the drying period?
You want your buds to dry nice and slow. Too fast, and you risk the chance of degrading all those compounds trapped inside the trichomes that we grow cannabis crops to produce. Trichomes and cannabinoids are easily upset and need to be treated with the same level of reverence as the crop while it is growing. For the best possible drying outcome, and lower chances of mold taking ahold of your harvested crop, you want the temps to be between 18-21 degrees Celsius (65 to 70 degrees Fahrenheit), and the humidity to not exceed 58%. If you can keep the humidity between 50 and 55 percent then you are on the right path. At this temp and humidity range, the buds should take between 7 to 10 days to fully dry, which is perfect.

You also need to ensure that there is sufficient air exchange in and out of the dry room, while not exposing the drying buds to direct airflow from any fans or AC units. Direct airflow will also have a detrimental effect on the eventual potency and taste of the buds, so try to keep that to an absolute minimum. Once you have those numbers taken care of, then your plants will dry perfectly, providing you with an optimal outcome, no matter if you have gone for a wet trim or dry trim.
How to decide between wet and dry trimming
This decision really comes down to how well you can control the dry room environment. If you are able to perfectly control the temperature and humidity level, then you have nothing to worry about in terms of mold. In this case, you should definitely leave the plant as whole as possible, and dry trim after. If, on the other hand, you live in a warm climate with high humidity levels, then wet trimming is the way to go. This will give you the best chance of making sure all those months of hard work don't go to waste as your buds develop mold issues during the drying period.
How about once the drying process has finished?
Once the buds have dried, they are ready to go to the curing jars. Wait, my buds aren't ready to smoke, even after they have finished the drying period? Look, you can 100% smoke your buds now. And they should taste pretty good. But if you want to get the absolute best smoke out of your harvest, you are going to have to wait a few more weeks. You can think of curing cannabis flowers as similar to aging whiskey, only it takes less time (thank god). The terpene profile hasn't finished maturing just yet and will take a few weeks in air-tight containers at room temperature and away from direct light to be fully done.
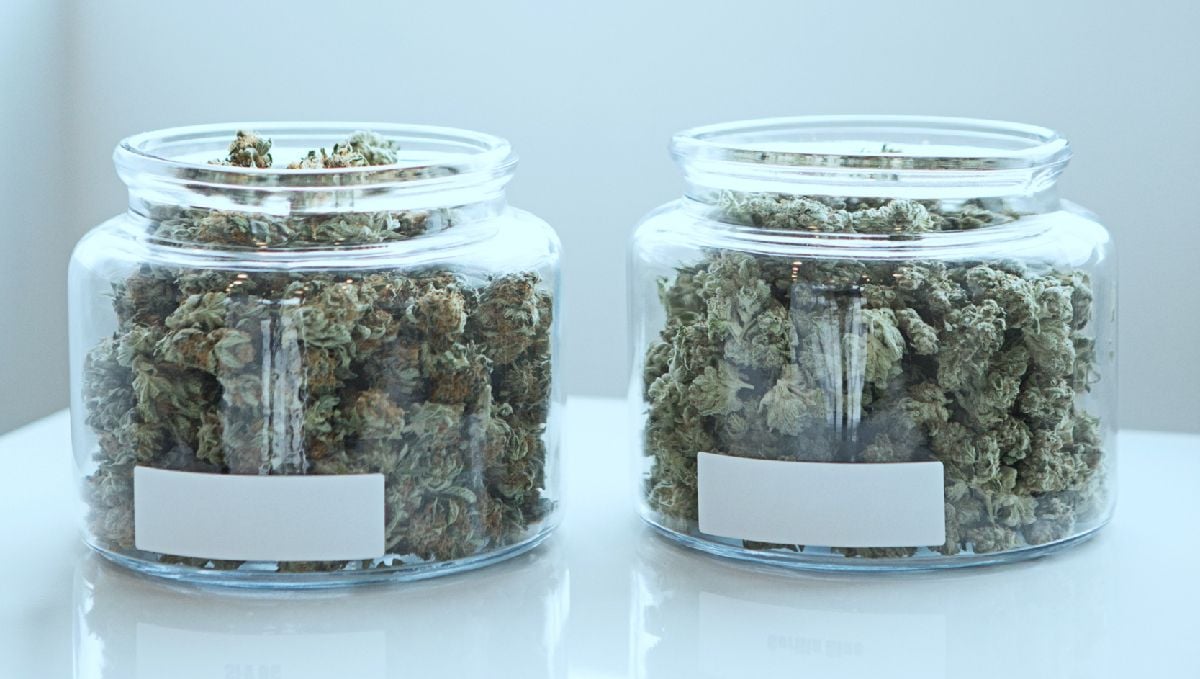
Careful though, the risk of mold isn't over just yet. Buds that have dried will still have very small amounts of the moisture trapped in their stems, and this will slowly leech out during the curing process. To ensure the buds don't mold at this stage, you have to burp the jars at least once a day for the first week of curing, and 3 times a week for the following weeks. If you smell even the slightest whiff of ammonia, get the buds out quickly and get them back in the dry room - this is a sign of mold creeping in. If you do see any signs of mold during the drying or curing process, remove those buds straight away to stop any chance of it spreading to the rest of the crop.
8. Health Concerns Relating to Moldy Cannabis
Cannabis that has been contaminated with mold should never be consumed, no matter how bad the contamination levels, the type of mold, and the method of consumption (smoking, vaping, edibles, extracts). This is especially important for users who suffer from acute respiratory symptoms, and those with weak or compromised immune systems. Cannabis users that are immunocompromised can be at risk of becoming seriously ill when ingesting moldy weed. There have even been recorded cases of hospitalizations, although no deaths have been attributed to moldy cannabis ingestion. According to certain studies, up to 20% of cannabis samples purchased in dispensaries throughout California in 2019 had some form of fungal or bacterial issues. Dispensaries are a controlled market, so let’s not even begin to think about how high that number may be on the black market. This widespread mold issue was less of an issue before the introduction of large-scale cannabis farming and is a problem that has been on the rise since legalization started (in the US anyway). As most hobby growers can attest to, it can be difficult to control mold issues with even a small grow, let alone a farm containing thousands of plants. Maintaining a clean and sterile environment for your plants to grow is harder the larger the scale of the operation, as is environmental control.
The more plants you have, the more difficult it is to control airflow, humidity, and the correct temperature range. This is one of the best reasons to consider growing your own plants, as you can have total control over the process - from seed germination to harvest, and then through the drying and curing process. If you suffer from asthma or other respiratory issues, then you are at a higher risk than the rest of the population. Always check for visual signs of mold before consuming any cannabis. Some of the possible adverse health reactions that could arise from consuming mold-infected weed are
- Allergic reactions, ranging from mild to severe
- Chest pain
- Wheezing
- Shortness of breath
- Heavy coughing
- Irritated eyes
- Loss of memory
- Low energy levels
- Fever
If you think you have smoked, vaped, or eaten moldy weed there are a few things you should do. If you have any of the possibly compromised weed left, check it thoroughly for signs of fungal growth. Don't panic, as for the large majority of us, there is nothing to be hugely concerned about. If you think you are having an adverse reaction to moldy cannabis, it may be best to consult a health professional. Unless you have acute upper respiratory symptoms there is no need to run off to the ER, but take note of how you are feeling and contact a doctor if you feel the symptoms are worsening.
9. The Best Mold-Resistant Cannabis Strains
Here at FastBuds, we have always focused heavily on ensuring our entire range of seeds and strains comes with a high degree of mold resistance. Autoflowering strains, for the most part, come with a high amount of natural resistance to mold. This is thanks to the Ruderalis heritage that all auto-flowering strains share. Cannabis Ruderalis is subspecies of Cannabis Sativa and has some interesting and unique properties including a high amount of inherent fungal and pest resistance. The name “Ruderalis” is derived from the German word “ruderal” - which was a widespread term to describe roadside weeds. This outdoor heritage ensures that auto-flowering cannabis plants, as a whole, have strong natural mold immunity. But, that doesn't mean there aren't certain strains that are known to be better mold fighters than others.
10. In Conclusion
It is relatively hard to get a fungus to affect your plants if you are keeping them in a good environment but it's essential you know how to tell if your weed has mold. Maintaining a good environment may seem easy to most growers but can be extremely hard for new growers, especially in countries where it’s hard to find growing equipment. If you’re tired of your plants getting mold, we recommend trying more resilient strain, like our Gorilla Cookies Auto.
We also recommend checking your plants every day and start taking action as soon as you see even the smallest sign that something is wrong. Have in mind that even if you can treat mold, it will affect the final yield and can affect flavor, smell, and effect, so the best thing is to prevent it. If you have tips and tricks to prevent mold, feel free to help fellow growers by leaving a comment in the comment section below!


Comments