How to Get Rid of Spider Mites on Cannabis Plants?
- 1. What are spider mites?
- 2. How to detect spider mites?
- 3. Different types of spider mites
- 4. How to prevent spider mites?
- 5. How to kill spider mites?
- 6. Organic methods
- 7. How to get rid of spider mites: step-by-step
- 8. Other pests to look out for on your cannabis crop
If there’s anything a cannabis grower is terrified of, it’s the myriad of pests that attack the plants. And talking of pests, most of them are easy to slay. As humans, we have control over almost all the pests troubling our plants, but there’s one pest that makes growers wet their pants with just a mention of its name. Yep, you guessed it…spider mites. The most horrifying of all. The deadliest, stubborn pests never leave once they find their way in. Once they invade the plants, there’s no way to get rid of them unless you’re super determined and match their vigor to counter-attack them. If you’re a victim of spider mites and have lost your precious cannabis seeds crop, read on to know how to fight them.
1. What are Spider Mites?
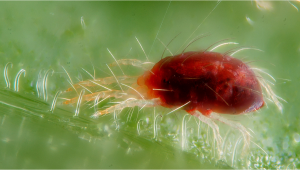
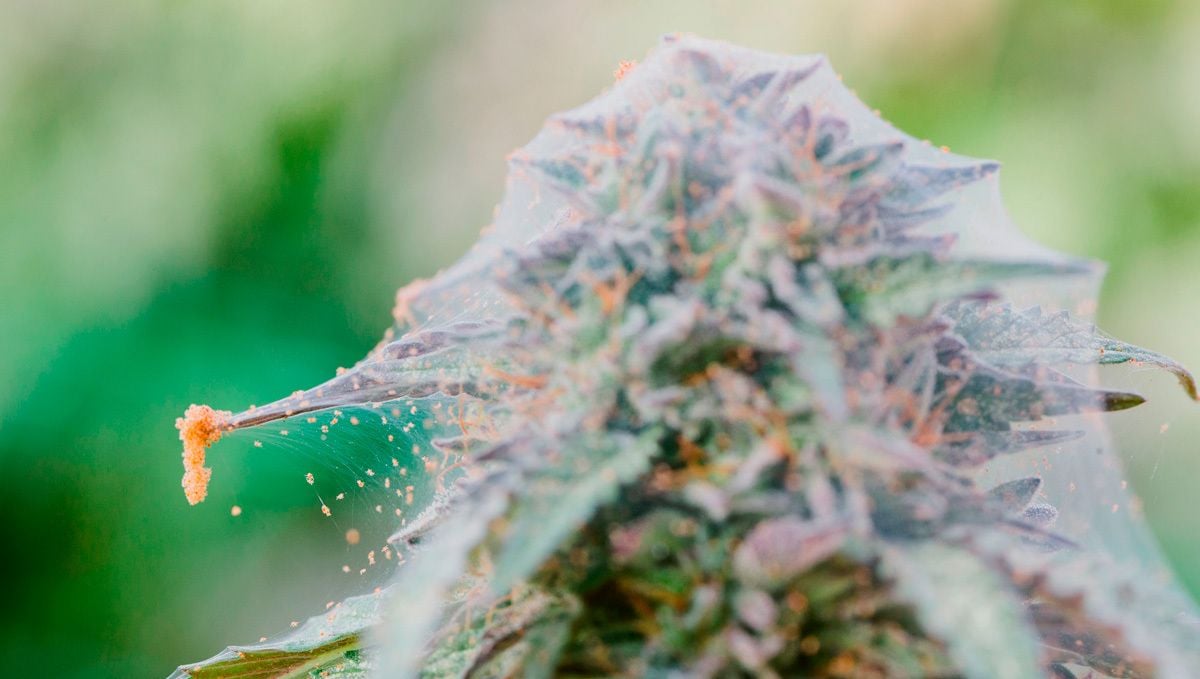
Spider Mites are not your regular spiders although they come from the arachnid family. Unlike spiders which are usually harmless, these little bastards suck the plant juices, ultimately killing the plant. One of their biggest advantages is that they are extremely small to be noticed, and by the time you even realize something’s wrong, a full-blown infestation can ruin and kill everything you’ve worked so hard for. Typically found on the underside of leaves, they spin webs all over the buds and leaves, making it impossible to save the plants. The webs are meant to protect themselves and their eggs from other natural predators, but the buds are rendered totally useless at the end of it all. As most growers prefer growing indoors, spider mites already have an advantage where you can’t spray anything with abandon.
2. How to Detect Spider Mites?
For beginners, it’s pretty tough to identify spider mites mostly because they are so tiny. The best way to avoid spider mites is by preventing them. As they say, prevention is better than cure, so keep an eye out for spider mites since it’s easy to get rid of them at the very beginning. Once they build an entire colony, though, your worst nightmares will come true. Therefore, the first step is to detect them early.
Scrutinize the leaves
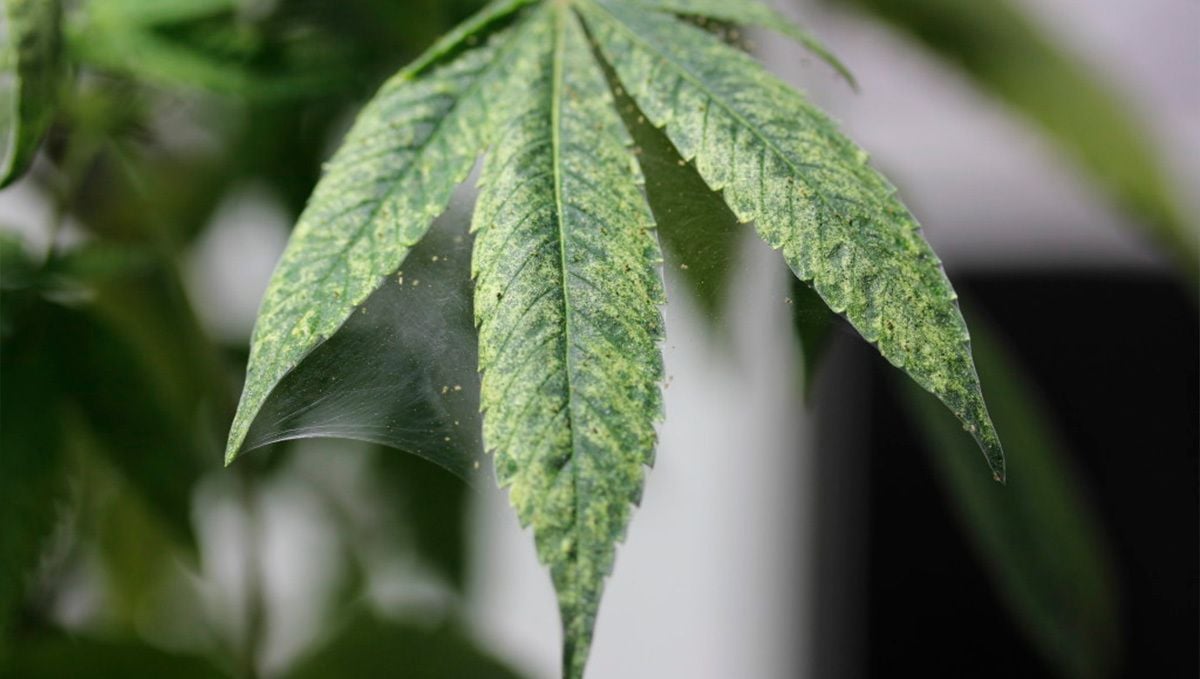
Spider mites suck the plant’s sap. They leave small teeth marks that are tough to be seen, but you can use a microscope or a simple jeweler’s loupe to identify the damage. The leaves turn yellow, making it seem like a nutrient deficiency rather than a pest attack, but if you look carefully and see webs, then it’s none other than your friendly neighborhood spider mite paying you a visit.

Always check the undersides of the leaves. That’s where they usually hide. The leaves also turn silvery due to the webs on them. The leaves appear spotted with white dots, and that’s the sign of teeth marks.
Use a magnifying glass
If you want to be absolutely sure that the pests are indeed spider mites, place a paper below the plant and shake the plant. Usually, the mites fall down on the paper and you can confirm their presence with a magnifying glass. After a while, the leaves will have a few webs on them. Within a week, you’ll see holes in the leaves, but you need to take action as soon as you see the leaves turning yellow. The plant may also start shedding leaves at this point. Seriously, don’t ignore these minute pests, because although they are small and seem harmless, they really aren’t.
3. Different types of Spider Mites
To add to your misery, spider mites come in different colors, and some of them are even more dangerous than others. The two-spotted mite with spots on the back is pale yellow in color. It’s the biggest villain with the ability to destroy over 200 different species of plants, and most growers give up because it’s extremely hard to get rid of them.
4. How to Prevent Spider Mites?
Spider mites thrive in hot environments with high humidity. Therefore, keep temperatures pretty low and make their life difficult. It’s also a good idea to remove any plant debris from the grow room because mites are amazing at hiding and waiting. Natural predators like ladybugs work amazingly well when plants are outdoors. Most spider mites come from gardens, so change clothes if you’re entering your grow room. It may seem like much, but it’s better to prevent them rather than tearing your hair later. Try not to touch clones or plants infested with spider mites since they may hitch a ride to your grow room.
Yep, they are really that clever! The two-spotted mite is almost impossible to kill unless you nuke your grow room, so be extremely careful. Check all plants if you’re moving them from your garden into the grow room. This applies not only to spider mites but to other pests as well. A magnifying glass is your best friend in this situation, so invest in a good one to kill mites as soon as they make an appearance!
5. How to Kill Spider Mites?
They are different ways to get rid of spider mites including organic and inorganic ways. It’s actually easy to kill them, but the problem is that they come back with a vengeance. It’s also important to get rid of the eggs. Spider mites have an amazing ability to reproduce faster than you can count them. Within a week, they can destroy an entire crop, so pay special attention to eggs on the soil. They become immune to pesticides quickly, which is why it’s recommended that you repeat the process every single day. Also, a combination of several methods described here should be followed. Spray liquids only when the lights are off to prevent the leaves from burning.
Before using any method, remove the infected leaves. It’s better to even remove infected plants that cannot be rescued since it gives other plants a better chance to survive. Don’t make the mistake of composting those leaves. Rather, just burn them. Try to use these methods when your autoflowers are still in the vegetative stage since it’s extremely difficult to get rid of mites in the flowering stage.
Mites don’t distinguish between photoperiod and autoflowering cannabis strains – they treat them equally. So, whether it’s a photoperiod or autoflowering strain, the damage should be controlled before the plant begins to flower. Also, buds taste a little different if liquids are used on them. If you absolutely must use any of these methods during the flowering period, spray the buds and plants with plain water to get rid of the pesticides.
6. Organic Methods
Remember to use a combination of several methods described here. Also, spray liquids on plants only when the lights are off to prevent the leaves from burning.
Soap Water
This is perhaps the cheapest way to get rid of most pests but certainly not the most effective. Simply mix a drop or two of castile soap or any insecticidal soap with a liter of water and spray away. Spider mites tend to slip and fall due to the soap. To be extra careful, wipe individual leaves with a moist towel soaked in soapy water. It’s best to repeat the process every day since this method isn’t as effective as other commercial products. Even the soil should be sprayed to kill all the eggs.
Neem Oil
The simplest way to kill mites is to use Neem Oil mixed with a little dish wash soap. You can get neem oil online or in your local store. All you need to do is follow the instructions; however, be careful not to kill the plants because it’s pretty strong. Start with minimal amounts until you’re sure the plants can handle it.
General Hydroponics Azamax
Safe and natural to use, growers swear by Azamax. The best part is that it doesn’t hurt the plants or roots but only targets gnarly mites, fungus gnats, aphids, thrips, and several other pests. Spray the leaves, stems, and every part of the plant including the soil to kill the eggs. Repeat the process every other day even if the mites are gone because they usually come back stronger
Spinosad
Another organic product, Spinosad is nothing but fermented bacteria that kills spider mites immediately. Safe to be used around pets and children, it can be mixed with fertilizers although it’s best to use any pesticide separately. Spinosad infects the pests’ nervous system, and unlike other pesticides that harm beneficial microbes in the soil, Spinosad is perfectly safe to use.
Essential Oils
Some essential oils like Rosemary and Cinnamon are particularly effective in getting rid of spider mites and other pests. As always, a little soap mixed in will work. Organic products are amazing but they should be used with care since the plants could get affected if the oil remains on the leaves.
Rubbing alcohol
Not exactly organic, but rubbing alcohol or isopropyl alcohol mixed with water can help. Prepare a 50:50 solution of alcohol: water and spray. Some growers use the alcohol directly without diluting it but that might do a number on the plants. Alcohol tends to evaporate pretty quickly so the plants are pretty safe. If you’ve tried everything and it still doesn’t work, pesticides made with toxic chemicals may be the only route for you.
But, remember to use such products with extreme caution because they aren’t safe around pets and children. Also, wear a mask while spraying since they are dangerous. Once you harvest the buds, spray the grow room with a bleach solution to prevent further attacks.
7. How to Get Rid of Spider Mites: Step-by-step
Now that you know what you can use to get rid of spider mites, here’s a step-by-step guide on how to do it!
Step 1
The first step in getting rid of spider mites is to kill as many as you can. So grab a pair of gloves and start collecting spider mites in a glass container (with a lid) and remove as many as you can before continuing. If needed, take your plants outside and shake the plants to remove as many spider mites as you can, you can also wash them off with a hose but this could end up causing mold, so go for a safer approach. Also, keep in mind that these bugs love the heat but hate the wind. Now, the wind will not get rid of mites but it’ll make it harder to reproduce so make sure to put your fan on maximum and make sure it’s blowing on the plants and substrate. Not only spider mites, but other buds cannot reproduce in windy conditions so keep in mind that good air circulation is ideal for bug prevention.
Step 2
Now that you’ve removed as many of the bugs as you can, use one of the products mentioned above, such as neem oil, azamax, or Spinosad, for example. Be sure to follow the manufacturer’s recommendations, especially if you’re using chemical products.
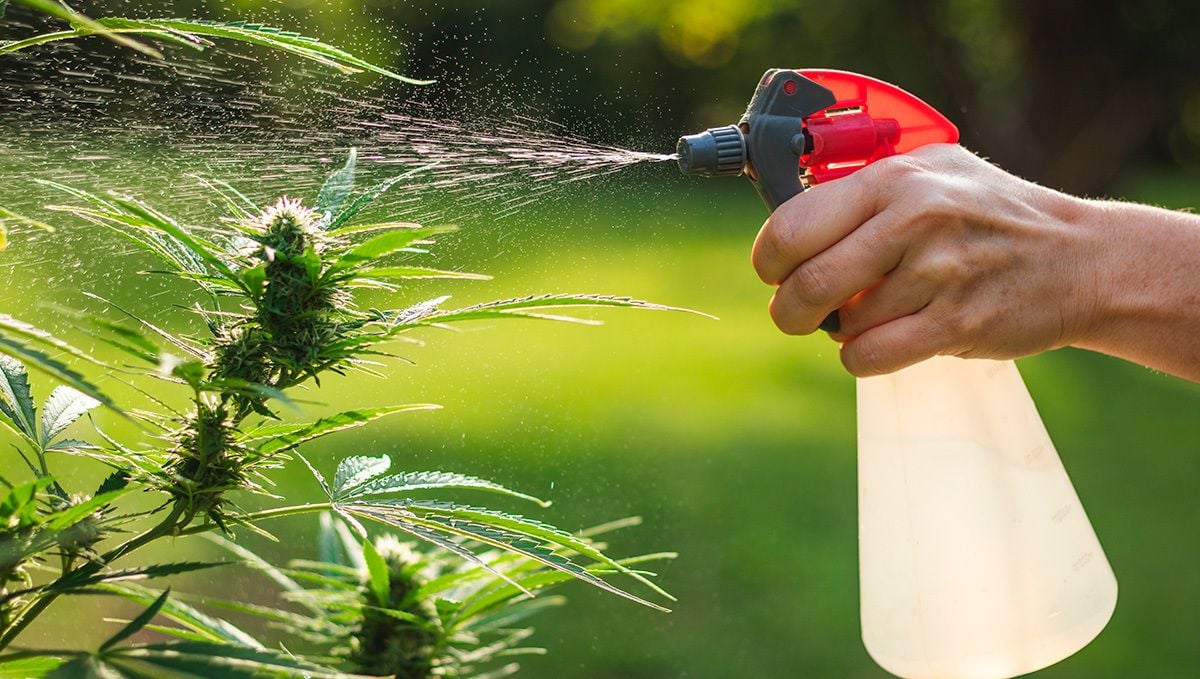
Once applied, wait 2 - 3 days and check what’s going on. If the application was effective, the spider mite population should be much, much lower but the surviving bugs will be more resistant to the product applied so use something different for the second application.
Step 3
As mentioned, apply a different product for the second application. This should get rid of all the spide termites, or at least of the majority of the bugs but if it doesn’t, repeat steps 1 and 2 until they’re completely gone.
Step 4
Now, remember that the spider mites can come back so make sure to clean and treat the grow space to prevent them from coming back. And for the next grow cycles, make sure to use Neem oil or take other preventive measures in order to prevent spider mites from coming back!
8. Other Pests to Look Out For on Your Cannabis Crop
While spider mites are the most common pests on cannabis crops, there is a bunch of annoying and unwanted little nasties that can, and will, come knocking. Let’s break down the full list, and quickly breeze over the best ways to deal with each.
Aphids
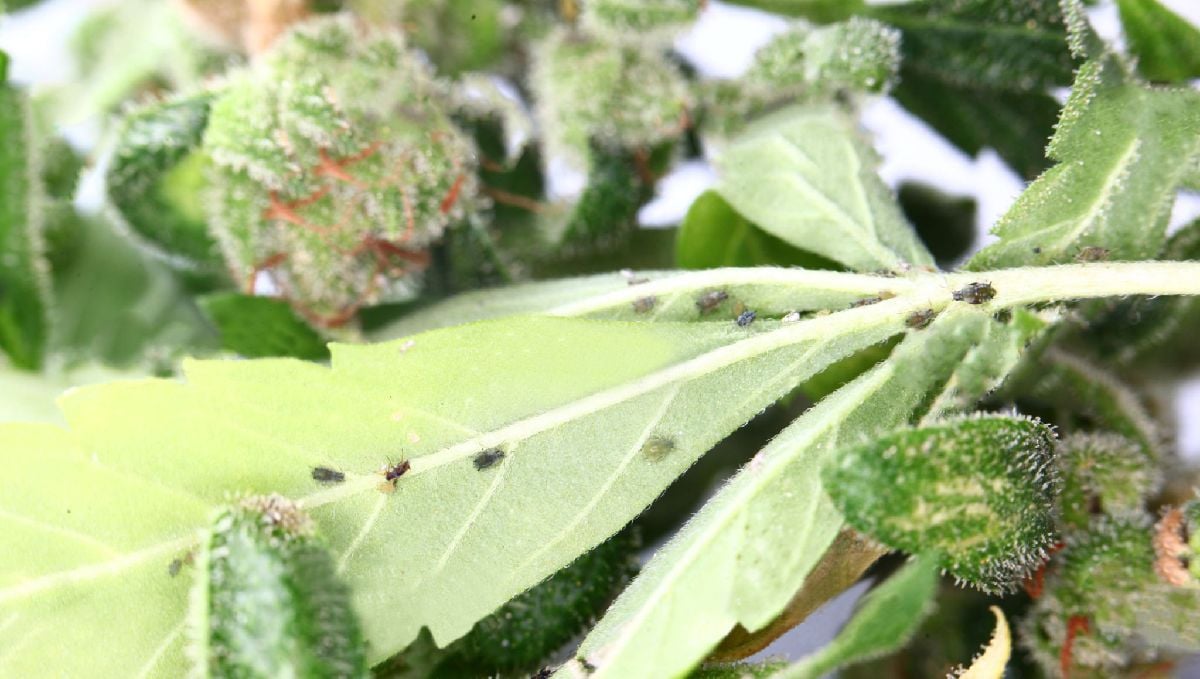
Aphids are small soft-bodied insects that feed on sap from plants and can be a serious problem for cannabis crops. They come in a range of different colors but are most often green, white, brown, or black depending on the species. Most species are between 1 to 10 mm in length, and most come with a pair of whip-like antennae sticking out of the forehead region. Small aphid colonies are nothing to be overly concerned with, but they can reproduce quickly and destroy entire plants when left unchecked. The best way to deal with them is to release beneficial insects, such as ladybugs and lacewings, in the growing area and to remove all affected areas as quickly as possible. Organic insecticides will also help, as will essential oil treatment.
Thrips
Thrips come in a couple of different forms, from small winged insects to worm-like larvae, and are some of the most common pests found on cannabis plants. They love to feed on flower and leaf sap and can quickly suck an entire plant dry. Cannabis fan leaves are a true favorite of thrips, and if they infect a crop early on then there is very little you can do to save it.
Thrips are not a huge concern to outdoor growers, but certain species are the true bane of indoor cultivators. The worst species is known as Frankliniella occidentalis. These thrips are tiny, white, and yellowish flies that lay their spawn directly on the plant. The best way to control thrip infestations is through preventative measures. Hang up some insect adhesive strips, and make sure to remove any and all dead plant material from your grow area. Neem oil and Pyrethrins can help to control infestations, but thrips are notoriously hard to eradicate once they have made themselves at home.
Broad Mites
Polyphagotarsonemus latus, or Broad Mites, are a little strangely named seeming as though they only measure a fraction of a millimeter. Males usually grow no larger than 0.1 mm, and females are rarely larger than 0.2 mm. This makes them invisible to the naked eye, and they can be especially hard to spot in the early stages of an infestation. They feed on new growth and prefer cooler climates, which is why they are such an issue in indoor grows.
Broad mites can cause the leaves of a plant to curl, discolor, and ultimately die. Their bite is acidic, so it can cause the affected area to become sunken and discolored. The best way to deal with this pest is to use Neem oil or botanical pesticides. If the infestation gets too out of control, you may have to resort to chemical means.
Whitefly
Whiteflies affect cannabis crops in a very similar way to spider mites. These small white moths hover around plants and suck out the moisture, and lay their larvae on the underside of fan leaves. A single pregnant whitefly can lay over 400 cone-shaped eggs every week, which hatch into crawlers that will decimate a plant in next to no time.
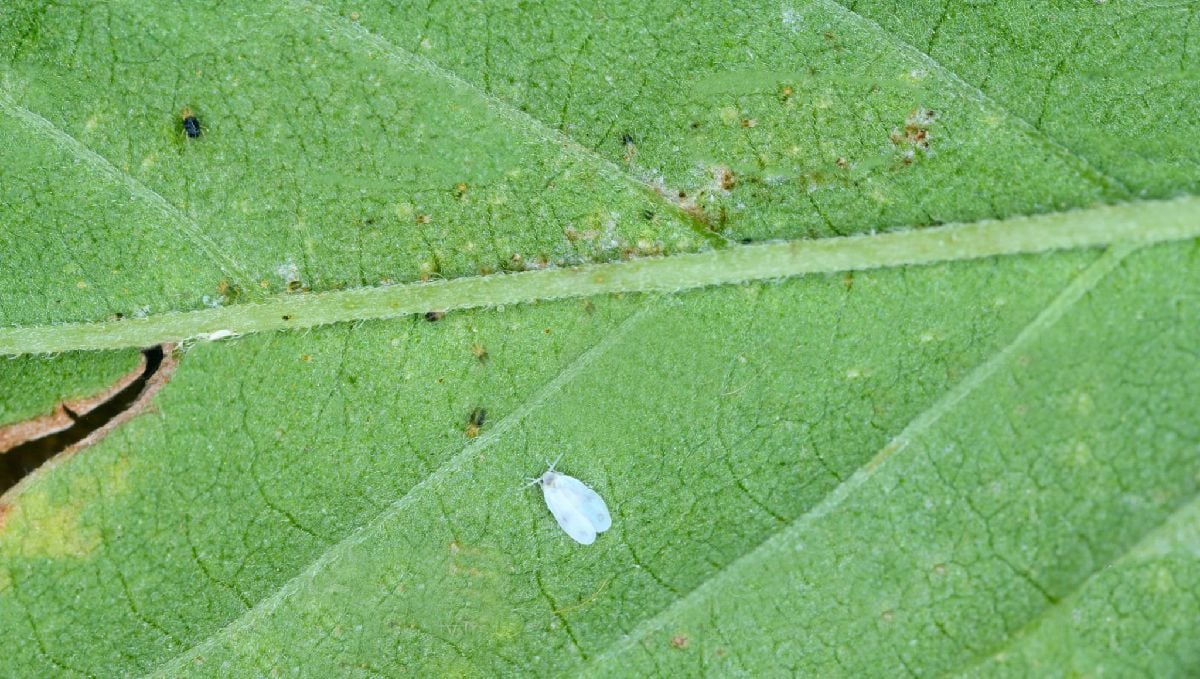
To treat whiteflies you should start by picking off any adults and larvae you can see. You can also use Neem oil to smother the eggs, and Pyrethrins and botanical sprays can help to control the infestation.
Fungus Gnats
Fungus gnats are minuscule, darkly colored fleas that, unlike most other pests, have no interest in the above-ground plant structure. Fungus gnats live in the actual soil or substrate, and the larvae feed directly off the root system. These pests are certainly not the worst thing to happen to a cannabis crop and can be seen as more of an annoyance than a real issue - except in young plants. If your crop is in the first few weeks then you should be very wary of fungus gnats.
The best way to control fungus gnats is through preventative measures. Use a good soil mix from a reputable retailer. Buying from hydroponic suppliers and choosing products from well-known companies should ensure you end up with no pre-existing larvae, eggs, or adults. You can also use beneficial nematodes to target fungus gnat larvae in the soil and prevent any from hatching in the first place. If you do have a particularly bad infestation, then Pyrethrins can help to control this pest.



Comments