Mimosa Cake Auto Cannabis Strain Week-by-Week Guide
- 1. Grow specification
- 2. Grow set up
- 3. Germination and seedling stage | week 1
- 4. Early veg | week 2
- 5. Mid veg | weeks 3-4
- 6. Transition (pre-flower) | week 5
- 7. Early flower | weeks 6-7
- 8. Mid flower (bulk phase) | weeks 8-9
- 9. Ripening and harvest | weeks 10-11
- 10. Drying, and curing
- 11. The outcome
- 12. In conclusion
Mimosa Cake Auto is a remarkable strain with outstanding characteristics that make it an excellent option for cannabis growers and smokers alike. This hybrid autoflowering strain boasts a unique flavor and aroma profile that combines the sweet and citrusy taste of Mimosa with the delicious and earthy notes of cake. Its well-balanced effects are uplifting, creative, and relaxing, making it an excellent choice for those seeking a well-rounded experience.
Mimosa Cake Auto is also an easy-to-grow strain, making it ideal for novice growers, which we are about to show you in our week-by-week guide. In it, we follow four sample grows and use pictures from several others as well. We hope our review will help you achieve the yields that are as impressive and the quality of smoke that is worthy of this delightful new genetics.
1. Grow Specification
Mimosa Cake Auto is a highly sought-after strain with outstanding characteristics that make it a great option for growers and smokers alike. This hybrid strain is composed of 60% Sativa and 40% Indica and has a THC content of up to 24%, producing a well-balanced high that is both uplifting and relaxing.
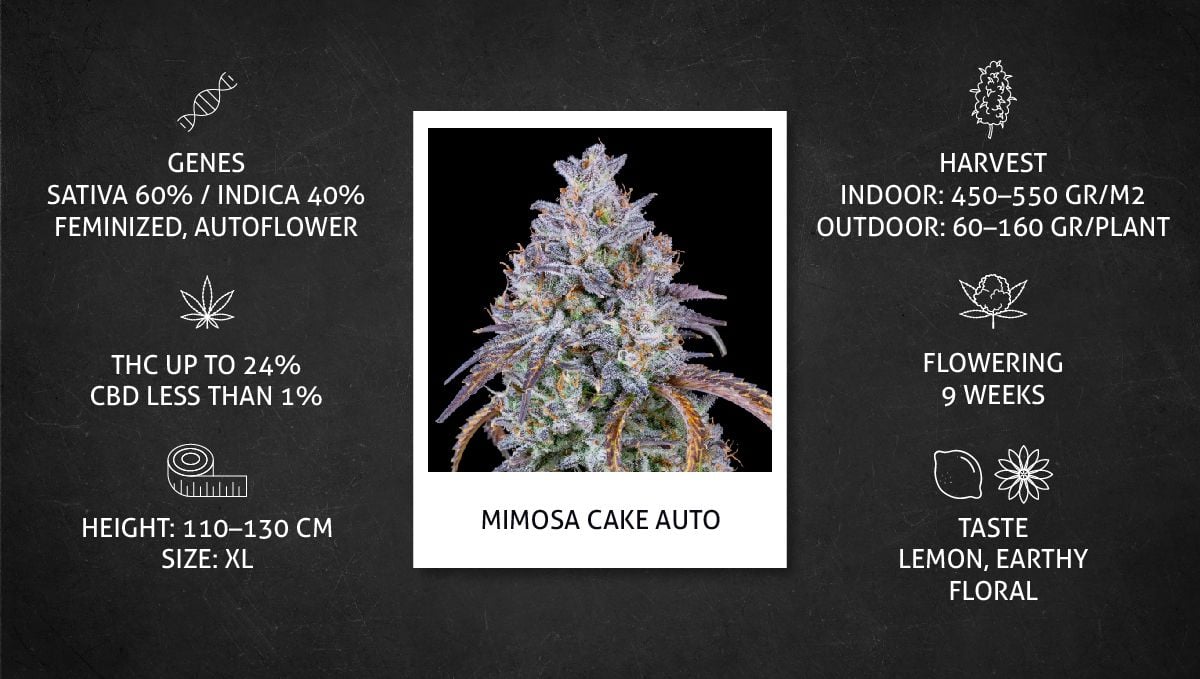
Mimosa Cake Auto is an easy-to-grow strain, ideal for both novice and experienced growers. It has a flowering period of just 9 weeks, producing a generous harvest of up to 550 gr/m2 (1.8 oz/ft2) indoors and up to 160g (5 oz) per plant outdoors. The plant is an XL size, with a height of 110-130 cm (43-51 inches), and boasts a unique flavor profile that blends lemon, earthy, and floral notes, making it a must-try for cannabis enthusiasts.
2. Grow Set Up
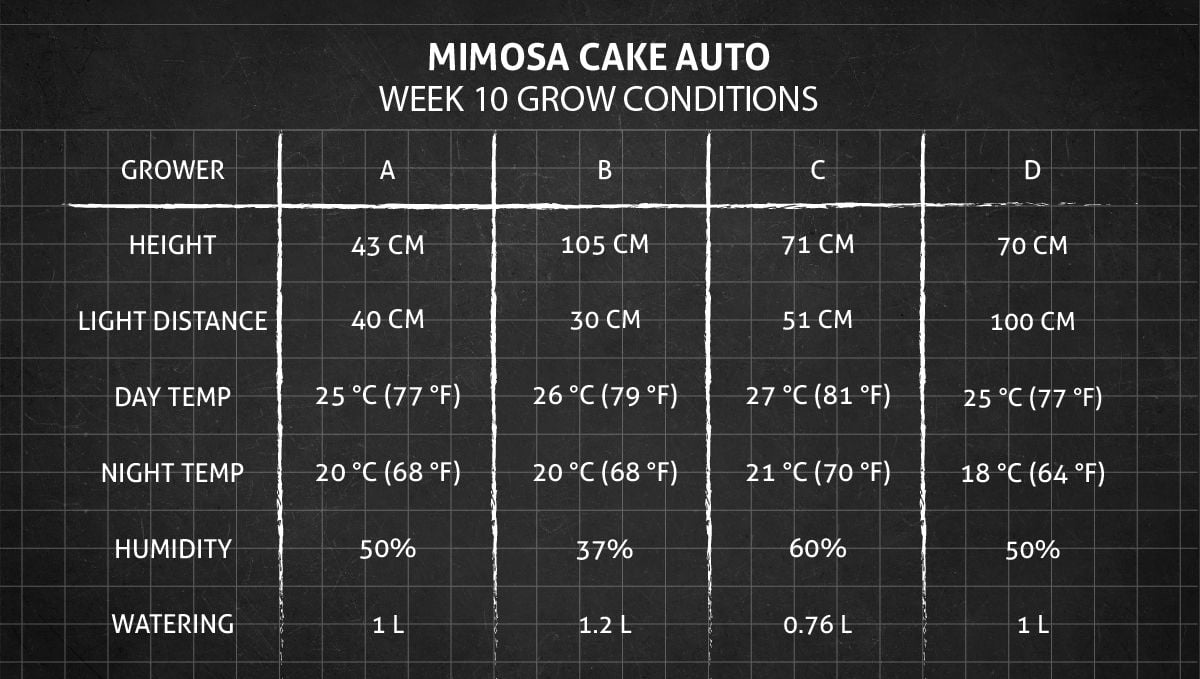
The Mimosa Cake Auto strain is still fairly new, but many growers have already shared their experiences with it. We'll go over four of these grow diaries in detail and use some photos from others as well. This will give you a lot of useful information if you're planning to grow Mimosa Cake Auto yourself. The table below shows the setup and specifications for all four grows. The plants were all grown indoors using medium-strong LED grow lights and this offers a good comparison between soil and coco coir, which are two common growing mediums for cannabis.
| Grow Space | Light | Medium | |
|---|---|---|---|
| A | 1 m2 | 270W LED | Coco / Perlite |
| B | 1 m2 | 310W LED | Soil / Perlite |
| C | 0.72 m2 | 300W LED | Soil / Perlite |
| D | 0.6 m2 | 140W LED | Soil / Worm Castings |
From the various Mimosa Cake Auto grow diaries we've seen, it's clear that this strain is adaptable to any setup and suits any growing style. So, no matter what your plans are for your own grow, you can be confident that this autoflowering strain will perform exceptionally well.
3. Germination And Seedling Stage | Week 1
Those who are new to growing cannabis may feel nervous when germinating their first batch of seeds. However, we want to reassure you that fresh and viable seeds purchased from a reputable shop only require three conditions -- warmth, moisture, and darkness -- to germinate successfully. While these seeds may not be cheap, there's no need to go above and beyond to bring them to life. So, don't be afraid and let's start growing!
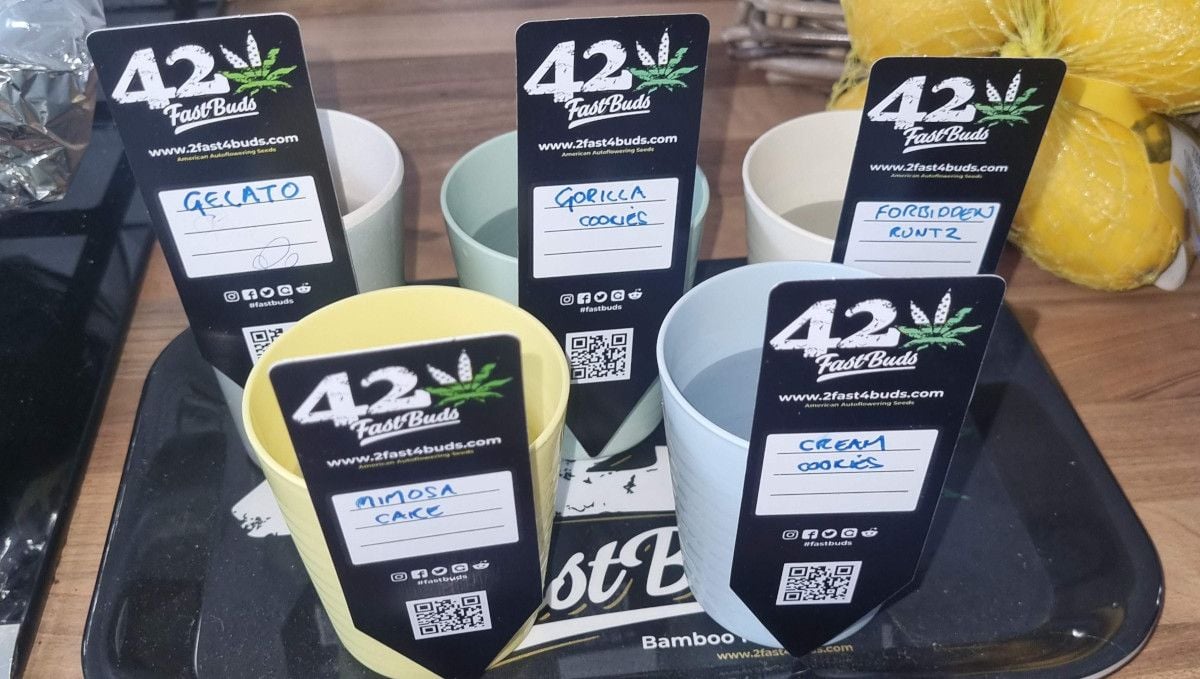
When it comes to moisture, many growers prefer to pre-soak their cannabis seeds in a glass of water (as seen in the photo below). However, it's important to be cautious because there is a risk that once the seed sinks to the bottom of the glass, it can suffocate without oxygen. To avoid this, make sure the seed stays afloat on the surface until it cracks and shows a taproot, or don't leave it at the bottom of the glass for more than a few hours. Generally, that will be enough time for some moisture to seep inside and jumpstart the germination process.
Most growers don't leave the seeds in the glass until they crack. Instead, they transfer the pre-soaked seeds to wet paper towels. This method is popular because it allows you to monitor the germination progress every few hours and ensure that you don't miss the optimal window to place the sprouted seeds into the growing medium.
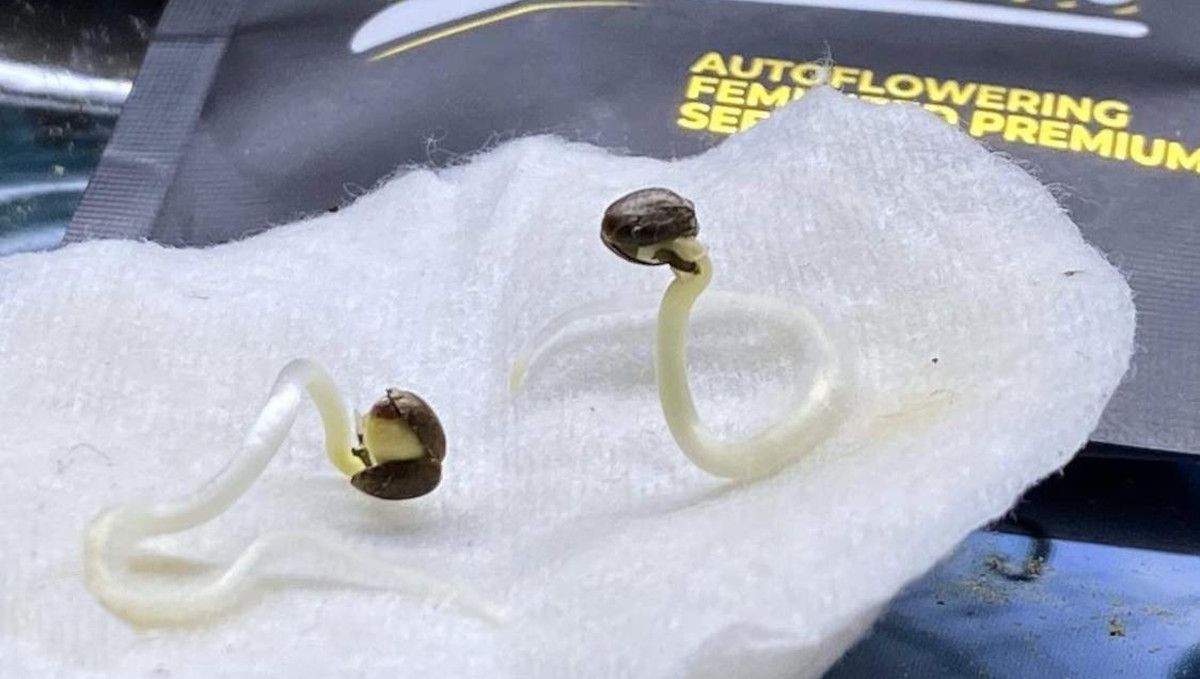
When the taproot is about half an inch long (1 cm), it's time to transfer the seed to your preferred growing medium, such as soil or coco coir. Avoid planting it too deep, and instead bury the seed about a quarter of an inch below the surface and cover it with loose and moist medium. Within a day or two, the seed should sprout, sometimes having already shed the outer shell during the process.
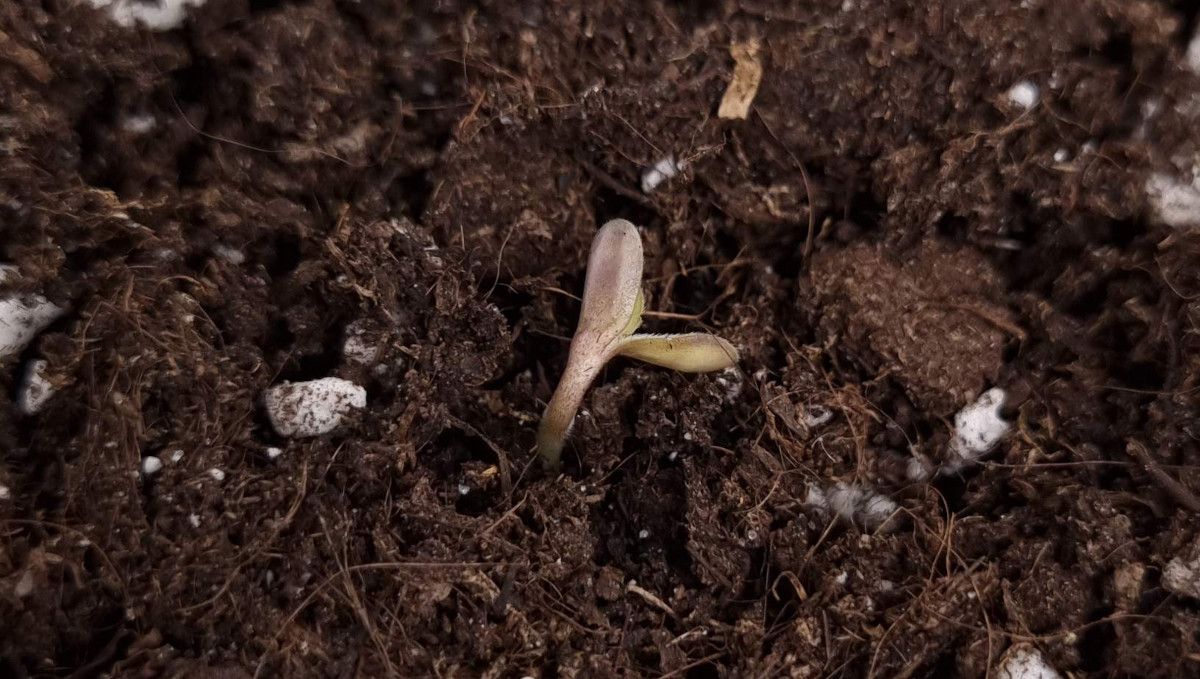
As a grower, one of the first decisions you'll need to make is whether to plant your seed directly into the final container or in a starter cup. If you're new to growing cannabis, we recommend planting your autoflowers in their final containers from the beginning. This approach will help you avoid any potential transplant shock. Leave the use of starter cups to those with more experience.
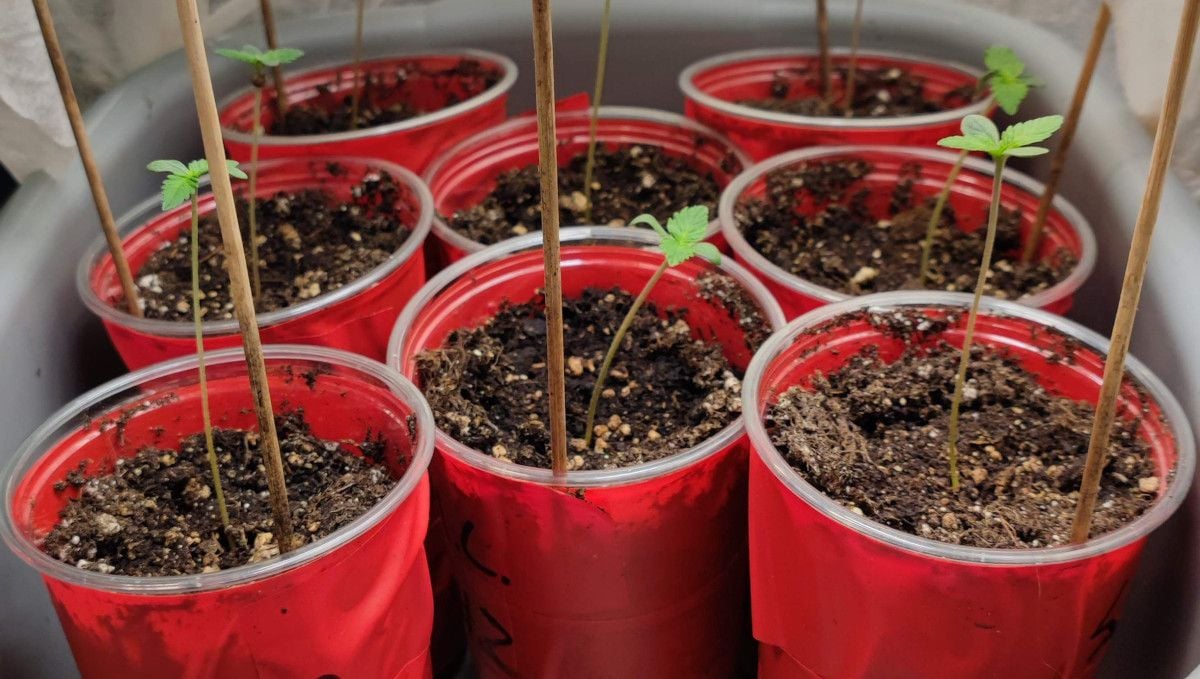
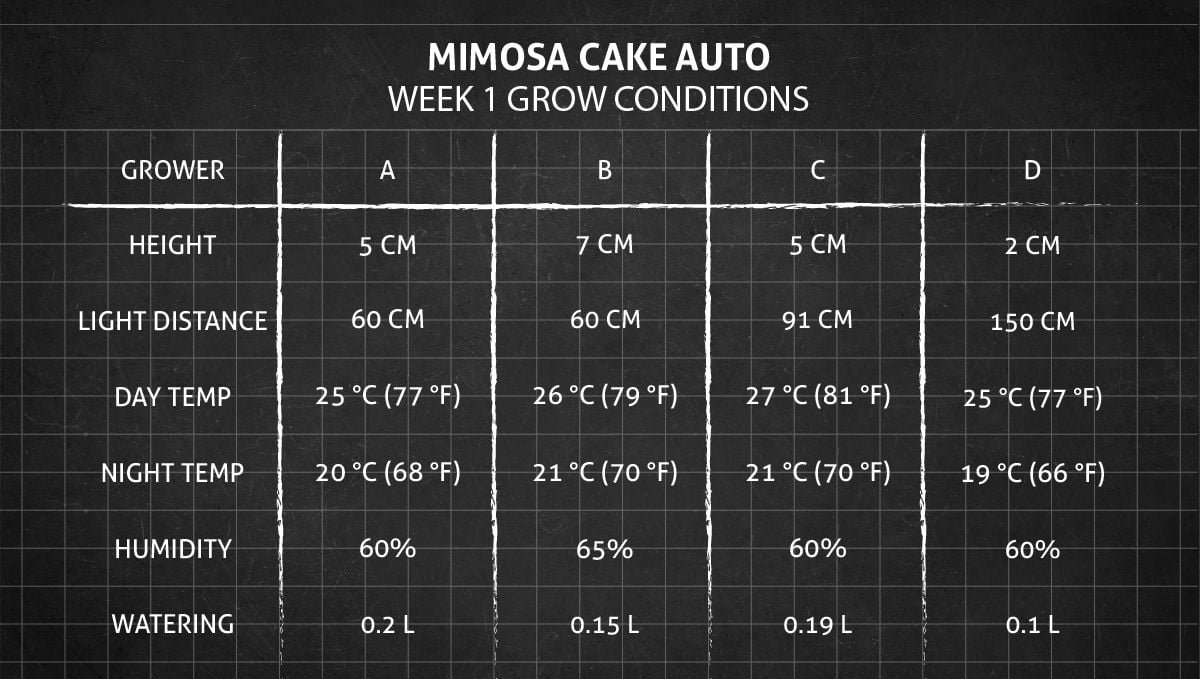
If you decide to grow your autoflower in its final container from the start, you may encounter some watering challenges. Typically, you'll need to water the entire container once before planting and then add a small amount of water around the base of the plant every morning. About 50 mL a day should suffice for the first few days.
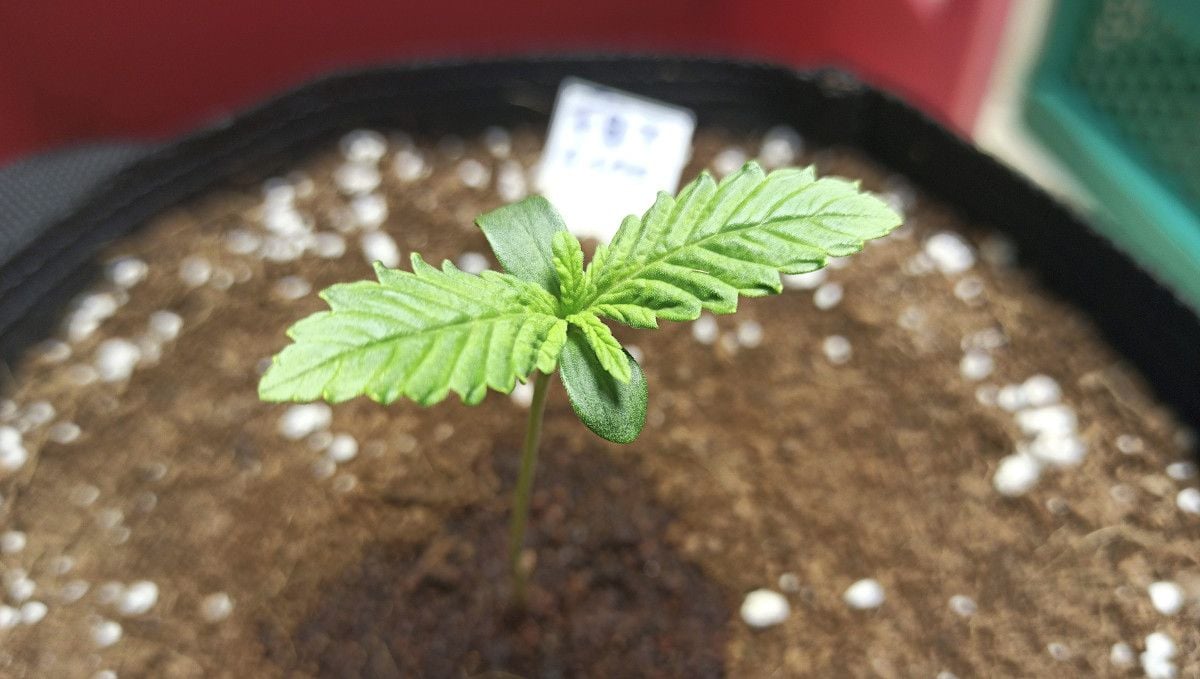
Another thing that you need to take into account is the distance between your little seedling and the light. It should be just close enough to prevent excessive stretching but not too close to cause any light stress or light burn.
4. Early Veg | Week 2
In the first few weeks in the lifecycle of a cannabis plant, it is very important to keep the environmental conditions as close to the ideal as possible. It means keeping things warm and quite humid because seedlings love mild conditions -- the ones that prevent excessive moisture evaporation and thus don't put too much stress on the root system (which is too weak at this point).
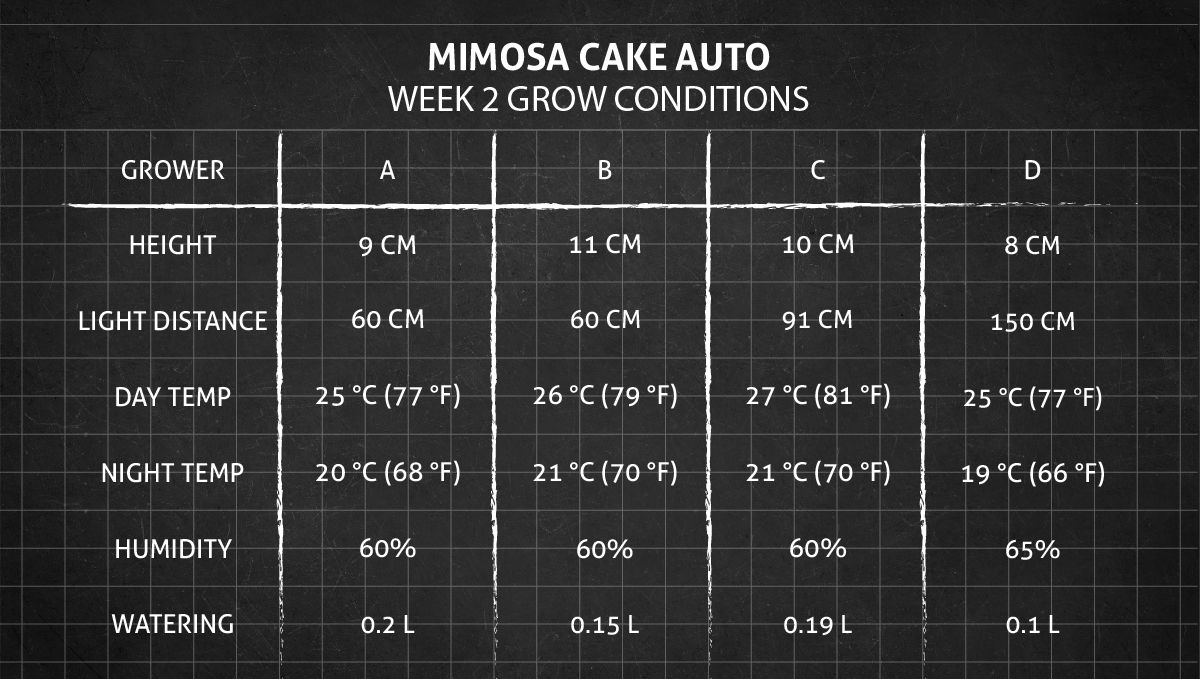
Again, it is very important to constantly monitor the height of your seedlings. They should neither be too close to the ground nor to stretchy and spindly-looking. The leaves should be perky, but they shouldn't be 'praying' to the light either.
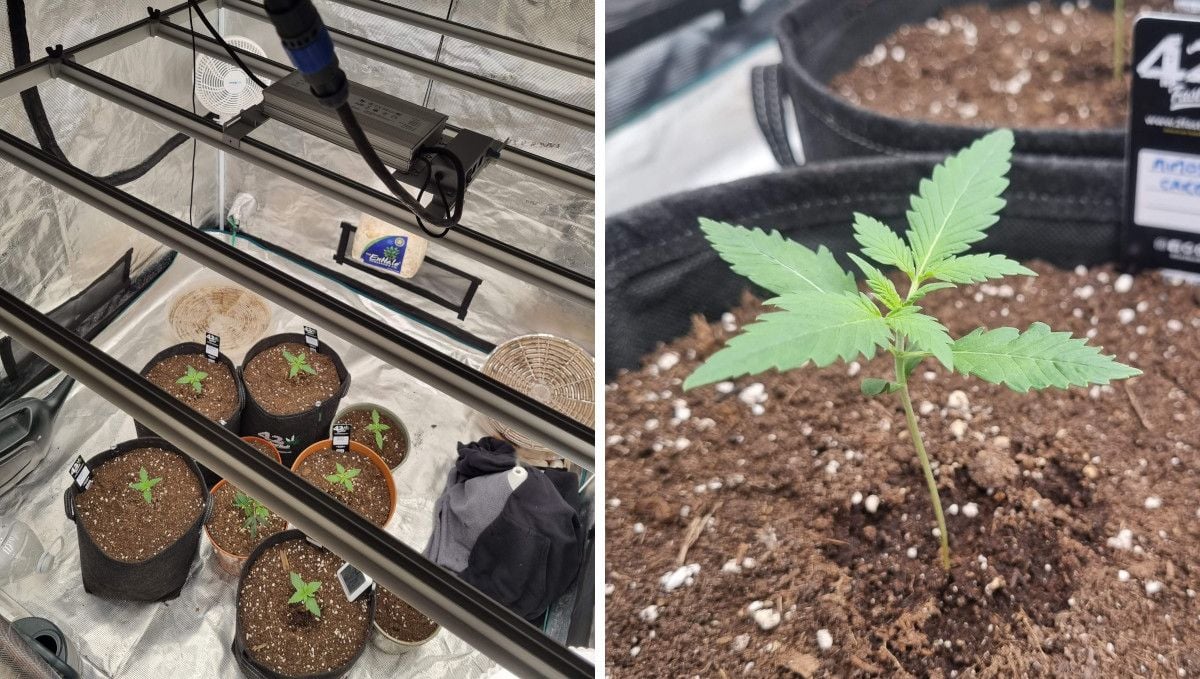
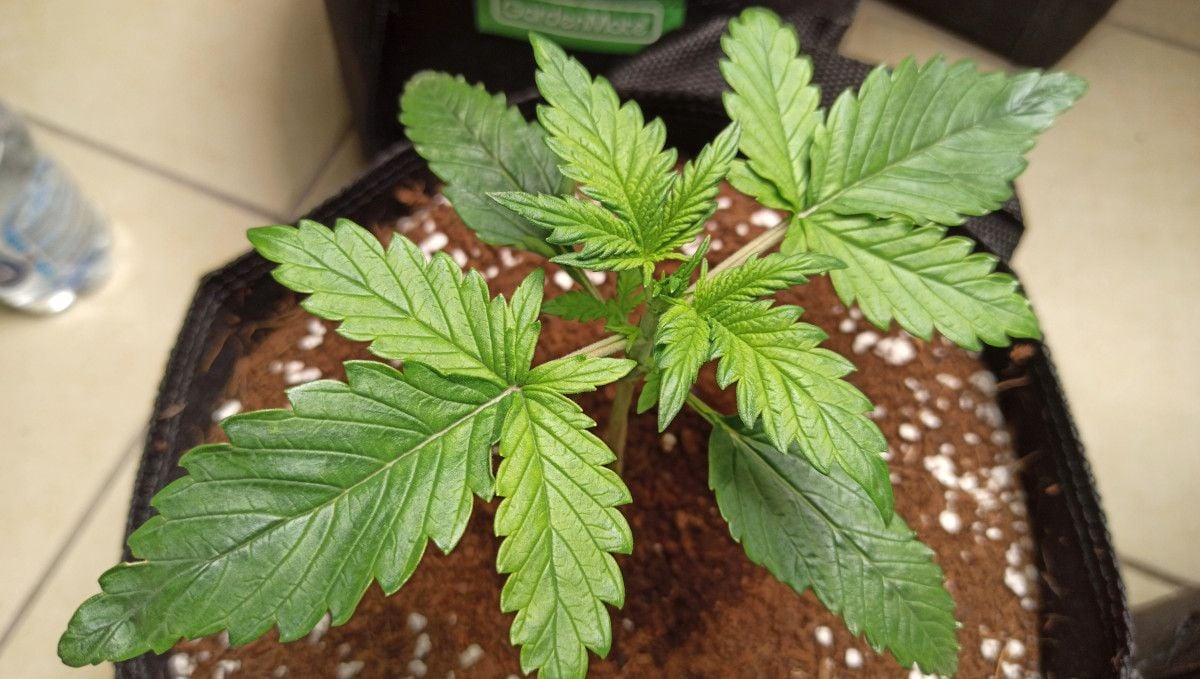
If you managed to hit the sweet spot with lights, temperature, humidity, and other environmental conditions, you should see a faster progress than before. Every day, you'll notice slight changes as the fan leaves grow larger in size and number, and there's new growth at the nodes, which will become side branches in the future.
The use of nutrients depends on the chosen medium. For hydroponics or coco coir, plants require extra nutrients with each watering from day one. On the other hand, in soil grows, especially with larger containers, the medium usually contains enough nutrients to last up to two or three weeks from seed. If you use extra large containers for growing autoflowers (with their short life cycle), chances are that you won't need to add extra nutrients until harvest. One method of achieving great results this way is preparing super soil.
Your main concern now is not to achieve the fastest growth rates possible but to ensure your autoflower stays healthy and has a color of the leaves that is smooth uniform green.
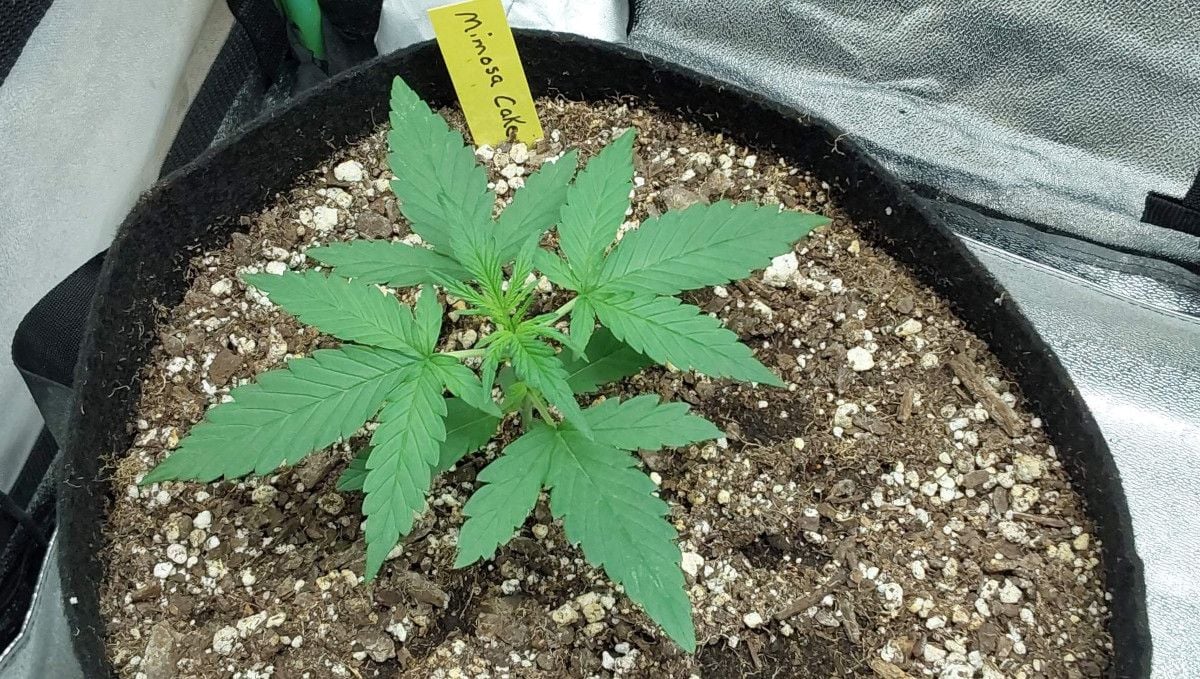
Different autoflowers have different bush structure. Some tend to grow just one main cola while the rest of the branches stay short. This maes such strains great for SOG grows. Others have a tendency to bush out, and this is something you can notice early on as the future branches begin to develop at the nodes. Such autoflowers will probably benefit the most from various training techniques such as ScrOG.
5. Mid Veg | Weeks 3-4
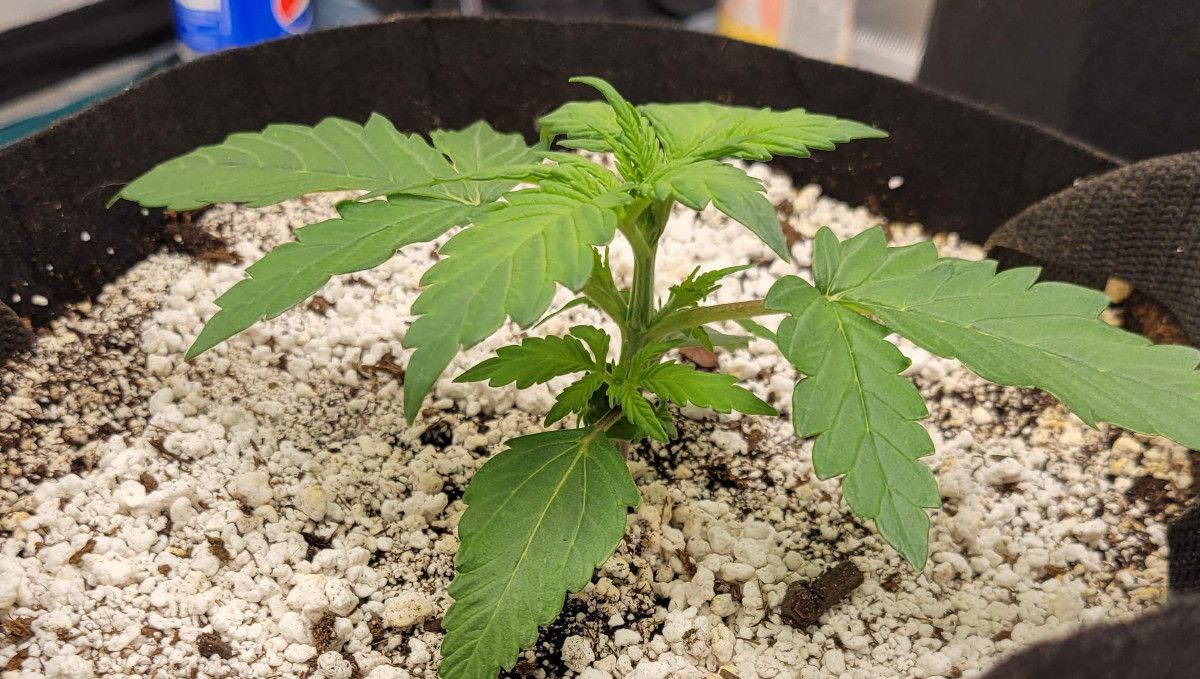
Weeks 3 and 4 are most probably the last weeks in the vegetative phase of your autoflower, and this is the period when both the roots and the above-ground part of the plant grow the fastest. This is when you lay the foundation -- in the form of branches and nodes -- of your future harvest. That's why it's so important to create the best possible conditions in your garden and avoid such common beginners' mistakes as overwatering and overfertilization.
This is also the time when you decide how the canopy of your plant should look like. While outdoors you have the luxury of letting your plants grow naturally, indoors, most growers use some training technique or other. The simplest and the most common of them is LST, and strictly speaking, it's all an autoflower needs.
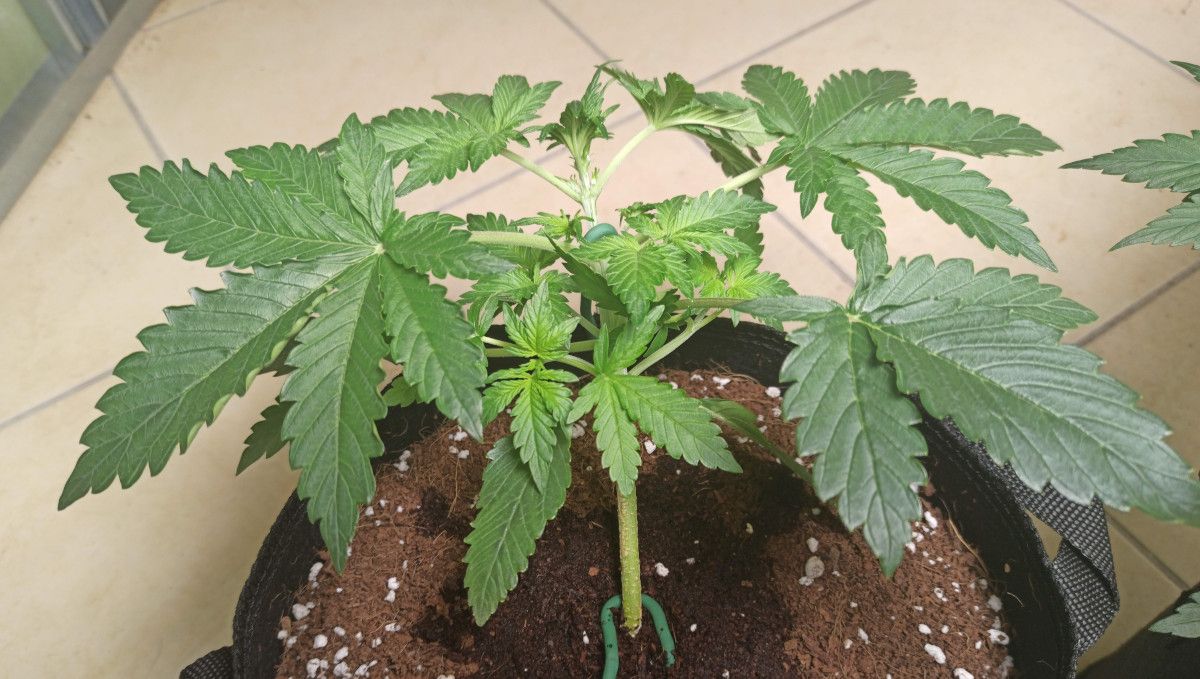
LST, or low-stress-training, means bending and tying down the main stem and any of the side branches that are growing taller than the rest. The purpose is to break the so-called apical dominance so that plant's energy redirects from the main stem to side branches, resulting in a bushier cannabis. The other benefit is that you literally give your auto the shape you need.
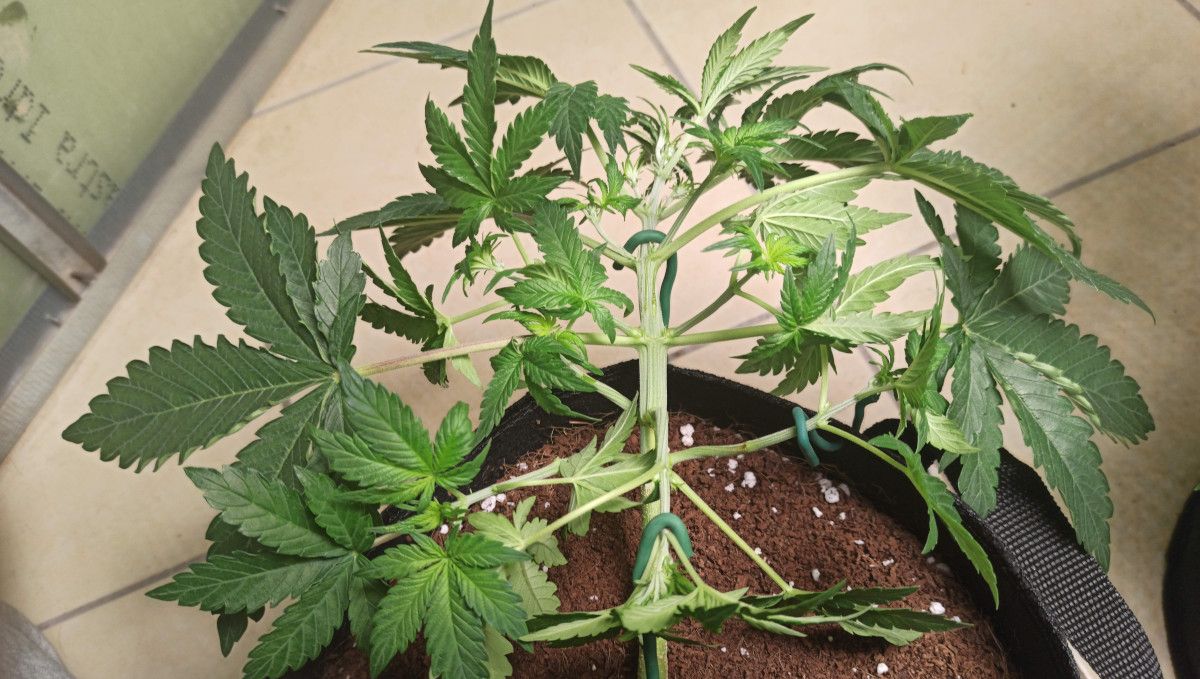
You may be more or less aggressive in your training activities, but unless you damage a stem or branch, it all causes only moderate stress to your plants, and modern autoflowers are more than equipped to handle it without any issues. More and more gardeners get so confident with the strength and resilience of modern autoflowering varieties, that they don't shun HST methods either, such as topping or FIMming.
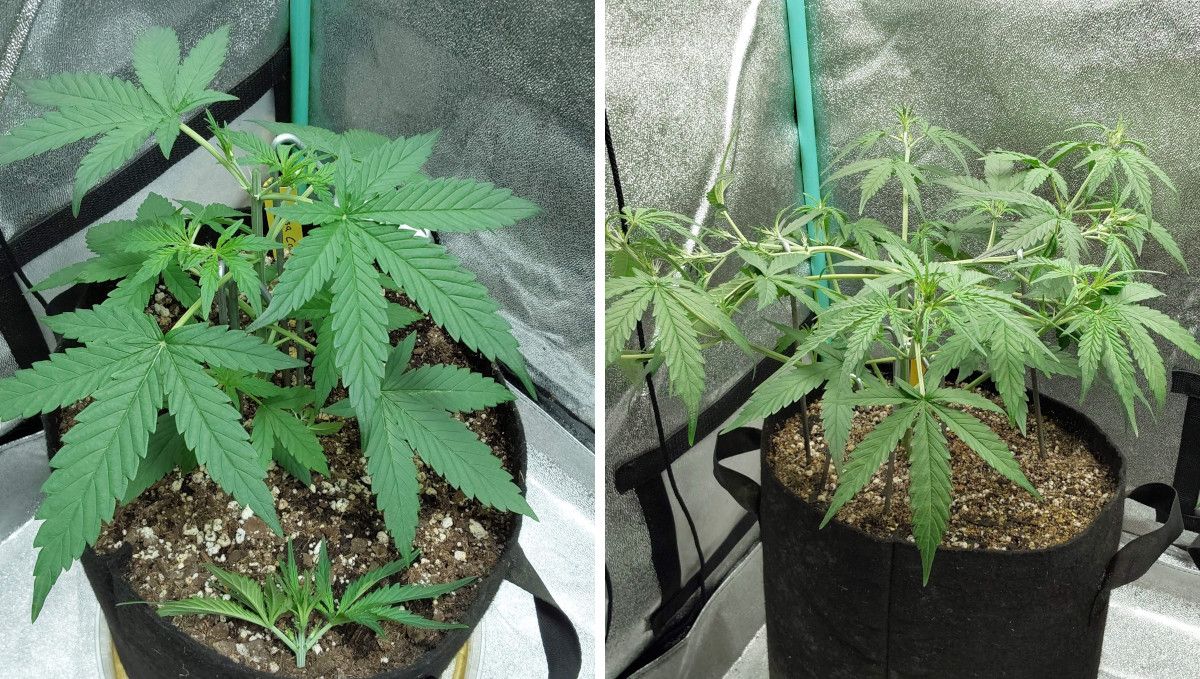
If the plant is strong and healthy, high-stress procedures can turn your bush into a monster. However, we recommend that beginners choose some simpler and less stressful growing method. Even letting your autoflower grow naturally may work in larger setups with enough headspace -- many autoflowering varieties are fast and compact enough for the size of the plant not to get out of hand.
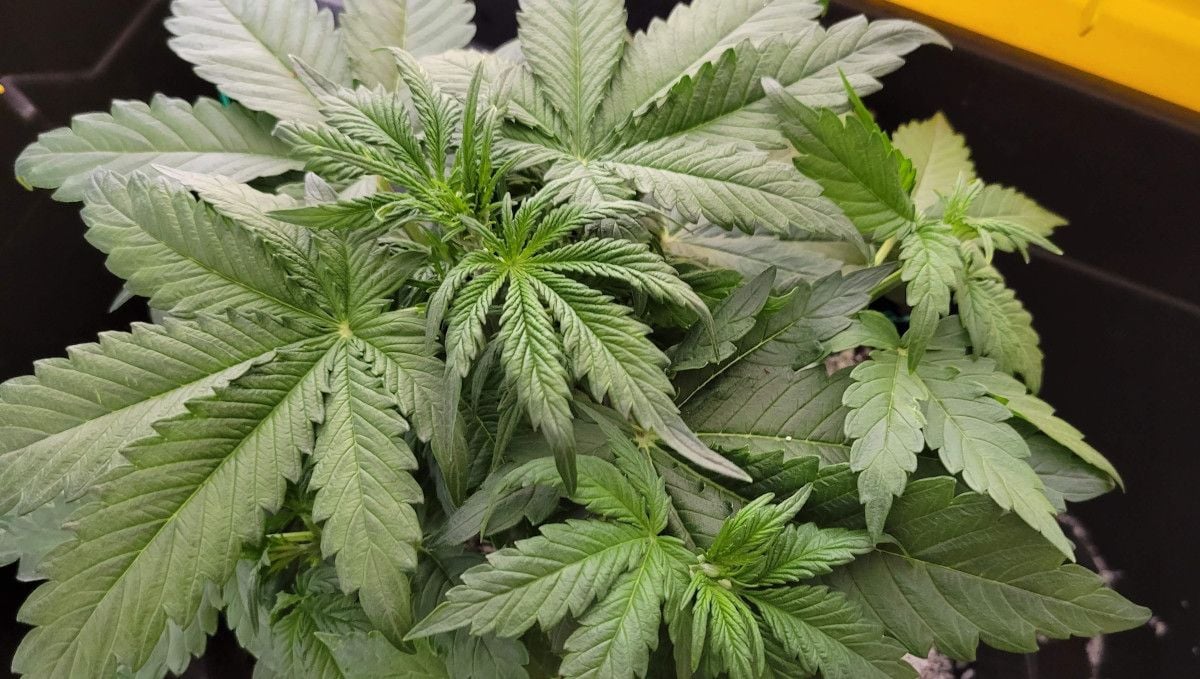
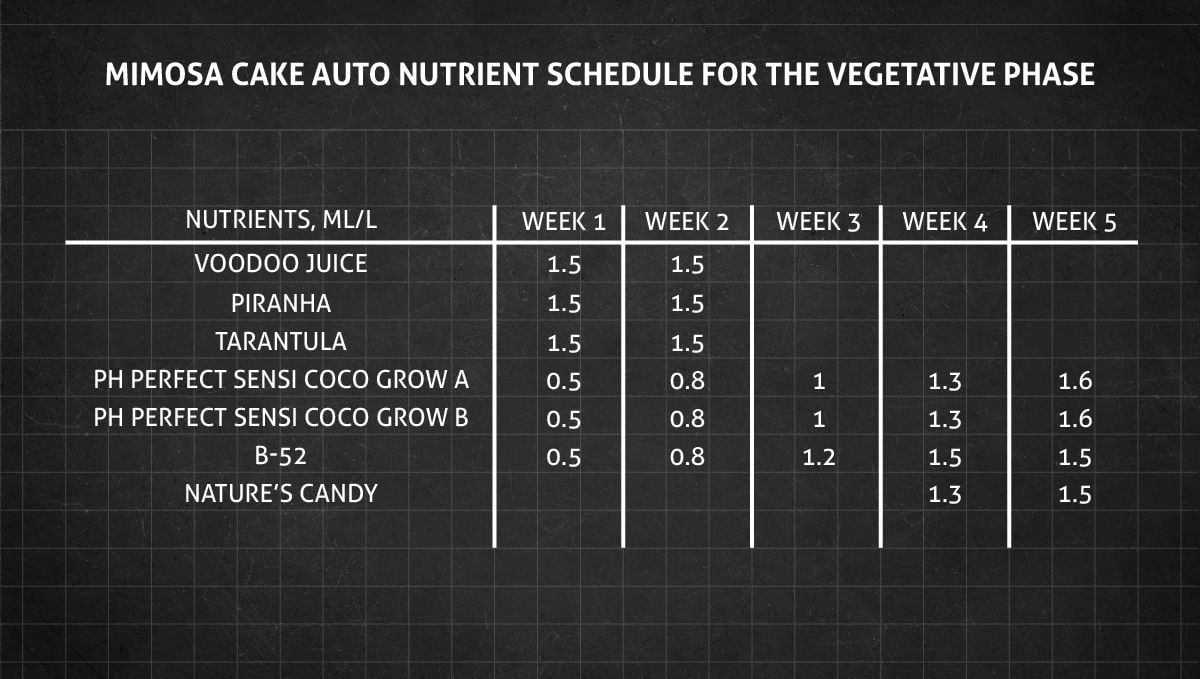
The second important concern at this stage is giving your autoflower enough nutrients to support all that active growth. Cannabis fertigation has turned into an almost exact science, with many companies competing to put revolutionary products on the market. You may use them, but please remember that less is more when it comes to using nutrients, especially at the start of your weed cultivation career. Better stick to a few essential products for the first few grow cycles. Below, is a sample feeding schedule which isn't overly complicated.
Having said that, the majority of growers prefer training their plants, and they start it quite early -- when it's yet hard to conceive (for a newbie) that the size could ever become a problem.
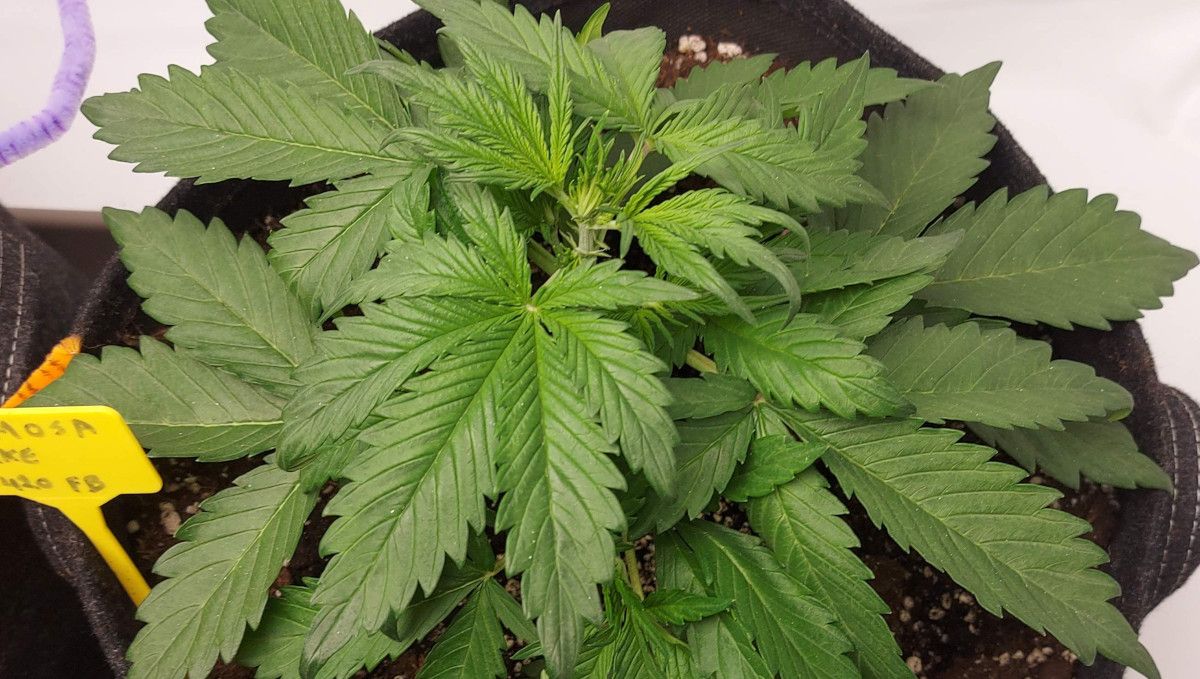
The beauty of weed plants is that if they don't like the feeding regimen or anything else, they'll show you that they're unhappy by changing the color or the shape of their leaves. Your goal is to keep them vivid green, flat and perky -- it means your plants are doing alright. In this case, they also grow at a steady pace, with new developents noticeable every morning.
6. Transition (Pre-Flower) | Week 5
In cannabis plants, the pre-flower stage is a crucial time for growers as it allows them to identify the gender of their plants. For autoflowering varieties of cannabis, flowering is not triggered by changes in light cycles, and instead, it begins automatically based on genetics and age. While it's not necessary to alter the growing conditions once flowering has started, some growers may choose to make adjustments to optimize future yields. Temperature, humidity, and light intensity can all be factors to consider during the flowering stage.
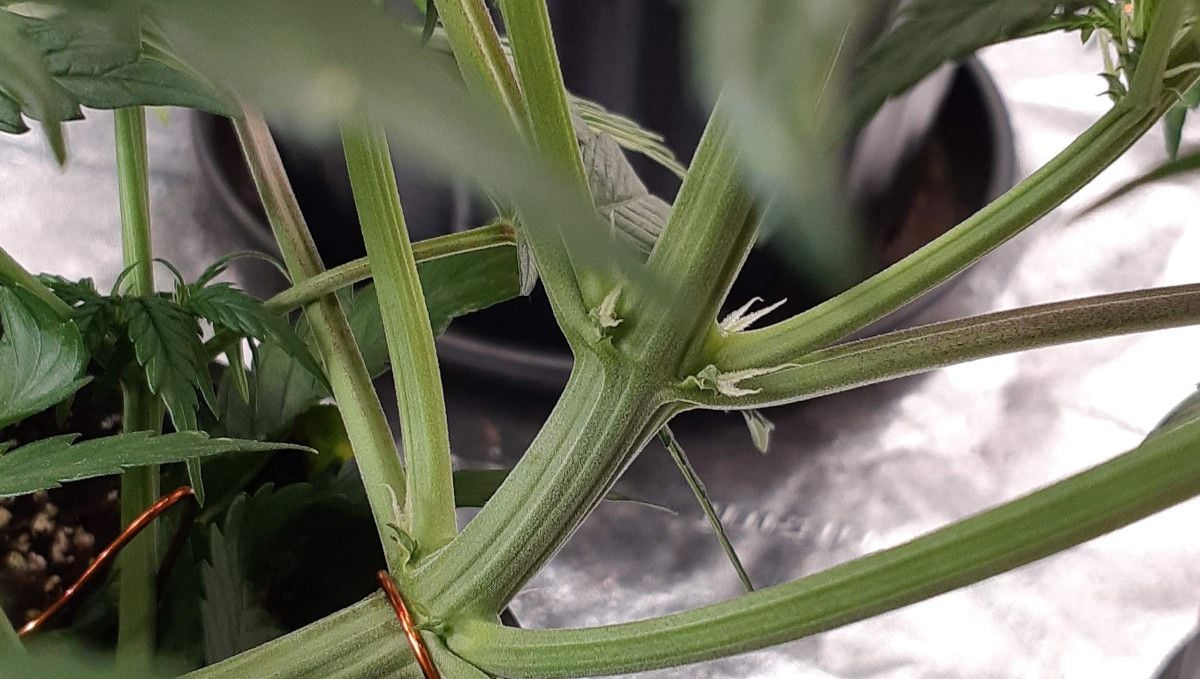
It may be counterintuitive to beginners, but the first signs of sex aren't found on tops but somewhere at the lower nodes. For female plants, it's pairs of white hairs. You should look closely if you want to discover them with the naked eye as they are really tiny.
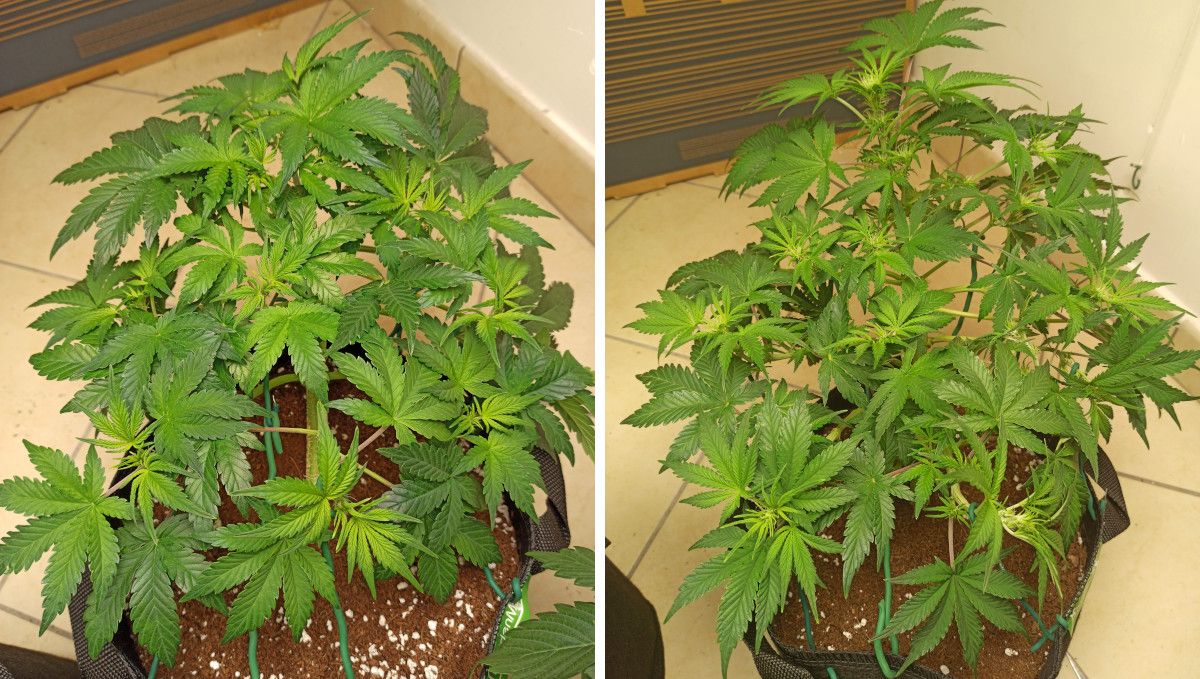
It is difficult to miss the signs indicating that your autoflower is finally entering the flowering stage. The green tops of the plant that were once identical to the surrounding foliage are now adopting a yellowish tone. Additionally, the new leaves that sprout become thinner and more delicate.
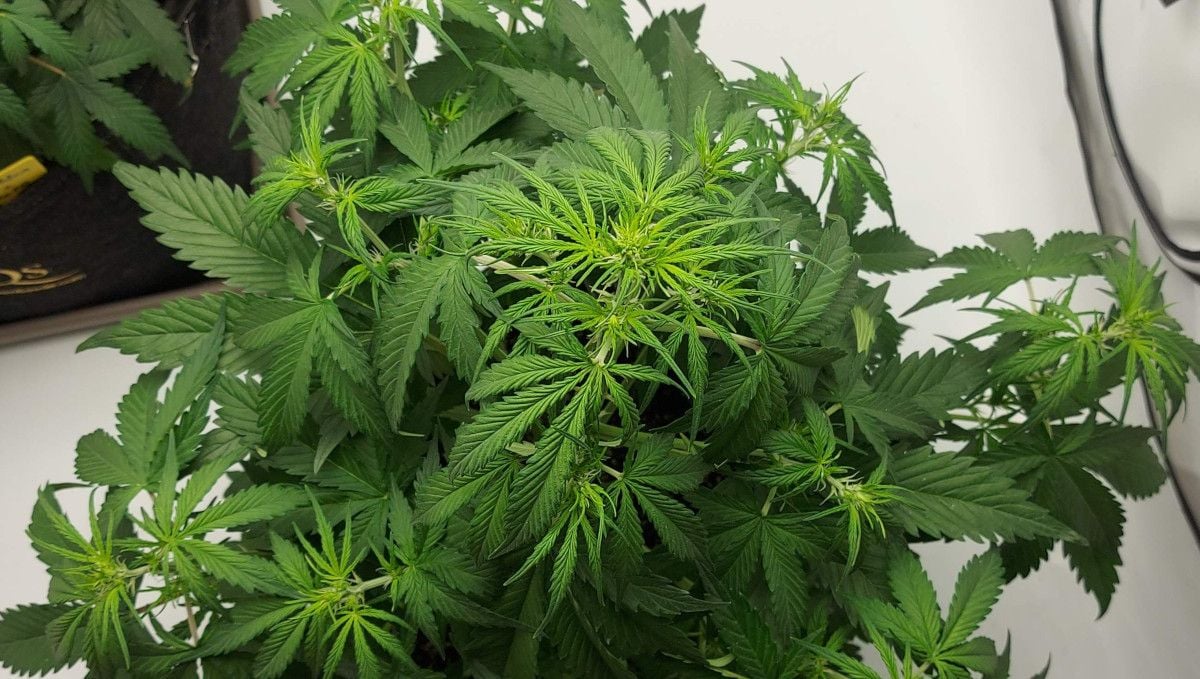
Simultaneously, small white hairs emerge amidst delicate top leaves, and after some time, the tops will appear fluffy and resemble budding flowers.
Some growers who are really into training continue with LST even as their plants enter the flowering stage. However, training can often lead to the canopy becoming too dense and preventing good air movement and light penetration. Therefore, you will probably need to remove some fan leaves, or even a lot of them.
We recommend that you always know the exact reason why you're defoliating. Don't pluck the leaves just because you can or because others do it. The only good reasons for defoliating are that the fan leaves are shading some bud sites from light or preventing airflow inside the canopy.
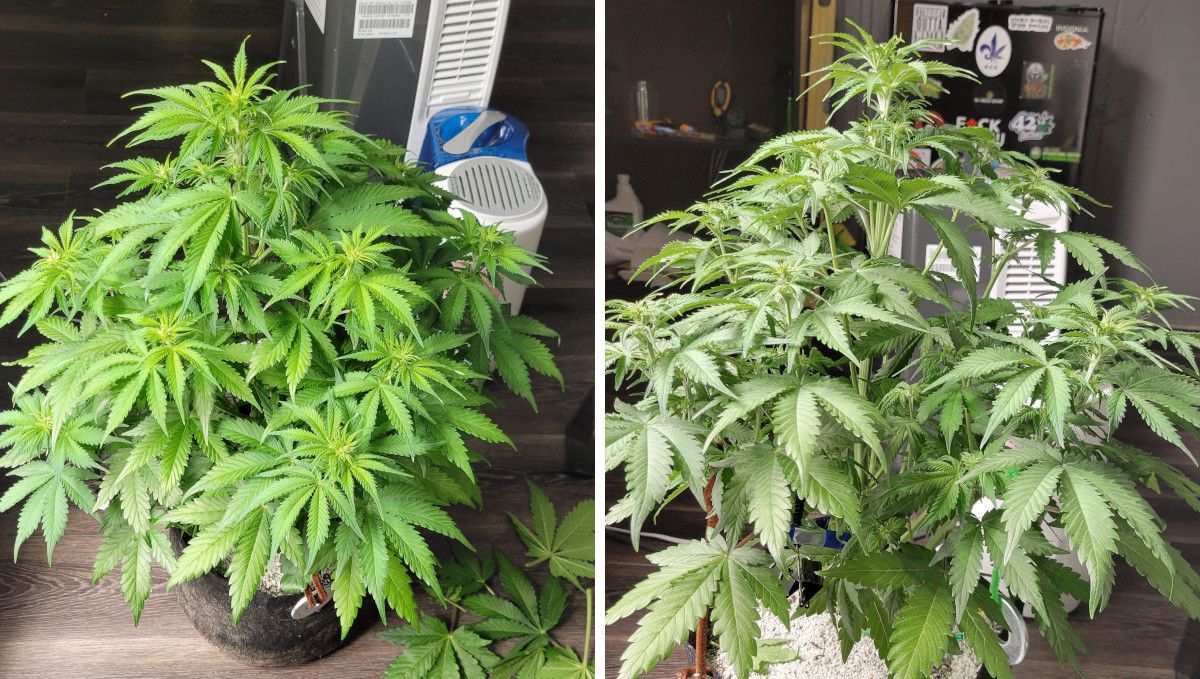
While LST can lead to its own set of problems, neglecting to train your autoflower in a tight space has its risks too. You may find that the central cola of your plant is growing too tall compared to the rest, which could lead to it growing too close to the light or requiring you to raise the light higher and higher -- untill the lower branches are out of the effective range. In such cases, you may have to resort to more drastic measures like super cropping, but this is not recommended during the flowering stage as it will only reduce productivity. Ideally, you'd want all principal branches to be of the same length and at the same distance from the light.
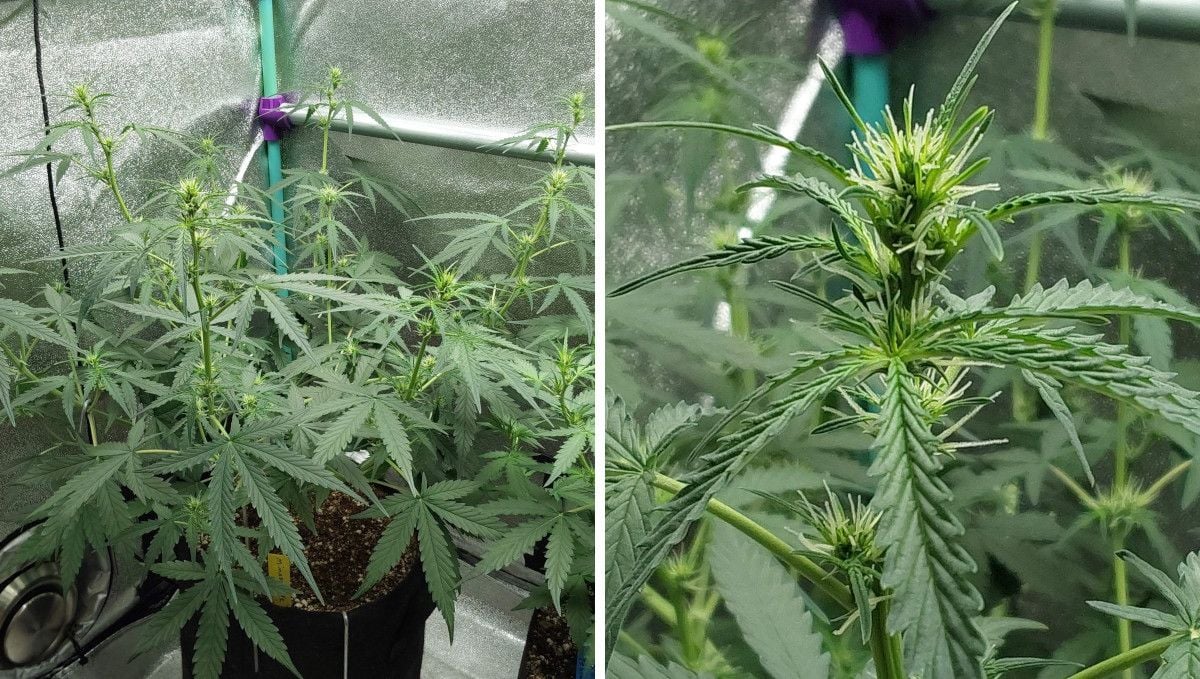
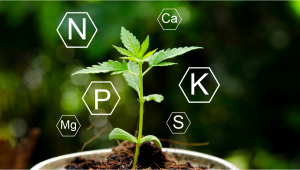
At this stage, the flower development process hasn't fully started yet. As a result, your plant doesn't require large amounts of phosphorus and potassium (the PK part of N-P-K). Some growers may delay the use of bloom nutrients for another week. However, most growers prefer to simplify the process and adjust their nutrient schedule to suit the flowering stage as soon as the plant starts to transition.
7. Early Flower | Weeks 6-7
In the early flowering stage of cannabis plants, they undergo a rapid growth spurt known as "the stretch," where they can grow taller while also beginning to form flowers. This phase can last up to three weeks, depending on the specific strain and environmental factors. Proper light distance is crucial during this stage, as it can help prevent light burn and promote optimal flower development. Additionally, the plants will require increased water and nutrients, but care should be taken not to overfeed them, which can lead to nutrient burn and other problems. Monitoring the leaves for signs of overfeeding is recommended to ensure healthy and robust flower growth.
New growers may be surprised to learn that during this stage, the cannabis plant's stem and branches grow longer, rather than the flowers getting bigger. This growth spurt can cause the plant to double or even triple in size.
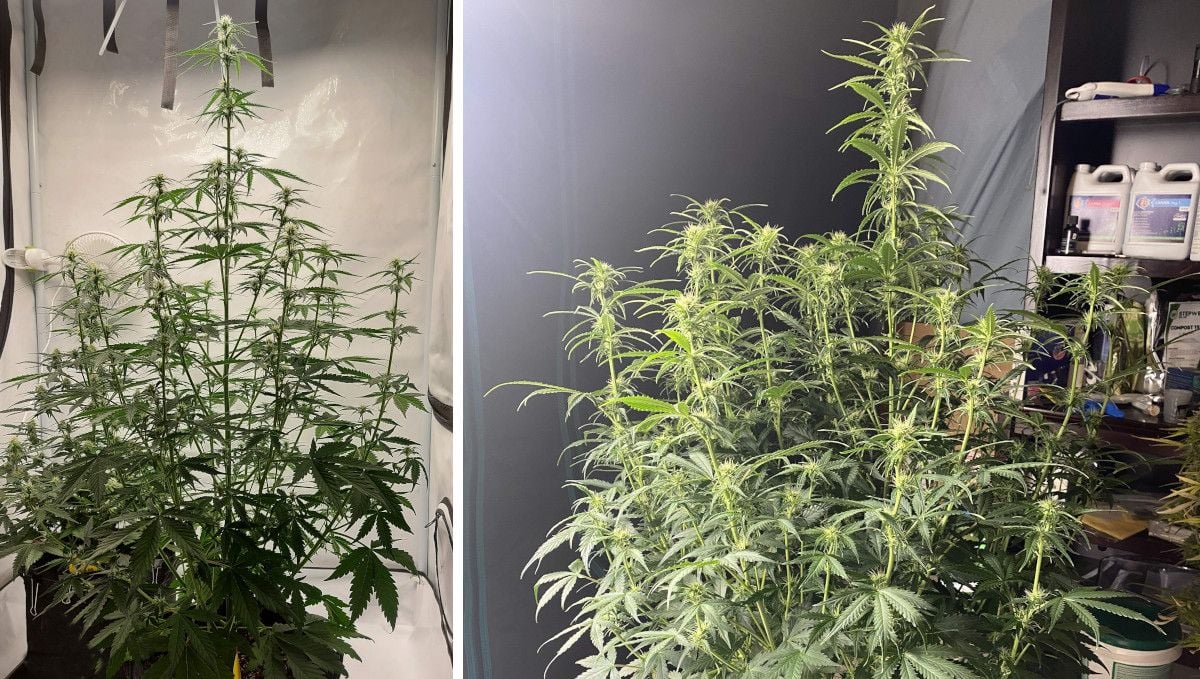
At first, the flowers may look small compared to the long branches, but they will soon fill out and grow into long, continuous buds called colas.
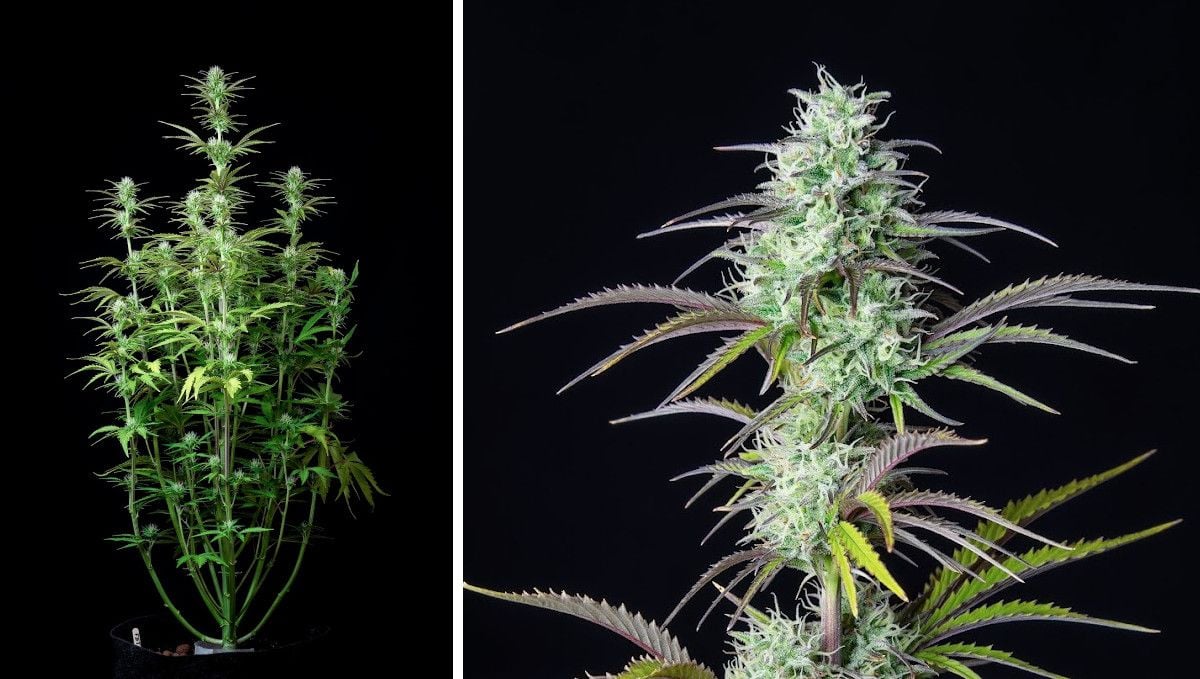
Of course with proper training, you can direct this growth sideways. Just make sure you have enough square area to fit all that extra girth.
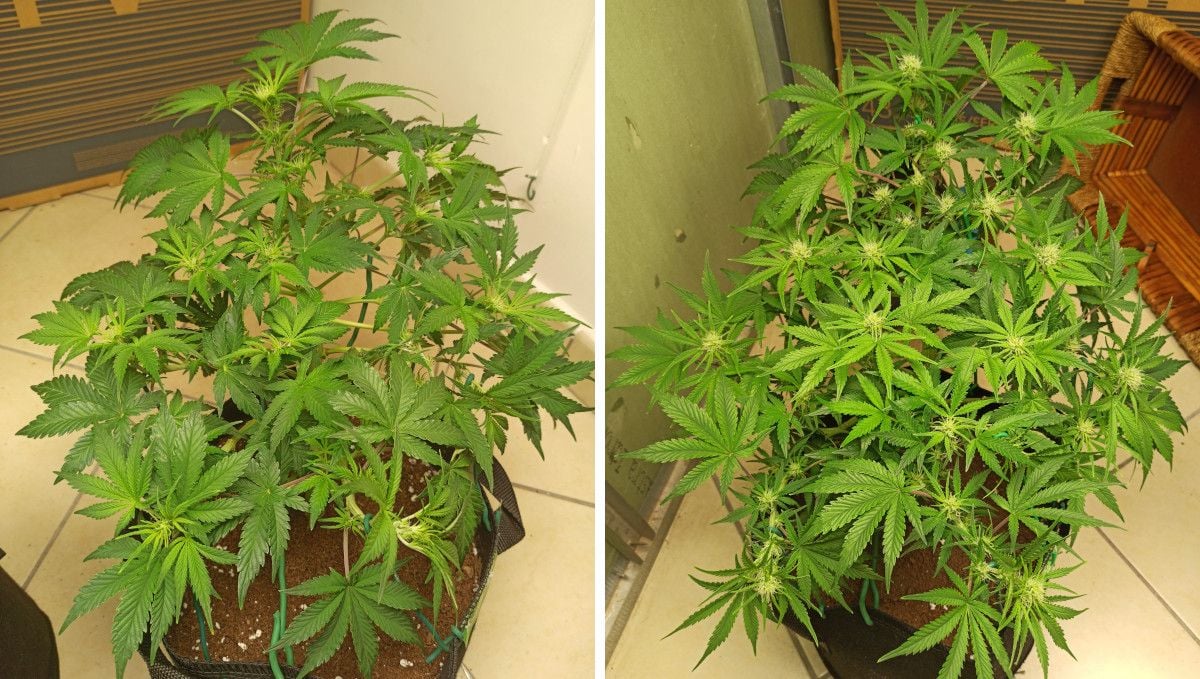
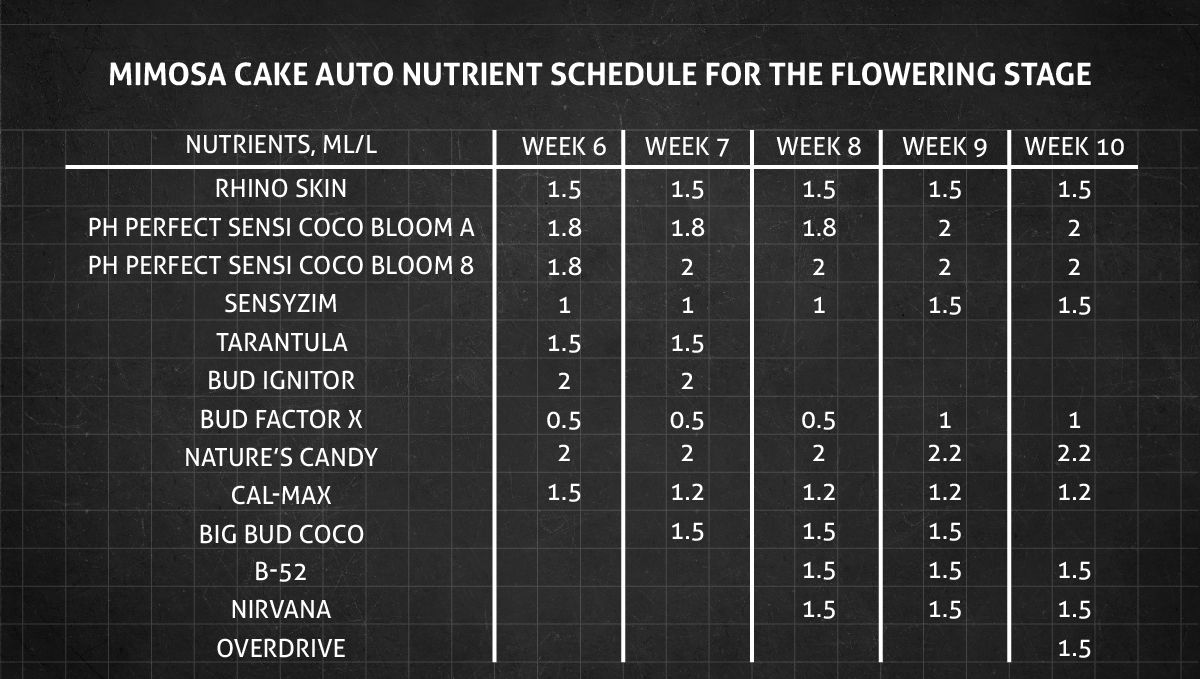
At this point in the timeline, don't let the small size of the buds fool you -- this is flowering all right, so your plants will start to need flowering nutrients around this time (and more and more of them with every passing week). So, put aside the nitrogen-rich products till the next cycle and replace them with those that have higher levels of such macronutrients as phosphorus and potassium.
Please find in the table below, the example feeding schedule for the budding stage. Please note that it might be too complicated for newbies. You'll probably be better off taking only some basic formulas and leaving fancier supplements for later -- when you have more experience.
If you can't allow your plant to spread its branches, make sure the canopy isn't impenetrable to light and air. Sometimes, simple leaf tucking helps, at other times, the only thing that lets you thin the canopy efficiently enough is defoliation.
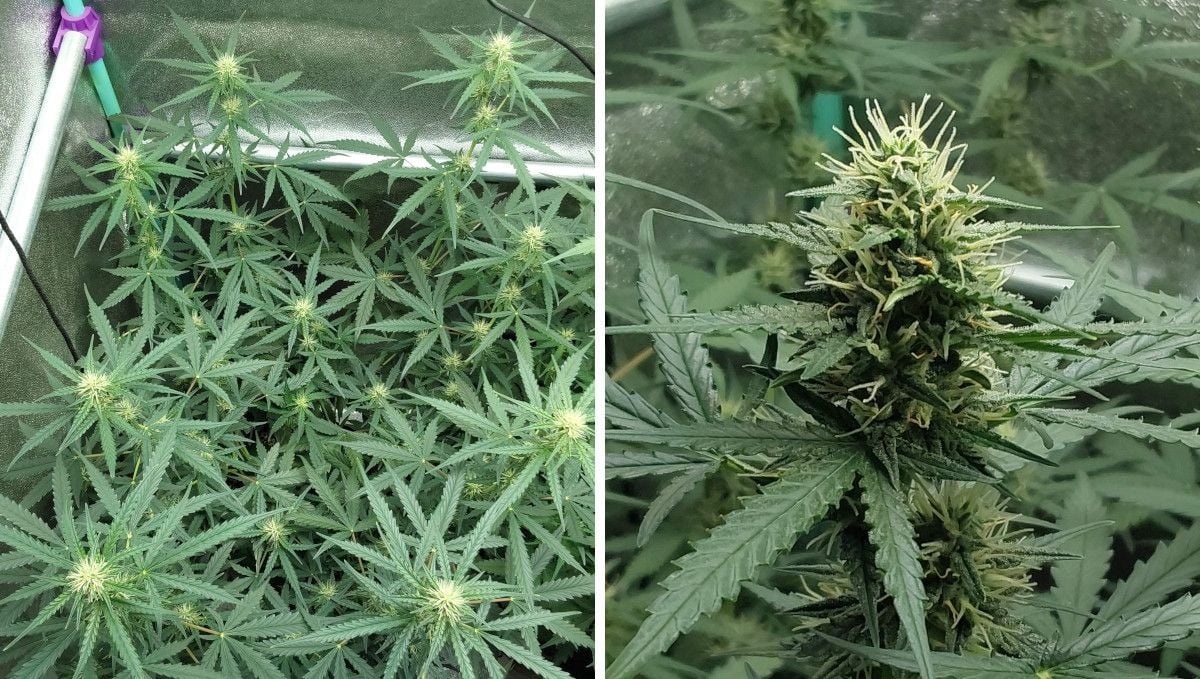
8. Mid Flower (Bulk Phase) | Weeks 8-9
When cannabis plants start stacking up buds, they stop growing taller, so you don't need to worry about them taking up too much space. Instead, you can now focus on giving them the right amounts of nutrients. It's also important to have good air flow to prevent mold and bud rot from growing inside the big and dense buds. To do this, you should lower the humidity and provide adequate ventilation. It's also a good idea to lower the temperature a little bit. This will help the buds keep their terpenes and THC.
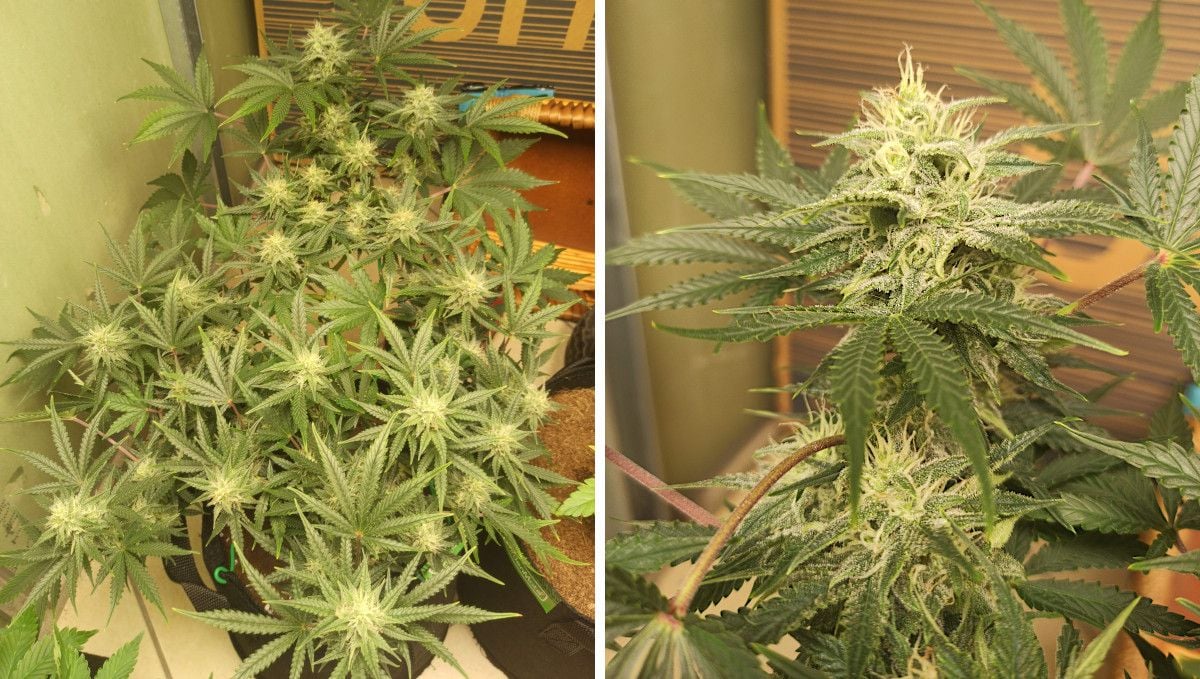
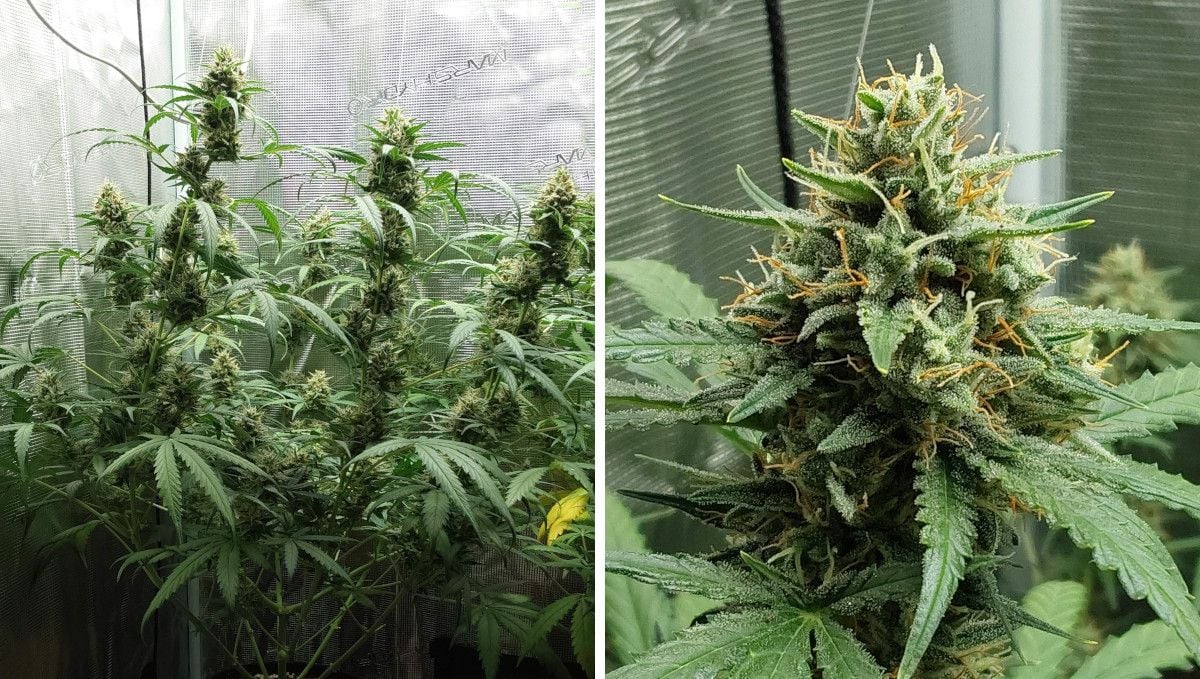
When the flowers are getting bigger, the plants are very hungry, and you can give them more food than before, especially phosphorus (P) and potassium (K). Just be careful not to give them too much or their leaf tips will burn. At this stage, most of the small hairs on the flowers are still white, but some of them may start to turn brown and dry out. That means the plant is getting closer to harvest time. The Mimosa Cake Auto that you see in the photo below is filling out nicely but still has a long way to go.
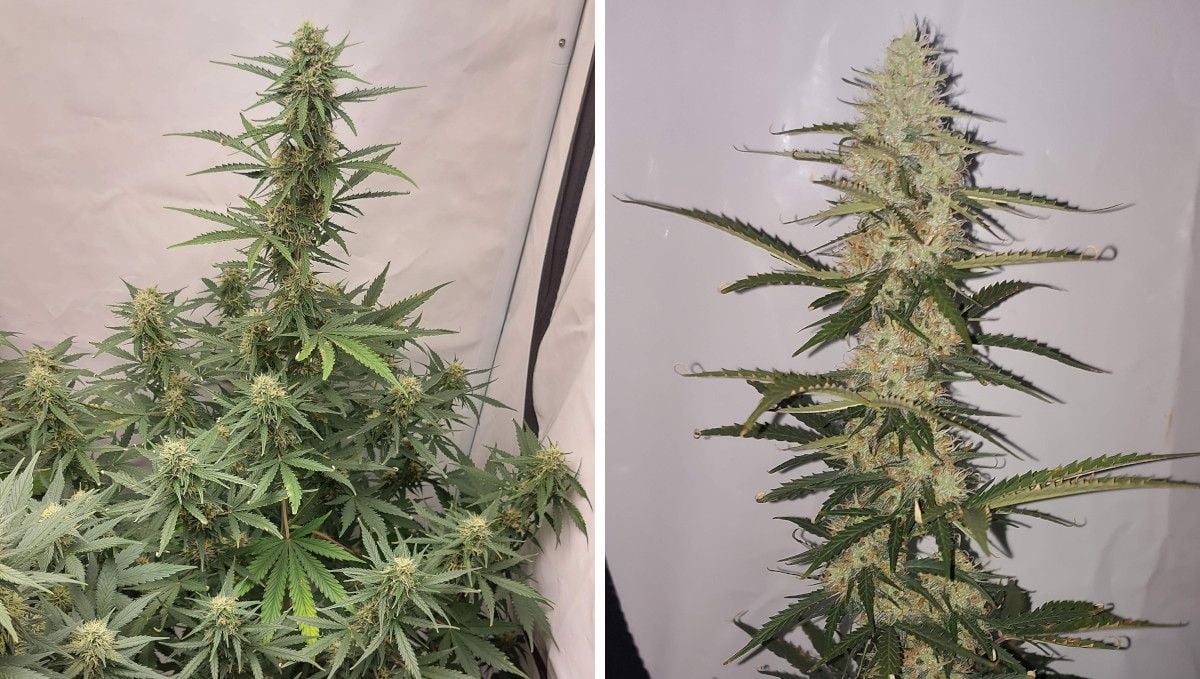
If you have powerful lights, you can let your autoflower develop as she likes. The light will penetrate all the way down. The main cola will be the biggest, but the lower flowers will also be large and dense enough.
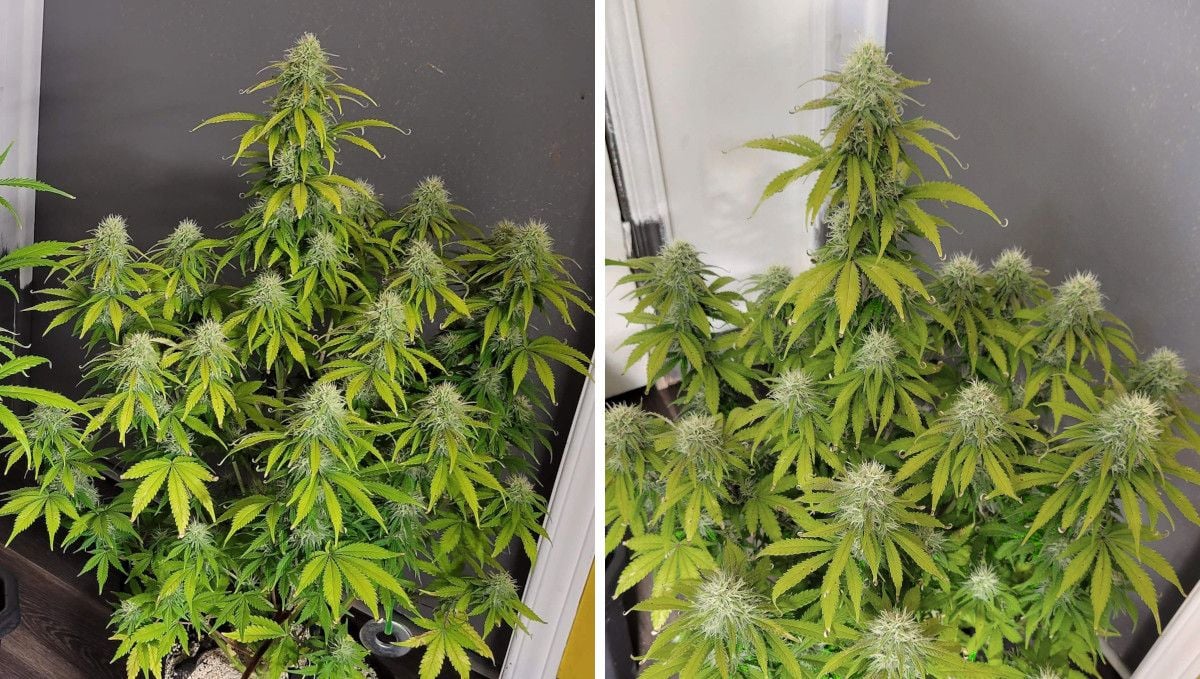
In small setups, training is probably inevitable, and it will make sure every cola is of top quality. However, you may think of defoliating your plant to facilitate light penetration and airflow. Keep in mind, that fan leaves store up nutrients and give some of them (for example, nitrogen) to flowers when they don't receive enough plant food from the gardener. If you defoliate large fan leaves, the plant may start to cannibalize younger growth and the smaller leaves will fade prematurely.
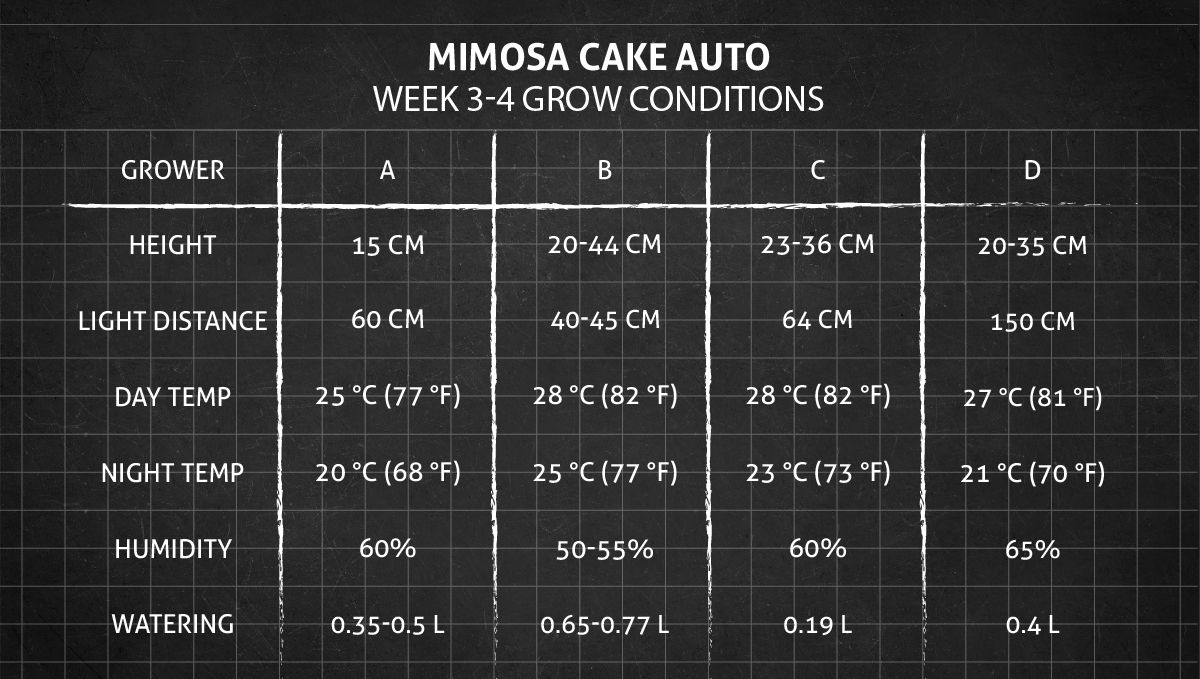
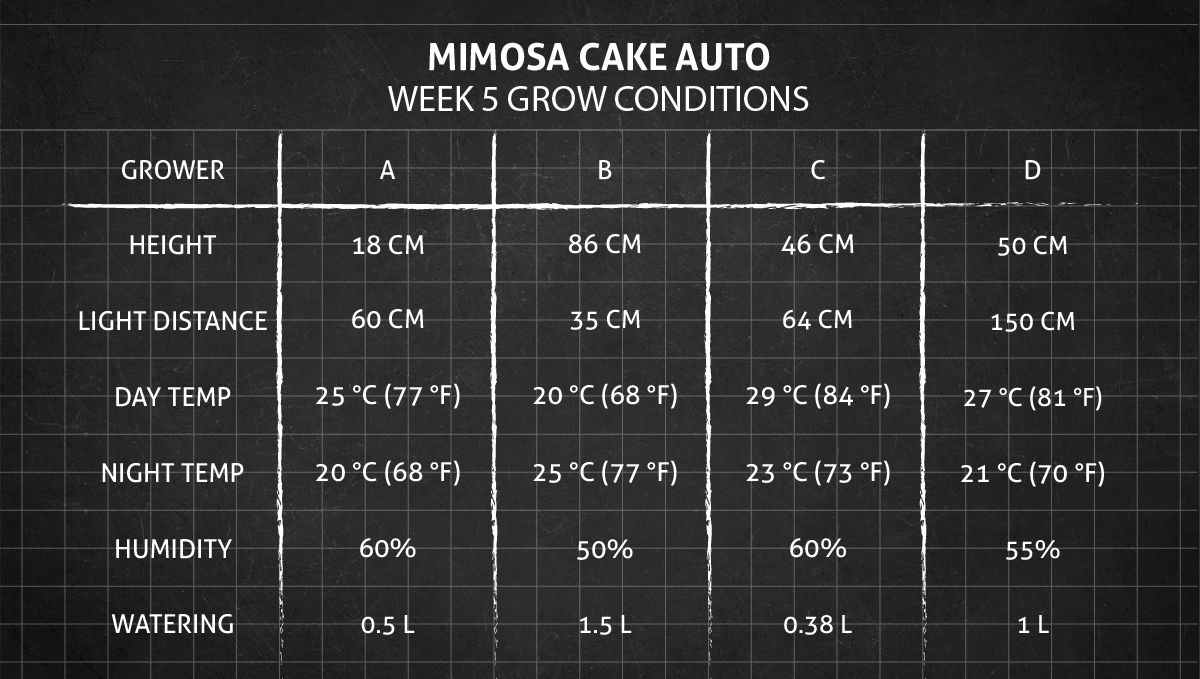
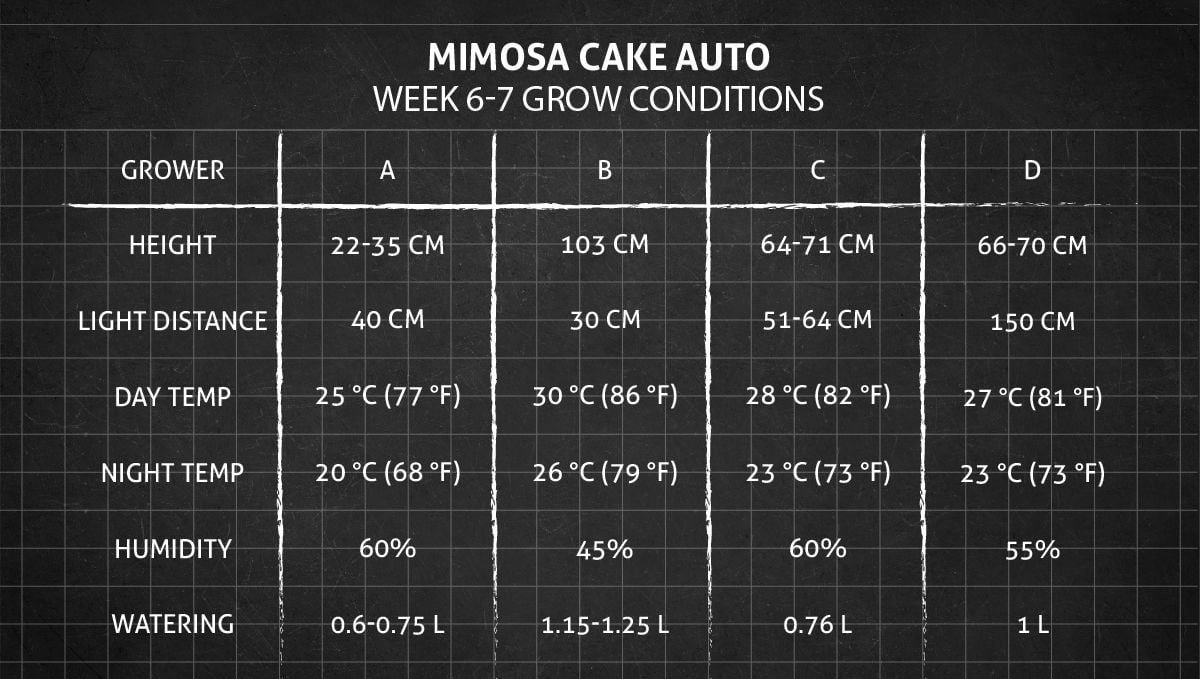
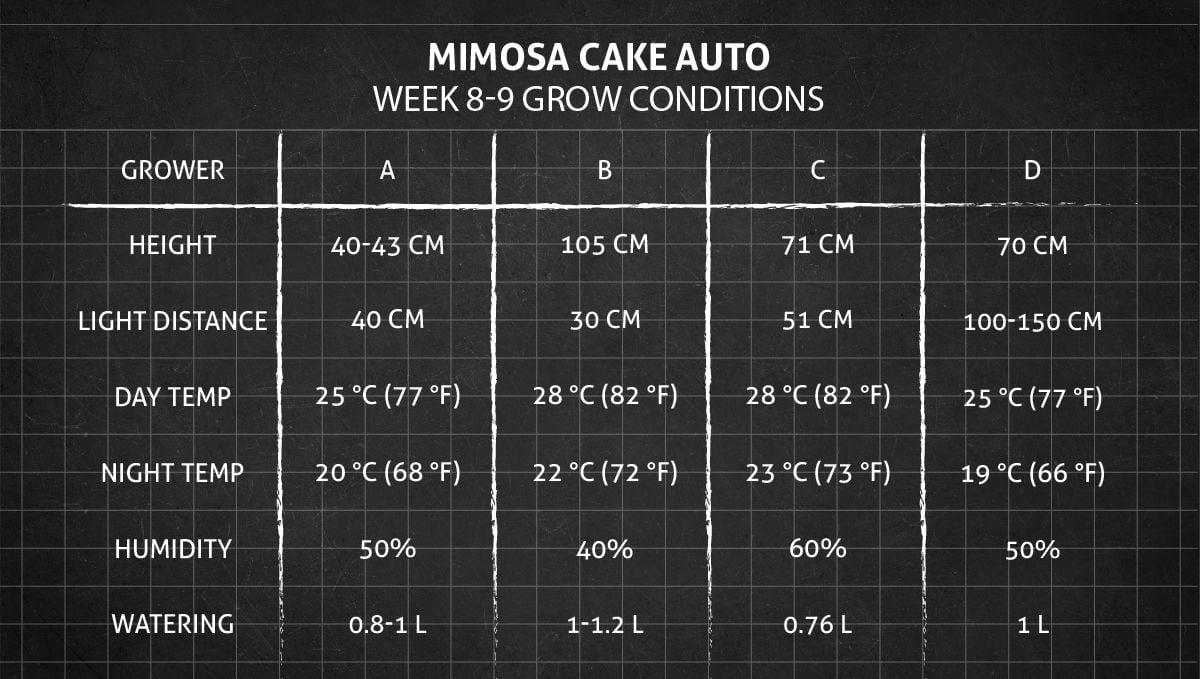
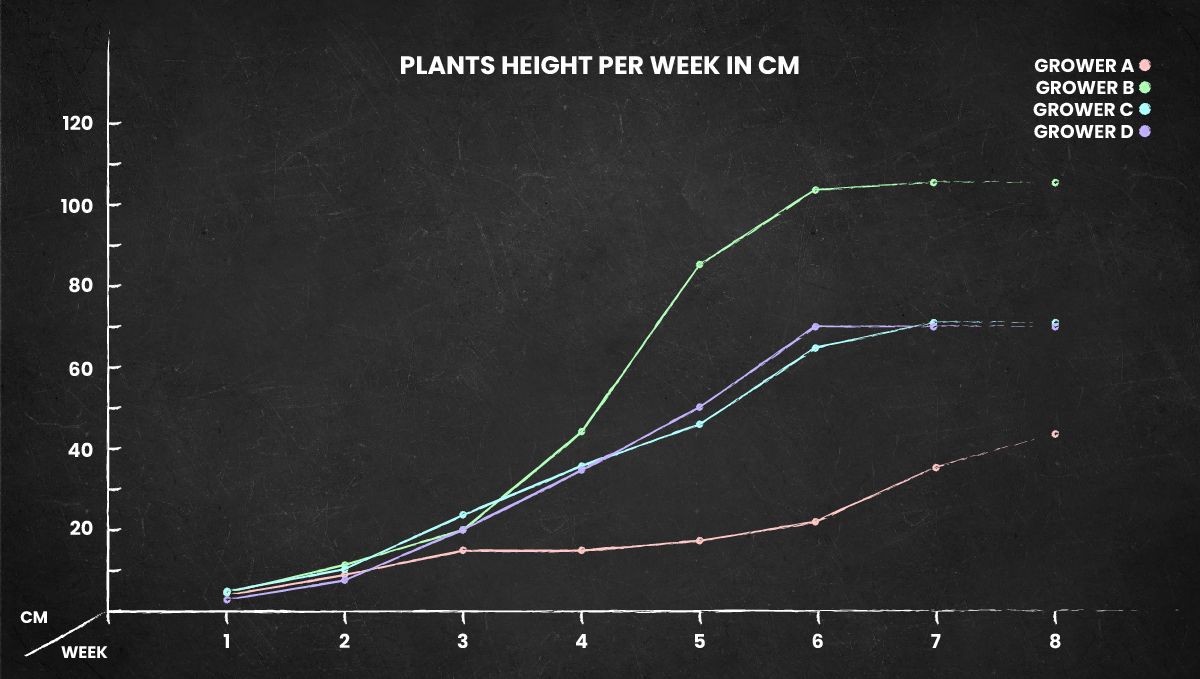
While Mimosa Cake Auto has a potential to grow quite tall, its final size depends more on training than anything else and thus is absolutely manageable. In the chart below, you can find all the info as to the height of the plants throughout the four grows we're reviewing:
When planning a large grow, don’t forget that even one plant smells, but many of them really stink a lot, so use a carbon filter.
9. Ripening And Harvest | Weeks 10-11
In the final weeks of an autoflower's life, it's important to keep the humidity low and the temperatures cool during the day and night. High humidity can harm mature buds, so it's essential to keep it low. Lower temperatures can help preserve the terpenes and THC in the buds.
In the last few weeks before harvesting, your buds may not grow bigger anymore, and you might think that they're ready to be harvested. However, there are still some important changes happening during this time. The texture of the buds will become denser, making them heavier, and the THC levels in the trichomes will continue to increase. So, instead of just looking at the size of the buds, it's important to use other indicators to determine when they are ready to be harvested.
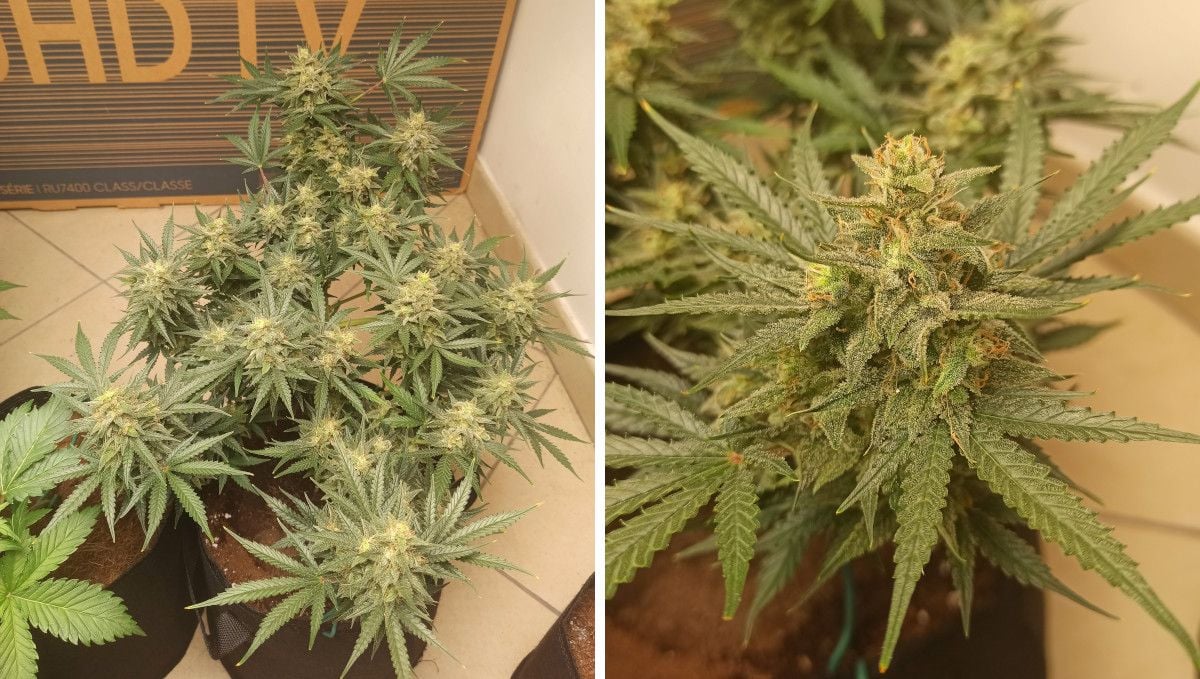
A breeder's specifications can provide an idea of when your plants will be ready to harvest, but it's not the most precise method due to the possibility of phenotypic differences and other factors affecting flowering time. A more accurate approach is to observe the color of the female hairs, or pistils, on the buds. When the pistils are still white, the buds are not ready, but when they turn brown or orange, it's likely that the harvest window is approaching. Another sign of readiness is when the leaves begin to fade and the plant takes on an "autumn" appearance.
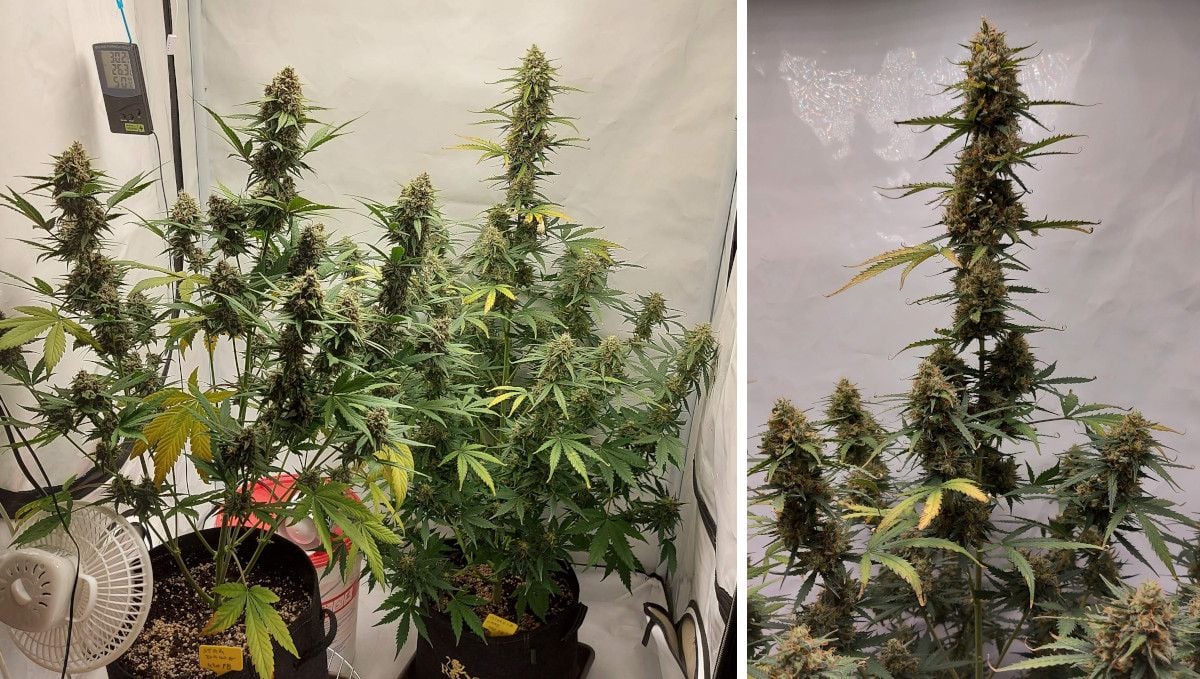
To determine if your marijuana plant is ready for harvest, the most reliable way is to use a 60-power hand microscope to examine the trichomes. By doing this, you can see the color of the trichomes, which indicates when the THC level is at its highest. When the trichomes are clear, they have a low THC level. Cloudy trichomes mean the THC content is at its peak, and as it starts to degrade, the color changes to amber.
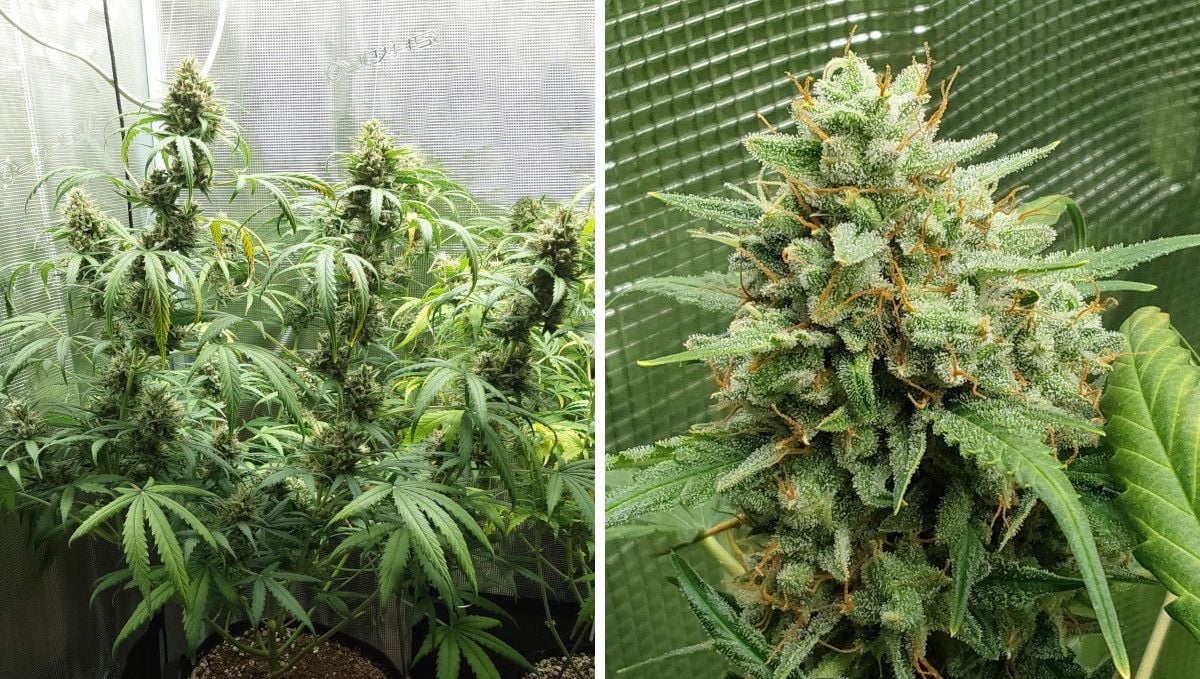
As you wait for the trichomes to mature, remember to stop giving your autoflower any nutrients and switch to pure water at some point. This process is called flushing and can take up to two weeks in soil, but less in hydroponic and coco grows. The purpose of flushing is to remove accumulated salts, resulting in clean and flavorful smoke that is not harsh on the throat. During the flushing process, the plant will start to fade as it uses up stored resources, and the leaves will lose their chlorophyll.
10. Drying, and Curing
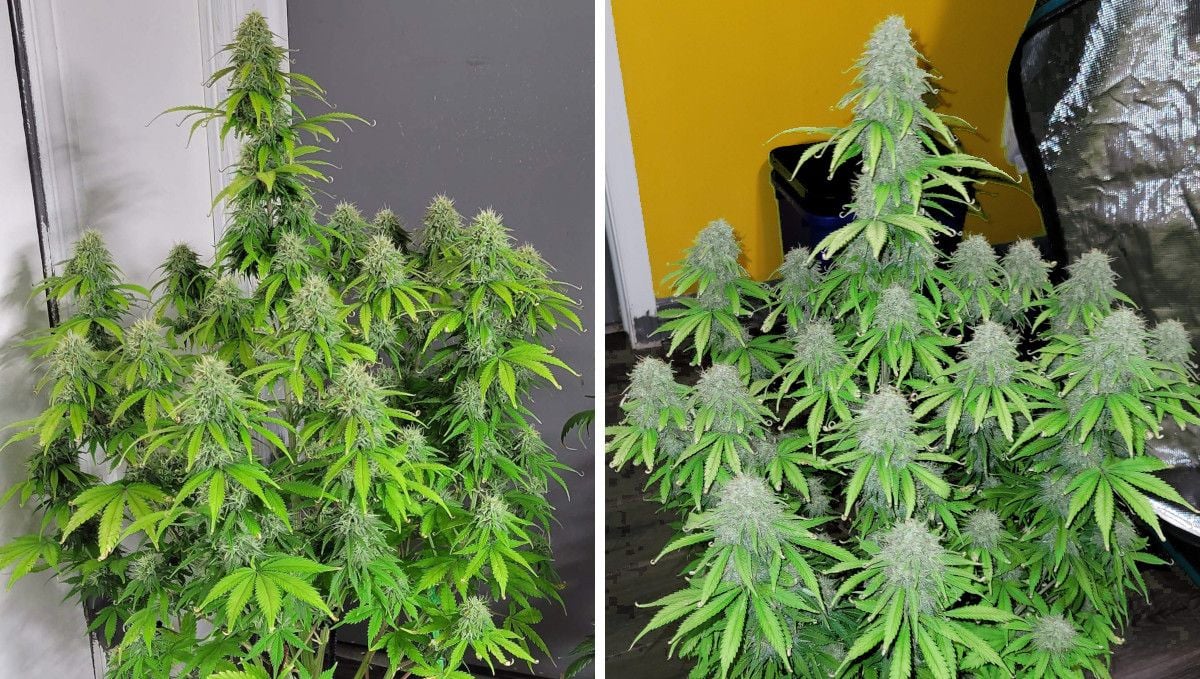
After you harvest your autoflower, there are still important things to consider when drying and curing your plants. Take your time with both processes and do them properly. Drying should occur in a cool and well-ventilated room and can take around 7 to 10 days. Once the buds have lost most of their moisture, you can remove them from the branches and put them in glass jars to cure for 2 to 3 weeks or more. Remember to open the jars once or twice a day to ‘burp’. If you forget it even once, the buds will probably get moldy.
11. The Outcome
Looking through all those Mimosa Cake Auto grow diaries, we found enough proof that this autoflower is very productive as it tends to grow multiple branches with big, dense, and heavy buds growing on each of them. So, big yields is something that you can count on in any setup and using any method.
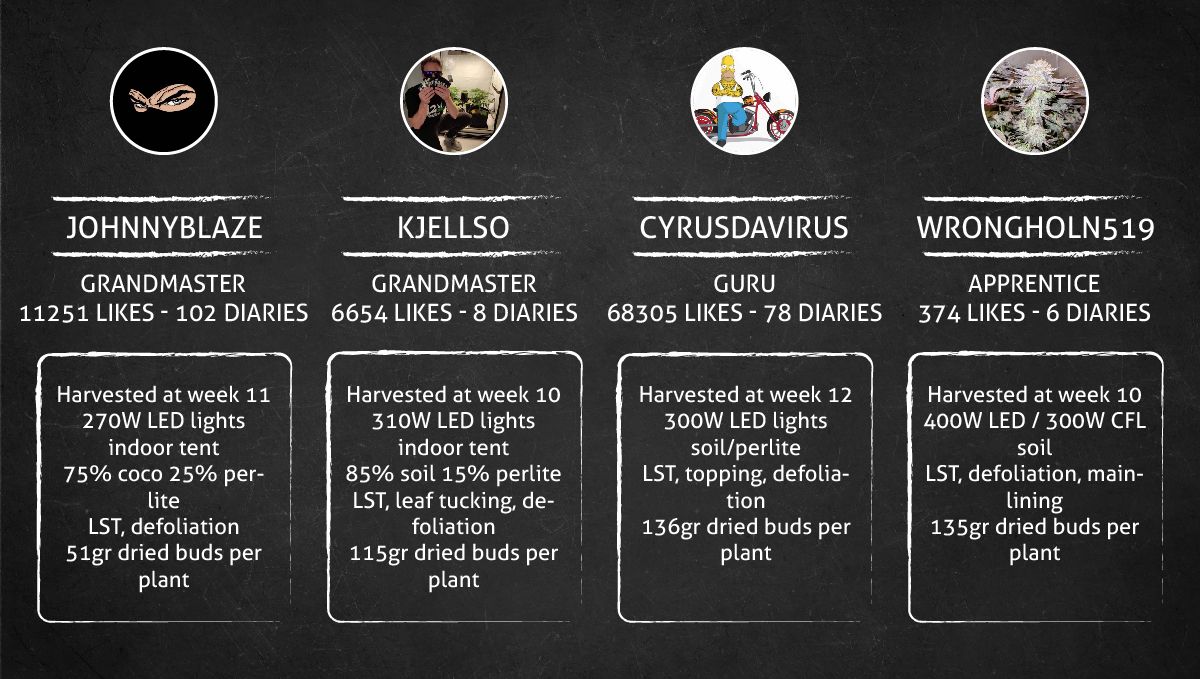
The first grower in our review kept his Mimosa Cake Auto short and its canopy flat so that the buds were uniform in size and looked like compact and resinous nuggets. They collectively weighed 51 g (1.8 oz) dry.

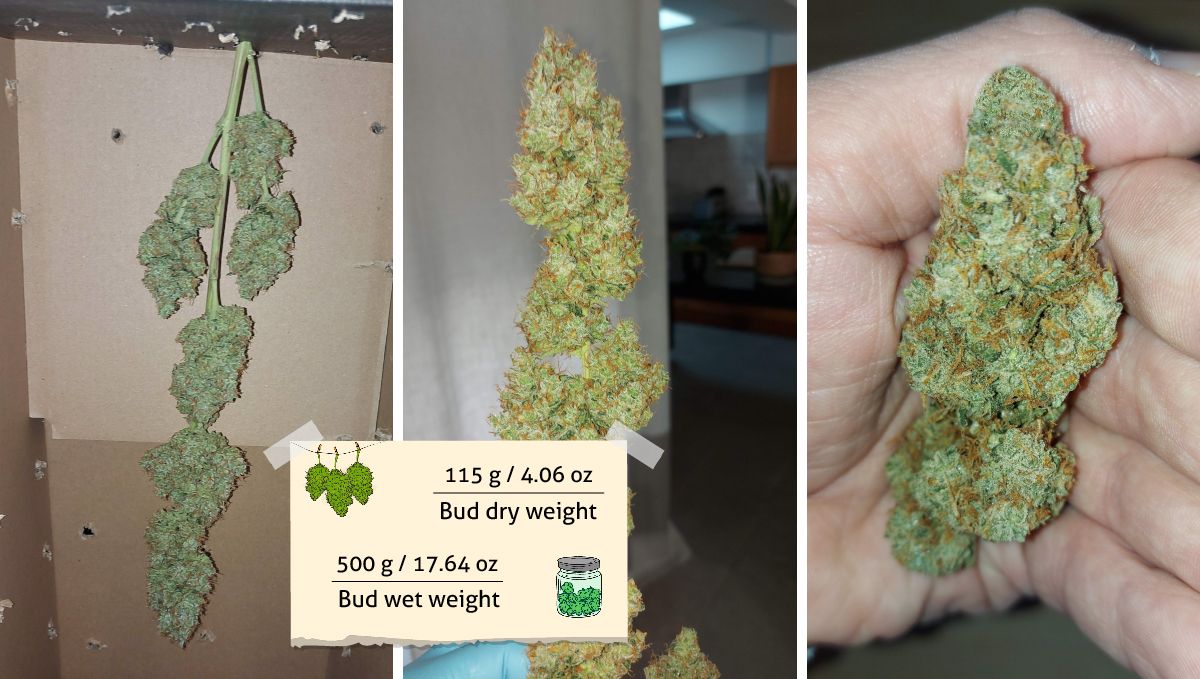
The second grower let his Mimosa Cake Auto stretch much more than the first, but his powerful grow light compensated for the increased distance. The internodes might have been too long, but even the lower buds were tight and heavy and they all weighed 115 g (4.06 oz) when dried and cured.
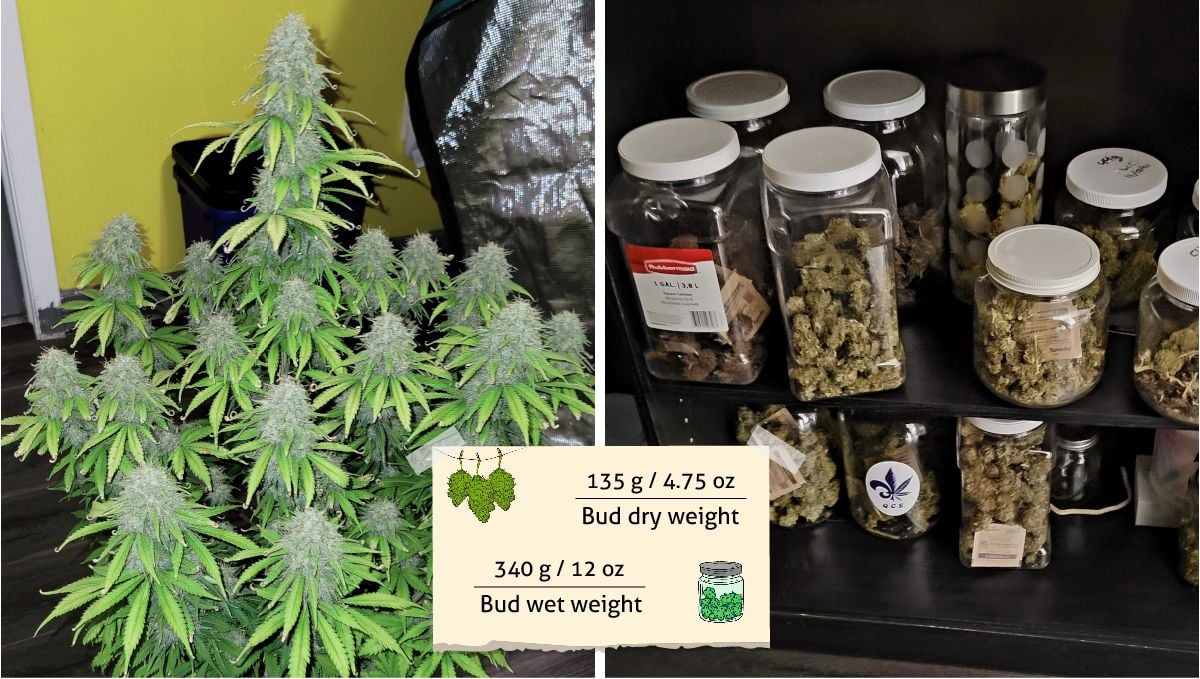
The third grower's Mimosa Cake Auto was big and bushy, with many buds which collectively weighed 97.16 g (3.43 oz) -- astonishing for such a short-flowering plant.
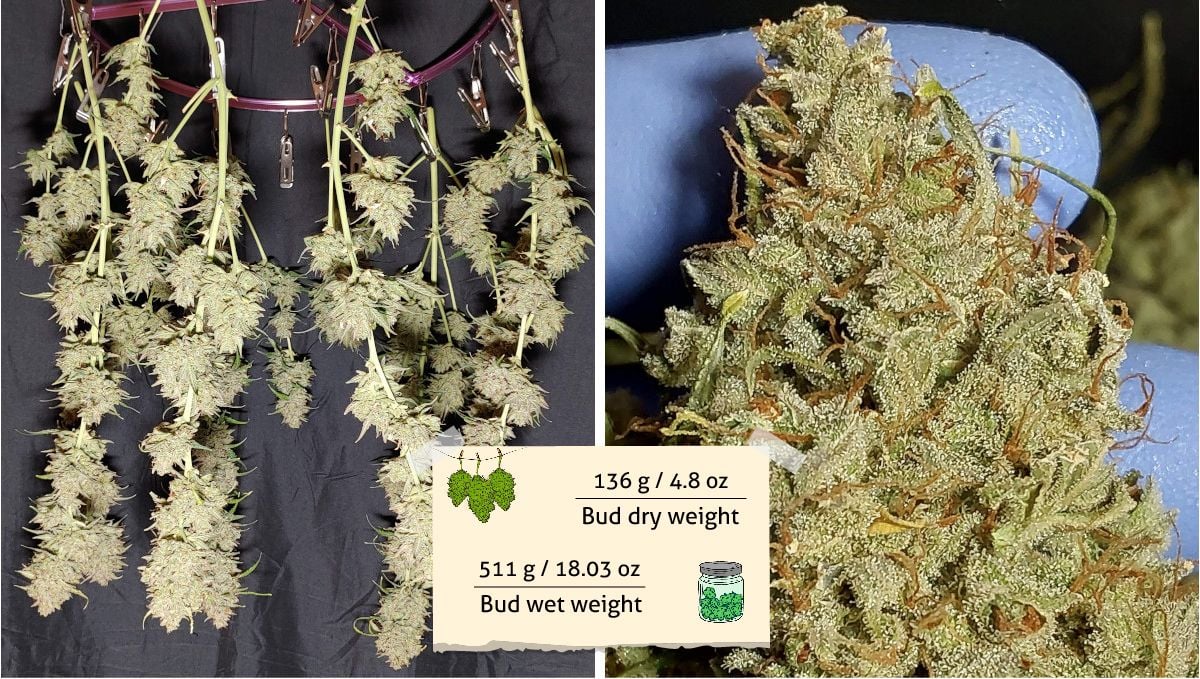
Finally, the fourth grower let his three Mimosa Cake Auto plants grow freely, and although he was forced to supercrop one particularly long branch, his yield set the record in our comparative review -- he harvested 464 g (16.37 oz), or 155 g (5.47 oz) per plant.
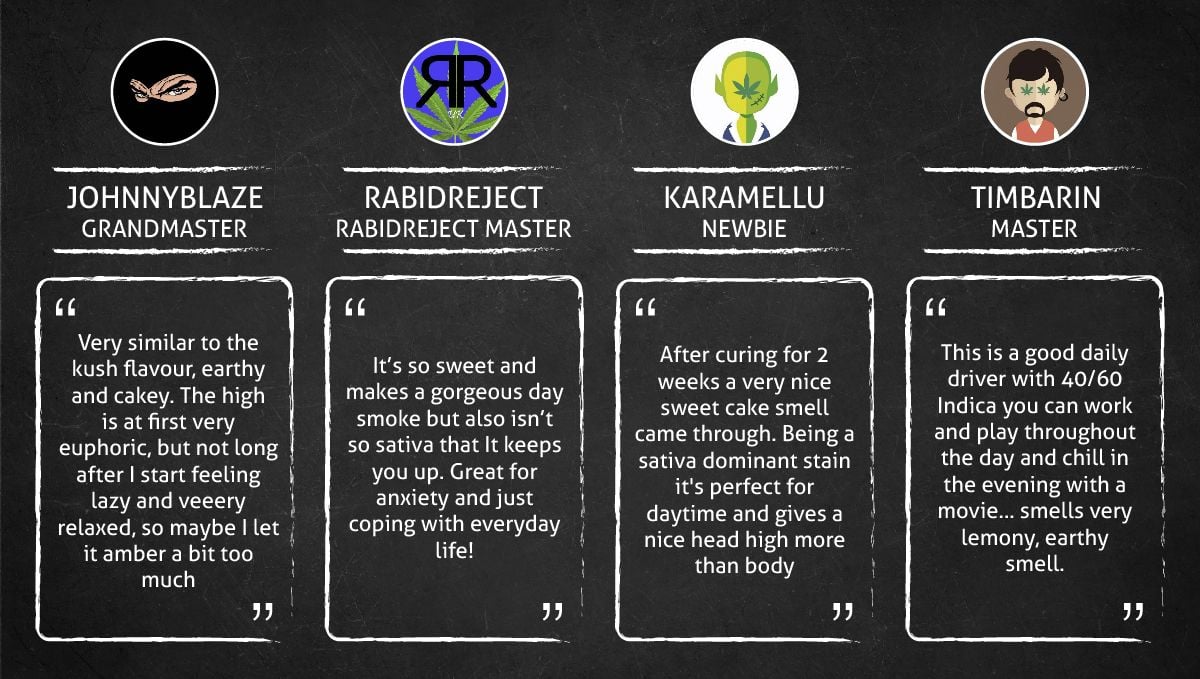
We have analyzed smoke reports from a total of 13 growers who were kind enough to describe their experience with the finished product, and based on them, there seems to be a common theme of sweet and fruity aromas with cake or lemon undertones emanating from Mimosa Cake Auto buds. The taste is often described as earthy, with cake or citrus notes. The effects are predominantly uplifting and euphoric, with a mellow and relaxing finish. The strain is recommended for daytime use, as it allows for productivity while still providing a pleasant high. Overall, Mimosa Cake Auto appears to be potent and flavorful, with a balanced and enjoyable effect.
11. In Conclusion
As we have seen from our week-by-week guide, Mimosa Cake Auto is an obvious choice for those looking for an easy-to-grow strain. While none of the growers employed high-stress techniques for canopy management, two of them did a lot of low-stress training, and that allowed them to better use the available space and light and get great results at harvest. The other two didn’t rely on training so much, and this approach also led to above-average results.
Mimosa Cake Auto also proved resistant to heavy defoliation and in one instance, reacted well to supercropping.
Another thing that grabbed our attention was that three out of four gardeners chose soil as their medium, but they got even better yields than the one who chose coco. It doesn’t mean coco is less effective, but shows that even a basic soil grow guarantees a great outcome.
Whatever your preferred style of cultivation or experience level, Mimosa Cake Auto is sure to deliver her goods. Happy growing!





Comments