Trainwreck Auto Cannabis Strain Week-By-Week Guide

- 1. History
- 2. Specifications
- 3. Week-by-week guide
- 3. a. Germination - week 0
- 3. b. Vegetative stage - week 1
- 3. c. Vegetative stage - week 2
- 3. d. Vegetative stage - week 3
- 3. e. Pre-flowering stage - week 4
- 3. f. Flowering stage - week 5
- 3. g. Flowering stage - week 6
- 3. h. Flowering stage - week 7
- 3. i. Harvesting - week 8
- 4. Terpene profile
- 5. Type of effect
- 6. In conclusion
1. History
A favorite amongst old-school consumers, Trainwreck’s origins are unknown because there are a couple of different stories. However, the most common one is that Trainwreck originated in Humboldt County, Northern California, and was bred from a Thai Sativa, Mexican Sativa, and Afghani Indica landrace strains
The story says that back in the ’60s-’70s, there was a trainwreck near a big outdoor crop. The two Californian brothers growing said crop were worried that the trainwreck could bring unwanted attention so they decided to harvest early and sold it as it was a new strain called Trainwreck. Although this is the most common story out there, there’s much debate. Some even claim that this strain originated in the city of Arcata. The strain became a global sensation and nowadays it's present in most reputable seed banks, including autoflower versions of the strain!
2. Specifications
This classic old-school gem was improved by the Fast Buds team and thanks to the hand-picked genetics, we can now offer a fast-growing strain with impressive yields and up to 22% THC in as little as 8-9 weeks. Taking around 56-63 days from seed to harvest, it’s a very resistant strain that can grow up to 120cm, developing a relatively homogeneous structure and yielding up to 550 gr/m2 indoors and up to 150gr per plant outdoors.

Thanks to the 22% THC percentage, you can expect an overall balanced yet potent effect that starts as a stimulating head high that gets you comfortable and cozy before deeply relaxing you and relieving pain without leaving you couch-locked. The strong effect comes with a sweet lemon and pine aroma with spicy undertones that makes for mouth-watering extractions!
3. Week-By-Week Guide
Here’s a general overview of the conditions kept throughout the whole grow cycle. Remember that this week-by-week guide serves to provide an idea of what to expect with our Trainwreck auto.
| Grow Conditions Specifications | |||
|---|---|---|---|
| Light Fixture: | LED | Nutrients: | Organic |
| Grow Space: | Indoor | PH level: | 6.5 |
| Temperature: | 21 - 26°C | Life cycle: | 8 - 9 weeks |
| Humidity: | 65% | Substrate: | Soil/Coco |
This means that in similar conditions you’ll get fairly similar results but you can get slightly different plant growth (or completely different) depending on your specific growing style and conditions, pot, fertilizers, etc...
Germination - Week 0
This grow guide starts by germinating a Trainwreck Auto seed directly in the final pot. This isn’t recommended for beginner growers because you can end up watering in excess and end up drowning your seed. So if it’s your first time we recommend germinating in a glass of water, this will increase the chances of success. Alternatively, you can place your seeds between two sheets of paper towel and moisten them using a mister bottle. These two methods give you the advantage of being able to physically see your seeds throughout the germination process. You’ll know exactly what their status is throughout this early stage of the growing cycle; you can simply discard seeds that aren’t germinating, and cater to those that show signs of life. Once the initial taproot reaches a length of 1–2cm, simply transfer them into a container filled with a high-quality growing medium.
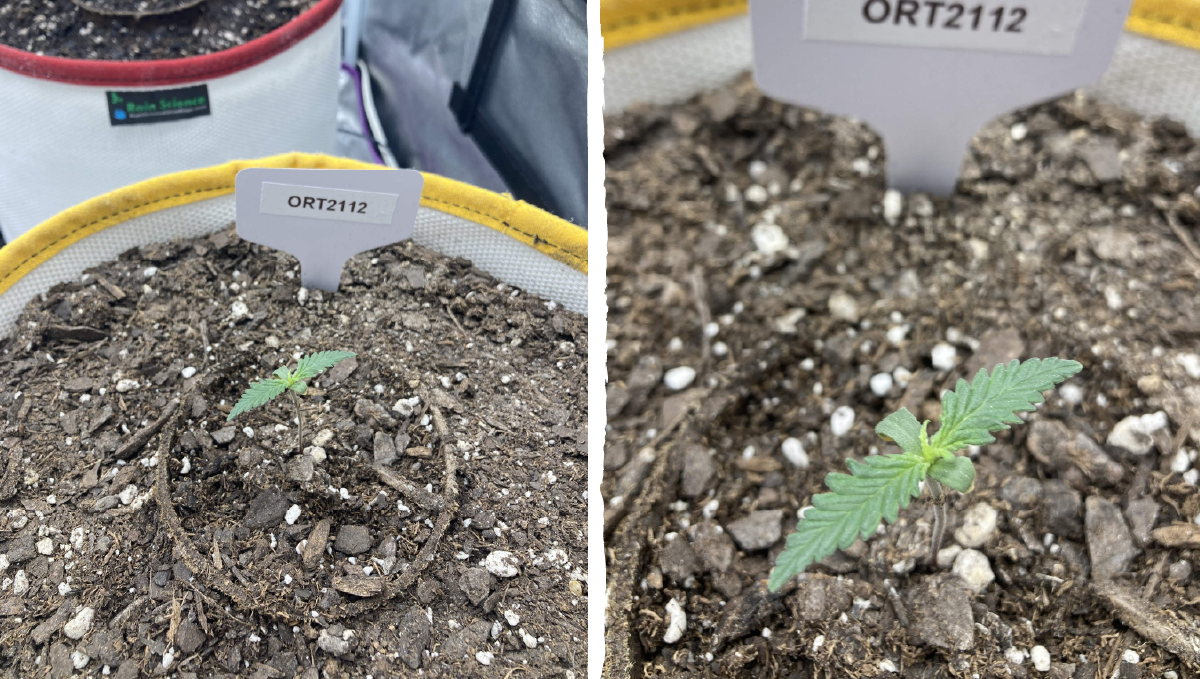
Now, if you have a couple of grows under your belts you can germinate the seeds directly in the substrate, just make sure to keep the temperatures between 18 - 25 °C and relative humidity ranging between 70-80%. If you don’t have a humidifier and are having trouble maintaining the right humidity levels you can place a plastic cup to help maintain higher humidity. Sowing your seeds directly into the substrate comes with several advantages.
For one, you don’t need to risk stressing your seeds by transferring them to a new environment after they sprout externally. Secondly, this gives your seed the opportunity to immediately come into contact with beneficial microbes within the soil that inoculate roots and help to defend them against potentially fatal fungal disease. Lastly, roots that emerge directly into the soil are free to expand downwards as soon as possible, resulting in a healthy and large taproot that will help to anchor the seedling down and protect against strong winds outdoors.
Vegetative Stage - Week 1
If everything goes as it should, the seedling should come out of the soil by week 1. Once the seedling emerges you can remove the plastic cup. During this week you’ll see how your plant slowly starts developing a new pair of 1-fingered leaves before starting growing the “true leaves” (aka 3-fingered leaves or more).
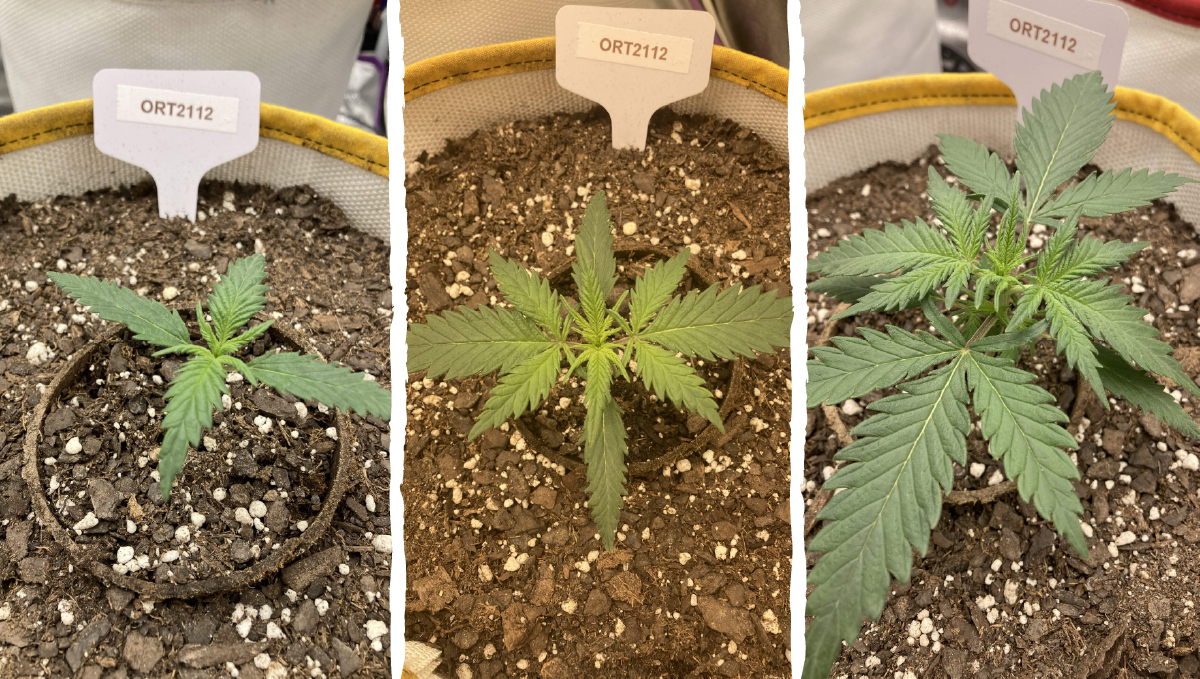
Depending on the substrate you’re growing in, you should start feeding Grow nutrients in a 3-1-2 ratio. Just remember that most products are designed for photoperiod strains so remember to start feeding using ⅛ of the recommended nutrient dose.

Vegetative Stage - Week 2
In week 3 from germination, the roots should have established and your plant should already be growing 3-4-fingered leaves and at least 3-4 nodes, meaning your plant is ready for plant training techniques. Keep in mind that all plants are different so even if your plant is not ready for training, it will probably be during the next couple of days.
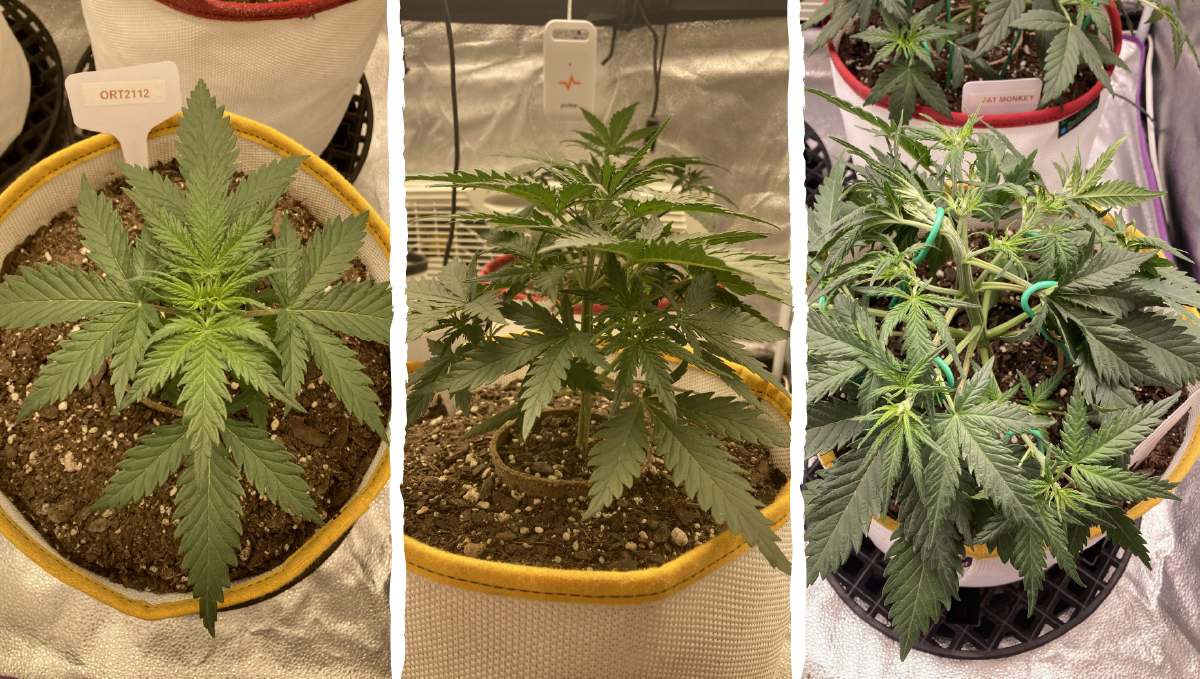
Keep in mind that it’s recommended to perform low-stress training over high-stress training due to being too stressful for autoflowers. This doesn’t mean that you shouldn’t top your auto, for example, but if you do it, do it carefully, ensuring the growing conditions are good enough for your plant to recover as fast as possible.
Vegetative Stage - Week 3
If everything is right, week 4 marks the week before the pre-flowering stage. This means that the flowering sites can gradually turn light-green and that soon the white hairs will start to appear. Remember that if you see any signs of nutrient deficiencies, now it’s a great time to fix them because your plants need a lot of food to start flower development.
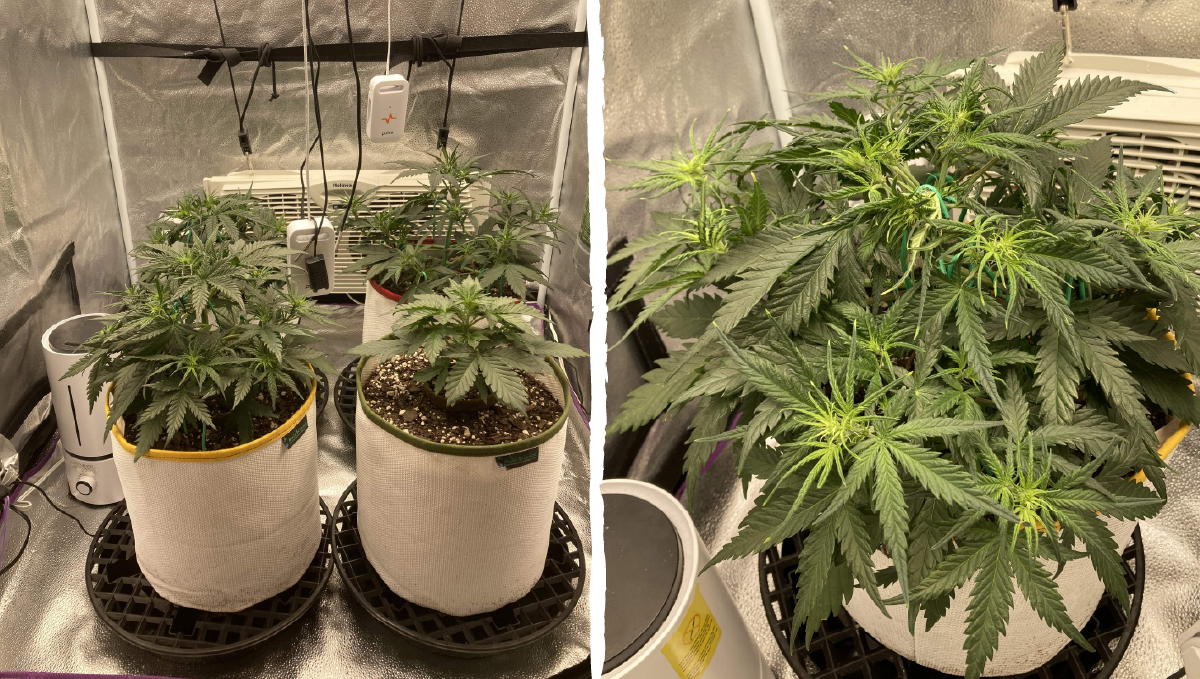
As always, keep an eye out for bugs and mold so that your plants start the flowering stage 100% healthy. In this case, the Trainwreck autoflowering seeds are all feminized but if you’re growing regular plants be sure to keep an eye out for male plants. Male cannabis plants grow pollen sacs 1-2 weeks before female plants start flowering and can end up pollinating your whole garden, so be careful!
During this time, your plants will benefit from high levels of nitrogen. This element helps to build amino acids, which are used by plants to create larger proteins that they use to grow and to facilitate enzymatic processes. Many synthetic fertiliser formulas contain high levels of nitrogen for this reason. However, if you prefer to take a more organic and natural approach, there are many different inputs you can apply during this stage. For example, vermicompost and compost teas have good amounts of nitrogen, alongside millions of beneficial bacteria and fungi. KNF preparations, such as fermented plant juice (FPJ) are also great plant food and inoculants during the vegetative phase of the growing cycle.
Pre-Flowering Stage - Week 4
After a couple of days with the light-green flowering sites, you’ll start to see the white hairs starting to develop. The appearance of the white hairs marks the beginning of the pre-flowering stage which is the transition from the vegetative stage into the flowering stage.
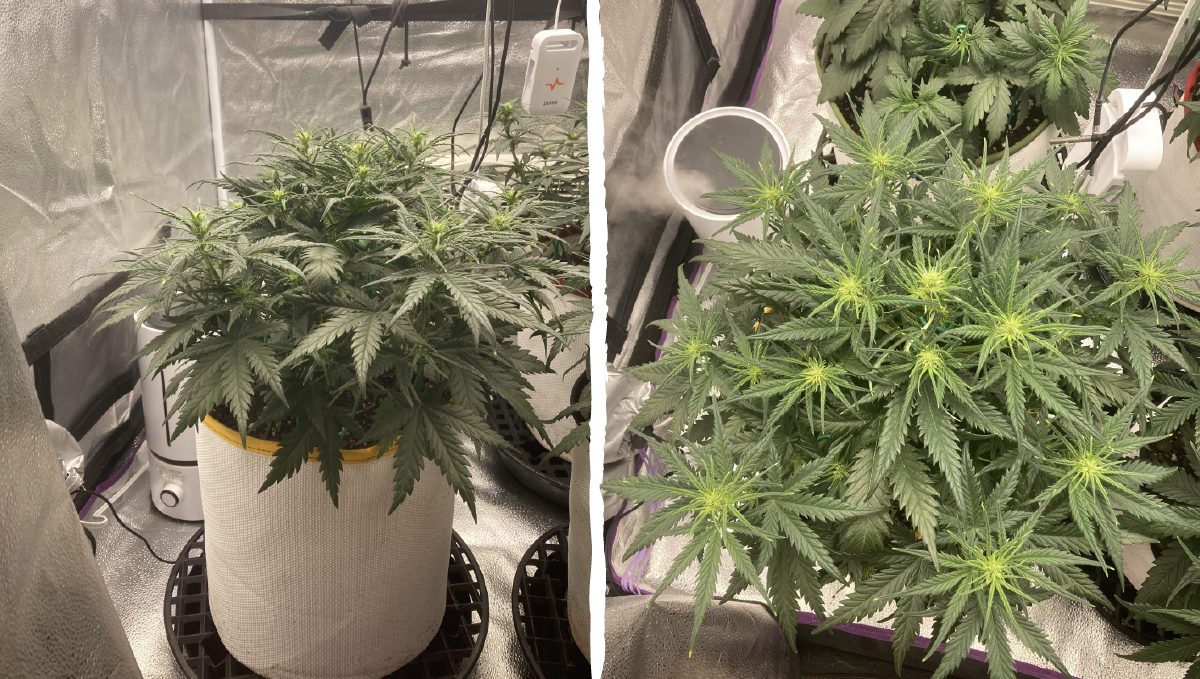
When cannabis plants start producing buds they need more food, mainly more phosphorus, and potassium so once you see the pre-flowers appearing make sure to slowly start feeding Bloom nutrients and depending on the substrate, add the secondary nutrients cannabis needs such as calcium and magnesium.
Flowering Stage - Week 5
Once the buds start to get shape, your plant is officially in the flowering stage. By now the trichome production should be apparent and the delicious cannabis smell should start to get stronger so if cannabis smell is an issue for you, remember to get the carbon filter ready.
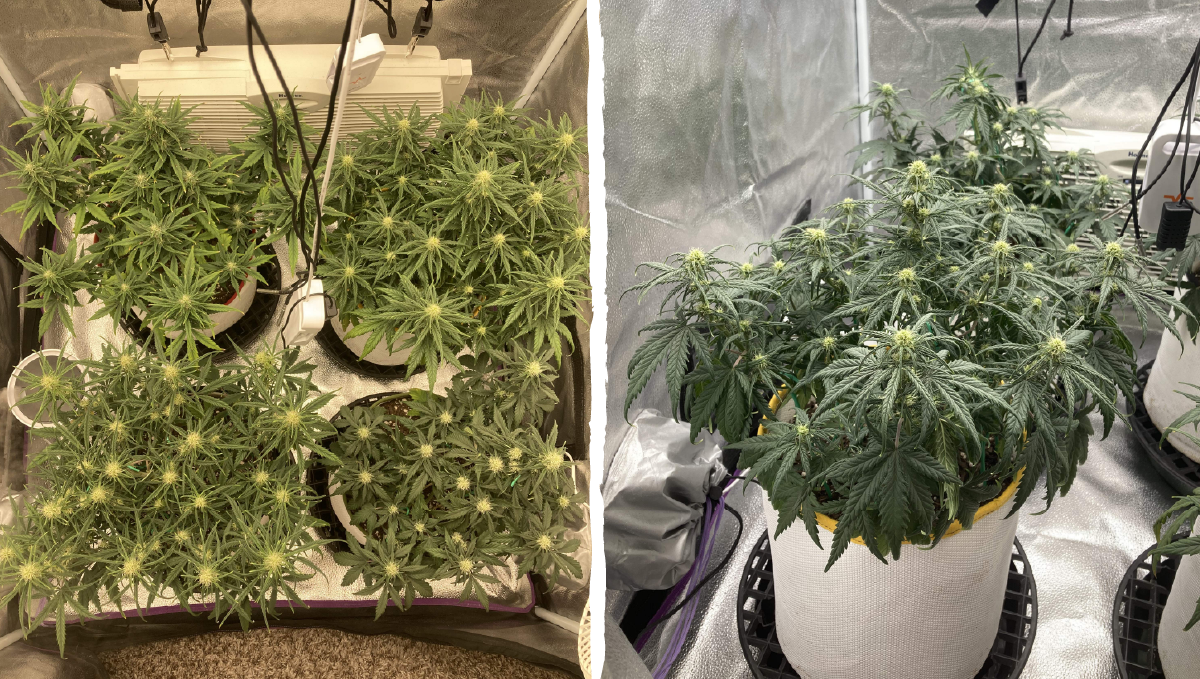
The smell can not only attract unwanted attention but also bugs so if you’re growing in soil for example (which contains organic matter) check every day for any signs of insects. It’s a good idea to place yellow sticky traps around your plants or spray your plants with a natural insecticide as a preventive measure.
Flowering Stage - Week 6
This week marks the beginning of the second half of the flowering stage. By now, your plant should be reeking of a super delicious smell and the buds should be covered in trichomes. Also, you’ll notice that your plant will not grow anymore because it’s focusing its energy on the buds, so despite the branches not growing anymore, the buds should be fattening up beautifully.
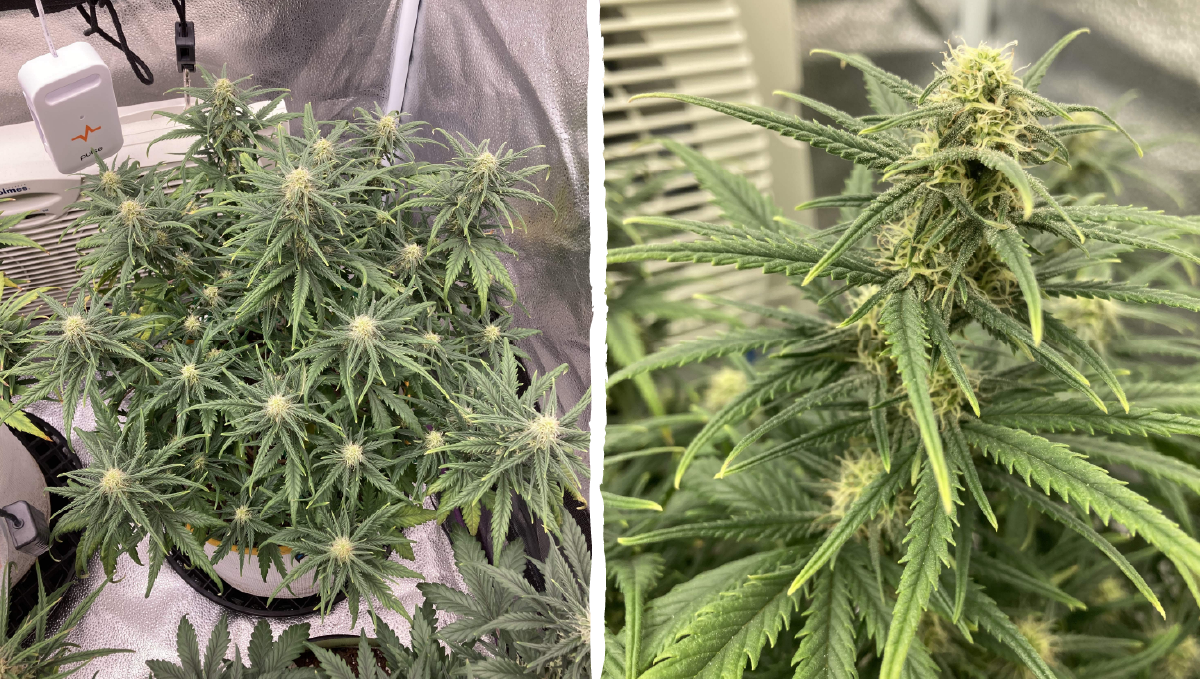
Remember to always keep an eye for bugs because insects and even mold can hide inside the buds, so make sure to adjust the fans in order to provide more airflow between them and avoid foliar sprays!
Flowering Stage - Week 7
Week 8 from germination is the last week before harvesting. By now, the buds should look almost completely formed and covered in trichomes. Depending on the type of light you’re growing under, the hairs may start turning brown and wilting but don’t worry, it’s completely normal.

Depending on the fertilizers you’re using, it’s a good idea to start flushing your plants with plain water to wash off the excess nutrients. In this case, the trainwreck Auto still needs one more week but it is possible that under your growing conditions the plants are ready, so pay close attention to the trichomes!
Harvesting - Week 8
The state (or color) of the trichomes is the standard practice of when to harvest so it’s highly recommended you get a magnifier (preferably a 40x jewelers loupe) and pay attention to the color of the trichomes.
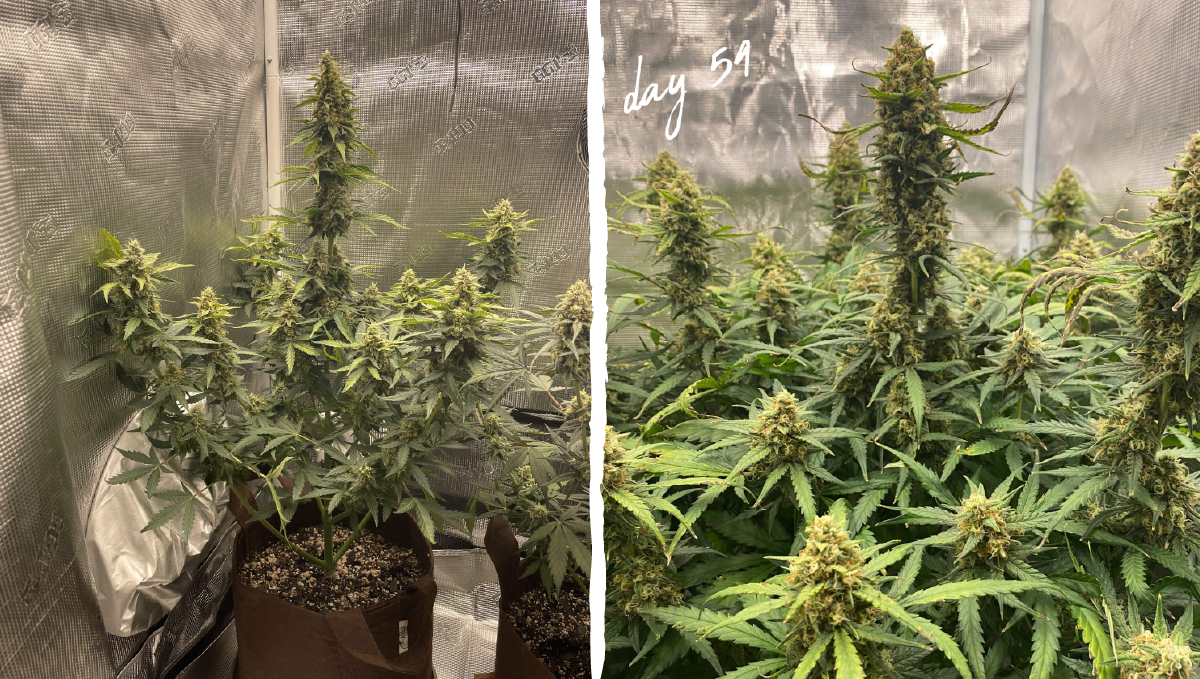
Once the trichomes are on point, your grow cycle has officially come to an end and it’s time to harvest. Remember to get your drying room ready before chopping down your plant. Even if you don’t have a dedicated drying room, grab a couple of boxes or make room in your closet and get ready to start drying!
4. Terpene Profile
Trainwreck Auto produces a delicious mouth-watering terpene mix composed of the following main terpenes: Caryophyllene, Myrcene, and Pinene, and the following secondary terpenes: Humulene, Linalool, and Limonene.
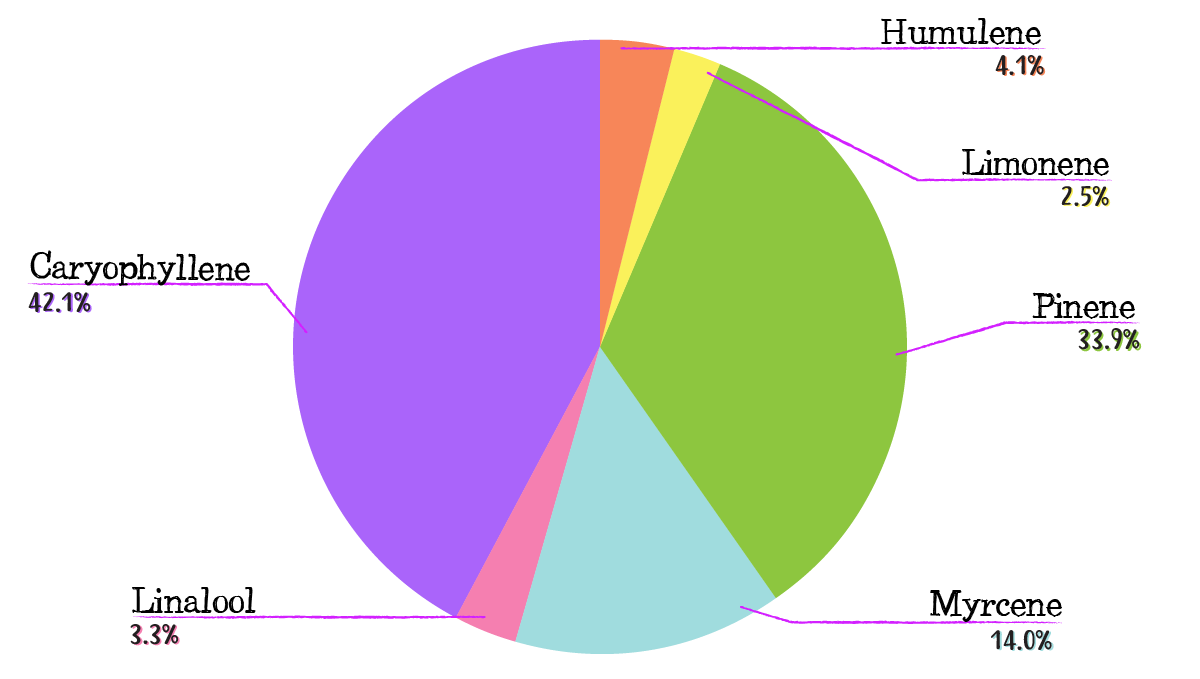
This mouth-watering terpene mix offers a complex lemon aroma with sweet hints on the inhale and unique peppery and spicy touches on the exhale that leave your mouth with a sweet and sour acridness on your whole mouth.
5. Type of Effect
Along with the delicious terpene profile comes a really cozy and energizing high that gets you comfortable and in a peaceful state of mind, feeling good with everything and everyone.
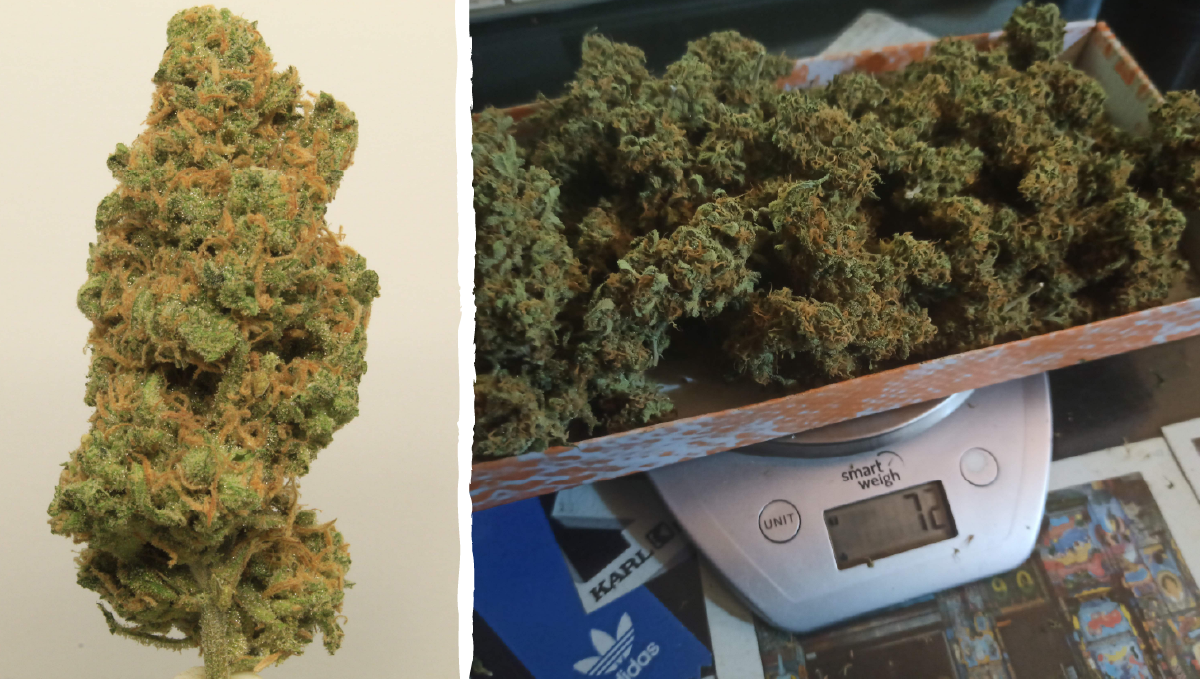
The energizing effect gradually turns into a more relaxing corporal high that won’t leave you sedated or couch-locked but will surely alleviate muscle pain and relax you deeply.
6. In Conclusion
Trainwreck Auto is a must for Sativa-leaning hybrids with sweet flavors. This excellent autoflowering strain is a must for beginners looking to grow top-shelf flowers with ease and for hash makers looking for distinctive terps. If you’ve grown our Trainwreck Auto before, feel free to share your experience with fellow growers by leaving a comment in the comment section below!







Comments