Wedding Cheesecake FF Cannabis Strain Week-by-Week Guide

- 1. Grow specification
- 2. Grow set up
- 3. Germination and seedling stage | week 1
- 4. Early veg | week 2
- 5. Mid veg | weeks 3-6
- 6. Transition (pre-flower) | week 7
- 7. Early flower | weeks 8-9
- 8. Mid flower (bulk phase) | weeks 10-11
- 9. Ripening and harvest | week 12 (and beyond)
- 10. The outcome
- 10. a. Wedding cheesecake ff yield
- 10. b. Wedding cheesecake ff smoke report
- 11. In conclusion
Wedding Cheesecake Fast Flowering stands out as a true cannabis gem. This strain, a fusion of delightful genetics, offers a swift flowering cycle with impressive yields. Boasting versatility, it thrives indoors and outdoors, requiring minimal effort for a bountiful harvest. In short, it’s a must-experience strain for a journey into cannabis enjoyment.
Beyond great genetics, the end result of a grow depends on your cultivation expertise, and we hope our week-by-week guide will answer many of your questions, providing insights into this plant’s timeline, growing patterns, and the best practices for achieving maximum yields of top-shelf bud.
1. Grow Specification
Wedding Cheesecake Fast Flowering, born from the illustrious union of Wedding Cake, Cheese, and Wedding Cheesecake Auto, showcases a harmonious Sativa 65%/Indica 35% genetic composition. This strain is a speedy bloomer, with the harvest ready in just 7-8 weeks after flowering initiation. With an impressive size classified as XXL, its height can reach up to a majestic 300 cm (10 ft), making it a standout feature in any cannabis garden.
Indoor cultivators will be pleased with the bountiful yields of 500-650 gr/m2 (1.6-2.1 oz/ft2), creating a flourishing canopy of resin-laden buds. Outdoors, this beauty doesn't disappoint, offering a generous harvest of 450-800 gr (15-28 oz) per plant, rewarding your efforts with a cornucopia of cannabis goodness.
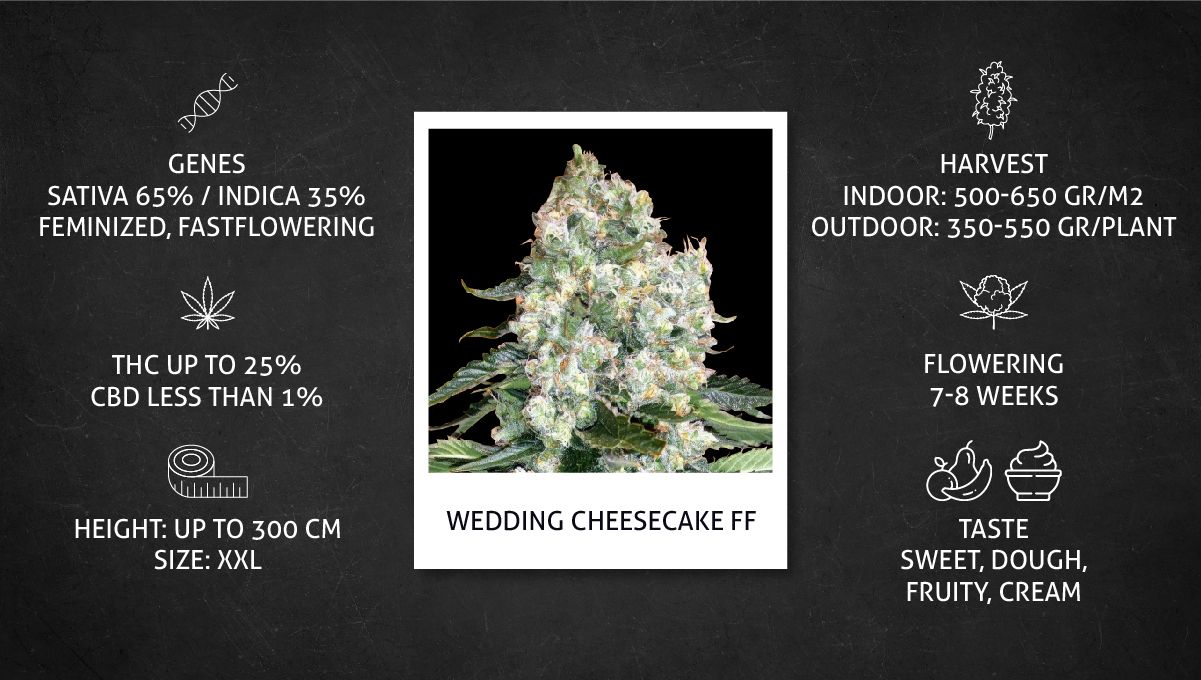
The THC content of up to 25% ensures a potent experience, blending an upbeat cerebral rush with a soothing body high. As for the taste, get ready for a sensory delight—sweet, doughy, fruity, and creamy notes dance on your palate, creating a symphony of flavors that truly sets Wedding Cheesecake Fast Flowering apart.
2. Grow Set Up
We're sure Wedding Cheesecake FF is a popular choice for outdoor growers living in cool climates with short summers, but most of the grow cycles on the growdiaries.com website describe the indoor cultivation of this strain. We've chosen 4 of them that are the most detailed and have the best quality pictures. In the table below, you can find some of the grow setup details for these 4 grows.
| Grow Space | Light | Medium | |
|---|---|---|---|
| A | 0.6 m2 | 300W LED | Soil/Perlite |
| B | 0.91 m2 | 300W LED | Clay Pebbles / Coco |
| C | 1 m2 | 310W LED | BioBizz Light Mix |
| D | 0.4 m2 | 650W LED | Soil |
Even this small sample shows a great variety of setups, solidifying the reputation of Wedding Cheesecake Fast Flowering as a highly versatile and adaptable strain, thriving equally well in any space and under any growing conditions.
3. Germination And Seedling Stage | Week 1
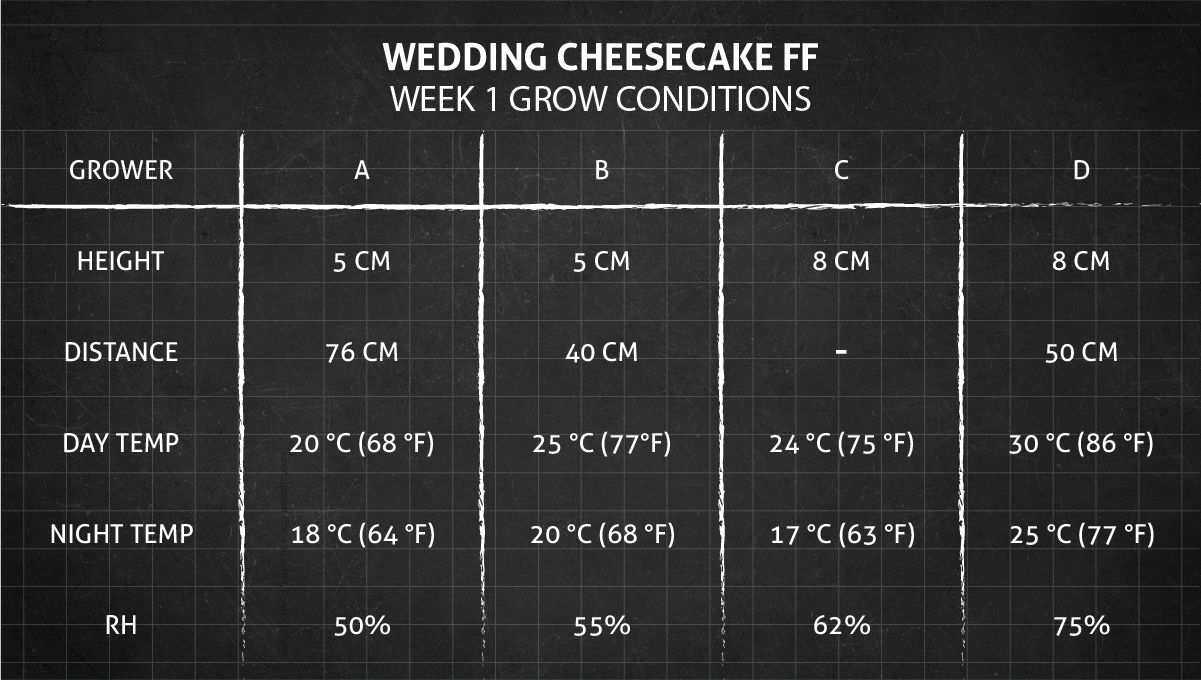
In the first week of cultivating Wedding Cheesecake Fast Flowering indoors, the key to success lies in establishing and sustaining optimal conditions. This phase is critical, as the seedling is susceptible to stunting if environmental factors deviate significantly. Of special importance is maintaining warm temperatures and high relative humidity during this crucial week, ensuring a nurturing environment for the seedling's early development.
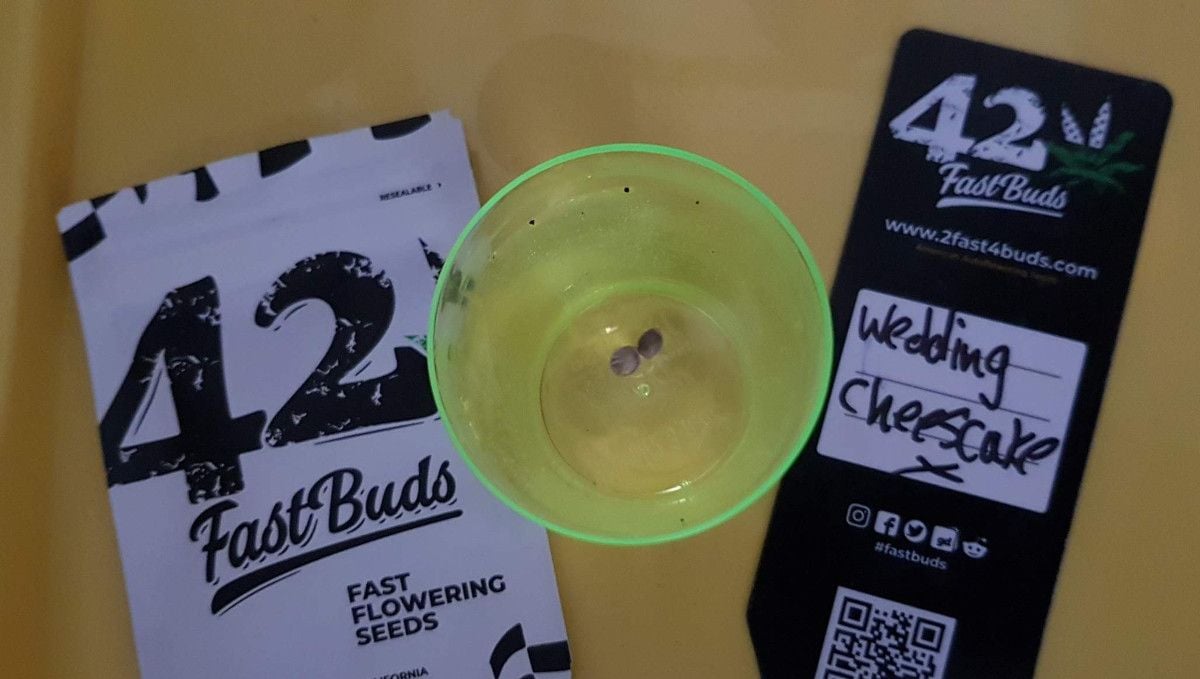
Germination kicks off the exciting journey of growing your Wedding Cheesecake Fast Flowering. Many growers swear by the method of pre-soaking seeds in a water glass for around 12 hours, or you can let them float and sprout in water if they're floaters. However, if they sink, be cautious not to leave them submerged for too long, as the embryos inside may not appreciate an extended diving session.
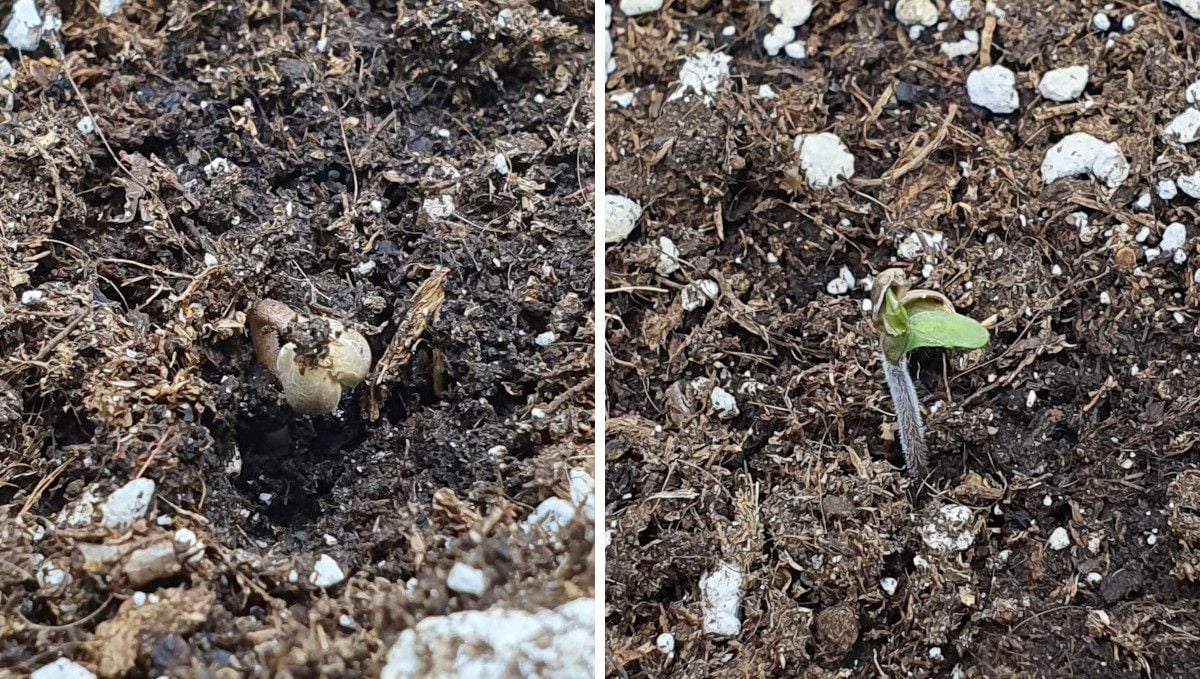
Whether your seeds took a pre-soak or are dry, you can plant them directly in moistened medium for germination. While this approach is natural, it has a tiny drawback – the suspense. You won't know if your seed is alive and kicking until it decides to pop up, a process that can take anywhere from under 3 days to a week.
Plant the seed at a depth of around 0.5 cm, keep the covering medium moist, and soon enough, your little seedling will emerge, hopefully shedding its shell in the process.
Now, the choise-of-container debate. Should you go big or start small with something like a solo cup? If you're diving into autoflowers for the first time, final containers from the get-go are often recommended. For photoperiod strains, you've got options. Solo cups might be just right for you – simple, convenient, and newbie-friendly. They sure make that watering routine a breeze.
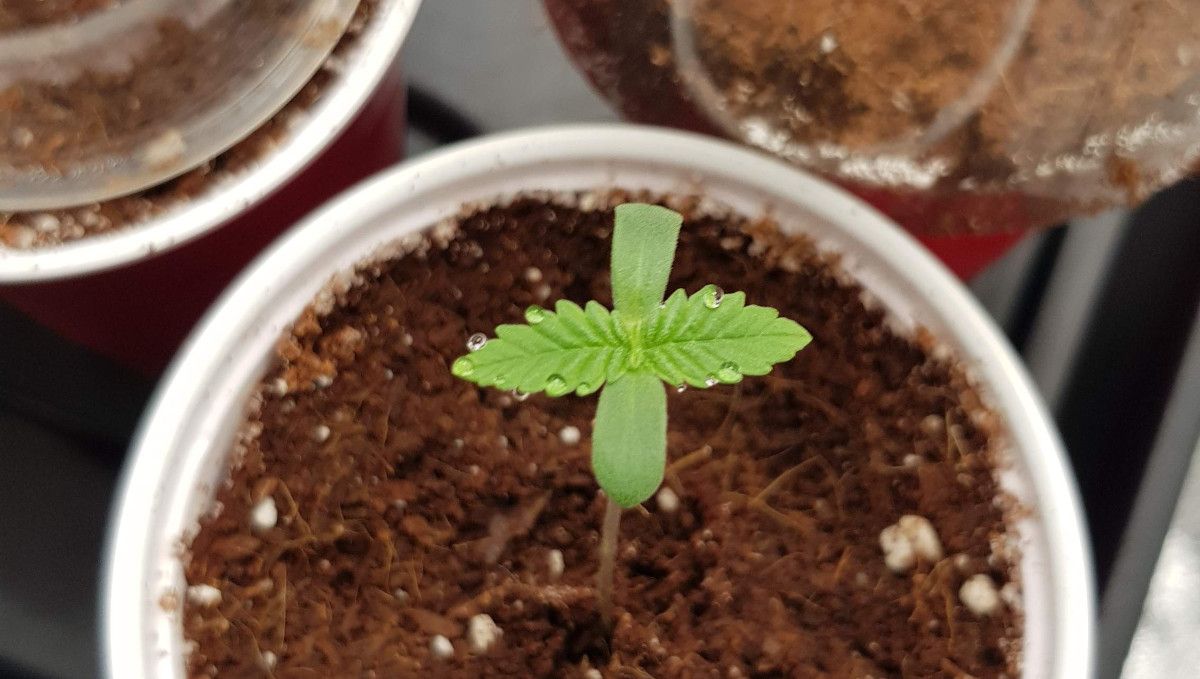
Seedlings are like babies—they don't need much light initially and can even hang out on a sunny windowsill for a week or two. If you prepare your green buddy for outdoors, a south-facing window is your best bet. Just keep an eye on harsh sunlight exposure, and don't let the cup or pot turn into a mini oven. Cool roots are happy roots.
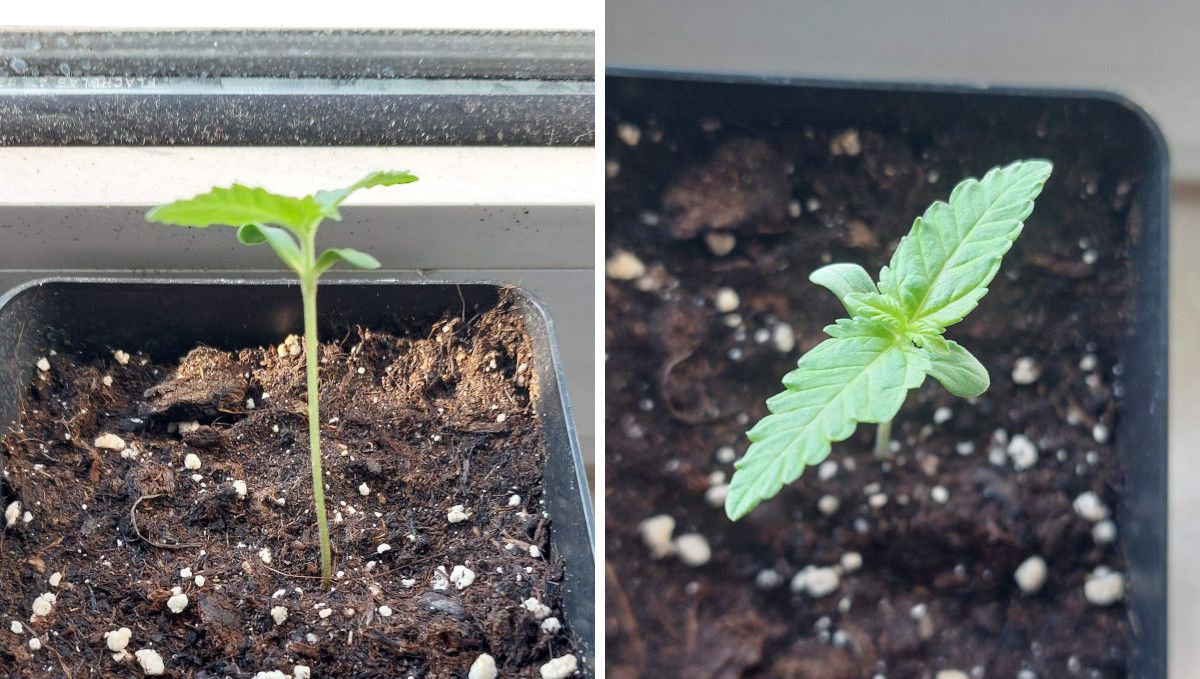
If you keep your Wedding Cheesecake seedlings in starter pots, watering is as simple as can be. A modest 50 ml each morning is enough to thoroughly saturate the medium and even produce some runoff. In larger pots, watering becomes a bit of an art. Don't try to soak the whole volume of the pot; just use a small amount around the stem's base, gradually widening the area as days pass.
4. Early Veg | Week 2
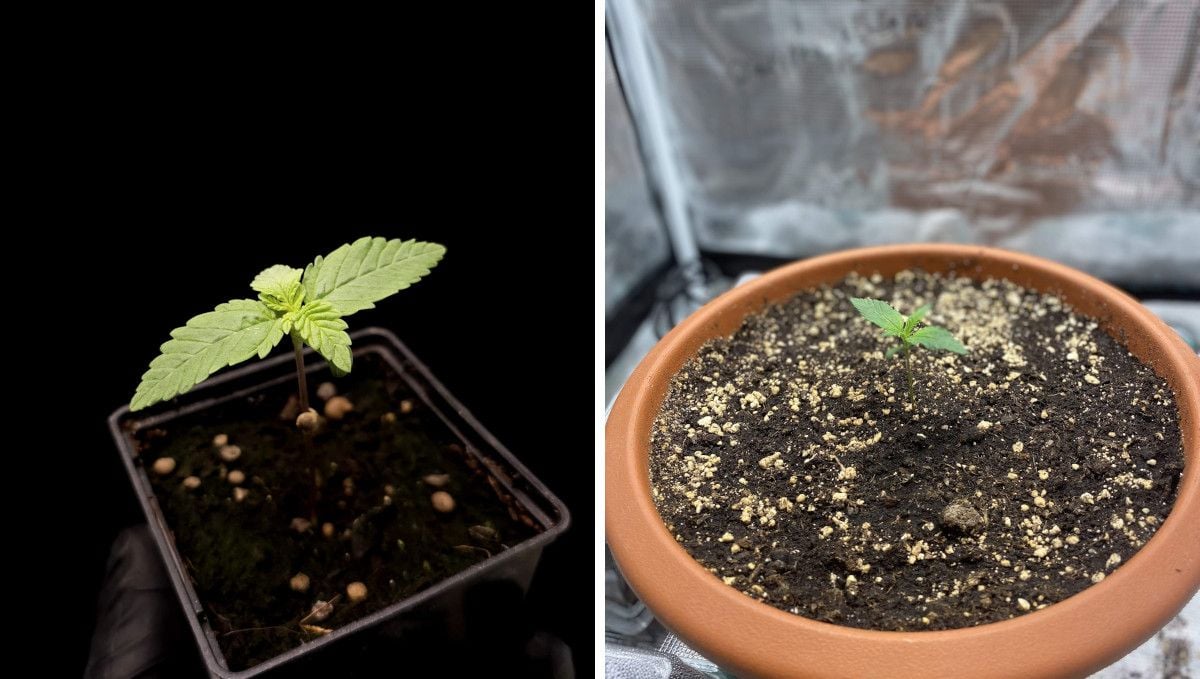
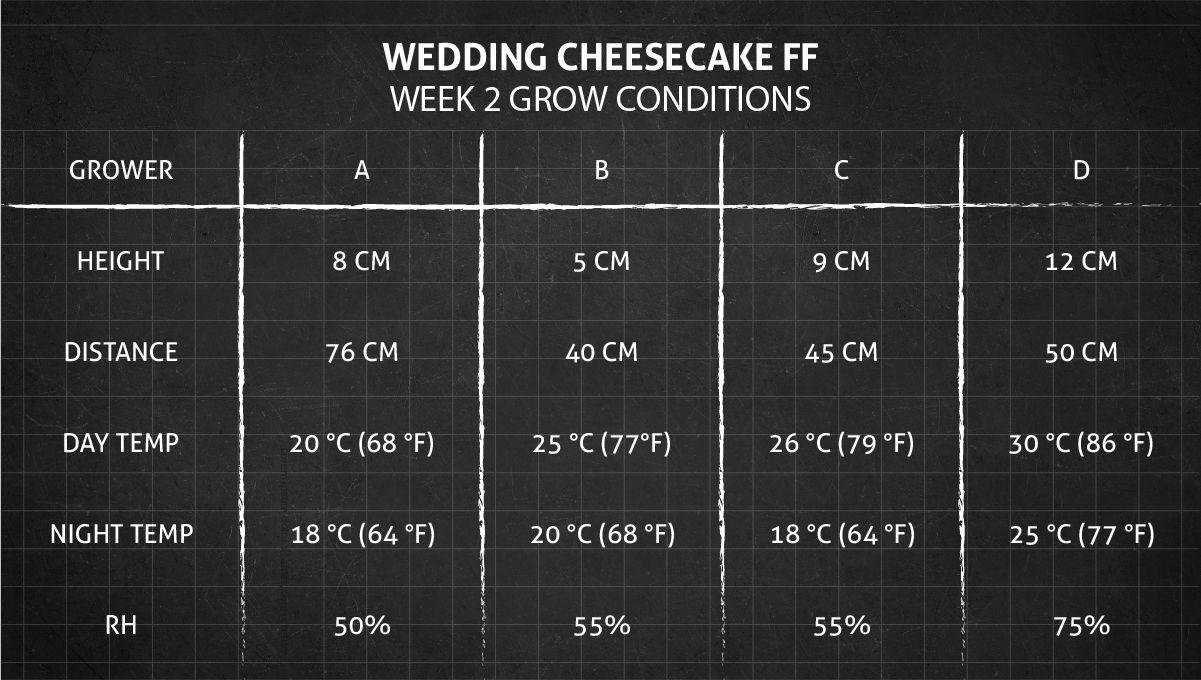
Entering the second week of cultivation, our little Wedding Cheesecake seedling is still a bit on the delicate side. It hasn't gained superhero strength yet, so it's crucial for the grower to continue playing guardian. Keep a close eye on the conditions, just like in the first week, with a special focus on temperature and humidity.
In the second week, the seedling stage hits its stride after a bit of a slow start in the initial week. Now, if your plant is liking its environment and the care you're offering, get ready for daily changes. A clear sign of a happy plant is each fresh set of true leaves outdoing the previous ones. Watch the leaflet count rise, starting with one on the first pair, graduating to three on the second, and a lively five on the third.
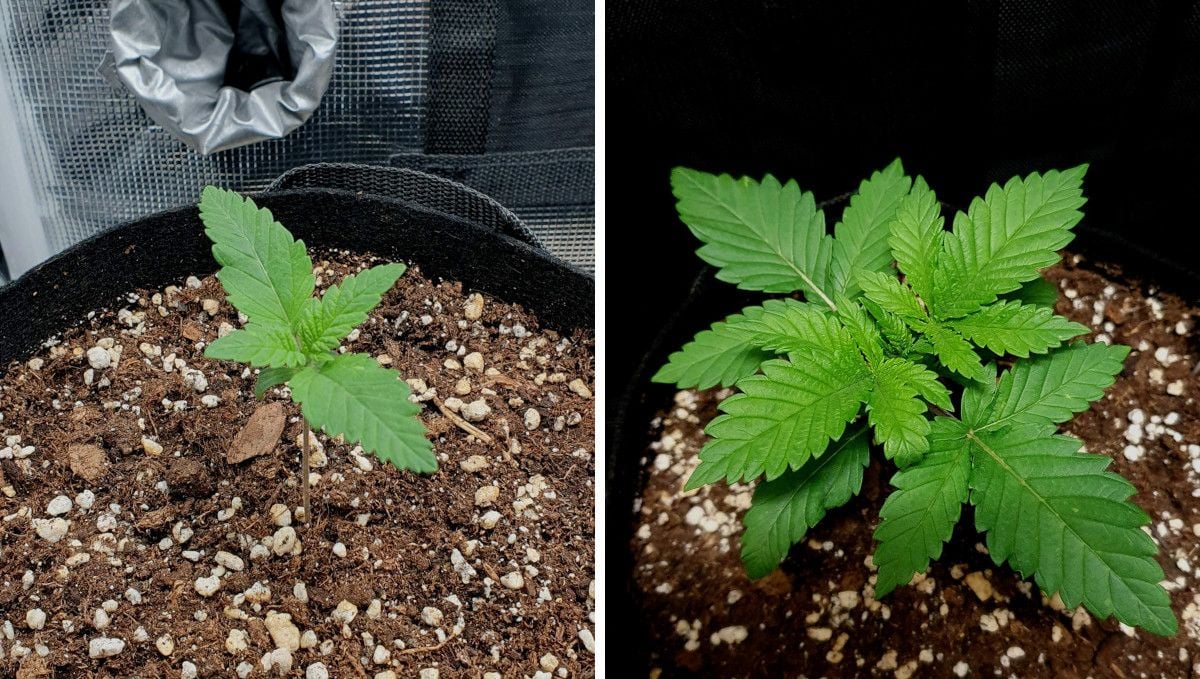
Week 2 isn't just about leafy affairs; there's more excitement brewing. Tiny new growth sprouts at the nodes, those junctions where the leaves' petioles meet the stem. These miniature green dots are the early promise of side branches. In bushier strains, these branches can rival the main stem in size and height, adding a dash of complexity to the plant's profile.

For the growers who love to play a bit of plant sculptor, here's a fun trick – bend and tie down the main stalk and do it as soon as the plant is a few inches tall. This simple procedure gives side branches an express ticket to the growth party, all while keeping stress levels low for the plant. It's like breaking the plant's fixation on its main top and redistributing its growth mojo to the sides. A little bending, a bit of tying, and voilà – your plant is now a bushier version of its former self.
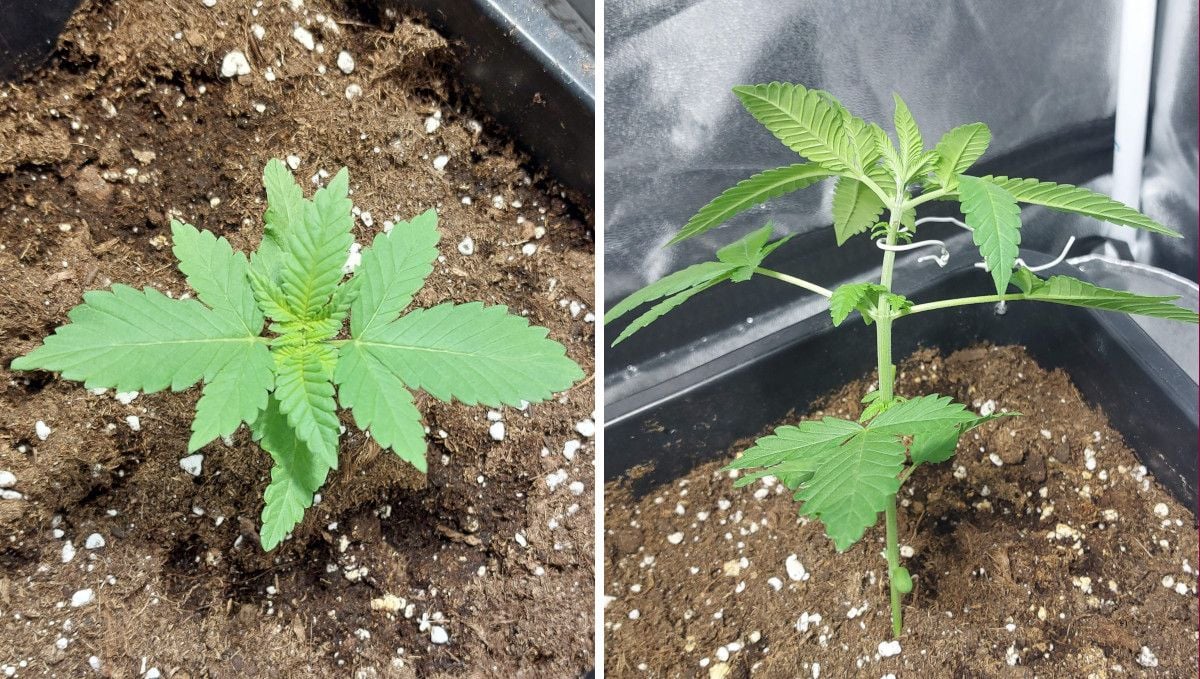
Timing is everything, especially when it comes to the young plant's housing situation. That solo cup has served its purpose, but now it's time for a larger pot. While the above-ground growth is stealing the spotlight, underground, the roots are staging their own takeover. By now, they've explored the whole medium and are sending out an SOS signal for more space. Don't let your plant feel cramped; give it room to spread its root wings.
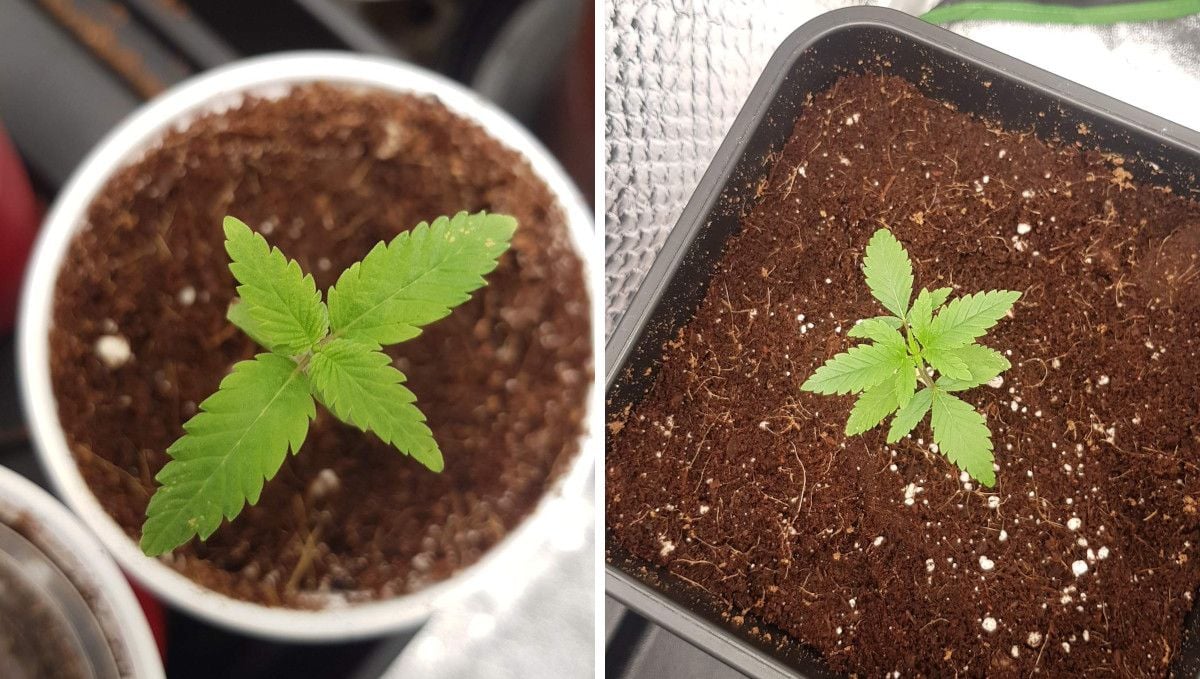
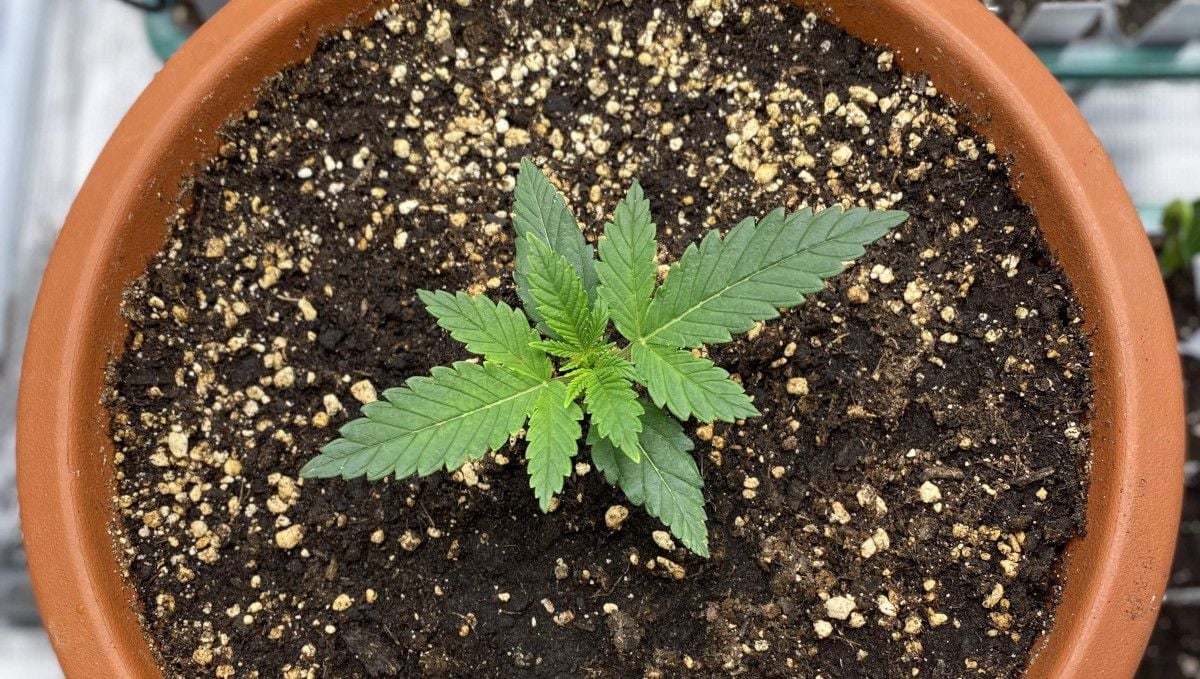
Though small, the conditions you've created for your seedling directly influence the harvest performance. A robust root system and vibrant foliage are laying the foundation for what's to come. This is crucial for autoflowers, with their short vegetative phase, while photoperiods offer more flexibility as you have all the time in the world to nurse a sickly plant back to health before switching to the flowering stage with a 12/12 flip.
5. Mid Veg | Weeks 3-6
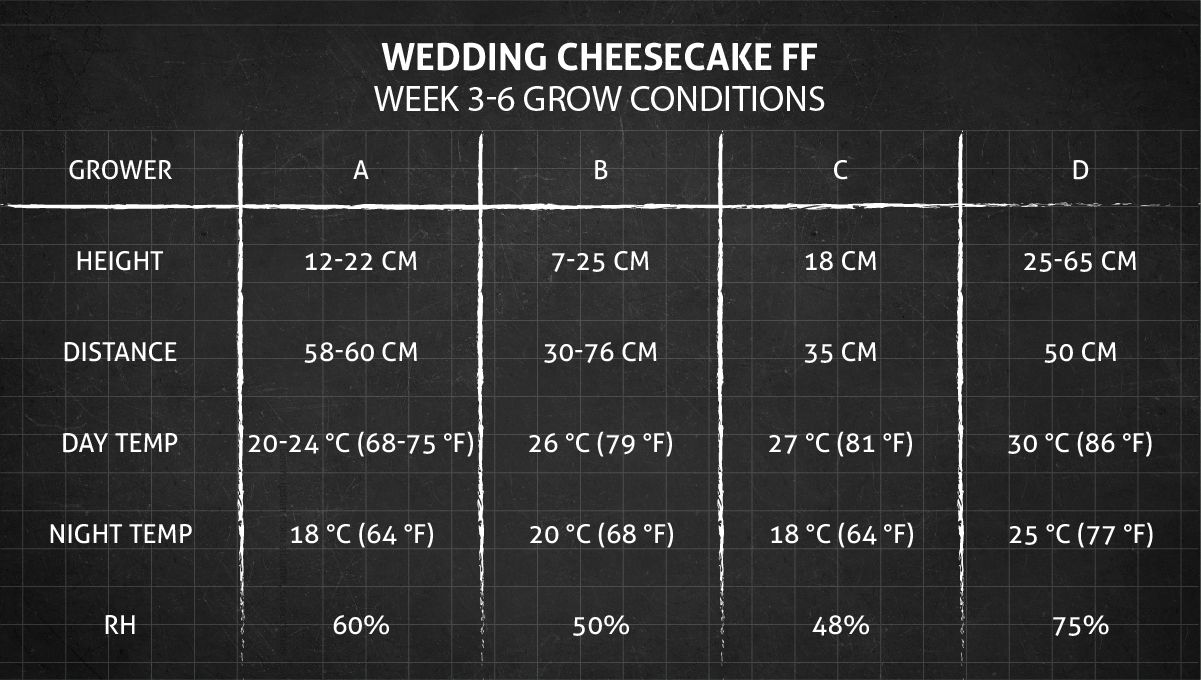
If you've been treating your Wedding Cheesecake seedling right in the first two weeks, get ready for the magic of weeks 3 to 6 – the vegetative stage. This is when your green friend hits the gas pedal on growth. Thanks to the mild and consistent conditions you've been serving up, the plant is feeling robust and less picky. It can handle a bit of deviation from the norm now. So, if life gets a little busy and you can't be the helicopter parent of plants, worry not. Your Wedding Cheesecake is getting hardy and gearing up for some serious green action anyway.
This is the time when the plant sprouts more fan leaves and side branches. For seasoned growers, this phase rings an alarm for potential space chaos. To tame the green frenzy, training techniques come into play, aiming for a compact and manageable canopy that won't strain your grow tent. Some growers go all-in with topping, snipping off the central shoot and redirecting growth to lower branches.
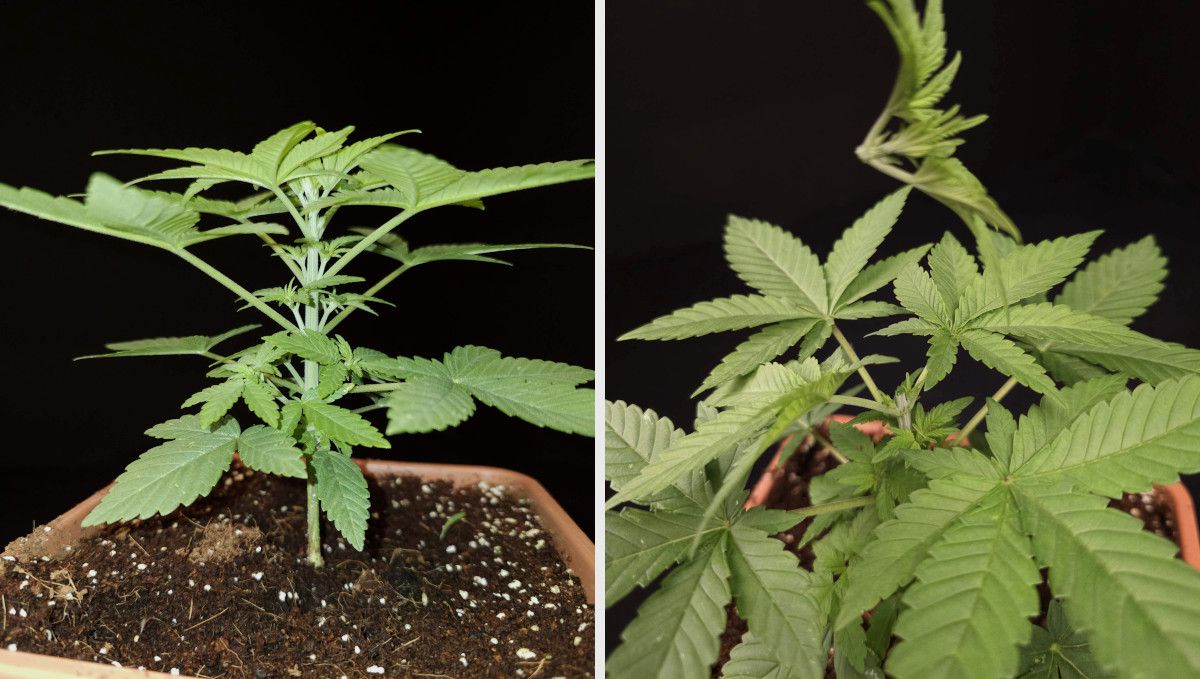
Topping isn't just about creating two top shoots instead of one; it involves a deeper strategy. By eliminating the central stem, resources shift to the lower branches, making the plant bushier. To enhance this effect, defoliation comes into play, bidding farewell to larger fan leaves that cast shadows on the nodes below. It's a light exposure party for those budding side branches.
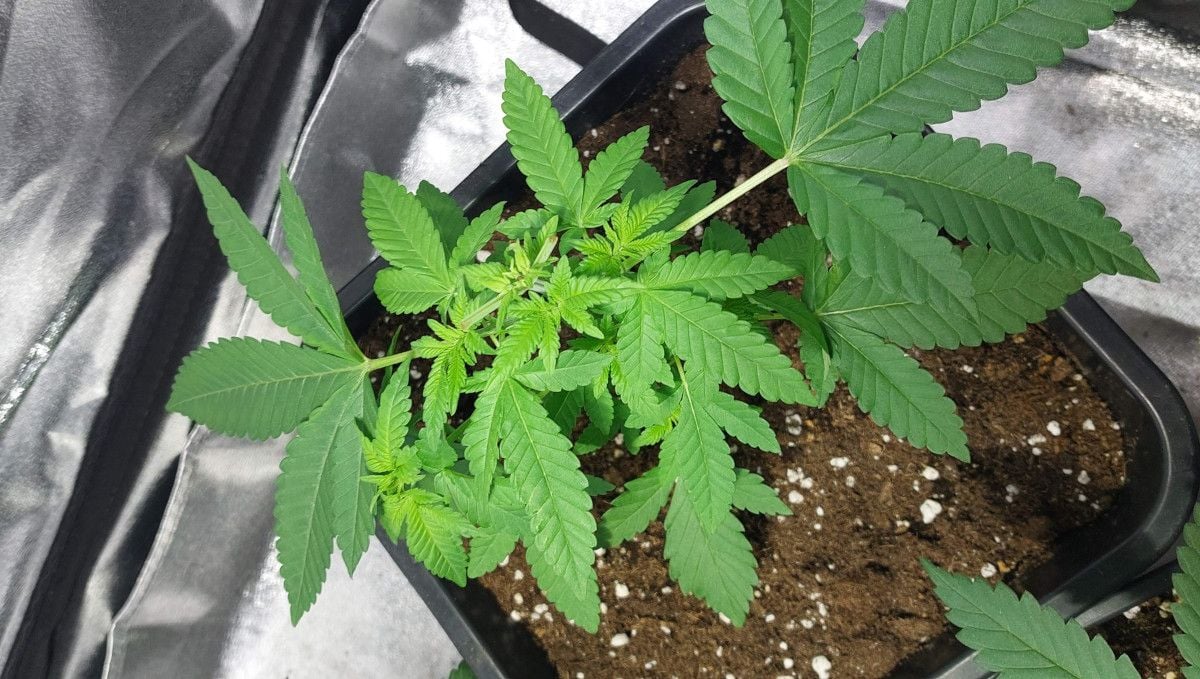
Yet, topping alone won't entirely rein in the plant's height. For a sizeable reduction, consider complementing topping or FIMing with some low-stress training. Training is the secret weapon for both short and towering plants, ensuring every bud site gets its fair share of light. This results in uniform-sized, weighty, and high-quality colas. No room for popcorn buds here!
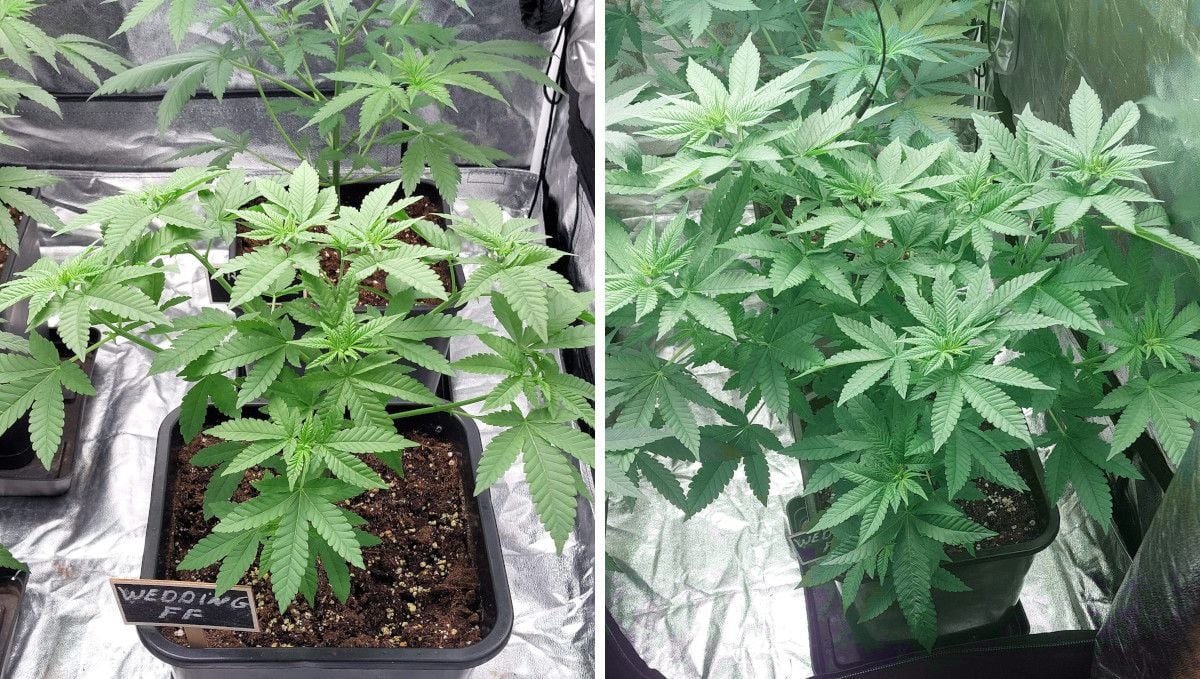
When it comes to training, you can take an ad hoc approach—bend and tie down any branch that outshines the rest—or add a touch of planning with a ScrOG net. Tuck in everything above the mesh until it's a lush sea of foliage. Whether spontaneous or structured, training is the art of sculpting your plant to perfection.
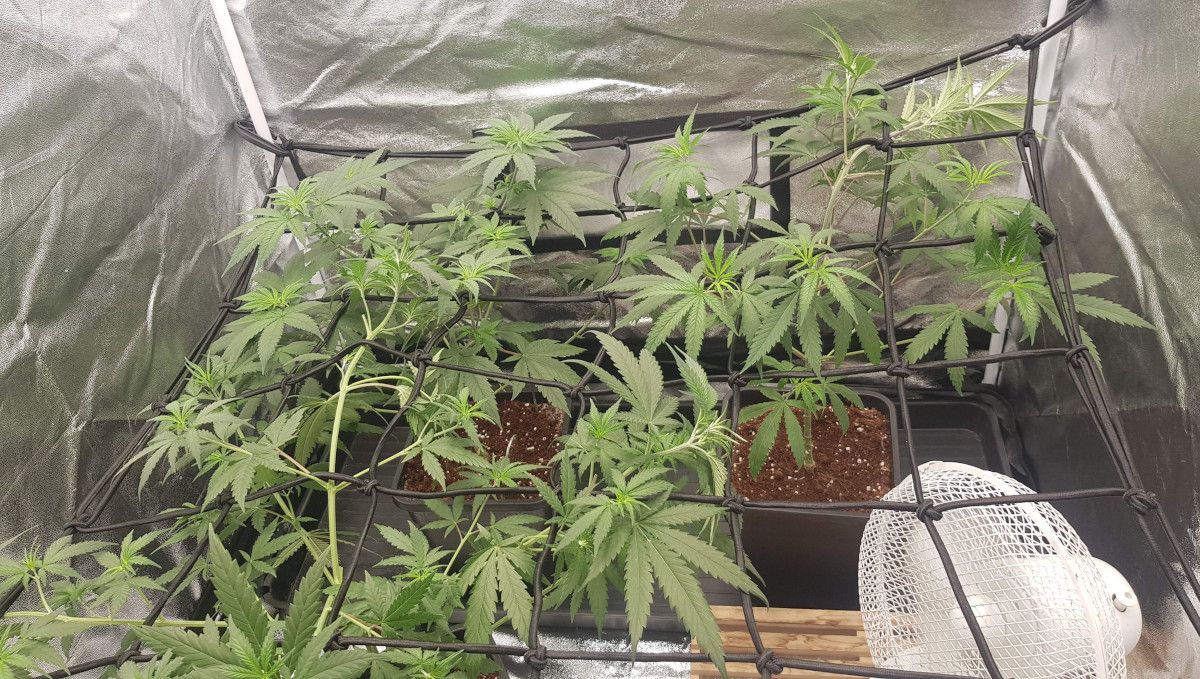
With the rapid vegetative growth comes an increased appetite. Unless you're cultivating in a nutrient-rich super soil, it's time to introduce fertilizers. Start cautiously, maybe at a 1/4 strength, and ramp up if your plants aren't showing signs of overfeeding.
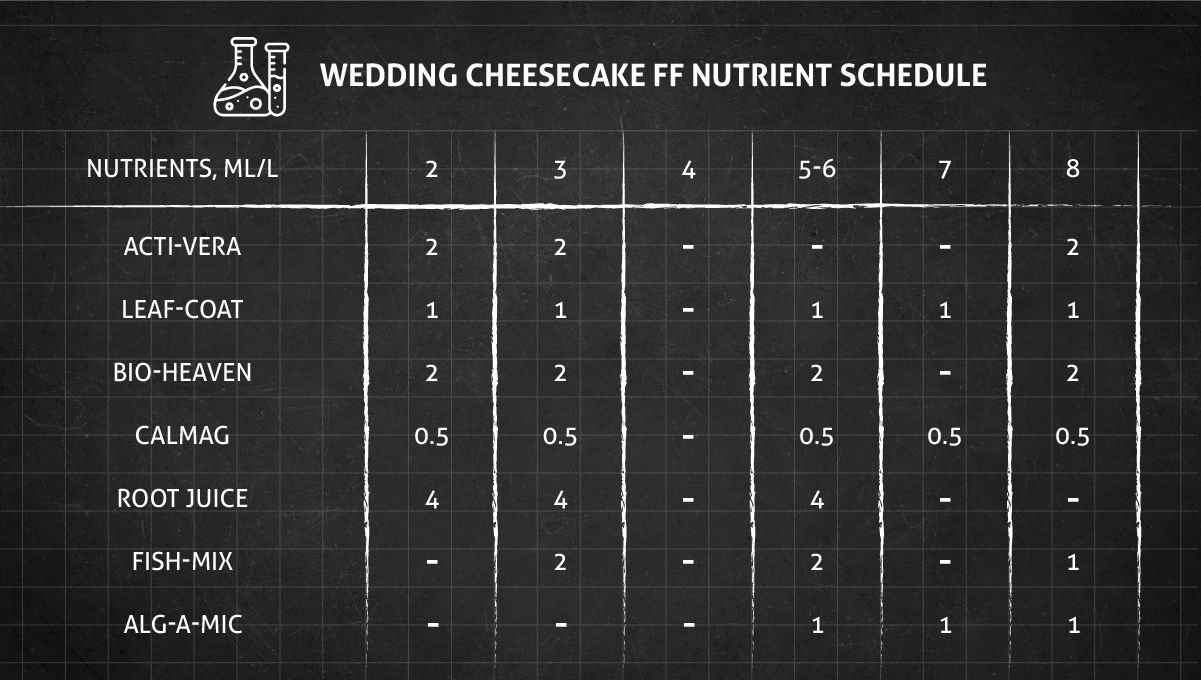
The composition of your fertilizer is as vital as its strength, especially in terms of macronutrients ratios. At this stage, nitrogen takes the spotlight, playing a crucial role in fueling your plant's green machinery.
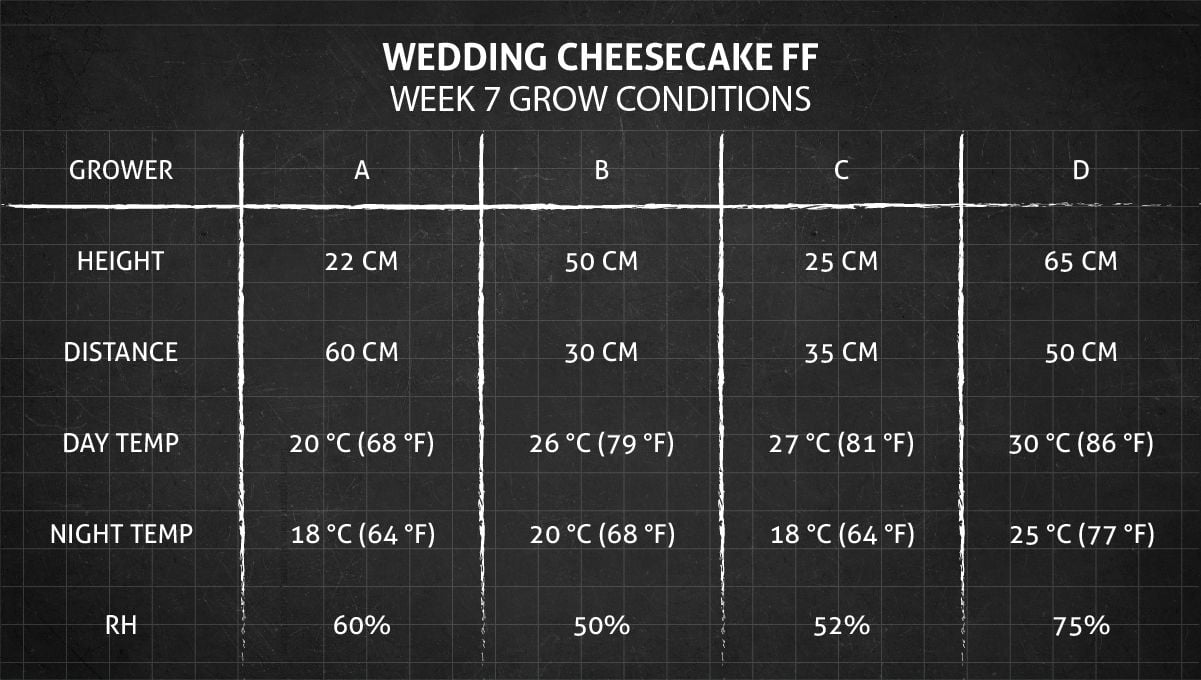
6. Transition (Pre-Flower) | Week 7
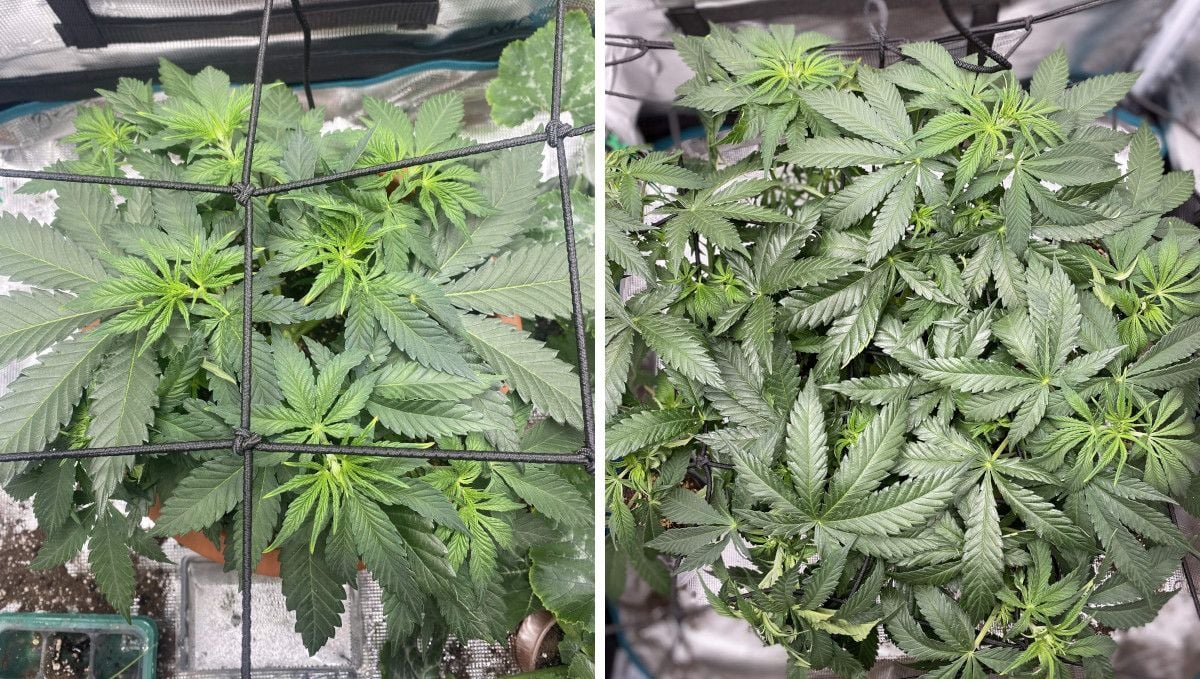
Week 7, and it's time of pre-flowers. Photoperiod weed plants are like clockwork – they won't switch to flowering until you give them the cue by changing the light schedule to 12/12. Without that switch, what you'll see are pre-flowers making their debut. It's like the plant's way of saying, "Hey, ready when you are." These pre-flowers won't automatically burst into full bloom. Instead, the plant keeps playing the waiting game, cranking out more branches and leaves.
As your cannabis plant matures, it drops a subtle hint that it's ready for the 12/12 flip: the alternating pattern of nodes. Each new leaf sits slightly higher on the branch than the previous one. While autoflower growers might miss this cue due to their plants entering the budding phase automatically, photoperiod strains, with their extended veg period, commonly exhibit this pattern. It's a visual signal of readiness for the big switch.
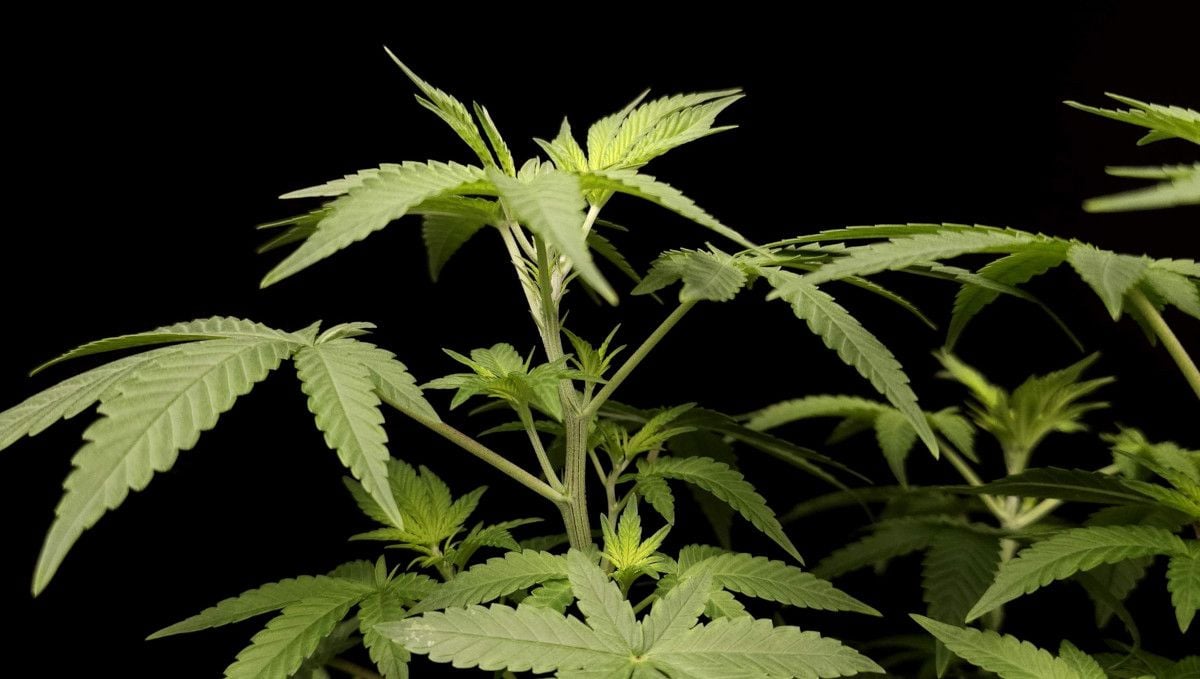
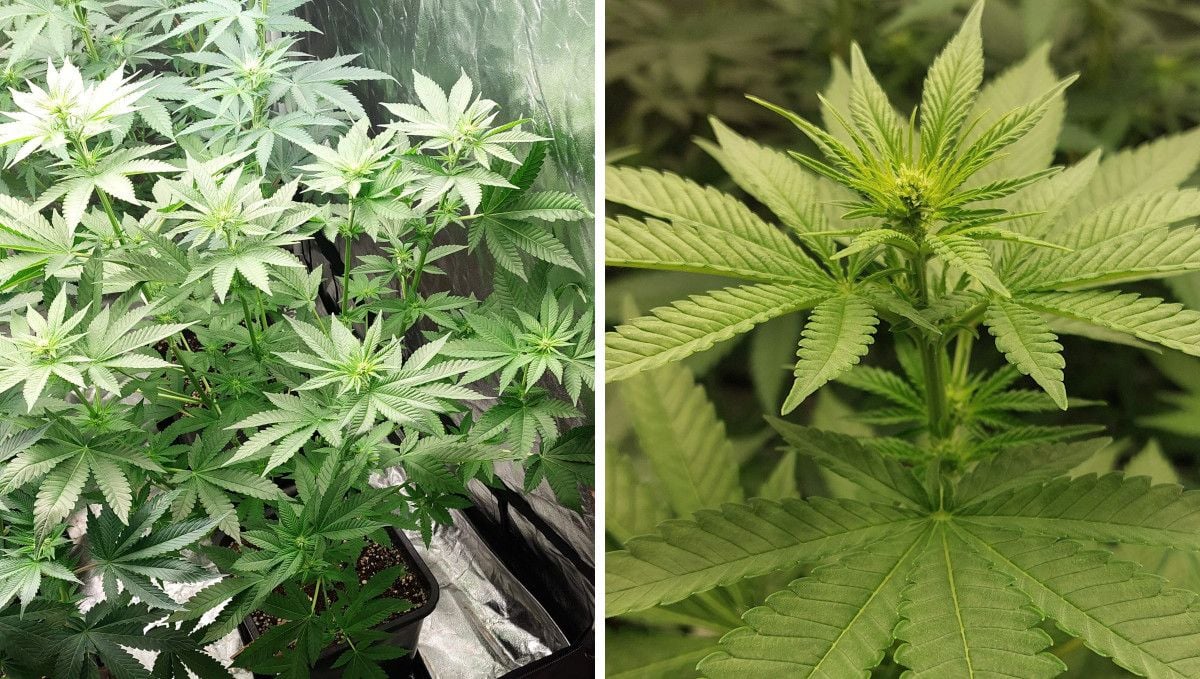
Post the 12/12 transition, the plant's appearance undergoes a transformation. The tops take on a lighter shade of green—sometimes even yellowish. It's a clear indicator that the next act in the drama is about to unfold: the emergence of the first flowers.
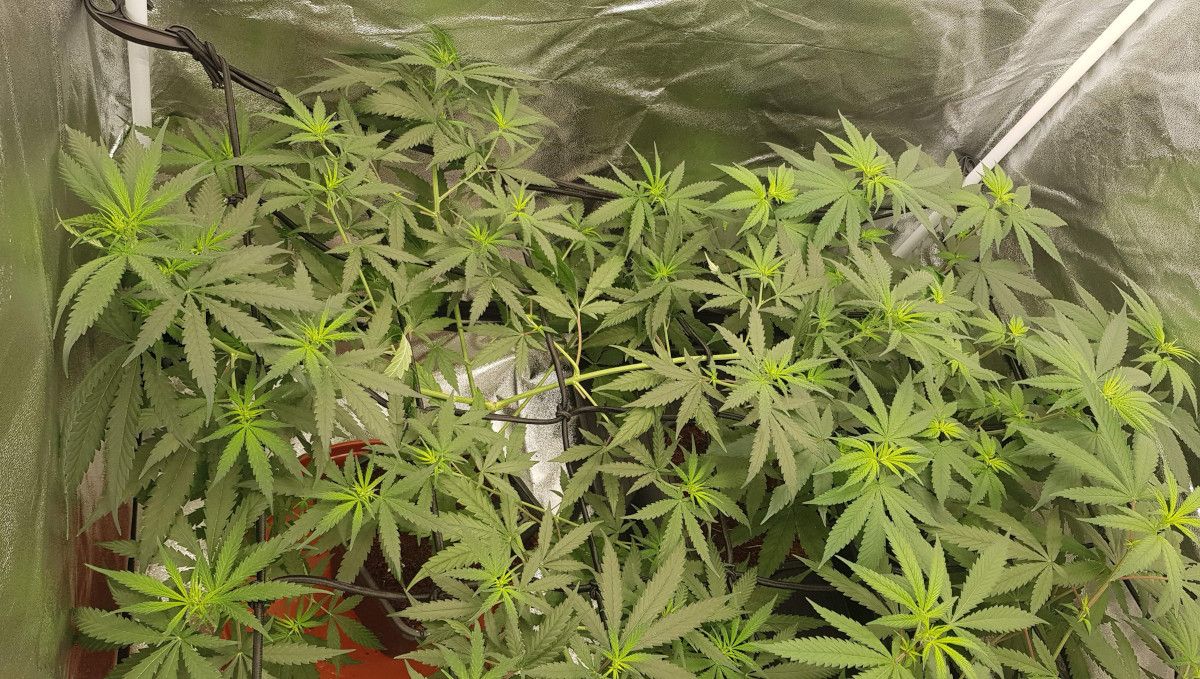
In addition to changing color, the leaves at the tops undergo a metamorphosis in shape. They become thinner, almost thread-like, and develop a curvy appearance. Though these may look like the coveted female hairs, they're not this telltale sign of flowering just yet. Patience is key; the real indicators will reveal themselves in the coming days.
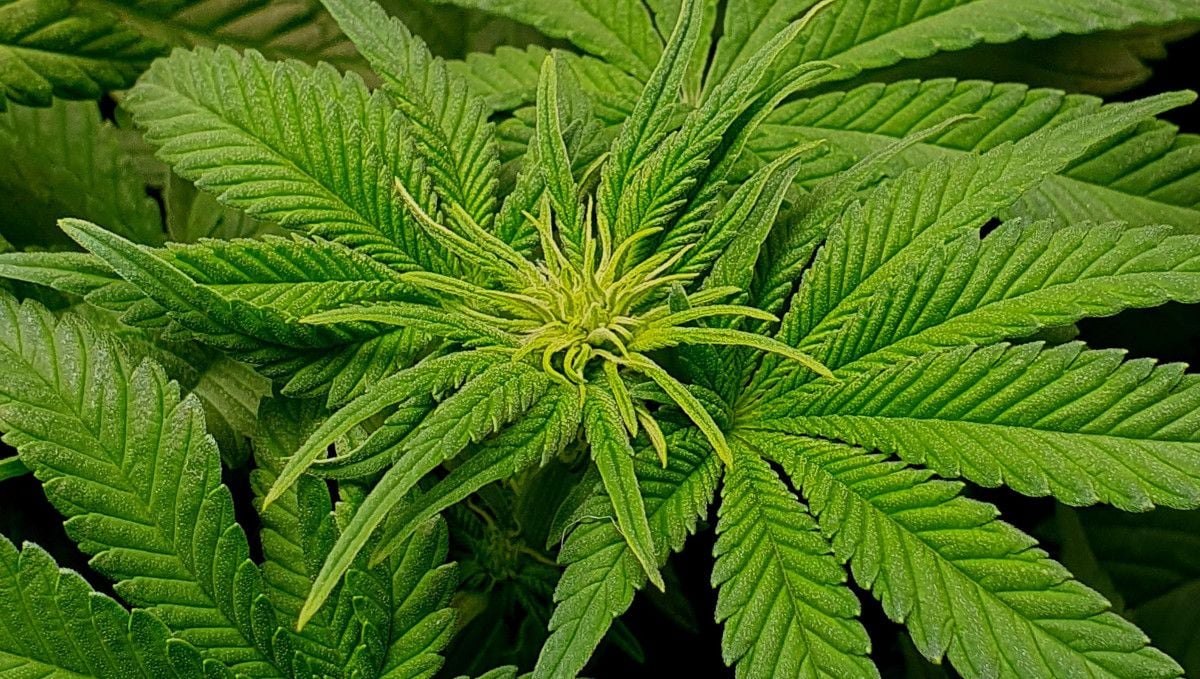
Contrary to a common misconception, weed plants don't hit pause on growth when the flowering phase kicks in. Quite the opposite—their upward growth accelerates, reaching new heights. While new branches may take a break, the existing ones elongate daily as they reach for the light.
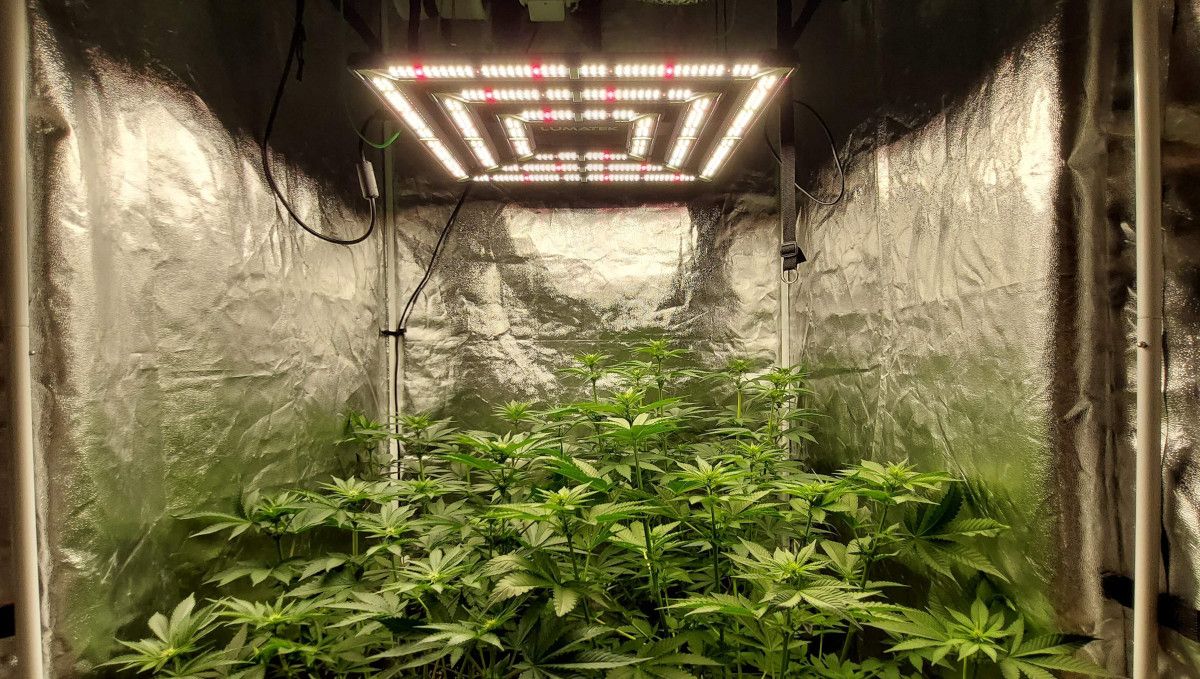
Sometime after the initiation of flowering, the first buds start to take shape, presenting themselves as fluffy tops.
7. Early Flower | Weeks 8-9
Remeber that switching to 12/12 doesn't mean instant blossoms. It's more like an introduction to the flowering stage. The transition takes its time, usually spanning 1 to 2 weeks or even more. How fast the plant develops its first flowers depends on its genetics and how mature (or not-so-mature) it was pre-switch. One more thing that could hit the brakes on this flowering fiesta is light leaks. If your grow tent isn't pitch black during the 12-hour dark period, or if someone's rudely interrupting the plant's beauty sleep, you might experience a bit of delay.
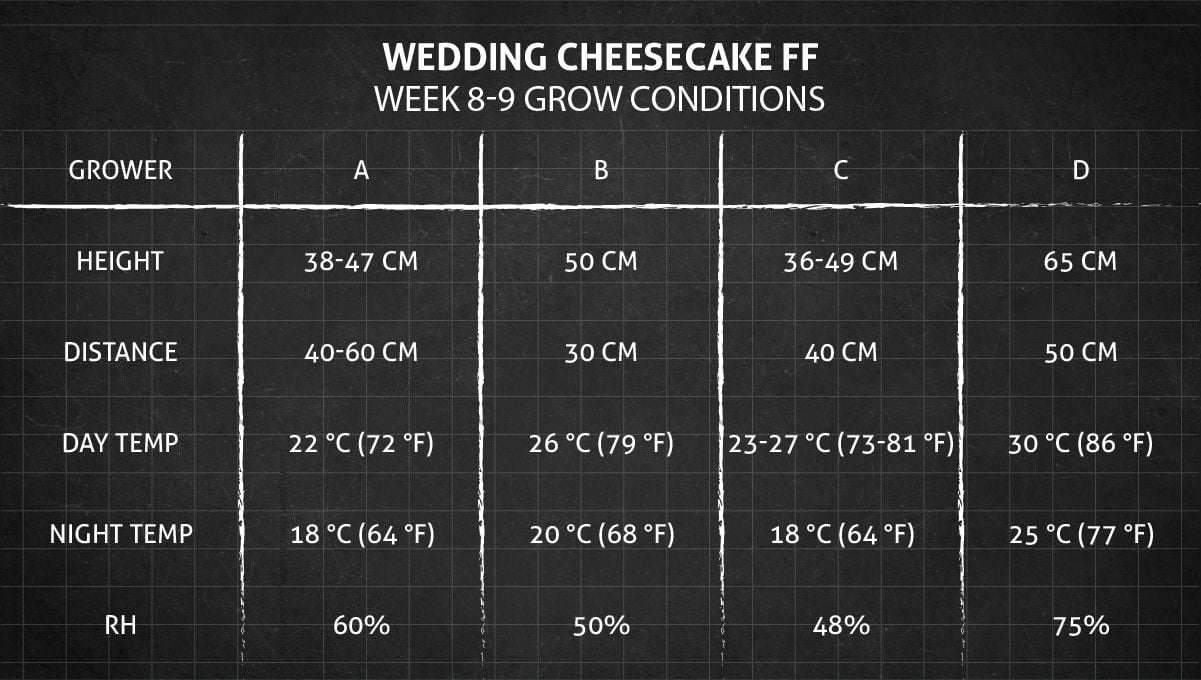
The flowering stretch, extending through the initial weeks of budding, can pose a challenge for novice growers who may inadvertently let their plants grow excessively before making the switch to 12/12. This unchecked upward growth becomes a space-related headache, with the looming threat of plant tops reaching the grow lights. To avert this scenario, it's crucial to remember that weed plants have a knack for doubling in size post the flowering initiation.
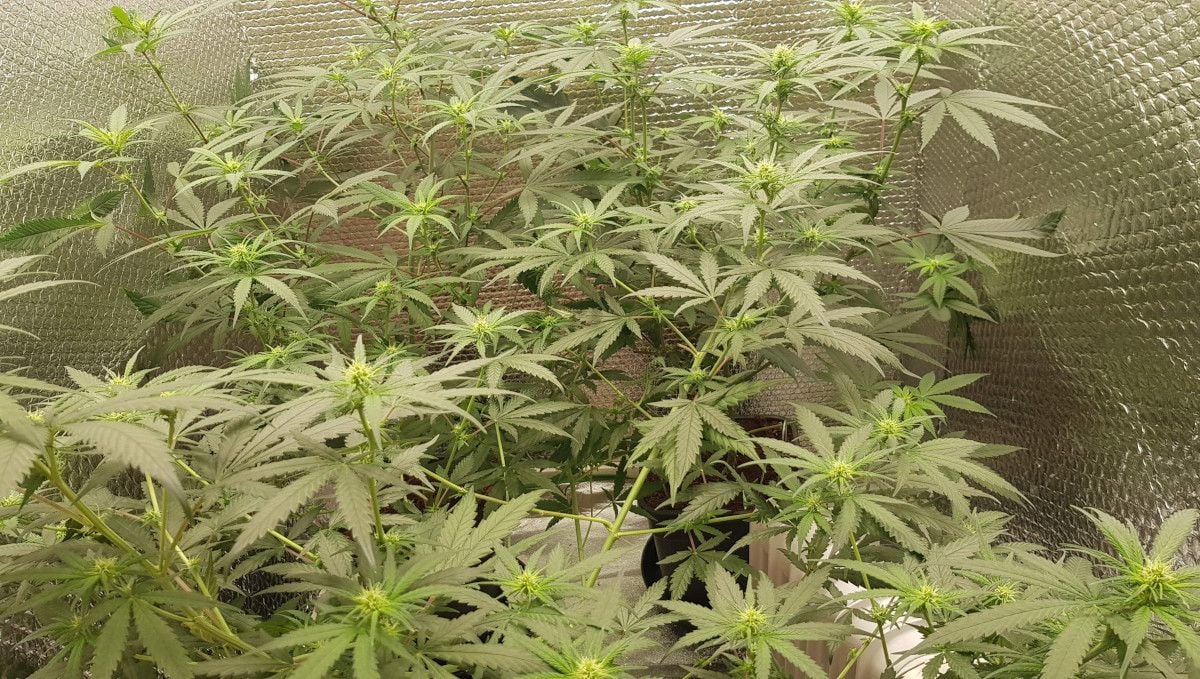
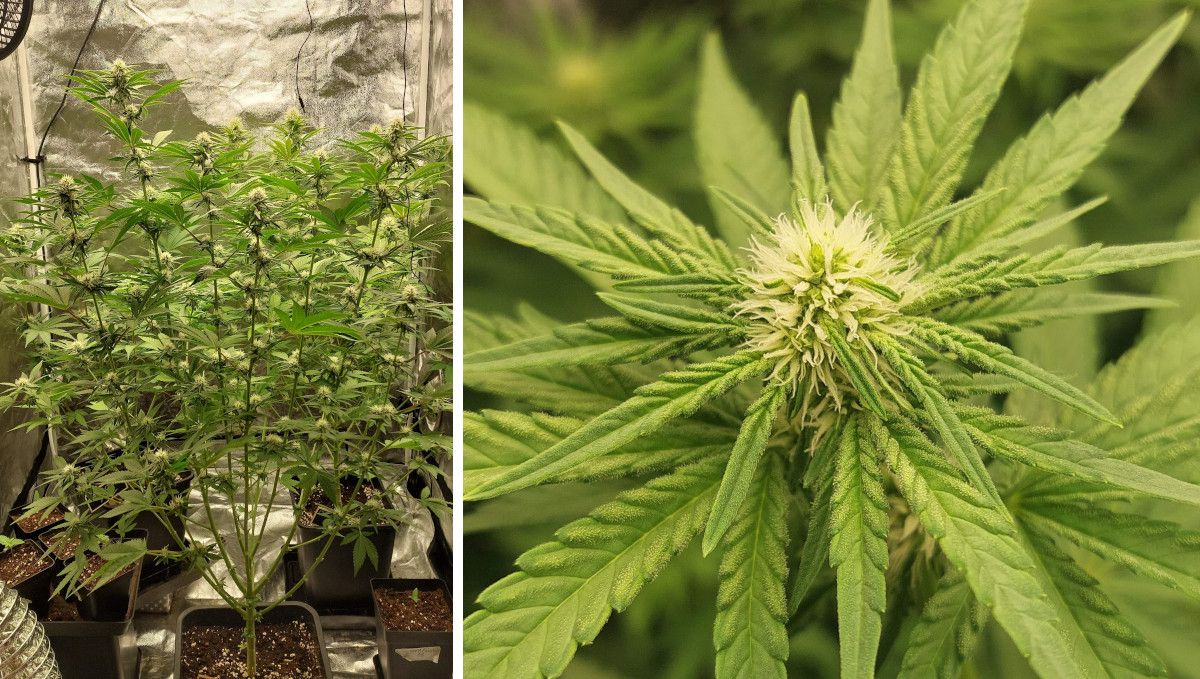
As the plants continue their upward journey, the first buds make their appearance, both at the tops and lower nodes. Initially, these buds may seem dwarfed by elongated branches, casting doubt on the possibility of achieving those coveted mature colas you see on product photos. But patience is the key; over time, the buds fatten up, transforming into long and bulky colas that grace at least the upper portions of the branches.
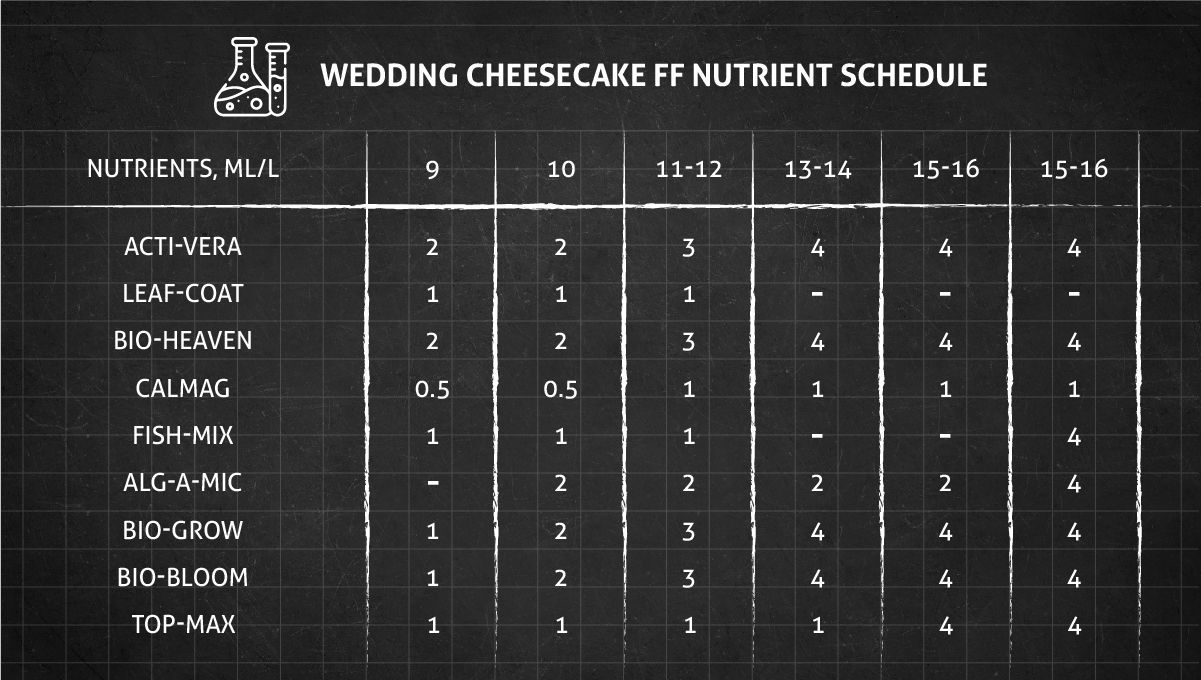
With the onset of the flowering stage, the plants' appetite for nutrients sees a gradual increase. The nutrient feed ratio needs adjustment, with a greater emphasis on phosphorus and potassium (P and K) over nitrogen (N) to support the demands of flower formation.
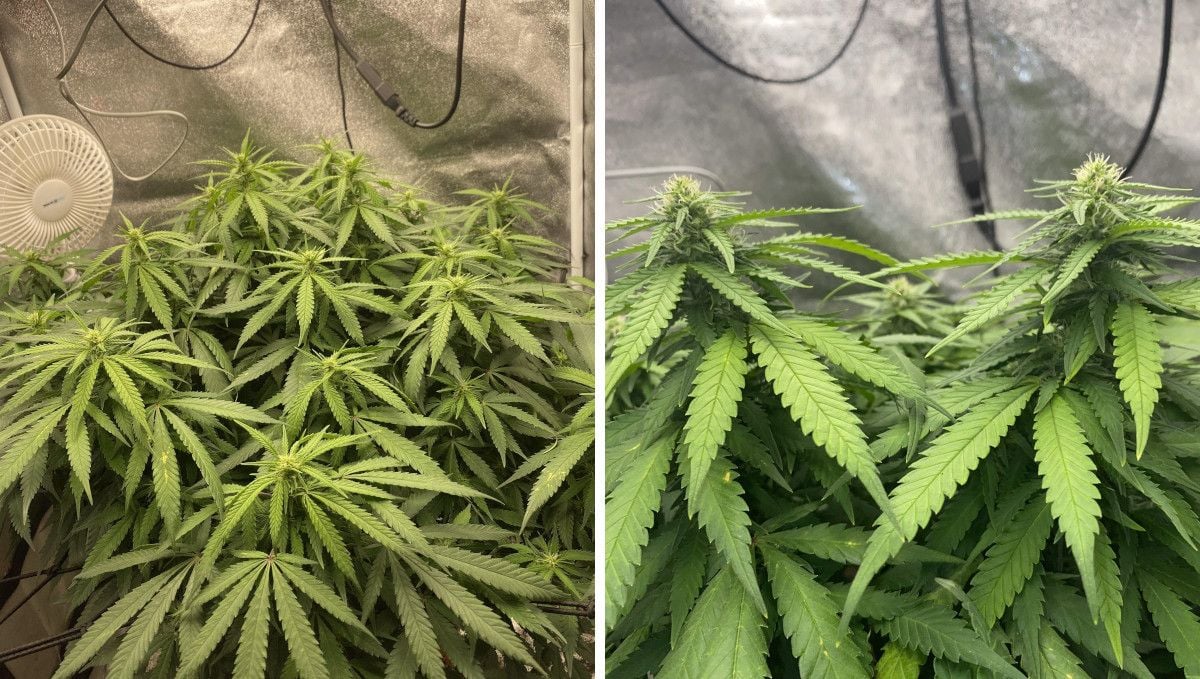
As the plants evolve into a lush state, their requirements escalate across the board, from water to light. The upward stretch brings them closer to the grow light, intensifying energy absorption. However, for shorter plants, adjusting the light height or intensity may be a wise move to ensure optimal exposure.
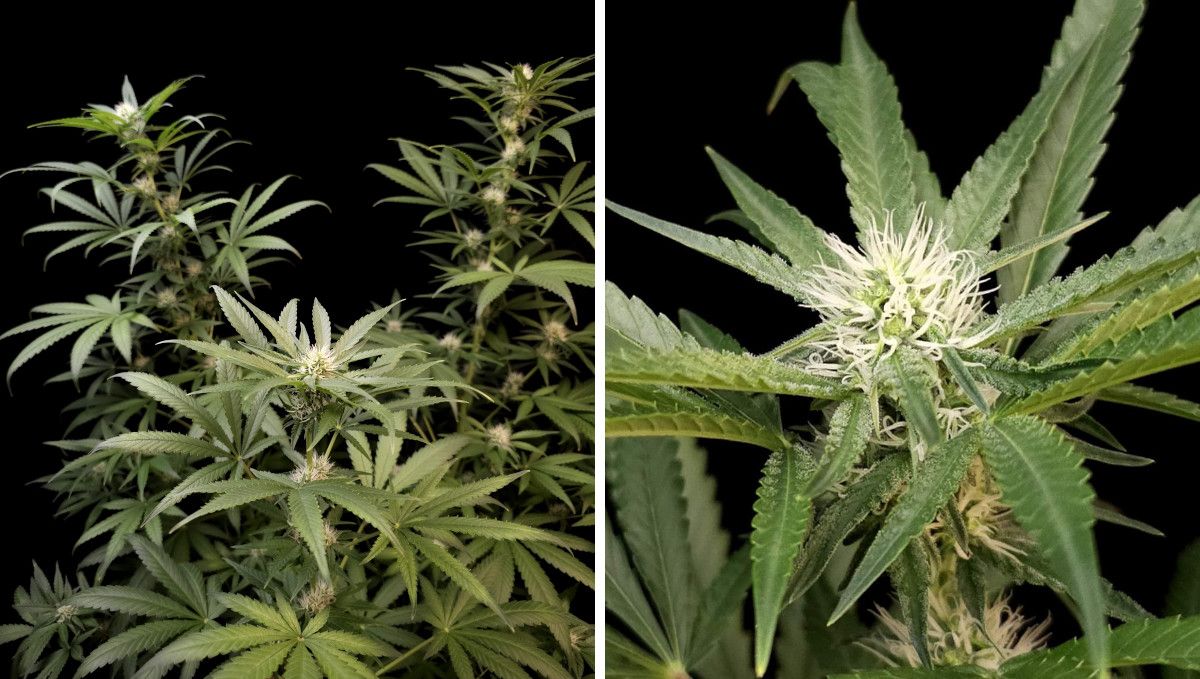
A hallmark of superior cannabis genetics is its resin-producing prowess. While the onset of this process varies among strains, the best and most resinous varieties, such as Wedding Cheesecake FF, don't waste time. Even in the early flowering stages, they start generating a captivating 'frost,' a visual testament to their resin-rich potential.
8. Mid Flower (Bulk Phase) | Weeks 10-11
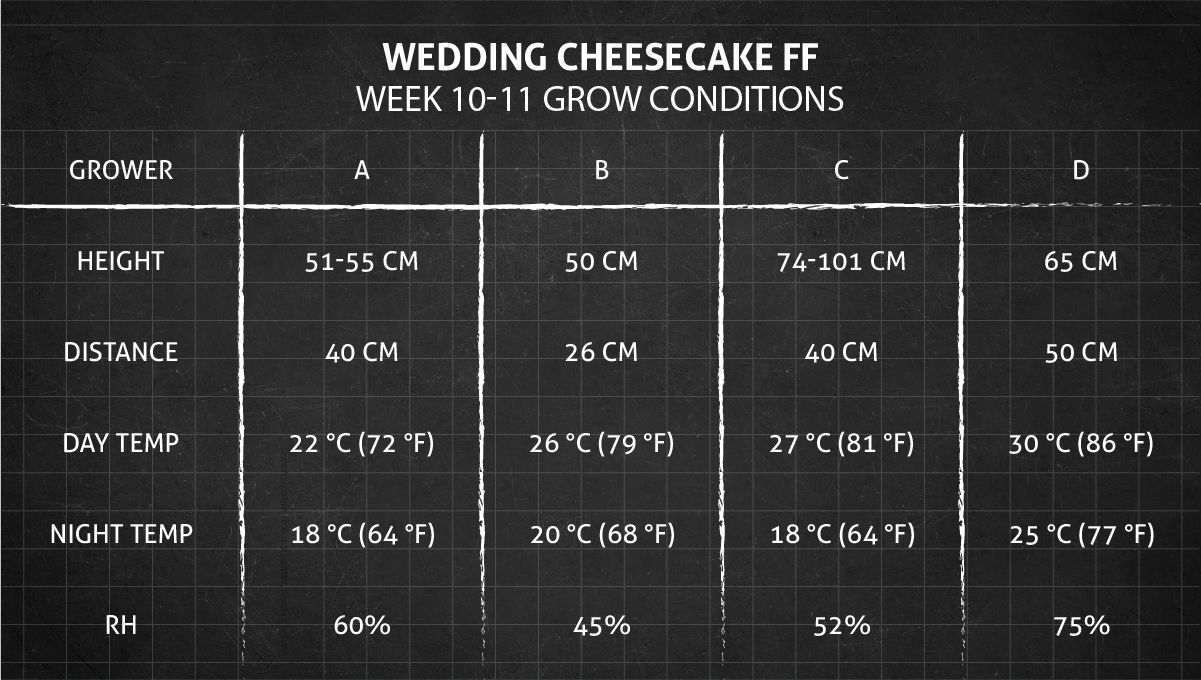
In weeks 10-11, the spotlight is back on relative humidity, but we're flipping the script. Instead of trying to bump it up like in the early days, it's time to dial it down. Why? Well, those buds are getting firm and dense, creating a cozy hideout for potential fungal infections. We don't want that. So, lower that humidity and let the buds breathe. Make sure there's a good airflow around the canopy too.
As the plants indulge in a banquet of light, water, and nutrients, they embark on the journey of covering their branches with flower mass. In these early stages of colas taking shape, they may still appear thin and notably immature, characterized by the white hue of their pistils.
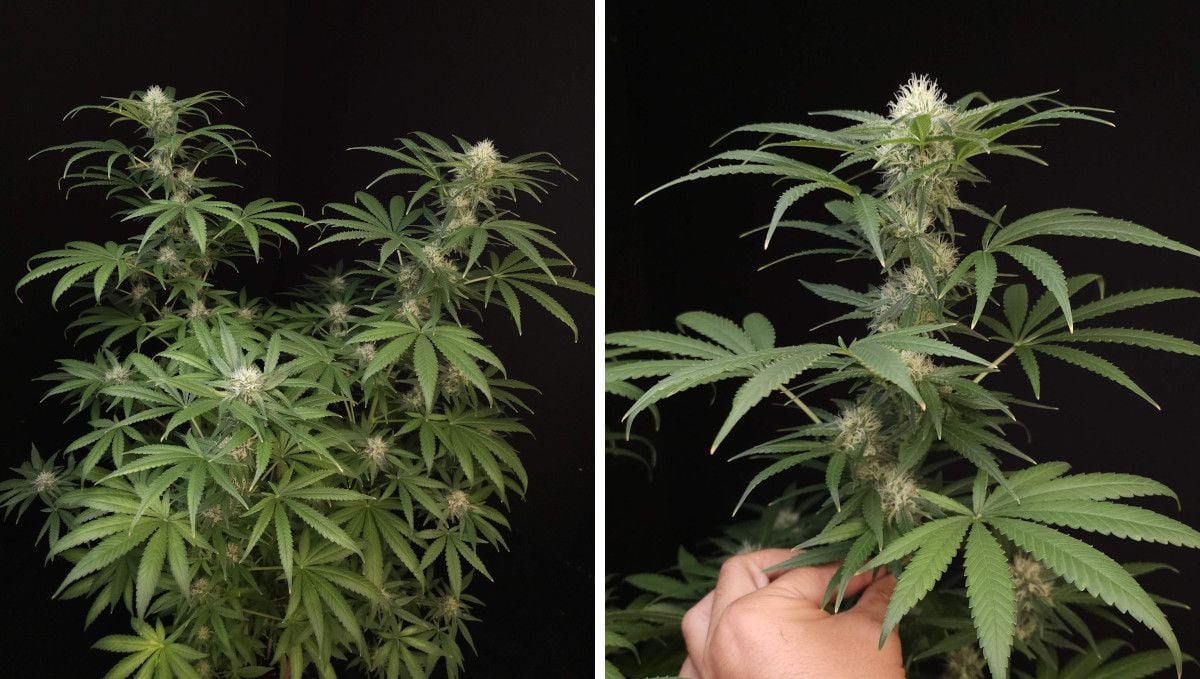
Anticipating the weight gain of buds in the later stages of flowering, a proactive grower opts for support systems for branches that might otherwise bow under the burgeoning load. Beyond ScrOG nets, options like yo-yos and wooden stakes come into play, providing essential structural reinforcement.
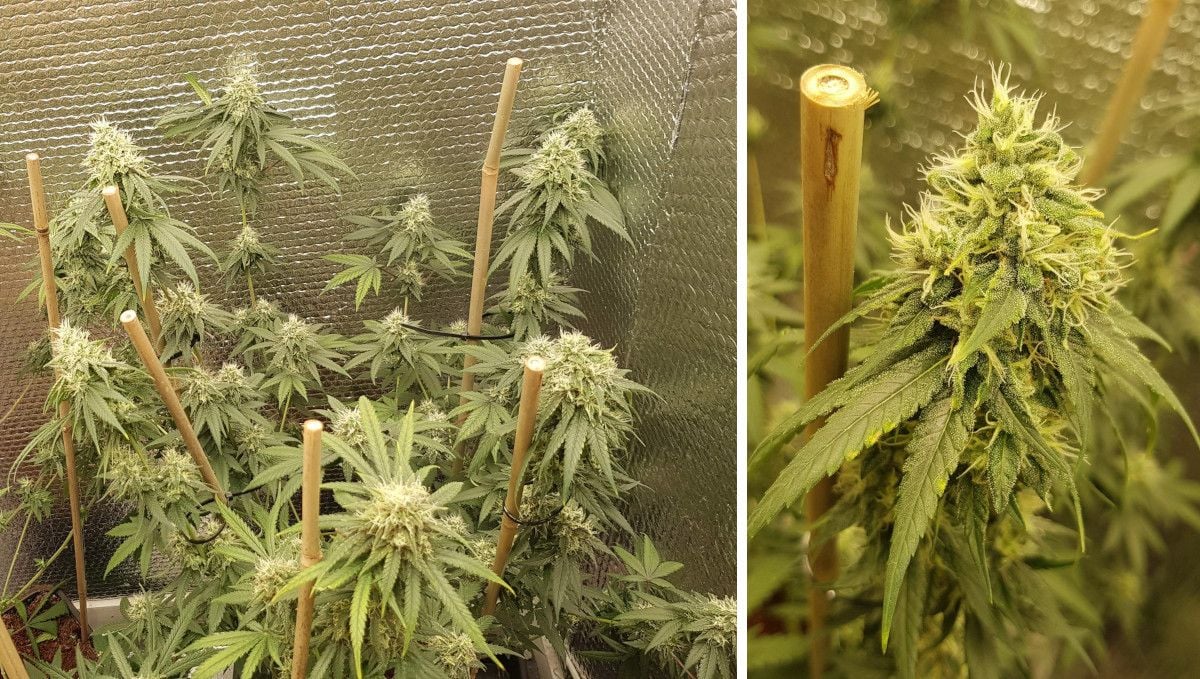
The distinct aroma of cannabis becomes an integral part of the indoor setting, intensifying as the buds swell and become adorned with an increasingly dense layer of trichomes. These resin-filled glands, nestled on the flowers and trim leaves, house not only psychoactive cannabinoids but also aromatic compounds known as terpenes. To maintain discretion, especially with multiple plants, the installation of a carbon filter becomes nearly obligatory.
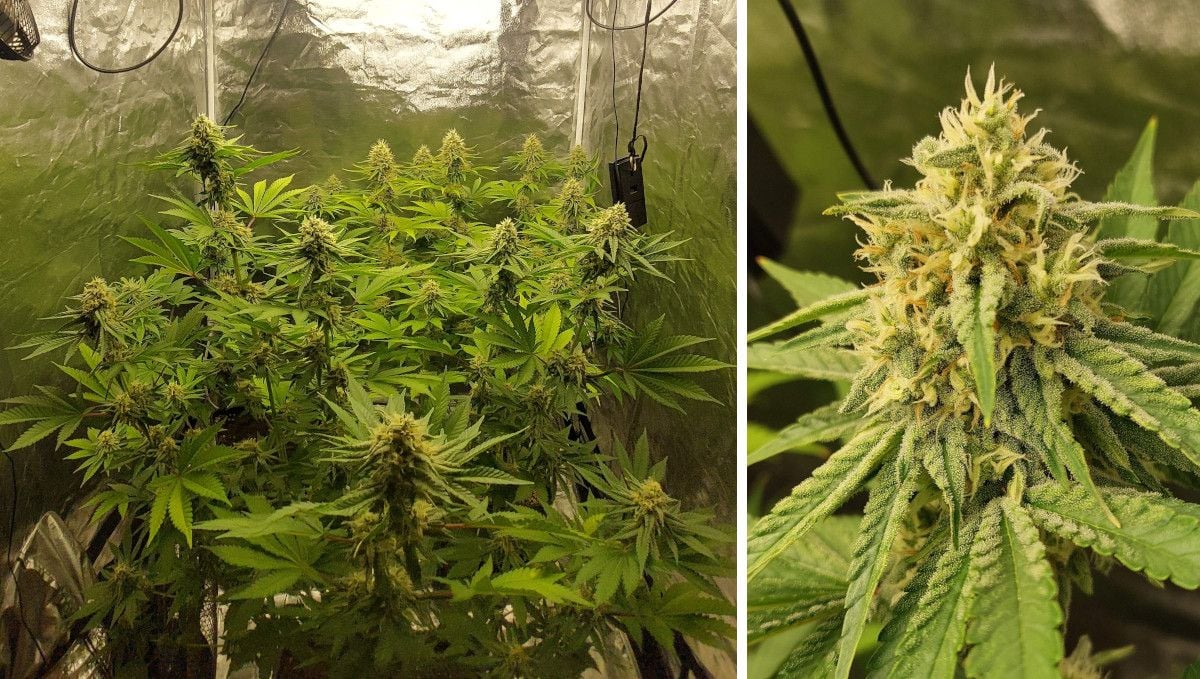
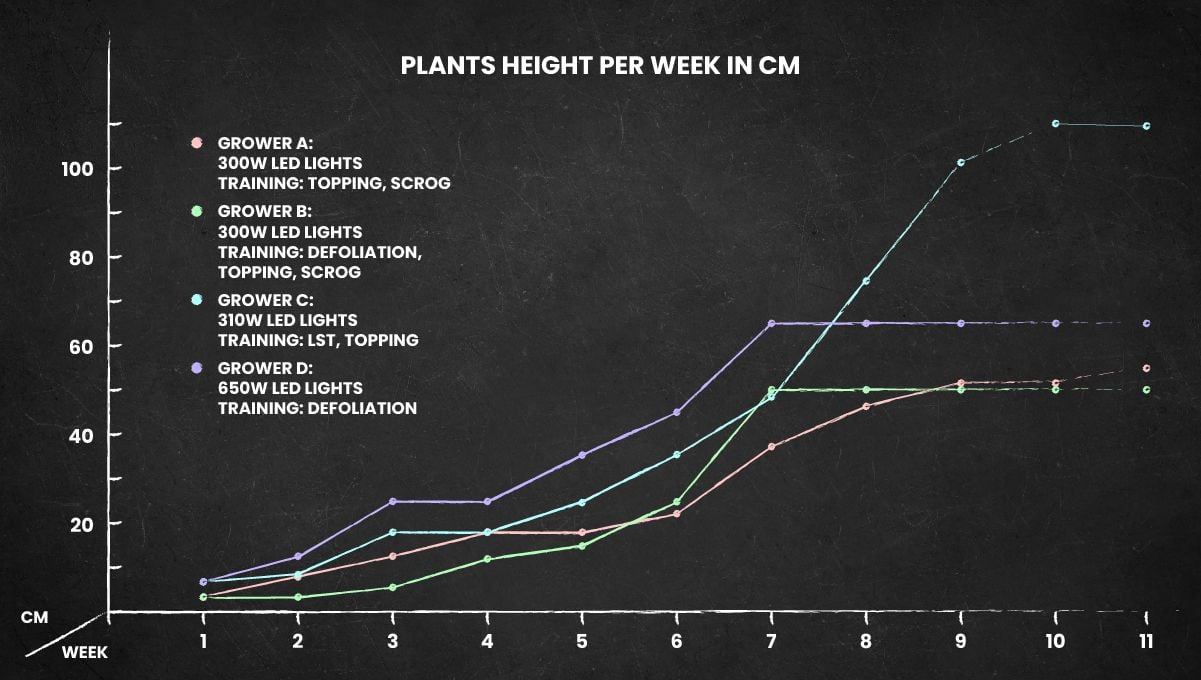
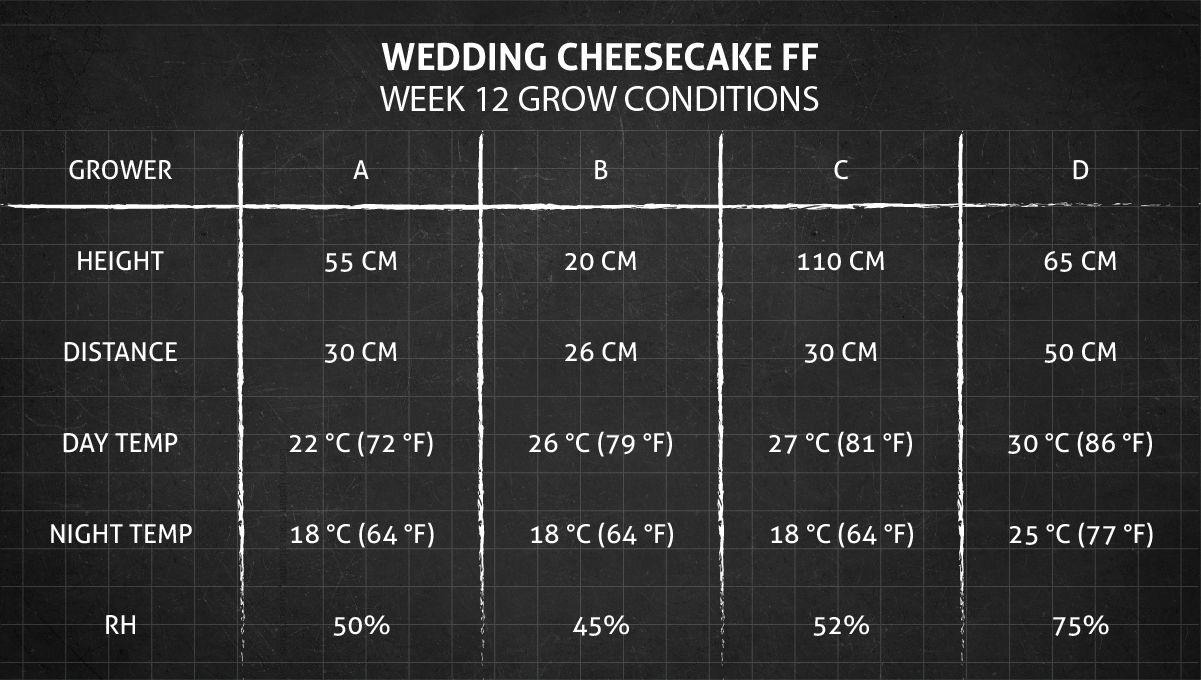
Somewhere in this phase, the plants attain their final size and shift their focus to stacking up more flowers and enhancing their density. This juncture offers an excellent opportunity to observe the height progression of Wedding Cheesecake FF throughout its growth cycle (see the chart below).
The altered nutrient composition, emphasizing phosphorus and potassium over nitrogen, may result in a deficiency of the latter. This shift can expedite the yellowing of older fan leaves, a natural and even desirable process. However, it's crucial to monitor and ensure this transformation doesn't start too early, allowing the leaves to fulfill their role in fueling active bud growth.
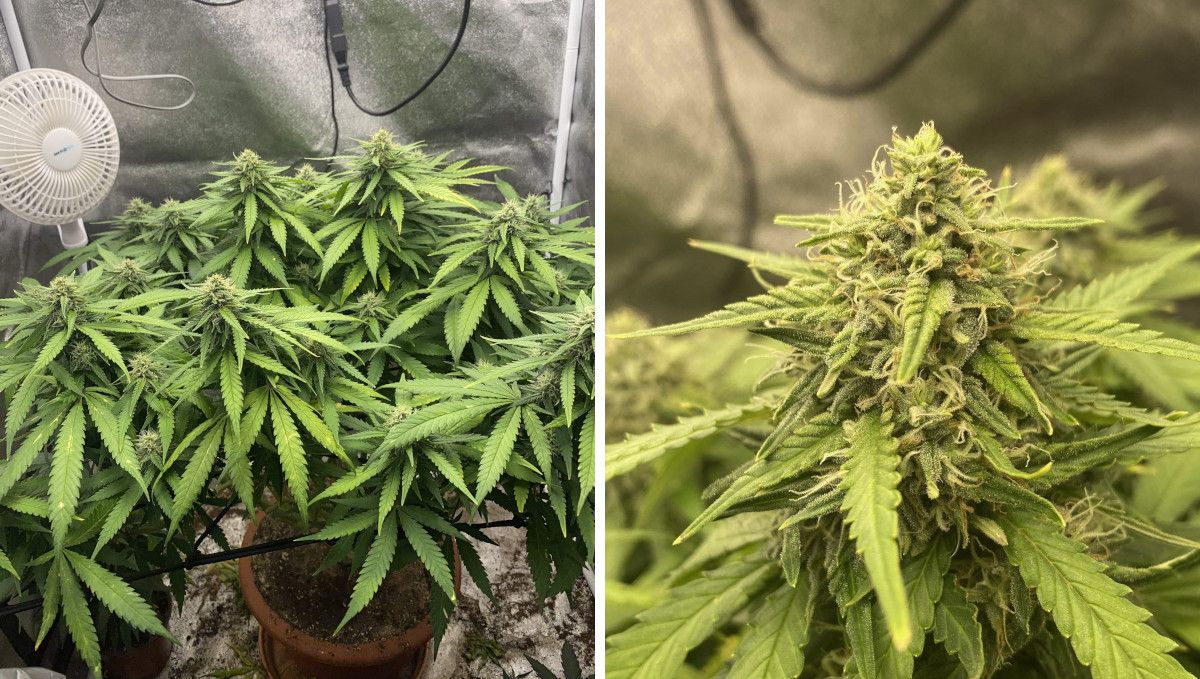
Phosphorus and potassium (P and K) continue to play pivotal roles during this stage, prompting many growers to supplement their plant's diet with a specialized PK booster. The modern market offers an array of excellent PK products, ensuring that the plants' needs are abundantly met and the buds reach their genetic potential in terms of size and quality.
9. Ripening And Harvest | Week 12 (And Beyond)
Remember that good ventilation we talked about before? It's not just a suggestion; it's practically a lifeline now. But here's the deal – sometimes, even with all the airflow, you might need backup, such as a dehumidifier to thwart the threats of mold, powdery mildew, and bud rot. These sneaky troublemakers can wreck your harvest party overnight. So, keep that humidity in check, even if it means bringing in the heavy artillery. And here's a pro-tip for an A-grade harvest: let the temperatures drop a bit. Mimic those autumn vibes with cooler day and night temps. It's like giving your plant the cue to bring out its best come harvest time.
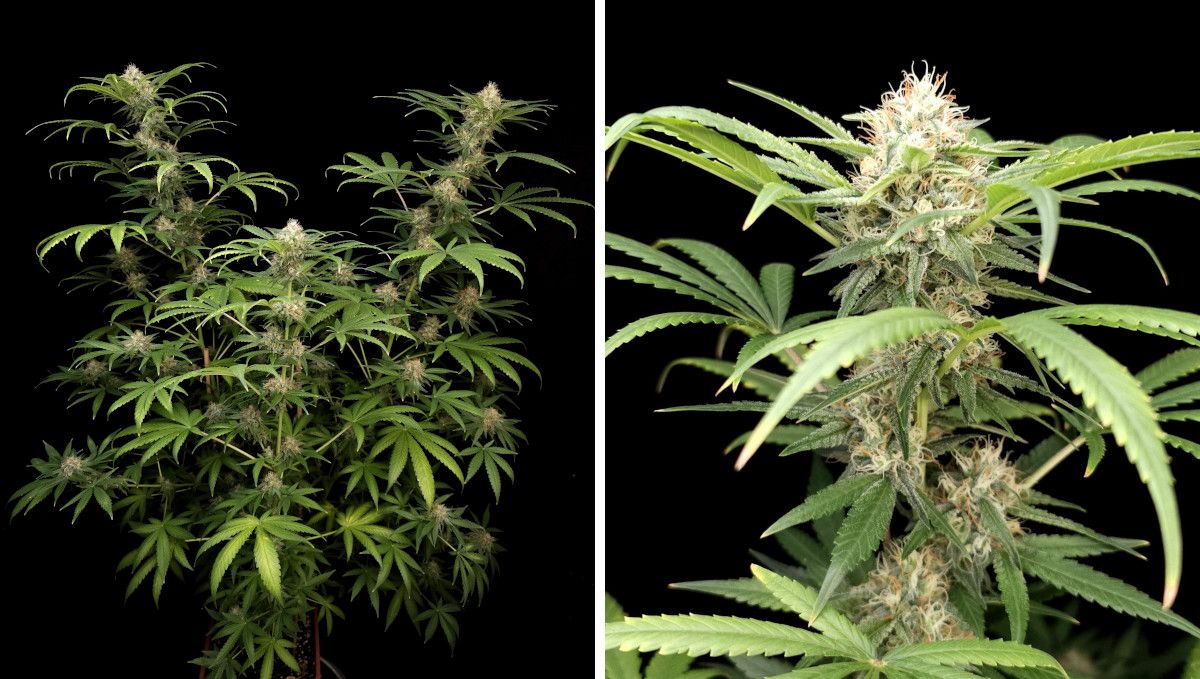
As the flowering stage approaches its anticipated conclusion as per the breeder's timeline, the grower should become increasingly attentive, eagerly searching for signs indicating the imminent harvest. An early indicator of bud maturity lies in the color of the pistils enveloping them; if they persist in their whiteness, the harvest is not near yet.
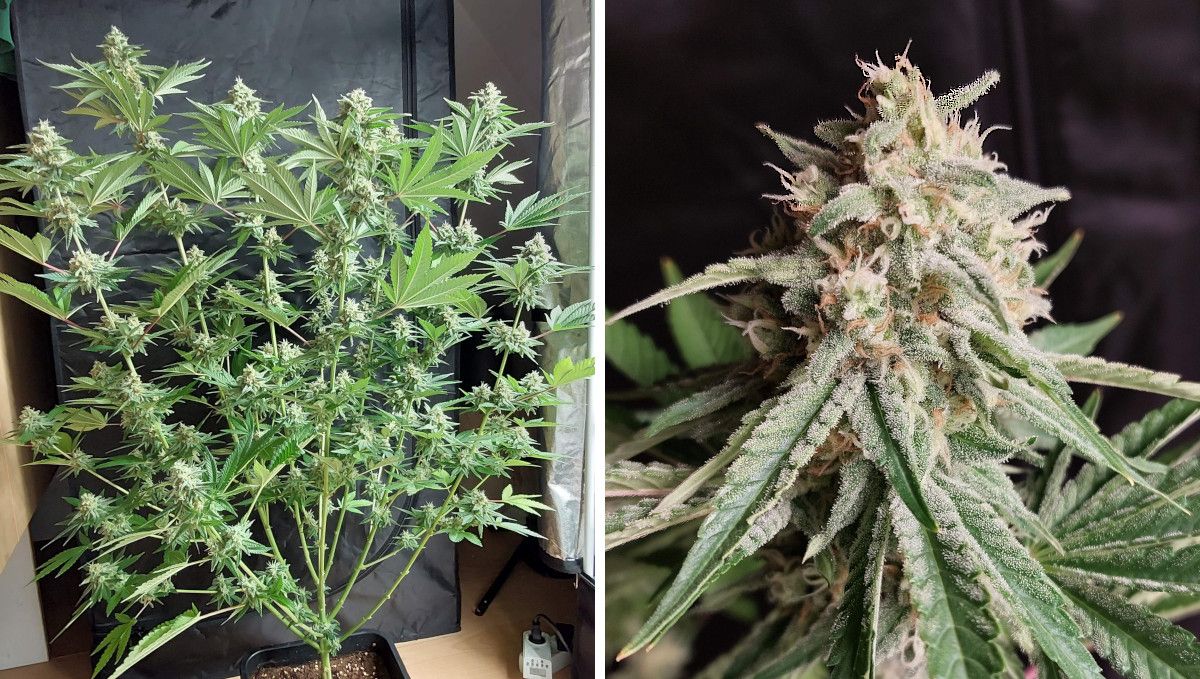
When the pistils gradually shift to a brown, dry state one by one, it serves as a crucial signal to heighten scrutiny. The buds are nearing their zenith of maturity, underscoring the importance of seizing the precise moment for harvesting.
Well before the actual harvest day, the final flush becomes a requisite step, purging both the medium and plant tissues of accumulated chemicals. Flushing involves exclusively providing pure water, without any nutrients, until the final pre-harvest watering. Hydroponic and soilless grows, like those in coco coir, necessitate a week of flushing, while soil grows benefit from an extended two-week flush.
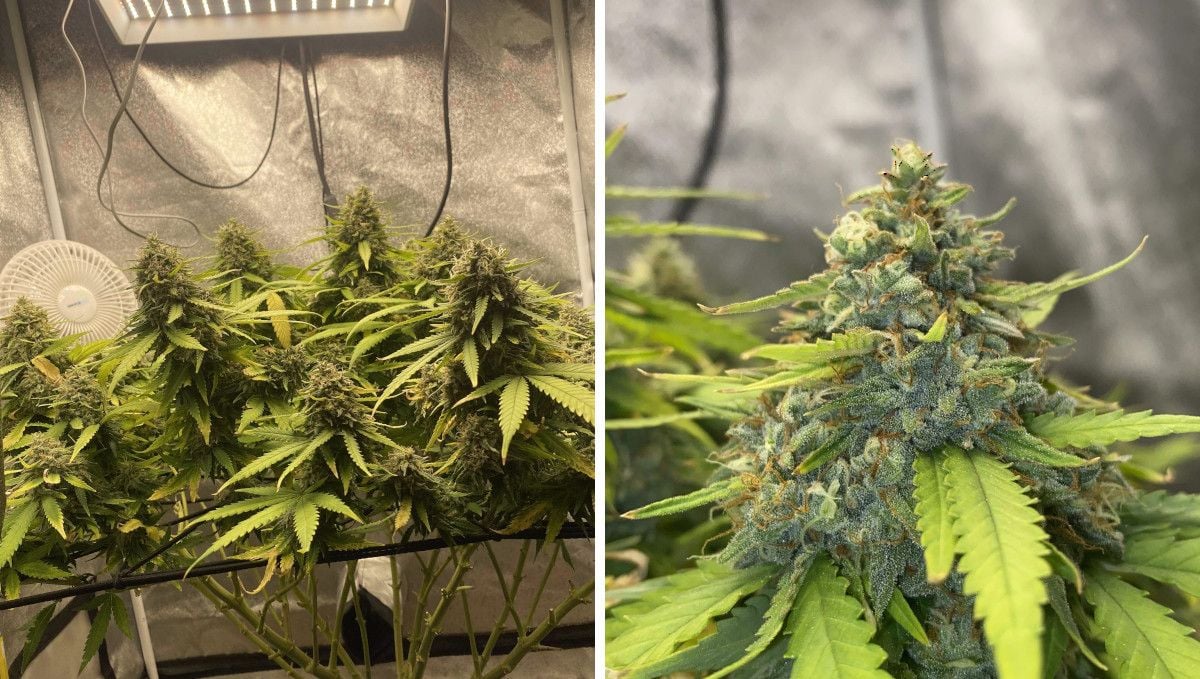
Simultaneously with flushing the medium, close attention to the trichome color is essential. The transition from clear to cloudy trichomes signifies the peak THC accumulation, ensuring the most potent smoke. Some trichomes may progress to amber, indicating THC degradation to cannabinol. While a certain percentage of amber trichomes is acceptable, an excess compromises potency, leading to more sedative effects.
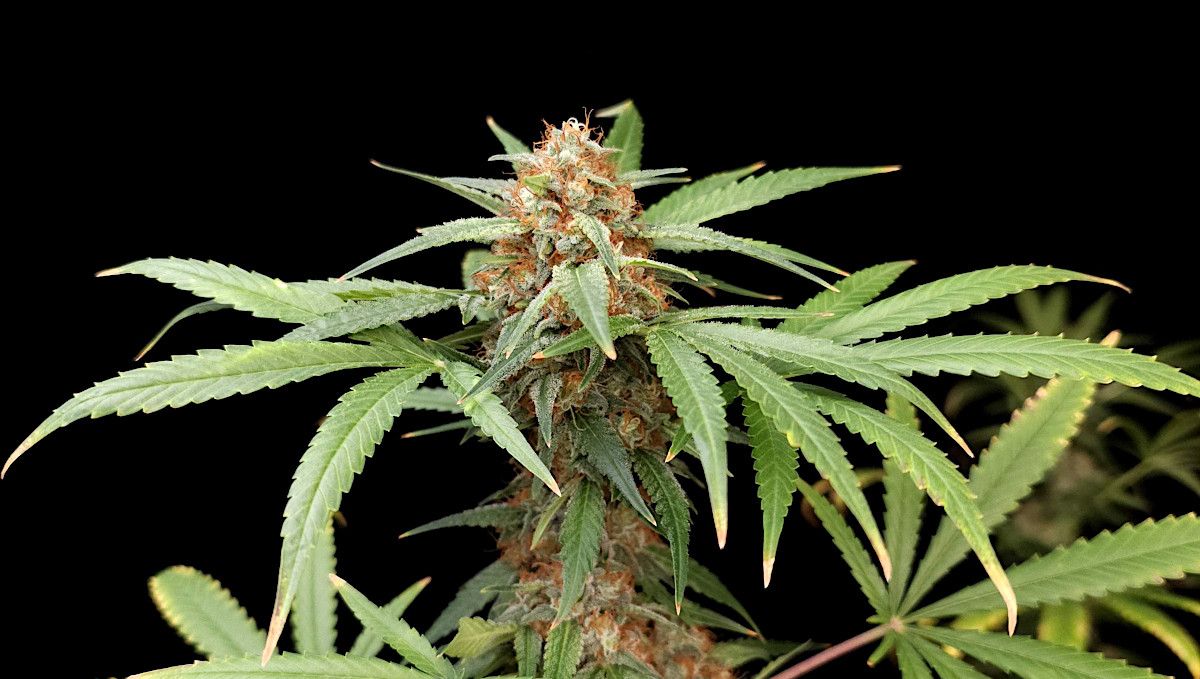
Upon determining the buds have reached their pinnacle, it's prudent not to rush the harvesting process. Consider a pre-harvest trim, removing most fan leaves. This approach makes trimming easier, eliminating the need to juggle branches while wielding scissors. Some growers advocate subjecting the plant to complete darkness for up to 48 hours before harvest, asserting that this final stress enhances resin production.
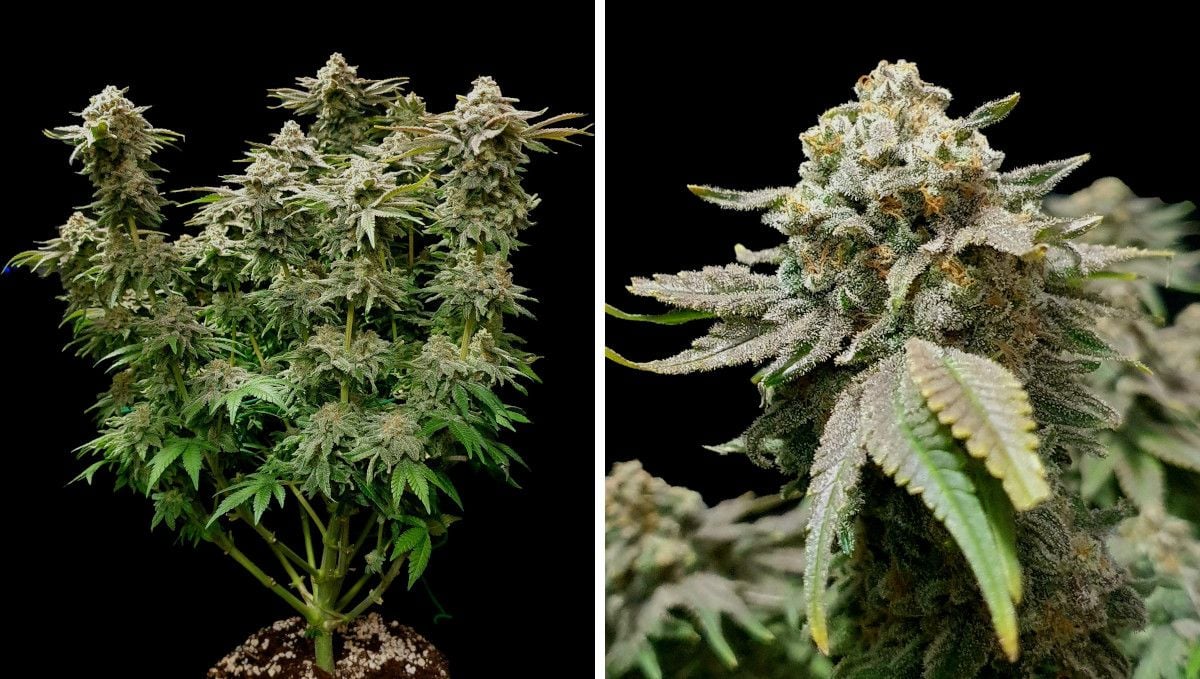
For growers placing a premium on smoke quality, the journey doesn't conclude with harvesting. Quality can be significantly enhanced post-harvest. Initiate this process by slowly drying the branches in a cool, dark, well-ventilated room. Then, remove the buds from the branches and place them in glass jars for a curing period of at least 2-3 weeks. Beyond extracting excess moisture, curing catalyzes the transformation of chlorophyll, starches, and sugars—often bearing an unpleasant taste—into more flavorful compounds, elevating the overall smoking experience.
10. The Outcome
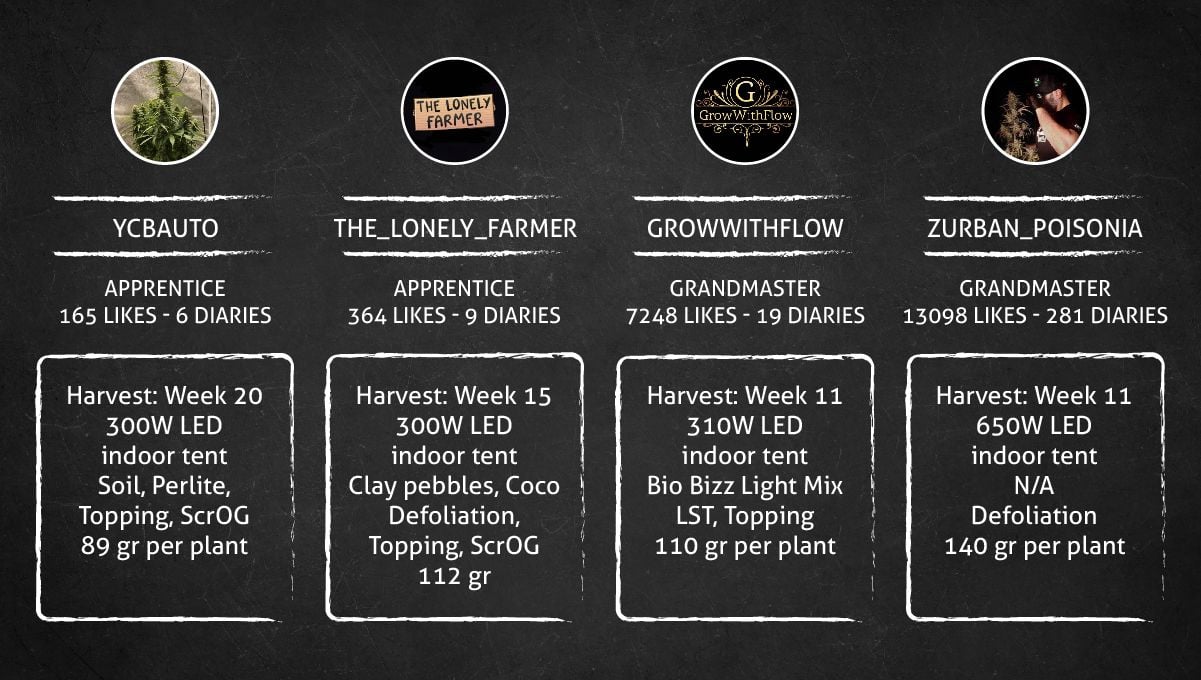
In the table below, you can see the outcome figures for the 4 grows that we've been following. As one might expect, the results were directly proportional to the grower's experience, and when the experience was substantial, Wedding Cheesecake FF performed exceptionally well and in the same timeframe (11 weeks) as an average autoflower.
Wedding Cheesecake FF Yield
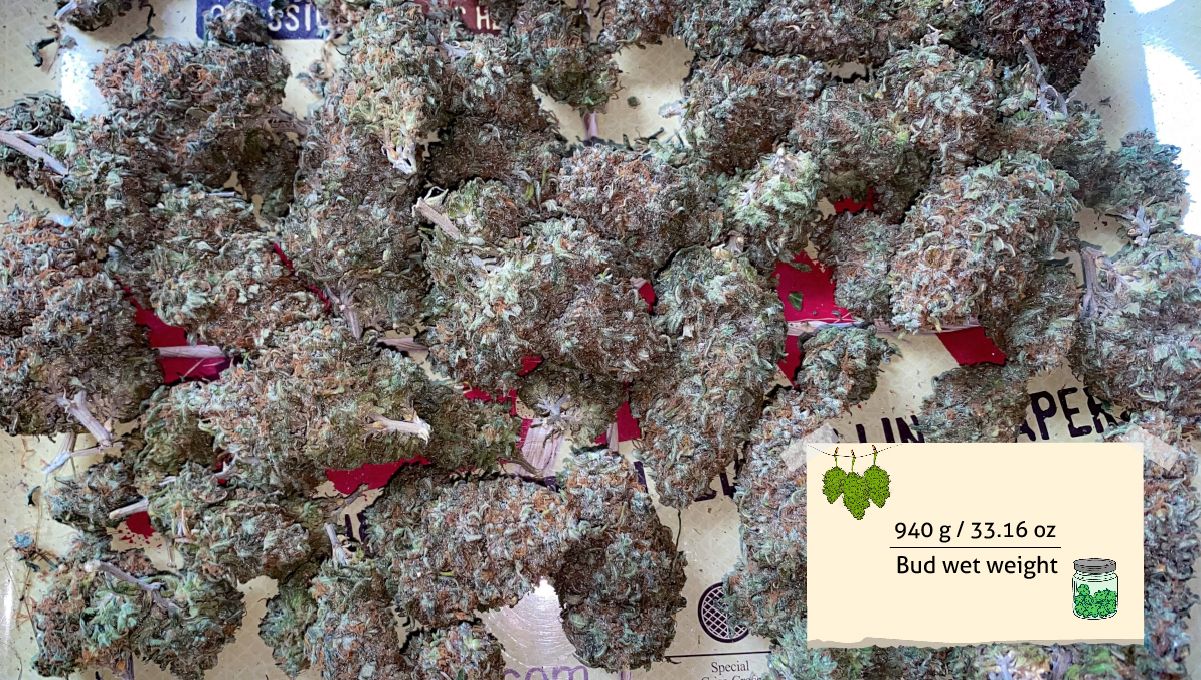
Grower A couldn't have been happier with the outcome of his grow as it brought him 940g (33.16 oz) of wet weight. When trimmed and dried, the nuggets had a huge bag appeal thanks to their tight, dense structure and beautiful purple color.
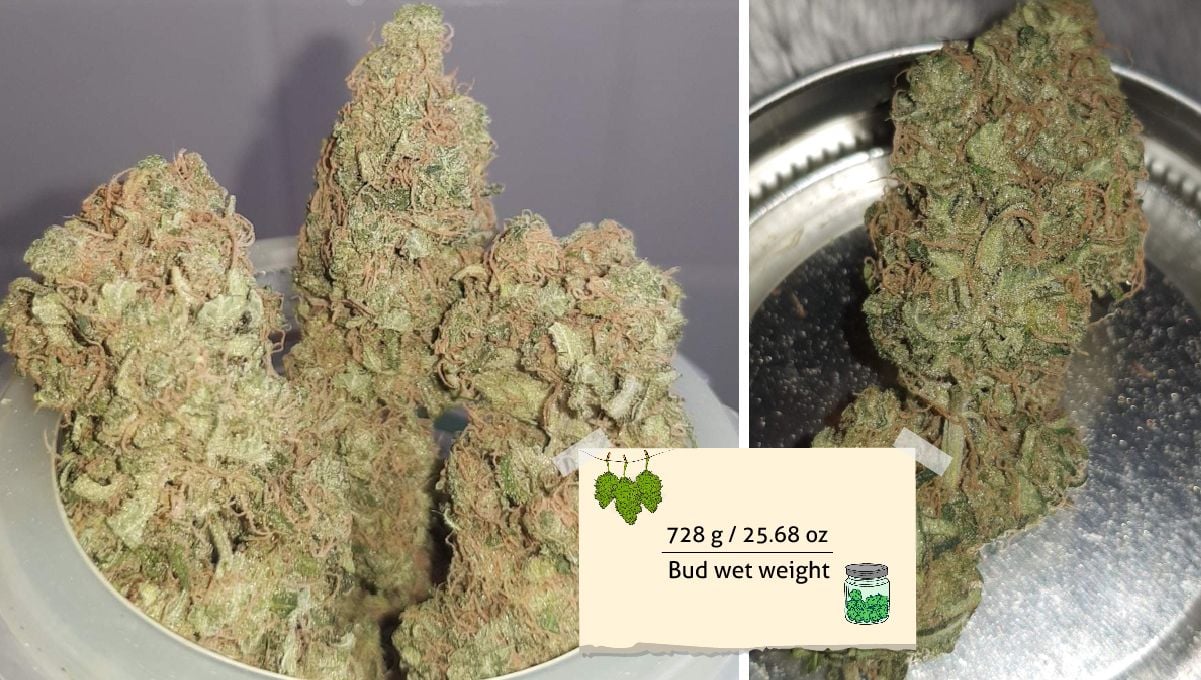
Grower B harvested two Wedding Cheesecake FF plants with exceptionally dense buds that weighed 728g (25.68 oz) wet.
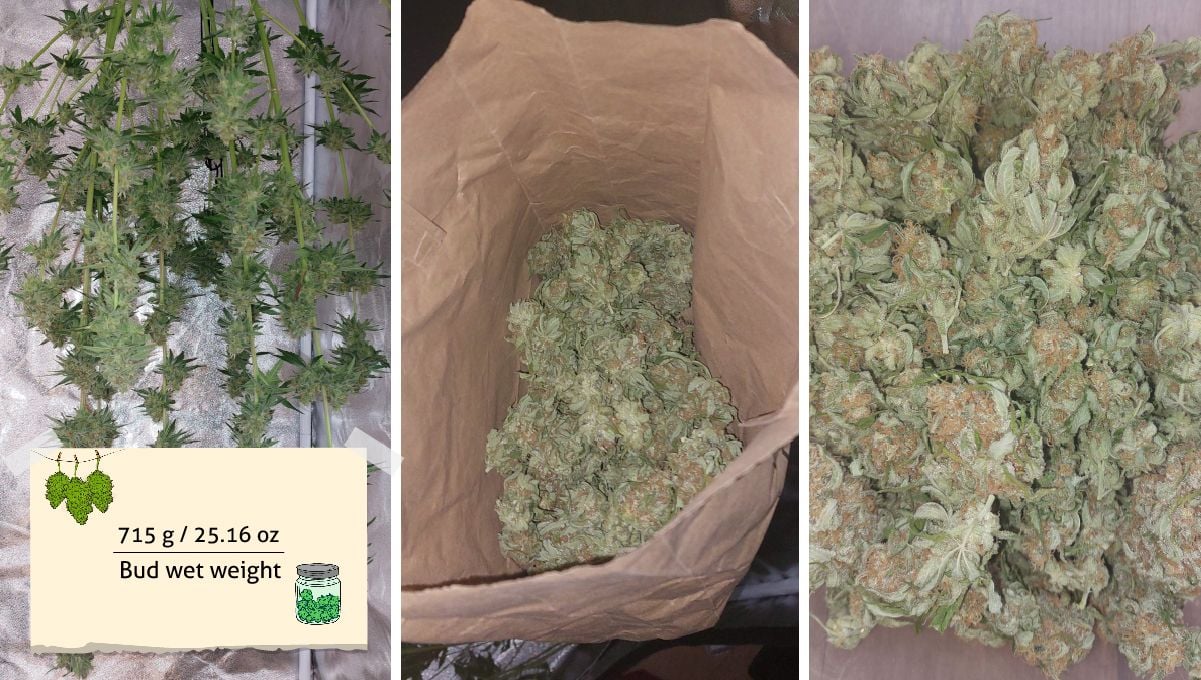
Grower C harvested 715g (25.16 oz) wet from just one plant, and he only trimmed them very lightly as the trim leaves were abundantly covered in resin and as smokable as the flowers themselves.
Finally, Grower D's yield was 375g (13.23 oz) per plant - a very respectable result for a photoperiod variety that took as little as 11 weeks from seed to harvest, just like an average autoflower.

Wedding Cheesecake FF Smoke Report
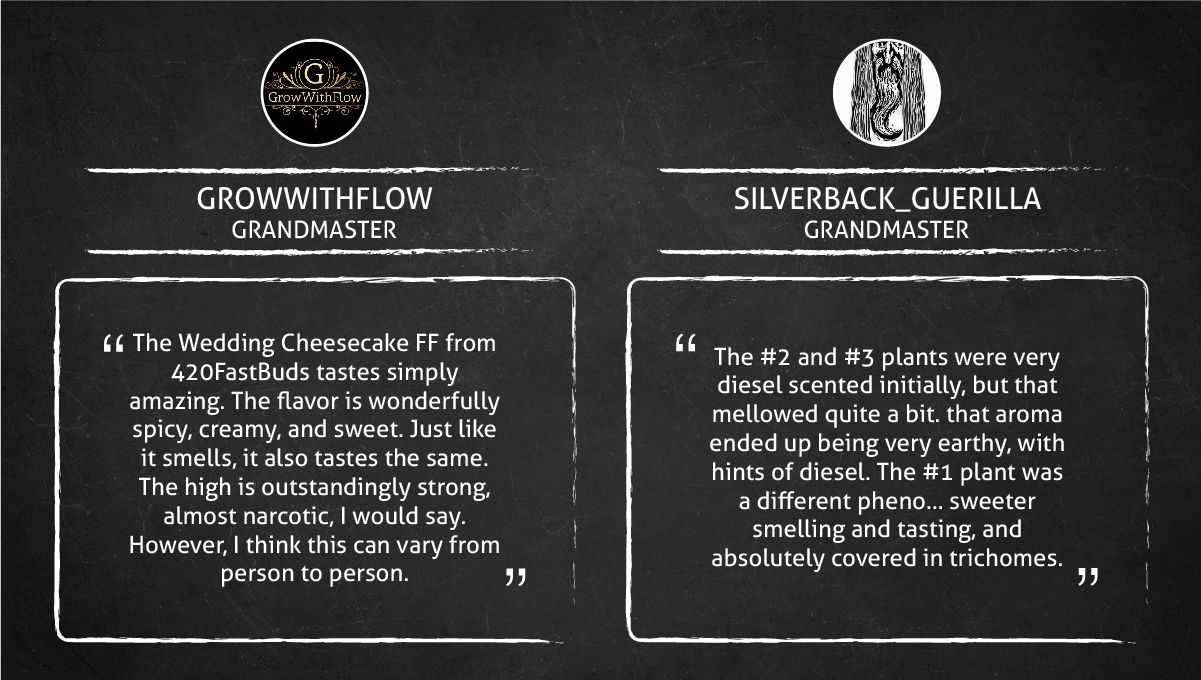
The smoke reviews for Wedding Cheesecake Fast Flowering consistently highlight its exceptional potency and robust effects. The aroma is often described as strong and diverse, ranging from old-school dank to a super spicy, creamy, sweet fragrance with prominent citrus notes. The taste aligns seamlessly with the scent profile, offering a delightful combination of sweet, earthy, and diesel undertones.
Users praise this weed’s outstanding strength, with some noting almost narcotic effects. Smokers appreciate its suitability for different occasions, suggesting both a nostalgic journey and a powerful, almost hypnotic high. Wedding Cheesecake Fast Flowering emerges as a well-rounded choice, perfect for diverse preferences and occasions, with a distinct and memorable flavor profile.
11. In Conclusion
As we have seen from the available grow diaries, Wedding Cheesecake FF is a vigorous strain that demonstrates confident, steadfast growth right from the start. Being a photoperiod variety, it is ideal for such high-stress training techniques as topping, as you have the option to extend the vegetative stage until your plant recovers from stress. But even that isn't necessary in experienced hands, and this photoperiod variety can be switched to flowering after only a short veg, compared to that of autoflowers.
Topping results in a boost of side growth, making Wedding Cheesecake FF a very bushy strain with many long branches that all produce same-size colas. Be aware of the plant's height potential and if your grow tent doesn't have a lot of vertical space, either use smaller pots, or keep the vegetative stage short, or employ LST to keep the size in check.
The branches of most Wedding Cheesecake FF plants are sturdy enough to support the weight of colas on their own, without extra supports, but their stretchy character will probably benefit from defoliation - to let light penetrate all the way down.
Be sure to install a carbon filter in advance, as Wedding Cheesecake FF produces very resinous buds that start to emit a pleasant but sharp smell in flower. Otherwise, this new offering by Fast Buds is beginner friendly and easy to grow following standart cultivation guidelines, so it will be a perfect fit for anyone. We wish you all trouble-free growing and abundant harvests!



Comments