Gorilla Cookies FF Cannabis Strain Week-by-Week Guide
- 1. Grow specification
- 2. Grow set up
- 3. Germination and seedling stage| week 1
- 4. Early veg | week 2
- 5. Mid veg | weeks 3-6
- 6. Transition (pre-flower) | week 7
- 7. Early flower | weeks 8-9
- 8. Mid flower (bulk phase) | weeks 10-11
- 9. Ripening and harvest | week 12
- 10. The outcome
- 10. a. Gorilla cookies ff yield
- 10. b. Gorilla cookies ff smoke report
- 11. In conclusion
Gorilla Cookies Fast Flowering is a cannabis strain that excels on multiple fronts, making it a top choice for growers and smokers alike. Cultivators will appreciate its exceptional resilience and ease of cultivation as well as high yields of visually striking, resin-rich buds. This strain delivers an intense euphoric high that transitions into a long-lasting, soothing relaxation, making it a must-try for those seeking potency. In the world of cannabis, Gorilla Cookies Fast Flowering stands out as a versatile and rewarding option for enthusiasts and cultivators.
Welcome to the definitive guide on cultivating Gorilla Cookies Fast Flowering. In this comprehensive week-by-week journey, we will take you through every stage of this exceptional strain's growth, from germination to harvest. By following our expert advice, you'll be well-equipped to nurture your own bountiful crop of these candy-like, sweet, and apple-scented buds. Whether you're a novice or an experienced grower, this guide will provide you with invaluable insights to ensure a successful cultivation experience.
1. Grow Specification
Gorilla Cookies FF is a cannabis strain that embodies the perfect blend of Sativa and Indica, having 55% and 45% of those, respectively. The plant’s XL size and impressive height of up to 250 cm outdoors make it a striking addition to any cultivation setup. Gorilla Cookies FF is a relatively quick grower, with a flowering period of just 7 weeks, making it a convenient choice for those looking to harvest an early crop. When cultivated indoors, you can expect to yield between 500-650 g/m2, making it a lucrative option.
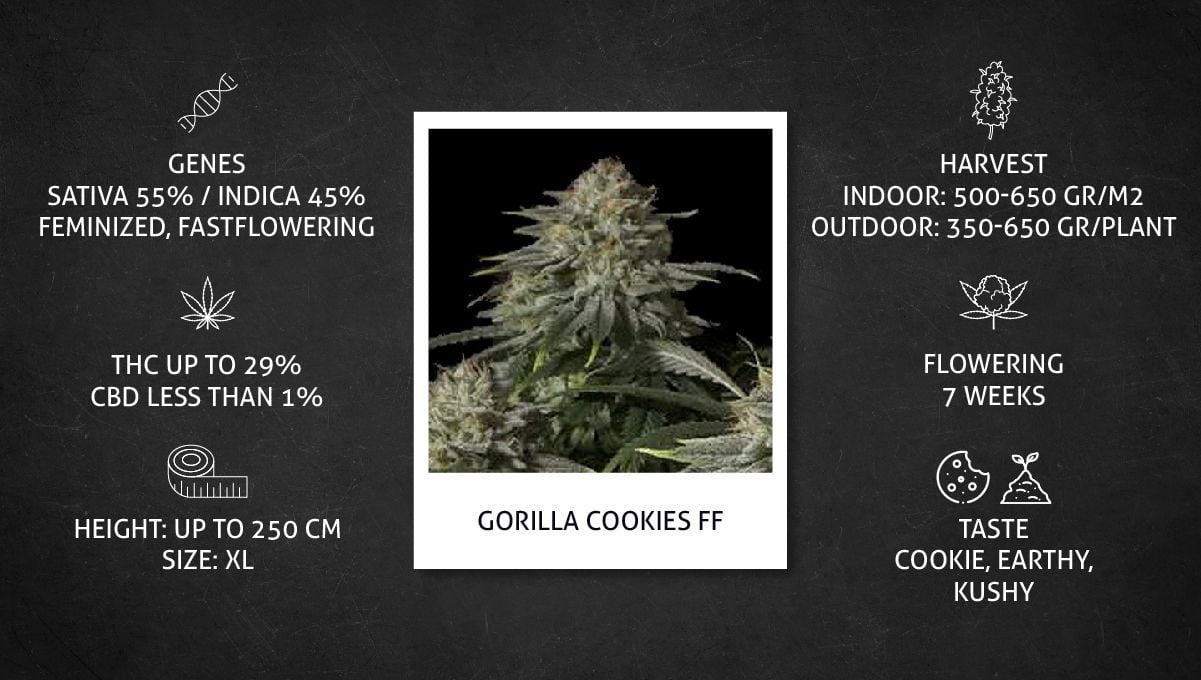
When it comes to the consumption experience, Gorilla Cookies FF doesn't disappoint. With a THC content of up to 29% and negligible CBD (< 1%), it packs a punch that's perfect for both recreational and medicinal users. The taste profile is a delightful combination of cookie, earthy, and kushy flavors that come together in a harmonious symphony for your palate. This strain's balanced genetics create a dynamic effect that's both uplifting and relaxing, making it an ideal choice for those looking to unwind while maintaining a clear mind.
2. Grow Set Up
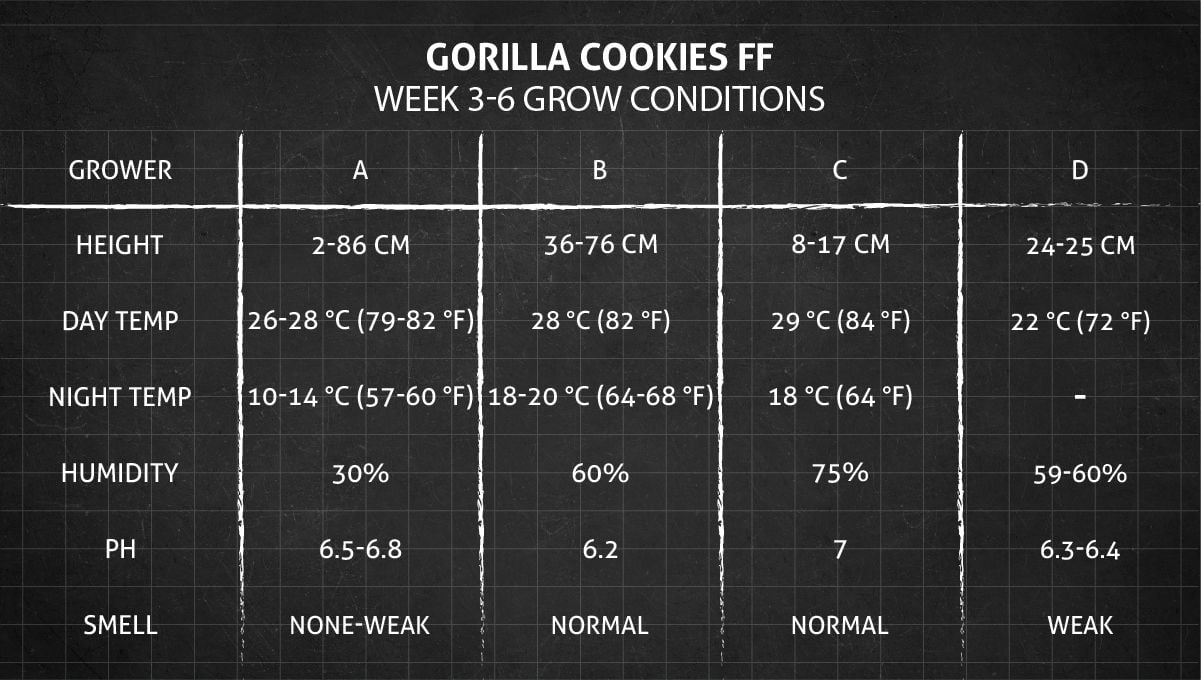
We have looked through several Gorilla Cookies FF grow diaries and selected four that seemed the most detailed and had good pictures. In this guide, we'll be looking at all four, providing weekly data on their environmental conditions. You can also glean some details about all four grow setups in the table below. Please note that one of the grows was outdoors and the rest indoors.
| Grow Space | Light | Medium | |
|---|---|---|---|
| A | Backyard | Sun | Soil/Coco/Perlite |
| B | 1.83 m2 | 720W LED | 100% Soil |
| C | 2 m2 | 1600W LED | 70% Soil / 30% Perlite |
| D | 0.45 m2 | 240W LED | Biobizz light-mix |
Although Gorilla Cookies FF was specifically developed for outdoor cultivation in climates with short summers, it's such a versatile plant that it also thrives in indoor gardens. You'll bear witness to this by following our week-by-week guide and seeing how successful each grow was. If you want even more insights into cultivating this strain, watch this video:
3. Germination And Seedling Stage | Week 1
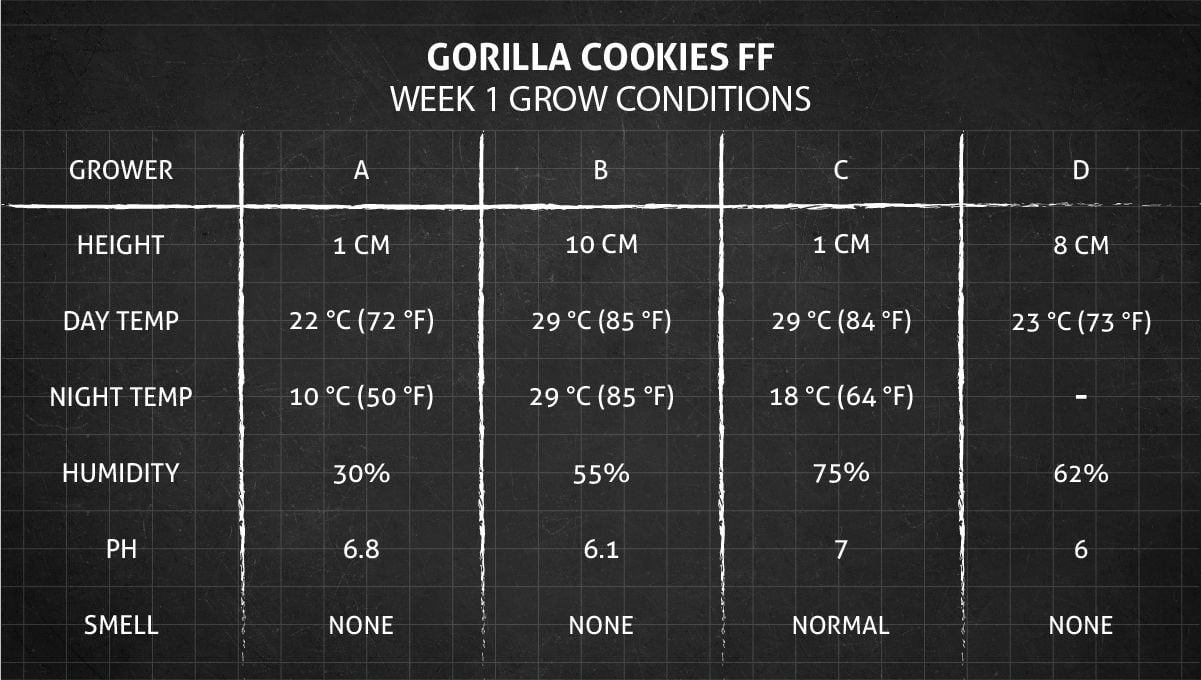
No matter if you plan an indoor grow from seed to harvest or want to cultivate Gorilla Cookies FF outside, we recommend starting your plants indoors as weed seeds and seedlings are vulnerable to the elements and thrive in mild, fully controlled, and consistent conditions that you can only realisticaly create in enclosed space. At the start of your grow cycle, pay special attention to warm temps and high relative humidity.
Cannabis seed germination is a crucial first step in the journey of cultivating your plants. Among the various methods available, the most common approach is the wet-paper-towel method. In this method, cannabis seeds are placed between moistened paper towels or cotton disks, creating a humid environment that encourages germination. Some growers further increase the chances of successful germination by pre-soaking the seeds in a glass of water. If you choose this method, it's important to note that while the seed may float on the water's surface, if it sinks, you should not keep it submerged for more than 12 hours to avoid suffocation.

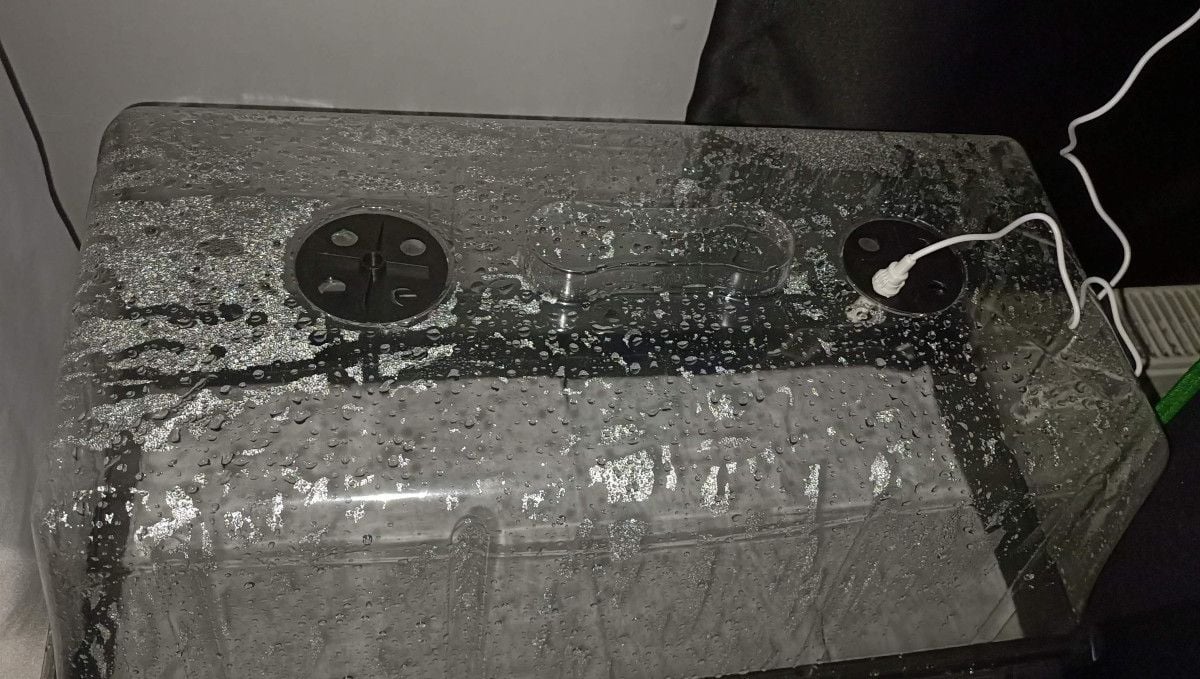
Creating the right conditions is paramount for successful germination. Warm temperatures and high humidity are key factors here. To facilitate these conditions, consider using a propagation tray (see the photo below) equipped with a special heating mat. These tools help maintain the ideal environment for germination, ensuring your seeds have the best chance to sprout.
Once the taproot has emerged and grown to about half an inch (1 cm) in length, it's time to transplant the seedling into the growing medium of your choice. Prepare a small hole in the medium to accommodate the seedling and leave enough space to cover it with about half a centimeter of moistened medium. This will help the sprout shed the seed hull, giving it a strong start in life as it emerges from beneath the medium.
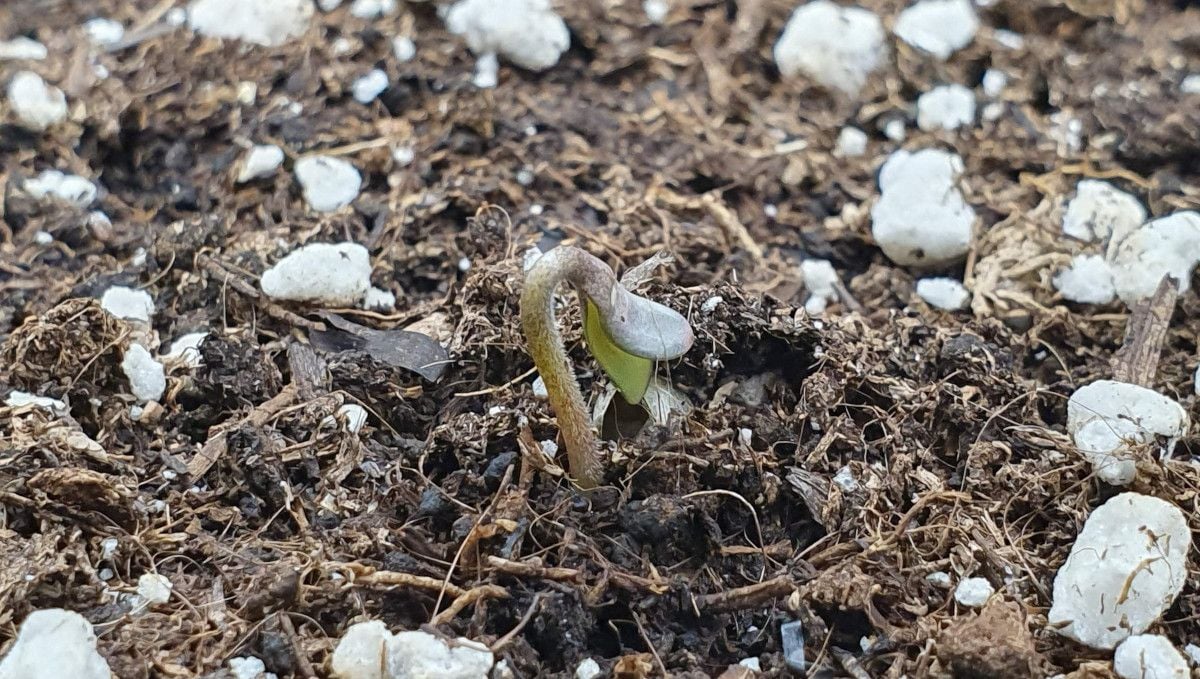
For growers dealing with multiple plants simultaneously, especially in the early stages, using small containers like solo cups for the first two weeks can be incredibly convenient. This approach simplifies the watering process, saves space, and minimizes electricity usage as you can cluster several plants under a single, less powerful light source.
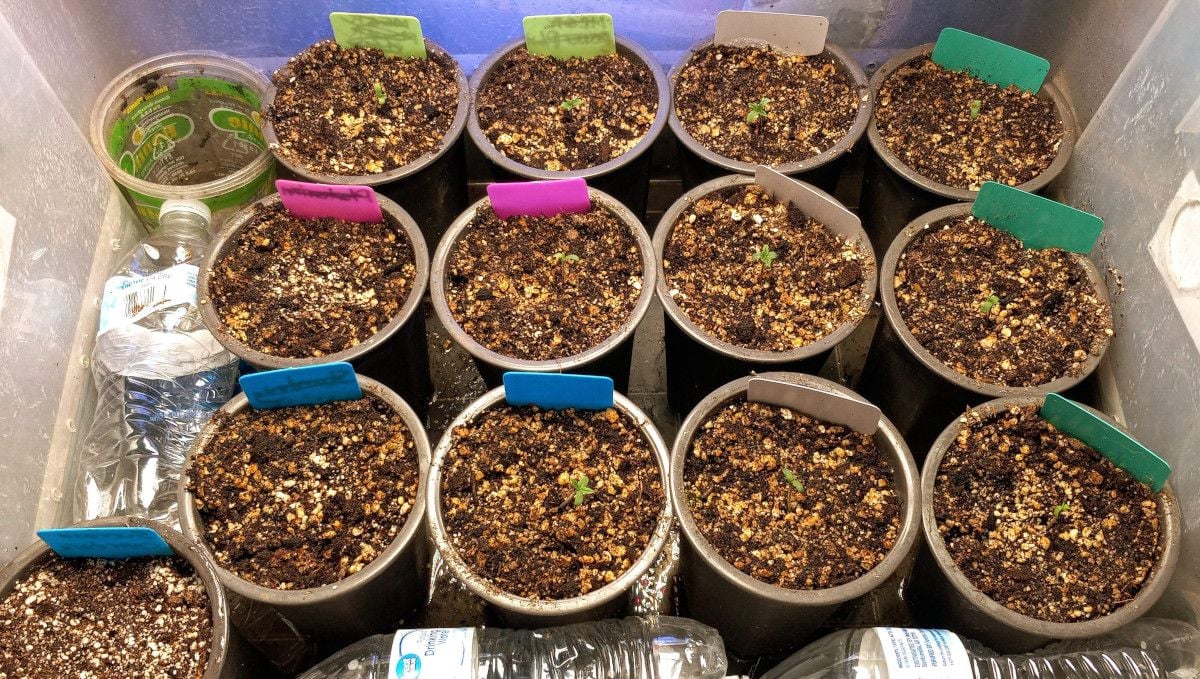
Another convenient option for starter containers is using jiffy pots. These biodegradable pots or cups can be later transplanted into the final containers, and the plant roots will naturally grow through the walls of the jiffy cup into the surrounding medium, making the transition smoother for your young cannabis plants.
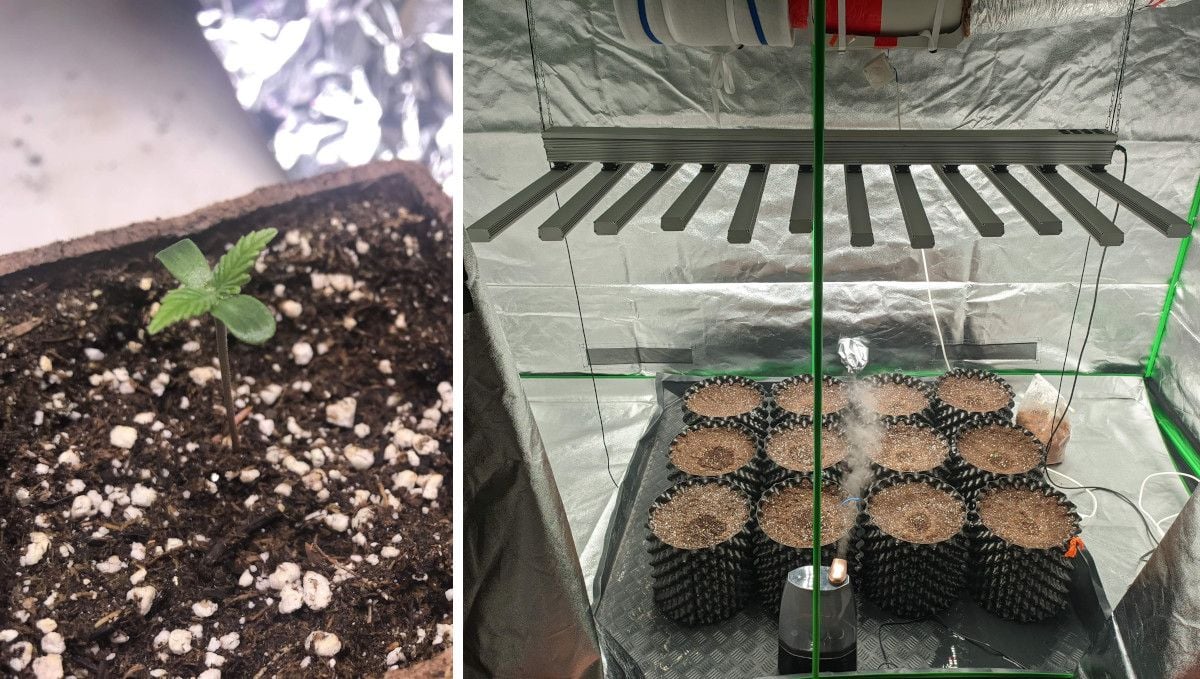
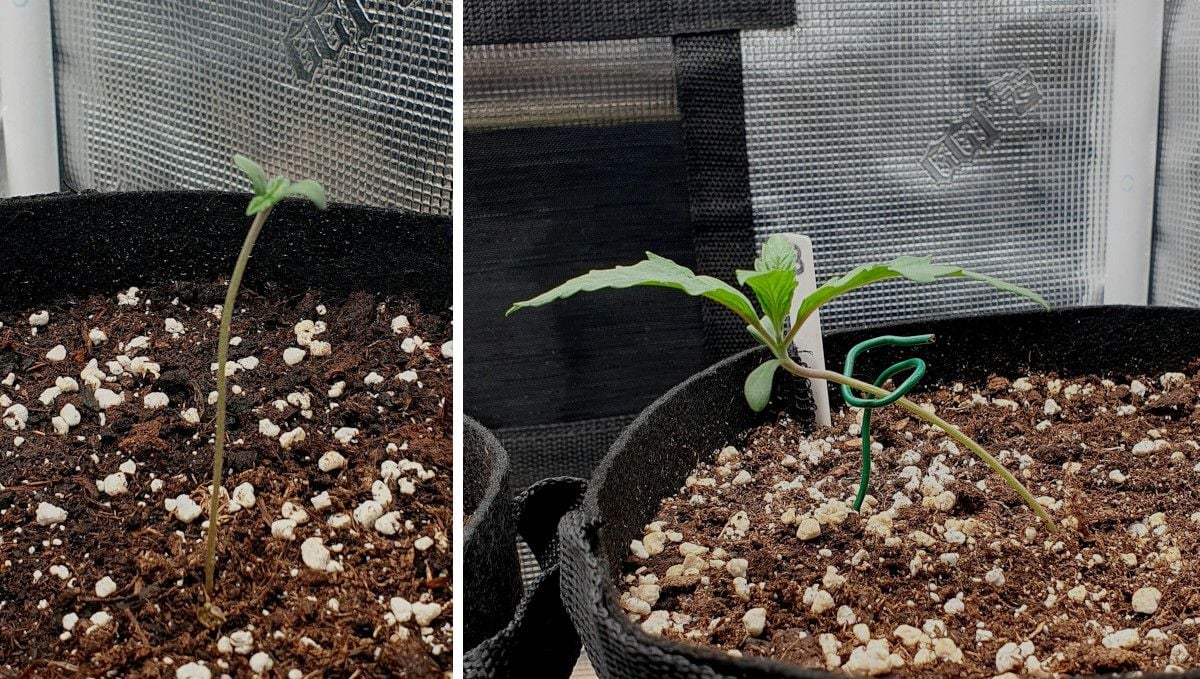
Maintaining the correct distance between the light source and your plants is essential to ensure they don't stretch excessively. If you observe that the stem has become too weak to support the leaves on top, and it starts to bend, you should provide support. This can be done using stakes, wires, or other suitable materials to ensure the healthy growth of your young cannabis plants.
4. Early Veg | Week 2
In the early stages of the vegetative growth period, young plants develop a few sets of true leaves, become robust, and basically stop being seedlings. Now, they can even handle being transferred outside but only if the weather is mild and stable. If not, keep your saplings indoors as they'll benefit from the carefully controlled conditions that you've created in your indoor grow space. However, if summer has arrived, there are no ground frosts, and night temps don't go below 10C, start hardening your Gorilla Cookies FF by putting it outside for a few of hours every day so that it gets used to the sun and the temperatures.
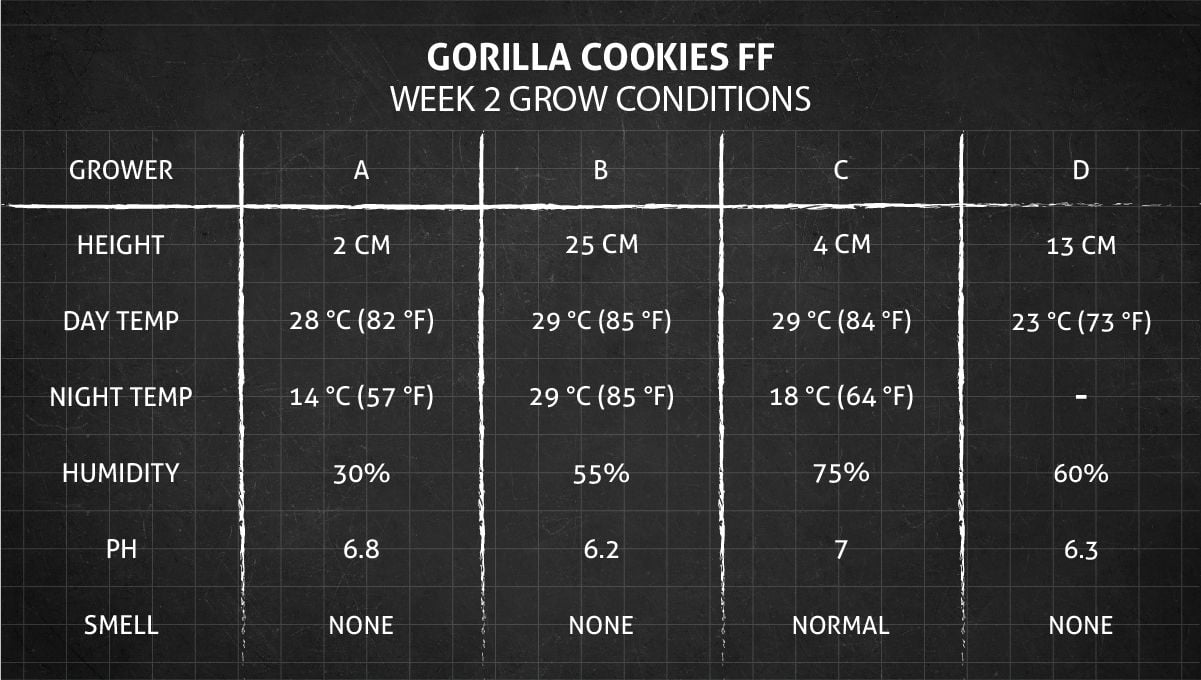
The seedling stage is a crucial phase in the development of your cannabis plants. During this period, the initial progress may appear slow, as the most significant changes are occurring in the root zone, which remains hidden from view. However, as you progress through the second week, you'll begin to see the first pairs of true leaves emerging. If the growth is healthy, you'll notice that with each new pair of leaves, they grow larger and span wider than the previous ones. This visible growth is a positive sign of your plant's health and development.
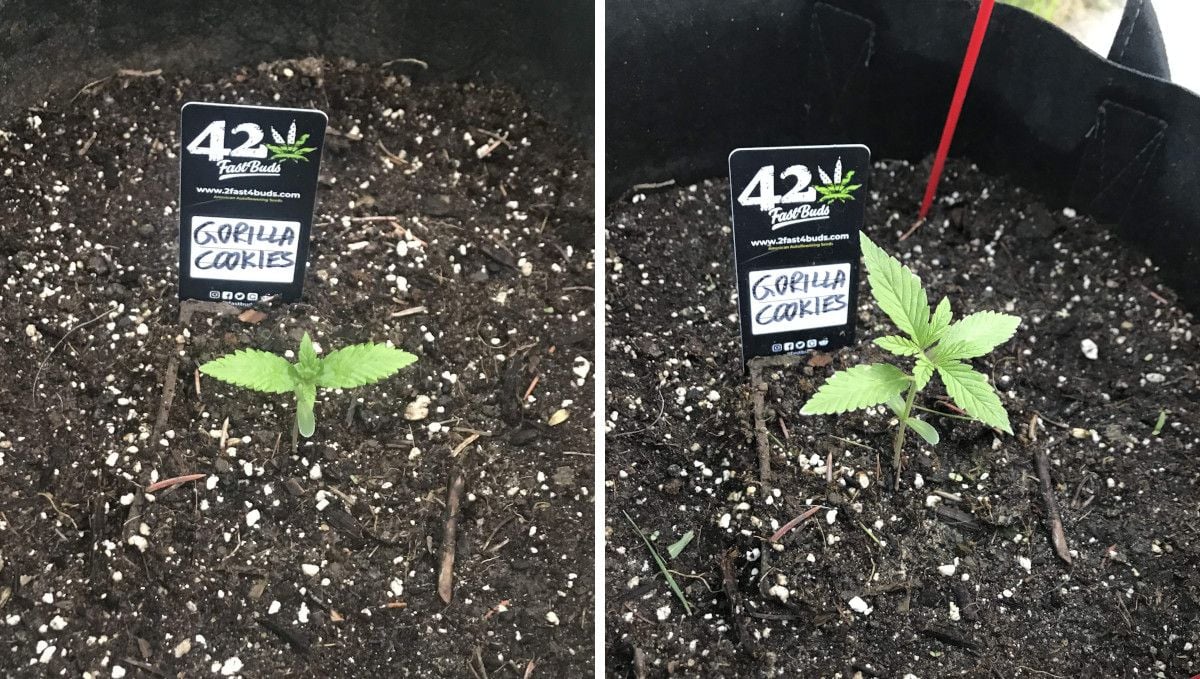
Determining the right moment to transplant your seedlings into larger pots is essential. You can assess this based on the roots and the leaves. If the roots have occupied all the available space in their current container or the leaves are extending beyond the edges of the pot, it's a clear signal that the plant needs more room. It's important not to allow your marijuana plants to become root-bound, as this can hinder their growth and overall health. Fabric pots, with their breathable walls, provide an excellent long-term home for cannabis plants, as they promote oxygenation, which the plant's roots thrive on.
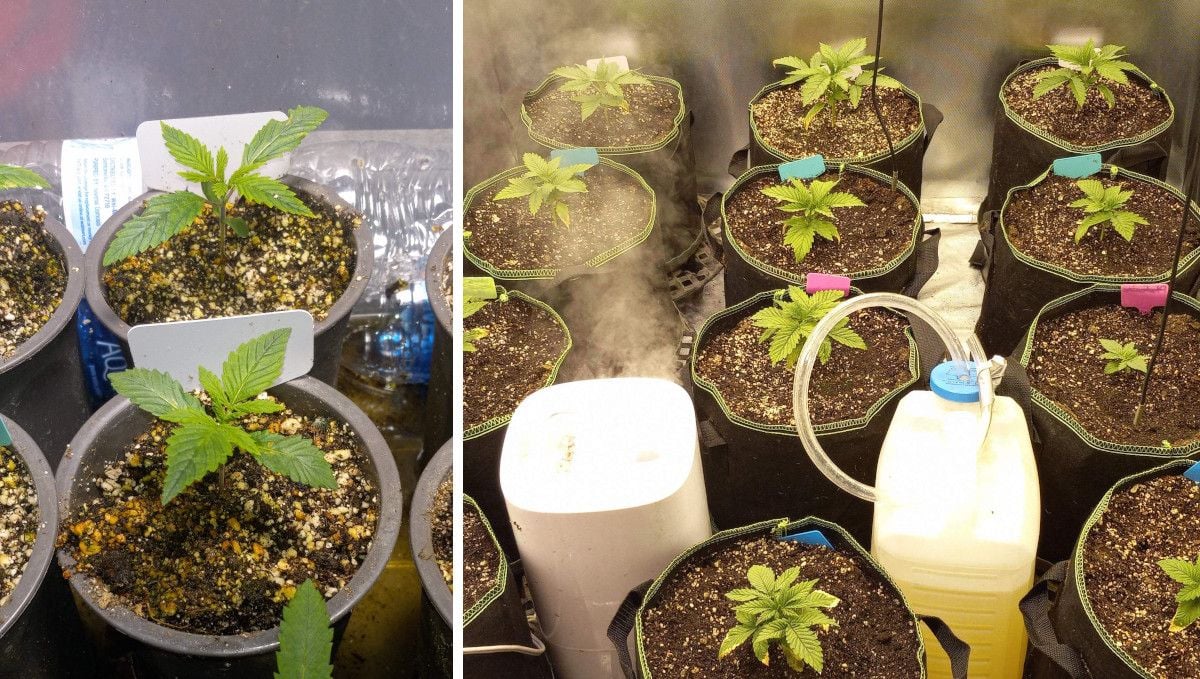
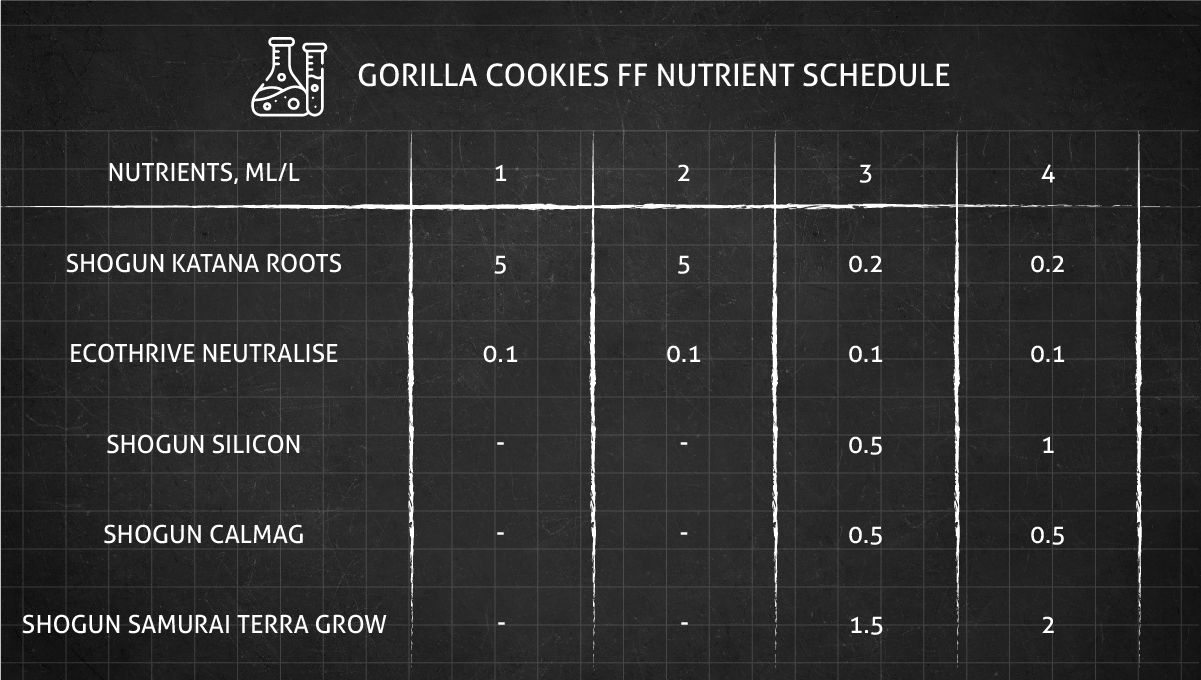
Having your plants in big containers with lots of nutrient-rich medium saves you from the trouble of giving them extra nutrients with water. However, if you chose coco coir or other inert medium or grow your weed hydroponically, you'll need to feed your plants practically from the start. Just go low and slow at first, which means giving your plants some 1/4 of the dose recommended by the manufacturer. If plants react favorably, you can up the dosages any time.
Airpots, with hundreds of holes in their walls, offer an even greater advantage than smart pots mentioned above as they ensure optimal oxygenation of the growing medium. To ensure that the roots do not suffocate, it's essential to water your cannabis generously but not too frequently. Striking the right balance in watering is crucial for healthy development during the seedling stage.
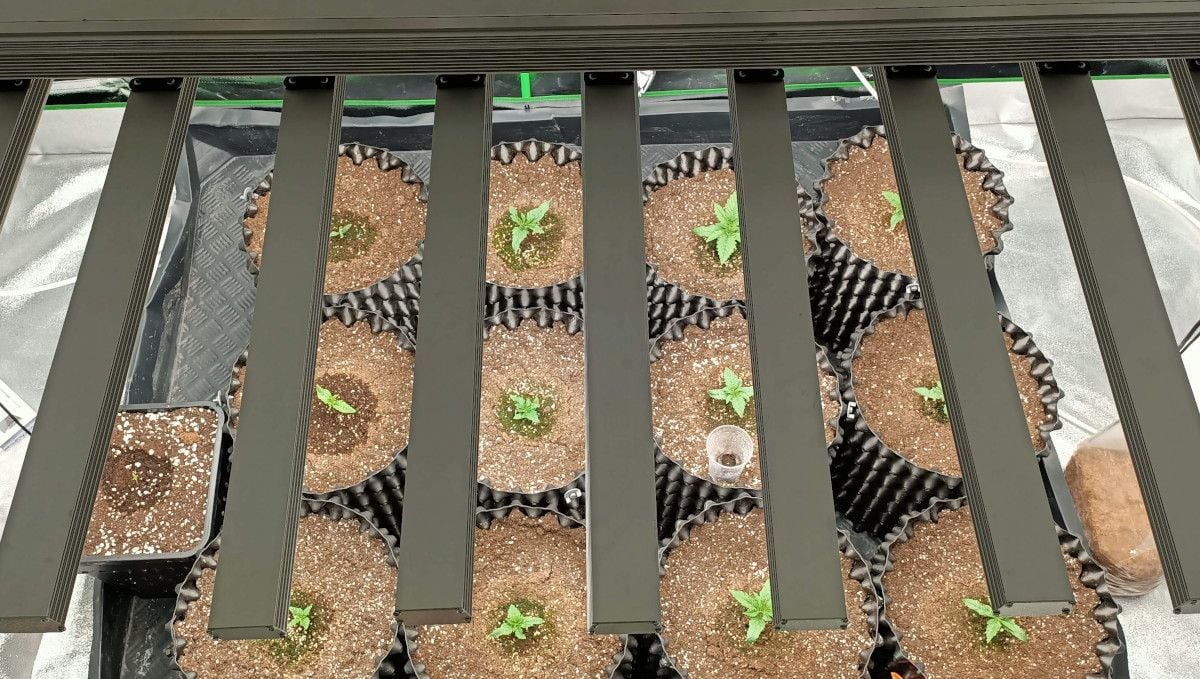
Lighting requirements remain important throughout the seedling stage. Young plants should not be inundated with excessive light, but they should receive an adequate amount. If they receive too little light, they can exhibit characteristics similar to outdoor plants in cool and cloudy climates, becoming stretchy, weak, and in need of external support. Therefore, maintaining the correct light intensity is key to nurturing robust and healthy seedlings as they transition to the vegetative phase.
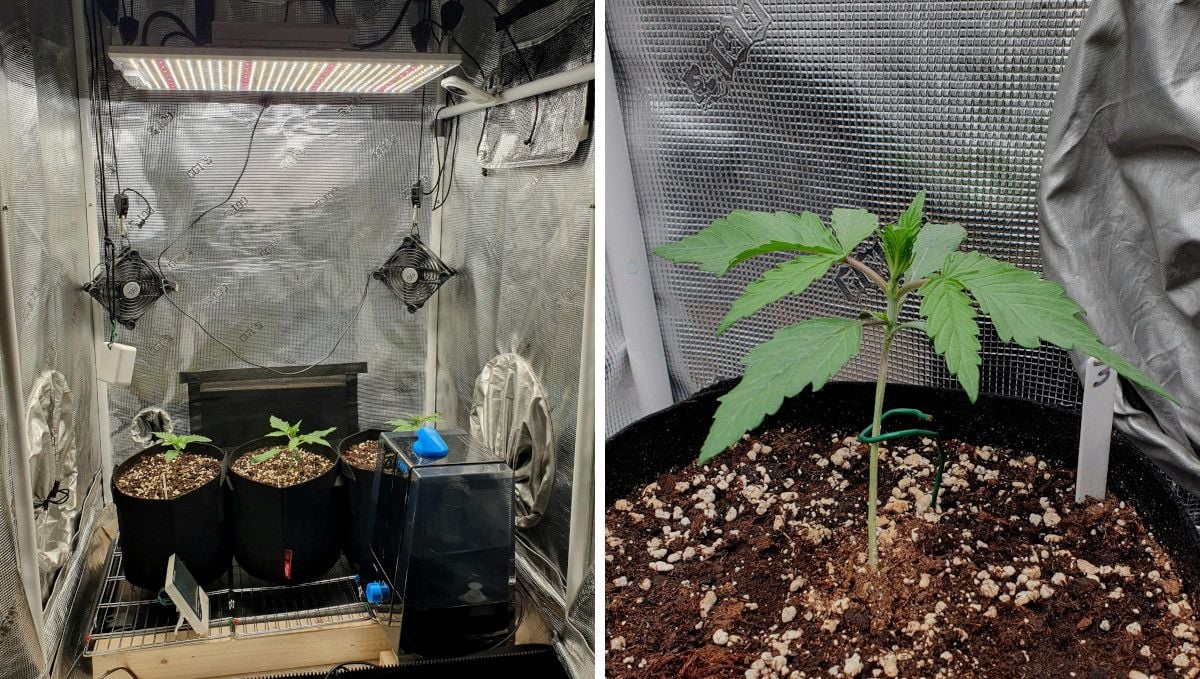
5. Mid Veg | Weeks 3-6
When your plants start to get big, they stop caring for the environment to be exactly right and do well in a wider range of temperature and humidity conditions. Nevertheless, keeping those in the sweet spot will ensure your plant's continued health. Outdoors, your best bet is using portable containers that you can bring inside any time the weather changes for the worse and threatens your young cannabis.
The commencement of the vegetative phase marks the onset of explosive growth in new foliage and side branches. During this stage, your cannabis plants undergo a rapid transformation as they fill the available grow space, and it may even become crowded due to the burgeoning growth.
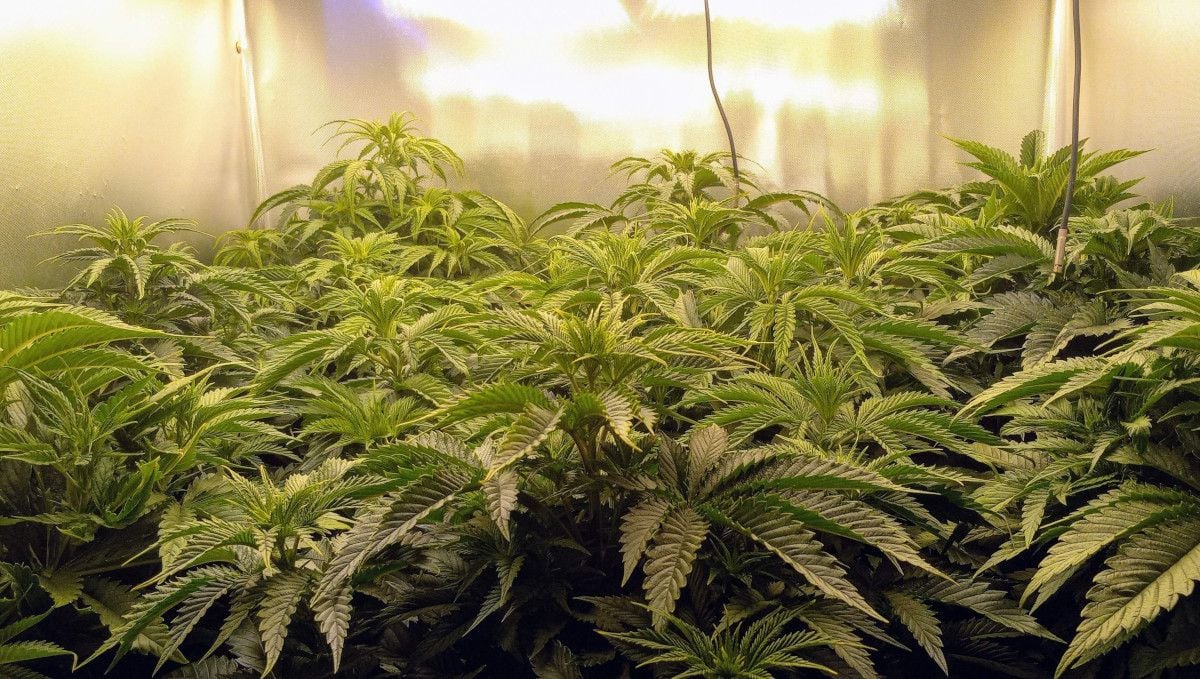
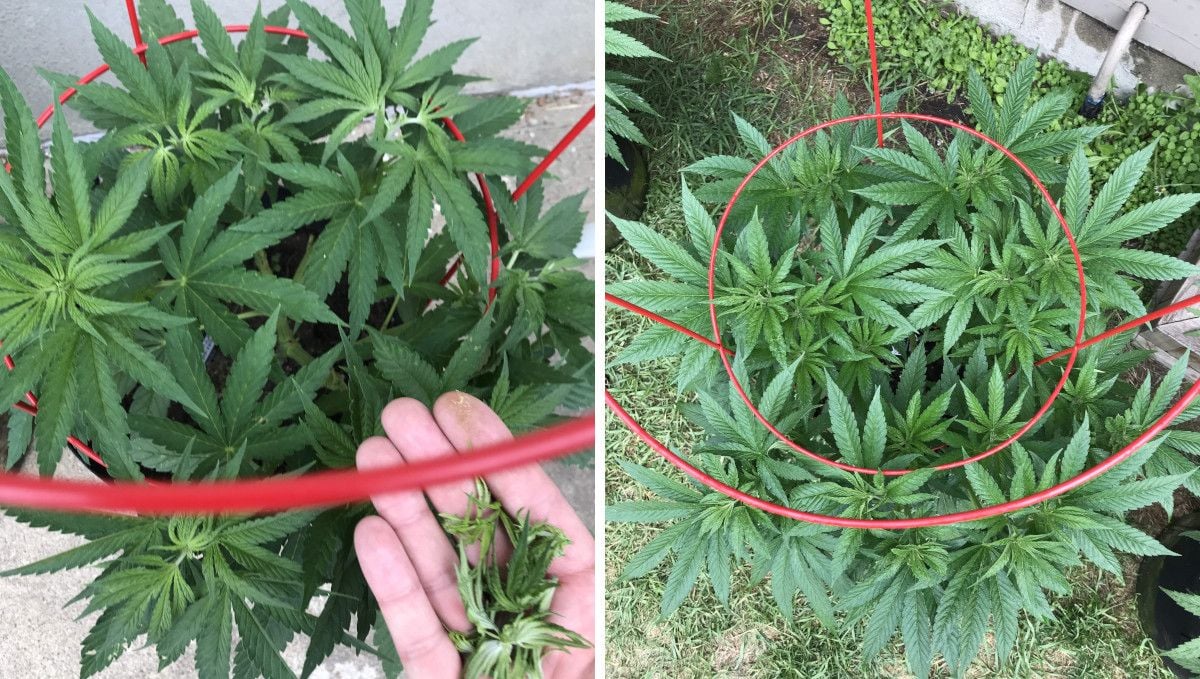
To prevent uncontrolled vertical growth and create a more structured canopy, many growers opt to employ various training methods. One of these methods involves the use of ScrOG (Screen of Green) nets. These nets are strategically positioned to direct the growing branches outward until they occupy all the available space, resulting in a horizontally expansive and uniform canopy.
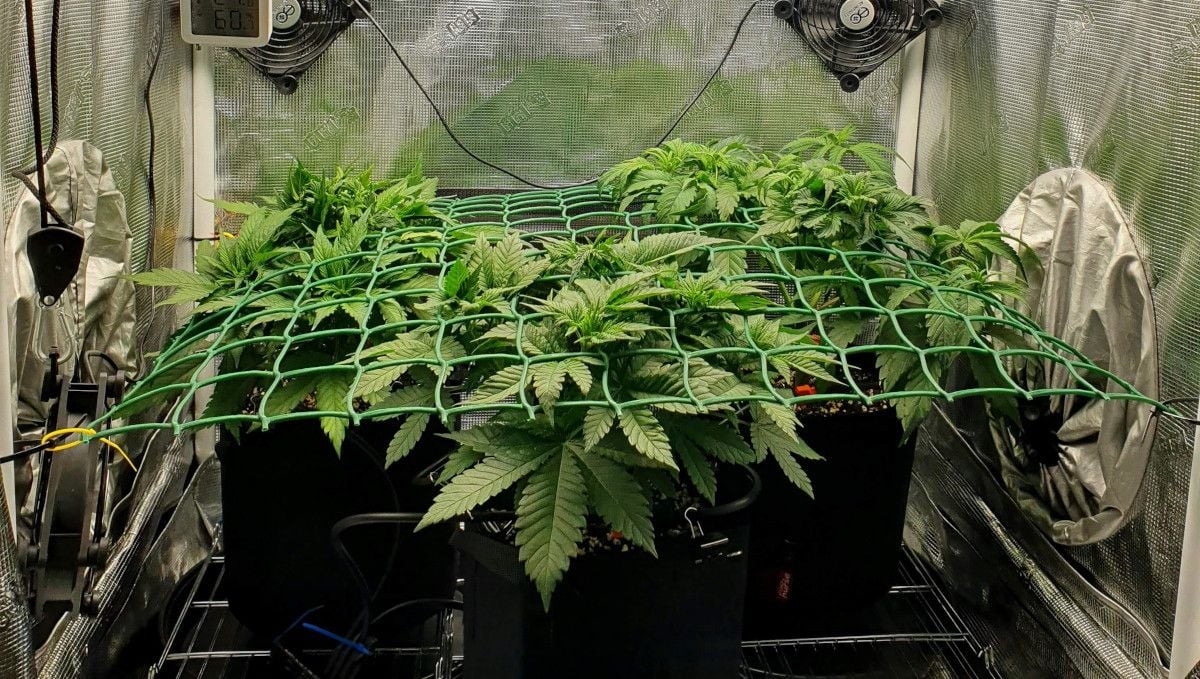
Another technique for stimulating lateral growth and creating a flatter canopy is topping the main stalk. This process involves snipping the main stem's tip and carefully spreading the side branches in an outward direction. This encourages the plant to develop multiple main colas rather than one dominant central stem.
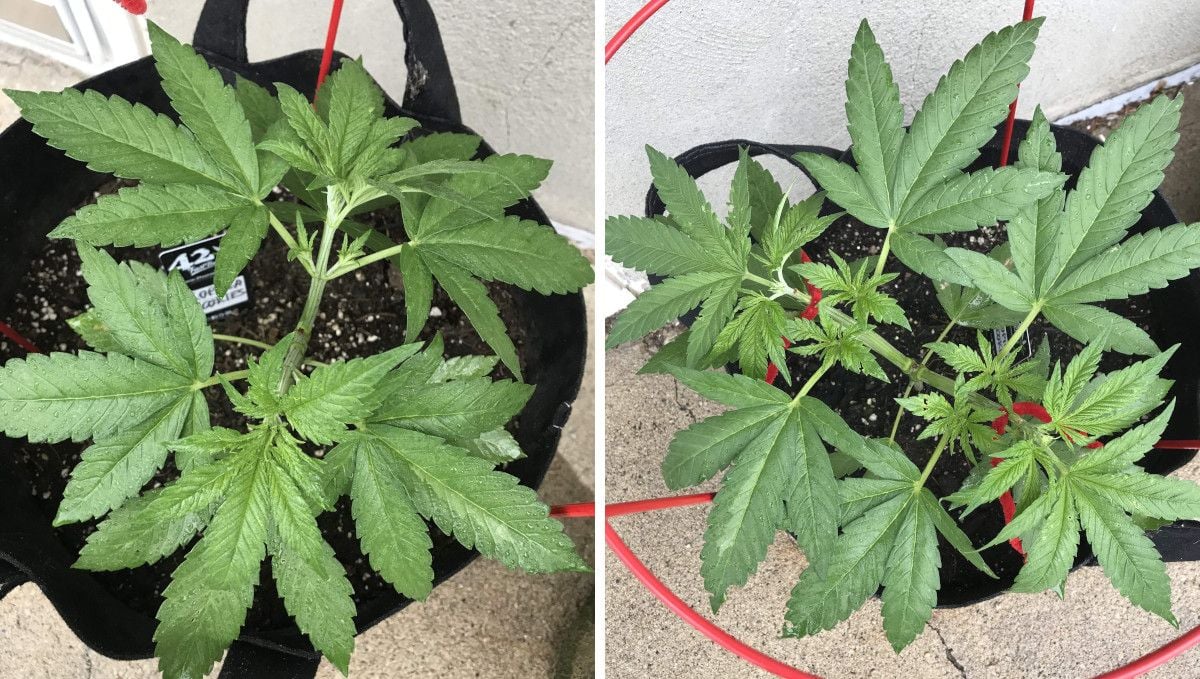
FIMing, short for "F**k, I Missed!" is a form of topping where the main growing point isn't entirely removed. Instead, you cut the apex approximately halfway. This method temporarily hinders the growth of the main shoot, promoting more vigorous lateral growth.
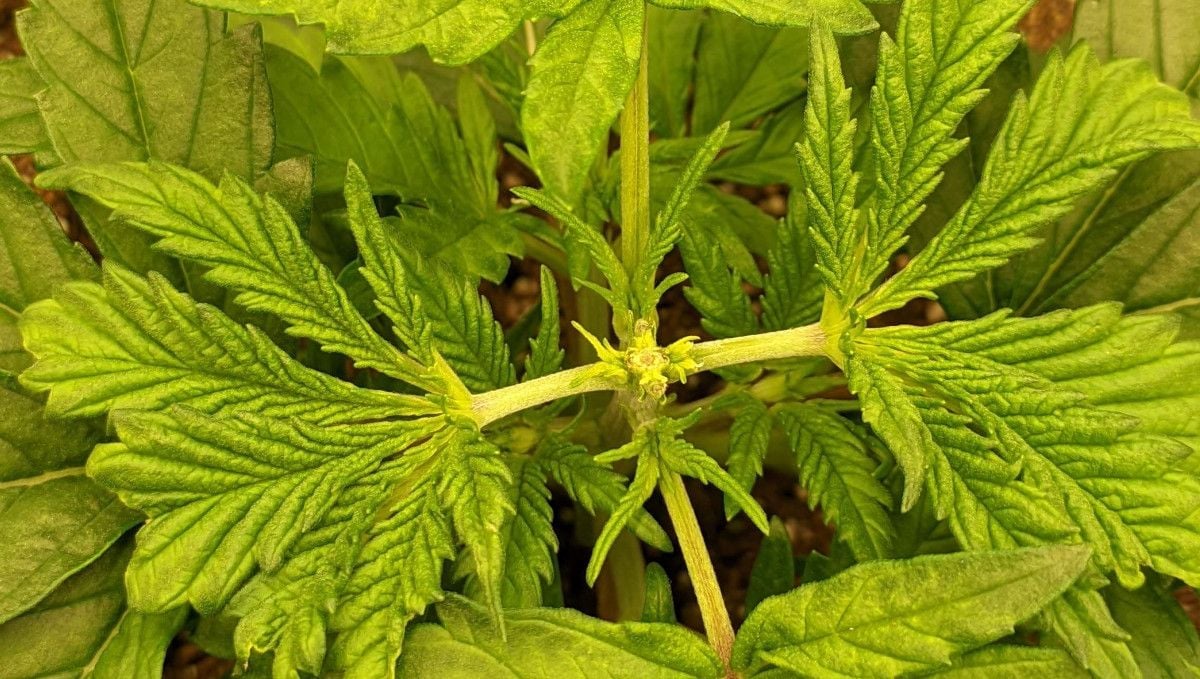
However, the main stem will eventually recover and continue to grow, albeit with a somewhat mangled appearance. It's important to note that the FIMed apex will remain active and become the site where future buds will develop.
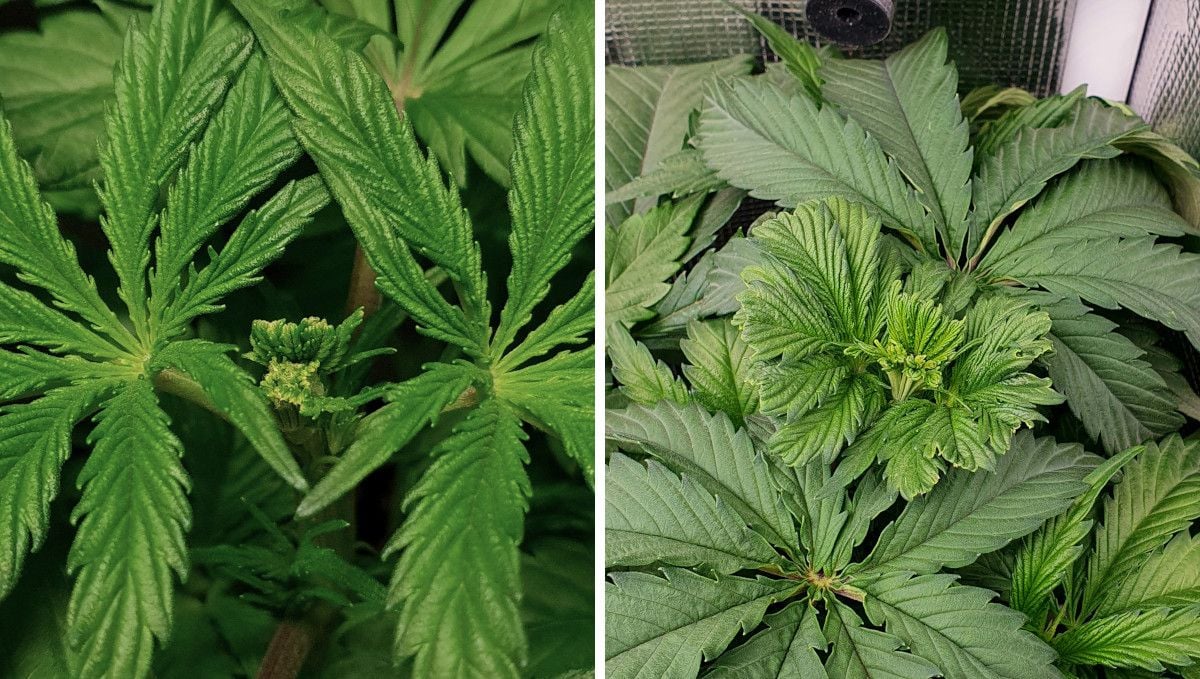
Depending on various factors such as the length of the grow cycle, available space, and the desired canopy shape, you can opt to perform topping multiple times during the vegetative stage. Initially, you can cut the main stem to encourage branching, and subsequently, you can perform additional toppings on the side branches to maintain an even canopy and maximize your yield. This flexibility allows growers to tailor their plant's structure to meet their specific goals and space constraints.
6. Transition (Pre-Flower) | Week 7
Gorilla Cookies FF starts to flower early and finishes fast outdoors, but it isn't an autoflower, so it needs a change in light schedule to finish the vergetative phase and enter the budding phase. Indoors, this means switching to 12/12 when you think that your plants have reached the needed size. In the four grows that we've been following, three indoor plants commenced flowering around 6-7 weeks from seed and in about 2 weeks after the 12/12 flip, while the only outdoor plant in our growing guide spent 12 weeks in the vegetative stage and then gradually started to transition as summer was nearing its end.

Cannabis plants that have matured sufficiently to enter the flowering stage exhibit a few telltale signs. One of these is the alternating pattern of nodes on the main stem and side branches, which means that the leaves don't grow in pairs but each is positioned slightly higher than the previous one. Another significant sign is the emergence of the first preflowers, typically found around the middle nodes of the plant. Female preflowers appear as a pair of tiny hairs, often challenging to spot unless you scrutinize the plant closely.
As the transition to the flowering phase begins, you can observe the change in how the plant tops look. They tend to become lighter in color, sometimes even taking on a yellowish hue. Experienced growers recognize this shift as a clear indicator that the next step is the emergence of buds, heralding the official onset of the flowering phase.
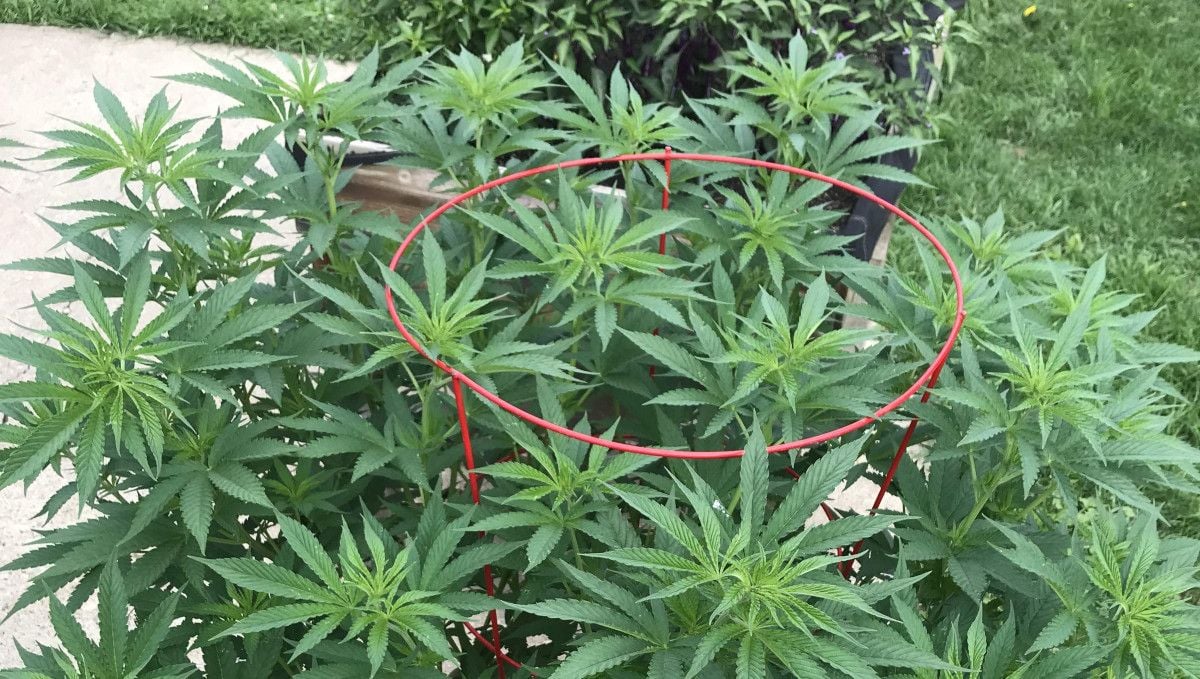
Inspecting the plant tops during this stage reveals that the new leaves growing here are noticeably thinner and more curved. These may raise questions, with some wondering if these are, in fact, pistils. However, it's important to note that true pistils will make their appearance a bit later, usually within a week from the start of flowering.
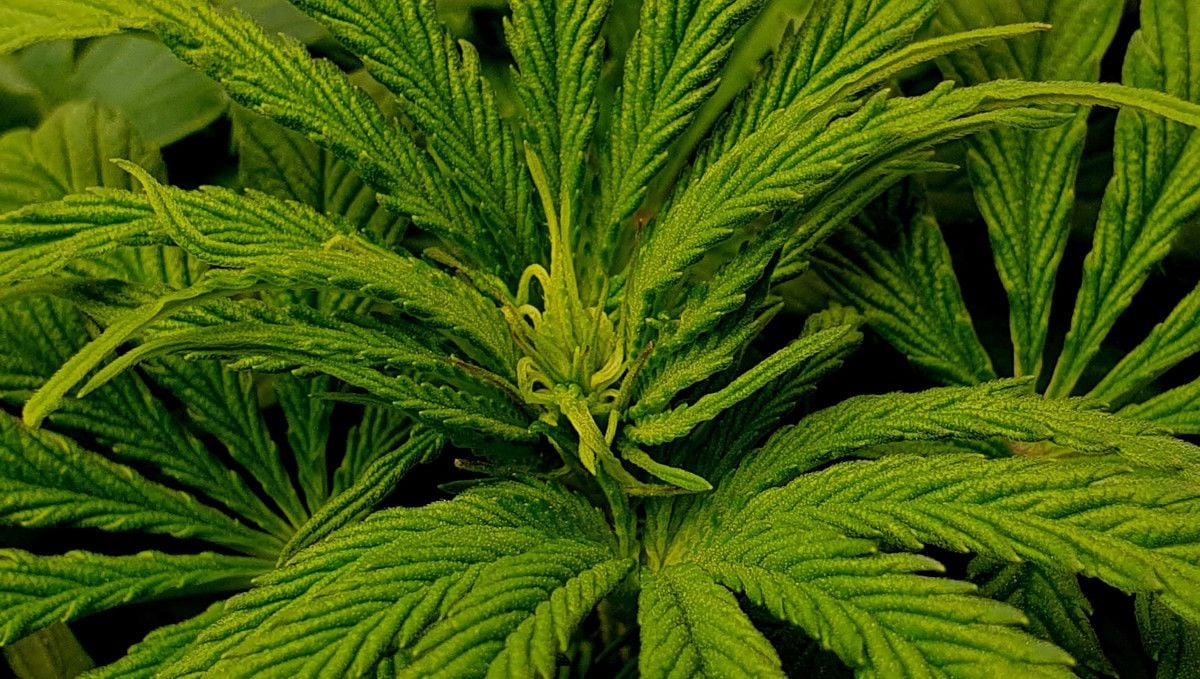
As the flowering phase progresses, the plant tops begin to bristle with these thin leaves and female hairs dispersed between them. This transformation gradually spreads to every lower bud site, and you can witness the formation of numerous new potential bud sites. This proliferation of budding sites is a promising sign of the flowering process.
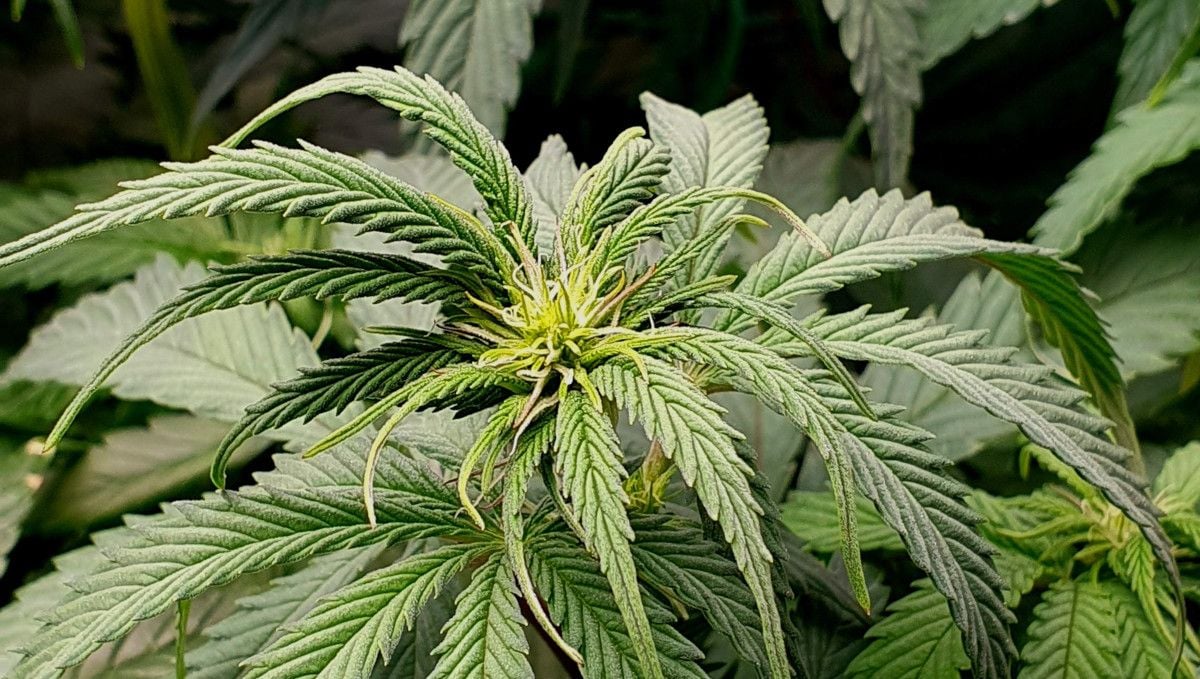
The initiation of flowering doesn't signify the cessation of vegetative growth; quite the opposite. During the early weeks of flowering, vegetative growth continues at an even faster pace, and the branches undergo a significant stretch. Simultaneously, the formation of buds takes place, creating a dynamic growth pattern.
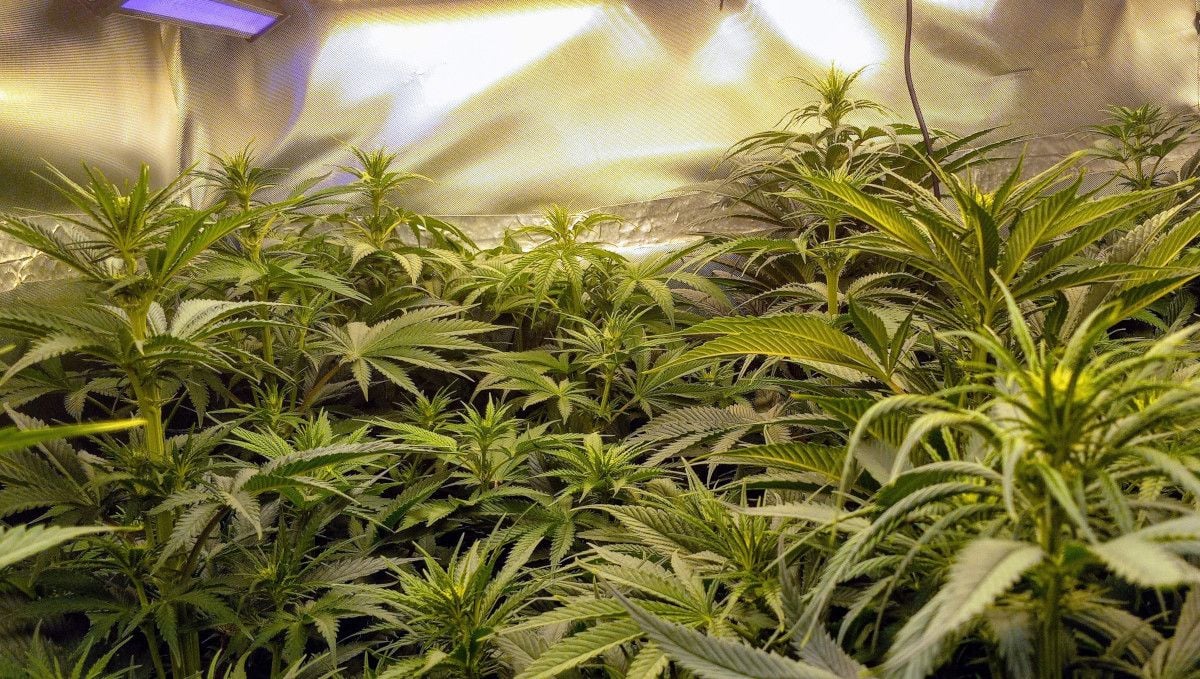
It's crucial to be aware that the demand for resources, especially light, increases significantly during the flowering phase compared to the preceding vegetative stage. Consequently, it's essential to find the ideal balance in terms of the distance between the light source and the canopy. This adjustment ensures that the plants receive the appropriate amount of light to support their heightened metabolic activity during the flowering stage, ultimately leading to healthy and bountiful yields.
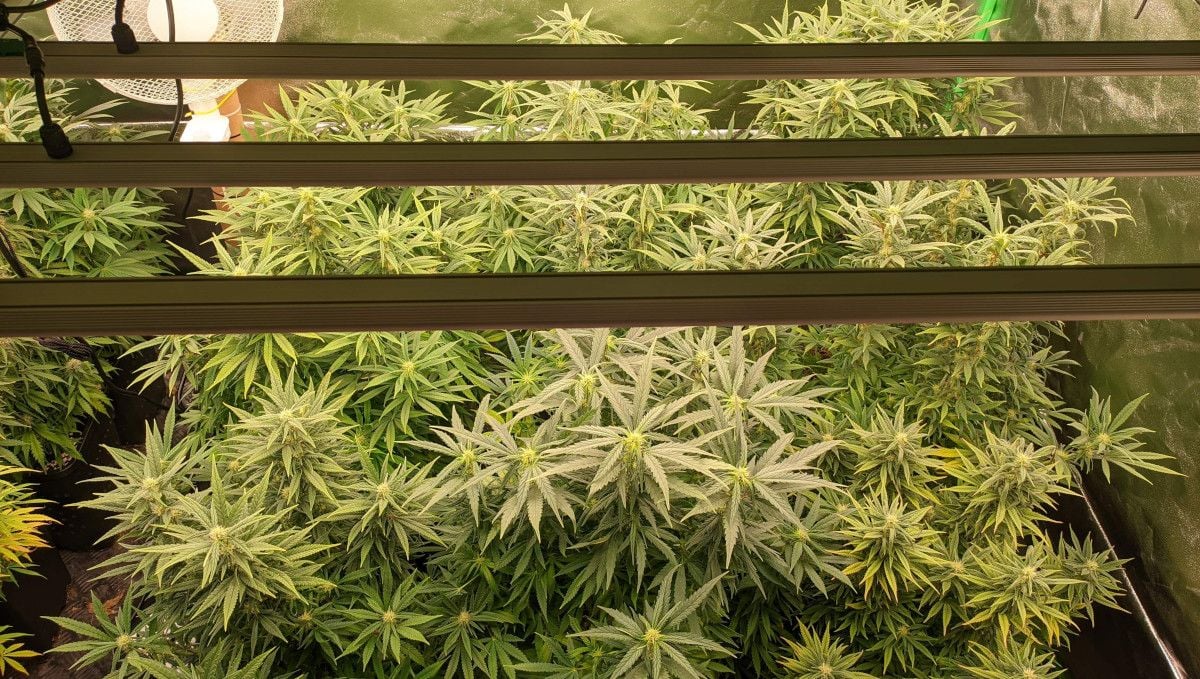
7. Early Flower | Weeks 8-9
Outdoors, cannabis plants start to flower when the summer is about to end and the weather turns less warm during the day, with even cooler nights. Indoors, you can emulate these conditions by slightly lowering temperatures too. Much more important than temps is the relative humidity. Unfortunatelly, the end of summer usually brings more rains, and this presents a challenge outdoors - when the buds are constantly wet, there's a risk they become moldy. In home gardens, you have the perfect opportunity of keeping the RH at a desired level through the use of exhaust ventilation and dehumidifiers. Use this opportunity to gradually bring down the readings on your hygrometer all the way to 30-35% by harvest.
The initial stages of flowering can be both exciting and challenging. One notable aspect you'll witness during this period is the stretch of your Gorilla Cookies Fastflowering plants. This growth spurt can be a major headache if your grow space isn't spacious enough to accommodate unrestricted growth. To tackle this, employing different training techniques is crucial. Techniques like low-stress training (LST) or topping can help control the height and spread of your plants. Additionally, inducing flowering at the right time can help keep the plants manageable. It's essential to remember that cannabis plants can easily increase in size by 50-100% during the flowering stretch.
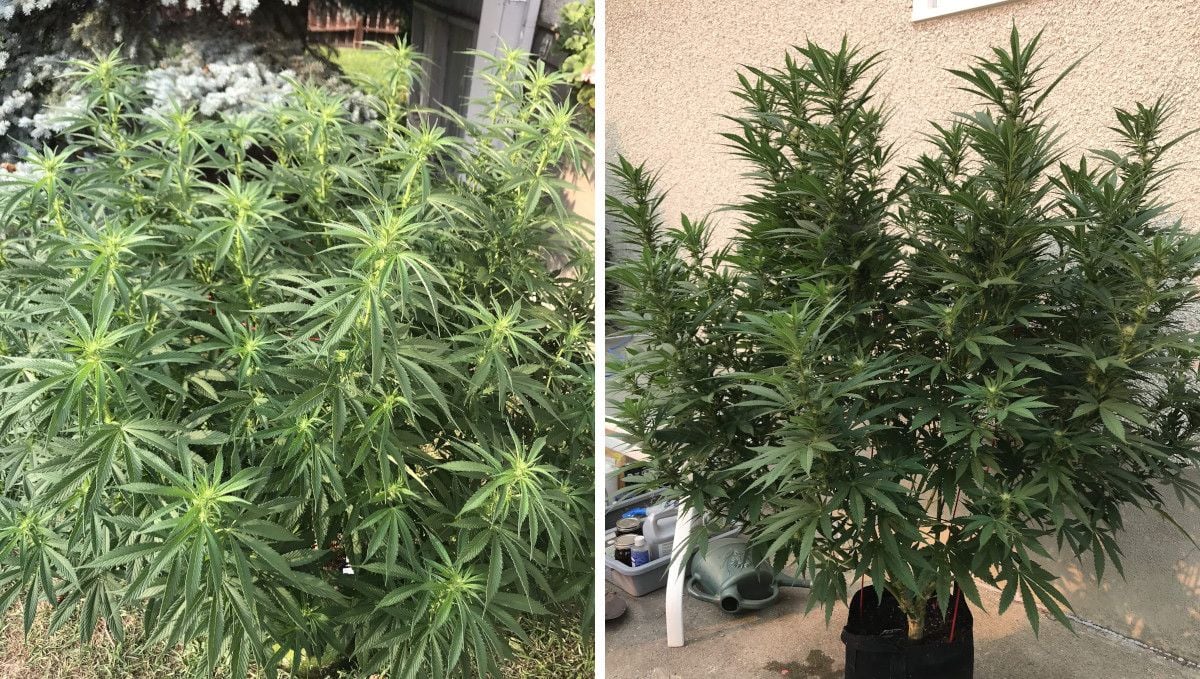
As the plants stretch towards the light in the early flower phase, they continue their journey of flower formation. At this point, the buds may appear small, and the spaces between them on the branches might seem excessive. However, rest assured that they will soon grow and ideally fill in the internodal spaces. This is a crucial time in the development of the flowering structure.
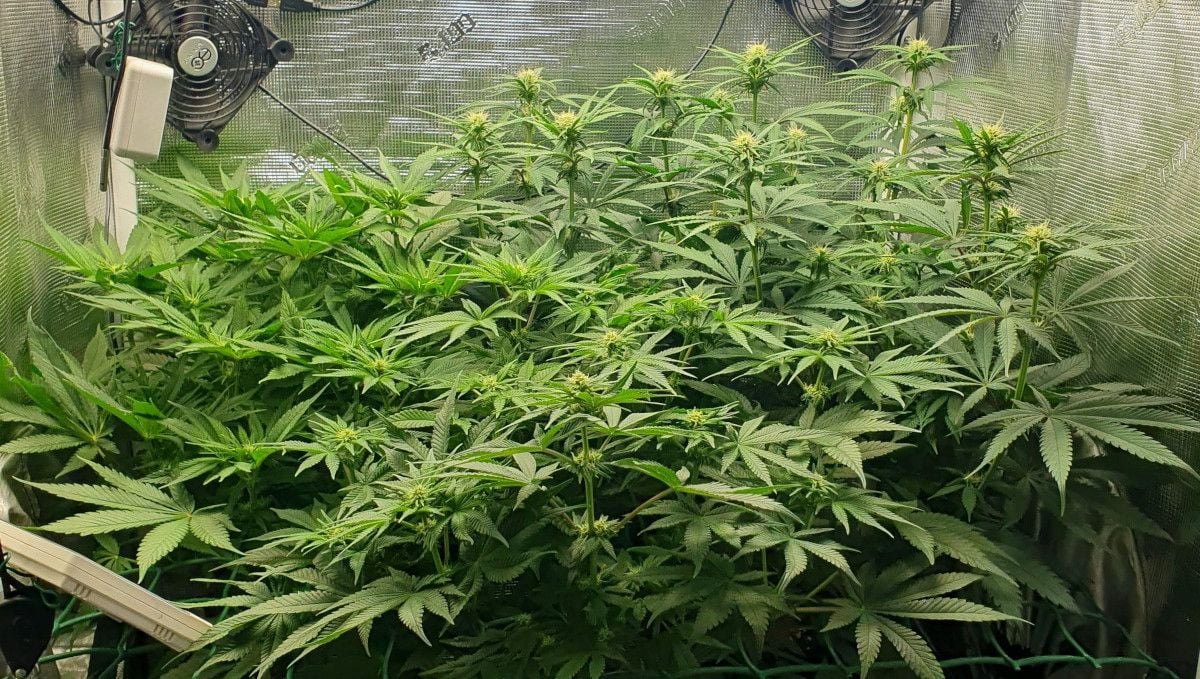
Cannabis strains can vary in terms of aroma. Some may start to emit a noticeable scent even in the vegetative phase, while others remain relatively low-odor. However, when the flowering phase kicks in, the majority of cannabis varieties begin to release a strong and distinct scent.
For growers with larger indoor gardens and multiple plants in close proximity, this can become an issue. To address this, it's often necessary to install a carbon filter in your grow space to control and neutralize the strong odors effectively.
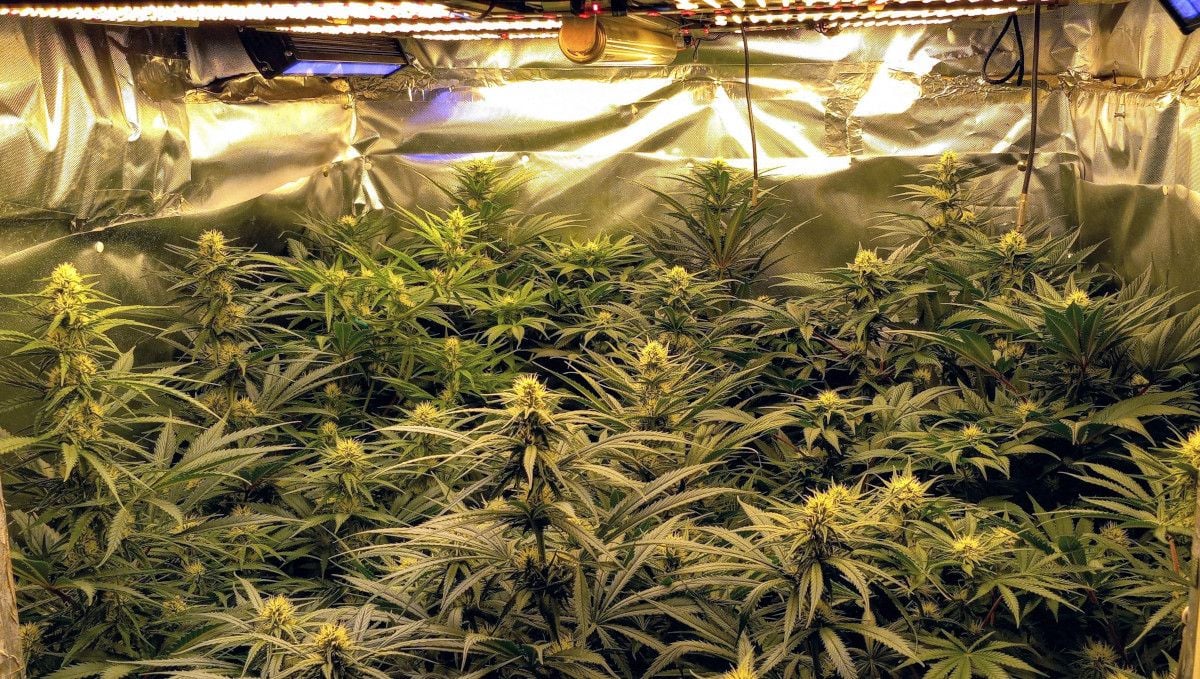
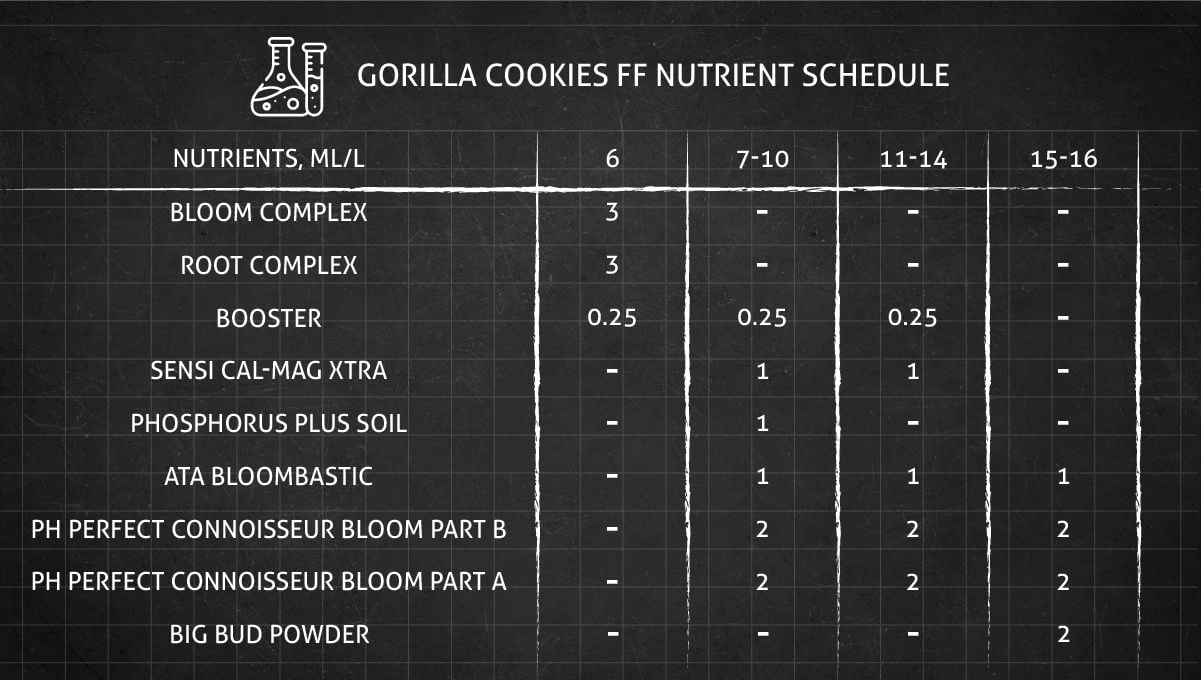
With your Gorilla Cookies Fastflowering plants entering the flowering phase and starting to fill out with buds, their appetite for nutrients undergoes a significant shift. Most notably, their requirements change. During this phase, cannabis plants need less nitrogen and more phosphorus and potassium. This shift in nutrient needs is why it's essential for a grower to transition from using the vegetative nutrient formula to the flowering one. Properly adjusting the nutrient mix will support healthy bud development and maximize your yield.
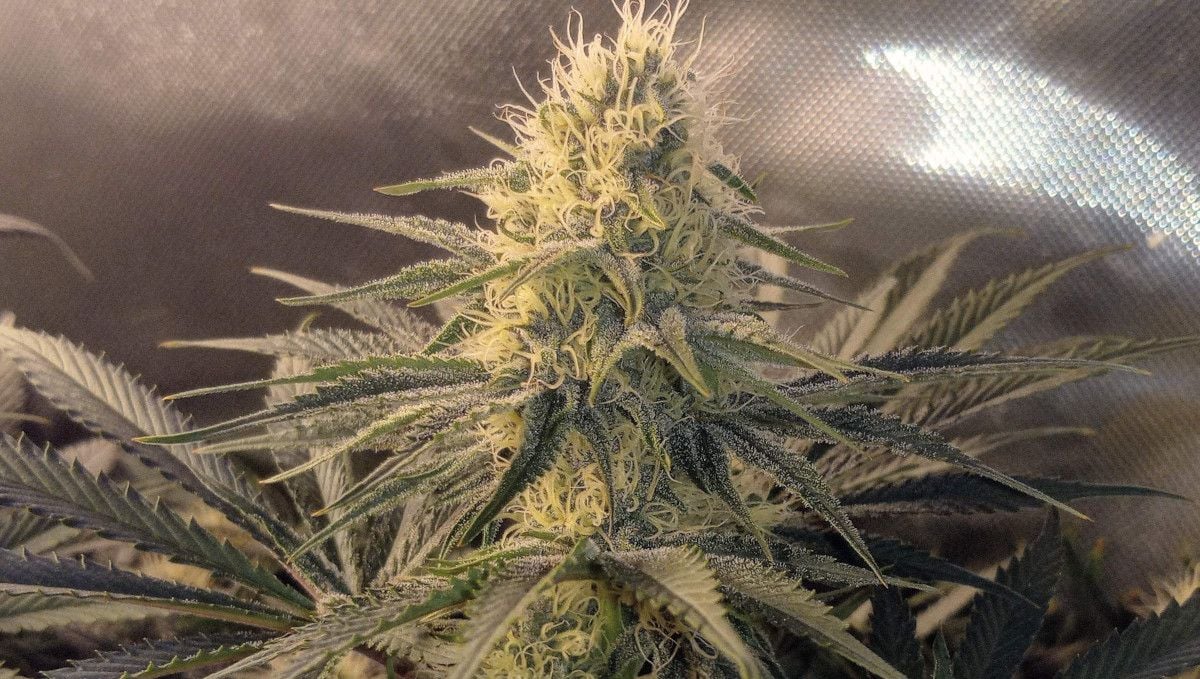
The quality of your Gorilla Cookies Fastflowering strain is often judged by the amount of resin it produces. In some of the stickiest strains, resin glands called trichomes can appear quite early in the flowering phase. These trichomes give both the flowers and the leaves surrounding them a frosted, crystal-like appearance. Keep a close eye on the development of these resin glands, as they play a significant role in the potency and overall quality of the final product. The presence of abundant trichomes is a promising sign of a high-quality yield.
8. Mid Flower (Bulk Phase) | Weeks 10-11
As the buds continue to fill out, it becomes doubly important to monitor and control temperature and relative humidity parameters. It's not so easy outdoors, but luckily, Gorilla Cookies FF starts flowering very early and has every chance to finish before the weather really takes a turn for the worse. Alternatively, you can plant it into grow bags and thus retain the option of taking the plants inside for especially cold nights, heavy rain, or hailstorms.
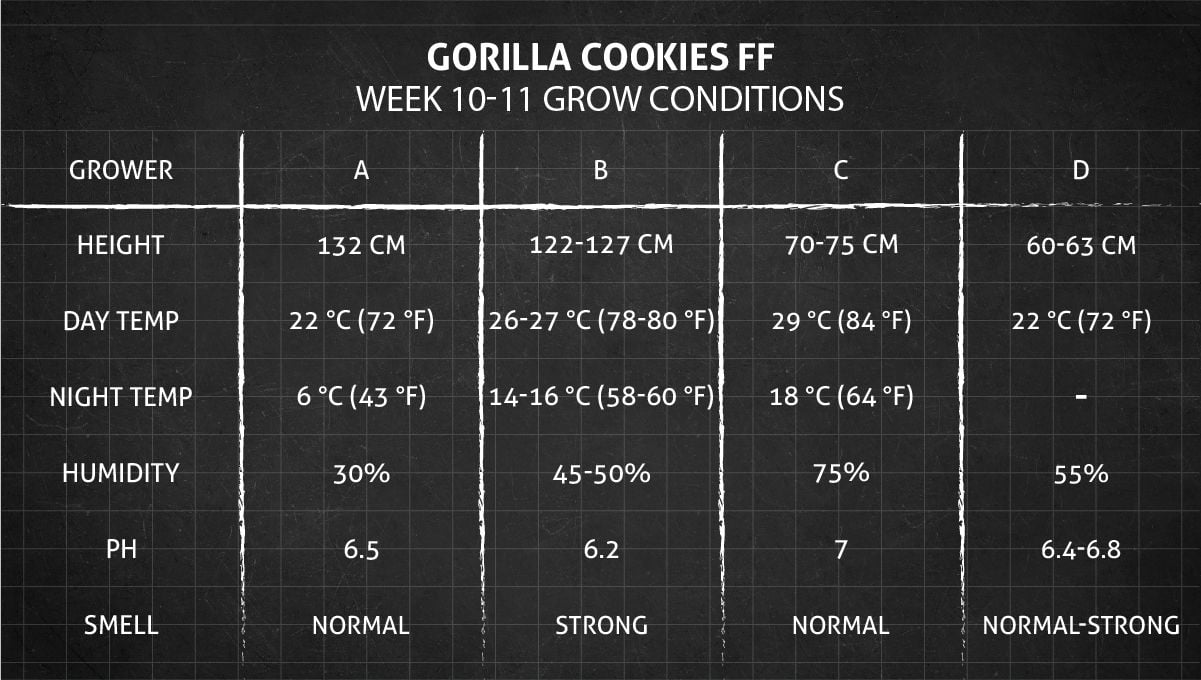
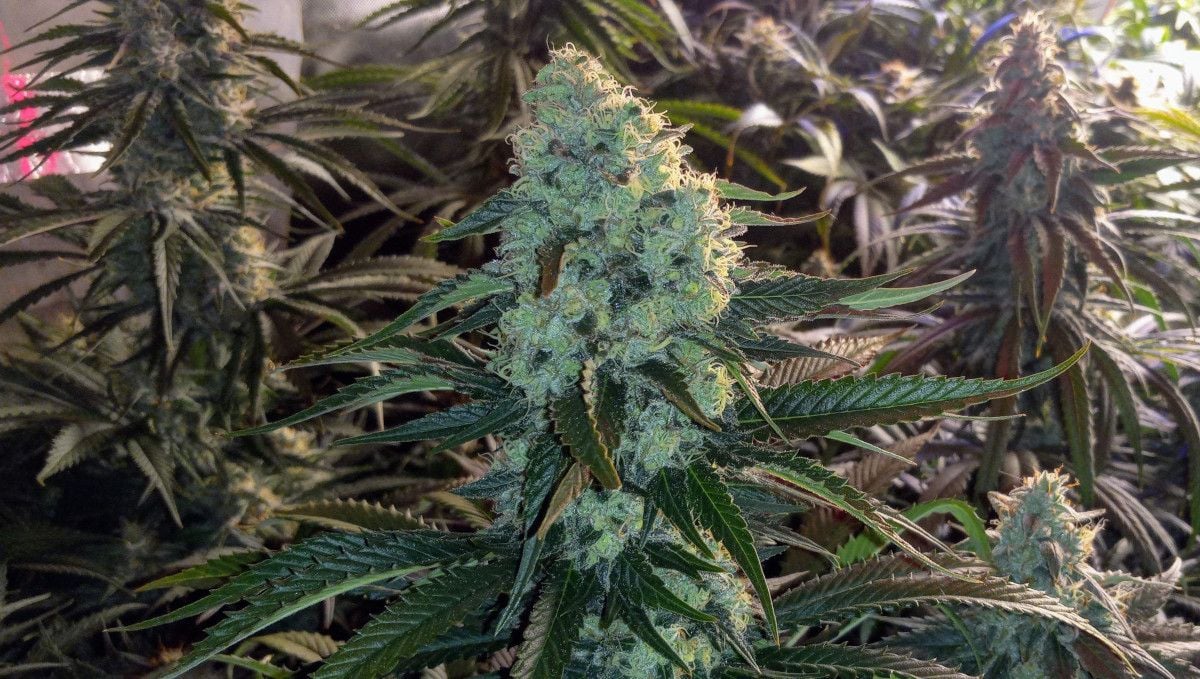
During this crucial stage of cannabis flowering, you'll witness a remarkable transformation as the buds begin to cover the entire length of branches, forming what experienced cannabis growers often refer to as "colas." These colas are the pride and joy of weed cultivators, representing the pinnacle of their growing efforts. However, even as the flowers become increasingly substantial and heavy, it's important to note that the pistils surrounding them are still predominantly white. This color signals their immaturity and underscores that the magic of development is far from complete.
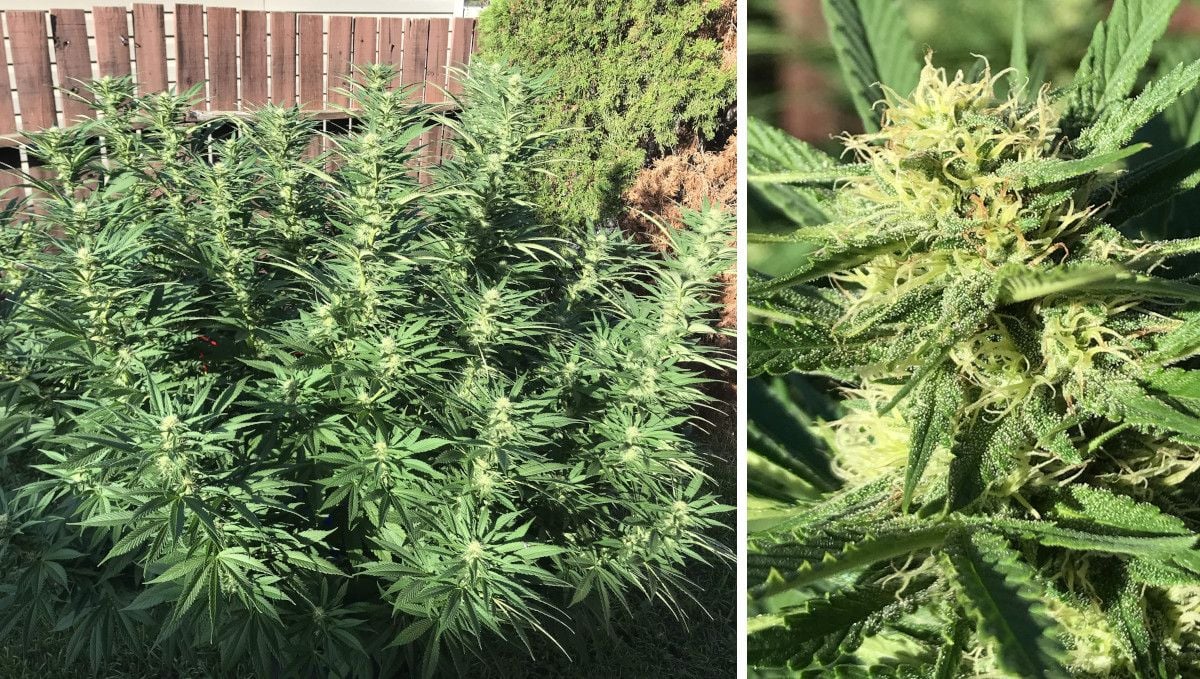
One factor that greatly influences the appearance and development of colas is the intensity of the light source. When provided with powerful and penetrating lights, colas have the potential to become exceptionally long as the light reaches all the way down to the lower branches. In contrast, with weaker lighting, the flowers tend to concentrate primarily at the top of the plant. In such cases, you may observe empty spaces between the middle bud sites, while the lower portion of the plant often yields small and fluffy buds, which are disparigingly called "popcorn buds."
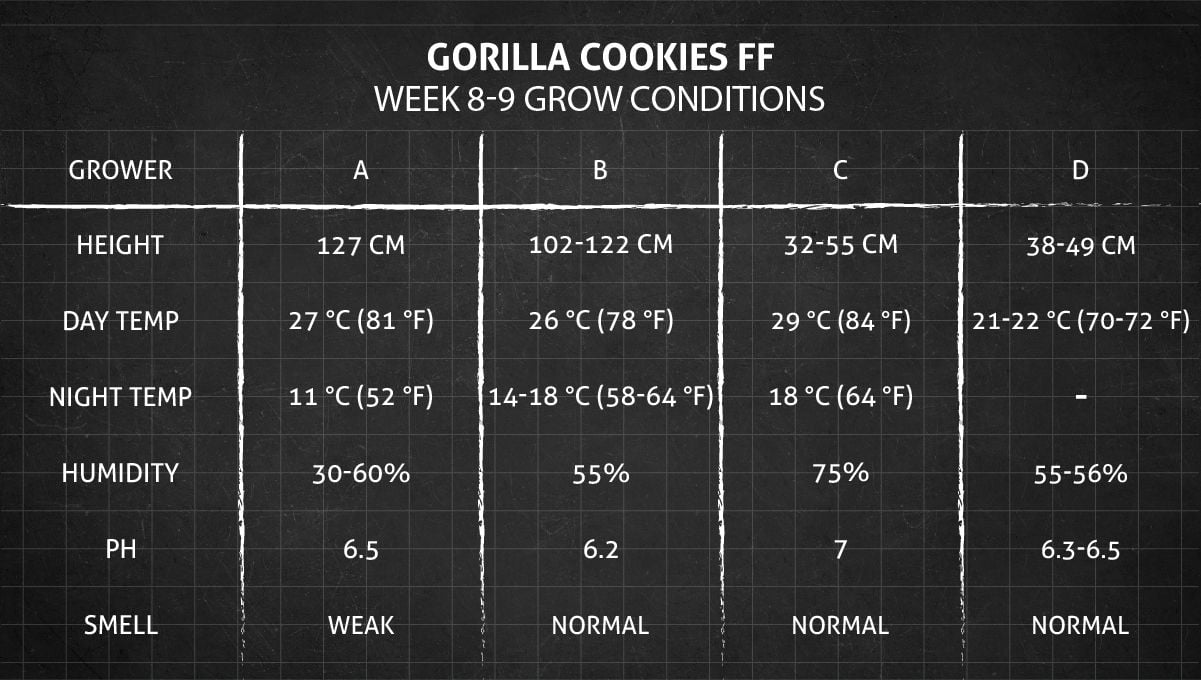
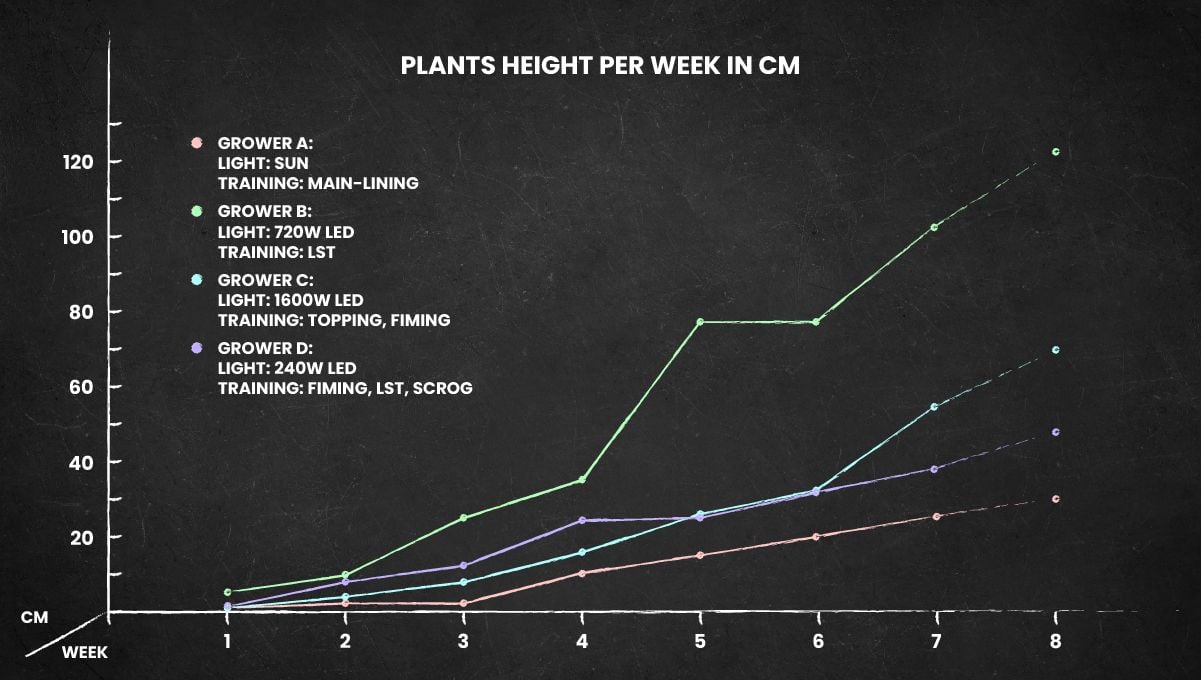
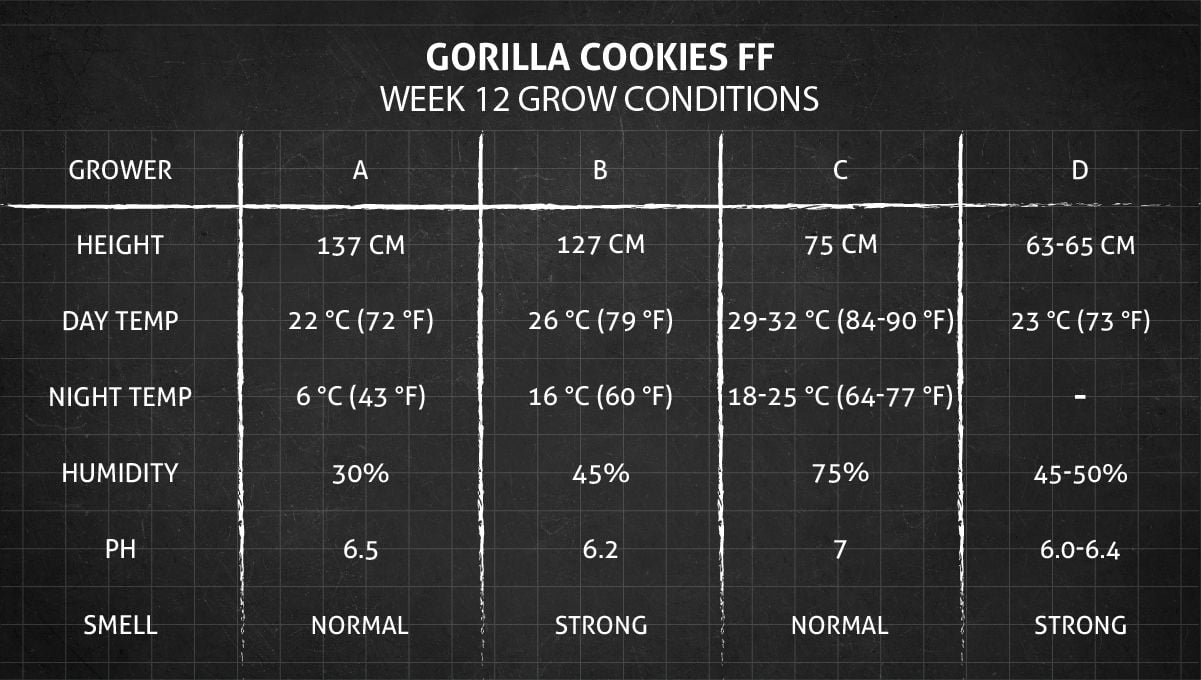
In the chart below, you can see that the four Gorilla Cookies FF specimens in our grow guide stayed quite compact despite the fact that this isn't an autoflower. This is what happens if you don't let the vegetative stage last too long and induce the flowering early enough. The only exception was the Gorilla Cookies FF grown outside - this one had a longer veg and eventually reached a height of 137 cm.
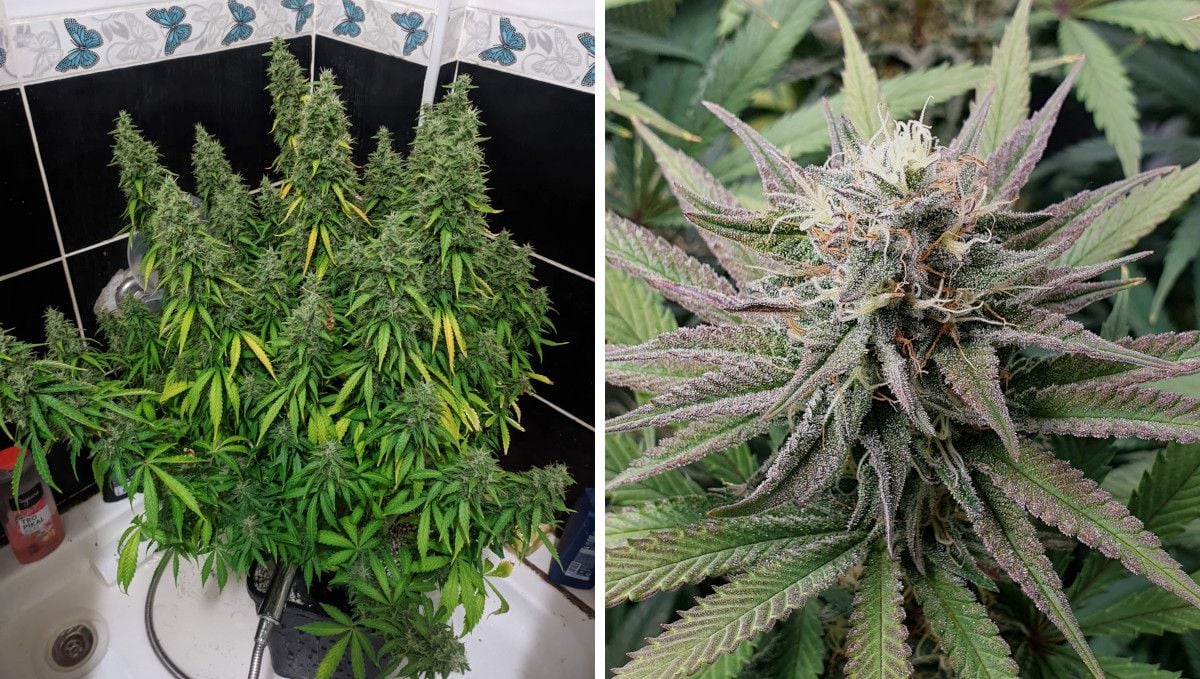
Every cannabis grower harbors a dream of achieving a high calyx-to-leaf ratio, which is when the cola appears to consist almost exclusively of densely packed flower clusters, with only a few leaves sporadically peeking out. This optimal structure is a genuine blessing, especially when it comes to post-harvest activities like trimming. A high calyx-to-leaf ratio significantly reduces the time and back-breaking effort required during the trimming process, making it an ideal goal for cultivators seeking a bountiful and efficient harvest.
9. Ripening And Harvest | Week 12
As your Gorilla Cookies FF plants mature, your main concern is to keep day temperatures down to somewhere between 23-25C. More importantly, the relative humidity should be kept below 40%, or else you'll run a very high risk of such fungal infections as mold, bud rot, and powedery mildew. Fat and dense buds are every grower's dream, but they are also the ones most susceptible to these diseases.
In the last weeks leading up to the much-anticipated harvest, your cannabis plants require possibly the largest amounts of nutrients and water. This stage is critical because soon you'll need to transition to plain water, preparing your plants for their final stages of growth. Notably, nitrogen (N) becomes less important than ever during this period, and an excess of it can even interfere with the development of your precious flower buds. Instead, the focus shifts to phosphorus and potassium (P and K), which are needed in larger doses than ever to support the maturation process.
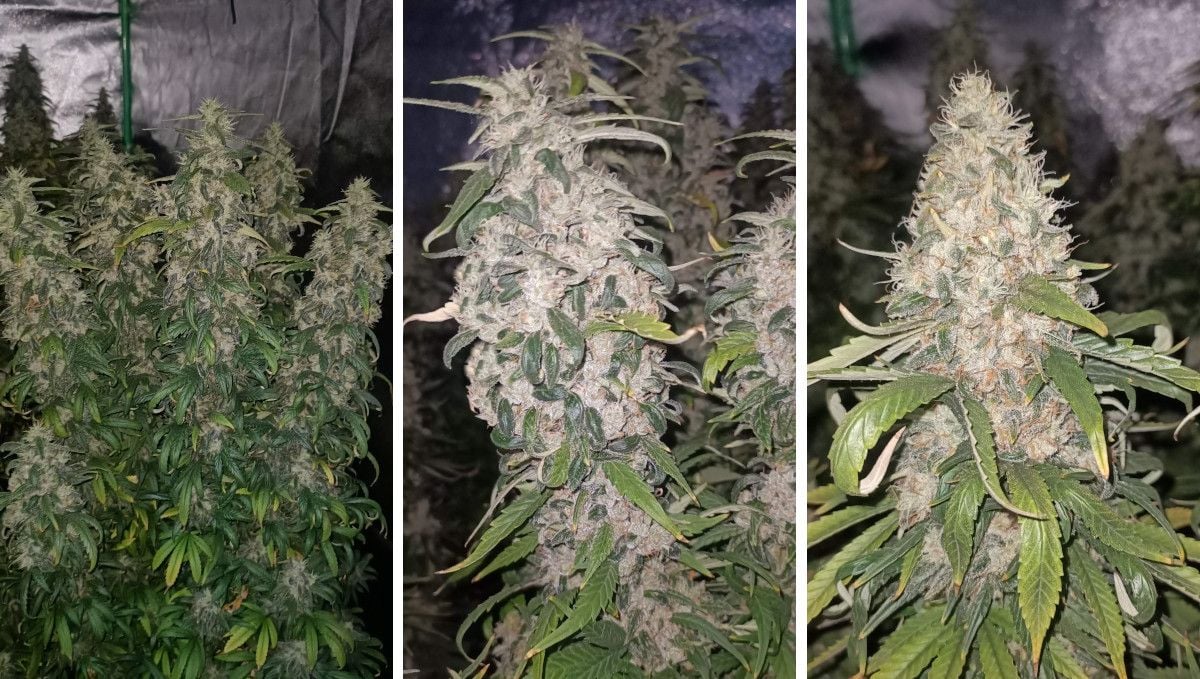
As you approach the end of the flowering phase, you might reach a point where you no longer notice significant changes in the appearance of the buds. Days may pass, and the size of the buds appears static. However, this doesn't signify the end of flower development. The buds continue to evolve, growing denser and heavier, which ultimately results in a more substantial yield when it's time to harvest.
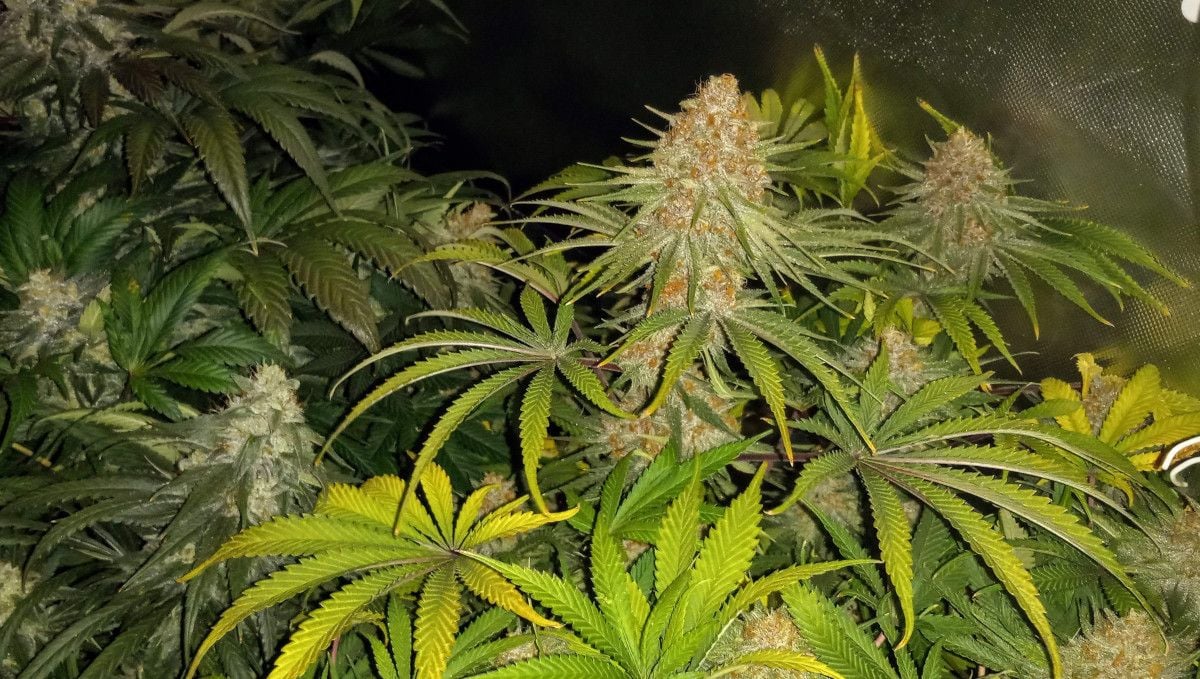
As you get closer to the harvest date, your vigilance becomes paramount because your main task now is to pinpoint the perfect moment for reaping your plants, ensuring they reach the peak of their cannabinoid content. One common method to determine the right time for harvest is to observe the pistils – most of which were white before the flowering phase – as they transition to a brown hue. However, this isn't the most reliable indicator.
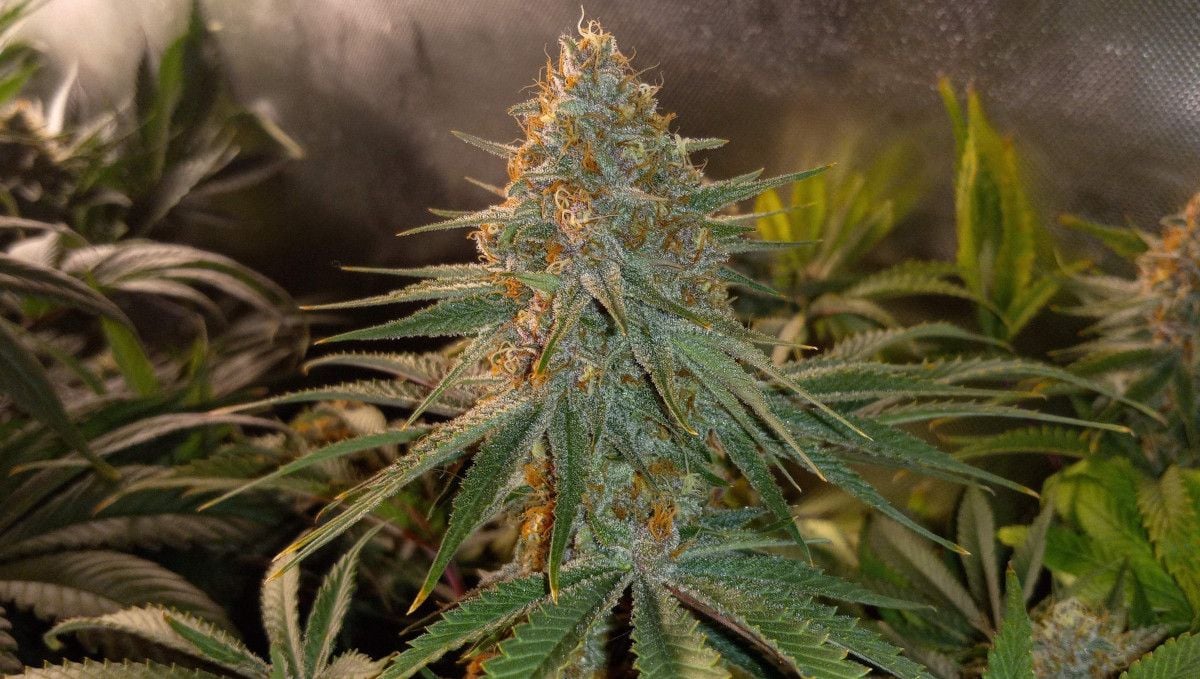
The most reliable method for gauging peak maturity is to closely examine the trichomes using a hand microscope. These tiny resin glands undergo a color transformation as they fill with THC, other cannabinoids, and terpenes. They begin as clear, turn cloudy when they reach their peak potency, and eventually start to amber out as the THC degrades.
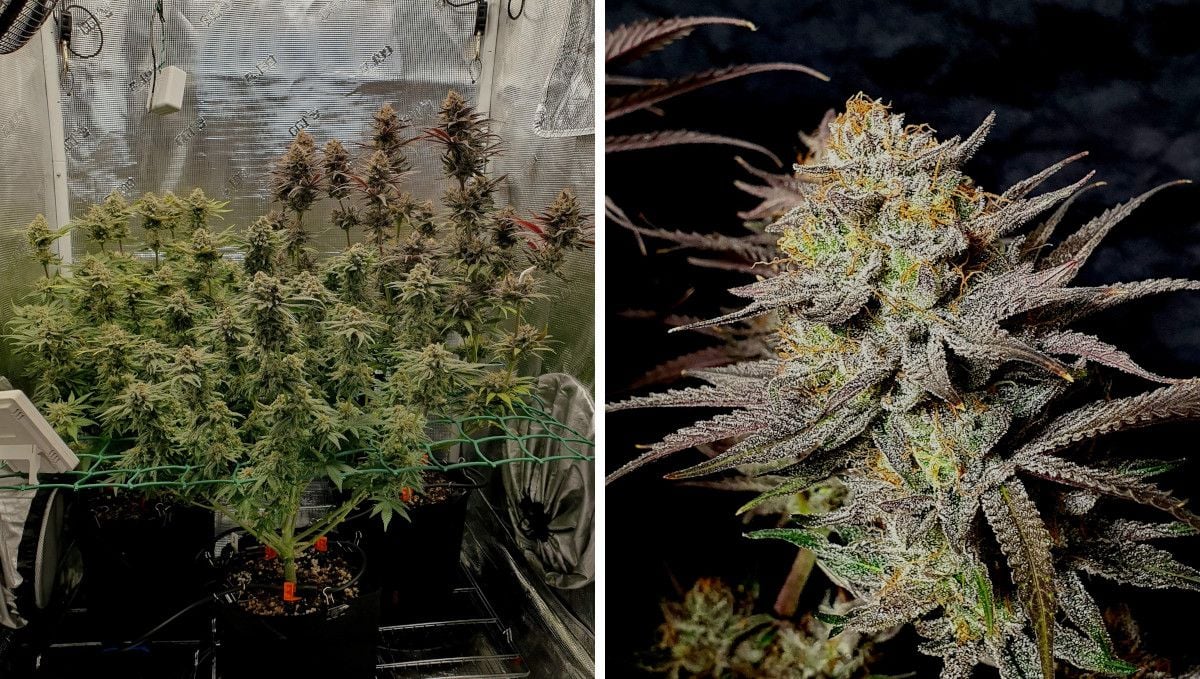
Transitioning your plants to plain water, as mentioned earlier, is a necessary step in ensuring the final product is cleaner and boasts better taste. This procedure, known as the final flush, serves to remove built-up salts from both the root zone and the plant tissues. The duration of flushing varies between soil and hydroponic grows, with soil typically requiring a longer flushing period.
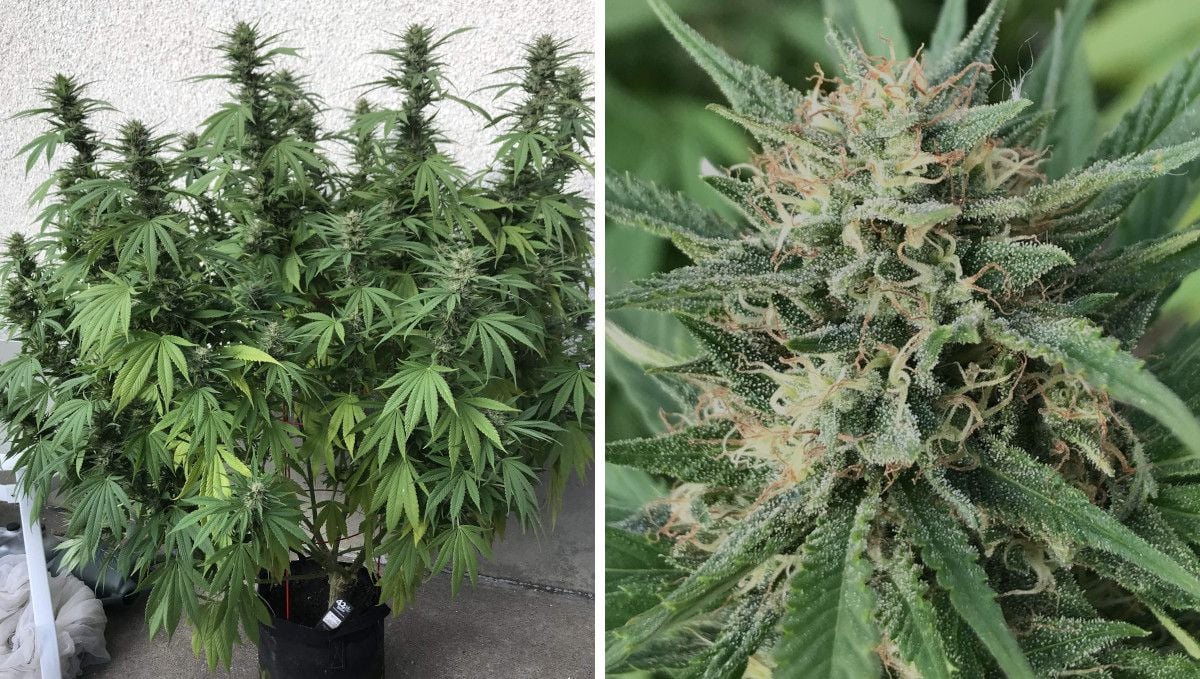
Once you've ensured your plants are well-fed and flushed, it's a smart move to begin trimming them before harvesting. This step can involve removing larger fan leaves and other unwanted materials. After trimming, it's time to hang your plants out to dry in a dedicated dry room. Creating the right conditions in terms of temperature and humidity is vital during this process. A suitable temperature range is around 60-70°F (15-21°C) with humidity levels of 45-55%.
As the branches dry, you'll want to determine the optimal time to cut the buds from the branches, considering both the visual appearance and feel. Post-harvest, curing your buds in glass jars is a crucial step. This process typically lasts for a few weeks to a few months, depending on your preferences. Curing enhances the flavor, aroma, and overall quality of the finished product by allowing the moisture to redistribute and the compounds to mature properly.
10. The Outcome
Although setups, conditions, and the techniques used were different, the results of all four grows were everything a weed grower could wish for. You can see it for yourself in the graphic below:
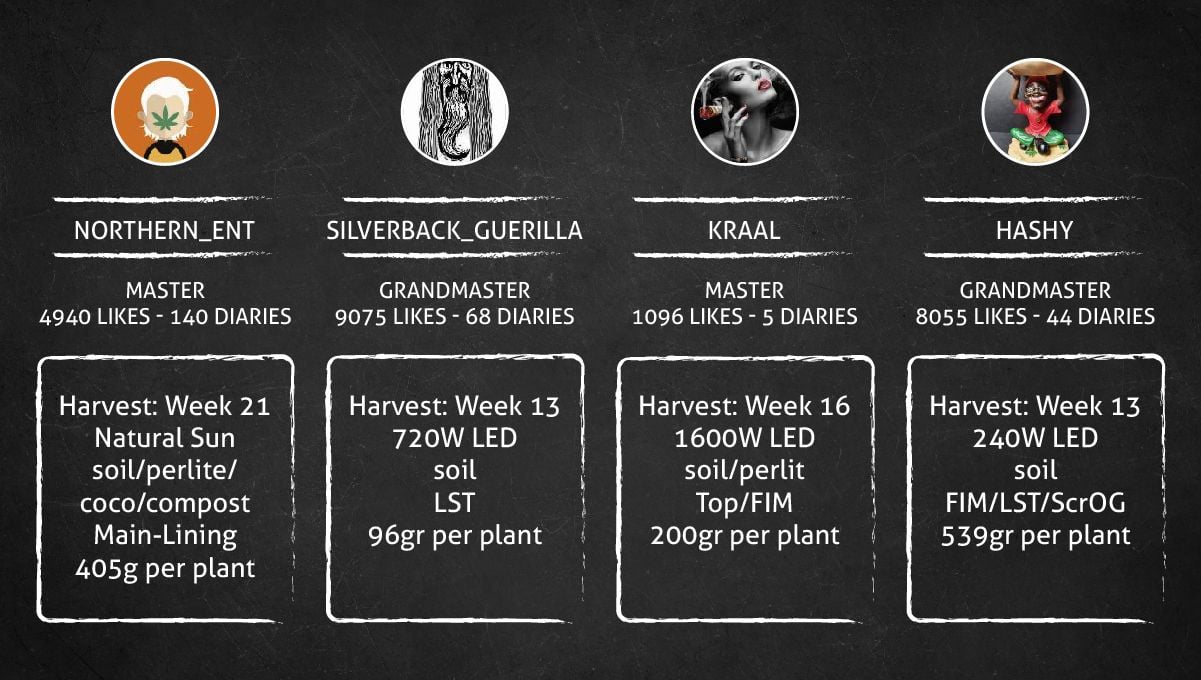
Gorilla Cookies FF Yield
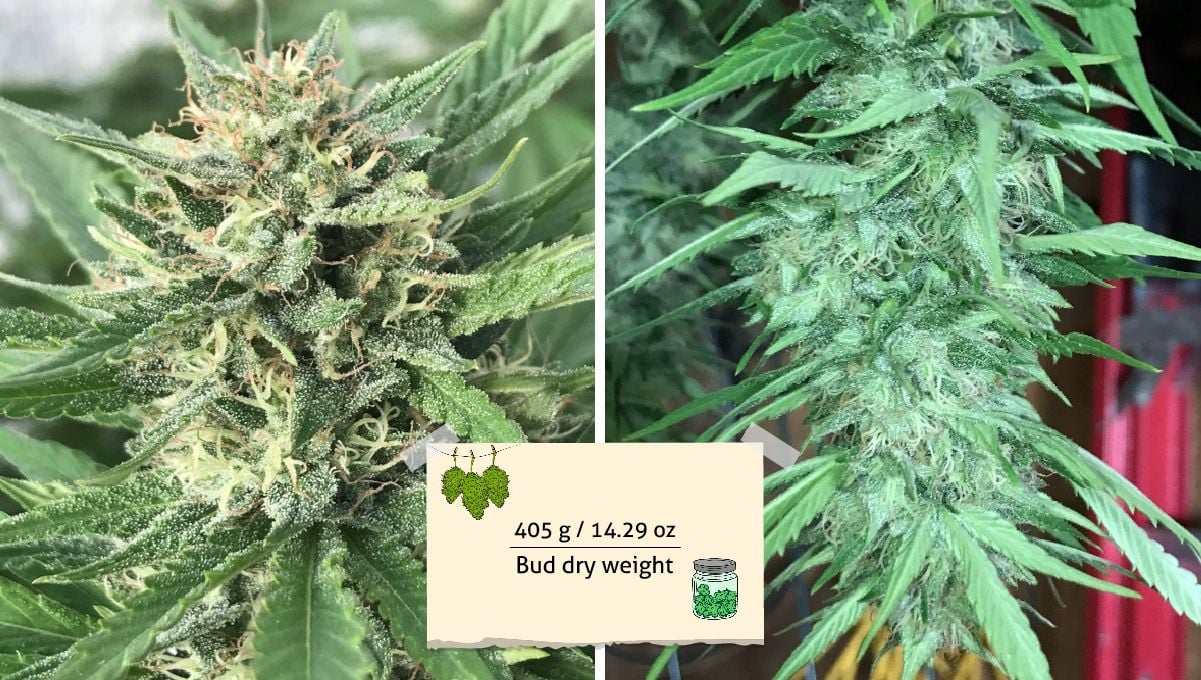
Grower A reaped the most generous reward among all four as his outdoor Gorilla Cookies FF plant spent many extra weeks in veg and turned into a medium-tall and wide bush with a great number of branches. The final haul was 405 g (14.29 oz) of dry bud.
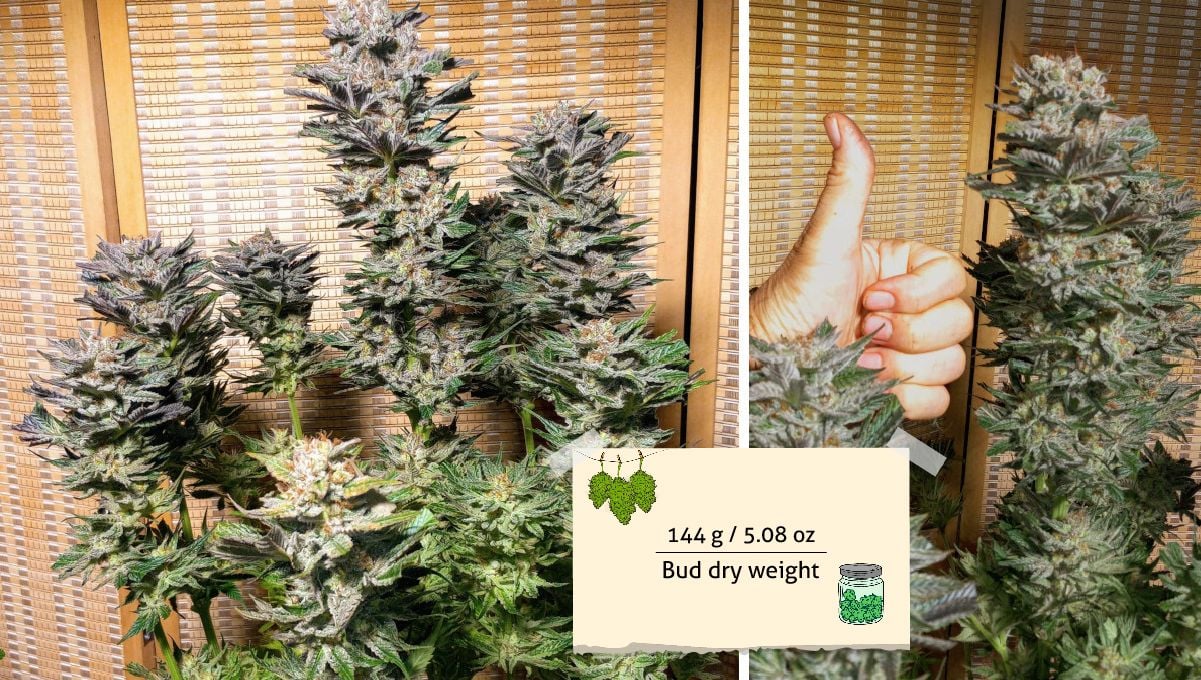
Grower B's results were equally amazing. Though his Gorilla Cookies FF's life cycle lasted full 7 weeks shorter, he harvested a respectable 144g (5.08 oz) of appetizing, frosty stuff.
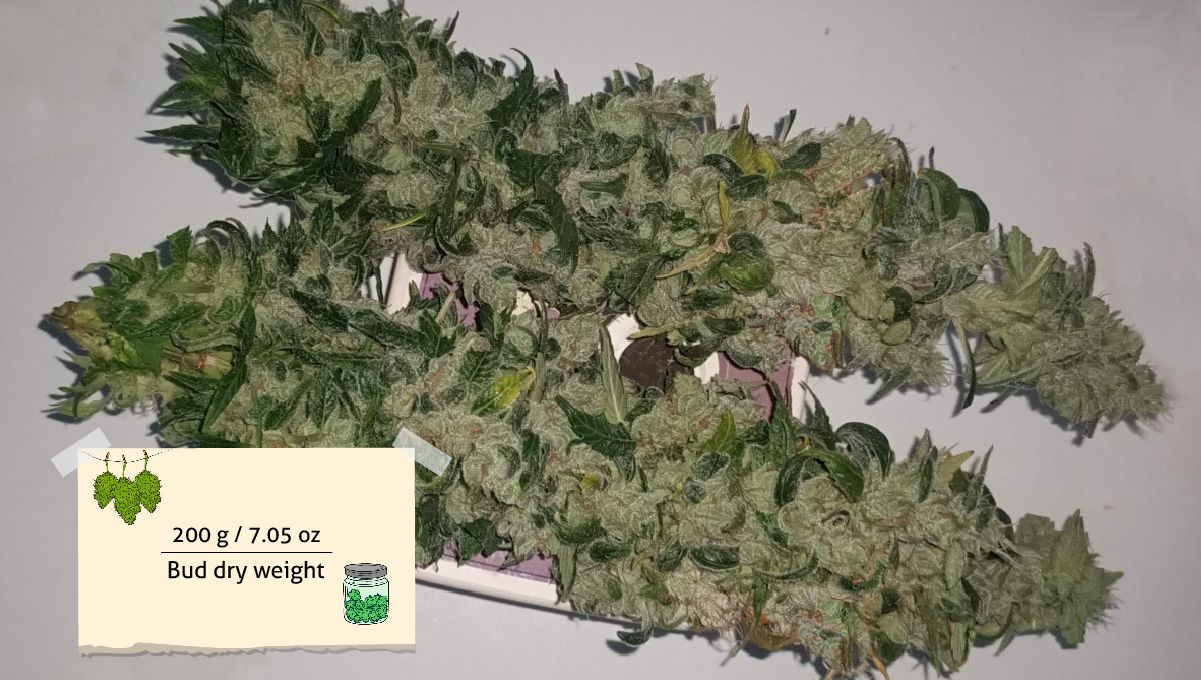
Grower C's plant turned out even more generous and brought an amazing 200g (7.05 oz) after a grow cycle of 16 weeks.
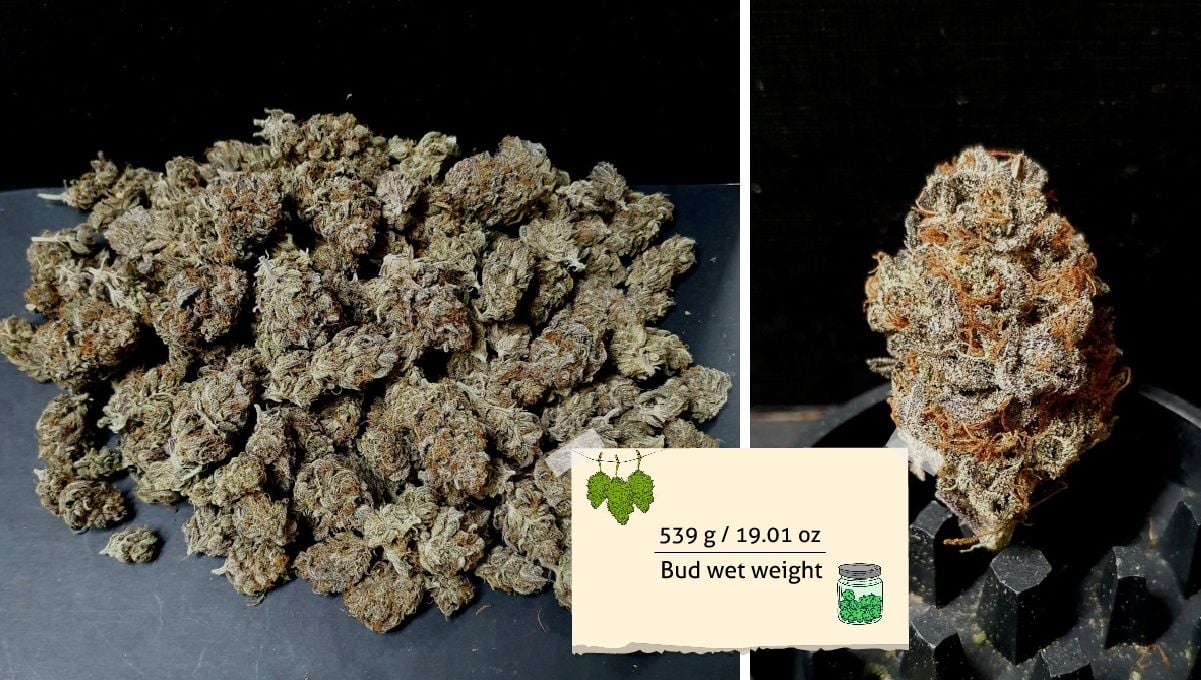
Finally, Grower D's wet yield was 539g (19.01 oz), which may sound less impressive, but Gorilla Cookies FF was just one of three plants in a small grow tent, and the product was top-notch.
Gorilla Cookies FF Smoke Report
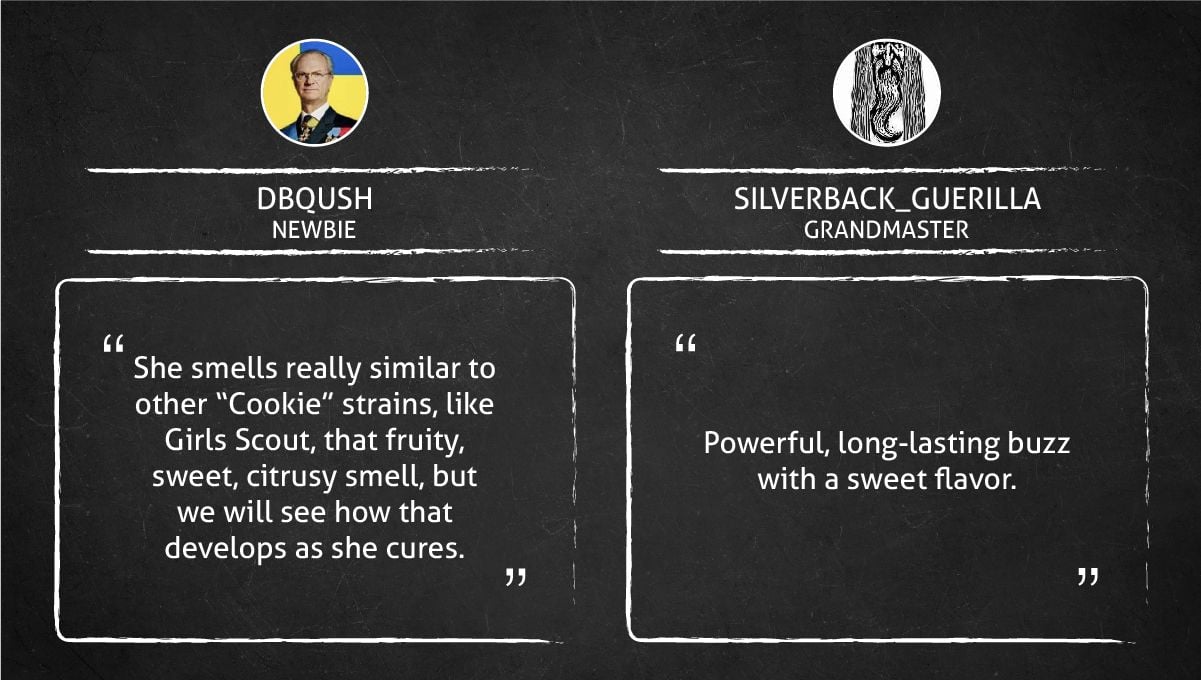
The smoking experience with Gorilla Cookies FF is a true delight, as attested by positive reviews from cannabis enthusiasts. When you first encounter this strain, you're greeted with a familiar and enticing aroma that's reminiscent of other strains with “Cookies” in their name. The initial impression is one of fruity sweetness with hints of citrus, promising a sensory journey that's both familiar and intriguing.
This fragrant bouquet sets the stage for what's to come as the buds cure and their flavors develop, keeping you in eager anticipation of the full range of taste and aroma that this strain has to offer. Once you take that first puff, you're in for a powerful and long-lasting buzz that's a hallmark of Gorilla Cookies FF.
11. In Conclusion
As you have seen in our Gorilla Cookies FF growing guide, this strain is really fast-flowering and can be successfully cultivated in climates with relatively short and cool summers, competing in this niche with autoflowering strains. Indoors, you can also hope to get your harvest quite fast - just 13 weeks from seeds in two out of four cases - and this timeline is also comparable with some longer-maturing autos.
If it gets enough light, Gorilla Cookies FF stays quite compact and is a perfect plant for either a SOG or ScrOG setup where a flat canopy with multiple tops results in an abundant harvest. Strong lights are also important if you want to get long colas with substantial buds all the way down. You shouldn't be afraid of high-stress training (HST) techniques either, be it classic topping or FIMing - three out of four growers tried them, and their outcomes were spectacular.
Gorilla Cookies FF tends to start producing resing quite early, and it's around this time that it begins to emit a strong weed scent, so we recommend installing a carbon filter, even for a single plant. The buds have a tendency to bulk up considerably and become very dense in many cases, so pay extra attention to humidity and temperature control. Otherwise, the plant is easy-to-grow, undemanding, and very generous. Whether you're used to autoflowers or photoperiod varieties, we recommend trying this one and have a trouble-free and rewarding experience. Happy growing!





Comments