Orange Sherbet FF Cannabis Strain Week-by-Week Guide

- 1. Grow specification
- 2. Grow set up
- 3. Germination and seedling stage | week 1
- 4. Early veg | week 2
- 5. Mid veg | weeks 3-6
- 6. Transition (pre-flower) | week 7
- 7. Early flower | weeks 8-9
- 8. Mid flower (bulk phase) | weeks 10-11
- 9. Ripening and harvest | week 12 (and beyond)
- 10. The outcome
- 10. a. Orange sherbet ff yield
- 10. b. Orange sherbet ff smoke report
- 11. In conclusion
Orange Sherbet Fastflowering is a superbly balanced hybrid that stands out in the cannabis landscape. With a remarkable citrus terpene profile, this strain delivers an unparalleled taste reminiscent of a tangerine and orange smoothie with a sharp, sour undertone. This strain is also a dream for growers, especially beginners, offering a low-maintenance yet highly productive experience. Though it was specifically developed for outdoor cultivation in cool climates, even more growers cultivate Orange Sherbet FF indoors for the sake of its unique character.
1. Grow Specification
Embracing a perfect balance of Sativa and Indica at 50% each, Orange Sherbet Fastflowering promises an XL-sized delight for growers. Reaching majestic heights of up to 250 cm, this strain exemplifies robust growth. With a relatively short flowering period of 7 weeks, it caters to those eager to enjoy the fruits of their labor swiftly. Indoor cultivation yields an impressive 500-650 gr/m2 while outdoor enthusiasts can anticipate a bountiful harvest ranging from 400-600 gr per plant.
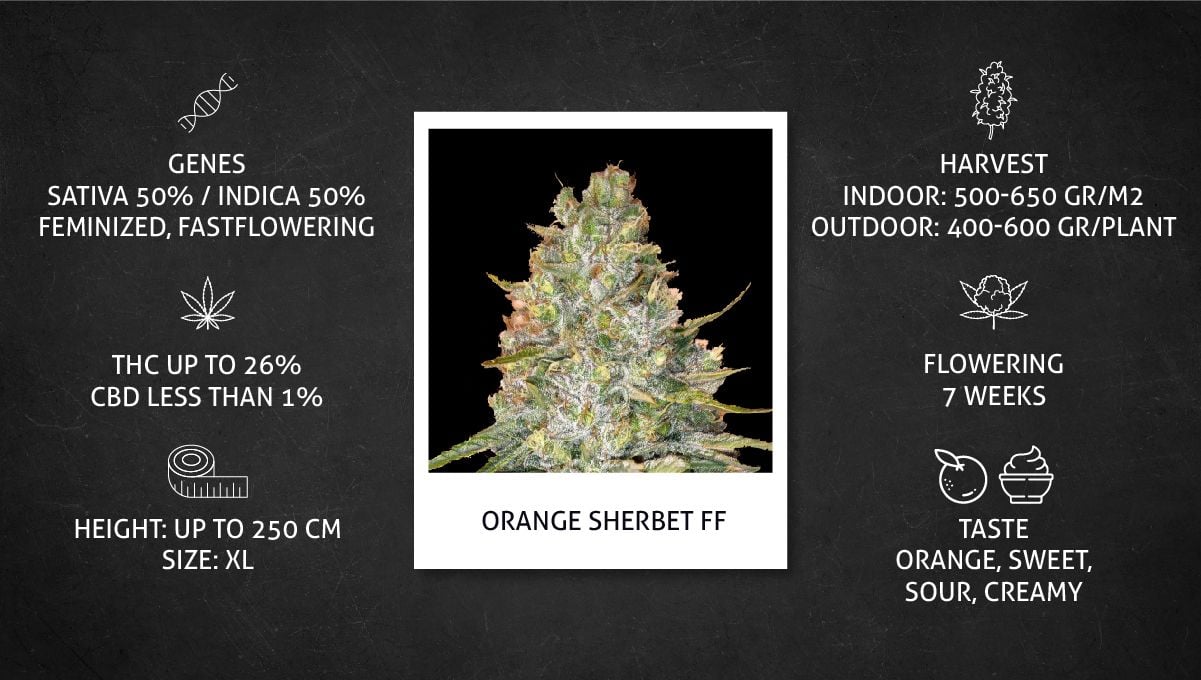
With a THC content soaring up to 26%, Orange Sherbet FF presents an excellent option for those seeking a potent smoke. Its blend of orange, sweet, and sour notes, complemented by a creamy undertone, creates a symphony of flavors, making this strain not just a great plant to grow, but a journey for the senses that beckons exploration.
2. Grow Set Up
Although the fast flowering versions of our bestselling strains were supposed to be outdoor varieties primarily, most Fast Buds fans try these plants in their home gardens. This means that you too can try to grow Orange Sherbet FF indoors and get great results. In the table below, are some details of the setups of four grows that we could find online. This strain is brand new, so sadly, there are no finished outdoor grow reports yet. There's only one balcony grow (whose photographs will be using occasionally), but it's also unfinished.
| Grow Space | Light | Medium | |
|---|---|---|---|
| A | 1 m2 | 150W LED | Soil/Perlite/Coco |
| B | 1 m2 | 310W LED | Bio Bizz Light Mix |
| C | 0.3 m2 | 650W LED | Coco/Perlite |
| D | 0.64 m2 | 200W LED | Soil/Perlite |
As with all cutting-edge cannabis genetics, you can rest assured that this plant will flourish under any conditions, no matter what setup, type of light, medium, or anything else.
3. Germination And Seedling Stage | Week 1
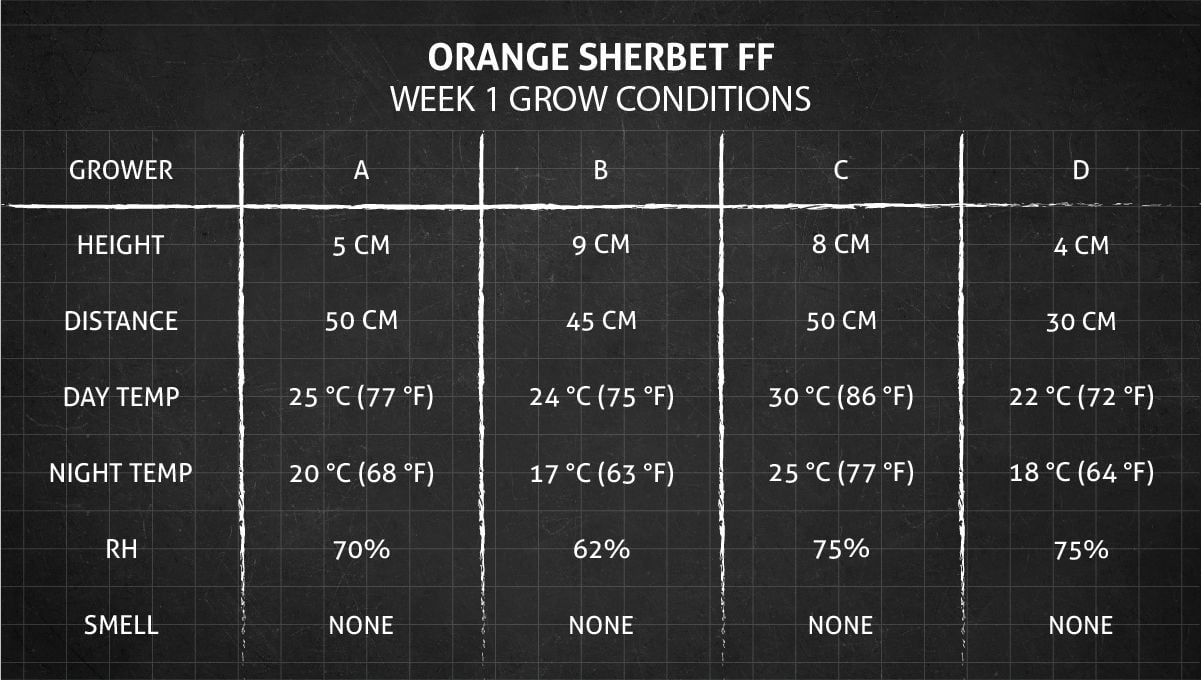
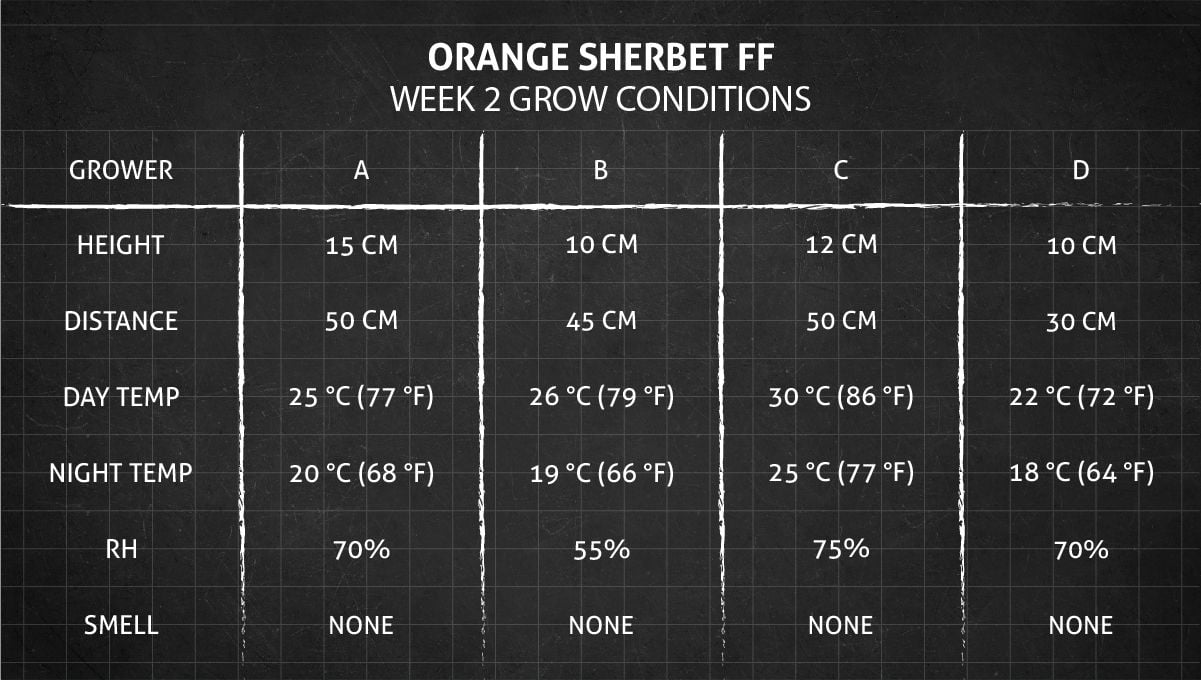
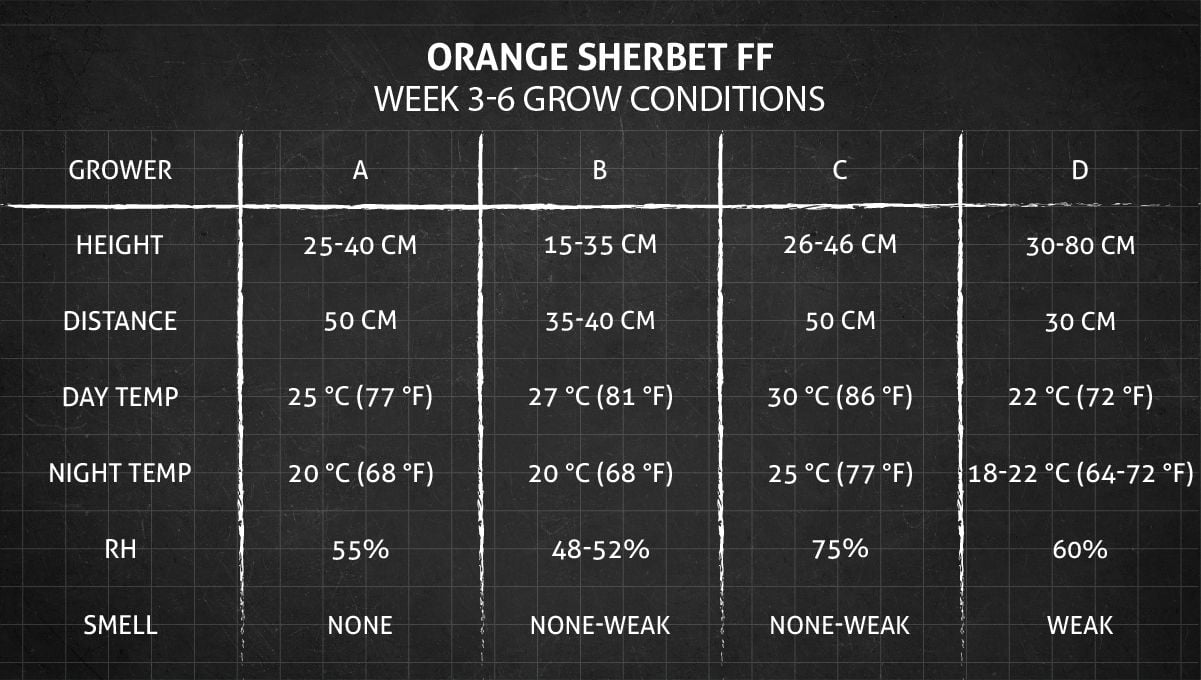
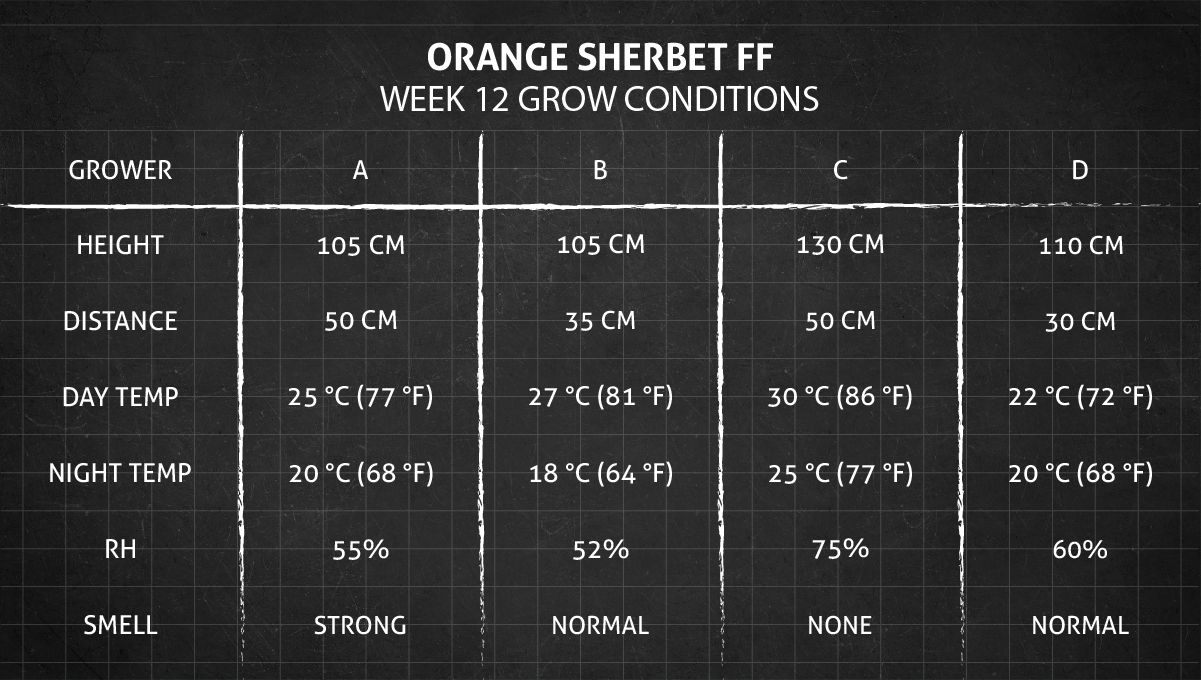
In the table below, you can look at some of the conditions that the four gardeners in our guide have created for their home gardens. Of special importance are the temperatures (both day and night) and the relative humidity. In the first few weeks in the life cycle of a cannabis plant, it will appreciate if you create very mild, warm, and humid conditions.
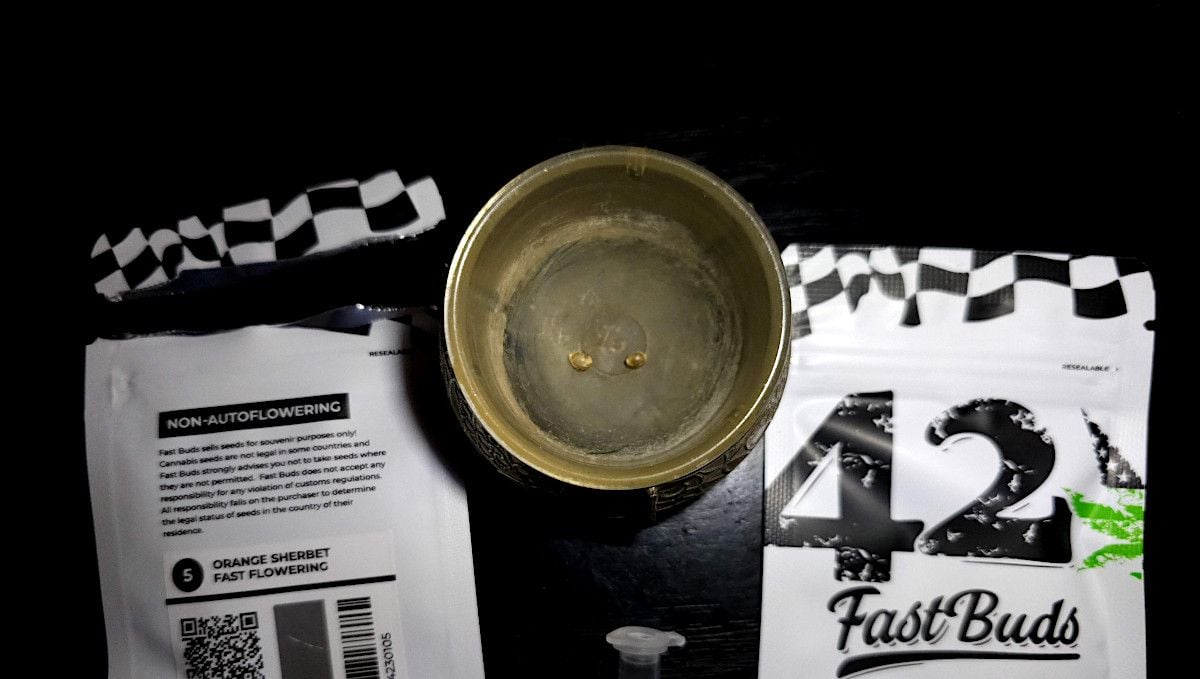
Growing cannabis begins with the magical yet nerve-racking process of germination. A common practice involves pre-soaking seeds in water, a ritual that softens the seed shell and invites moisture inside. This combination of moisture and warmth acts as the catalyst, coaxing the dormant embryo to awaken and prompting the taproot to extend. However, caution is advised as leaving the embryo submerged for more than 12 hours can lead to the bean's suffocation.
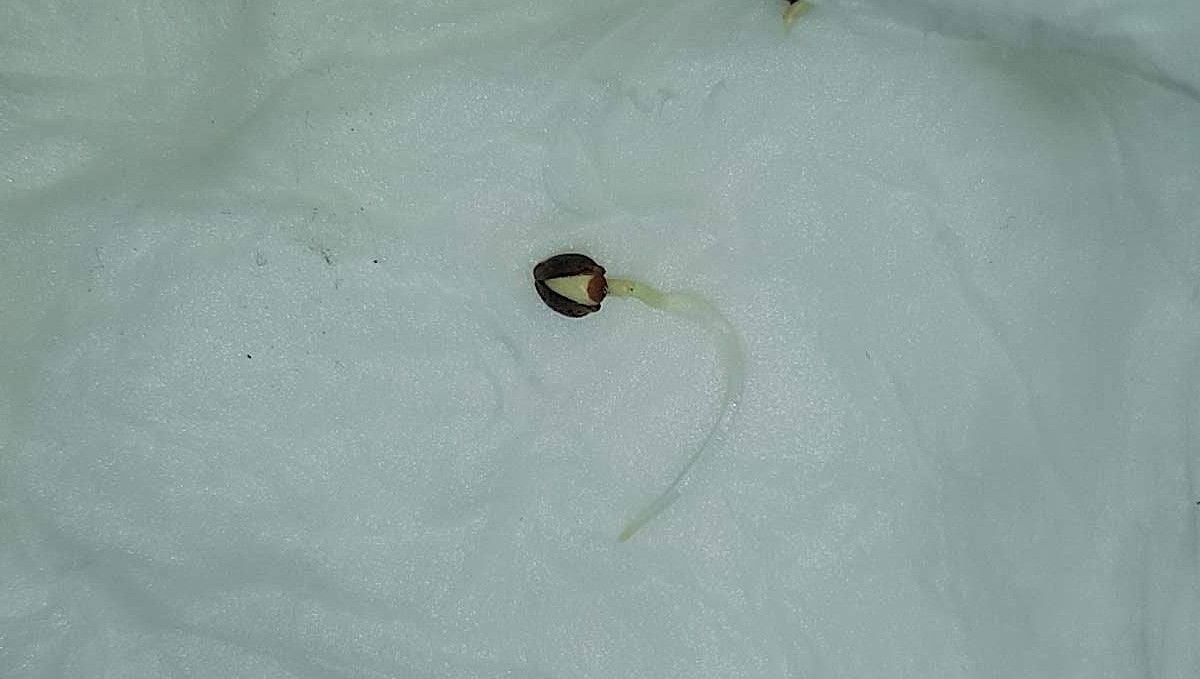
Among the myriad germination methods, the wet-paper-towel technique stands out as a widely embraced and effective approach. By delicately placing the seeds between layers of damp paper towels, you create an environment conducive to sprouting. While this method is generally reliable, it's worth noting that the taproot may take on a long and curvy form, posing a challenge during the subsequent planting into the growing medium.
An alternative method involves germinating seeds directly in jiffy plugs or transferring them there post-germination. Picture the convenience of these soil-filled plugs, providing a cozy and nutrient-rich environment for the sprouting seeds. However, growers must exercise caution by ensuring the seedlings are placed under a grow light at an optimal distance to prevent excessive stretching.
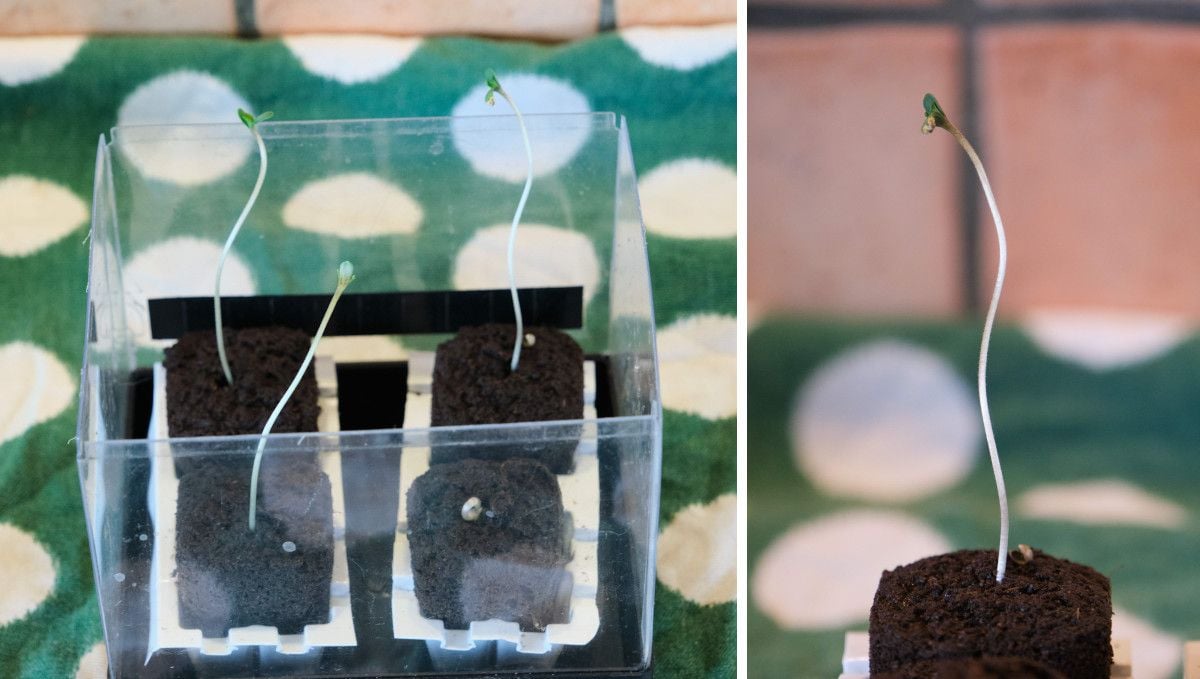
It's not uncommon for the seed shell to resist shedding during the sprouting process. Try to avoid this as stuck shell will stunt the growth and probably lead to excessive stretching too.
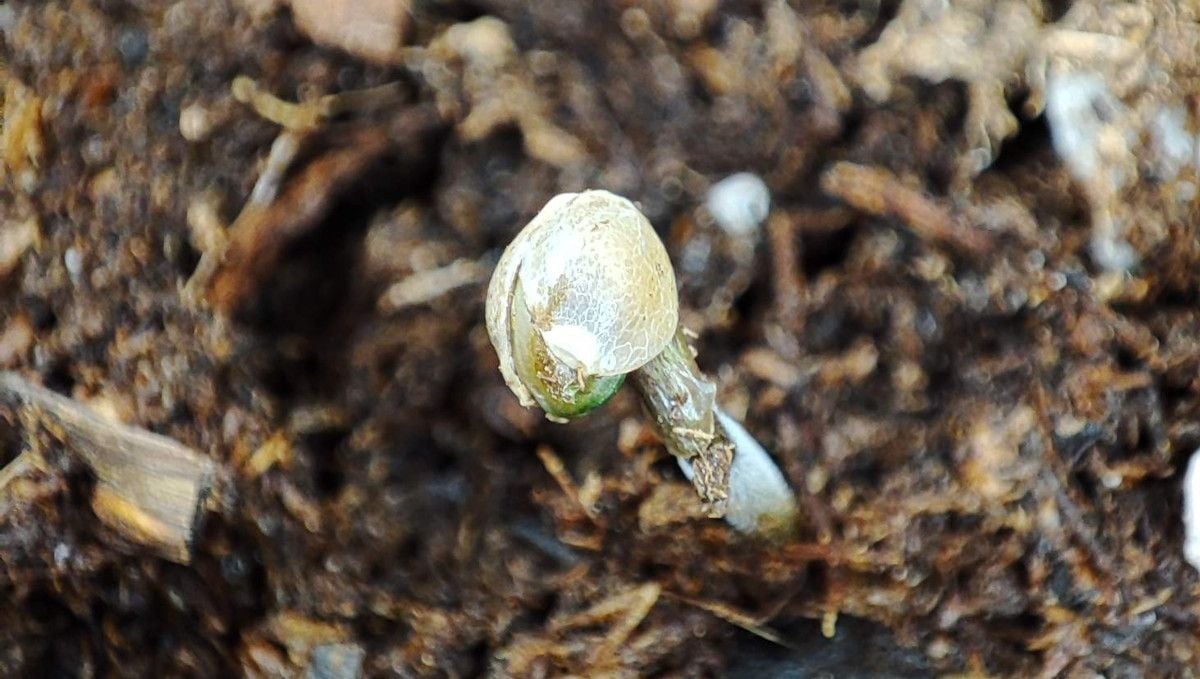
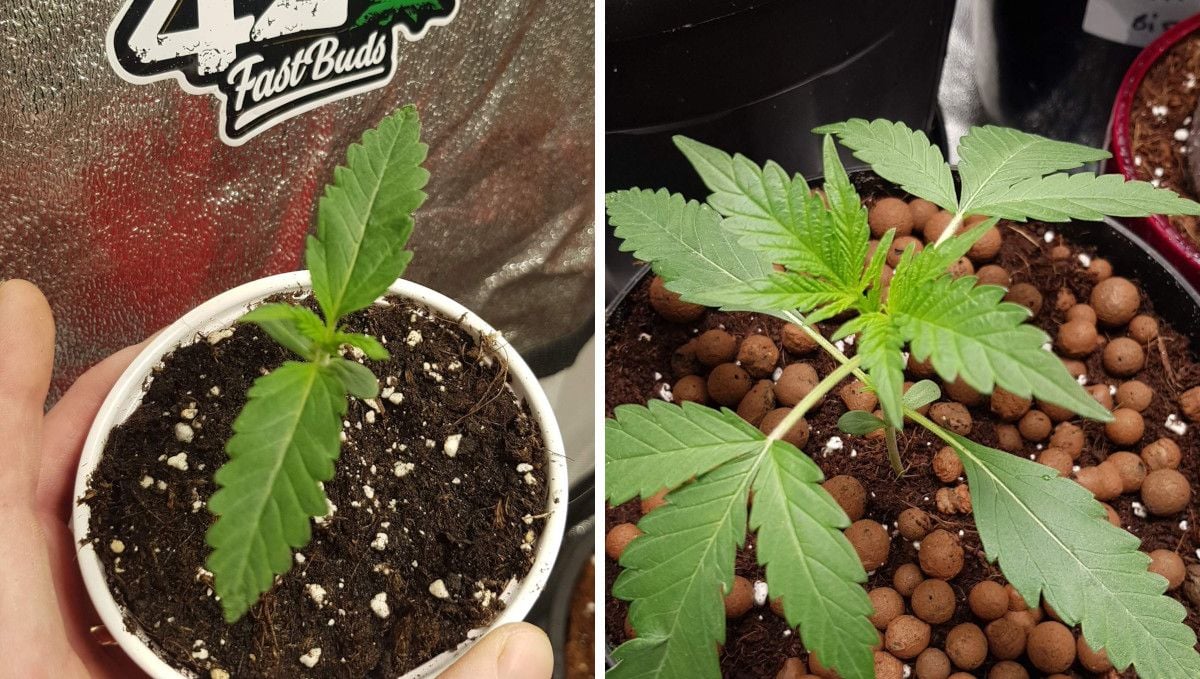
Proper planting depth is crucial for the successful emergence of seedlings. In a scenario where the sprout is planted at an ideal depth of approximately half a centimeter, it effortlessly breaks through the medium. Keep the medium moist, and the seedling will emerge sans the 'helmet head', paving the way for unobstructed early development. Despite the initial appearance of yellow cotyledons and a slightly crooked stem (see the photo below), exposure to adequate light ensures the seedling's straightening and greening.
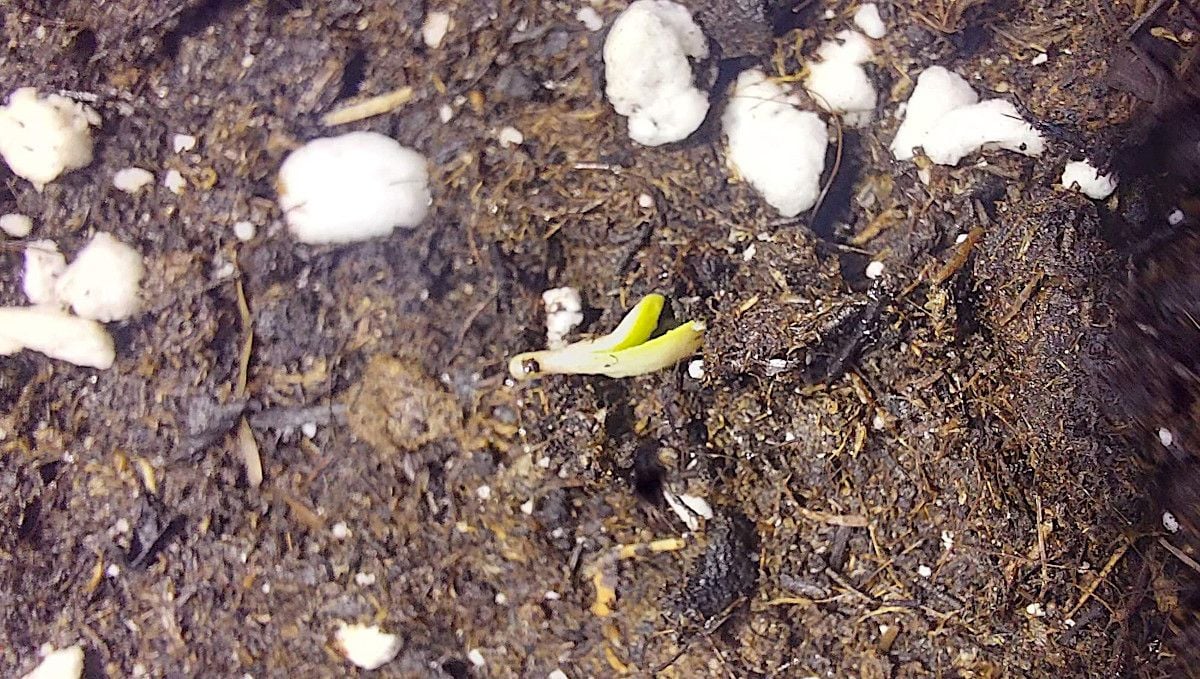
The dilemma of choosing between small starter pots and large final containers adds an intriguing layer to the germination process. There are trade-offs involved, where small pots offer ease of watering, while larger pots eliminate the need for transplanting, sparing the seedlings from associated risks.
4. Early Veg | Week 2
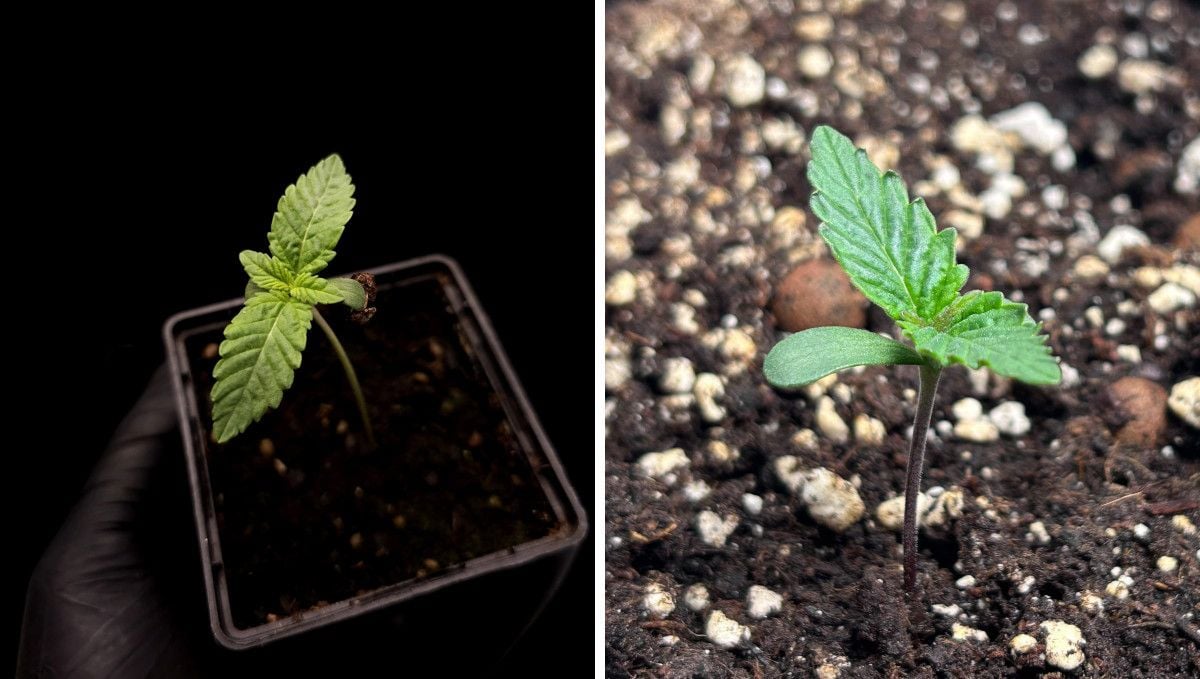
In the second week from seed, when the growth becomes perceptible, continue to provide the same warm and humid conditions that were conducive to the rapid development of your seedling in the previous week. Such conditions ensure a stress-free environment for your young weed plants.
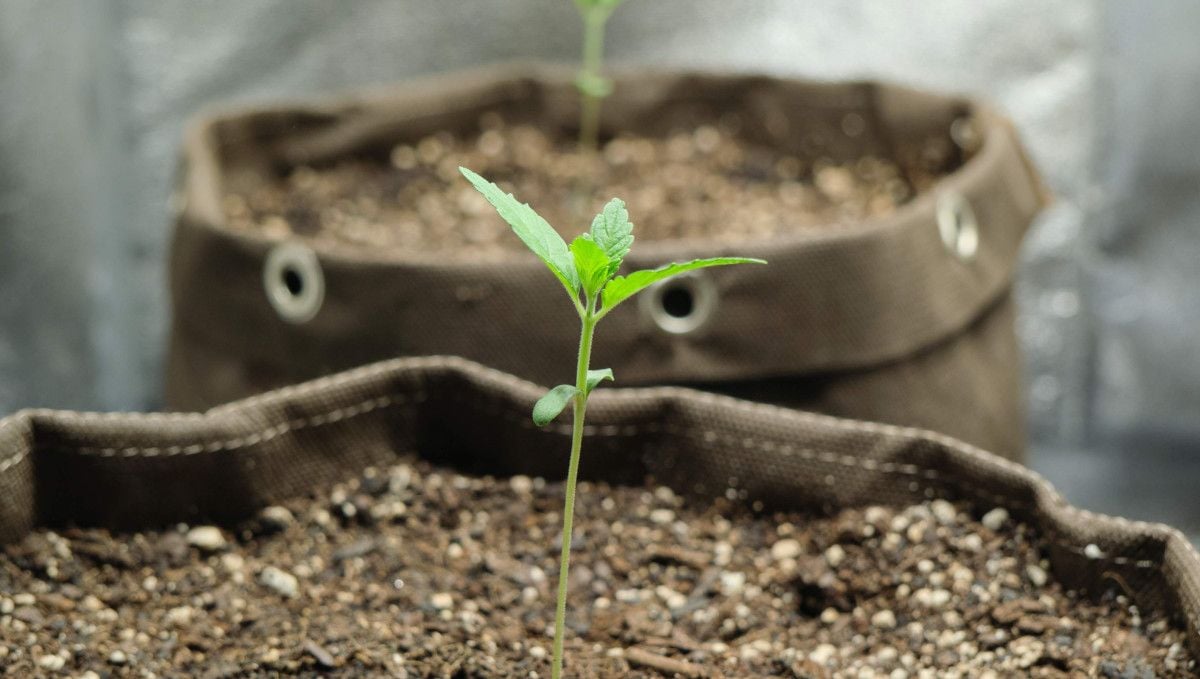
As the cannabis journey enters its second week from seed, visible progress may still appear modest. However, beneath the soil surface, a silent spectacle unfolds as the roots diligently weave their way throughout the container, establishing a foundation for future growth. Patience becomes a virtue for the grower, as the true explosion of the plant is just around the corner.
As the days progress, the plant begins to quicken the pace of its development, with the emergence of increasingly larger pairs of leaves. This serves as a visible testament to the plant's overall health. Each succeeding pair of leaves surpasses its predecessor, an encouraging sign that the young cannabis is thriving.
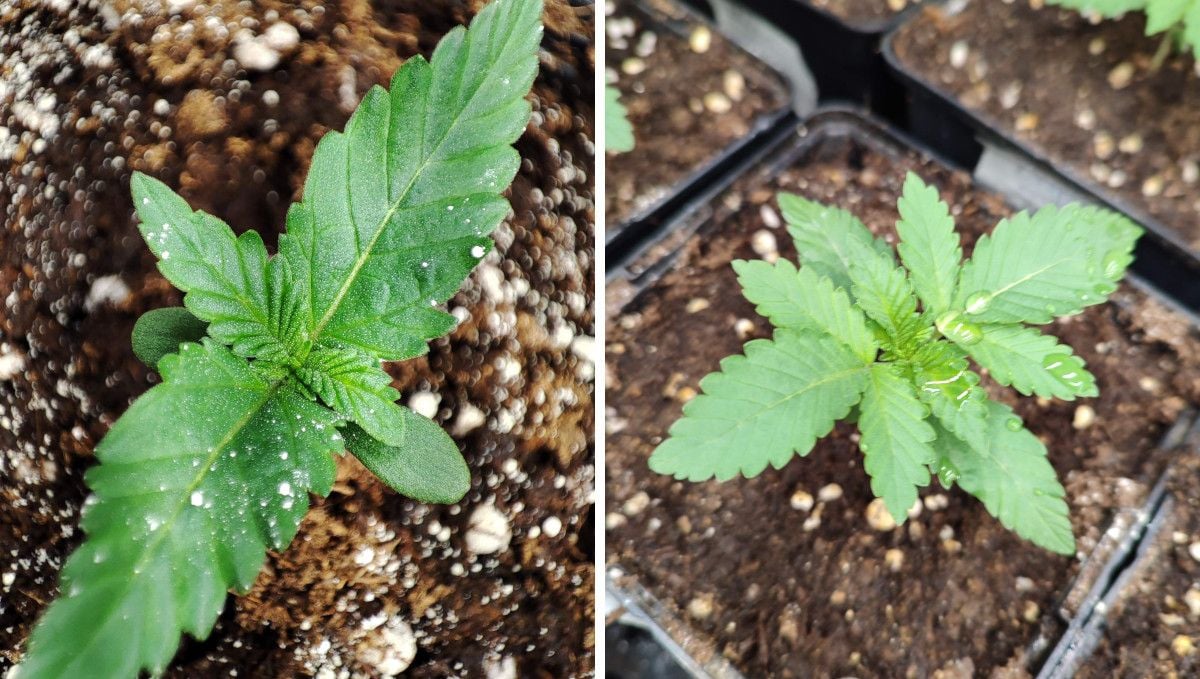
A delicate balance must be struck when considering the timing of re-potting. On one hand, hasty action can result in the desintegration of the root ball because the soil lacks cohesion due to insufficient root development. Conversely, allowing the plant to become rootbound is a pitfall to avoid. A clear indication that re-potting is imminent is when the plant outgrows the current confines of its small pot or party cup.
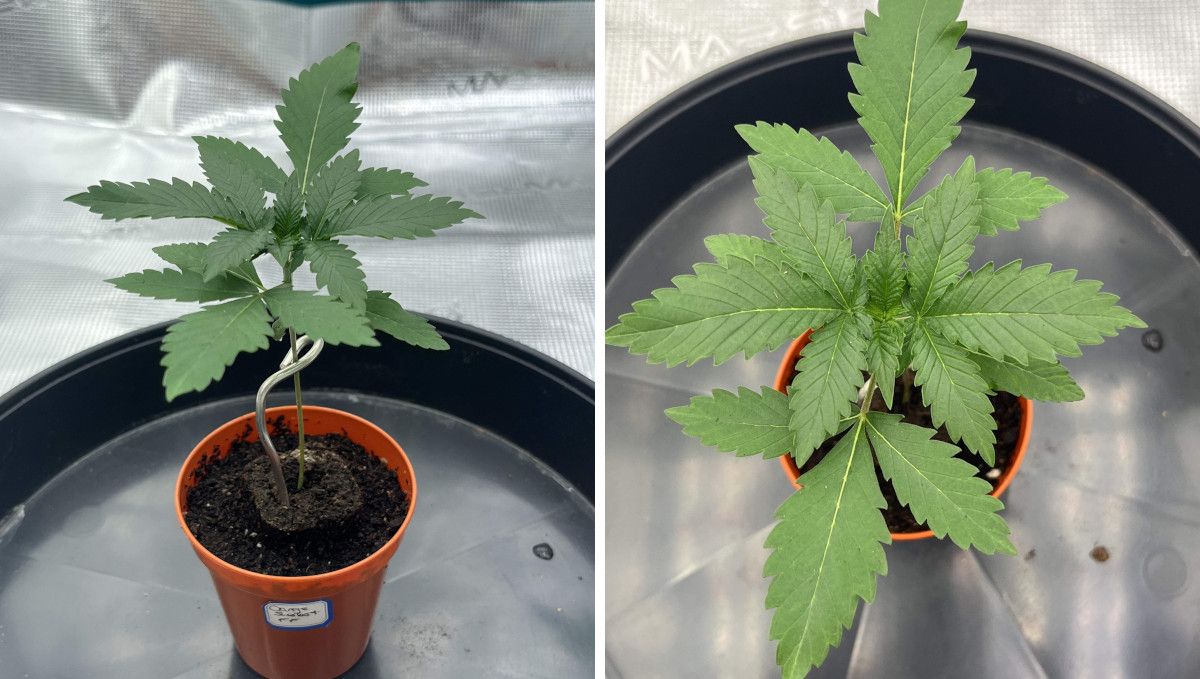
The frequency of transplants becomes a pivotal decision, heavily influenced by the plant's life cycle duration. For the swift journey of autoflowers, characterized by a remarkably short life cycle, a single transplant or direct cultivation in the final pot from the outset is crucial.
In contrast, photoperiodic strains offer the flexibility of multiple transplants into progressively larger pots. The key consideration is to execute the final repotting well in advance of the anticipated switch to the flowering phase, ensuring the cannabis plant has ample room for its full expression.
5. Mid Veg | Weeks 3-6
When your Orange Sherbet FF commences rapid vegetative growth, it's time to lower the relative humidity in your grow tent just a bit, bringing it within the recommended 40 to 60%, maybe closer to 60% for now. The temperature should continue to be warm - around 25°C in the day with only a slight drop of about 5° for the night.
With a robust root system firmly in place, the cannabis plants embark on a phase of remarkable acceleration, characterized by the rapid proliferation of new leaves and branches. This period witnesses the plants reaching impressive heights and girth as they prepare for the bountiful growth of flowers.
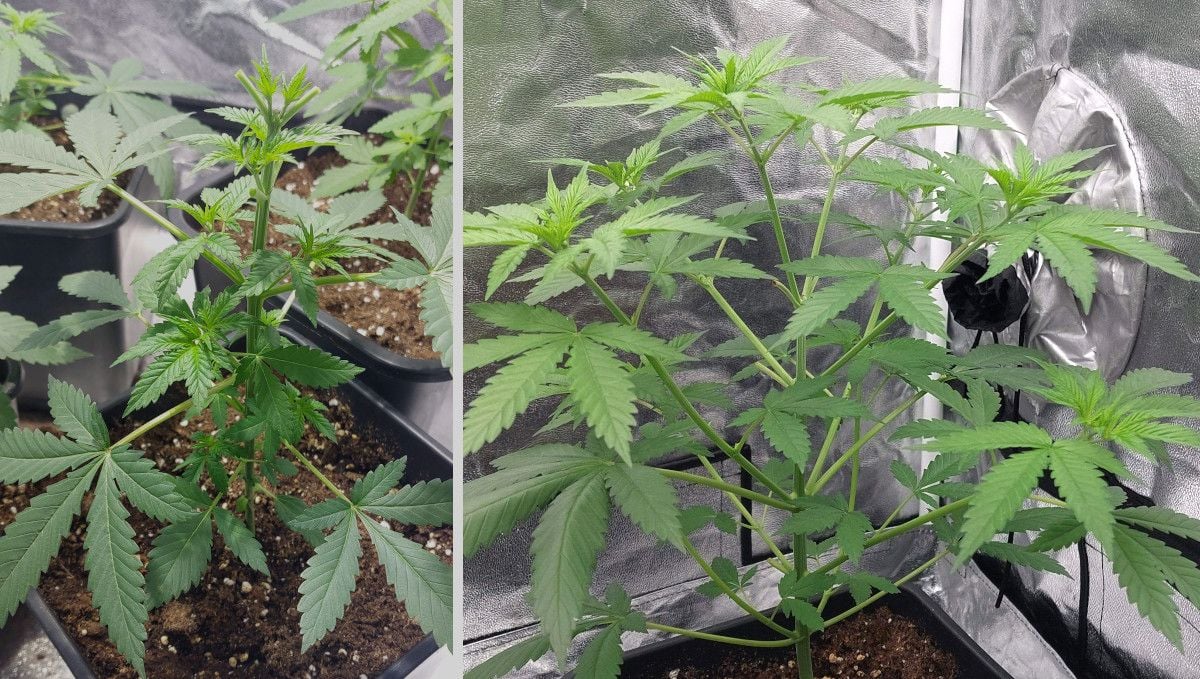
In the realm of indoor cultivation, where space and light resources are constrained, the key to success lies in the art of training. This practice serves a dual purpose: restricting the vertical expansion of the plant and fostering a bushier structure.
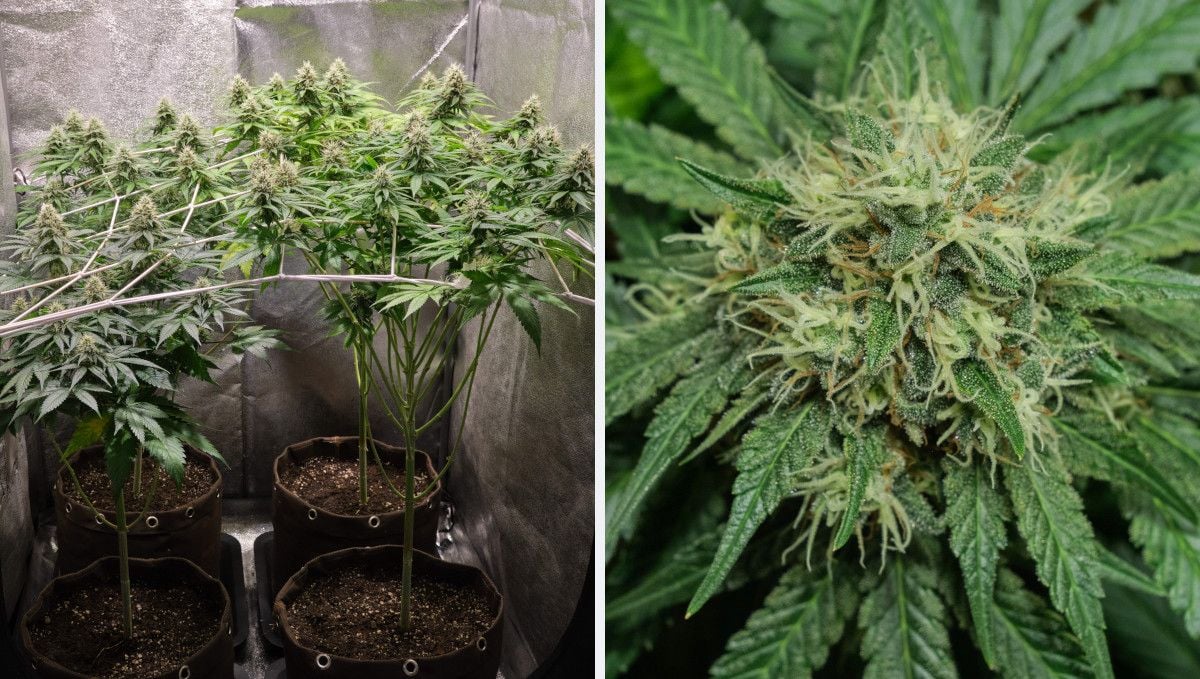
The ultimate goal is to craft a canopy with a uniform profile, ensuring that each bud receives an equitable share of the available energy. A simple yet effective method involves tying down the main stem and securing it with wire (as you see in the photo below).
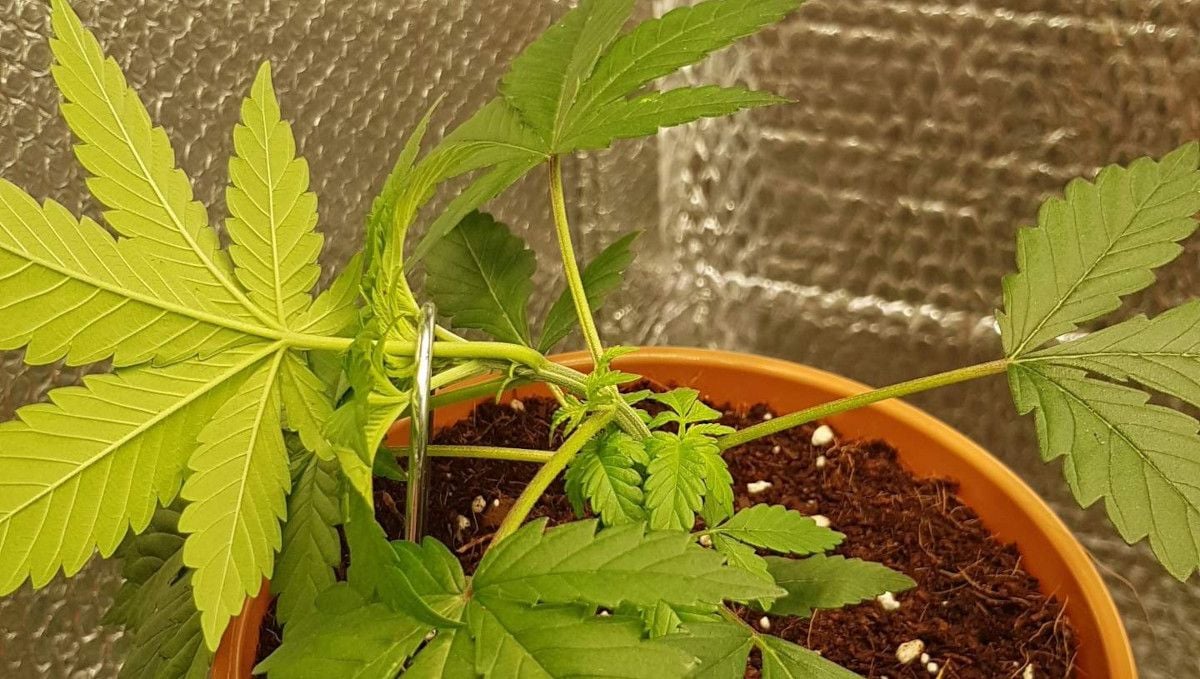
Timing proves to be a crucial factor in training. Initiating training during the early stages, when the plants are still modest in size, is strategic. This preemptive approach prevents the vegetation from spiraling out of control and facilitates efficient management. Waiting until the plants have grown substantially tall may render training less effective, underscoring the importance of an early and proactive approach.

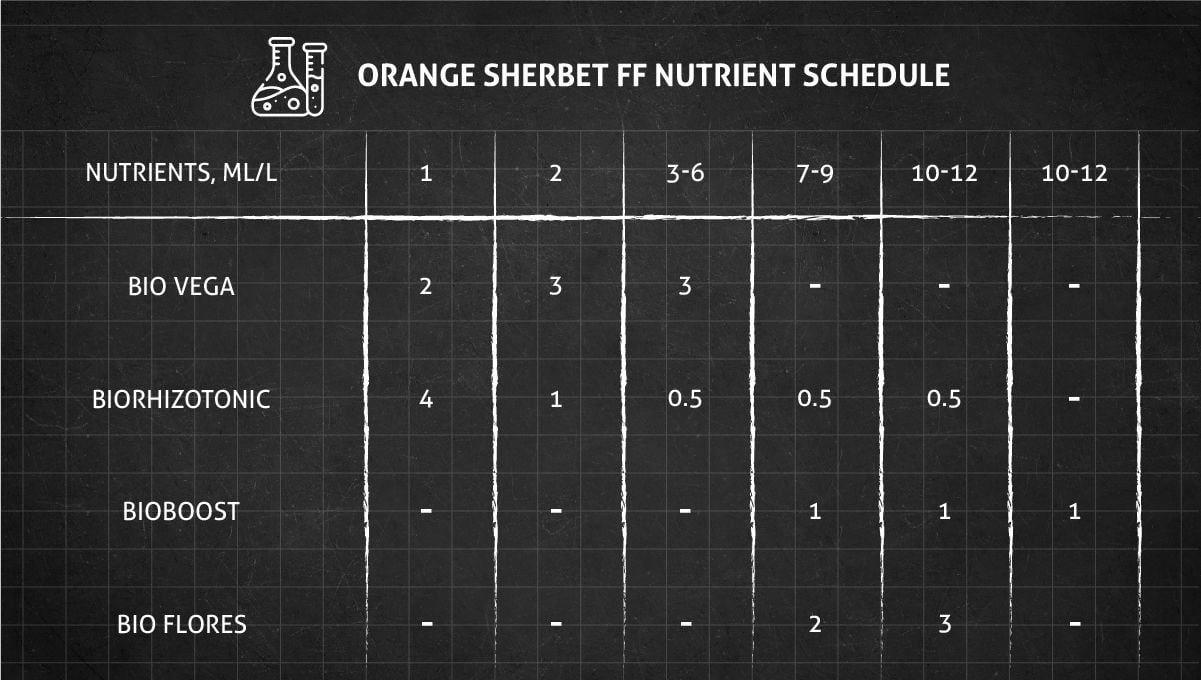
When the explosive vegetative growth in your garden starts, the issue of providing it with enough nutrients becomes one of the most important considerations. Growing in soil and using lots of it may have freed you from the need of giving any extra feeding with water in the previous week, but now, the nutes available in the medium will be depleted and you'll want to start adding extra fertilizers, amendments, and boosters.
In soilless grows, plants need extra nutrients practically from day one. Look at the simple yet effective feeding schedule below, and don't forget that vegging plants need a nitrogen-rich diet and that you should always start your feeds with about a quarter strength of what the fertilizer manufacturer recommends.
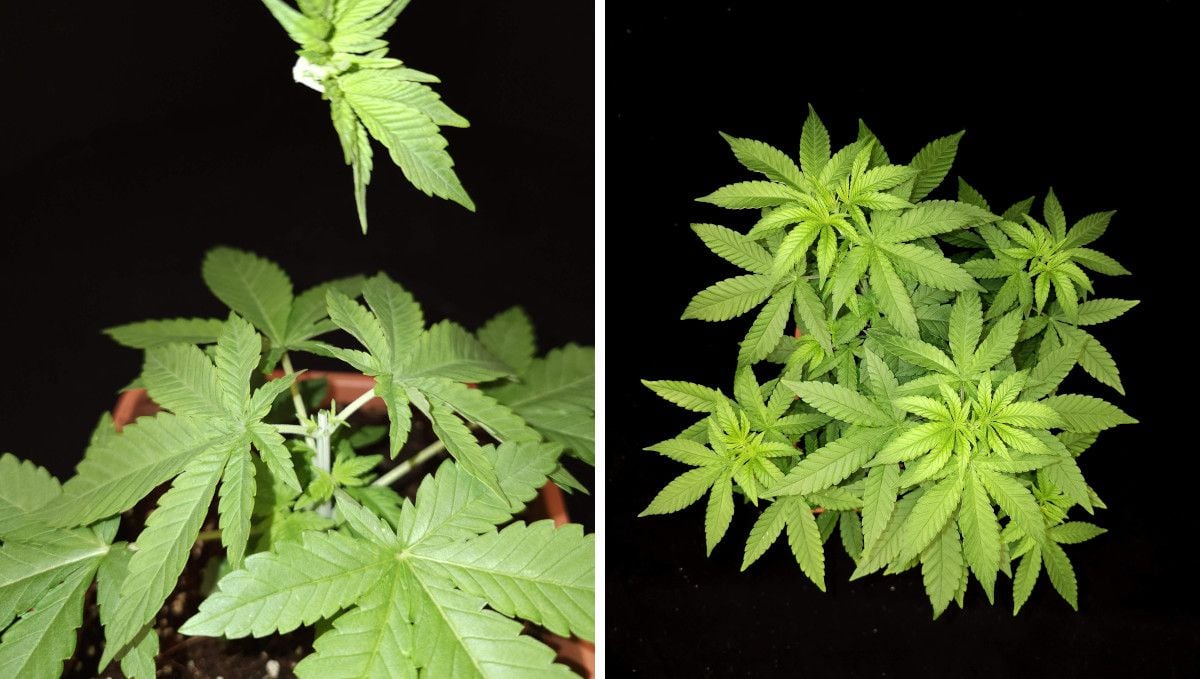
Among the arsenal of techniques for canopy control, topping stands out as a popular method. This involves the deliberate removal of the central growing point, prompting the plant to redistribute its resources to the two shoots just below the main apex as well as the lower side branches. The outcome is a denser and more voluminous profile.
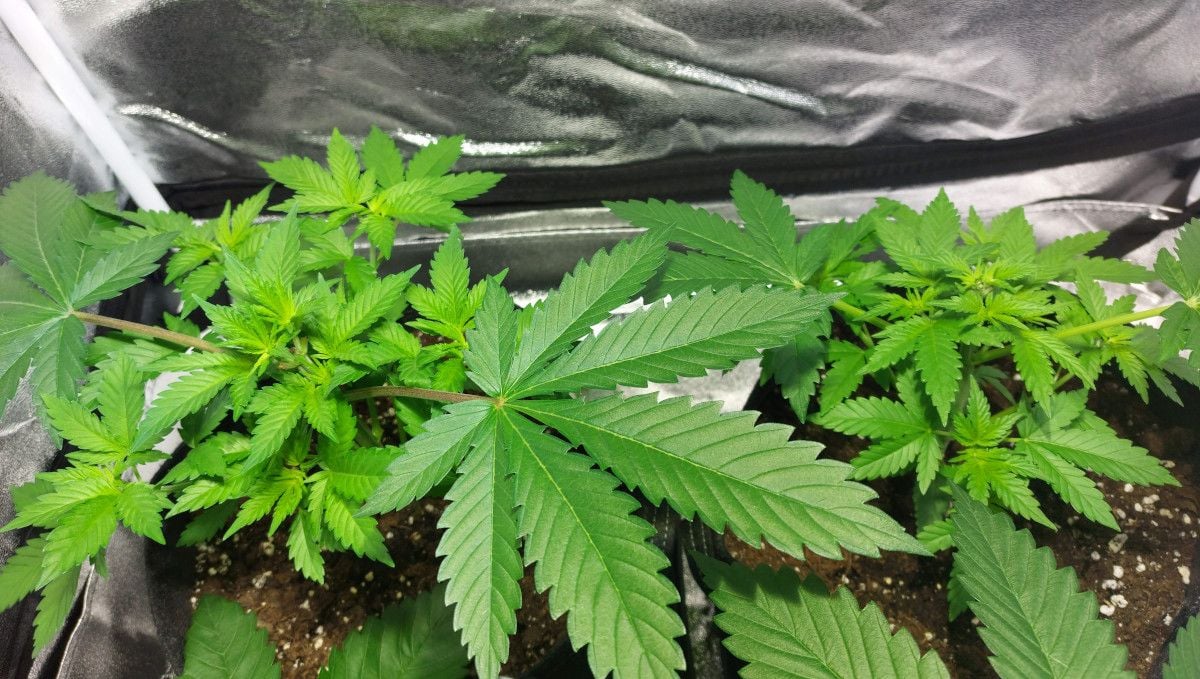
In some sophisticated cultivation practices, growers combine topping with heavy defoliation to sculpt the plant's growth further. This dual strategy not only disrupts apical dominance but also ensures that the side branches receive ample exposure to light, preventing them from being overshadowed. By optimizing the plant's energy distribution, you'll foster a lush, well-lit canopy.
6. Transition (Pre-Flower) | Week 7
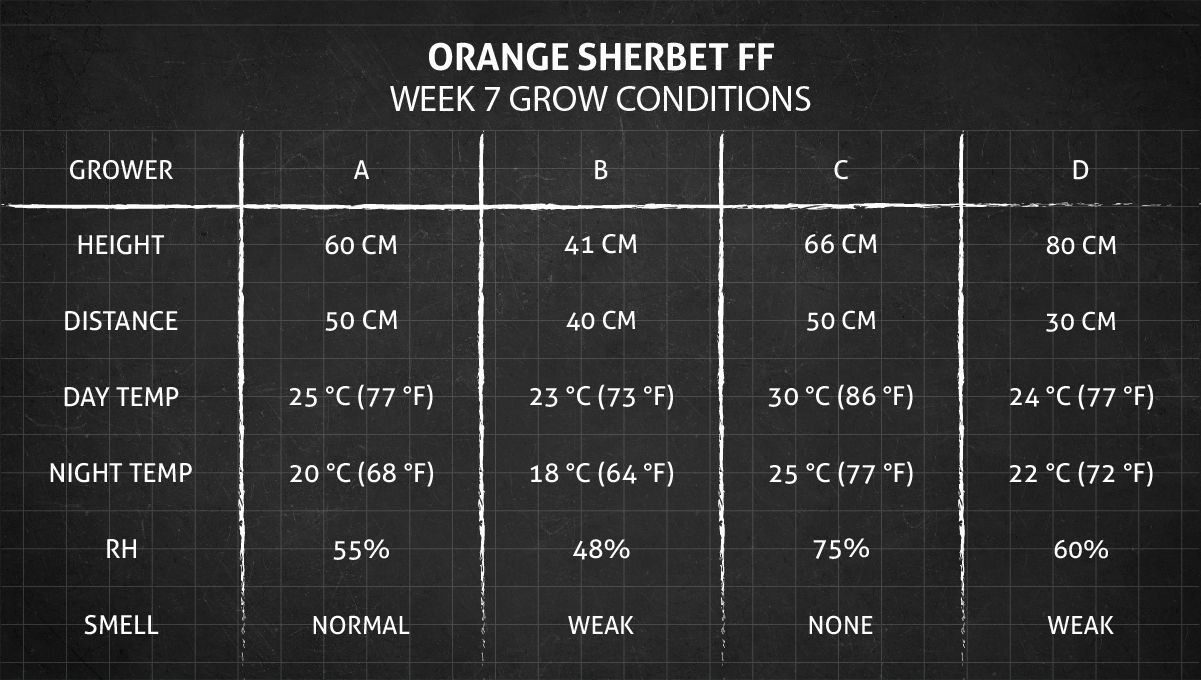
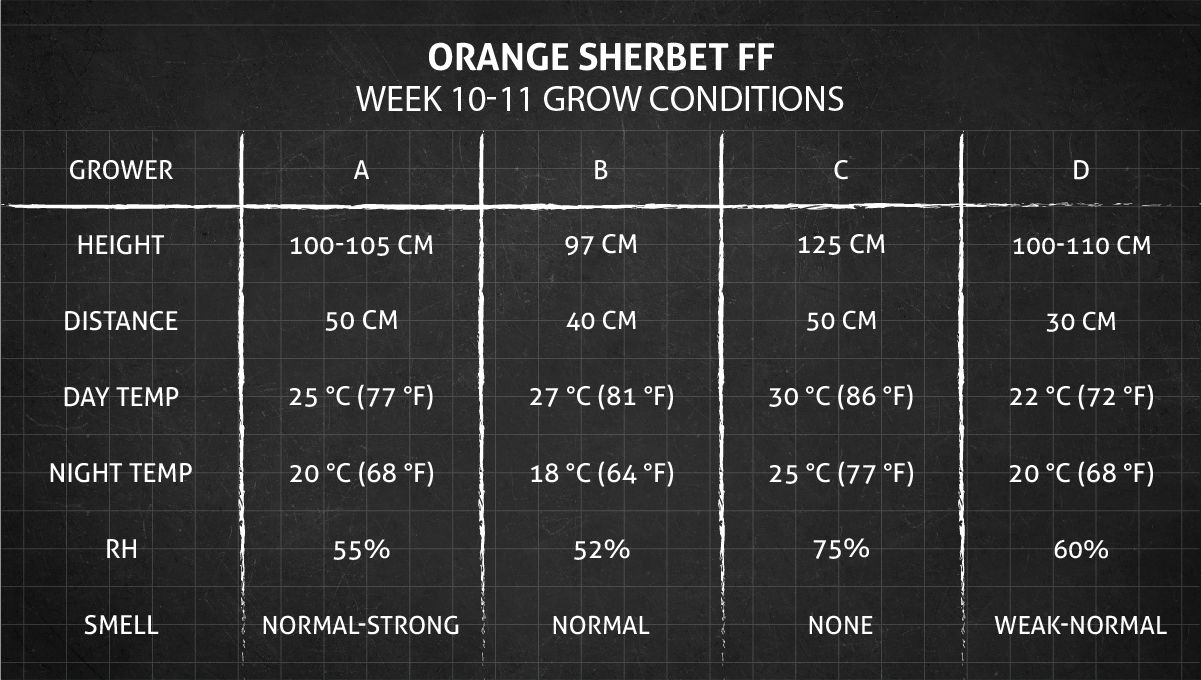
When vegetative growth has resulted in big enough plants and you have induced flowering by switching to the 12/12 light schedule, you can decrease both the temperature and the relative humidity compared to the previous weeks. Also, expect the plants to start emitting a strong cannabis odor as they transition to flowering. However, as you can clearly see in the table below, Orange Sherbet FF is hardly a smelly variety.
As a cannabis plant transitions into the flowering stage, a visual transformation unfolds, signaling a shift in its growth dynamics. The once deep-green tops undergo a change, adopting a lighter hue. This alteration signifies a pivotal moment in the plant's life cycle, as it redirects its energy away from new branch growth. Instead, the focus now intensifies on stretching existing branches and channeling the majority of resources into flower formation.
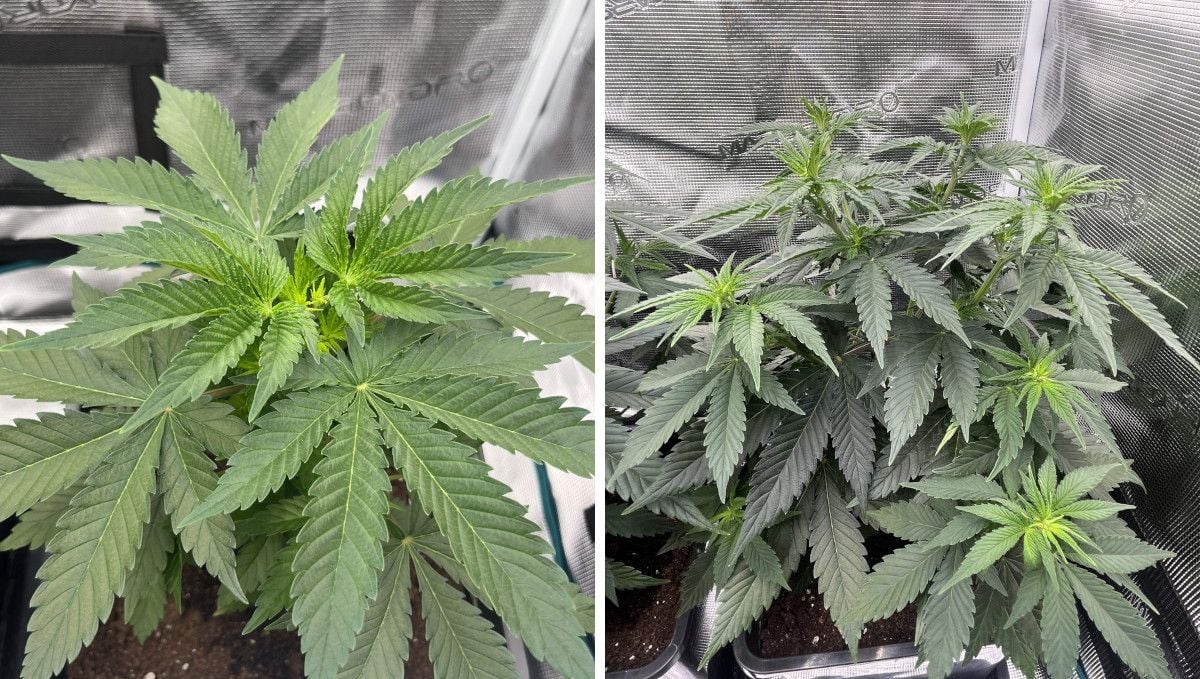
Upon closer inspection of the plant tops poised for flowering, one can observe not only a change in color but also a shift in shape. The leaves take on an ultra-thin and curvy appearance, resembling delicate threads. Although this may give the impression of pistils, the small female hairs that eventually emerge from flower calyces, these telltale signs will manifest later in the flowering process.
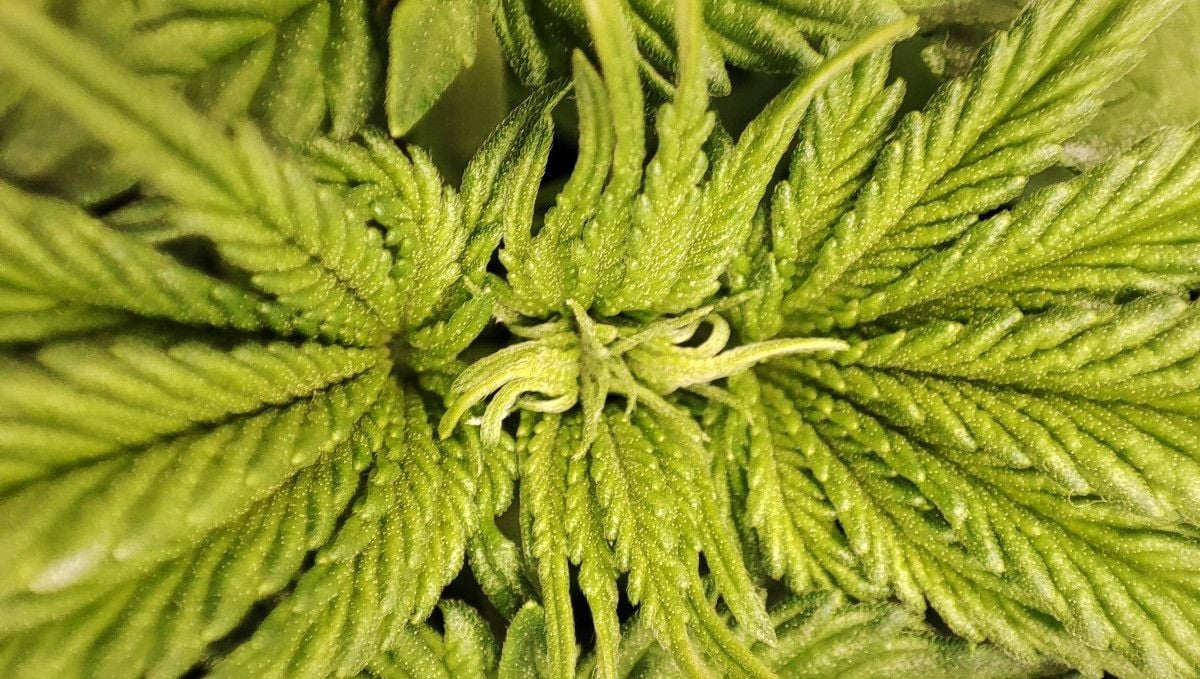
Pistils, crucial indicators of the plant's readiness to initiate budding, first make their appearance at the middle nodes rather than at the tops. You need to look deep inside the canopy to spot these early signs.
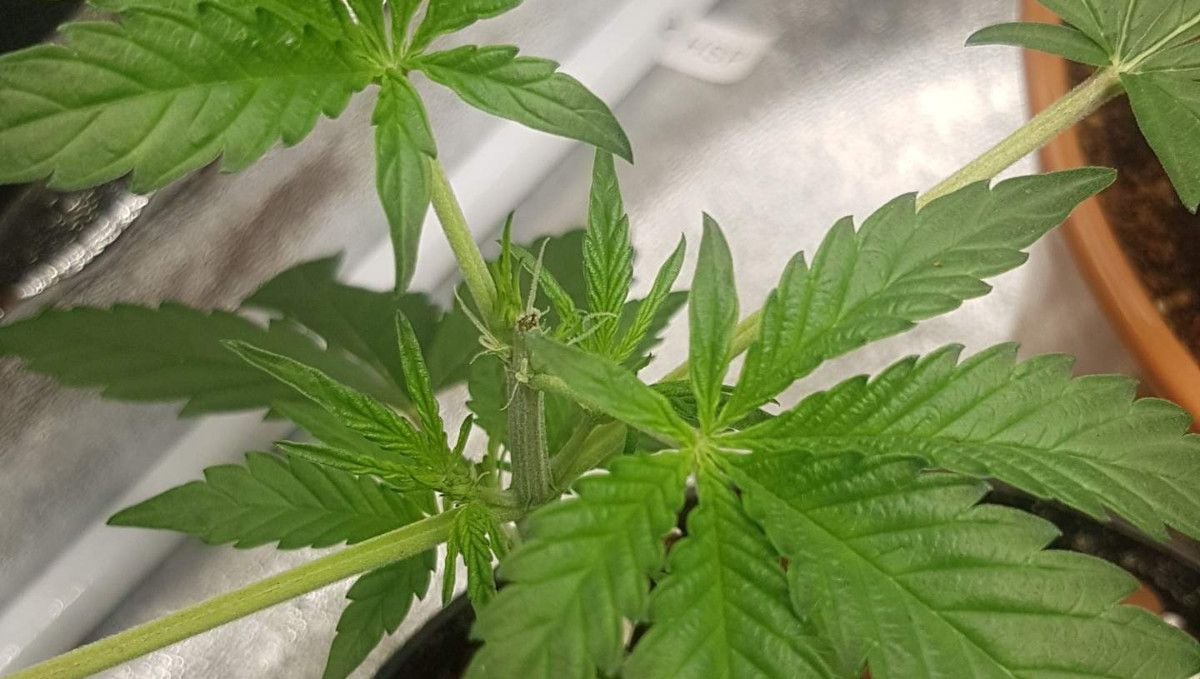
Within a span of one to two weeks from the emergence of the first pistils, the plant tops undergo a delightful transformation, becoming adorned with a sufficient number of pistils to appear fluffy. Simultaneously, a more conspicuous change unfolds as the branches undergo a noticeable stretch.
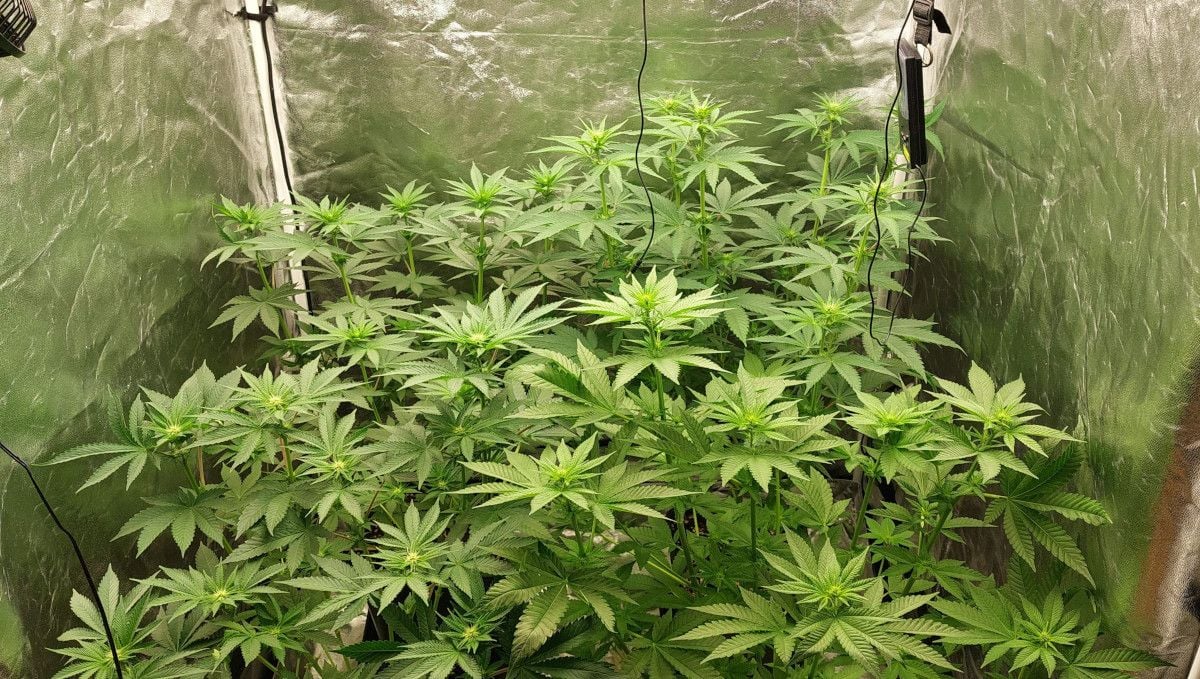
As the plants continue to burgeon in size and embark on the formation of their first flowers, their heightened metabolic activity demands an increased supply of essential resources. The diligent grower must ensure a judicious provision of light, water, and nutrients to meet the escalating needs of the garden.
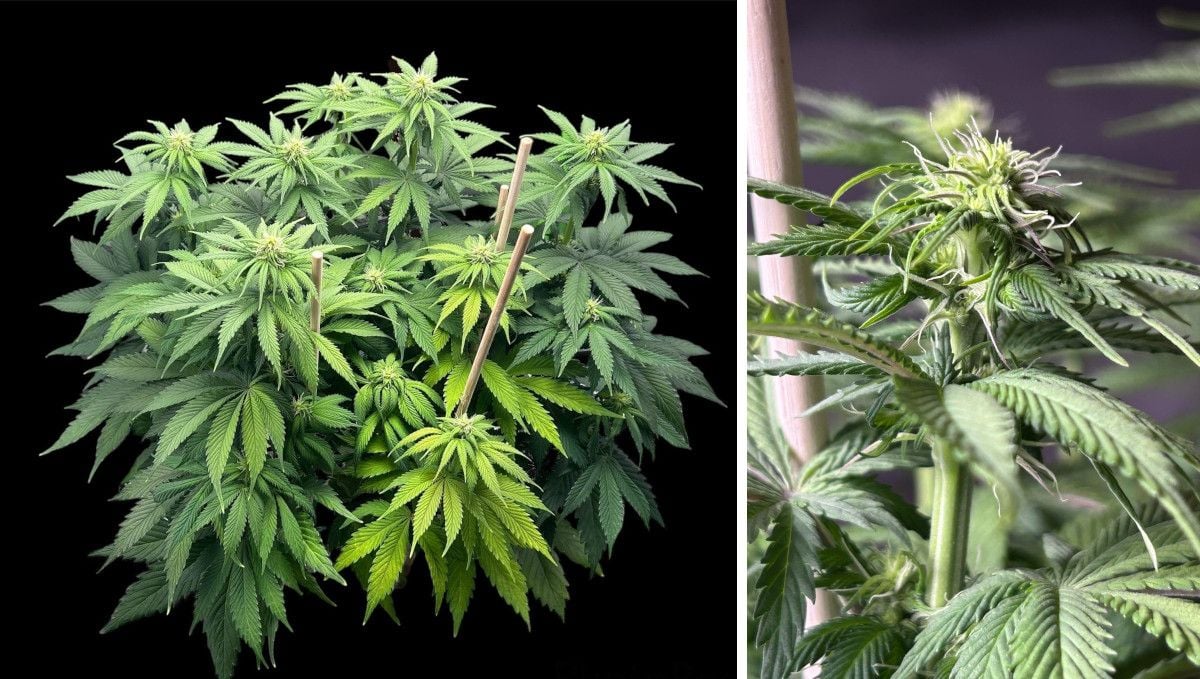
While indoor growers shouldn't forget that it's up to them to induce flowering (by shortening the light cycle to 12 hours of light and 12 hours of darkness), outdoors, Orange Sherbet FF will start to show the first signs of entering the budding stage when the days get short enough closer to the end of summer or even in early fall - it all depends on your latitude.
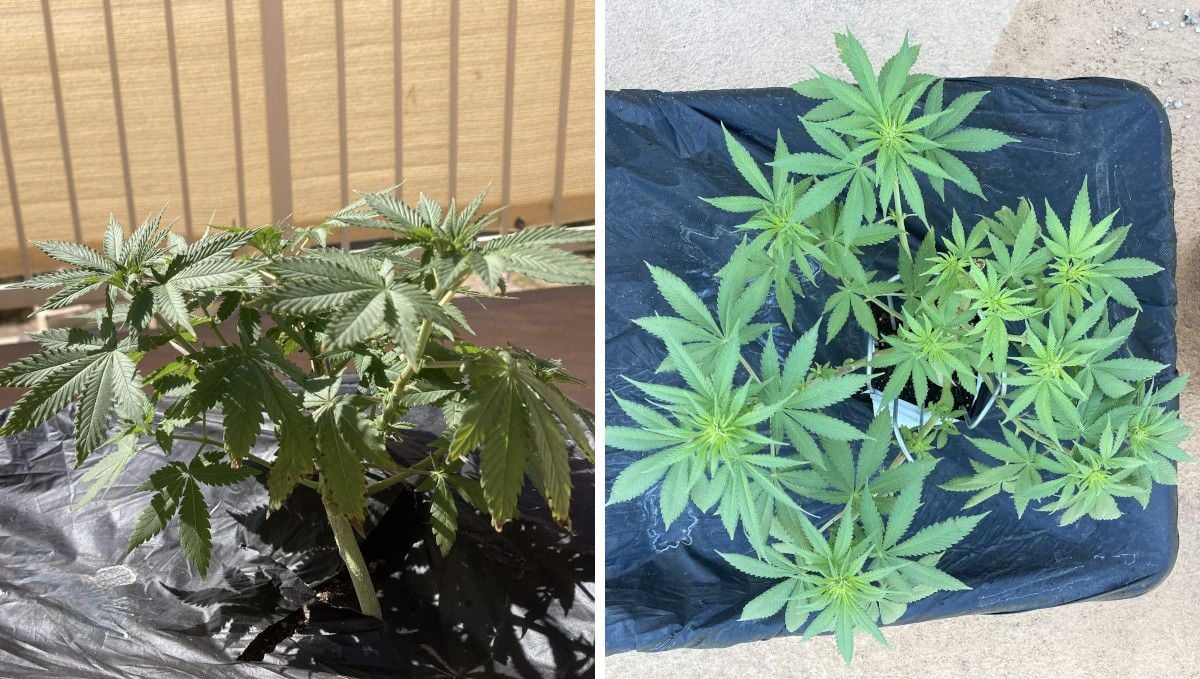
7. Early Flower | Weeks 8-9
As far as the growing conditions are concerned, your main task during this period is to watch the height of your plants and prevent them from getting too close to the grow lights, or else you may see issues from light burn or overheating. Make sure that you raise the lights as your plants stretch towards them.
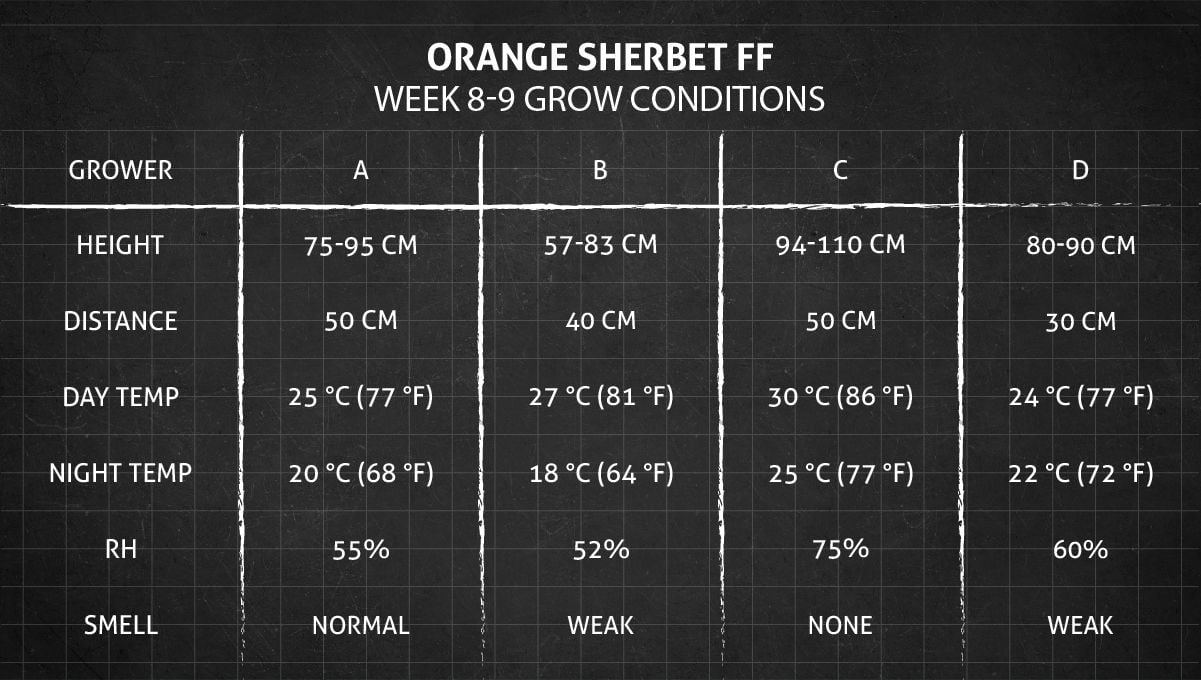
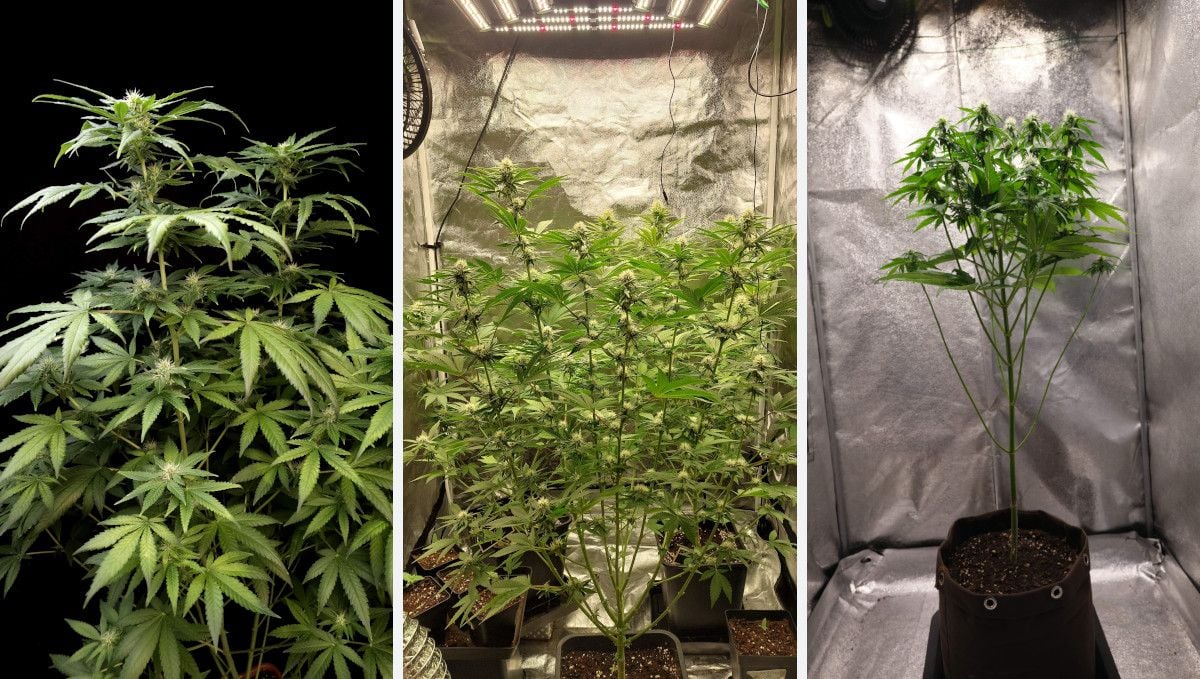
In the initial weeks of flowering, an intriguing paradox emerges as the formation of buds takes a backseat to a more conspicuous phenomenon — the continuation of explosive growth. Astonishingly, the stem and every branch undergo a doubling or more in size, often catching first-time growers off guard.
This rapid upward surge poses a challenge as the tops dangerously approach the light source, leaving growers to helplessly contend with the limitations of vertical space. The key takeaway for cultivators is to strategically induce flowering before the plants reach a critical height, averting potential complications.
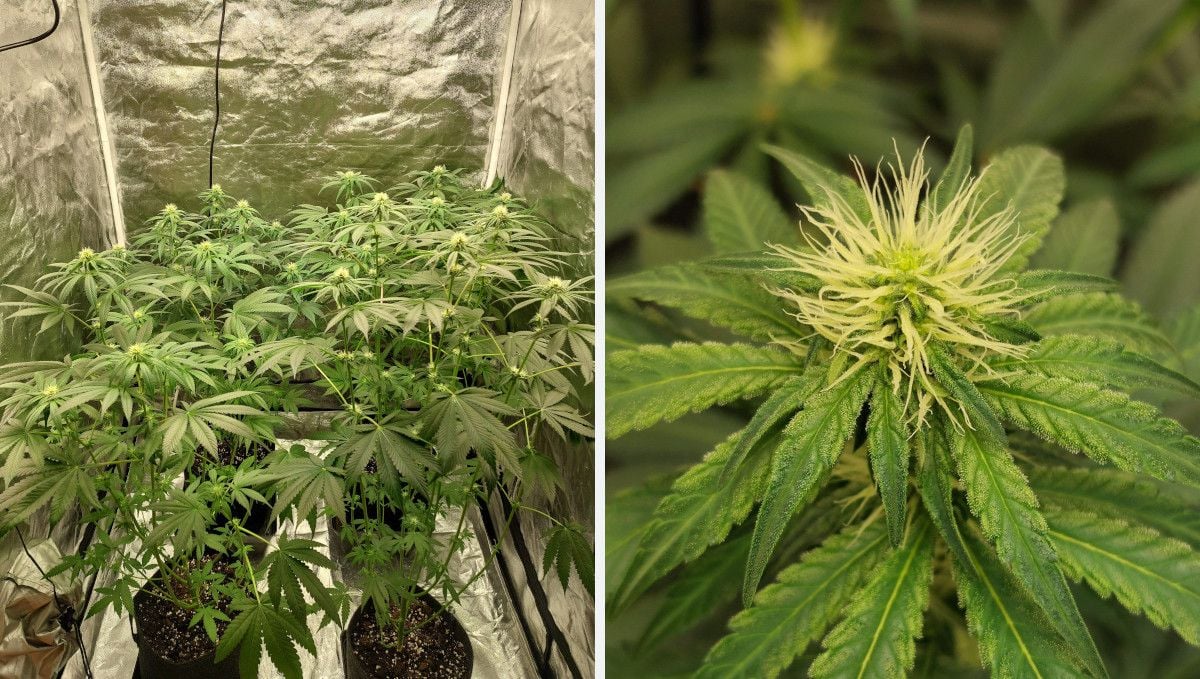
While some degree of stretching during the flowering phase is inevitable, its extent is within the grower's realm of influence. Factors such as the distance from the light source, its spectrum, and training techniques all play a role in determining the degree of stretch. Indoors, managing and limiting excessive stretch not only ensures that even lower buds receive adequate light but also relieves the plant from the burden of transporting water and nutrients over an extended vertical distance.
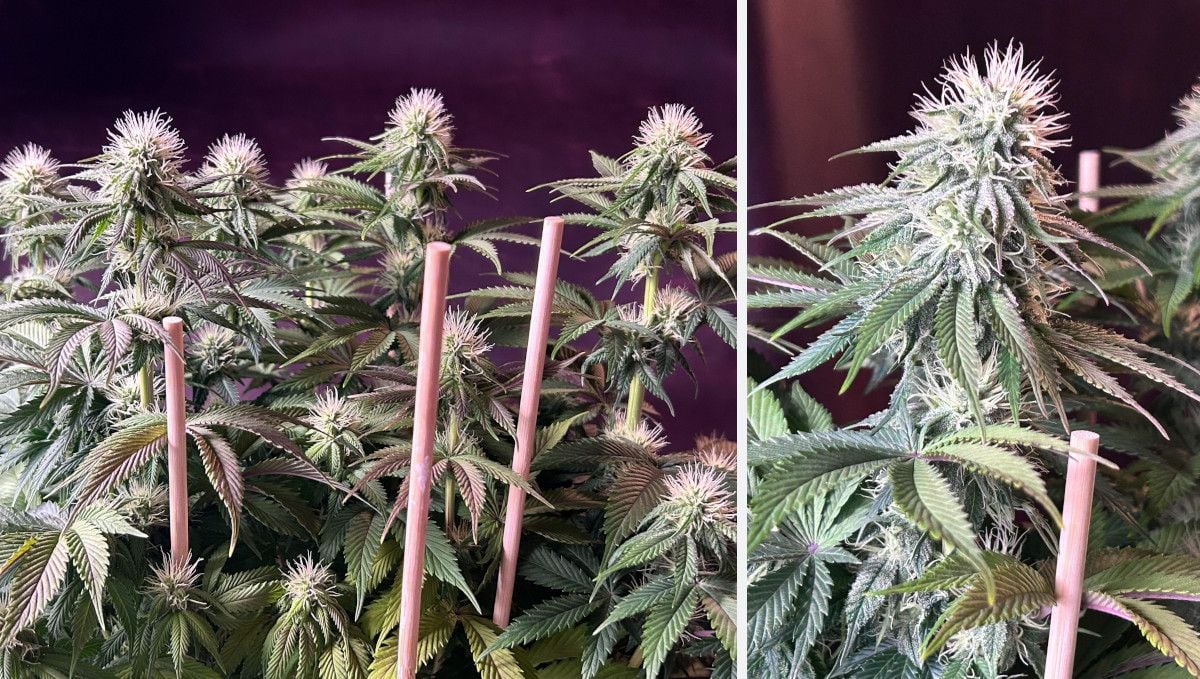
A notable transformation during the flowering stage is the initiation of resin production. In the 'frostiest' of modern cannabis varieties, this process can commence quite early, promising the development of exceptionally sticky buds at harvest. The resin not only contributes to the plant's defense mechanisms but also enhances the overall quality and potency of the final product.
As the plants undergo these dynamic changes in the early weeks of flowering, their nutritional needs intensify. Crucially, the demand for specific macronutrients undergoes a shift, with nitrogen playing a supportive role while phosphorus and potassium take center stage. The vigilant grower must adapt their nutrient regimen accordingly, ensuring that the plants receive the precise balance required for robust and thriving development during this critical phase of their life cycle.

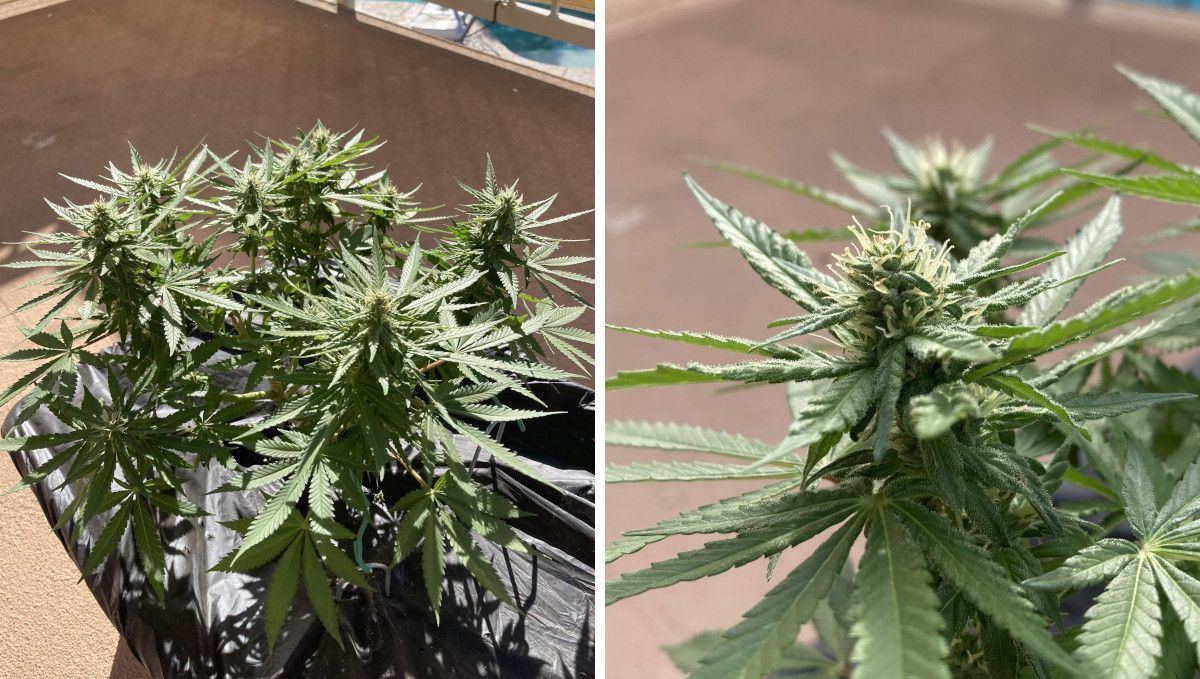
Those who will grow Orange Sherbet FF outdoors will notice that both the transition to flowering and its start take longer than in a grow tent. The reason is that an abrupt change in light schedule indoors makes the plants hurry with the budding while outdoors the length of daylight decreases gradually, and the process of flowering is likewise gradual. Nevertheless, even outdoor plants will slowly fill out as the summer draws to an end.
8. Mid Flower (Bulk Phase) | Weeks 10-11
While marijuana plants appreciate consistency in the growing conditions, you can slightly adjust those according to the different growth stages. When the flowering is full steam and results in big, chunky, and dense flowers, it becomes of paramount importance to protect them from fungal infections. The best way to achieve this is to ensure sufficient exhaust ventilation, good airflow around the canopy, and low relative humidity - that can be done through the use of dehumidifiers.
As the cannabis plants enter the phase of bulking up, this period stands out as one of the most uneventful in their entire life cycle. Growers can breathe a sigh of relief as concerns about training, defoliation, and the risk of tops reaching the lights become a thing of the past. By now, the grower has likely fine-tuned the ideal watering and feeding schedule. The key to success at this stage is to maintain the established routine and witness the plants flourish in their bountiful development.
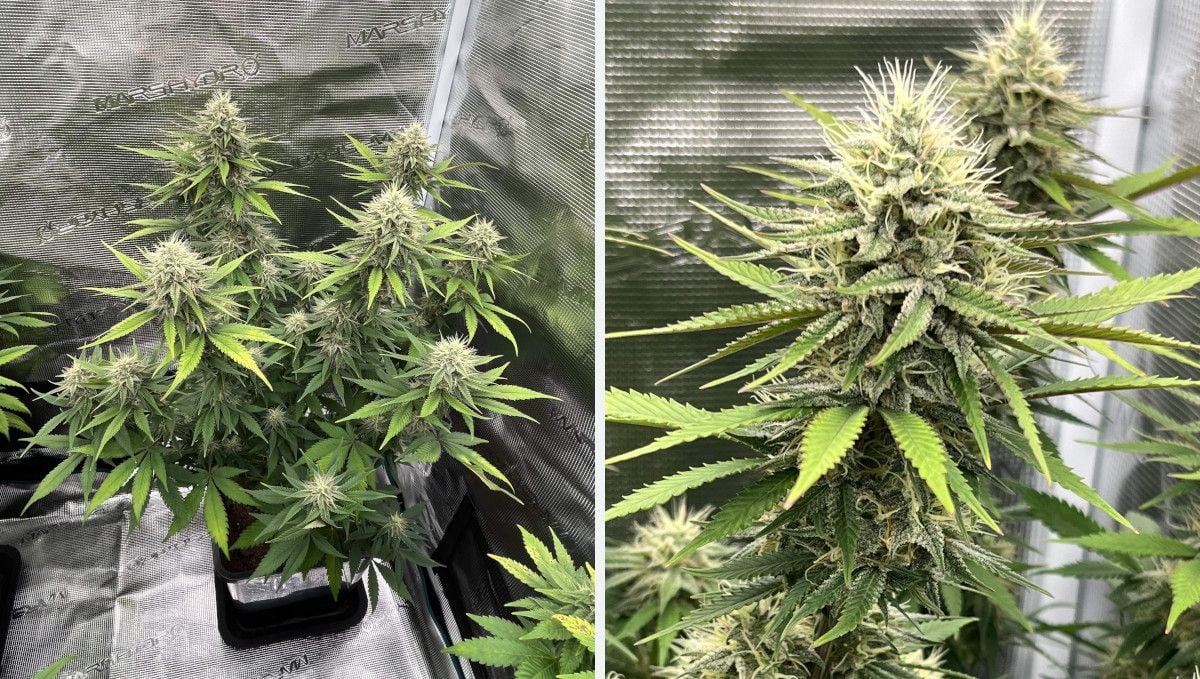
For those acquainted with the flowering cannabis plant, the unmistakable aroma that accompanies the swelling of buds and the coating of resin is a sensory experience. To mitigate the pervasive smell in the grow room, growers commonly employ methods such as carbon filters, air purifiers, and odor-neutralizing agents. These strategies help create a more discreet and controlled cultivation environment.
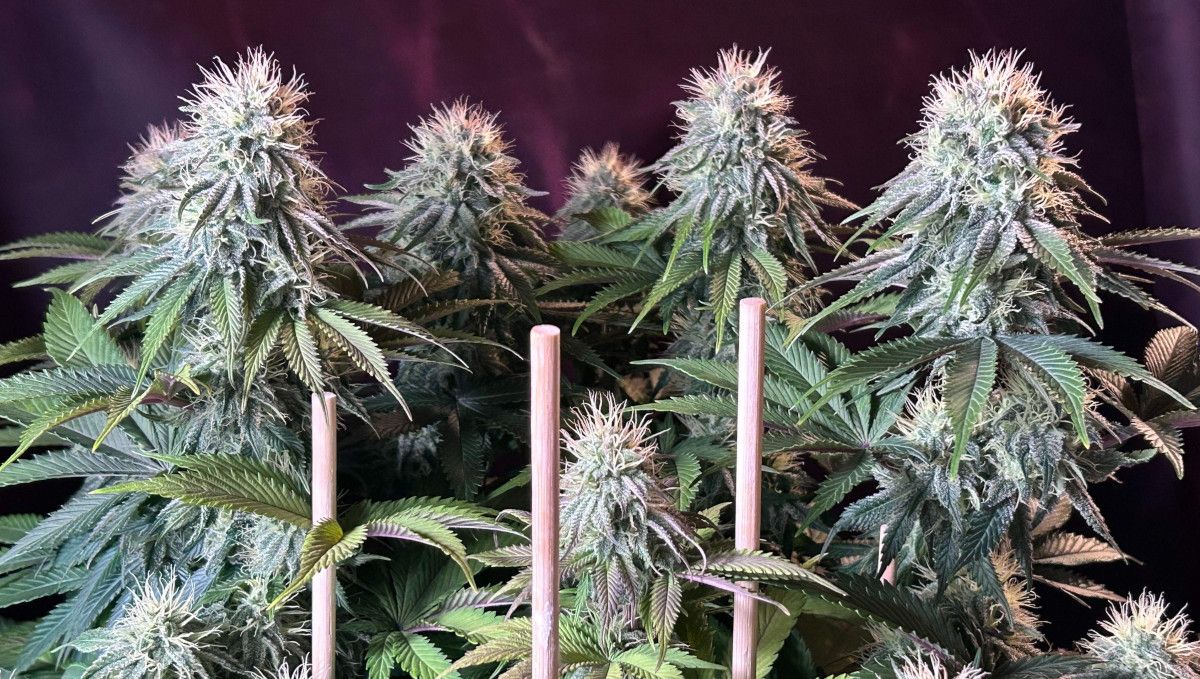
In the late stages of flowering, particularly in strains with long and thin branches supporting heavy colas becomes crucial. The ScrOG (Screen of Green) net proves to be an effective solution. While ScrOG is primarily employed for shaping a flat canopy, it also excels in preventing branches from drooping and snapping under the weight of burgeoning buds.
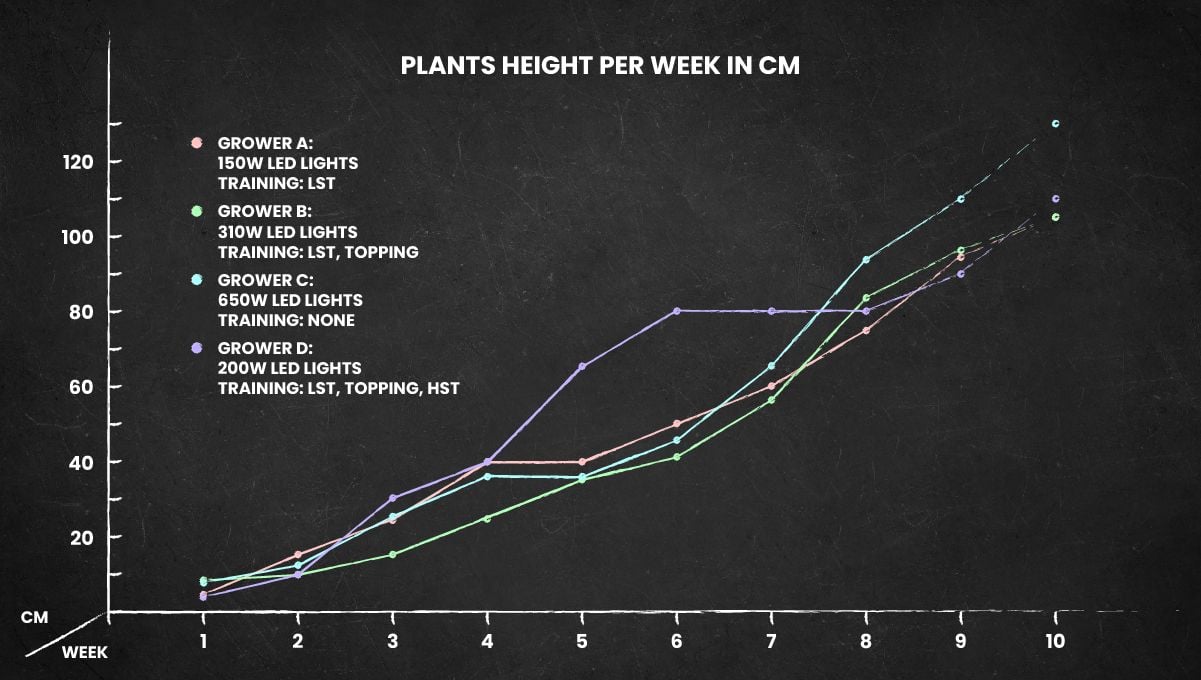
After a few weeks into flowering, the branches cease their upward stretch, and the plant attains its final height, maintaining this stature until the day of harvest. Referencing the chart below allows readers to trace the height trajectory of the four plants throughout their entire life cycle.
Ensuring a continued supply of the precise nutrient composition suitable for this stage is paramount. This involves an increased emphasis on phosphorus and potassium relative to nitrogen, coupled with adequate quantities of magnesium (Mg), calcium (Ca), and essential microelements. Reputable manufacturers catering to the cannabis growing market offer flowering formulas tailored to meet these specific needs.
9. Ripening And Harvest | Week 12 (And Beyond)
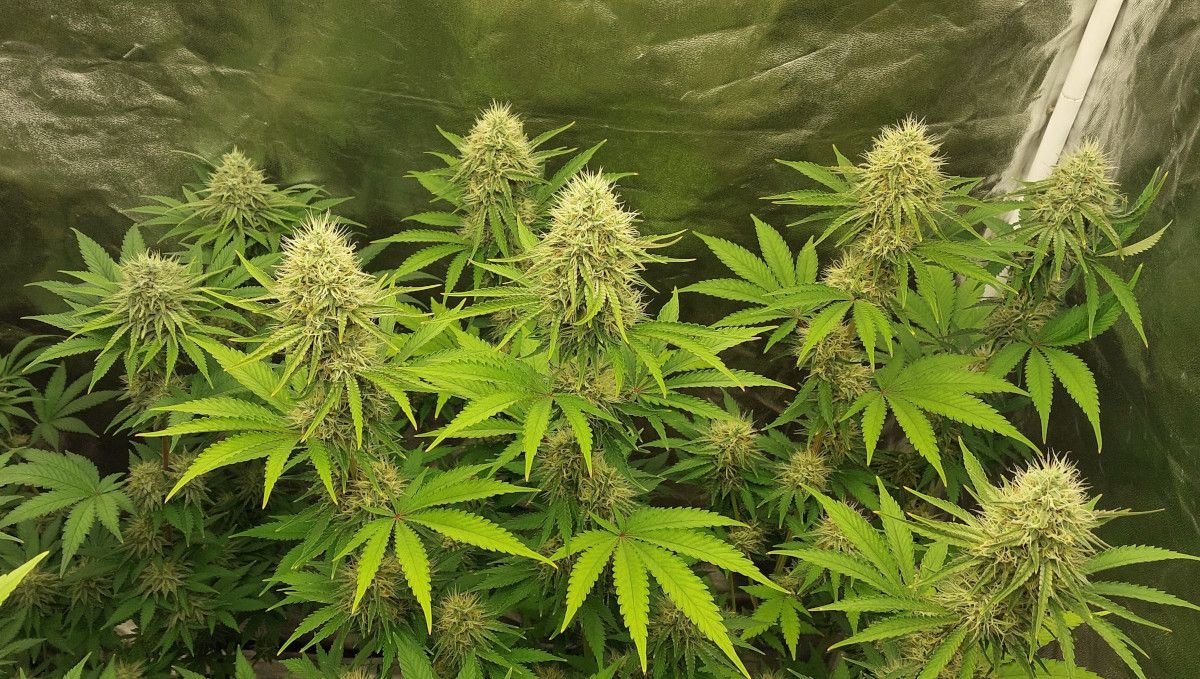
When your weed plants are nearing harvest, which in nature happens at the end of summer or beginning of fall, you can emulate these natural conditions by lowering both day and night temperatures and, most importantly, the relative humidity. The latter will lower the risk of mold, bud rot, and powdery mildew.
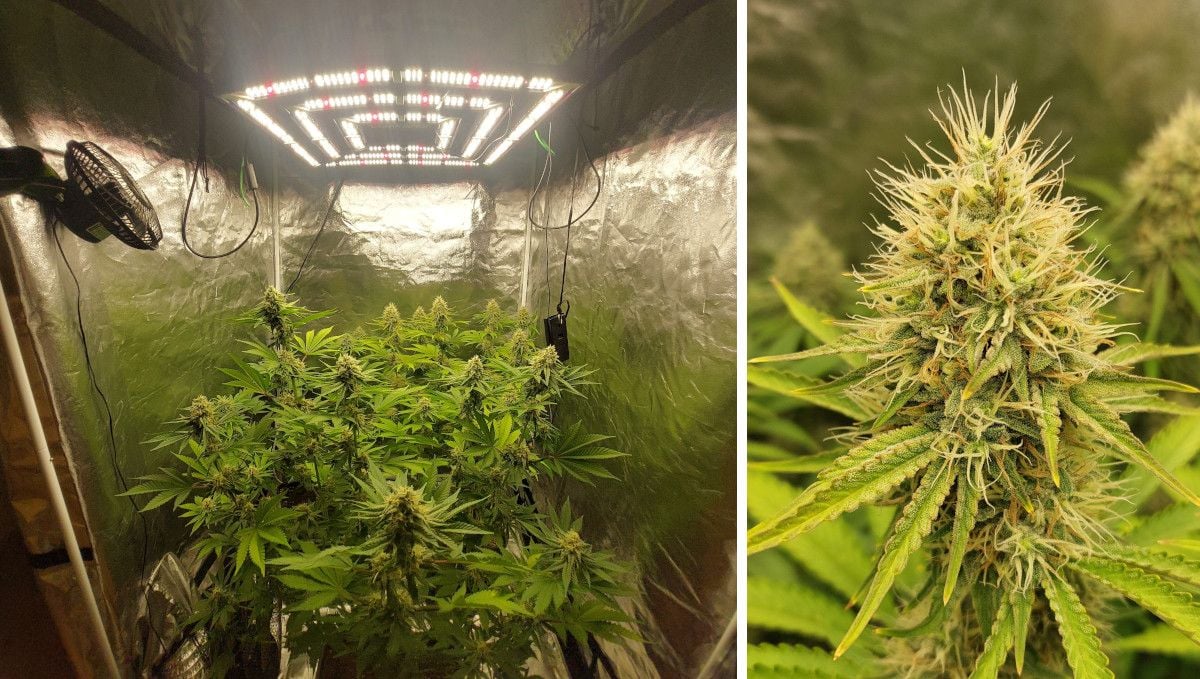
The onset of maturation in cannabis is unmistakable, marked by the transformation of pistils covering the flowers as they transition from vibrant hues to shades of brown. This heralds the plant's entry into the final stage of its life cycle, presenting the last opportunity for the grower to provide an additional dose of fertilizers, particularly those rich in phosphorus and potassium (P and K). Some cultivators opt for a standalone PK-booster to enhance the plant's final nutritional intake.
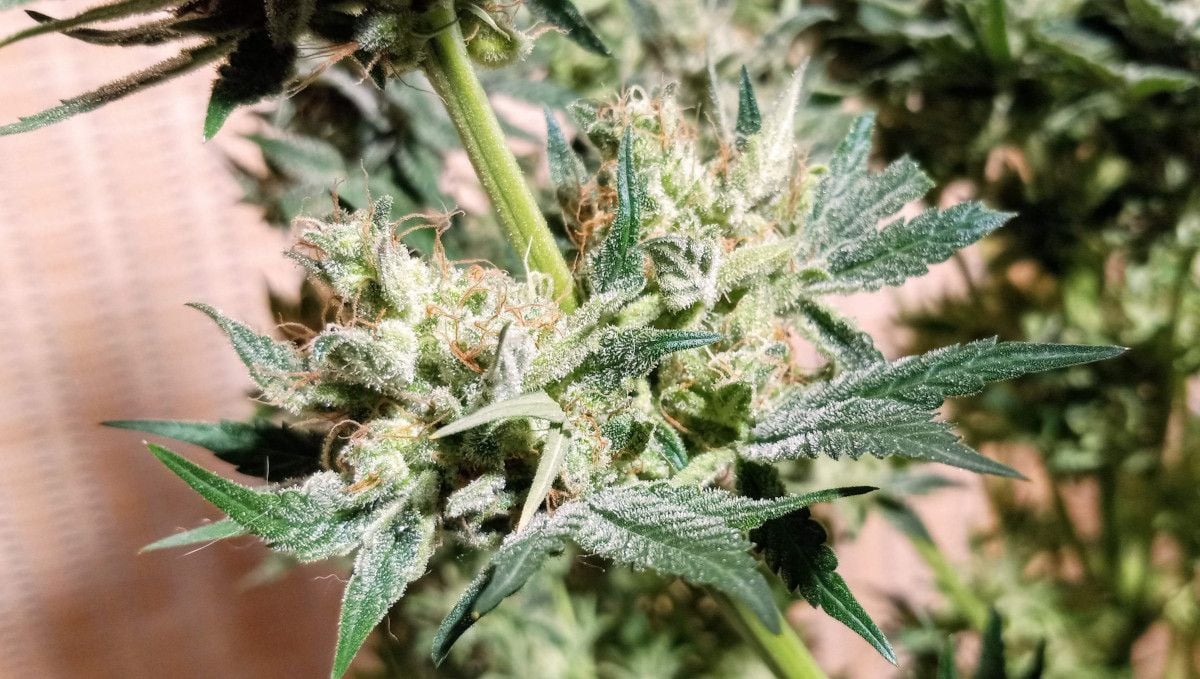
Maturation in cannabis plants progresses from the top downwards. Therefore, to gauge the proximity of harvest, careful attention to the tops is essential. This also opens the possibility of a staggered harvest, where growers may begin by harvesting the top colas and allowing those at the middle and lower nodes to ripen for a few extra days.
An additional indicator of the cycle's conclusion is the fading of the largest fan leaves. This natural process occurs as chlorophyll degrades, revealing other pigments such as anthocyanins. While the fade is a desirable occurrence (unless premature), as it contributes to a more aromatic and flavorful end product, it signifies that the plant is approaching the final stages of its life.
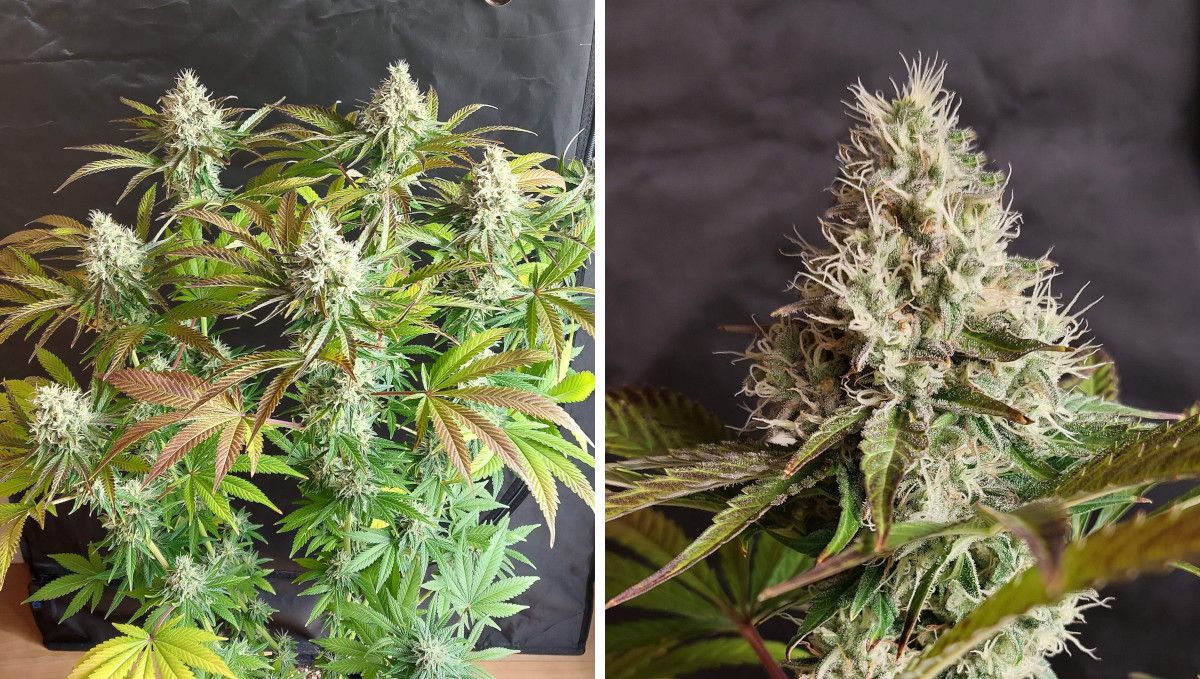
A pivotal moment arrives when the buds cease their visible enlargement, potentially misleading the impatient or inexperienced grower into believing it's time for harvest. Patience, however, proves rewarding as the buds, though ceasing to grow larger, become denser and heavier. Moreover, they continue to ripen, accumulating more aromatic and psychoactive substances (terpenes and cannabinoids).
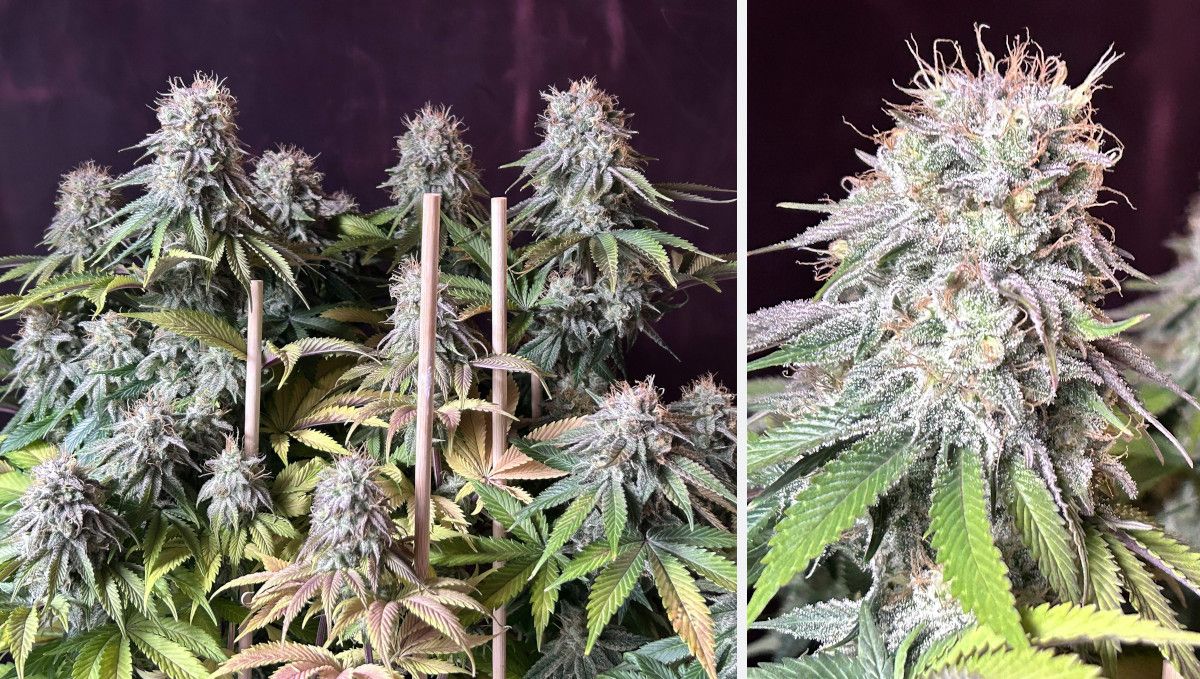
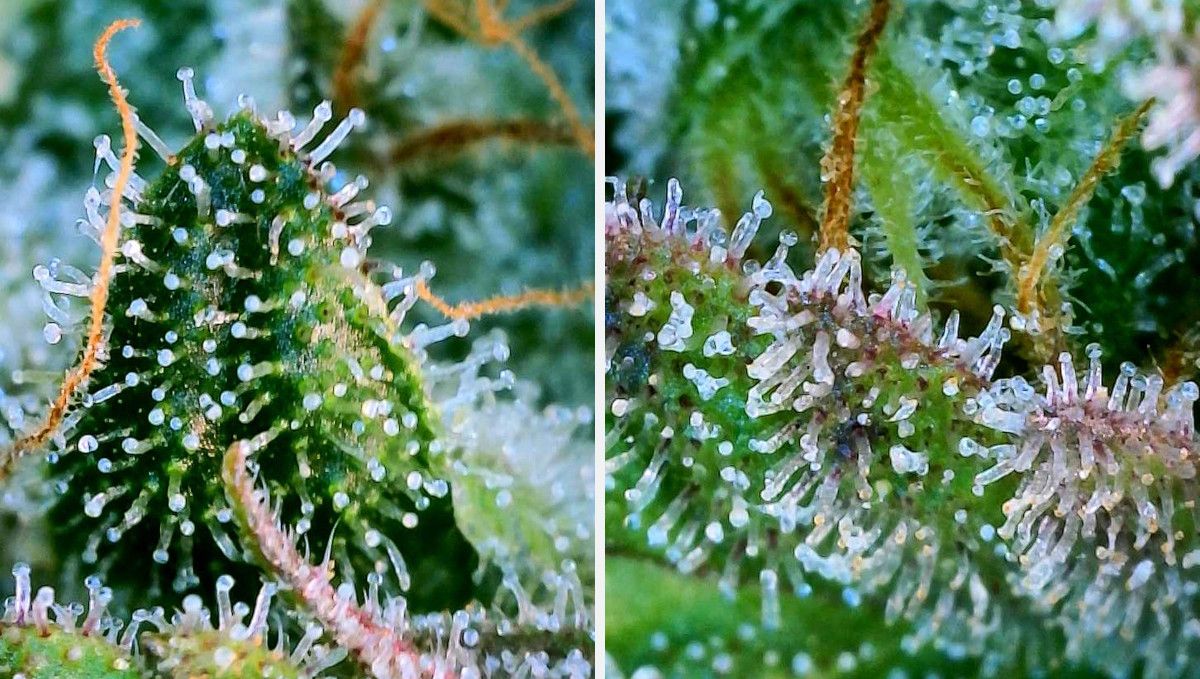
For growers serious about their craft, investing in a hand microscope becomes imperative. The reliable determination of the perfect harvest moment hinges on closely inspecting the trichomes. These tiny resin glands undergo a color change from clear to cloudy, signaling the optimal time for harvest. When all trichomes exhibit a cloudy appearance, the plant is ready to be harvested. Focus on inspecting trichomes covering the calyces, as their maturation timeline differs from that of trim leaves, and the calyces significantly contribute to the overall smoking experience.
Before the flowers reach peak maturity, a critical step is the final flush. This entails ceasing nutrient provision and switching to plain water. The flush duration varies, taking a week in hydro or coco grows and two weeks in soil. Even for organic cultivation, this step is essential to eliminate built-up fertilizers in both the medium and plant tissues, resulting in a cleaner, healthier, and tastier end product.
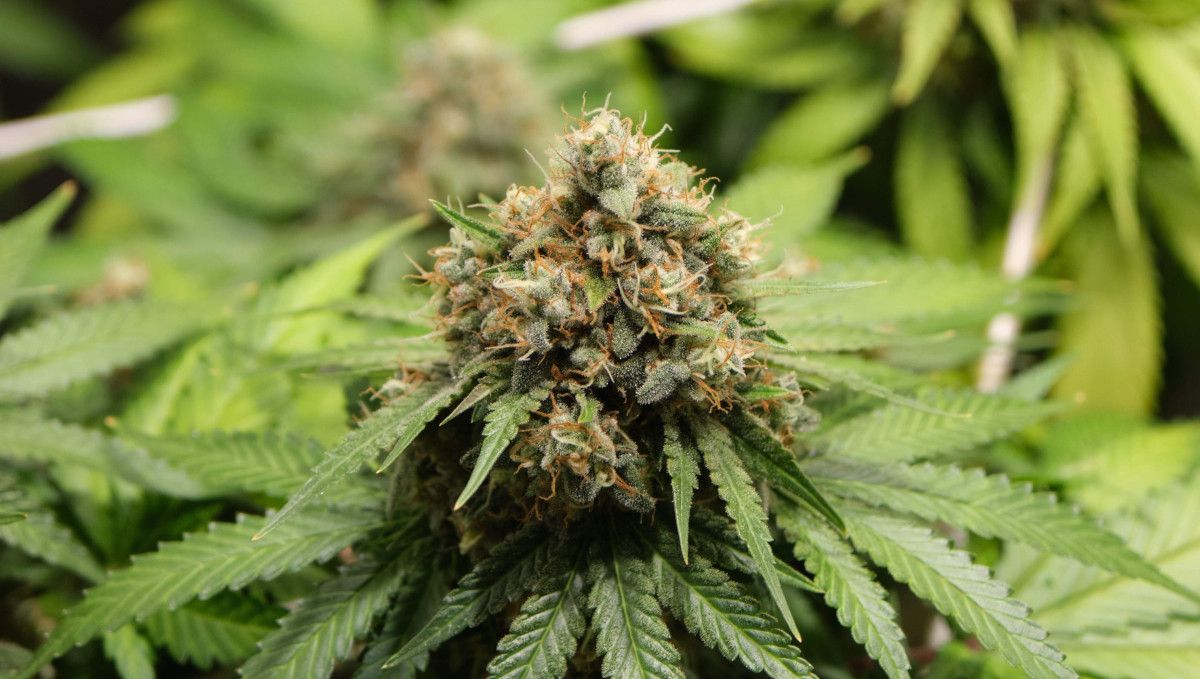
Cultivation best practices extend beyond the plant's harvest, emphasizing the importance of post-harvest treatment. Proper drying of buds for 7-10 days while still attached to branches, followed by a curing process in glass jars for at least 2-3 weeks, enhances potency and flavor, ensuring a premium and enjoyable smoking experience.
10. The Outcome
As you can see in the graphic below, the outcome of Orange Sherbet FF grows was very generous for each of the 4 gardeners in our grow guide. Partly, the reason of success was their experience, but it also has to do with the fact that this isn't an autoflowering genetics and it produces bigger plants.
Orange Sherbet FF Yield
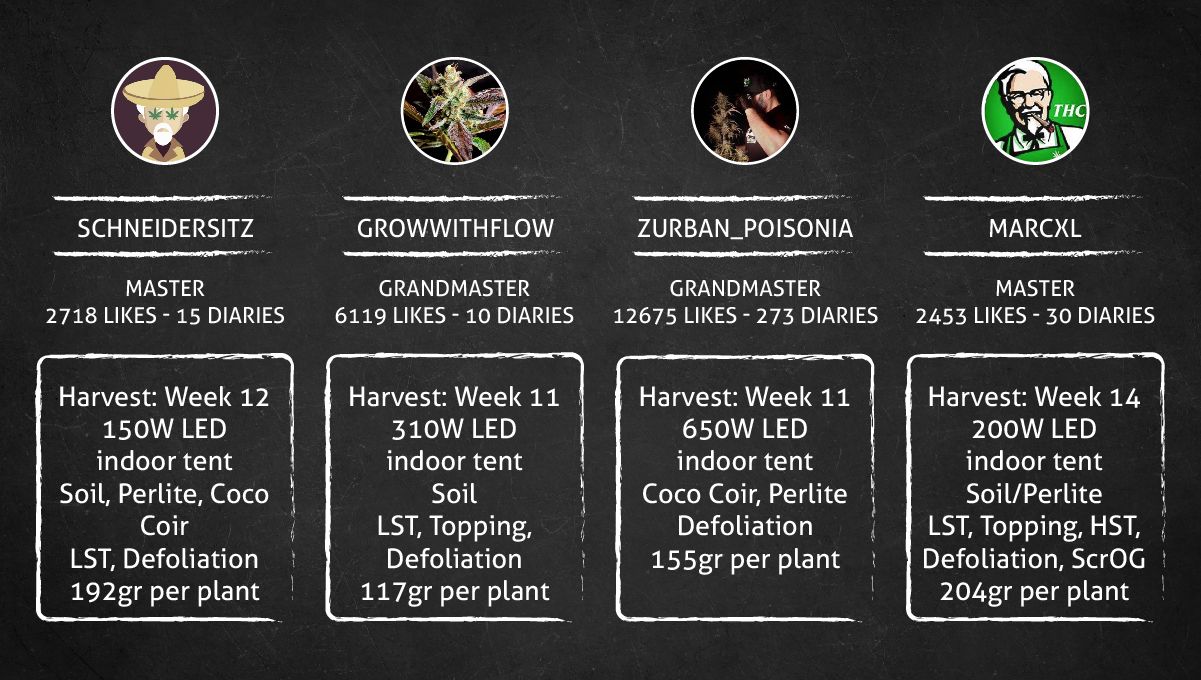
The first grower in our week-by-week guide got 192g (6.77oz) of dried and cure buds from his one Orange Sherbet FF plant.
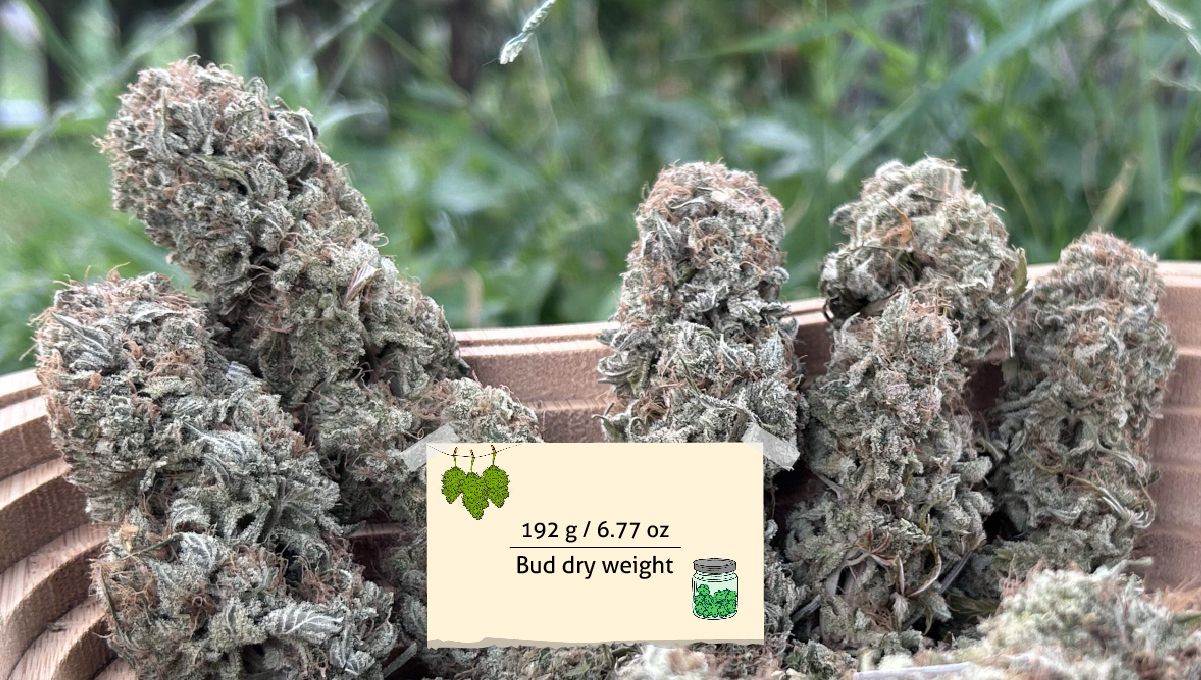
For the second grower, the outcome was slightly less generous and the buds weren't trimmed as tight, but the result was nevertheless impressive at 116.5 g (4.11 oz).
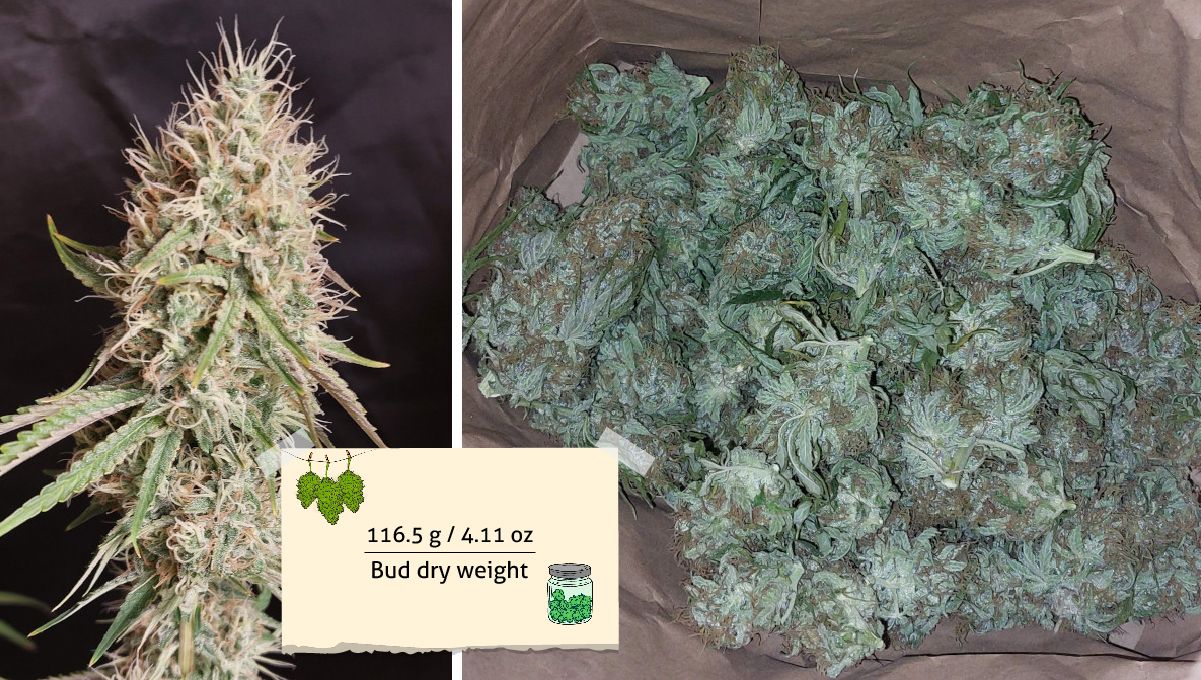
The Orange Sherbet FF cultivated by the third grower wasn't that impressive at first sight, but it brought a very good amount - 155g (5.47oz) of well-trimmed nuggets.
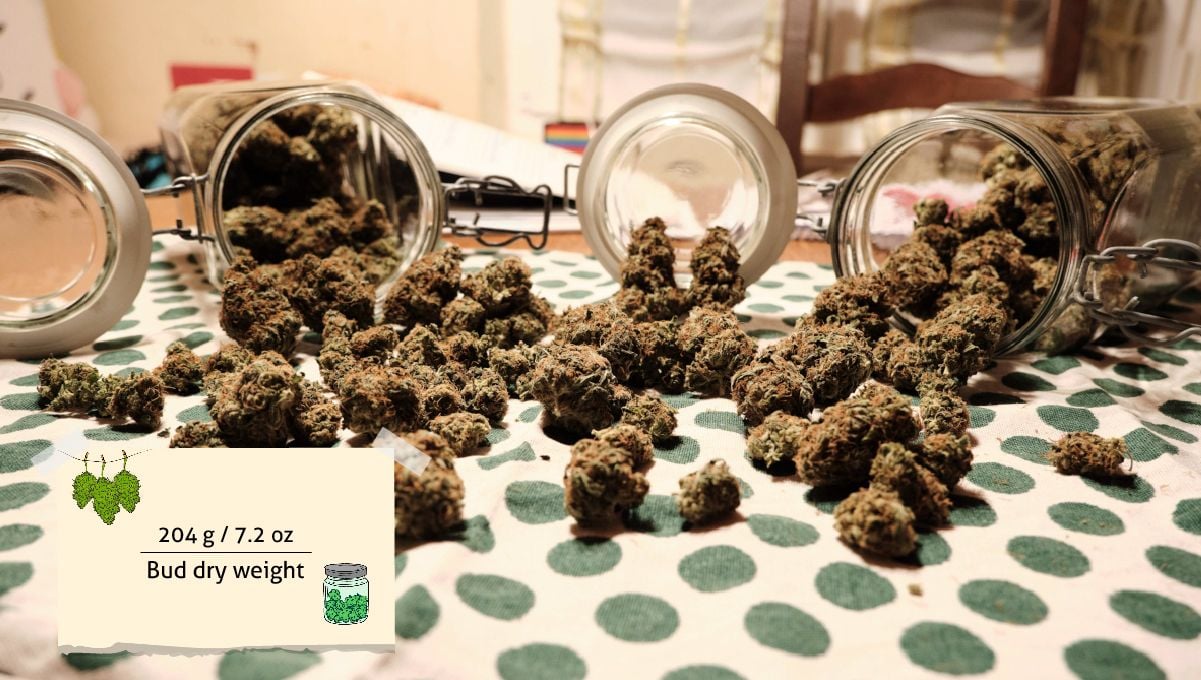
Finally, the fourth grower harvested 204g (7.2oz) from one plant - enough to fill four glass jars with dank goodness.
Orange Sherbet FF Smoke Report
The reviews for Orange Sherbet FF consistently highlight its exceptional qualities. Smokers rave about its pleasant and super sweet taste, often described as having a delightful orange-citric flavor with hints of sweet cream. The strain's potency is emphasized, with users noting a euphoric onset that gradually transitions into a relaxing indica stoned effect. This makes Orange Sherbet FF a versatile choice, suitable for any time of day, offering a well-rounded and enjoyable experience. The aroma is frequently praised, characterized by a creamy orange scent that adds to the overall appeal of this strain. Whether enjoyed for its excellent buzz, strong growth, or as a go-to strain in a photoperiods-only run, Orange Sherbet FF consistently earns acclaim for its robust qualities and compelling effects.

11. In Conclusion
Judging by the grow diaries available online, Orange Sherbet FF is an easy-to-grow and rewarding strain. It tends to form open-structured bushes with comfortably long internodes, which allows the light to penetrate all the way down and facilitates airflow inside the canopy. However, if you see the need to thin the canopy, this plant takes defoliation in stride.
Though Orange Sherbet FF doesn't grow very tall either indoors or outdoors, we recommend starting to train this plant early to avoid the need to lollipop the lowest part of the train that is in shade or outside the effective range of the grow light. Topping the main stem results in a multi-branch structure with many colas of the same size and texture and a great yield potential, so growers of any skill level are encouraged to take this approach.
Pay attention to the color of pistils in the weeks leading to harvest - they may look white and immature till the very end, but it doesn mean you should extend the cycle until they all turn brown. The color of trichomes under a microscope is a much more relible sign of maturity.
All in all, Orange Sherbet FF is a wonderful new genetics and a great alternative to autoflowers as it takes only a couple of weeks longer on average (if at all) but is significantly more productive. Whether you plan an indoor or outdoor grow, this plant is the perfect choice.





Comments