Six Shooter Auto Cannabis Strain Week-by-Week Guide

- 1. Grow specification
- 2. Grow set up
- 3. Germination and seedling stage | week 1
- 4. Early veg | week 2
- 5. Mid veg | weeks 3-4
- 6. Transition (pre-flower) | week 5
- 7. Early flower | weeks 6-7
- 8. Mid flower (bulk phase) | weeks 8-9
- 9. Ripening and harvest | week 10 (and beyond)
- 10. The outcome
- 10. a. Six shooter auto yield
- 10. b. Six shooter auto smoke report
- 11. In conclusion
Six Shooter Auto is a strain that truly lives up to its name, offering a powerful and fast-acting high that hits with an intense head buzz and a calming body effect. This hybrid strain is a perfect balance between Sativa and Indica genetics, resulting in a plant that grows to an impressive height with yields that are just as impressive. The XXL plant size and high yields make this strain an ideal choice for growers looking for a bountiful harvest.
The aim of our week-by-week guide is not only to showcase this strain but mainly to provide tips and tricks of growing a perfect plant and give you a timeline of its life cycle. We hope that this will help you plan and execute your own Six Shooter grow and achieve the best possible results.
1. Grow Specification
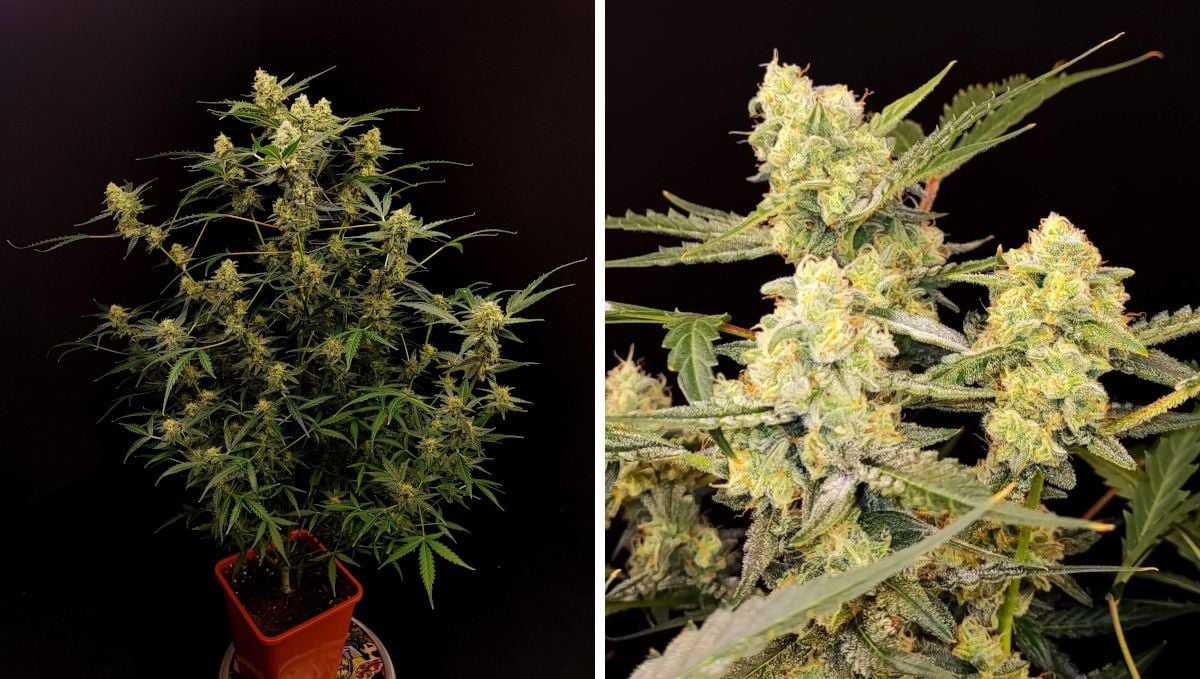
Six Shooter is a balanced hybrid, with a 70% Sativa and 30% Indica composition, giving it the best of both worlds. It is an XXL sized plant, with a height of 100-140 cm (39-55 inches), making it a great choice for those looking for a high-yielding strain that doesn't take up too much space.
When grown indoors, Six Shooter can yield an impressive 500-650 gr/m2 (1.6-2.1 oz/ft2) and can be harvested after 10 weeks of flowering. Outdoor growers can expect a harvest of 70-350 gr/plant (3-12 oz/plant).
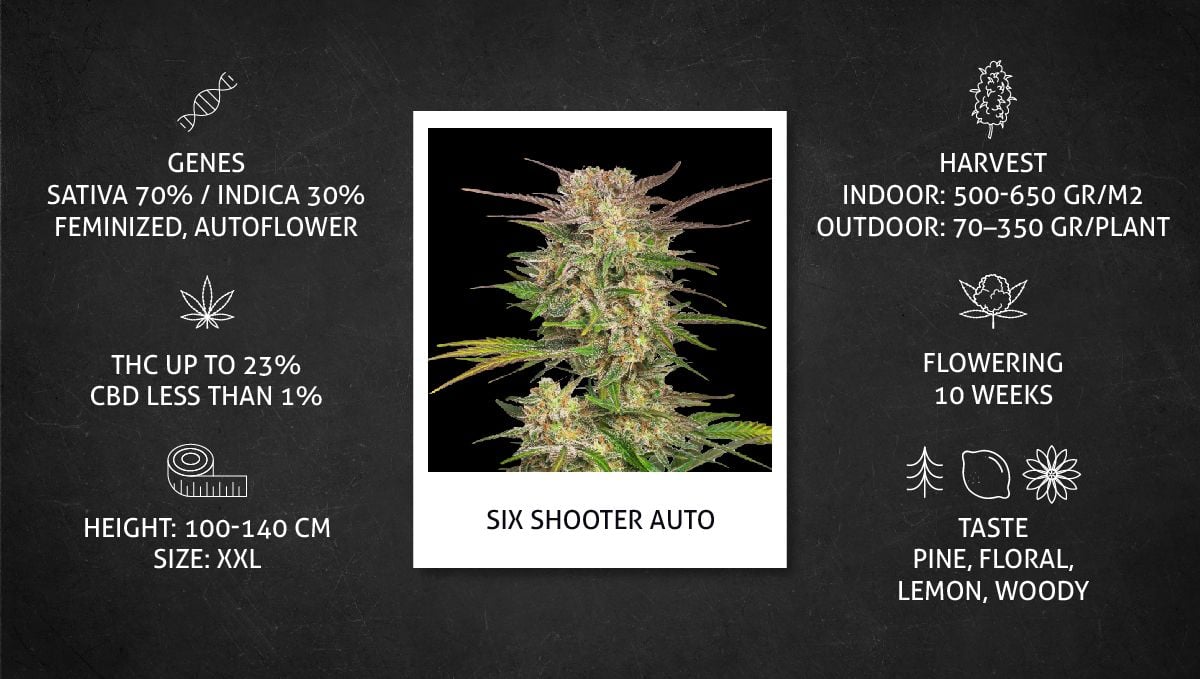
The smoke produced by Six Shooter is known for its delicious pine, floral, lemon, and woody taste, which is sure to tantalize your taste buds. With THC levels reaching up to 23%, this weed packs a powerful punch and is sure to provide a relaxing, yet energizing high.
2. Grow Set Up
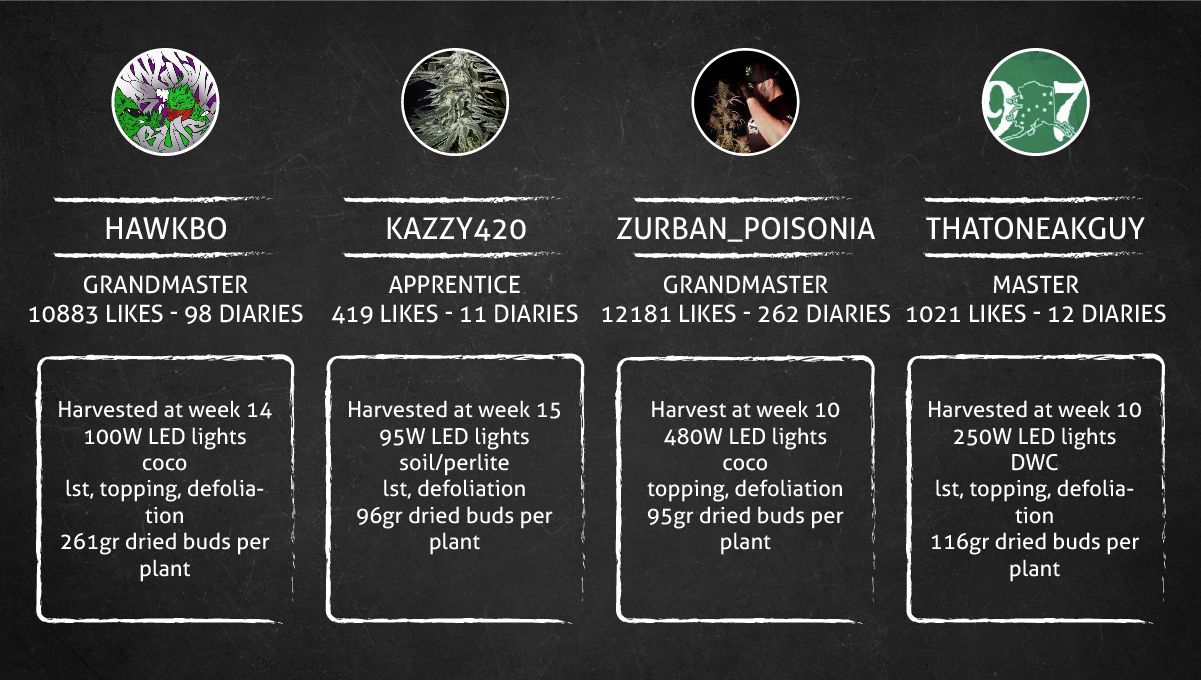
Six Shooter is a classic Fast Buds variety that growers have been enjoying for years. Luckily for you, it means that if you want to grow this autoflower yourself, there's a plethora of information available online. For our week-by-week guide, we have selected four grow diaries out of dozens that are available. We tried to focus on those in which the growers were using only the best weed cultivation practices so that you can safely follow them and get outstanding results too.
| Grow Space | Light | Medium | |
|---|---|---|---|
| A | 1 m2 | 400W LED | Coco |
| B | 0.42 m2 | 95W LED | Soil |
| C | 0.3 m2 | 480W LED | Coco/Perlite |
| D | 4.88m2 | 250W LED | DWC |
We’ve also tried – whenever possible – to showcase this strain in different scenarios and setups. We hope this will help you better adapt this wonderful genetics to your personal growing style. However, rest assured that Six Shooter Auto has time and again proved to be a versatile plant that is able to produce top-shelf product under any conditions and for the growers with any level of experience.
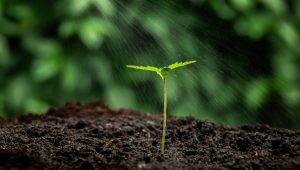
3. Germination And Seedling Stage | Week 1
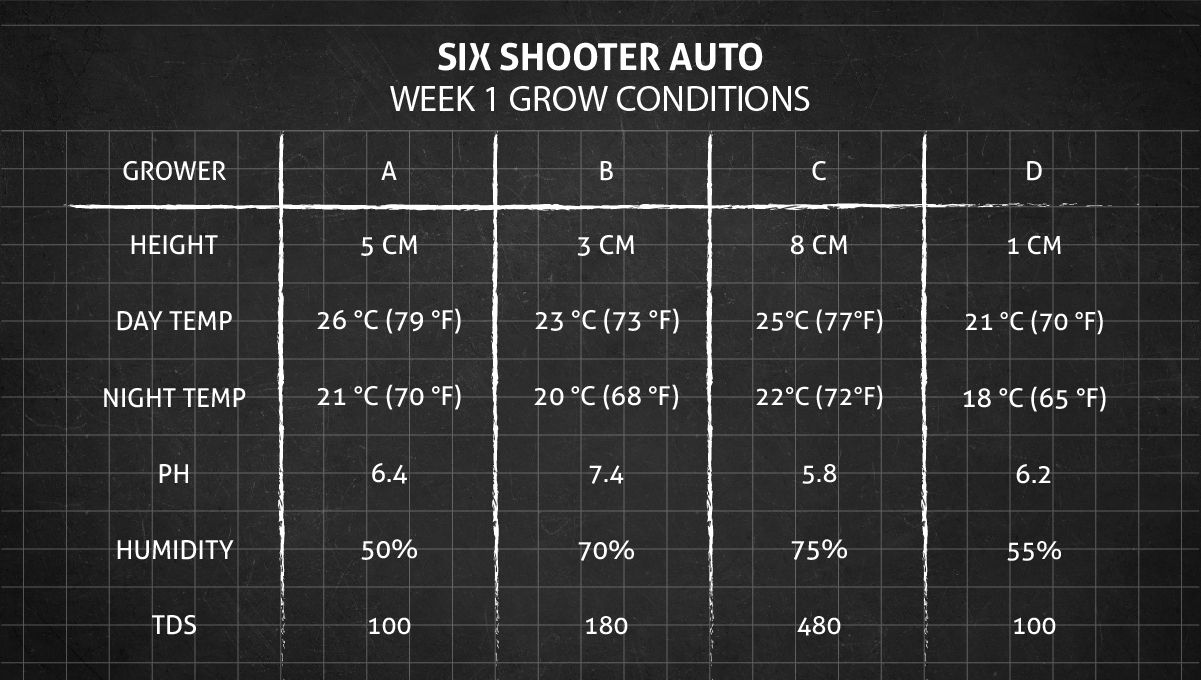
Successful cannabis cultivation starts with creating the right conditions in your indoor grow space, and it’s especially important in the first few weeks of the grow cycle – when the seedlings and young plants are still weak and vulnerable. So, pay extra attention to keeping the temperature on the warmer side and the air nice and humid.
For novice gardeners, weed seed germination is a source of worry and even panic. We understand that you don’t want to ruin your beans (whose price is quite steep), but don’t worry: good-quality seeds from reputable breeders are surprisingly hardy and vigorous and bringing them to life is no rocket science.
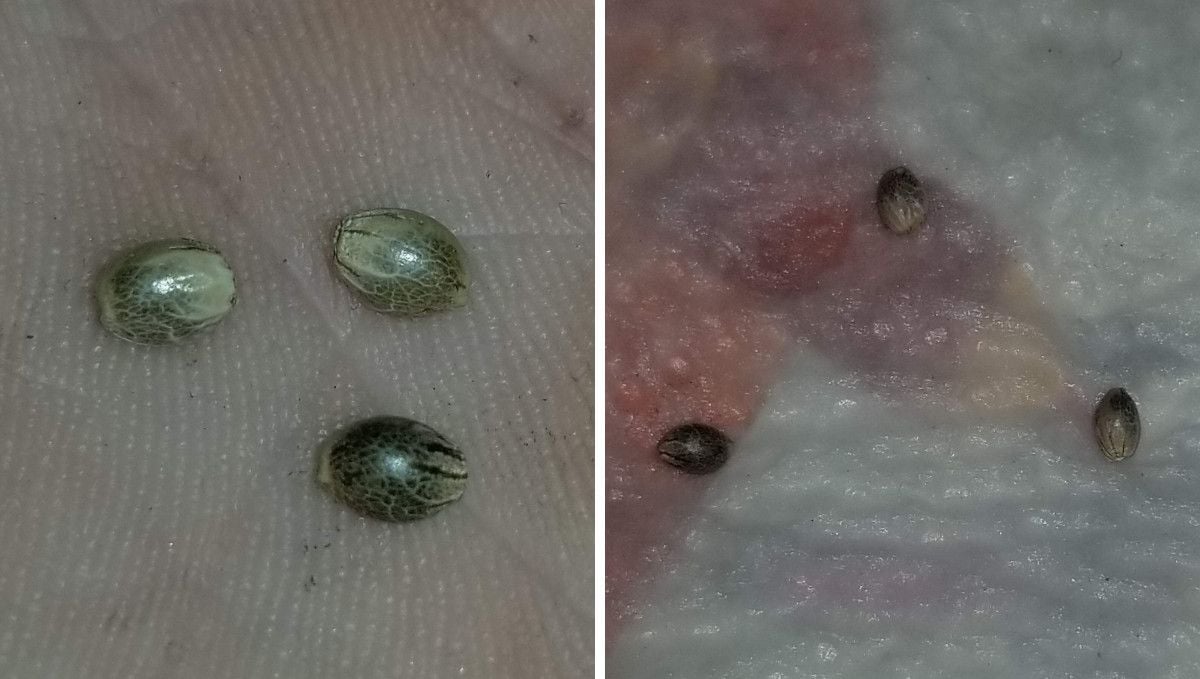
You only need three things really: it should be comfortably warm (like it is in spring time), moist, and dark, and it will be enough for your seeds to sprout within 1-3 days. There are many methods that create these conditions, and the most straightforward of them is to place seeds between damp paper towels and keep the whole thing between plates in a dark warm place.
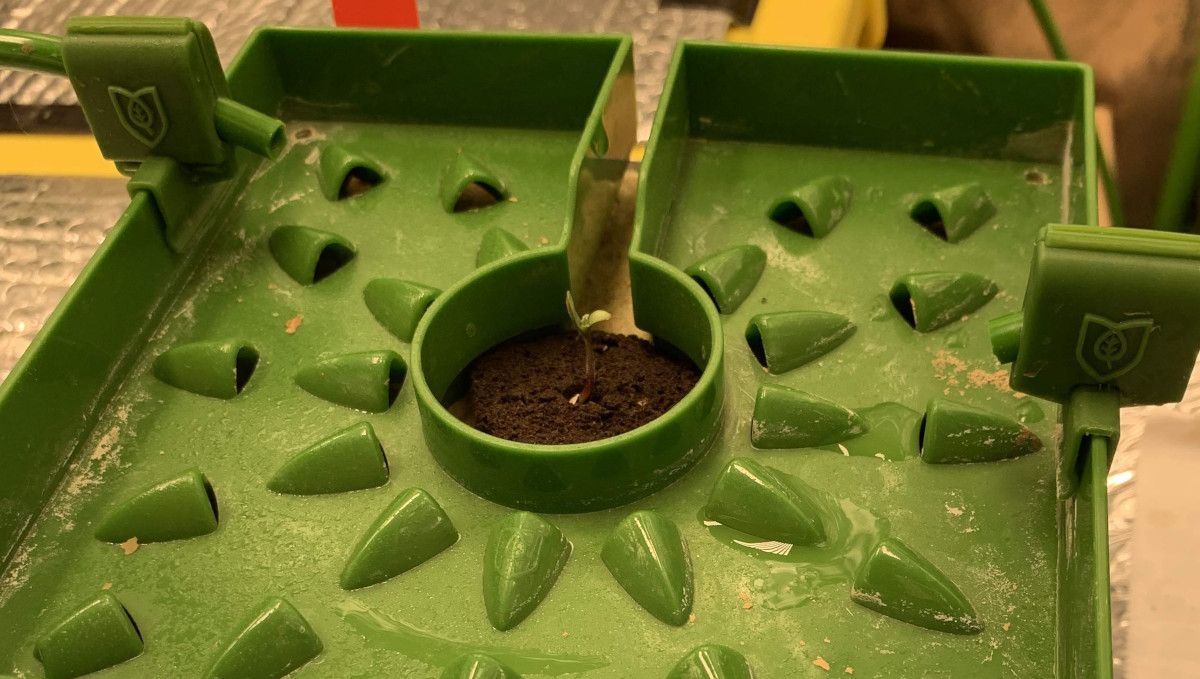
Some growers prefer to pre-soak their seeds in a glass of water, and some even keep them floating on the surface till they crack open and show the taproot. It’s a legit way of germinating cannabis too, but whatever method you choose, remember that the same three requirements – warmth, moisture, and darkness – apply to all of them.
When the seed has successfully popped and its taproot has grown to something like half an inch (a little over 1 cm), it’s time to plant it into the medium of your choice. When growing autoflowers, we suggest that you use the final (large) pot from day one. It’s the best way to avoid the dangers of re-potting. However, with some experience and dexterity, you can also start your autos in smaller containers, such as solo cups. It’s more convenient in some respects, including watering.
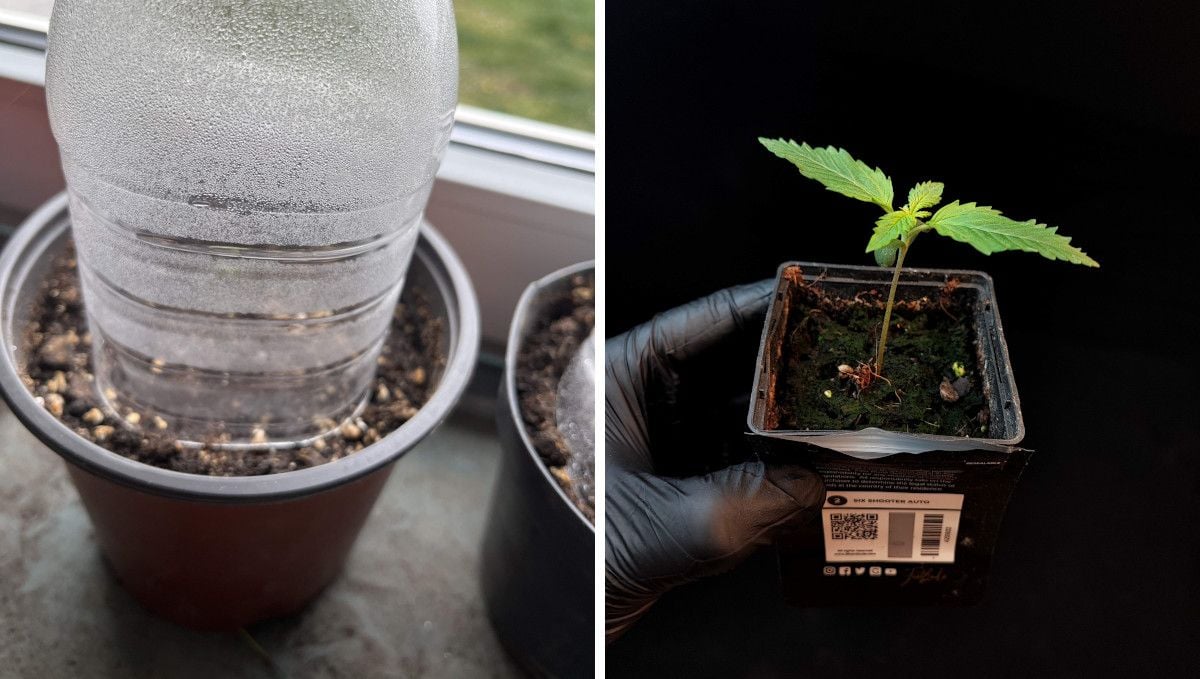
4. Early Veg | Week 2
Though the seedling will still seem to you very small at the start of the 2nd week from seed, the root ball has already grown substantially, making the above-ground part more resistant, so that it can deal now with slightly cooler temperatures and lower relative humidity than before.
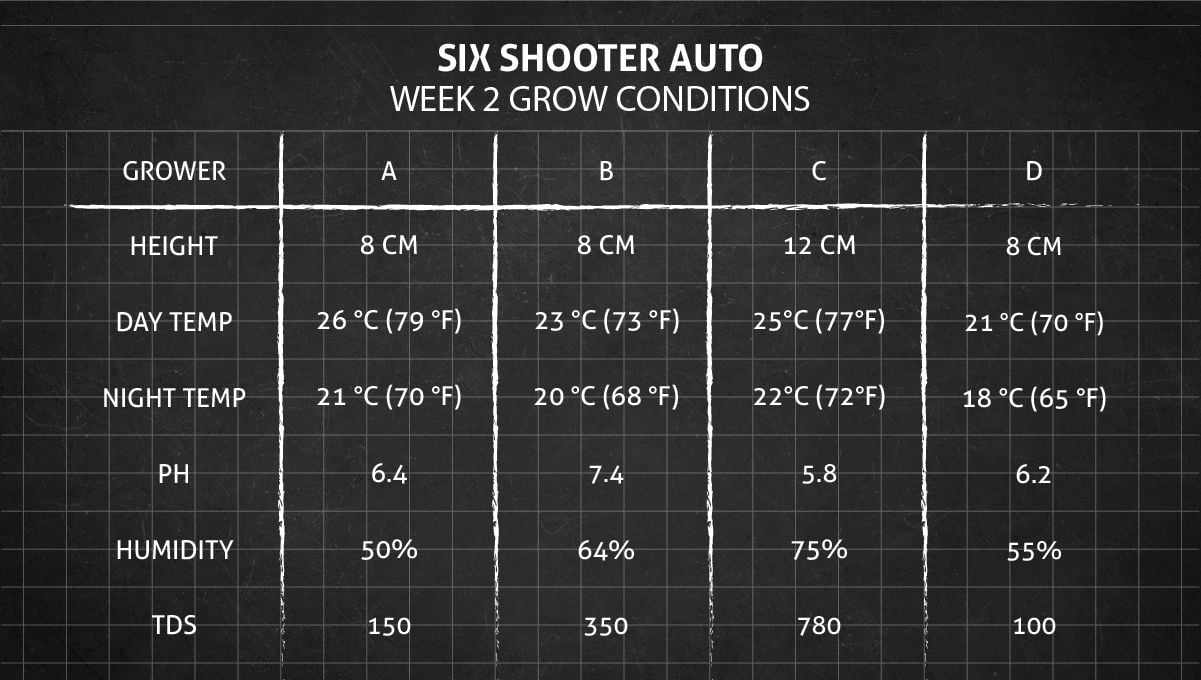
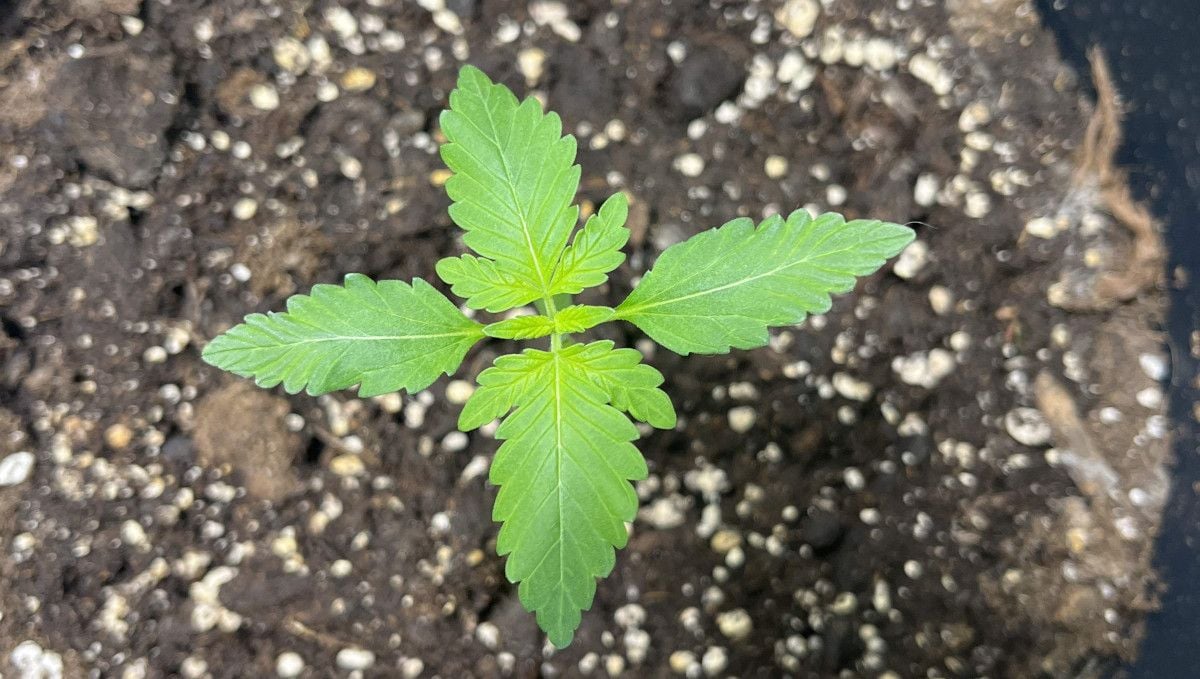
Starting from week 2, you will see your young plant ramping up the rate of growth. By day 10, the second pair of leaves on a healthy seedling should catch up in size with the first one and then overtake it. This is a good benchmark that lets you judge if your autoflower likes the conditions you’ve created.
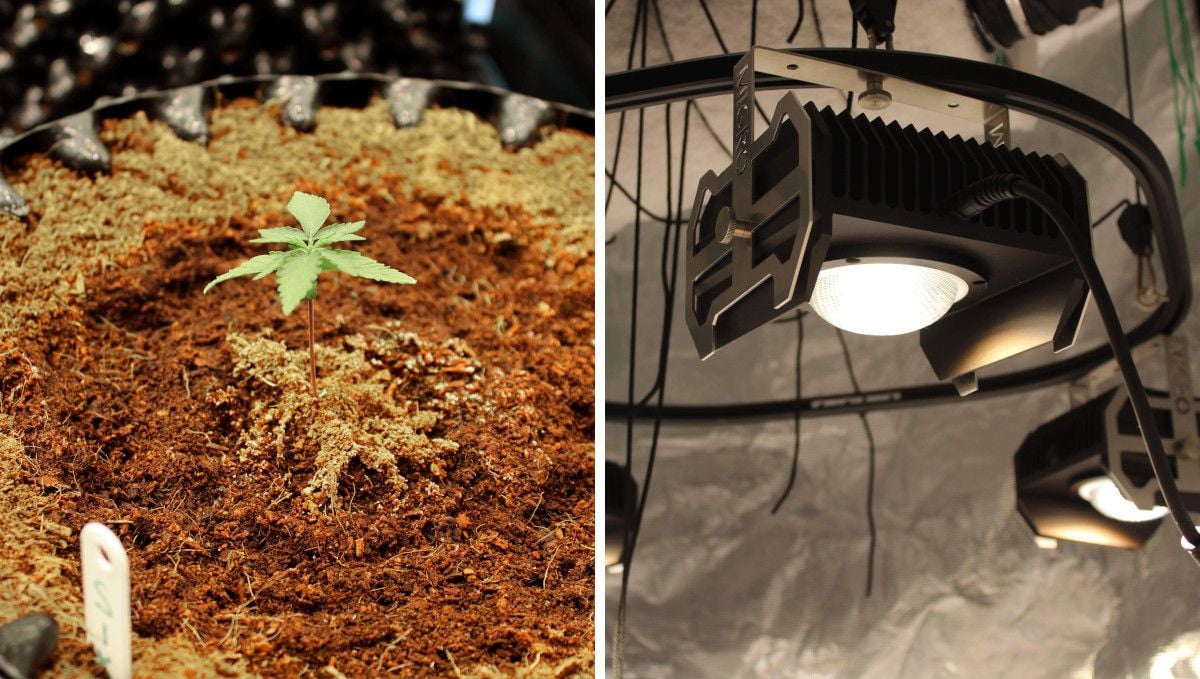
Keep paying extra attention to the amount of light you’re using. The seedling should be neither too tall and spindly (so that it needs support) nor too short (as if all those watts of light are beating it into the ground). Raise or lower your light or dial it up or down accordingly.
Most gardeners prefer to leave the plant alone for now in terms of training, but if your grow space isn’t very tall, you may start your canopy management even this early. With autoflowers, the safest way is to simply bend and tie down the main stalk, but experienced growers may try more high-stress methods, such as FIMing or topping. In any case, make sure your little guy is healthy and vigorous before subjecting it to stress.
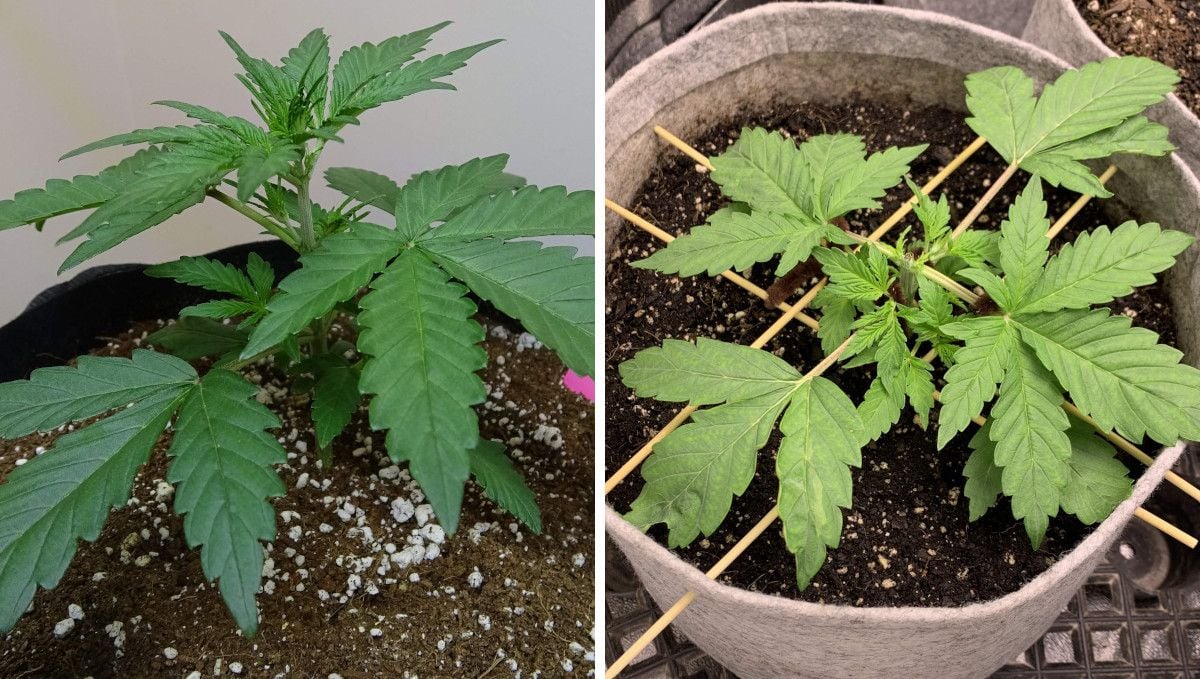
Soil growers usually don’t add any nutrients to their water in the first week, but starting from the second one, some of them do. By this time, the seedling will have already used up some (or all) of the plant food stored inside the medium and may go hungry, especially if you chose a small starter container, such as a solo cup.
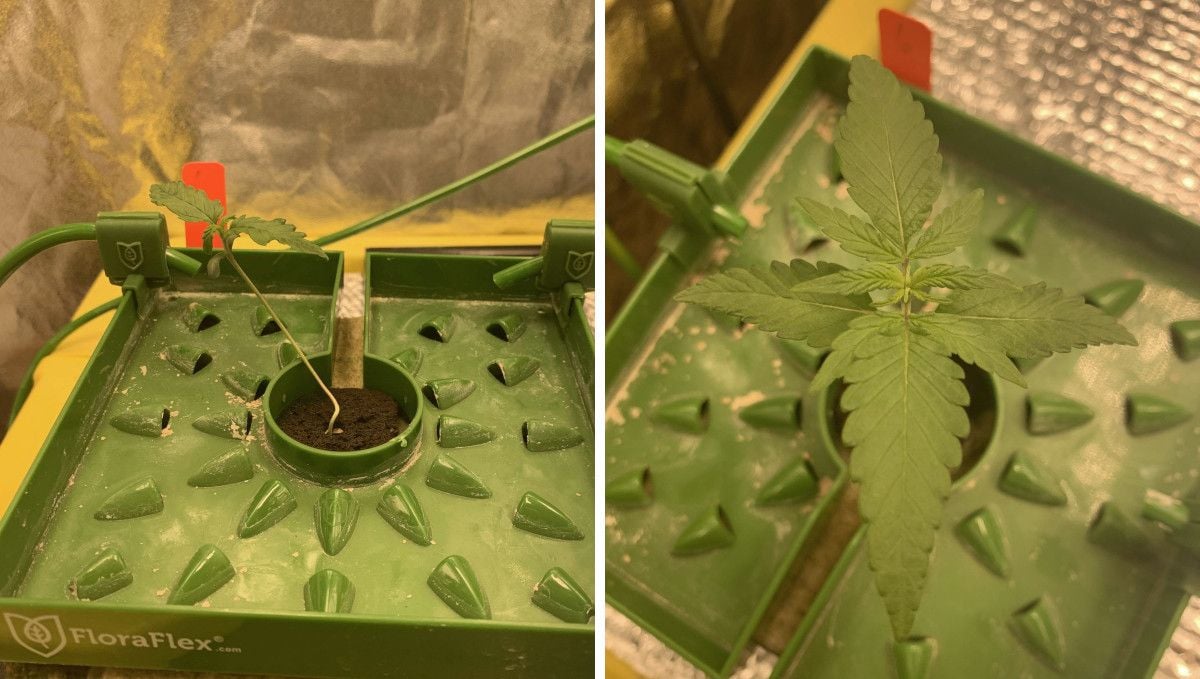
In bigger pots with rich soil, you can use plain water for the whole of the veg and well into the flowering stage. Some organics enthusiasts go even one step further and make super soil which lets them use nothing but compost teas from seed to harvest. Of course, in hydropinics (see the pic above), you'll need nutrients right from the start.
5. Mid Veg | Weeks 3-4
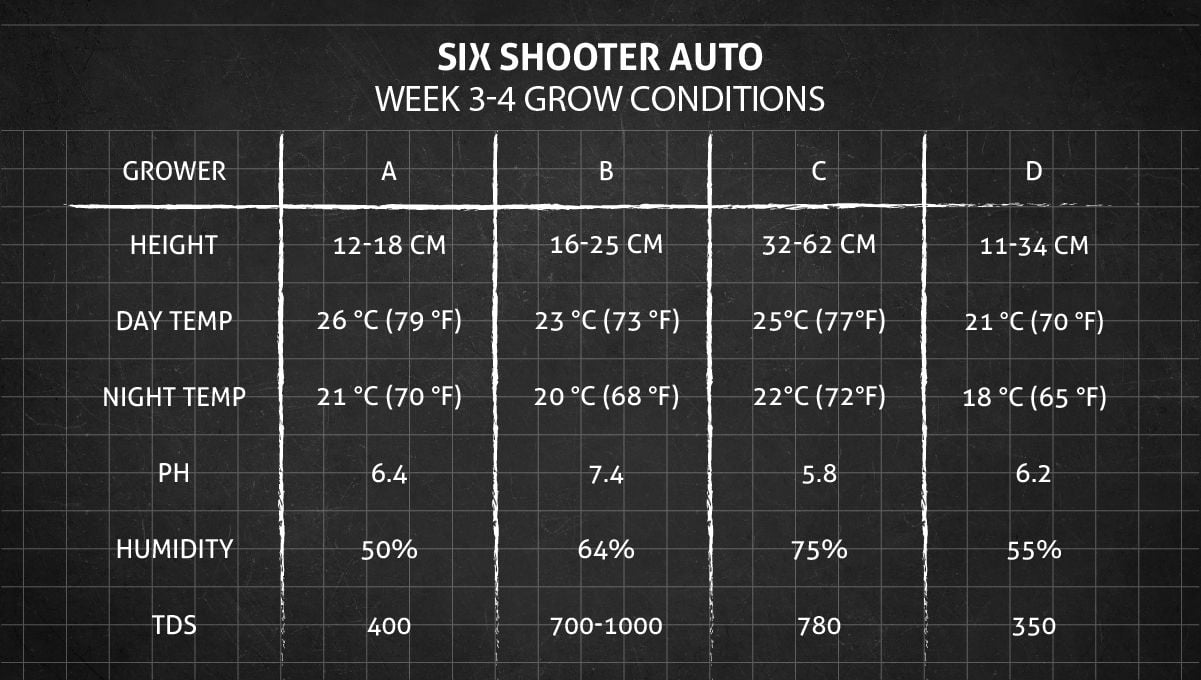
In weeks 3 and 4, your autoflower leaves behind whatever growing pains it could have experienced before. While maintaining a uniform environment indoors is always a good idea, don’t worry too much if you fail to hit the sweet spot in terms of temperature and humidity – your plant is mature enough now to handle a wider range of conditions.
This is the period of vegetative growth, and you’ll be excited to witness explosive development of your auto as the size of the fan leaves and the number of branches increase and your little baby turns either into a tall young plant or a squat dense bush.
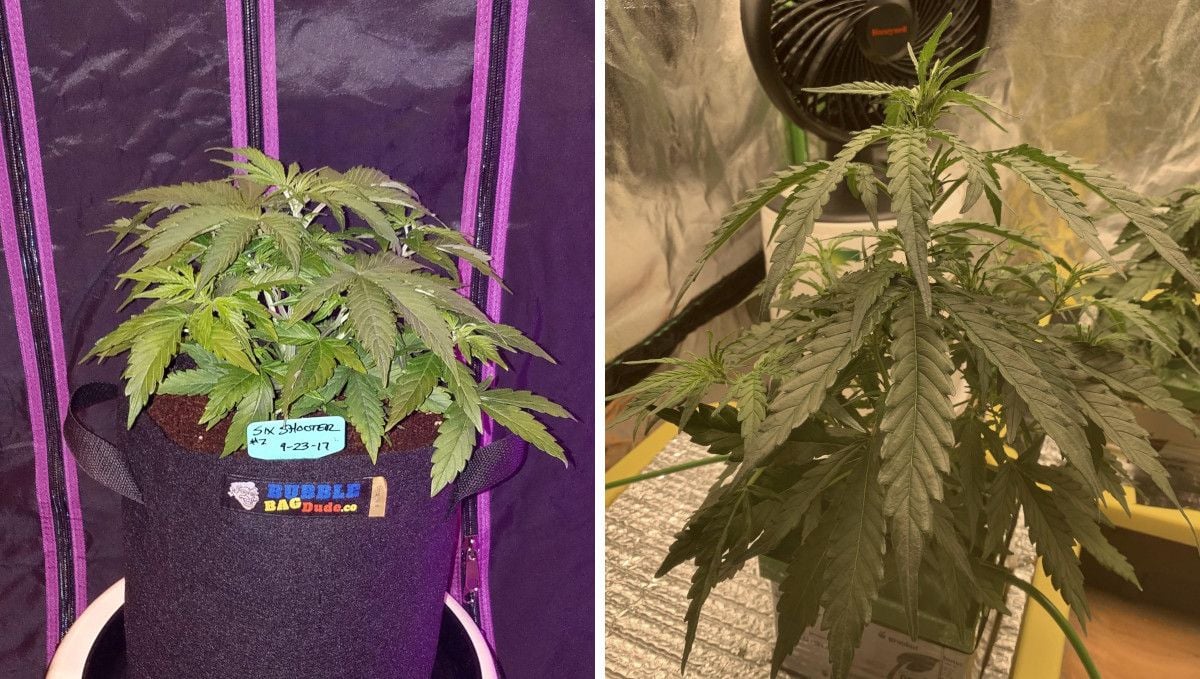
If training is your thing, now is the right time to give the canopy the shape you want – this not only prevents you from running out of space during the later stages, but also ensures that every future bud site is within the effective range of the light and turns into a firm and frosty nugget.
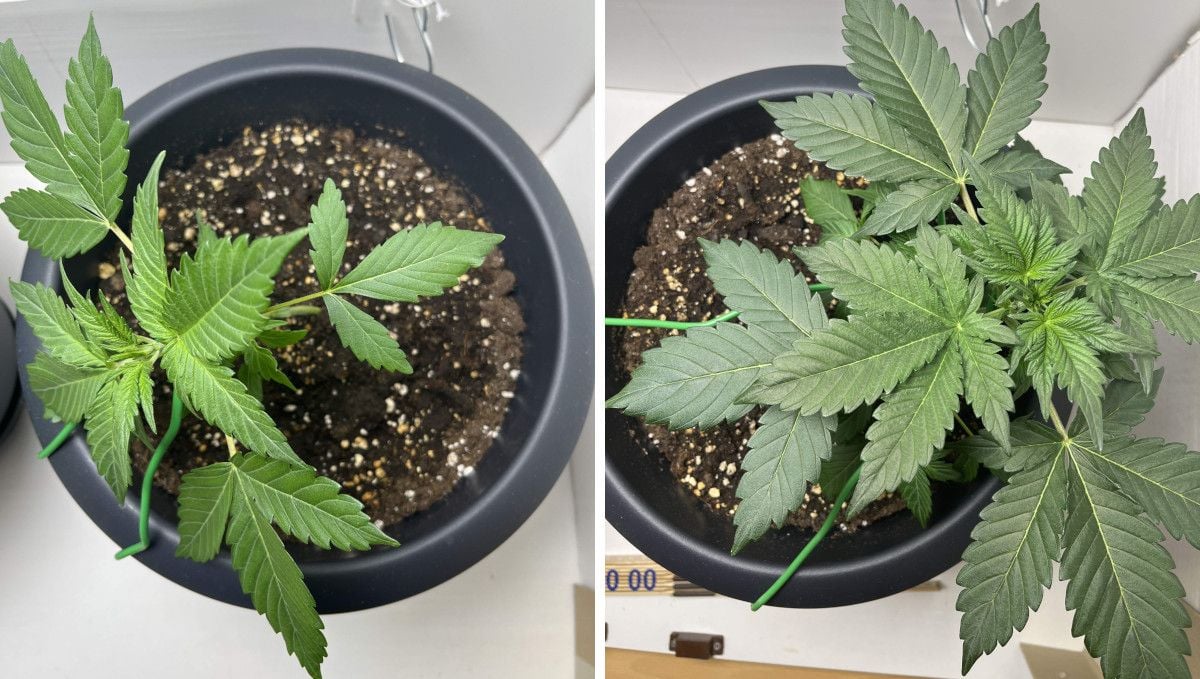
The state-of-the-art modern autoflower, such as Six Shooter, is amazingly hardy and takes in stride almost any form of training. Having said that, we should also warn you that with autos, low-stress training (LST) techniques are always the safest bet while HST methods should be used only if there’s no alternative or you’re confident about your growing expertise. Even safer would be letting your plants alone and growing them without training, SOG-style. For a naturally bushy strain like this one, it's the most obvious route.
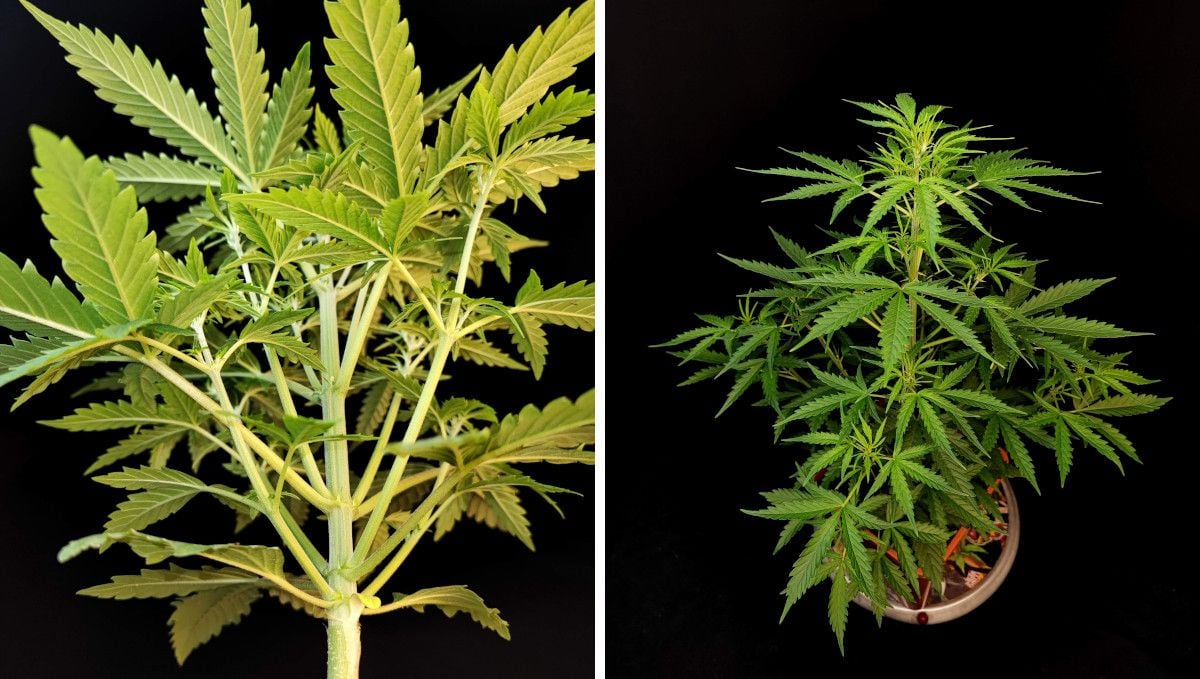
Another main concern is feeding your weed plants. As the growth ramps up, their appetite increases. In veg, cannabis is especially hungry for nitrogen (N) while the other two macronutrients – phosphorus (P) and potassium (K) – should also be present but in lesser quantities. Please bear in mind that NPK values are always specified on the bottle and this will greatly help you choose the right product for the vegetative stage.
Your feeding regimen shouldn’t be too complicated. Generally, buying just two formulas – one for veg and another one for flowering – is enough, especially for newbies. As your experience grows, you may want to introduce more products that stimulate, enhance, and regulate growth. Look in the table below at a sample nutrient schedule from one of the grows we’ve been following.
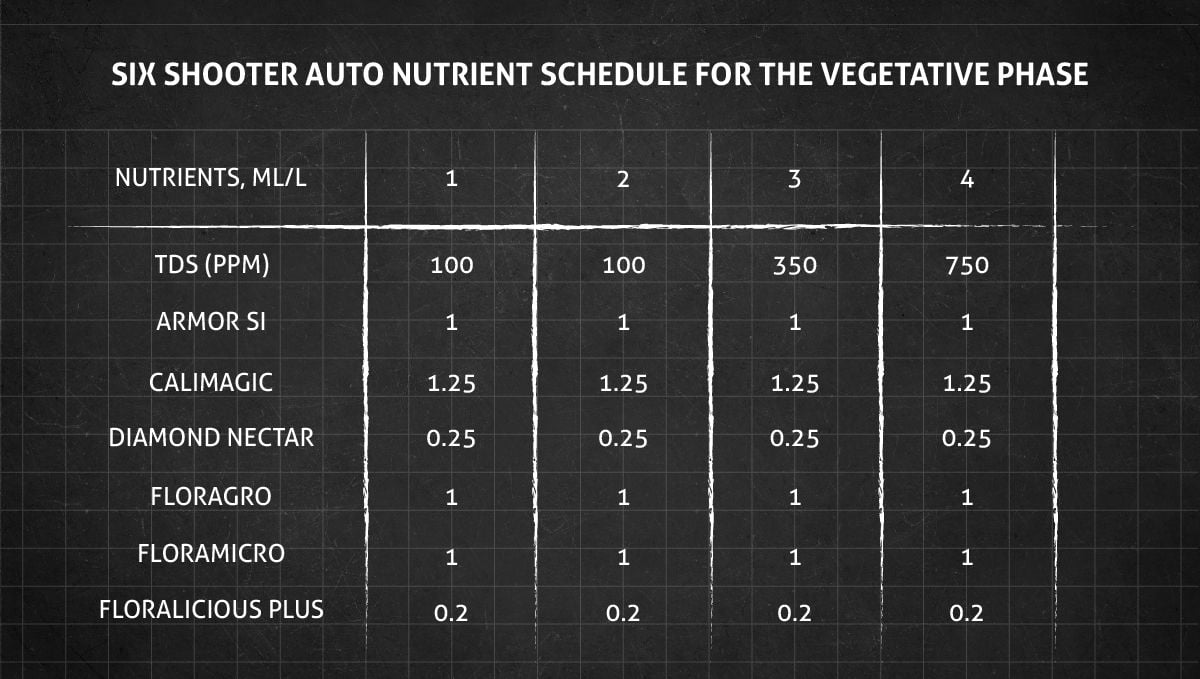
Whatever fertilizers you end up choosing, don’t forget that with cannabis, especially its autoflowering varieties – a little goes a long way and it’s safer to keep your plants on a diet than overfeed them.

6. Transition (Pre-Flower) | Week 5
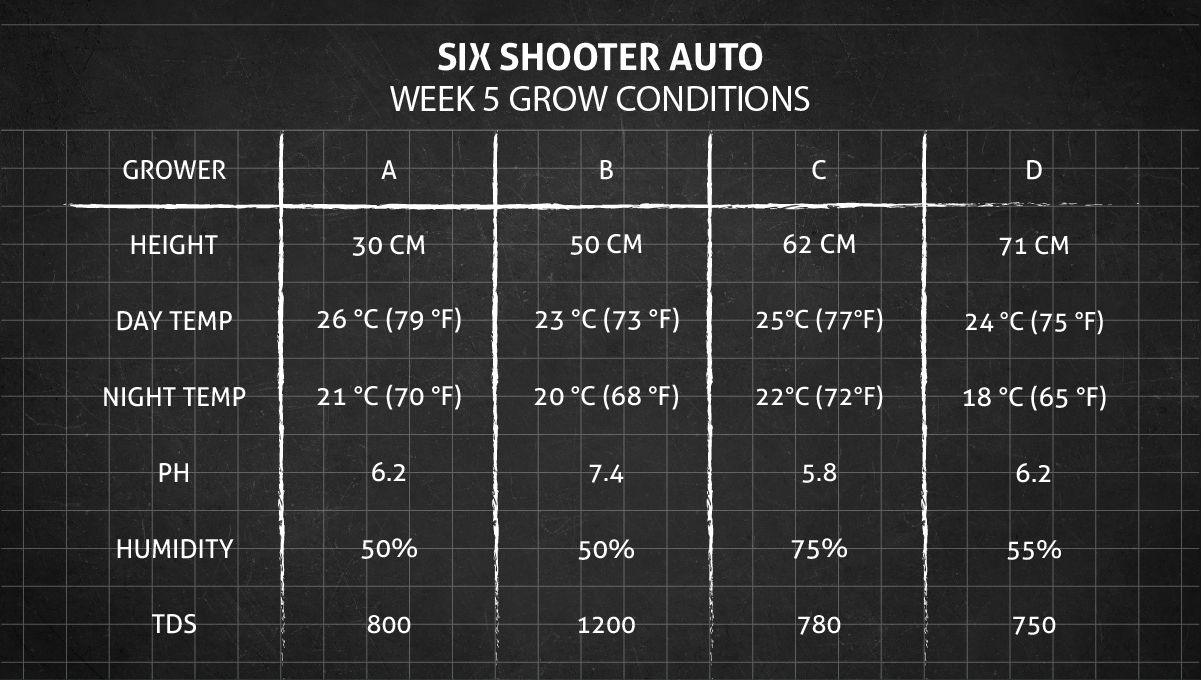
During the pre-flowering stage, it's still essential to maintain a consistent environment. Aim for temperatures between 73-77°F (23-25°C) during the day and slightly cooler at night. Relative humidity can be decreased to around 40-50%. As for light requirements, continue providing 18-24 hours of light per day as you did in the previous stages – autoflowers don’t need a change in the light schedule to start budding.
Pre-flowers that give the name to this stage are tiny white hairs that you will see first in the middle nodes and later at the tops. In photoperiod strains, this stage can continue indefinitely – if you give your plants more than 14-16 hours of light a day. But autoflowers, regardless of the light schedule – will begin flowering in earnest soon after.
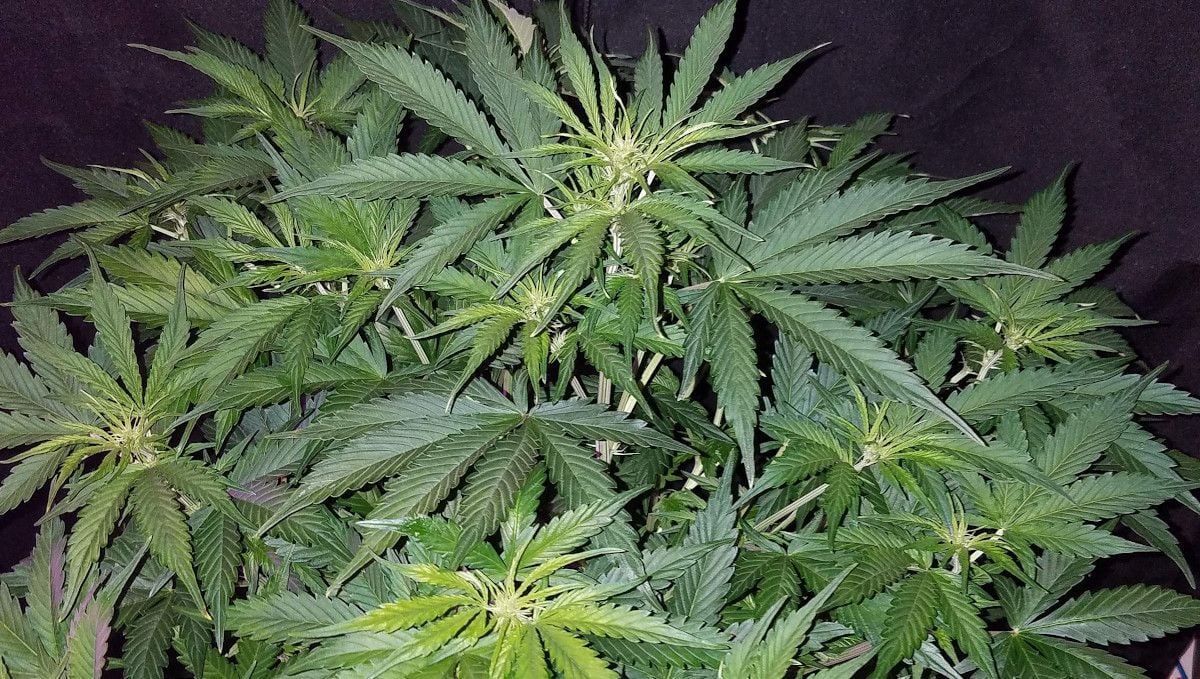
It’s just a matter of days before the tops become first yellowish and then begin to bristle with all those white hairs and thread-like thin leaves. For you, it will be a clear sign that your autoflower has come on the last leg of its journey to harvest – the flowering stage.
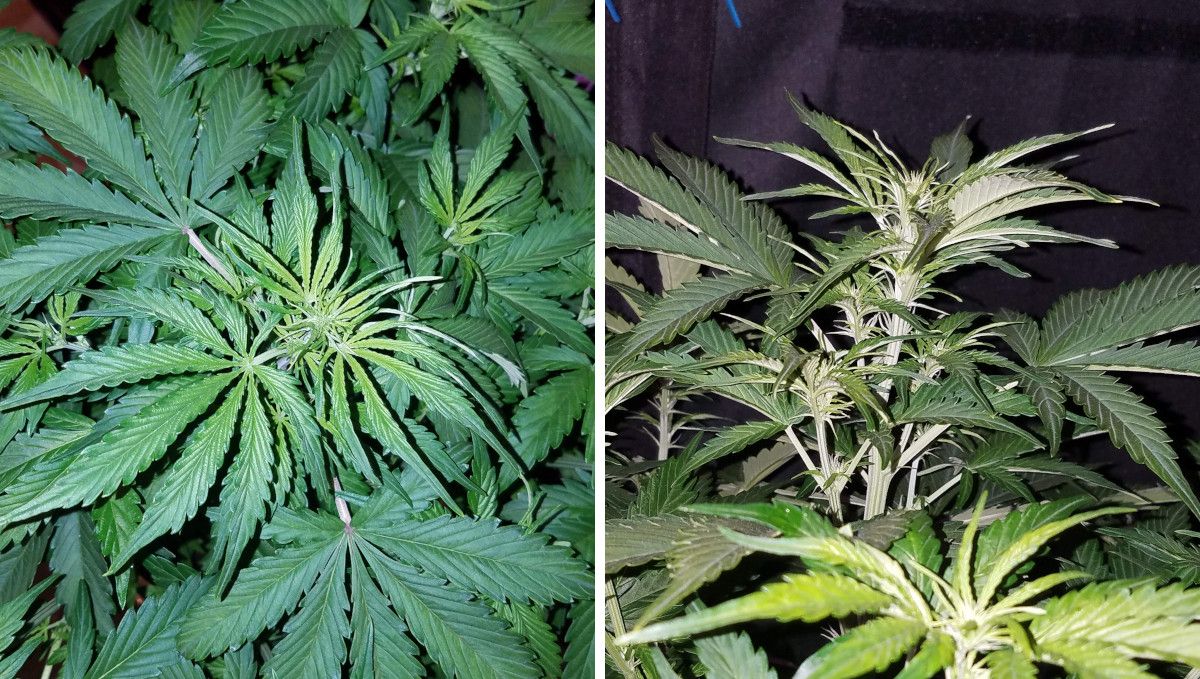
There might be some phenotypic difference between different autos, but modern breeders feel the pressure to come up with faster and faster varieties, so Indicas, Sativas, and hybrids all start to flower around this time.
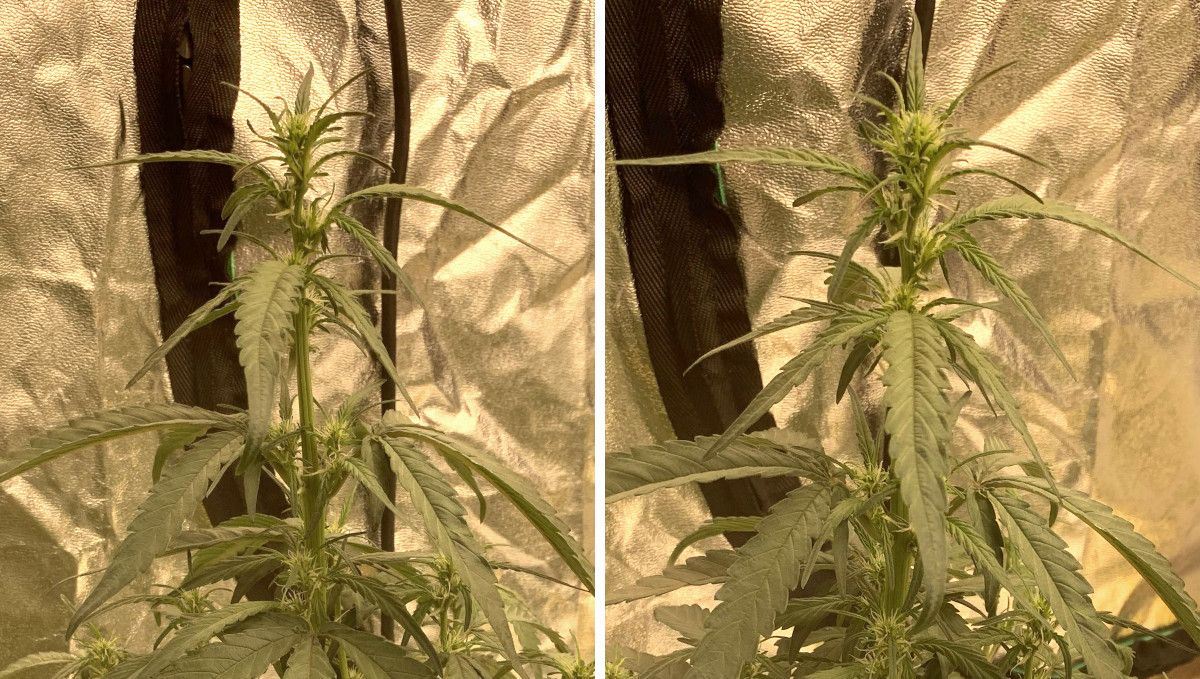
It’s not strictly necessary to change your nutrient regimen to something more suitable for flowering – it will be a must in the following weeks – but many growers do that: they replace the N-rich formula for the one that has more P and K.
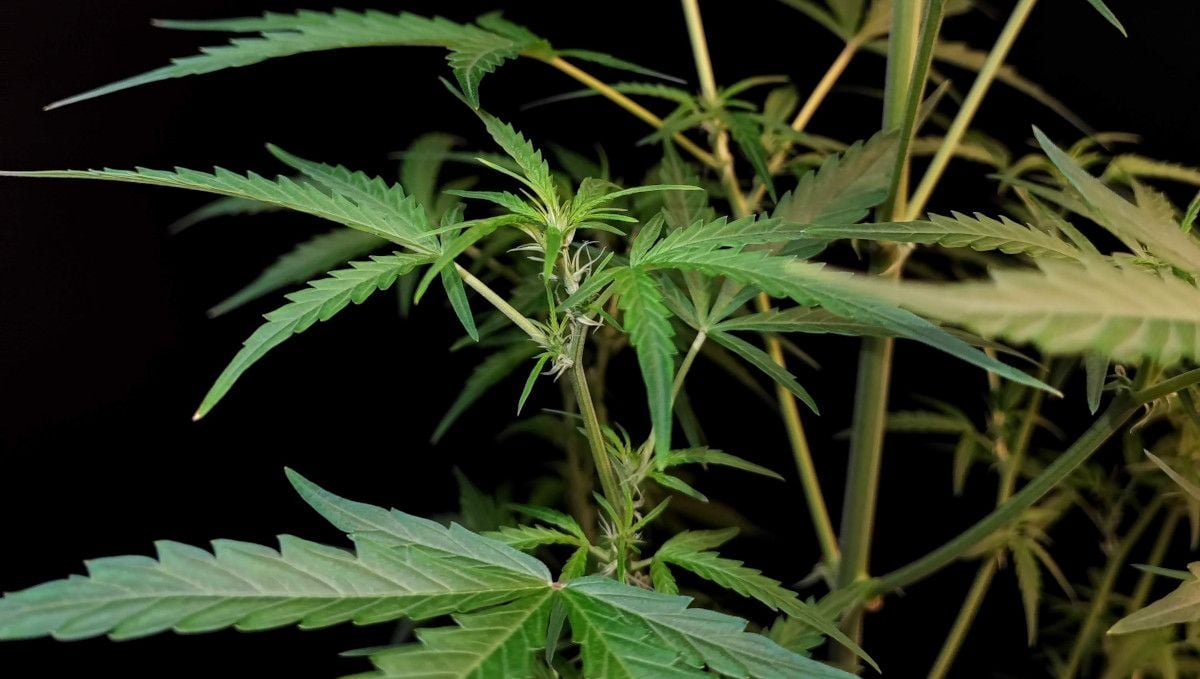
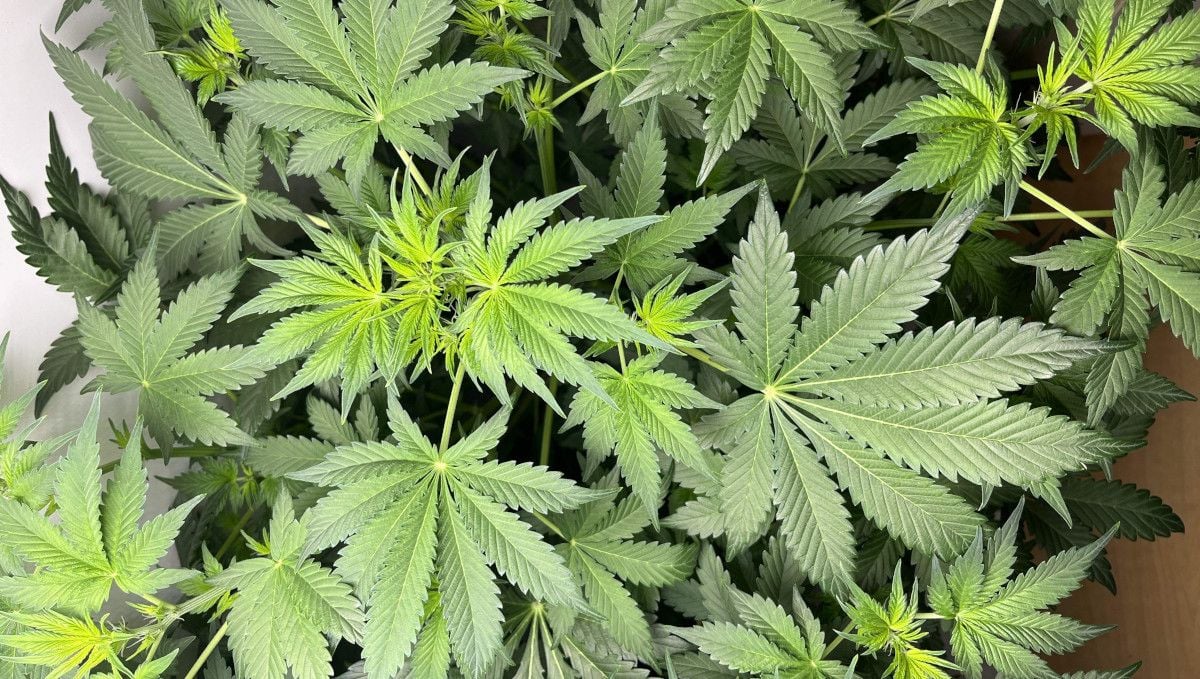
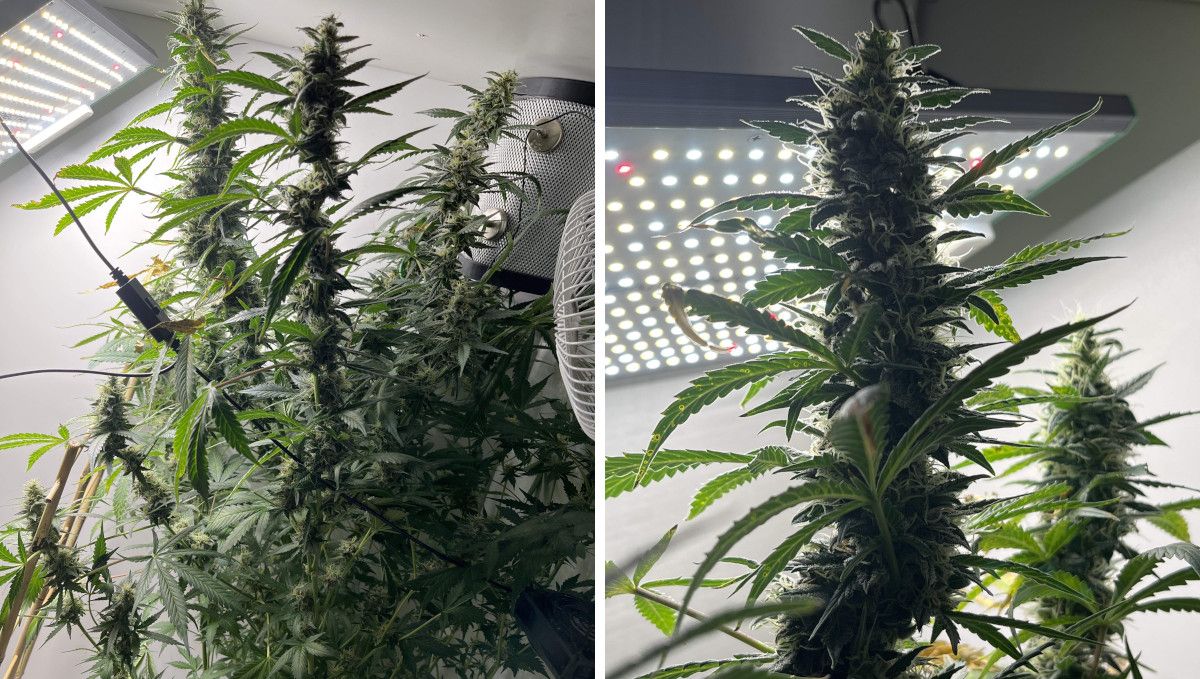
In many cases, the canopy of your auto will get super dense and even tangled by this time. You’ll probably need to do something about it: from leaf tucking to defoliation to pruning of some branches in the bottom and middle part of the plant. Don’t postpone this to the later stages of flowering to spare the plants additional stress when all they should focus on is the production of flowers.
7. Early Flower | Weeks 6-7
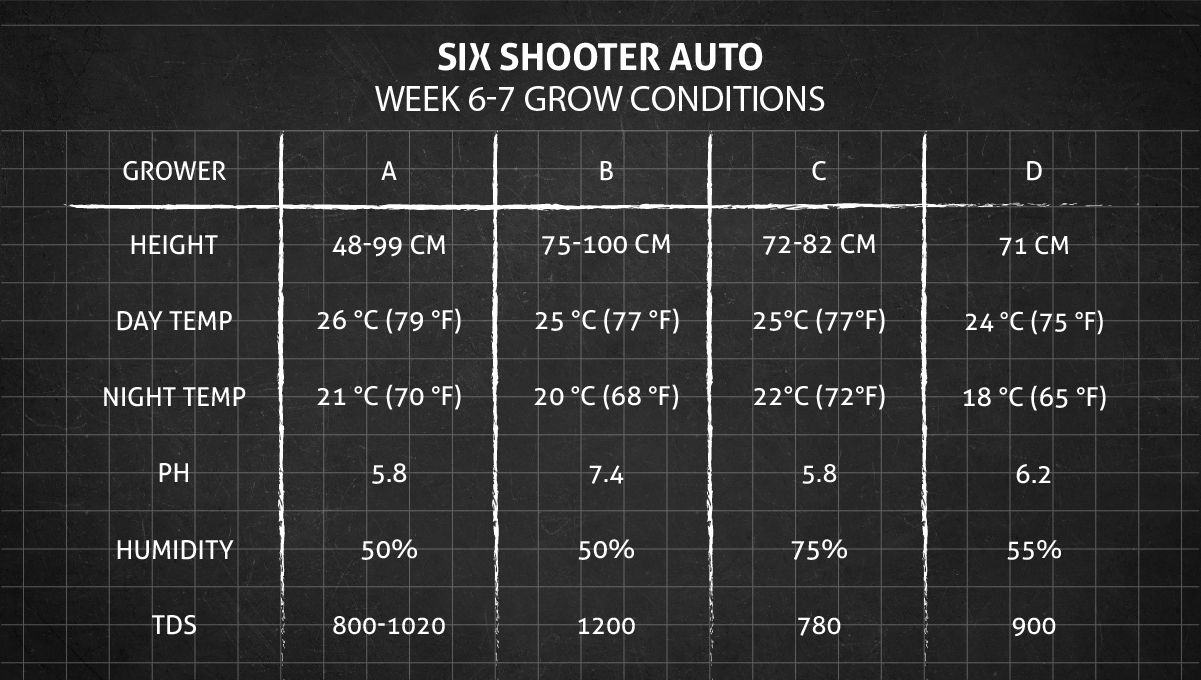
It’s safe to say that cannabis requires more or less the same environmental conditions throughout its life cycle, but experienced growers can fine-tune them for different stages to achieve better results. We recommend lowering the day temperature for a couple of degrees as soon as the flowering starts. As for decreasing the relative humidity, it will be crucial later – when the buds start to fill out in earnest.
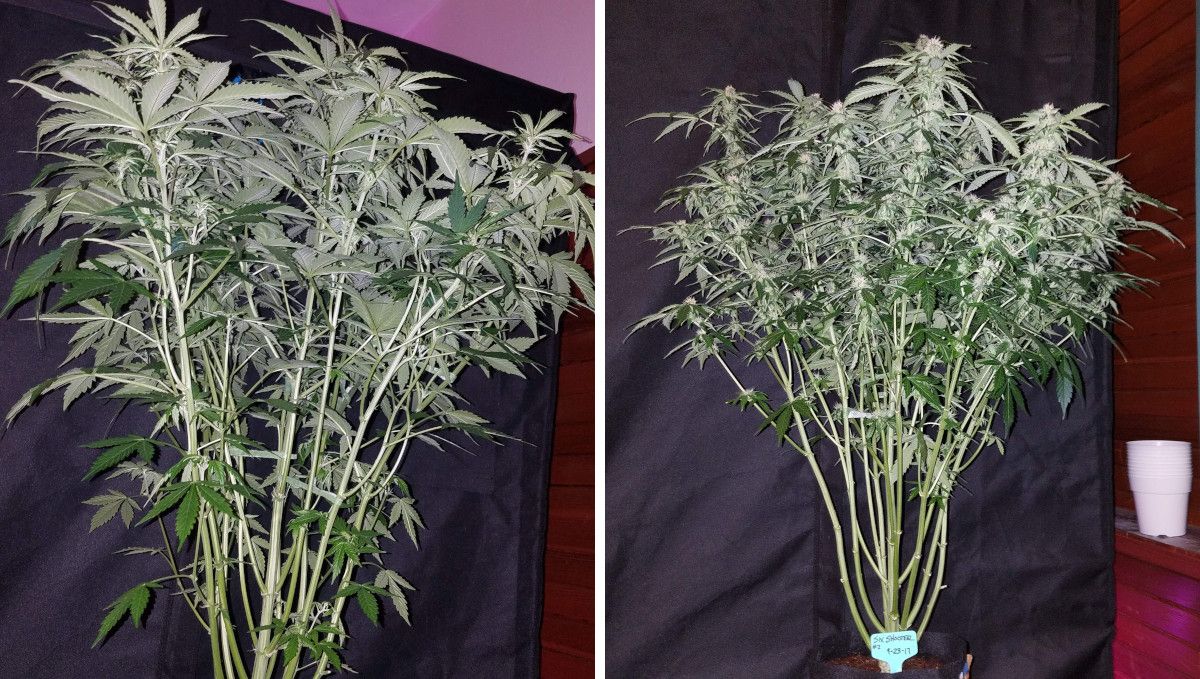
Those of you who haven’t had the pleasure of witnessing cannabis enter the flowering stage will be surprised that the first thing your plant does is stretching its branches. They can easily double in size during the first couple of weeks of the flowering stage, although a gain of about 50% is more common.
It’s usually too late in the day to continue training, but you can keep defoliating excessive foliage if you feel it prevents free airflow inside the canopy or shades some lower bud sites. Just don’t get carried away and remove leaves sparingly to save your weed additional stress.
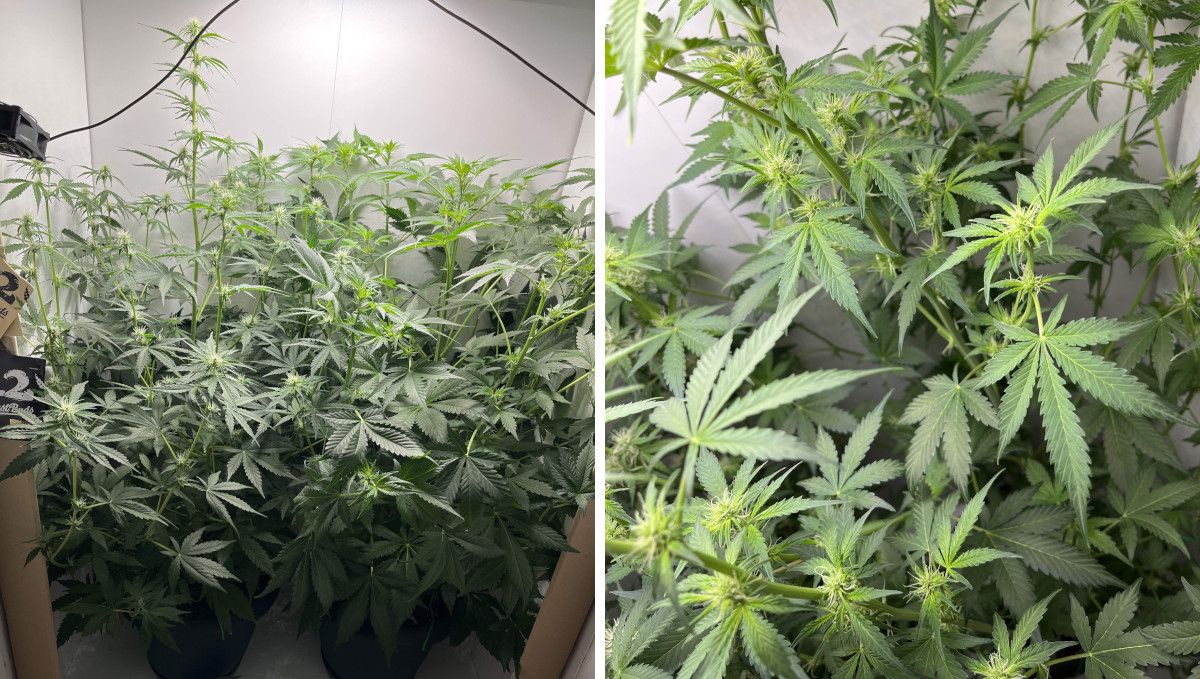
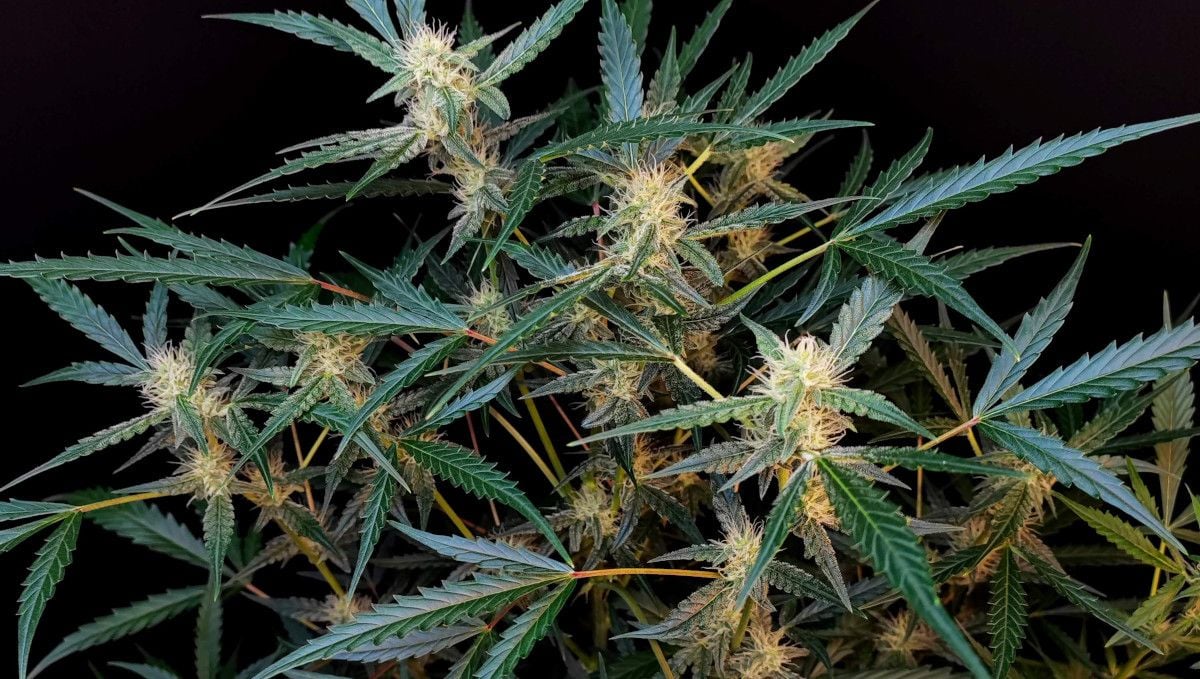
The size and texture of flowers may disappoint you at this moment, and you may even think that you got some low-yielding pheno because really, how can something that looks so light and insubstantial ever turn into huge, dense colas that you see on product photos? Well, it can and it will – just give your autoflower some time.
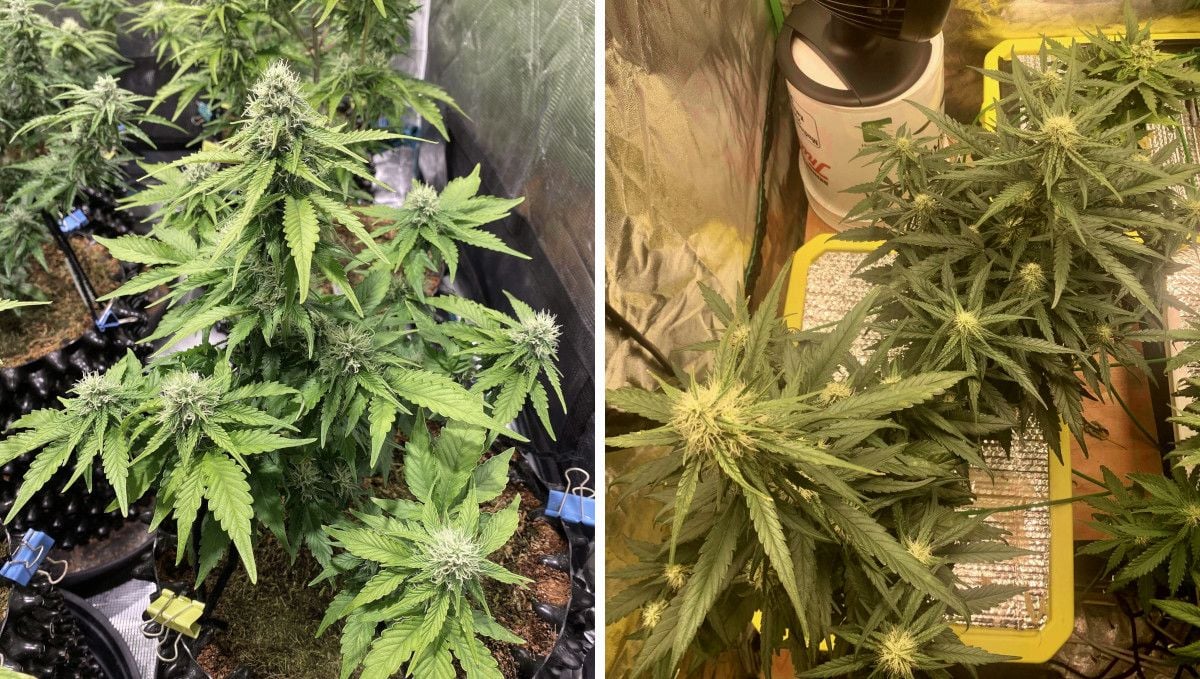
As your lady gains in size, she’ll get more and more thirsty. For younger plants, it’s not uncommon to water them no more often than every few days. Mature ones require watering every other day and then daily. Lift the container to see if it feels light – if it does, it means it’s time to water.
The appetite for plant food will also increase. Hopefully, you’ve started with something like 1/4 of the dosage recommended by the manufacturer when the plant was young. Now, you might want to try full doses; just monitor the health of your plants to prevent overfeeding. As for the choice of nutrients, it should be products with higher levels of phosphorus and potassium (P and K). Nitrogen plays a lesser role compared to veg, and its excess is even harmful now.
8. Mid Flower (Bulk Phase) | Weeks 8-9
Now that your weed plants finally start to bulk up, you should focus on good airflow and maintaining lower relative humidity. These considerations are now more important than ever, as mold, bud rot, and other fungal infections love stale air while thick and dense flowers offer them the perfect conditions to thrive.
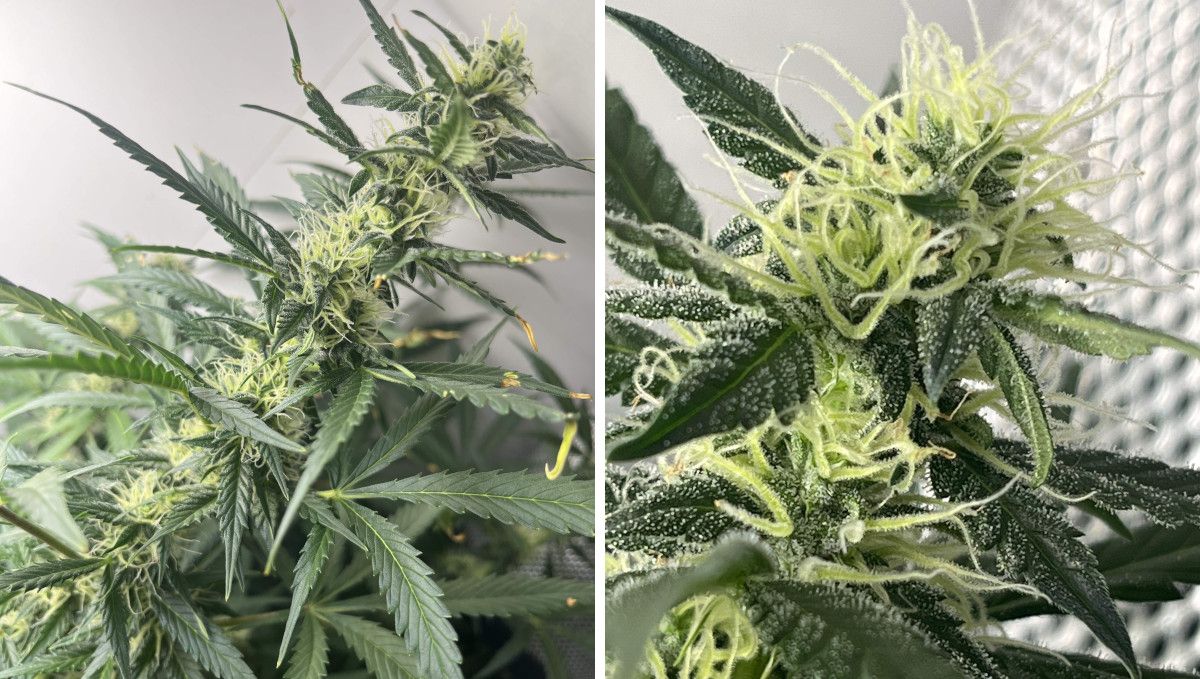
If cannabis is happy with its environment, the flowers that form at the nodes gradually cover the whole length of branches and turn into long and fat colas that we all love so much. While growing visibly, they also get denser on the inside, but their looks show that harvest is nowhere near – the pistils still look greenish-white and immature.
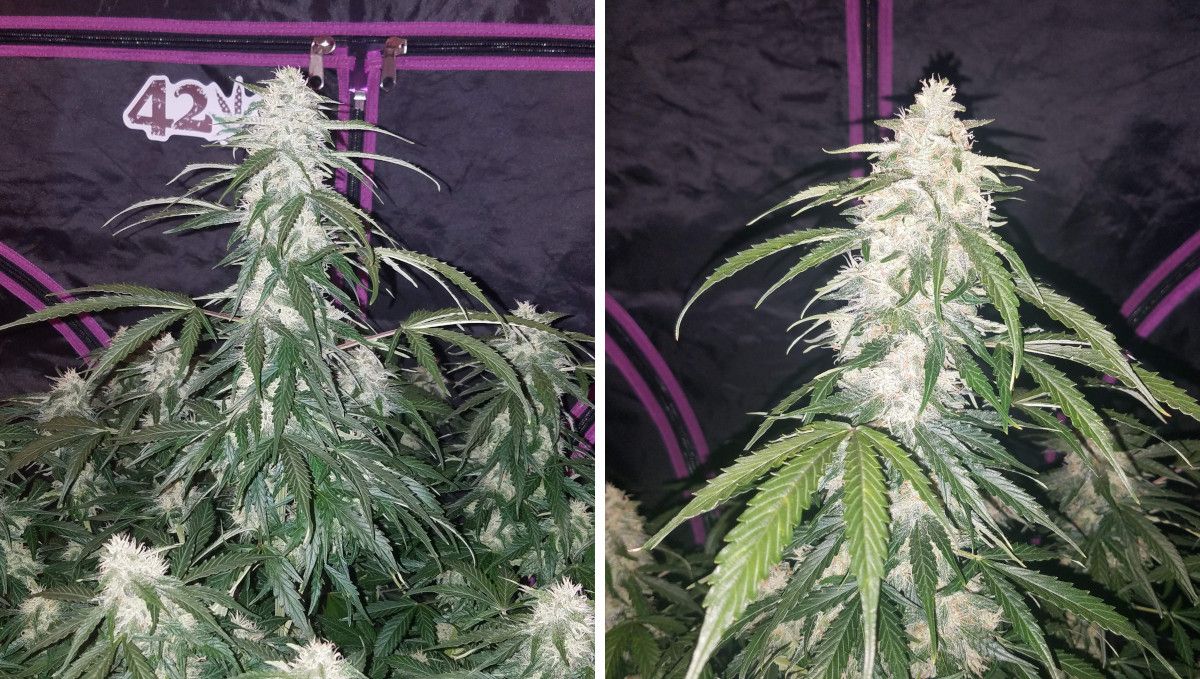
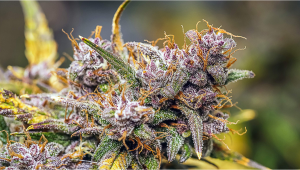
Even at this stage, good autoflowers, such as Six Shooter, become frosty as resin glands called trichomes start to appear on calyces and little leaves growing next to them. Since trichomes are the main repository of THC and other cannabinoids, this sugared look augurs serious potency that will peak at harvest time. Trichs are also full of terpenes – weed’s aromatic substances – so, you’re likely to get a strong pungent smell in your grow room now.
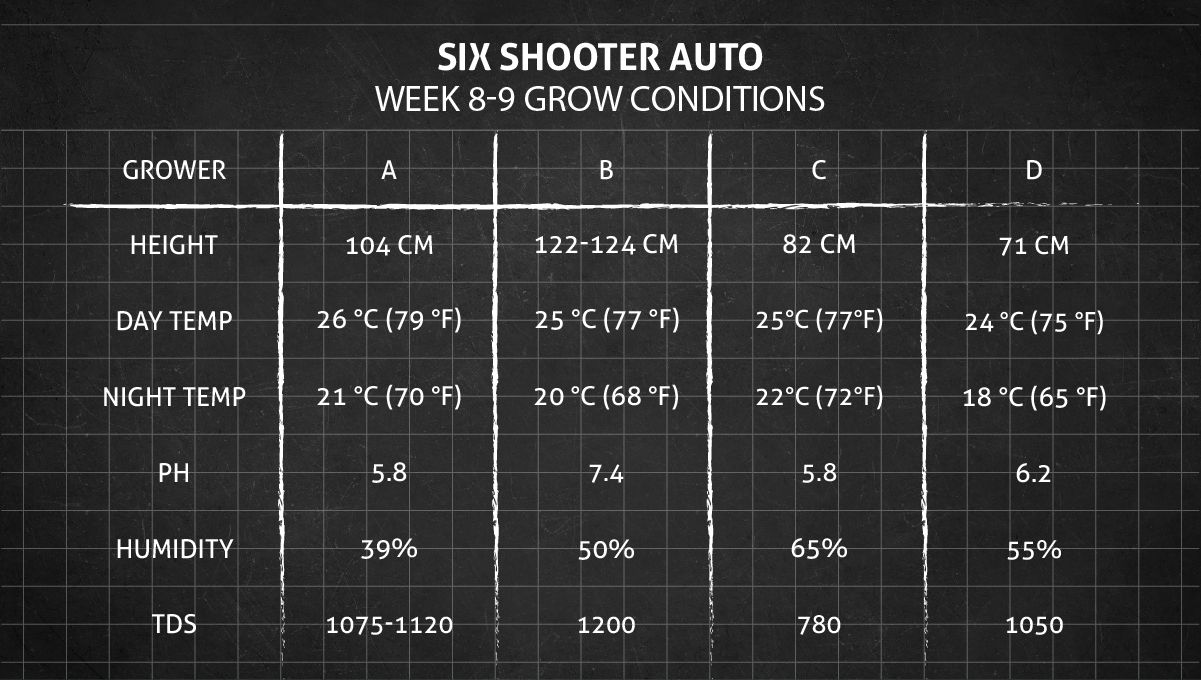
Even before the buds start to bulk up, marijuana plants generally stop stretching, and their size stays the same till the day of the harvest. Check out the table below to see what you may expect from a Six Shooter Auto indoors week by week.
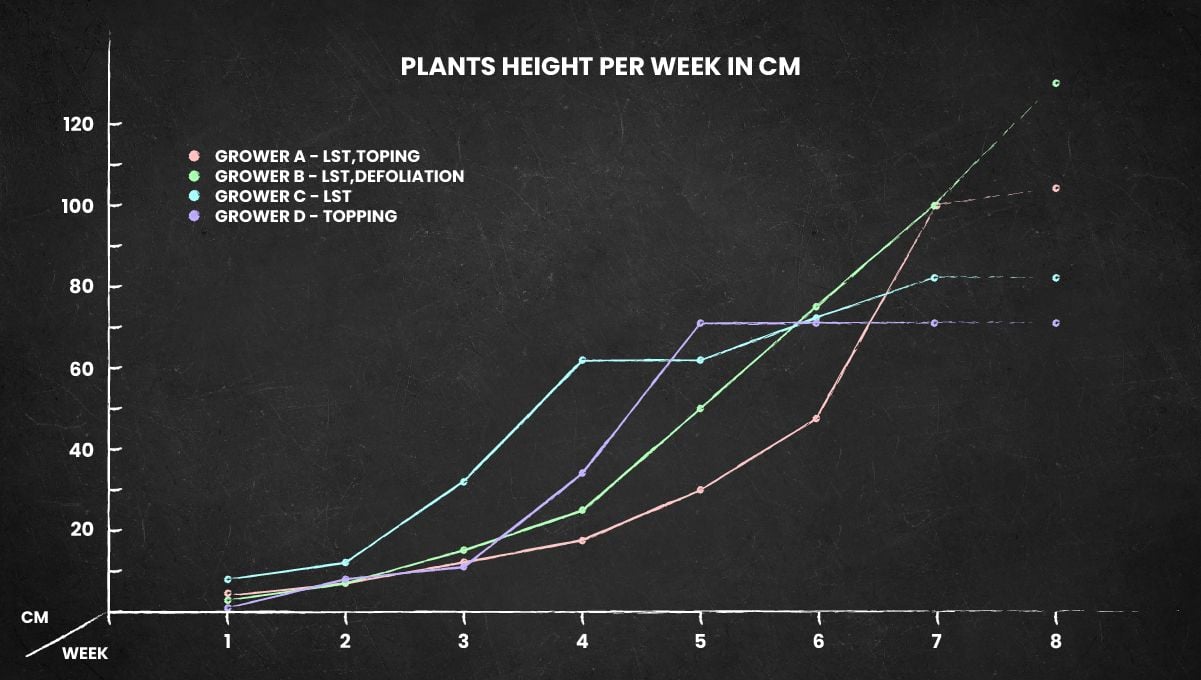
You may now forget all your previous worries of your auto stretching without limit and growing past the lights and can concentrate on something that really matters – a proper watering and nutrient regimen.

This is actually the last stage at which you’ll be giving your cannabis any food, so make every meal count. Especially important are phosphorus and potassium – either as a part of your staple formula or a standalone PK-booster. At the next stage, you’ll be tapering off any feeding and finish with plain water only.
9. Ripening And Harvest | Week 10 (And Beyond)
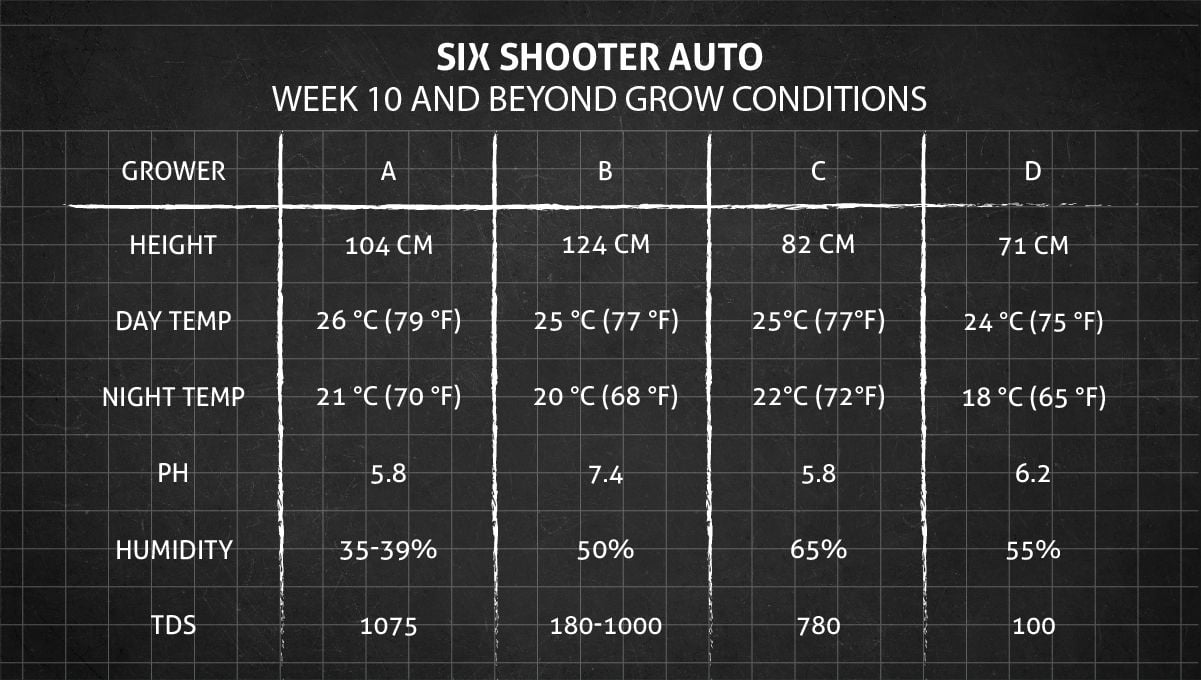
In the final weeks leading up to harvest, do your best to keep the RH in check and try to keep things cool both during day and night. It remains a contested subject, but THC probably degrades at a greater rate when it’s hot in the grow room. As for terpenes, they without a doubt evaporate faster when you fail to keep heat in check. This is also the time when the risk of a fungal infection from high humidity is the highest.
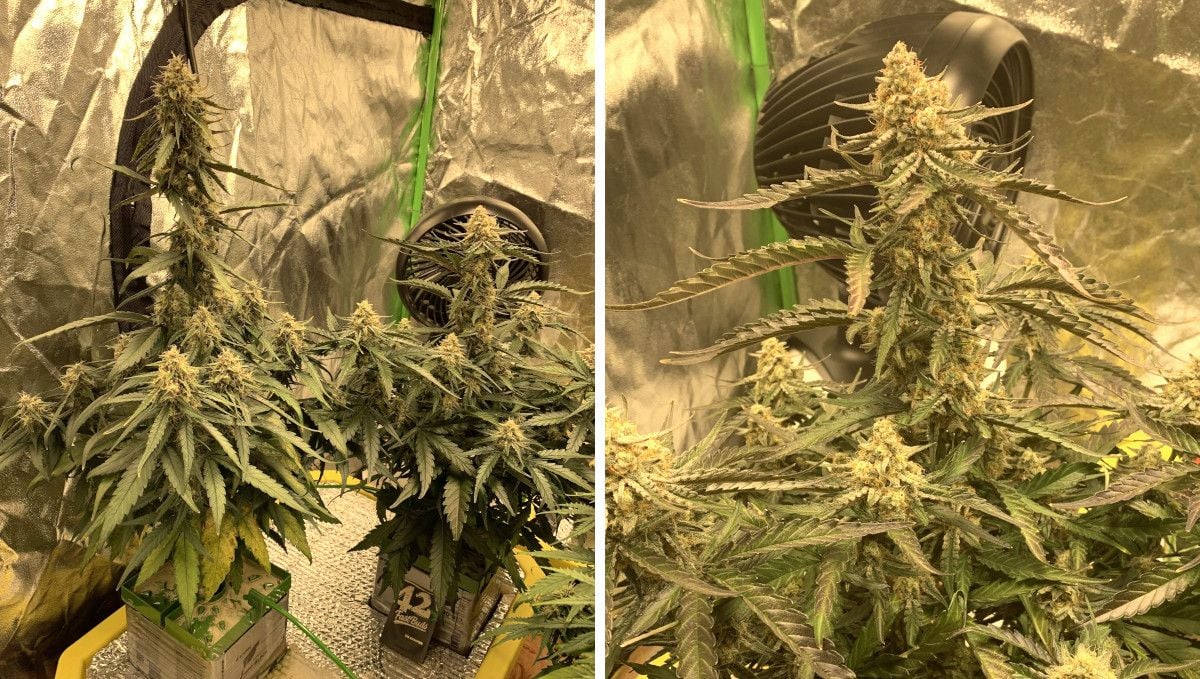
As the time given by the breeder as the maximum duration of your auto’s life cycle comes to an end, you’ll start to look inquiringly at the buds that will look more and more mature every day. Are they ready for harvest yet? The quality of your smoke depends on whether you give a correct answer to this question.

You can't rely solely on the breeder’s specifications for when to harvest because different plants can grow differently even if they are the same strain. A more accurate method is to look at the pistils. If they're still white, the buds are not yet mature, but if they've turned brown or orange, then the perfect time to harvest is likely approaching. Additionally, the leaves of the plant may begin to fade and have a more "autumnal" look as the plant gets closer to the end of its life cycle.
So, what do you do to harvest buds at the peak of their potency and flavor profile? The only 100% reliable way is to look at the color of trichomes under a microscope. Take a 60x jeweler’s loupe and inspect the trichomes that cover the calyces (not trim leaves). If all of them have turned milky instead of clear and some have progressed to amber, this is the optimal moment to harvest your bud.
There’s one caveat though. Some time BEFORE that moment of peak maturity, you need to stop giving your autoflower any plant food and flush the medium with a copious amount of water. This procedure purges any accumulated salts and other unwanted chemicals that could otherwise ruin the taste of your flower or even make it harmful for you. This procedure is called final flush and takes up to 2 weeks in soil grows and up to a week in hydroponic setups. Good luck timing it so that your buds arrive to harvest fully cleaned!
The quality of your smoke also depends on two other things – drying and curing. For best results, don’t rush with either, you need about 5-7 days to slow-dry your cut branches, then snip off the buds, and cure them in glass jars for another 2-3 weeks, opening them regularly to let out excess moisture.
10. The Outcome
We're glad we managed to find four grow diaries so unlike each other and thus demonstarte the performance of this strain in totally different mediums, setups, and growing conditions. Despite diverse cultivation styles, Six Shooter Auto consistently produced big buds with a dense texture and a frosty look, and every grower was happy with the quantity of the final product, to say nothing of its quality.
Six Shooter Auto Yield
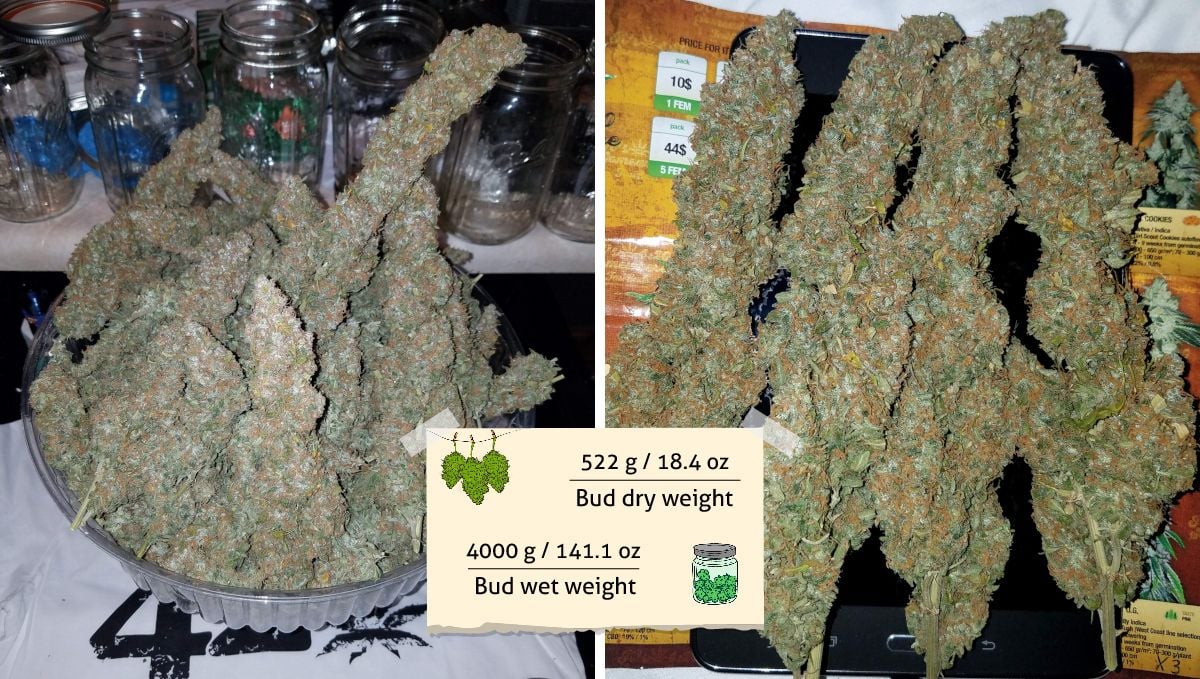
Grower A cultivated two Six Shooters that got him 169g and 352g respectively, or 261g (9.2 oz) per plant on average. It's hard to imagine how one can get such an amazing result, but the reason was the perfect combination of size and density, seldom seen on an autoflower.
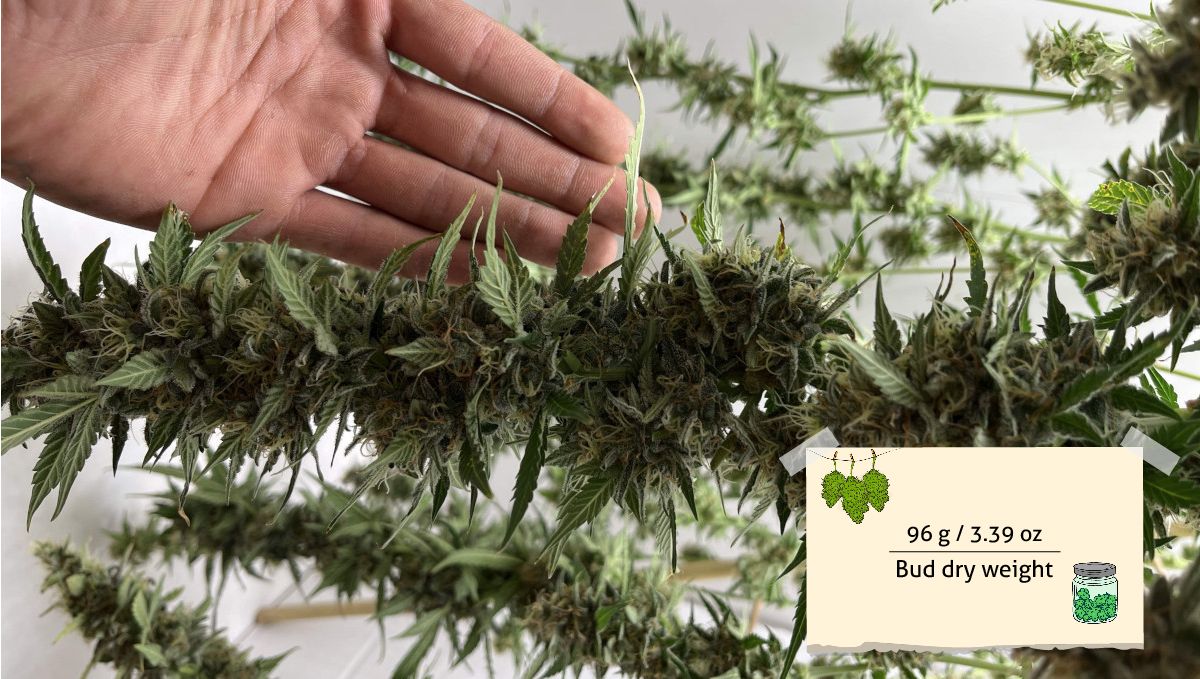
The result of Grower B was more modest, probably because he grew a tall plant without much training while using a weak light. Be it as it may, 96g (3.39 oz) from one plant is a respectable figure, and with a 95W light, the result was just over the gram-per-watt mark.
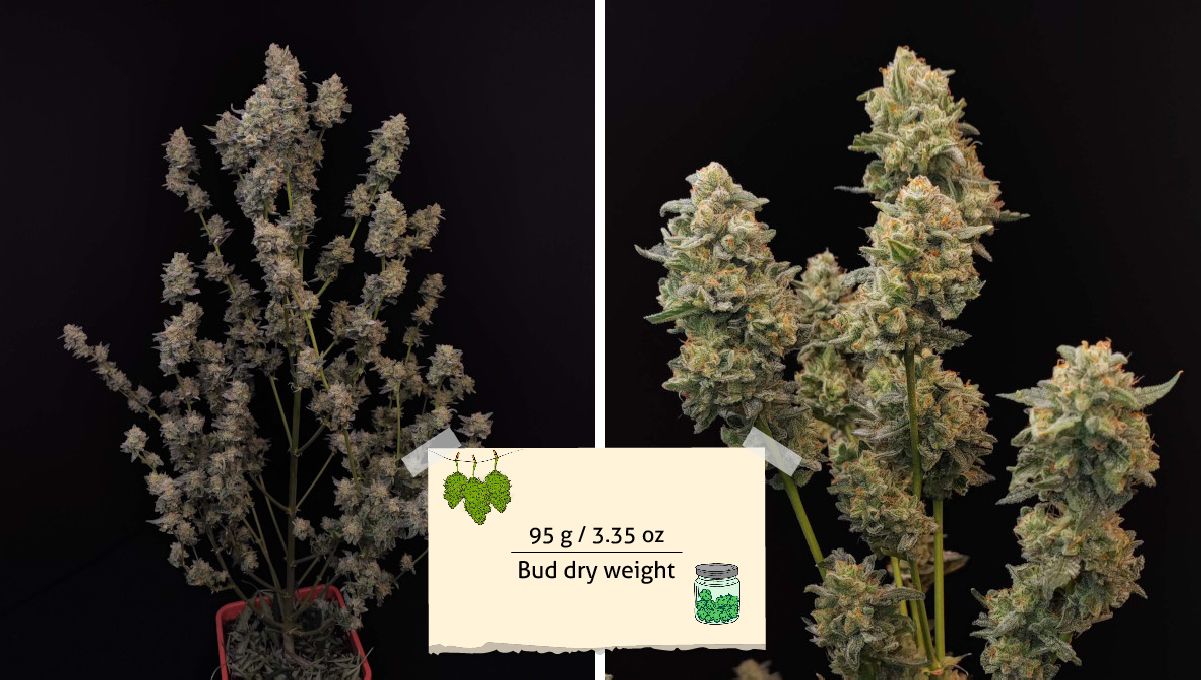
The yield harvested by Grower C was almost the same as for Grower B -- 95g (3.35 oz) from one tall multibranch plant -- and the quality of the buds was much higher.
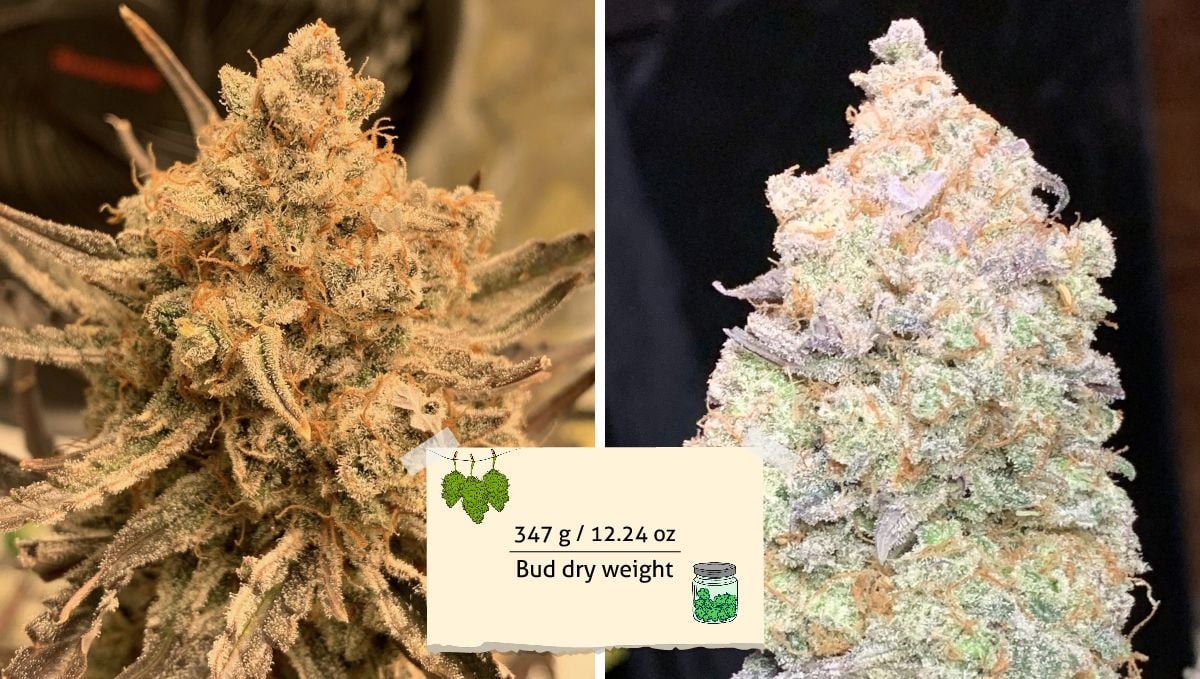
Finally, Grower D's plants were an enigma. They weren't big, bushy, nor had an especially large number of bud sites, but the buds were so rock-hard that they weighed a surprising 347g (12.24 oz), or 116g (4.08 oz) each.
Six Shooter Auto Smoke Report
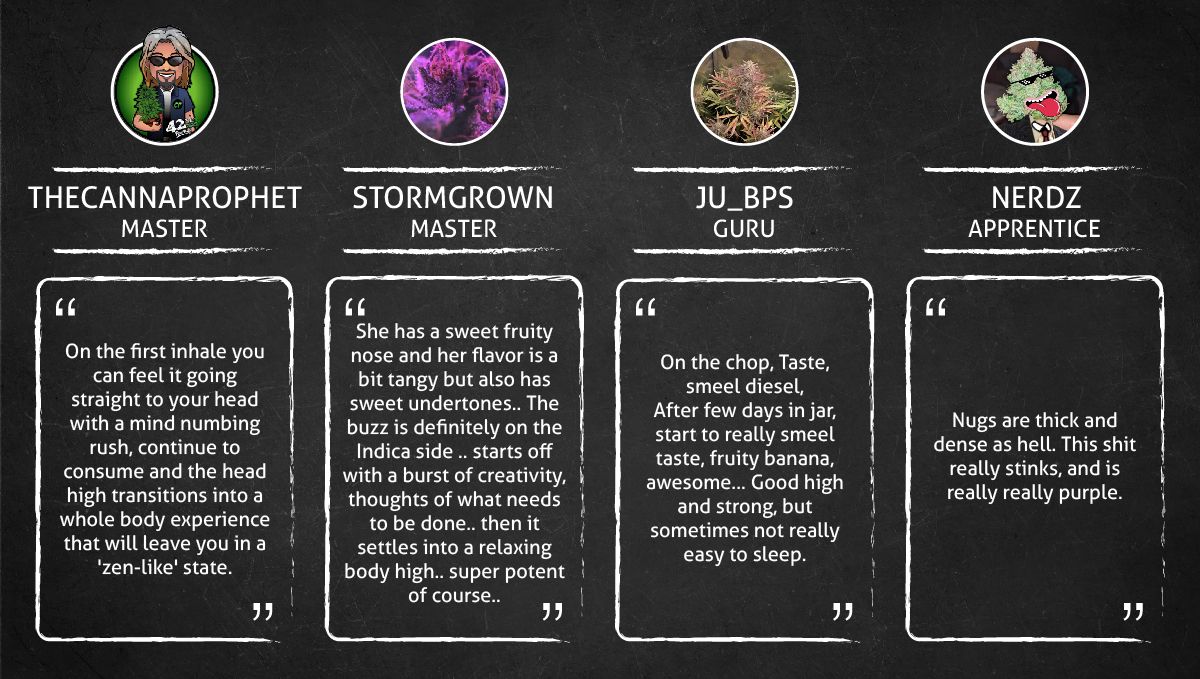
Six Shooter Auto smokers commonly describe the strain as potent with a strong head and body high that is great for use during the evening. The flavor and aroma are often described as earthy, piney, and citrusy with a sweet undertone. Many users have also noted that the effects of Six Shooter Auto are uplifting and euphoric, making it a great choice for social gatherings or creative activities. Overall, Six Shooter Auto is highly praised for its potency, unique flavor profile, and versatile effects.
10. In Conclusion
We want to conclude our Six Shooter week-by-week guide with a quick analysis of the growing techniques used and the outcomes they led to.
Grower A used the tried-and-true sea-of-green method, never interfering in his plants' growth patterns and focusing on optimal feeding and watering instead. Thanks to the power of coco, his cultivation expertise, and Six Shooter's excellent genetics, he achieved the best results.
Grower B cultivated his one plant in soil which is the most natural method but also less effective than such advanced techniques as DWC or coco coir. He didn't do much training either, so his Six Shooter grew to about the genetics' potential. Even despite this, the top colas were extremely long and packed enough weight, but of course, the lowest bud sites were inferior in quality and would have probably benefited from more loillipopping.
Grower C achived good results for the method he chose (SOG), and his plant performed beautifully even after two consecutive transplants.
Grower D somehow failed to take advantage of rapid growth rates that hydroponic setups ensure in veg, but during flowering, he seemed to have figured things out as the buds came out amazingly dense and resulted in a bumper harvest.
To sum it all up, Six Shooter Auto performs great in any setup and doesn't require training to produce outsized yields. Give it some L&C and show some basic growing skills and it will thank you with an amazing amount of top-shelf product. Happy growing!





Comments