Strawberry Pie Auto Cannabis Strain Week-by-Week Guide
- 1. Grow specifications
- 2. Grow set up
- 2. a. Grower a: tweezer
- 2. b. Grower b: thraxa
- 2. c. Grower c: highfromhome
- 2. d. Grower d: silverback_guerilla
- 3. Germination and seedling stage | week 1
- 4. Early veg | week 2
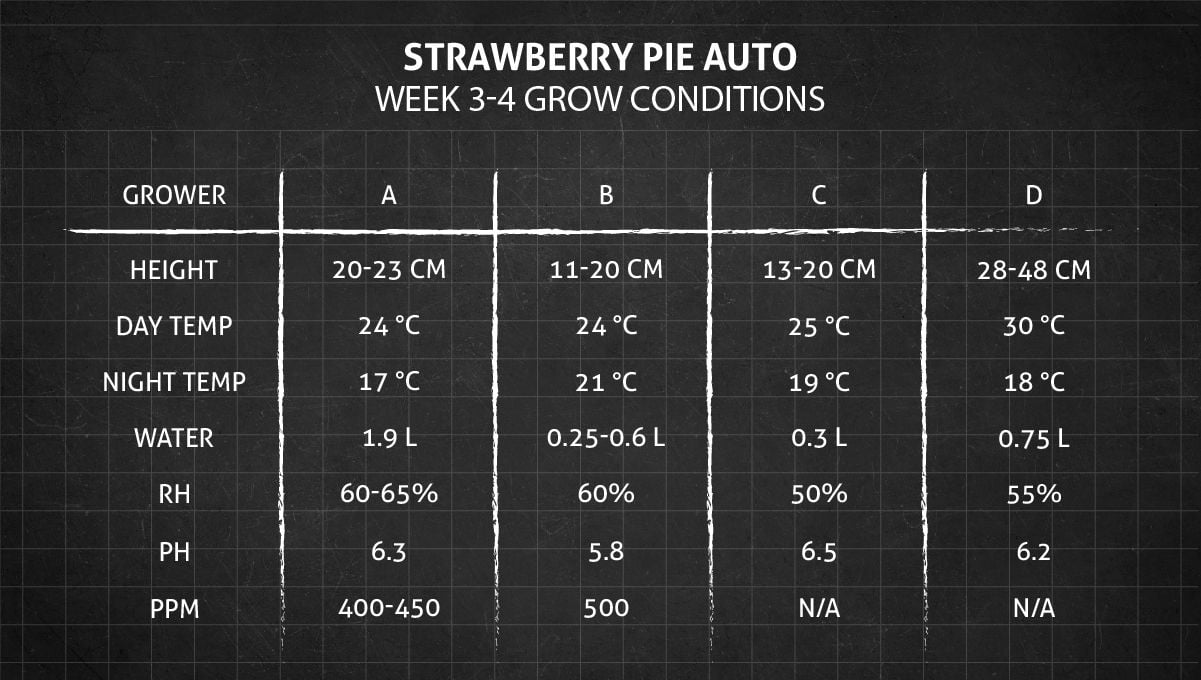
- 5. Mid veg | weeks 3-4
- 6. Transition (pre-flower) | week 5
- 7. Early flower | weeks 6-7
- 8. Mid flower (bulk phase) | weeks 8-9
- 9. Ripening and harvest | week 10 (and beyond)
- 10. How to properly trim, dry, and cure your cannabis harvest
- 10. a. Why dry and cure your cannabis crop
- 10. b. Drying your cannabis harvest
- 10. c. Why is it important to control and adjust the drying conditions?
- 10. d. How to cure weed?
- 11. The outcome
- 11. a. Strawberry pie auto yield
- 11. b. Strawberry pie auto smoke report
- 12. Strawberry pie auto cannabis strain grow guide - faqs
- 13. In conclusion
Intuitively, we all know that rich terpene profile and potency in cannabis go hand in hand. That’s why we often choose our weed by smell. And Strawberry Pie Auto is a perfect example of when our nose helps make a perfect choice. Expect a smoke that is redolent of cookie-dough, cream, and strawberry and is as sweet as candy, but also packs 26% THC — enough to pierce any tolerance.
This autoflower doesn’t waste any time producing larger-that-life amounts of resin which is brimming with both aromatic substances and THC. The thick coat of trichomes gives buds a unique bag appeal, but is also a dream-come-true for lovers of hash and producers of concentrates. Smoke a little of these trichome-laden gems, and you’ll feel blissfully alert and focused without much tiredness or spacing out. Perfect for a solitary afternoon or evening with a book or a movie.
1. Grow Specifications
While most satisfying for a smoker, Strawberry Pie Auto also shines in any garden. Her Indica heritage (85% compared to only 15% sativa genes) expresses itself in a classic Christmas-tree structure where one towering central cola dominates the rest. This—as well as her manageable height of only 60–100 cm (24–39 inches)—makes Strawberry Pie Auto ideal for SOG-setups. Stand as many of them side-by-side as you like and don’t worry about too much girth. Another type of gardeners who’ll benefit from Strawberry Pie Auto small stature are those who have smaller tents or micro-grows and also those who are trying to make their weed patch as inconspicuous as possible.
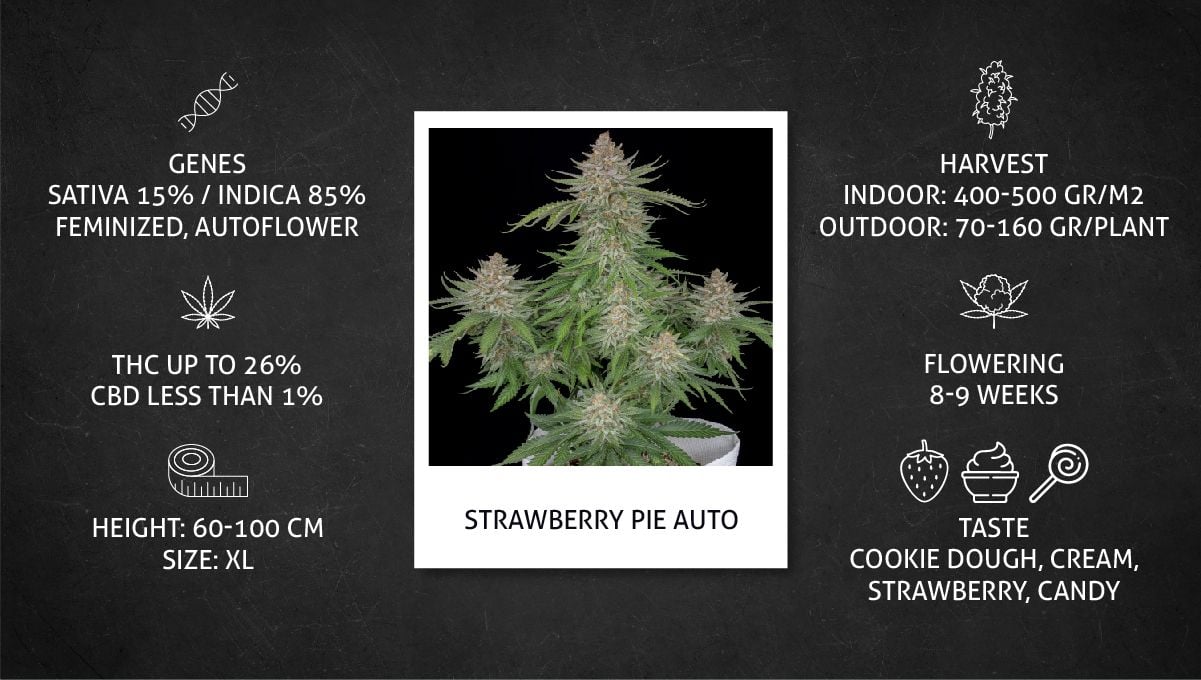
Despite size restrictions, this autoflower is able to bring in as much as 400–500 gr/m2 (1.3–1.6 oz/ft2) indoors or 70–160 gr (2–6 oz) per plant outdoors. A huge yield potential which puts to shame many photoperiod cultivars.
Strawberry Pie Auto’s chunky, yet dense buds mature in as little as 8-9 weeks from seed. This is a shorter flowering time than in many other autos and an extra point for this strain among commercial growers.
2. Grow Set Up
There are many dozens of diaries describing Strawberry Pie autoflower week by week progress. We have sifted through all of them to present four that can give you the best idea of this variety’s timeline, how she moves through all the grow stages, and how to best take care of her.
Grower A: Tweezer
Tweezer joined the Growdiaries community only 10 months ago and has managed to finish just 4 grow cycles at the time of writing, but he’s already decorated with the title of ‘Master’. No wonder: he’s got a lifetime of experience cultivating vegetables and fruit. He set up his first-ever cannabis grow in the basement where he installed a 5’x3’ Vivosun tent ($125) and equipped it with some LED quantum boards.
However, for this particular cycle, he used HID lights (a 400W MH in veg and a 600W HPS in flower) instead because it was winter time and HIDs helped raise the temperature in the tent from too low 16°C (60°F) to more comfortable 76°C (24°F) or thereabouts. He had still to use a heat panel at night, at least in the more vulnerable seedling stage (for cannabis flowering stages, cooler temps are acceptable).
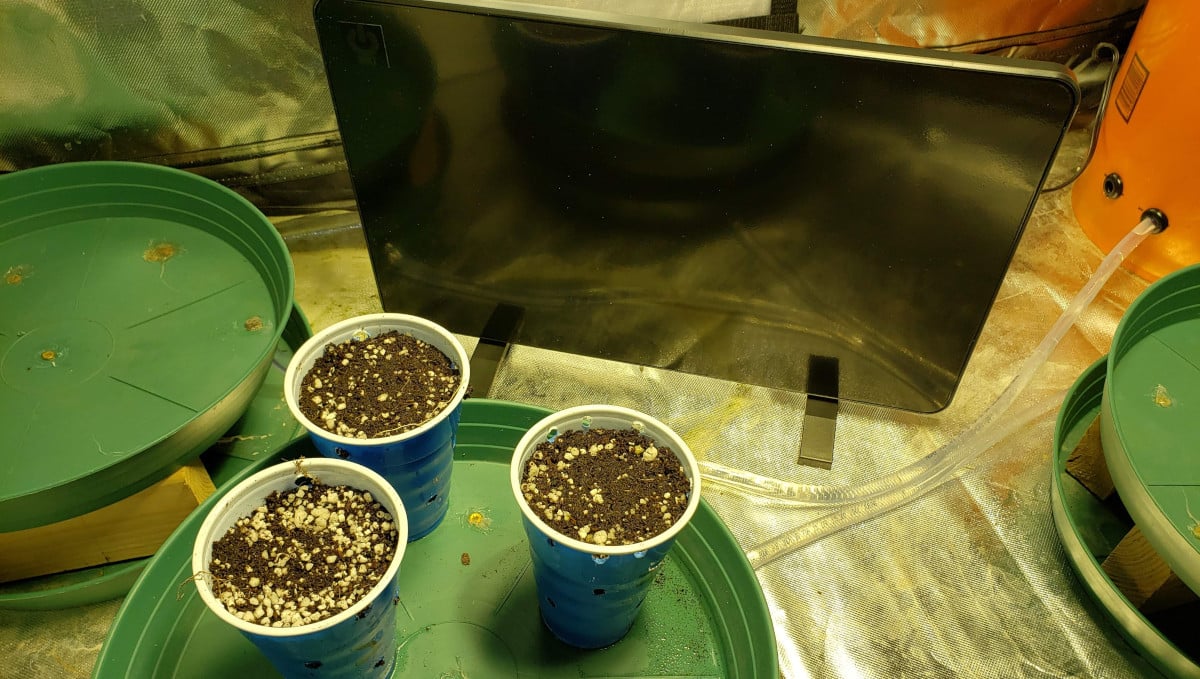
It was also necessary to install a humidifier, otherwise the MH light would burn off the moisture from the tent. Especially, when the very powerful 8” AC Infinity Cloudline exhaust fan kicks in at the same time. This fan lowers the temperature in a heartbeat but also makes the air very dry.
Low ambient temperatures never make things easy. It’s always better to put your tent right where you live and feel comfortable yourself, and not in a basement.
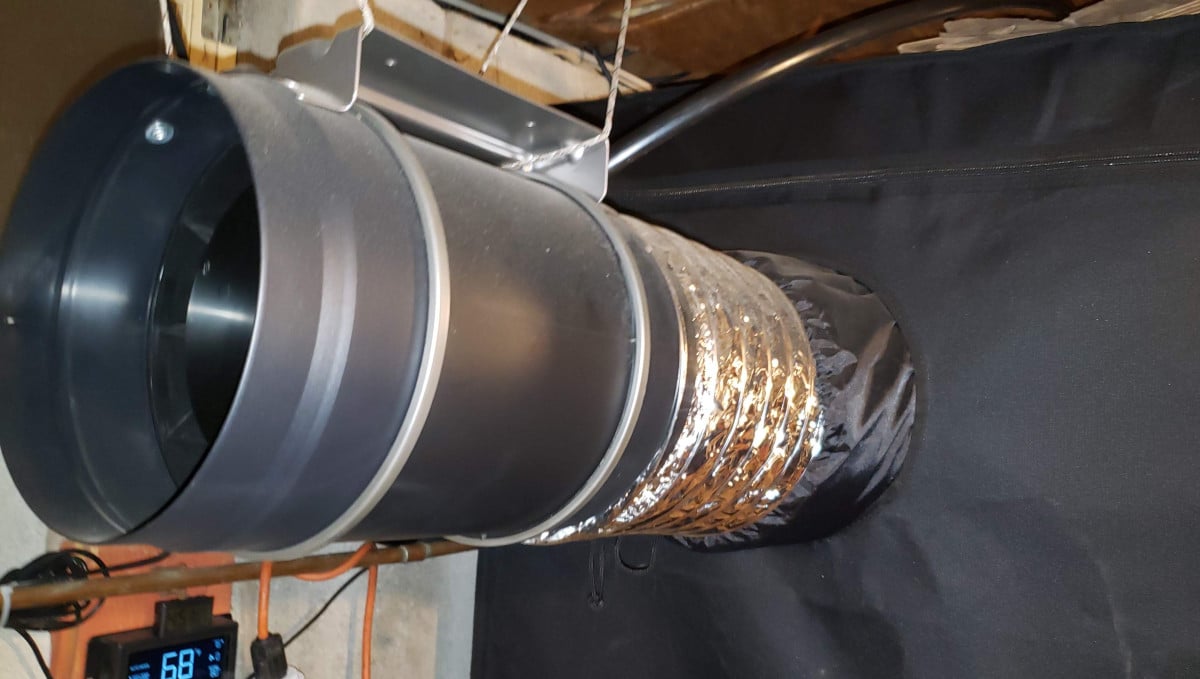
A very interesting feature of the guy’s setup was the use of a DIY automatic fertigation system. A nutrient solution from a reservoir just outside the tent was fed to the plants 6 times a day for just one minute through a system of tubes and halo sprinklers. Then the runoff would gravity drain through a system of self-draining saucers and a catchment bucket.
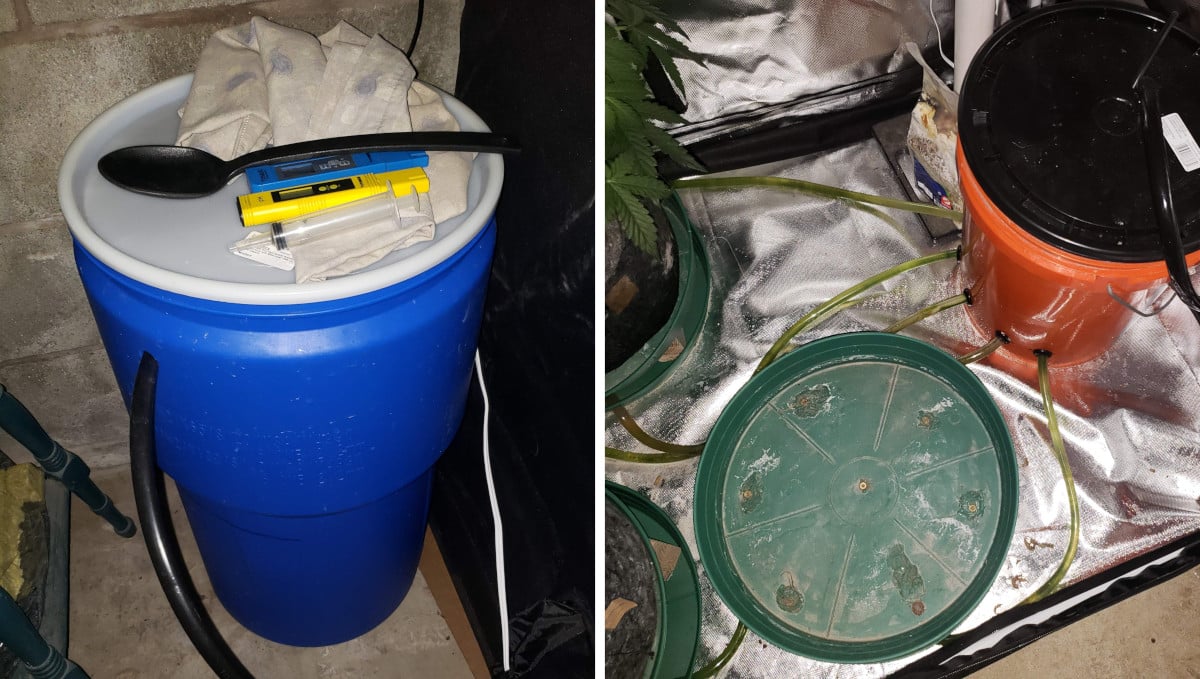
For coco coir, frequent fertigation is a prerequisite to reaping a rich harvest , and Tweezer did everything he could to achieve very impressive results. Stay tuned.
The gardener tried to make everything as eco-friendly as possible, so he used the water from the house’s dehumidifiers and fed the run-off to his outdoor tomatoes (which made them MONSTERS).
Grower B: Thraxa
Thraxa has published only 3 reports so far on Growdiaries and is still an ‘Apprentice’, but do not let that fool you. His whole setup and the assured way he tends to his garden indicate a lot of prior experience. He uses a medium-size tent Mars Hydro GT 100x100x180cm (3'X3'X6') and runs two sets of lights: one for the vegetative phase and the other for all different stages of flowering. Both sets are custom-made LED quantum boards which draw 250 and 300 watts respectively.
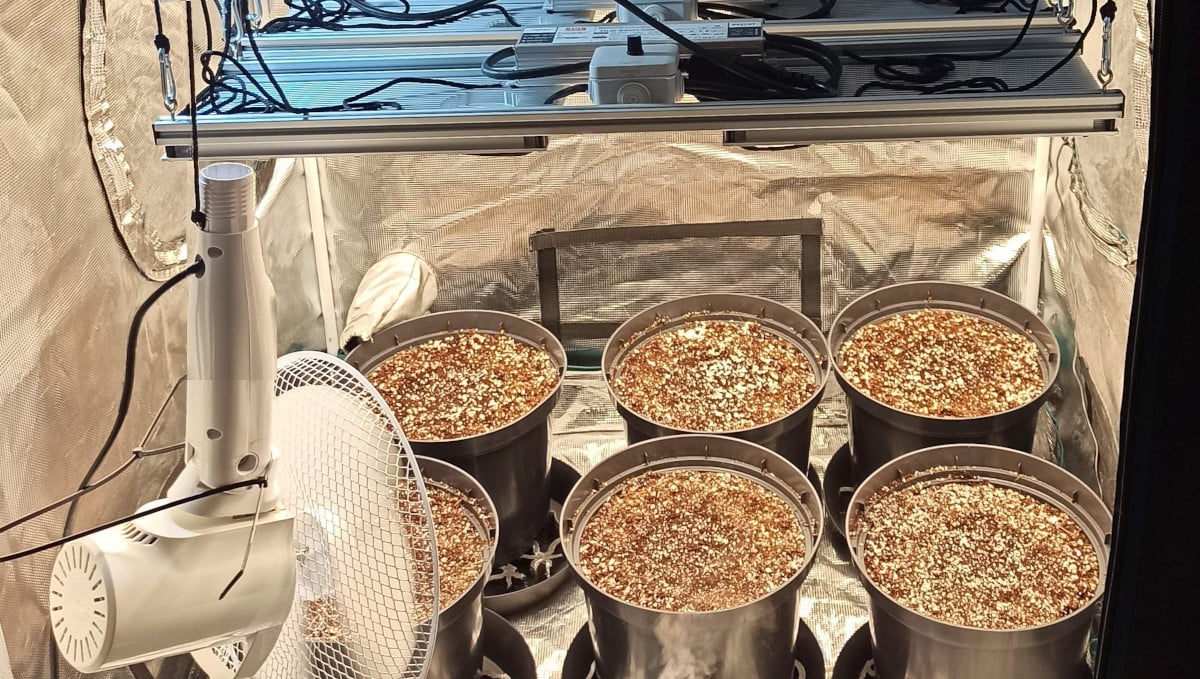
The tent comfortably houses 6 plants in 11L (2.91 gal) plastic pots. Despite using a coco/perlite mix as the medium, the grower hasn’t installed any auto drip system but hand-waters his garden.
Grower C: HighFromHome
By all standards, HighFromHome has a very small setup. His Black Orchid tent measures only 40x40x100cm. For many growers, this wouldn’t even be enough as a veg room, especially height-wise. You can see in the picture below how tight this space is. The grower even had to place his 4" inline exhaust fan and his 4" Rhino Pro filter outside the tent. Otherwise, he wouldn’t be able to fit in the grow light.

For such a tight space, a ViparSpectra P1000 LED grow light is just about right. Do not let the number 1000 fool you — this quantum board MIGHT be equal to a 1000W bulb by some metrics, but it only draws 100W of power. In this small garden of his, however, the grower does wonders and achieves that Holy Grail of home cannabis cultivation — the one gram per watt yields. A bit more in fact. Having published only 4 journals so far, HighFromHome has got 1002 likes and a title of Master. And he really has something to teach.
Grower D: Silverback_Guerilla
Silverback_Guerilla has been active on Growdiaries going on three years now. He obviously has at least two grow tents, and one is dedicated to growing autoflowers. It’s quite small, at least for this gardener who is accustomed to sprawling multi-strain grows in a large custom-made tent or closet.
The surface area is only 0.3m2 (4.5 square feet), and the exact dimensions are 36" x 18" x 60". The funny thing is that the gardener decided to cram 6 (!) plants into this tiny space.
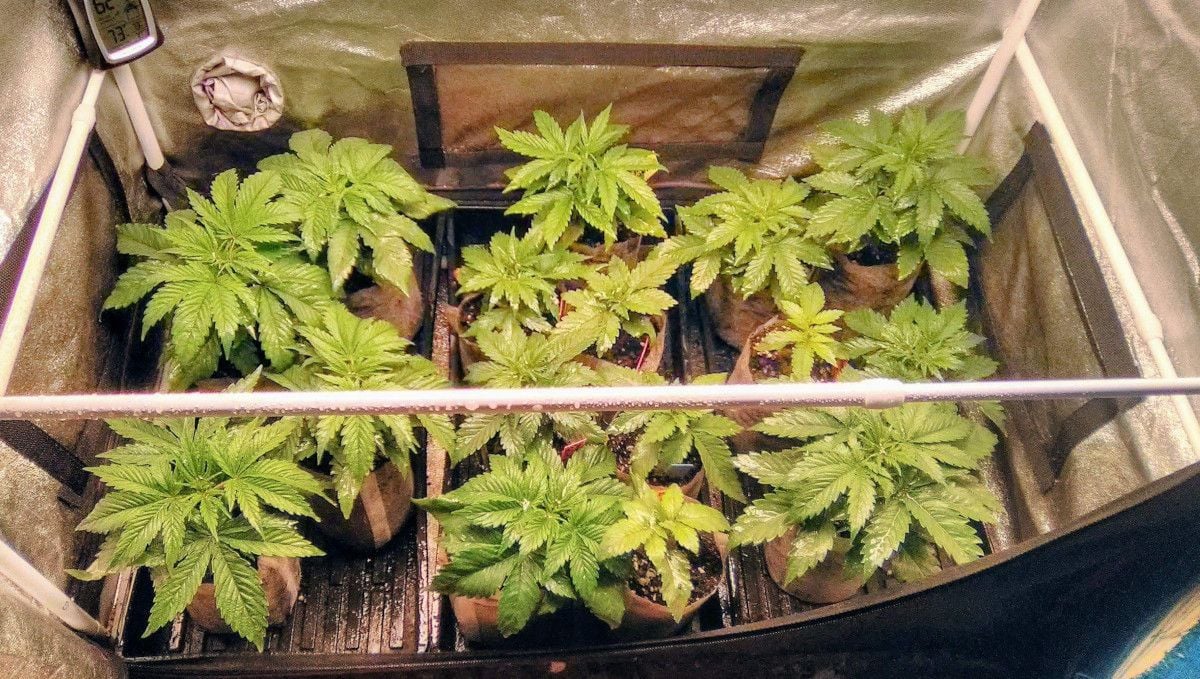
Another thing to marvel at is that he installed 2x150W LED quantum boards into this tent. And he was going to add one more QB (plus 60W) halfway through the flowering stage. So, in the final month or so, all the plants, including Strawberry Pie Auto, would be hammered with more than 70 watts per square foot.
To any other horticulturist, we would suggest thinking better of it because it’s clearly an overkill, but Silverback_Guerilla has a title of GrandMaster for a reason, so he can definitely pull it off.
The primary LEDs that he used for this run were Mars Hydro TS 1000. They produce just the perfect spectrum for all grow stages, are continuously dimmable and two of them are good for 8 sq. feet in different stages of flowering, not to mention vegetative phase.
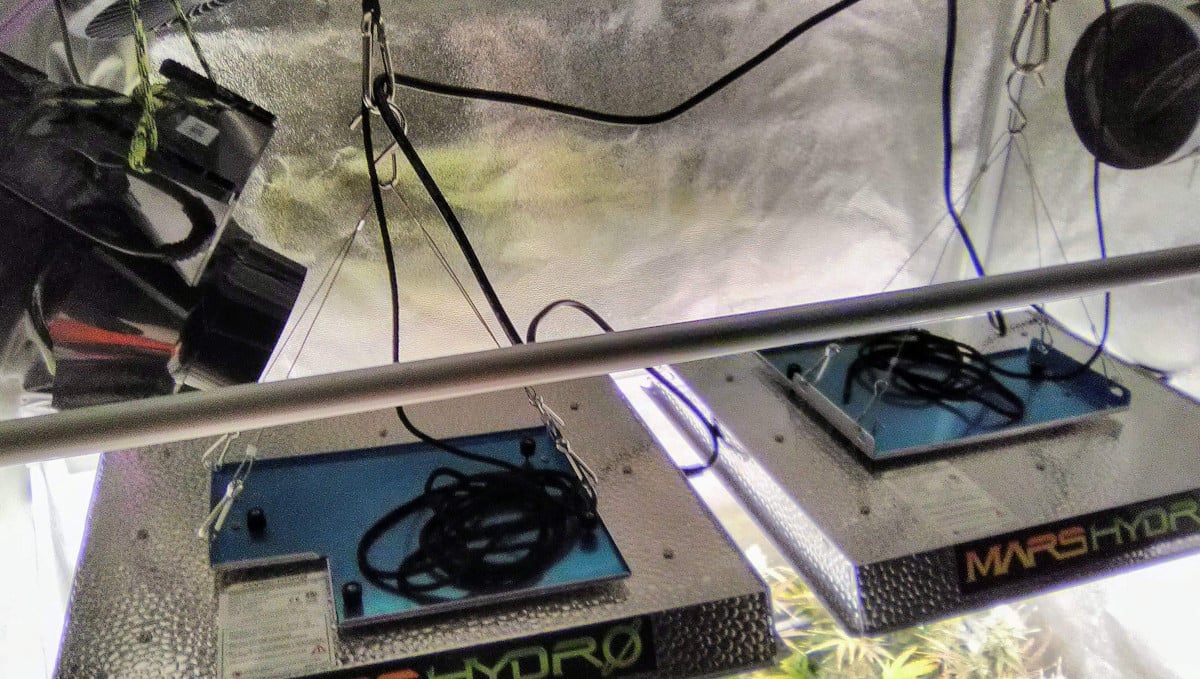
The ventilation for this space used to be a passive one. The air was drawn THROUGH this tent by a fan installed in the adjacent and much larger grow closet. This system wasn’t effective enough, so Silverback_Guerilla bought a 4” 106 CFM AC Infinity booster fan. This created quite a bit of negative pressure, making the tent walls concave, with 3-4” of space lost on all sides. To remedy this, the grower installed some additional tension rods.
The table below will give you an idea of the grow room size, the wattage, and the type of lights for all four grow cycles:
| Grower | Grow Room | Watts Used | Type of Light | Brand |
|---|---|---|---|---|
| A | 5' x 3' | 600W | HPS | Unknown |
| B | 3' x 3' | 300W | LED | Custom |
| C | 40 x 40 cm | 100W | LED | ViparSpectra |
| D | 36" x 18" | 360W | LED | Mars Hydro |
3. Germination And Seedling Stage | Week 1
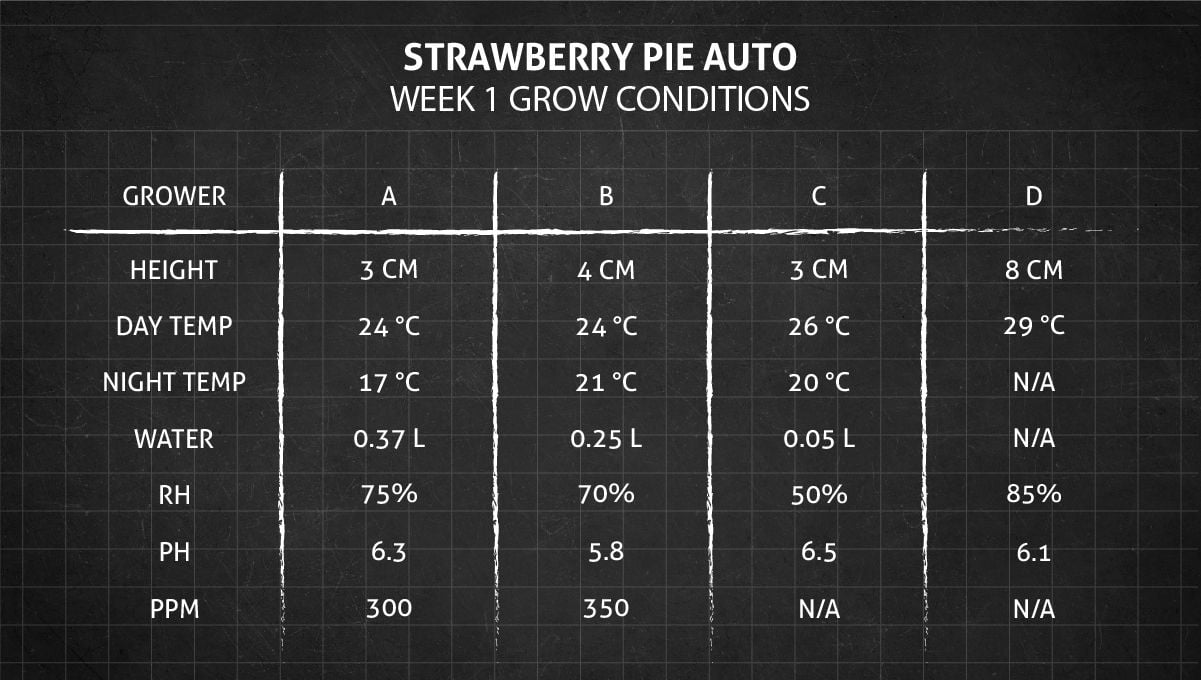
We start our Strawberry Pie autoflower week-by-week exposition with the germination of seeds. Curiously, three out of four gardeners chose the method of pre-soaking their beans in a glass of water, and one used a far more sophisticated DWC cloner. The success rate was 100% for everyone.
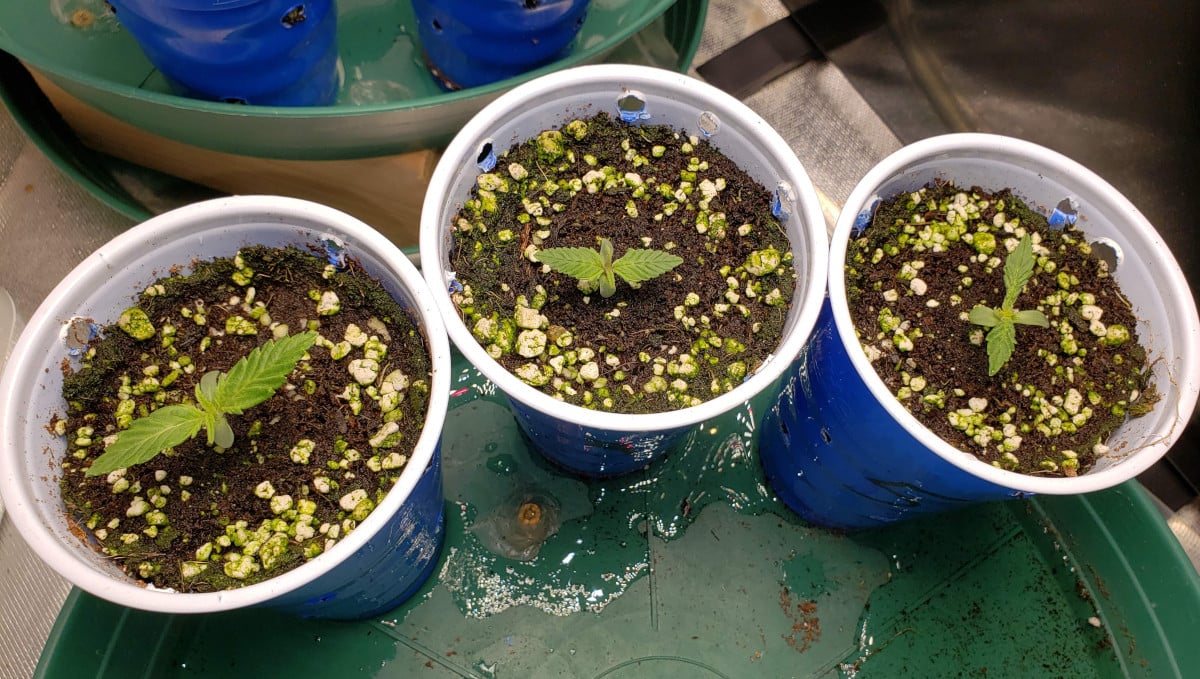
A: A Perfectly Calm Start
The germination method that Grower A chose for his three Strawberry Pie Auto seed has a very high success rate and is highly recommended. He pre-soaked the beans in a glass of water overnight, then kept them between wet paper towels (inside a plastic bag) for 24 hours.
That was all that was needed for the seeds to open and show half-inch tap roots.Then they were put in solo cups filled with a coco/perlite 60%/40% mix (pretty standard).
As you may know, coco should be treated with a Cal Mag amendment beforehand, so that there’s no deficiency of these two nutrients. The grower made sure to do this and to flush the medium to a very moderate 0.4 EC.
Throughout the first week, he gave them 10% of the recommended dose of General Hydroponics MaxiGro, a nitrogen rich formula that contains everything a weed plant needs in the vegetative stage and all the way up to the pre-flowering stage. The dosage would gradually increase to 25% of the recommended value till the beginning of flowering. It was a good strategy — young seedlings hardly need a lot of nutrients, but can easily suffer from overdose.
The only complication during the first week was a spell of unexpectedly warm weather. It raised the temperature inside the tent and forced the grower to temporarily replace the hot-running metal-halide light with a much cooler LED (remember that, this being a winter grow, the HID bulbs were supposed to play a double function: to provide both light and heat).
Hint: If you grow autos in a cold environment, simply set your timer to 24/0. This lighting schedule suits even autoflower flowering stages. It also eliminates the dark period and thus the need to use any heaters.
B: First Days and First Meals
The germination method that Grower B chose was exactly the same as A, with the only difference that he pre-soaked his 6 Strawberry Pie Auto seeds for longer. After 24 hours in a glass of water and another 24 between wet paper towels, the tap roots were long enough to be planted in the 80% / 20% coco/perlite mix. Straight into the final 11L pots. As for the nights, they were cool enough to call for the use of a small heater.
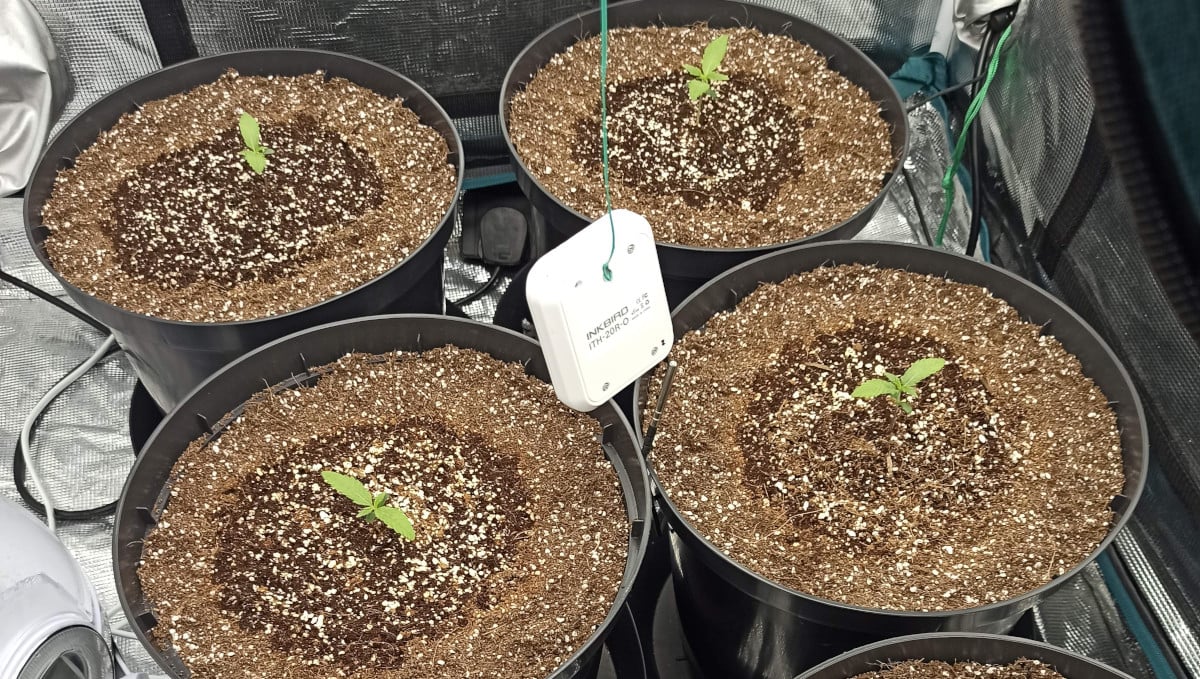
During the seedling stage and for the first 5 days after sprouting, the seedlings received 3 ml/l of CANNA RHIZOTONIC with their water. This stimulator is algae based and contains many vitamins and microbiological substances which help cannabis germinate faster and then develop a massive and healthy root structure.
On day five, Strawberry Pie Auto also received their first ration of nutrients:
- CANNA Coco A (0.5 ml/l),
- CANNA Coco B (0.5 ml/l),
- Plant Magic Magne-Cal + (0.25 ml/l).
The first two are components of a complete nutrient formula that covers the need for all essential elements from seed to harvest. As you may have guessed by its name, this line was specifically designed for coco. This medium can be rather tricky for newbies because you must know what to feed your cannabis and at what doses. With CANNA, all that knowledge is already present in the formula. Just follow the enclosed schedule (and maybe watch how your plants react).
The third member of the trio is a magnesium/calcium supplement. In coco, these two elements get easily depleted, so make sure to pre-treat your medium with them and also add them throughout the life cycle.
C: In Close Quarters from Day 1
Strawberry Pie Auto was germinated along with three other autoflowers using the most basic method of pre-soaking seeds in a glass of dechlorinated water. Having spent only 24 hours there, all seeds cracked and showed tiny (2-3 mm) tap roots.
This was enough for the grower and he planted them into small plastic containers for the first couple of days of their life cycle. He wasn’t sure that every one of them would sprout, but that never worried him because, frankly, even one autoflower would be more than enough for his extremely small tent.
Let’s get ahead of ourselves a bit here. Out of four grow cycles this grower did, some had just one auto in the tent and others — 4 autos, SOG-style. And every 4-plant run yielded more than twice as much as a 1-plant grow.
In the end, all four sprouted, and the first one was Strawberry Pie Auto — after only 48 hours. The grower kept her and the other girls in a homemade 40x40 cm box under a 125W CFL. He left the box open to keep the temperature within the comfortable 26°C (79°F). He also covered the pots with plastic domes to locally raise the humidity.
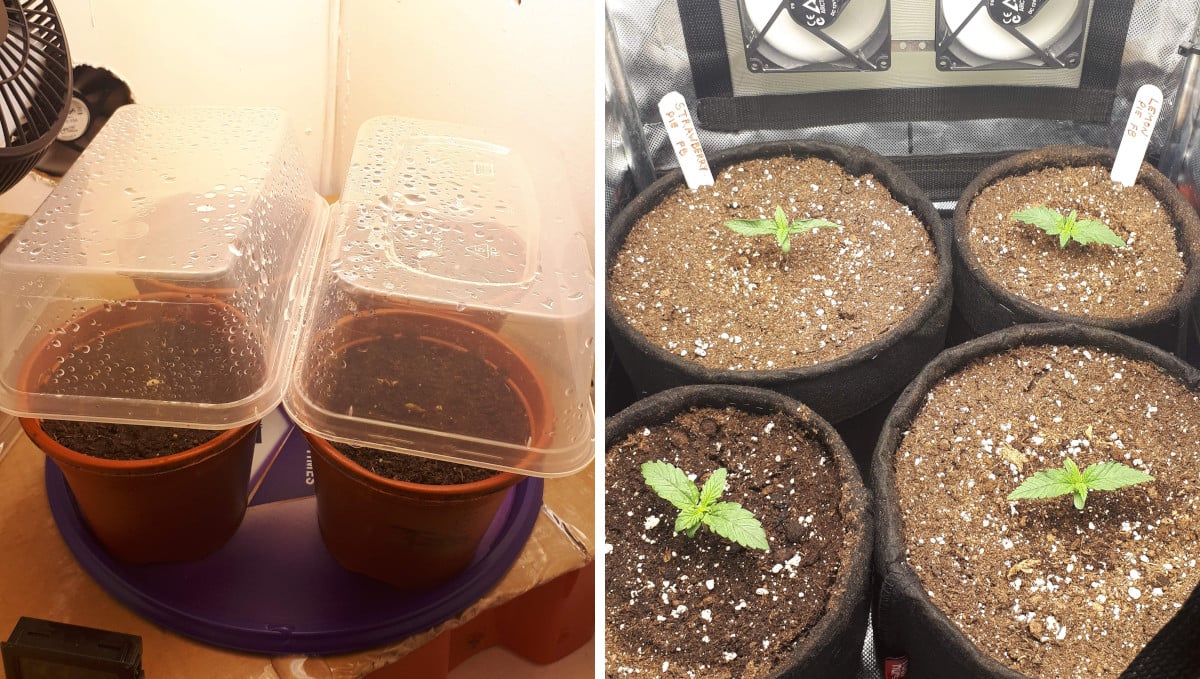
On day 5 from sprouts, all four were transferred into textile growbags. The one with the Strawberry Pie Auto was folded from 8L to 5L, and the grower put a ring of wire in the fold to use it later as the base for LST.
He filled the bags with BioBizz All Mix whose composition includes everything that’s needed for all grow stages, including autoflower flowering stages:
- garden peat (35%) as the base,
- perlite (30%) to create pockets of air for the roots to breathe,
- sphagnum peat moss (20%) for texture and water retention,
- worm humus (10%) as a source of organic nutrients,
- BioBizz Pre-Mix (5%), a potent organic fertilizer.
With a medium like this, all you really need to do is give your plants plain pH-balanced water, but the grower went a bit further: he sprinkled some mycorrhizal fungi before putting root balls in the holes and added 2 ml/L of Voodoo Juice (a root stimulator) into the water. Another important thing that he did was wash the dust cover of his carbon filter because it had gotten dirty during the previous run and thus was reducing the airflow of the fan.
D: A Lucky Afterthought
Strawberry Pie Auto wasn’t initially supposed to be a part of this run, but one of the six seeds the grower germinated didn’t pop, so he replaced it with a SP seed (which strain he had grown before and loved).
All seeds were inserted into Rapid rooters and those placed inside net pots in a DWC cloner. The solution contained not only fresh water but also two organic stimulators:
- Green Eden Endoboost (0.25 tsp/gal),
- SUPERthrive (0.25 tsp/gal).
The former is an endomycorrhizal inoculant, the latter a vitamin solution, and both are supposed to help cannabis develop large and healthy root structure. Some 5 days after sprouts, the seedlings were transplanted into biodegradable 0.5-gal starter bags. These nonwoven bags are very convenient because when the roots are large enough to start growing through the walls, you simply insert the bag into the final container, and the whole procedure is completely stress-free.
For Strawberry Pie Auto, the timeline started a few days later and she had some catching up to do, but she looked healthy and strong.
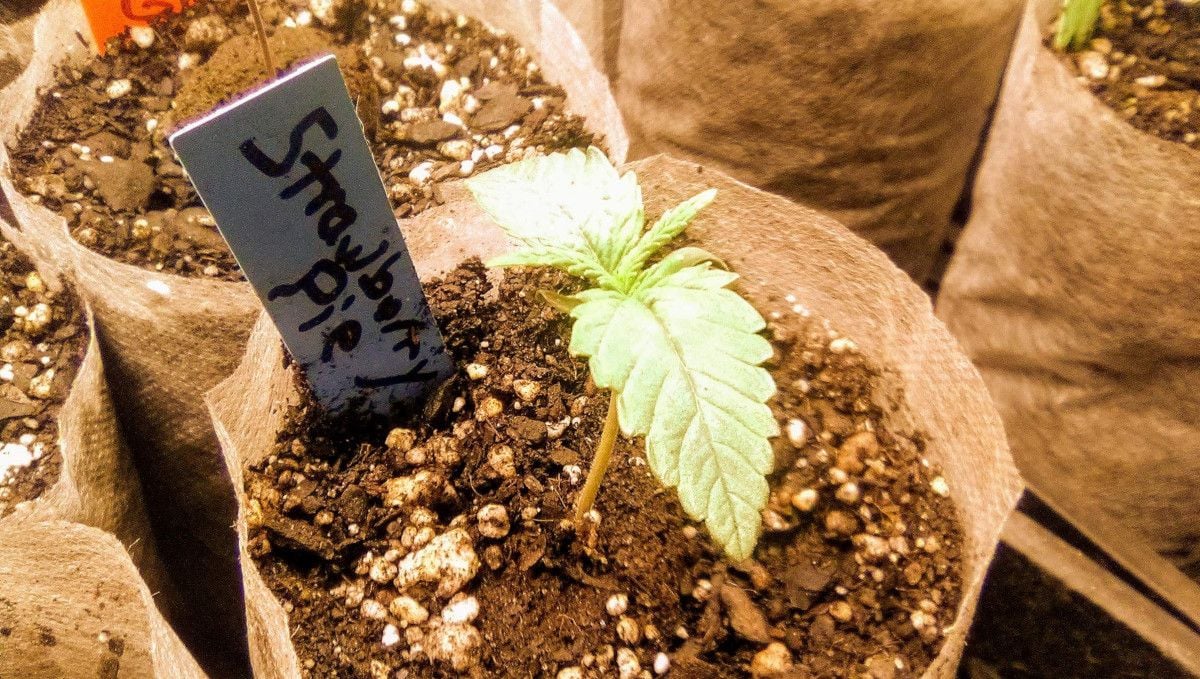
Once in grow bags, the seedlings received an even reacher organic diet which included:
- Microlife Super Seaweed (4 tsp/gal), a natural tonic brimming with minerals, plant hormones, stimulators, vitamins, carbon, and protein,
- Fox Farm Bush Doctor Boomerang (3 tsp/gal), protects roots from the stress of repotting,
- True Plant Science One (8 tsp/gal), a first portion of classical N-P-K nutrients.
Sometimes, the plants received their food with water, other times it was foliar-fed. The grower made sure to mist his babies every time he checked on them.
Interesting thing is that, despite his very advanced cultivation skills, the grower never bothered to measure the PPM of his solution. With organic horticulture, one doesn’t need to. Simply following the instructions on the label is enough. The same can be said of pH.
4. Early Veg | Week 2
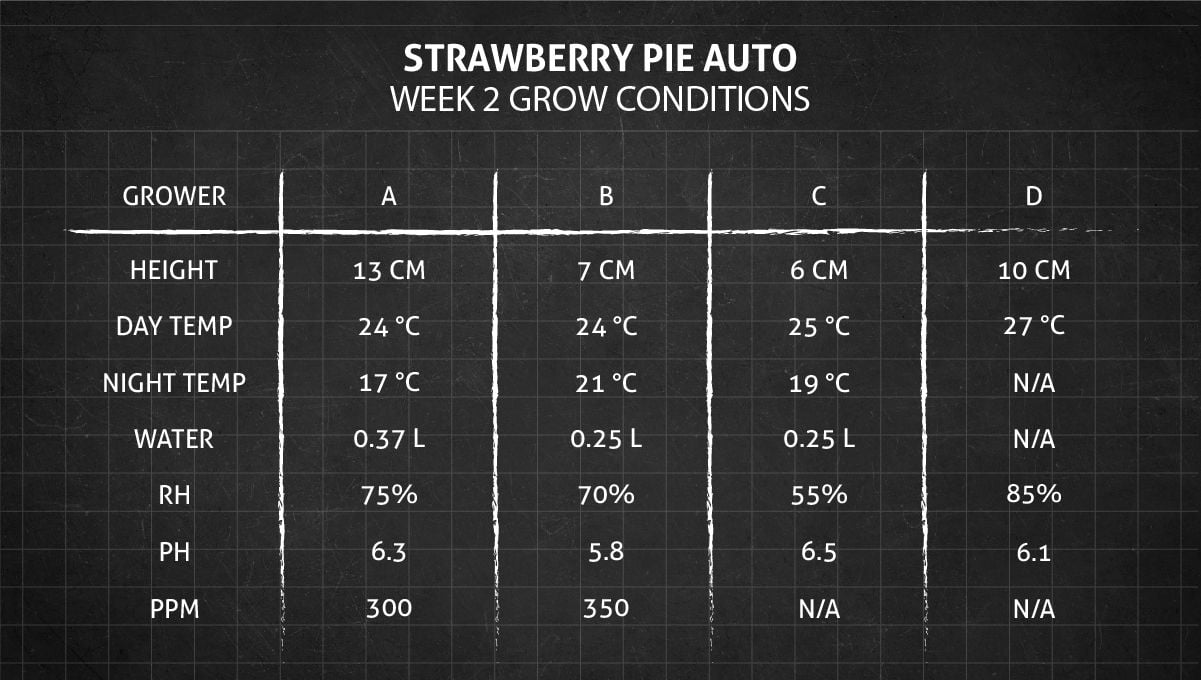
Another chapter in our Strawberry Pie autoflower week-by-week progress was more about setups and environments than the plants themselves. At least three of the four gardeners were tweaking the conditions so that their autos could be in the best possible shape.
A: Almost Too Big for Solo Cups
On week 2, even the smaller of the three babies looked okay for her age, and her neighbors were even bigger and healthier. The grower planned to top the stronger ones after the 6th node, but, at this point in their timeline, they were only developing the 4th node, with small side shoots already visible. They were still in solo cups, although a transplant was imminent.
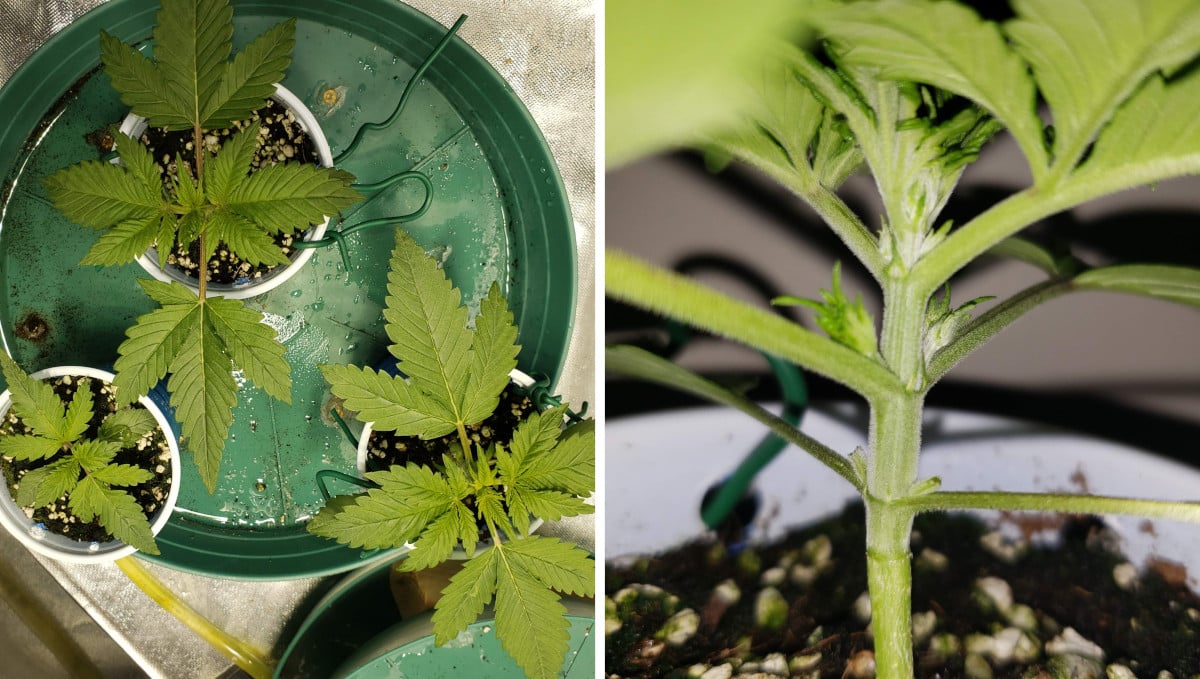
Their diet was the same — CalMag and MaxiGro, only upped to 0.9 EC, or 450 TDS.
B: A Slow Start
During the second week, all the six girls looked just about average for their age. The grower thought that he probably dialed down his LEDs too much. He was probably right about that because the temperature, the humidity, the nutrient levels were all fine, but the plants looked as if they were missing something essential.
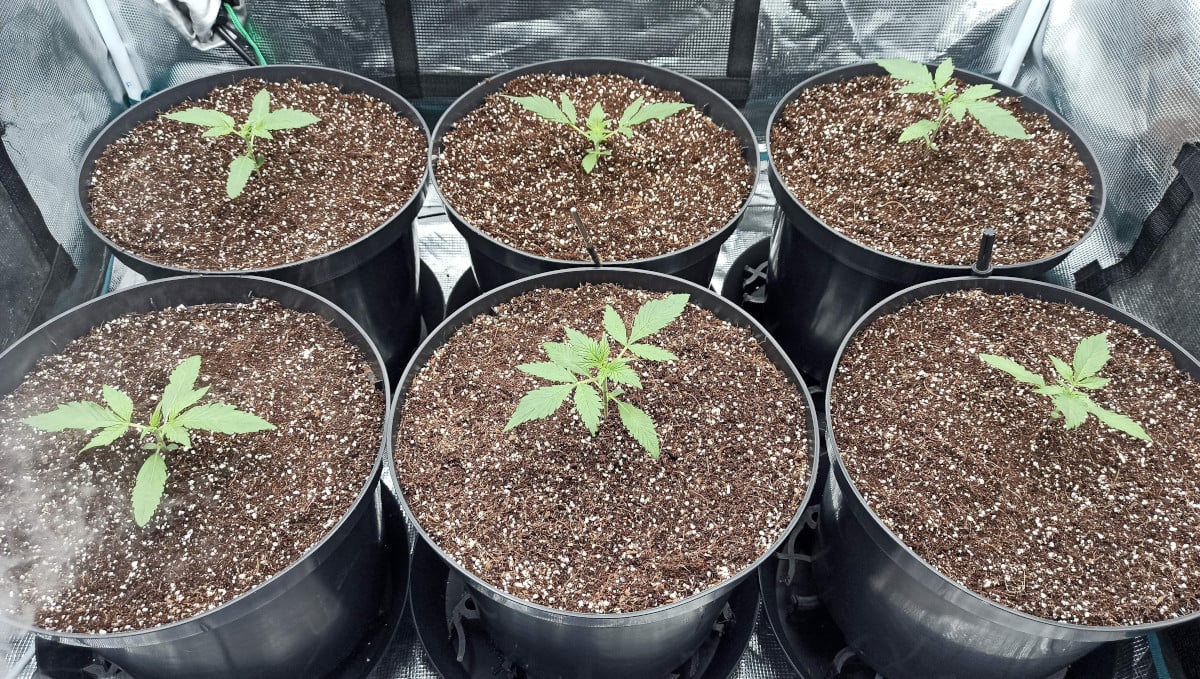
The grower wished he had a PAR-meter (which measures the light intensity not across the whole spectrum, but only the important part — the photosynthetically active radiation). He did the second best thing: used a lux meter and then increased the flow from 14k lux to 20k lux.
C: Which Way the Wind Blows
By the end of week 2, the garden was in excellent shape — compact plants with healthy foliage and great side development. Only Strawberry Pie’s leaves looked deformed.
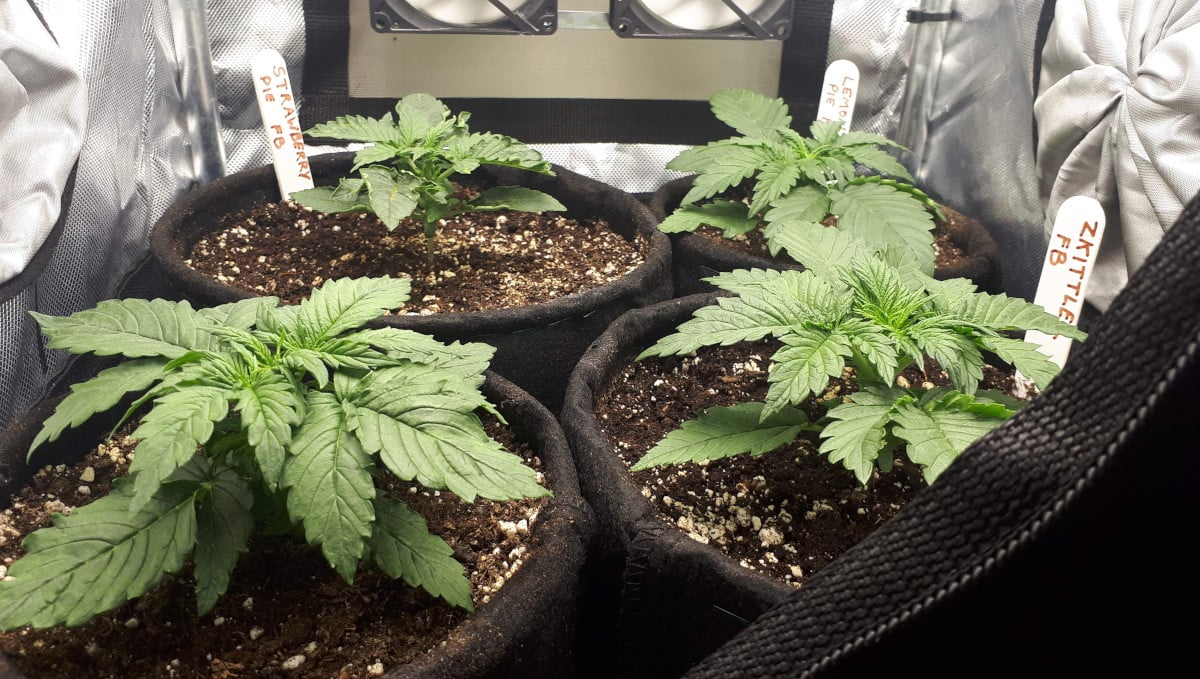
It may have been her reaction to the intake fan that was blowing directly on her. However, the grower considered other possible causes, such as too much light or some bizarre nutrient deficiency. So he turned down the light intensity from 65% to 50% and gave this particular plant some Cal Mag and Revive (which is another Calcium/Magnesium supplement with a little Nitrogen to boot).
Whatever the issue was, it didn’t prevent this particular Strawberry Pie Auto from producing the prettiest buds in this little garden come harvest time. Early leaf mutations are something that’s best ignored because the final result can still be amazing.
D: Optimizing the Ventilation
Week 2 was dedicated to solving the issues of ventilation which we mentioned when talking about Grower D’s setup. After he had installed a small booster fan, extracting excessive heat from the tent got easier. Now that only some of the lights were running, the temperature stayed under 80°F (26.5°C). A quite comfortable level, especially during the seedling stage. Later in the timeline, in mid and late flowering, it would be preferable to have cooler temps, but all three LEDs would be running and generate more heat. However, the grower believed the winter temps would help. So everything looked promising.
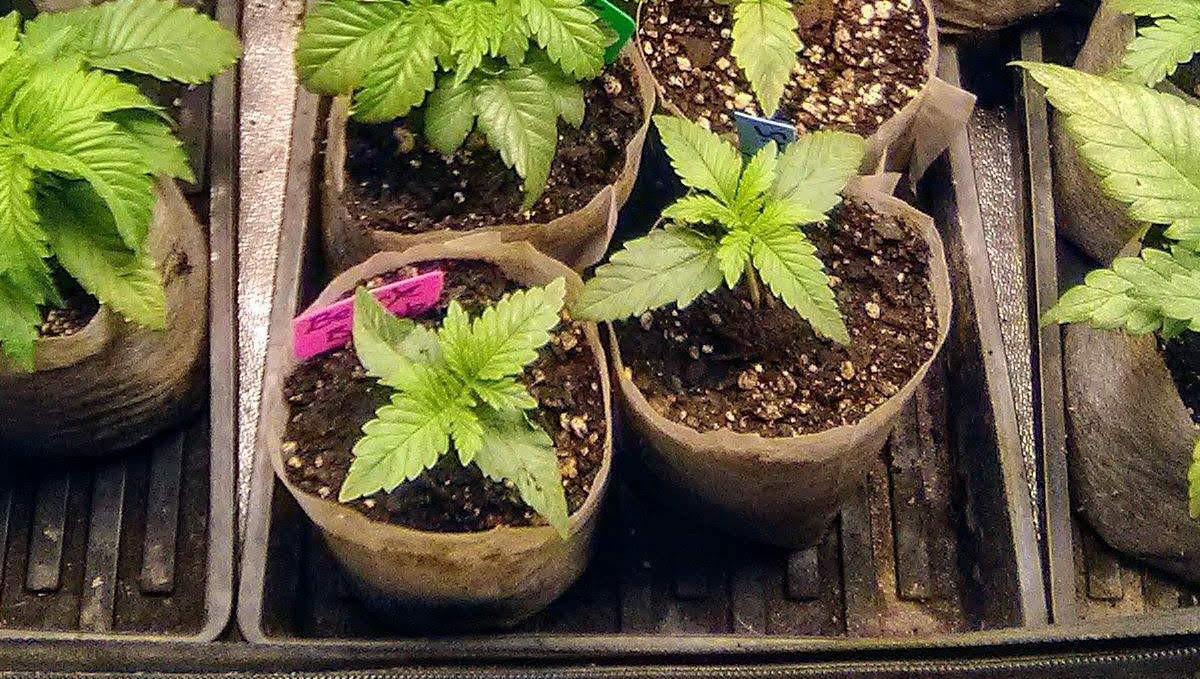
In the second week, Strawberry Pie Auto (which, as you may remember, was germinated as an afterthought) was still smaller than the rest of the bunch. One of her neighbors had even shown sex. Nevertheless, SP was a vibrant-looking little number, with big healthy leaves.
5. Mid Veg | Weeks 3-4
In this last period before cannabis flowering stages begin, the gardeners went through all those potentially stressful procedures such as re-potting, topping, and pruning. This is also the time to start feeding weed a serious amount of nutrients to give it a boost before it enters the pre-flowering stage.
A: Transplanting — Not a Day Too Soon
This part of the vegetative phase started with a transplant into final containers. It was really a high time to do this because—as you can clearly see in the picture below—the roots at the bottom had already started to form a mat. This signals the beginning of the ‘rootbound’ condition.
Rootbound is something to avoid when growing autoflowers because this type of weed often reacts to the restricted pot size by promptly switching to flowering. After a short initial flowering stretch, plants stop growing and remain small, with fewer bud sites.
The bottom line: if you want bigger yields, give your cannabis roots plenty of space.
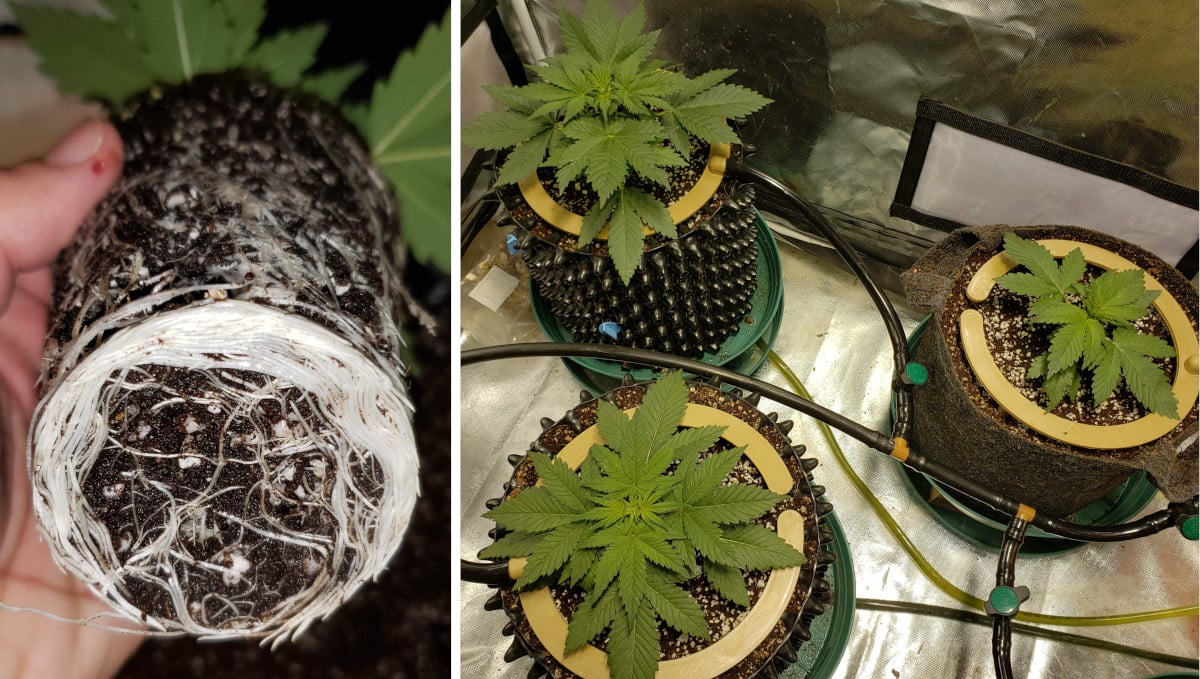
The smaller of Strawberry Pies went into a nonwoven fabric pot, the bigger two were put into 3.8-gal Air Pots (which are made of plastic, but have a lot of holes in the walls). Both types of containers are great for cultivating cannabis because they allow roots to breathe and also air-prune them when they reach the walls. So, instead of older roots circling around and getting longer and longer, new roots develop all the time and evenly fill the medium.
As you can see in the picture above, the plants weren’t hand-watered anymore. Instead, they received the nutrient solution through an automatic drip system. Please note the halo drippers (yellow rings).
While a more traditional drip emitter provides only one point of irrigation per container, a halo dripper ring has dozens of small pores. This distributes the water evenly across the whole surface. Even in this case you’ll have to hand-water now and then (to make sure there are no dry pockets), but not so often as with regular drip emitters.
The topping took place on day 21, but involved only two bigger girls. The third one was left alone. Well, not quite because all three were LSTed to further stimulate the side growth and to keep the height in check.
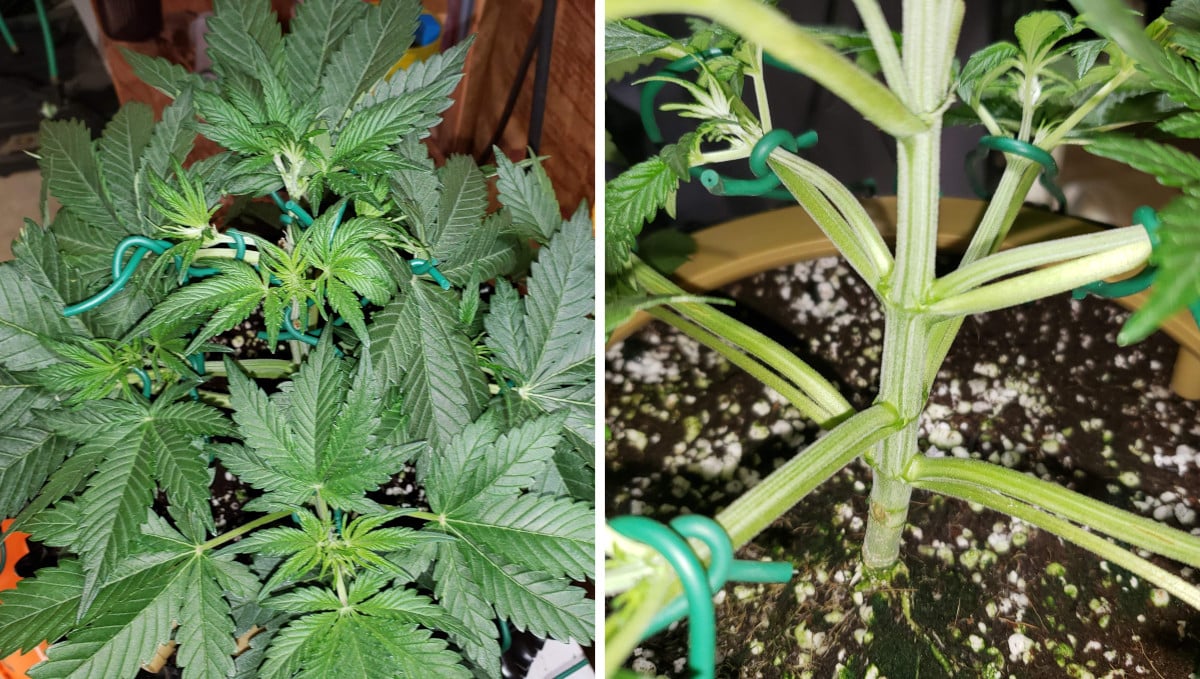
The grower never bent the main stalk but spread and fixed the side branches horizontally. By the end of week 4, the girls were no taller than 9 inches (23 cm).
B: A Welcome Change of Pace
During the third and the fourth weeks, all six ladies finally picked up the pace. One of the reasons might probably have been the Exhale CO2 bag (you can see it in the bottom-right corner of the pic below). Or not. Some people who use these bags and also have a CO2 meter say it never registers a difference. So the jury’s still out.
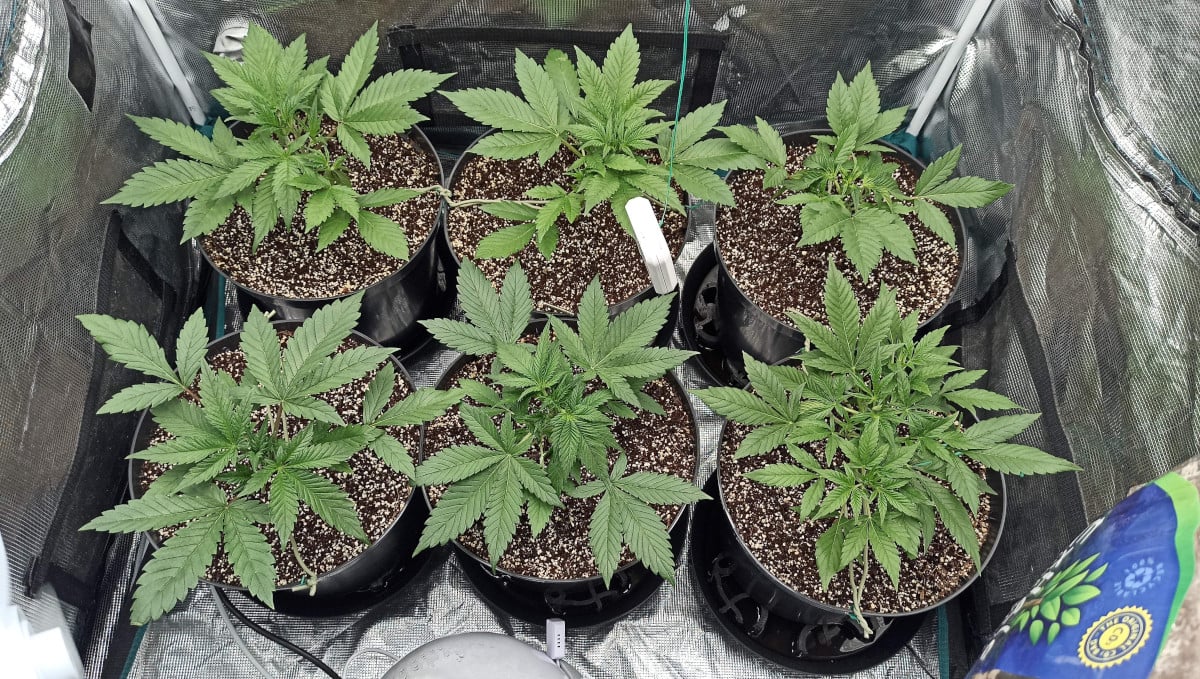
The grower also bought something much more valuable — a PAR-meter, so that he could now measure light intensity at canopy level and dial in his LEDs with more precision. It seemed to him that 400 PAR and later 460 PAR were about just right.
All six plants were now large enough for some canopy management. First, the gardener pruned the bottom pair of nodes to redirect energy to the tops. Then he started with LST. Nothing too fancy, just bending and tying down the main stalk to stimulate the side growth.
C: Two Weeks of High- and Low-Stress Training
On week 3, the grower started the HST season. He topped 3 bigger plants on day 16 and Strawberry Pie a day later. The subject of topping autoflowers is still a controversial one, but in this tiny garden this high-stress training technique was probably a must. It’s much more preferable to get tiny autoflowers than let them grow out of control. Three days later, when the little plant recovered from stress, it was time for heavy defoliation, and at the end of week 3 the tying down began.
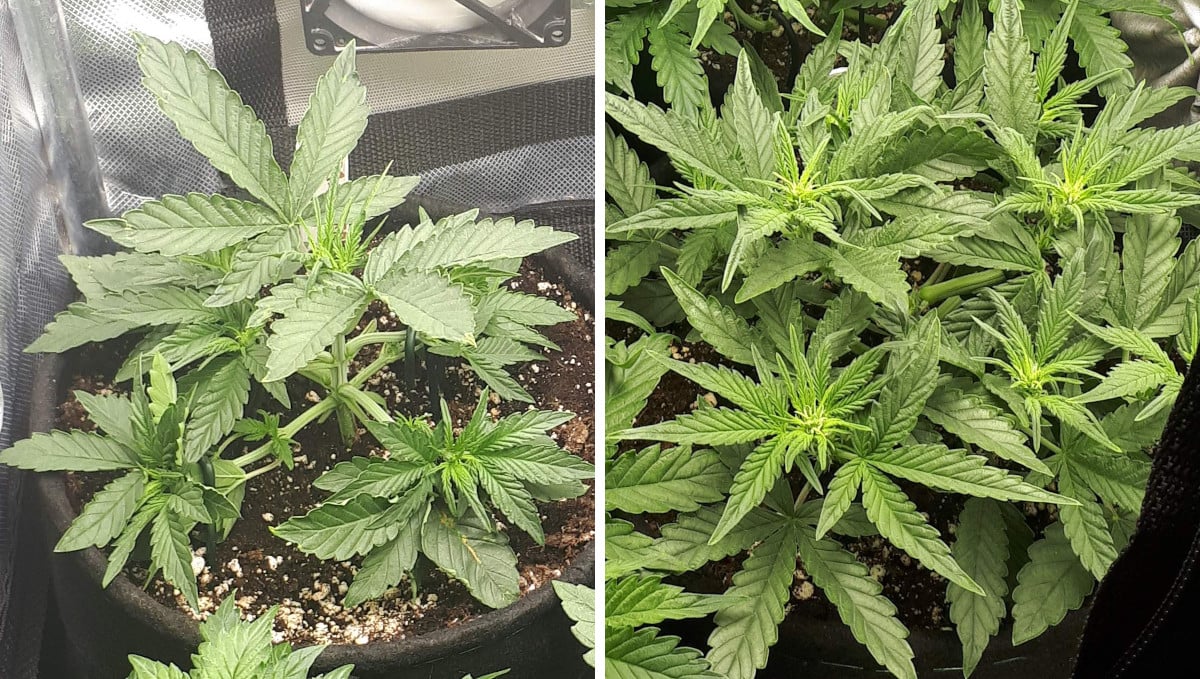
The timing for all this was perfect, because on week 4 most plants in the tent, including the Strawberry Pie Auto, started to flower and either began the stretch or were about to do so. The grower was slowly increasing the light intensity — going from 65% (week 3) to 75% (week 4) and planning to reach 100% at the peak of the flowering stage.
The grower also started with nutrients, and we suggest having a closer look now at his feeding schedule:
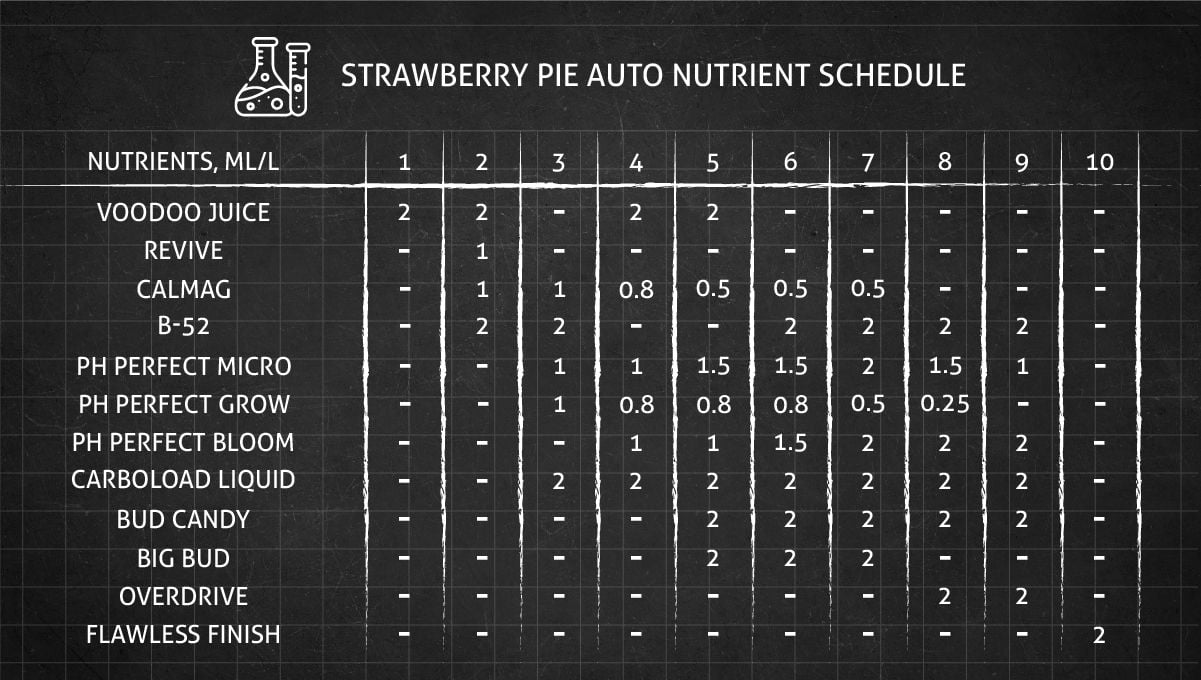
The staple of this diet were three pH Perfect products which are the source of main nutrients (N-P-K) as well as secondary macronutrients and all the microelements.
Other supplements are optional but can help cannabis with the following:
- increase cell replication and stimulate roots and stems (B-52),
- provide sugar to microorganisms in the root zone (CarboLoad Liquid),
- make buds sweet, fat, and strong (Bud Candy),
- create larger, denser, and tastier flowers (Big Bud),
- boost bud formation in late flower (OverDrive),
- flush built-up salts before the harvest (Flawless Finish).
By the way, the gardener alternated between giving his plants plain water and feed, and he always kept pH at 6.5.
D: A Compact and Dense Little Bush
On week 3, the grower transferred biodegradable bags into the final 2-gal textile bags. This also was the time for the serious feeding to begin. The plants received more of what they got in the previous weeks plus the following:
- Fox Farm Open Sesame, a non-organic NPK formula with raised levels of phosphorus and potassium and the whole range of micronutrients,
- True Plant Science CalMag Complete, despite its name also has a lot of nitrogen for vigorous vegetative growth,
- True Plant Science Silica Gold, a complex with organosilicate and amino acid extractives for better flower formation.
All this looks more like something that’s needed during cannabis flowering stages, although Strawberry Pie Auto—being the youngest in the garden—was still in her vegetative phase.
Besides fertigating his autoflowers in a normal way, the grower foliar fed them with the following supplements:
- Rx Green Technologies AXIOM Harpin Proteins, a supplementary boost to increase plants’ natural defenses,
- Bio Tabs Boom Boom Spray, a rich dose of organic nitrogen with amino acids, peptides, and glucosides; makes cannabis resistant to all kinds of stresses.
An interesting thing the gardener did was turn down the light and shut off the air circulation right after a foliar spray — to let the nutrients soak in “nice and slow”, not just evaporate quickly and leave a whitish residue on the leaves.
6. Transition (Pre-Flower) | Week 5
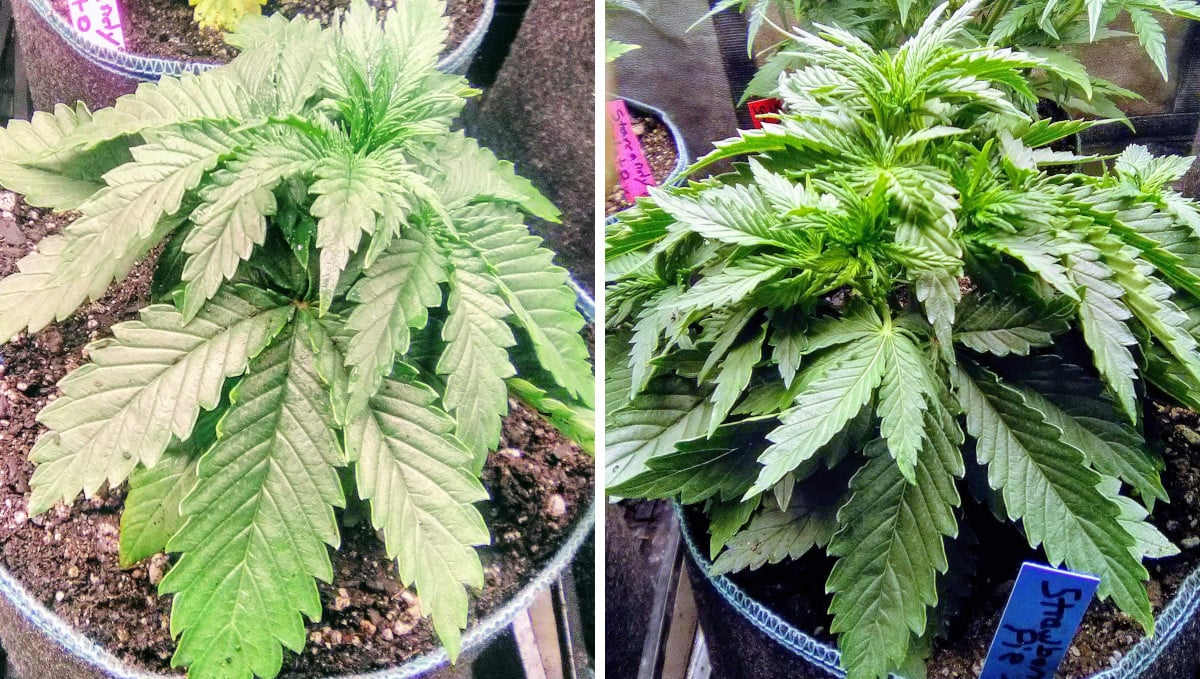
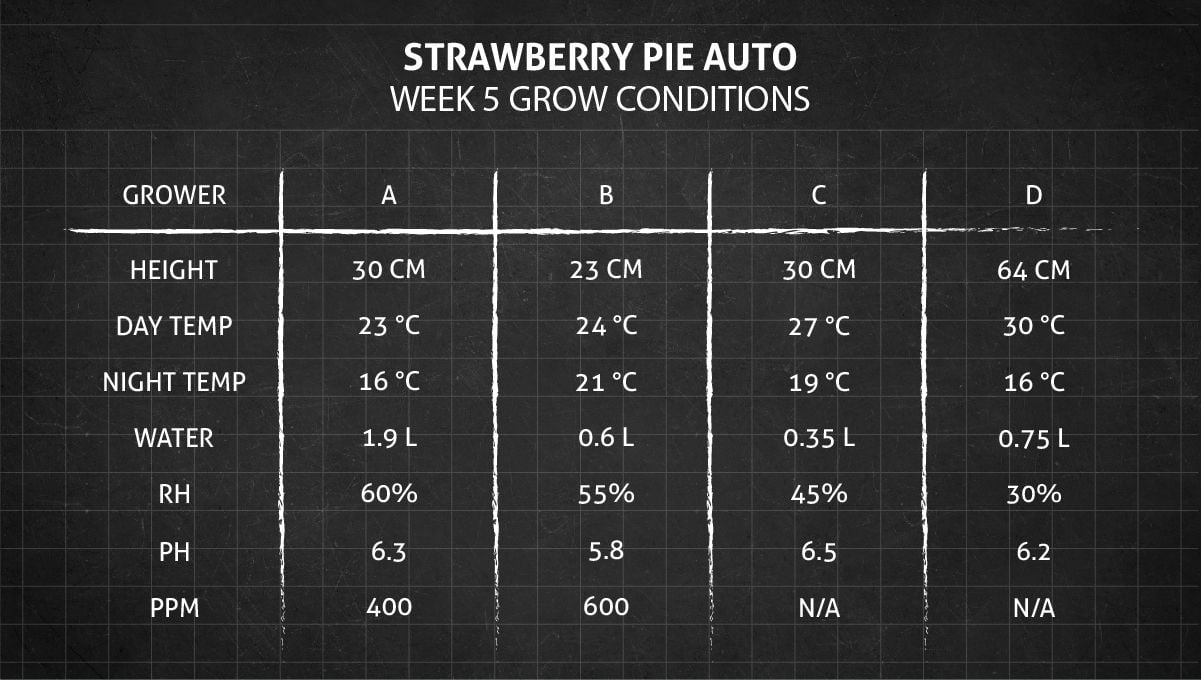
Strawberry Pie Auto is a very fast variety, as evidenced by the fact that in two out of four gardens she was already flowering in week 5. In the other two, she showed sex—female pistils (hairs) in the internodes—meaning that at the very least she has entered the pre-flowering stage.
A: Facilitating the Light Penetration
Although the plants weren’t too leafy to begin with, the grower made sure that the canopy wasn’t too dense for the light to reach every bud site. And if some bud site was shadowed anyway, he simply removed it.
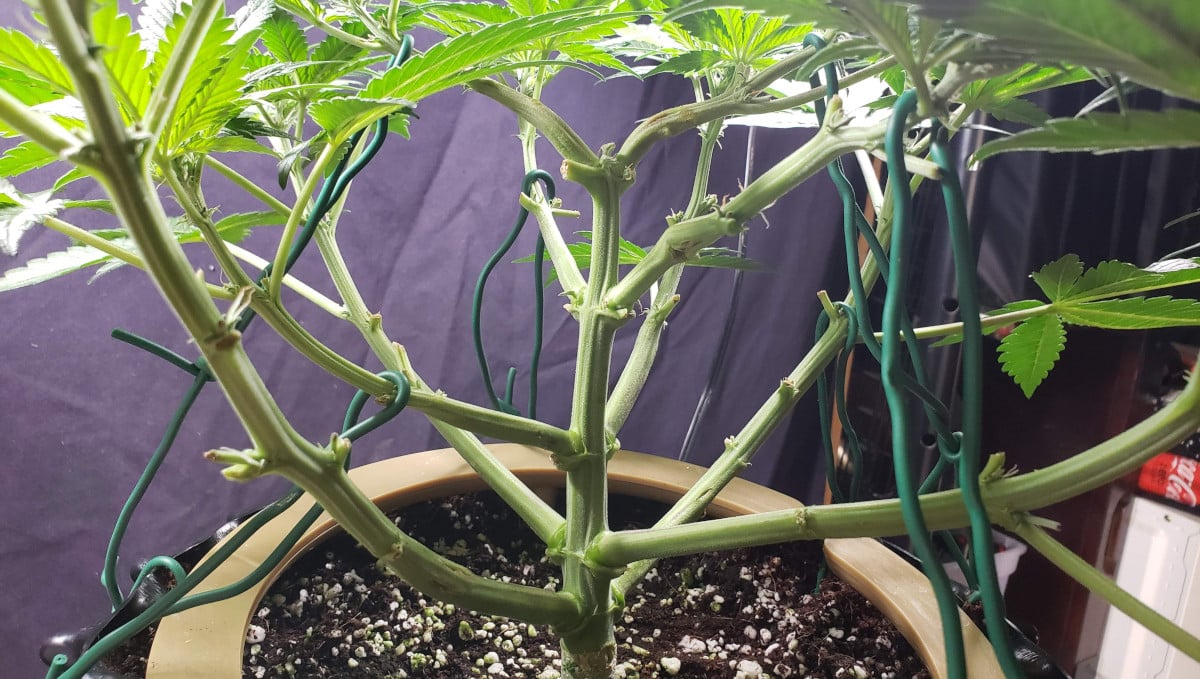
This technique is called lollipopping and is a good way to direct more energy to the topmost buds (where it matters). Buds that are too low or don’t receive enough light are going to be larf (popcorn buds) anyway. Please note that the plant in the picture above has only 5 pairs of branches (5 nodes). That’s because she has been topped above the 6th node and the bottom pair pruned.
All three Strawberry Pie Autos now had white female hairs visible at every node. However, the grower considered this to still be a part of the vegetatve phase and was feeding his girls the same diet of CalMag and MaxiGro — at 0.25 and 0.5 tsp/gal respectively.
B: Spreading Out
By week 5, the six Strawberry Pie Autos had already a lot of girth. If they had been standing in two compact neat rows before, now the grower began to move them away from each other. He further stimulated their side growth with more LST and also did some light defoliation to make the canopy less dense.
All six showed first white hairs, meaning that they had entered the pre-flowering stage. And the timely introduction of CANNABOOST Accelerator was meant to speed up the process of flowering. This metabolism-enhancing supplement wasn’t the only change in the diet, so let’s have a closer look at what other nutrients and stimulators were used. Not just on week 5, but from seed to harvest:
- CANNAZYM — enzymes that break down dead roots and help plants with nutrient uptake.
- Advanced Nutrients Rhino Skin — a rich source of potassium (K) to toughen up cell walls and make branches stronger.
- CANNA PK 13/14 — this one will be introduced during the flowering stage. It’s rich in phosphorus (P) and potassium (K) both of which are absolutely essential for the formation of flowers. This nutrient works great with CANNABOOST Accelerator because the latter boosts metabolism and the raised levels of both P and K get fully processed by the plant.
And below you can see the complete feeding chart. Please note how relatively simple (yet very effective) it is.
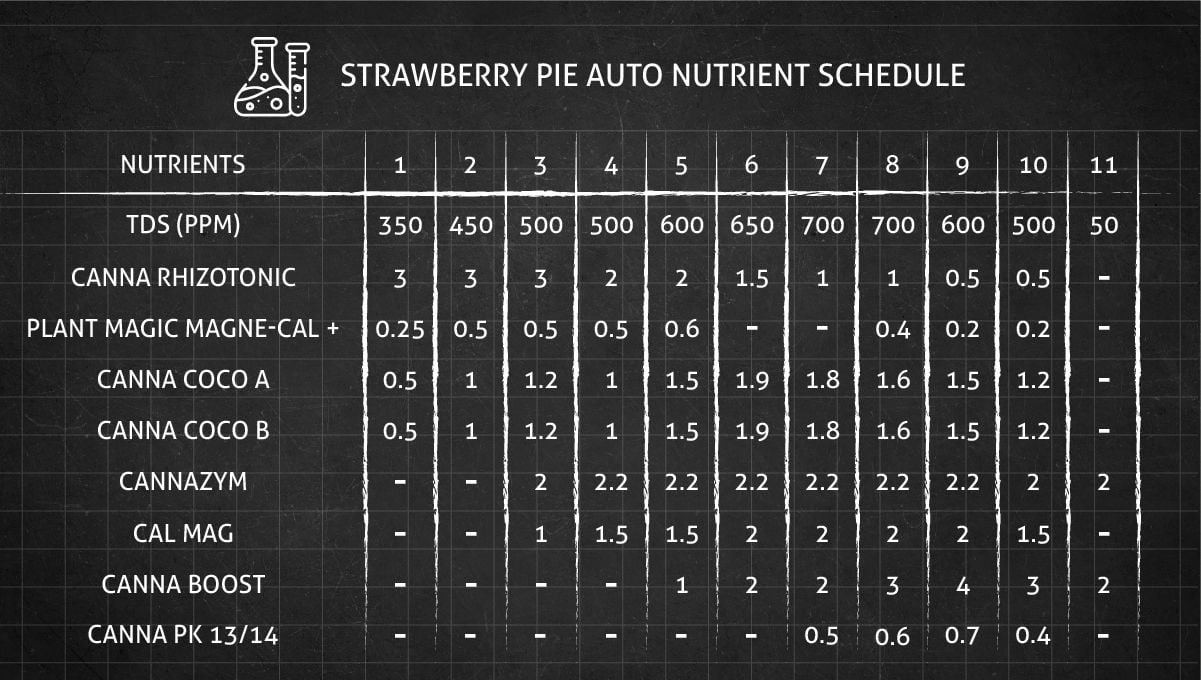
As you can see from the table above, the grower never went beyond 700 PPM (1.4 EC) because to him Strawberry Pie Auto seemed like a modest feeder. But he kept increasing the intensity of light (photosynthetically active radiation)—to 560 PPFD by the end of the vegetative phase and all the way to 700 PPFD for the flowering stage.
C: Pistils and First Trichs
Believe it or not, but the fifth week from seed was also the second week of flowering for this Strawberry Pie Auto. She had a lot of white pistils on every top and also a barely visible layer of trichomes on ‘sugar’ leaves. The stretch wasn’t yet very pronounced, but it was underway, too.
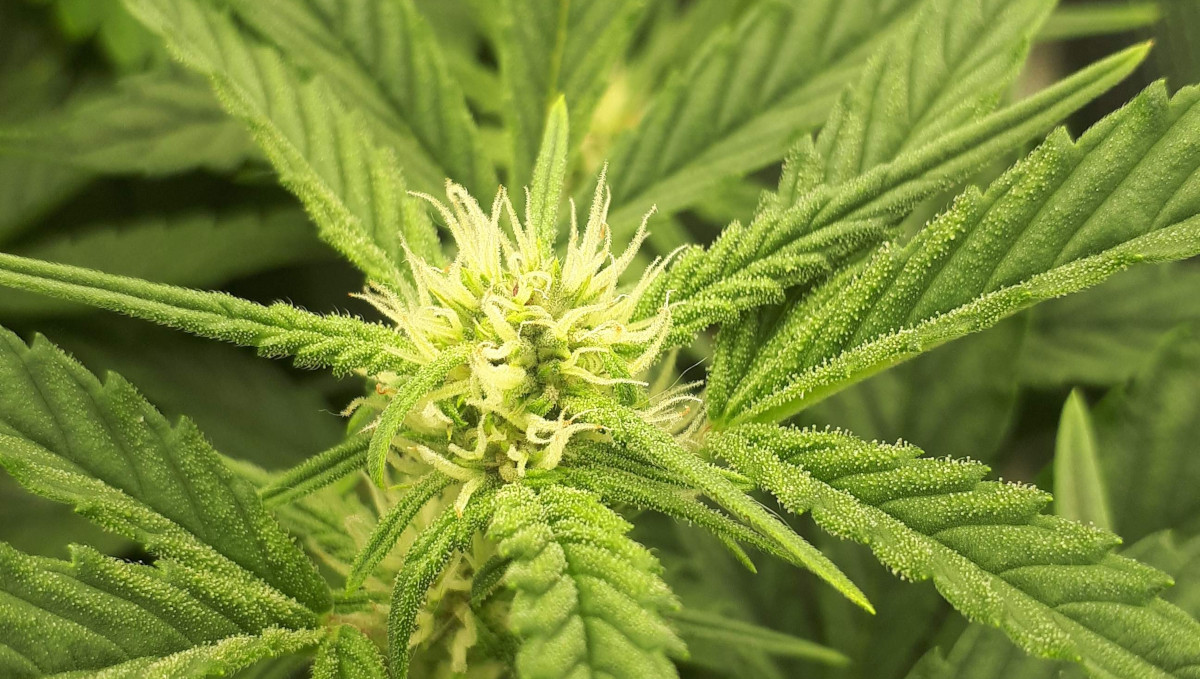
The reason everything was happening so early for this baby was probably the use of a very small growbag (only 5 liters). When the roots of an autoflower have very little medium to work with, they send a signal upstairs to quicken the life cycle. The grower didn’t do much except defoliate a bit to let more light and air into the canopy and adjust the ties on some of the branches to make the spacing between them more even.
D: Fully Transitioned to Flowering
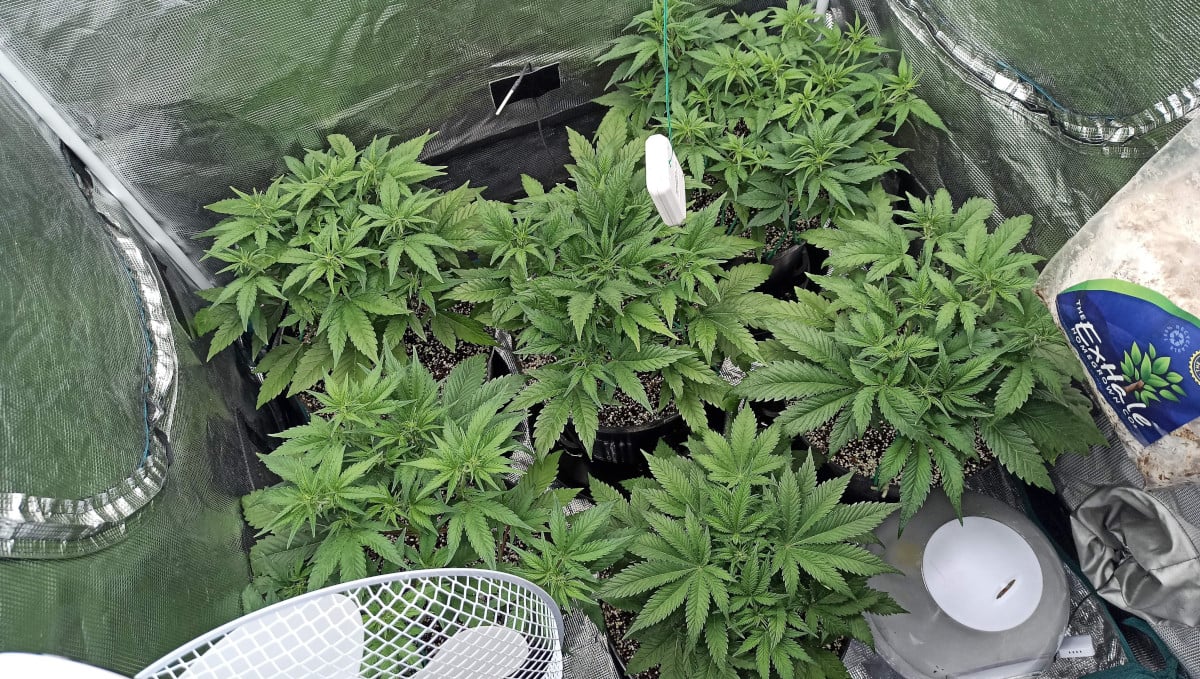
This particular horticulturist chose to neither train nor defoliate his autoflowers. You can see the result in the picture below - the six girls filled out the tent completely by week 5. Even the latecomer to the party, Strawberry Pie Auto, has begun to flower by this time.
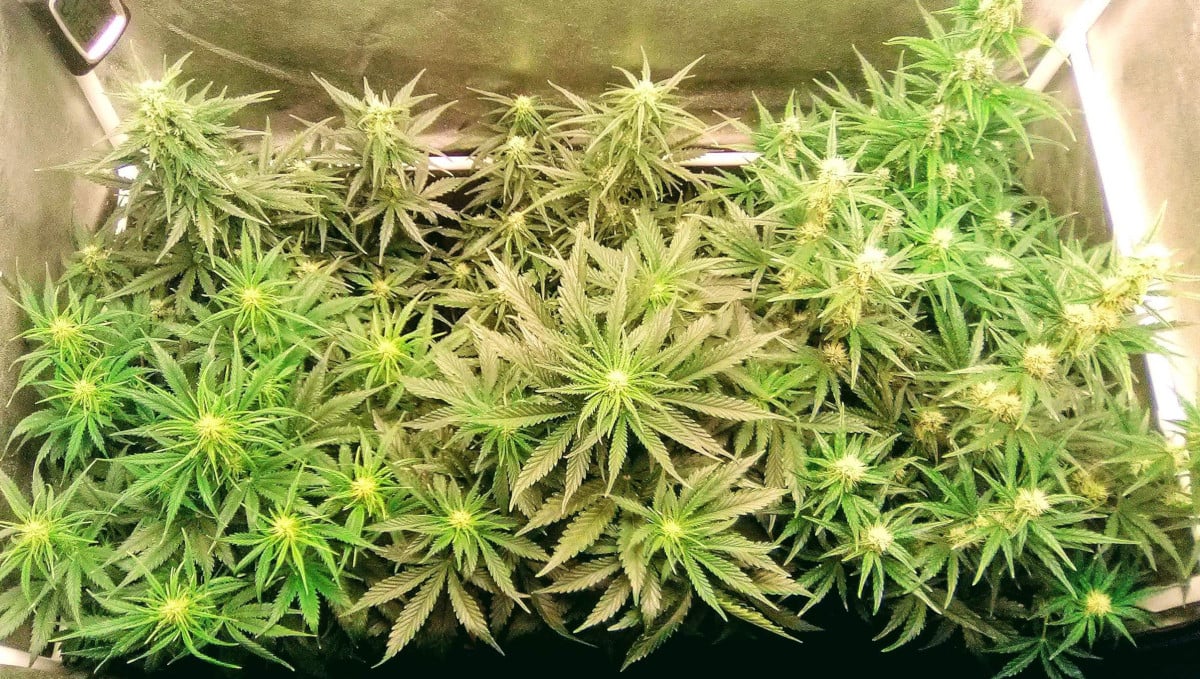
The grower tried to regulate the level of the canopy (and the stretch) by using platforms to raise a particular plant, but, other than that and occasional feeding, he did nothing much.
7. Early Flower | Weeks 6-7
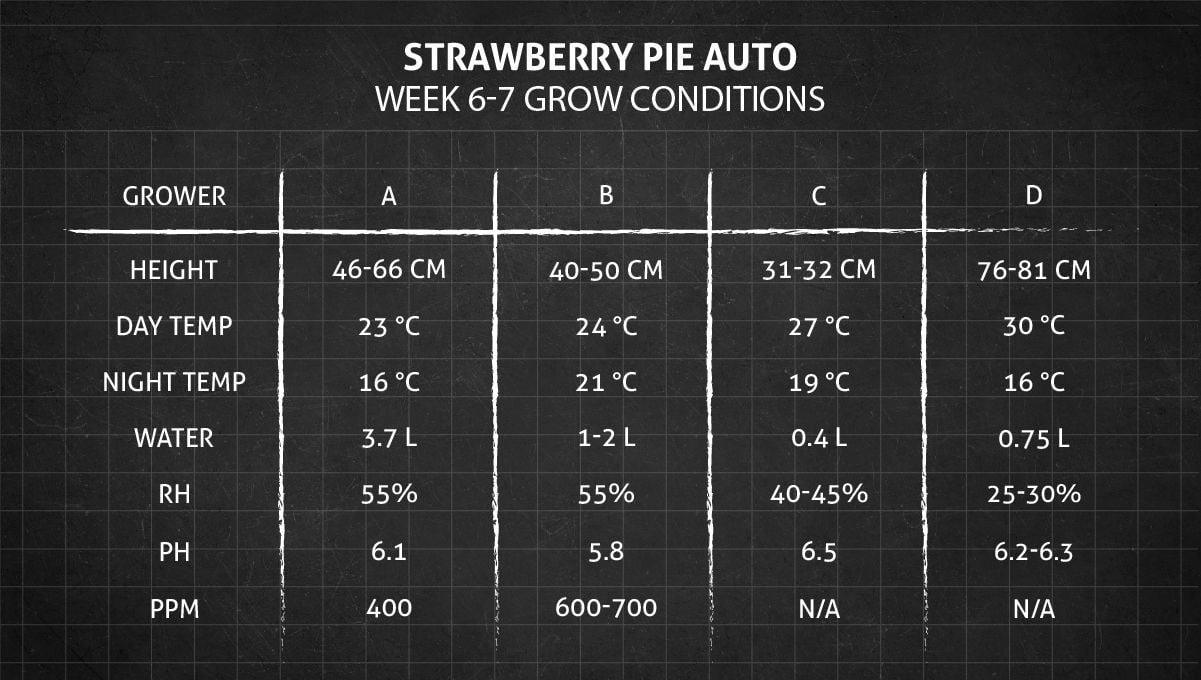
At this point of Strawberry Pie Auto’s progress from seed to harvest, the main thing that was happening to the plants was stretching. However, it didn’t affect all of them equally—some stayed comfortably compact and bushy.
A: Shivering from Cold
For some reason, week 6 was still marked as ‘veg’ in the diary. But you can clearly see small fluffy ‘kittens’ at every top. This is a clear sign that the budding phase is well underway.
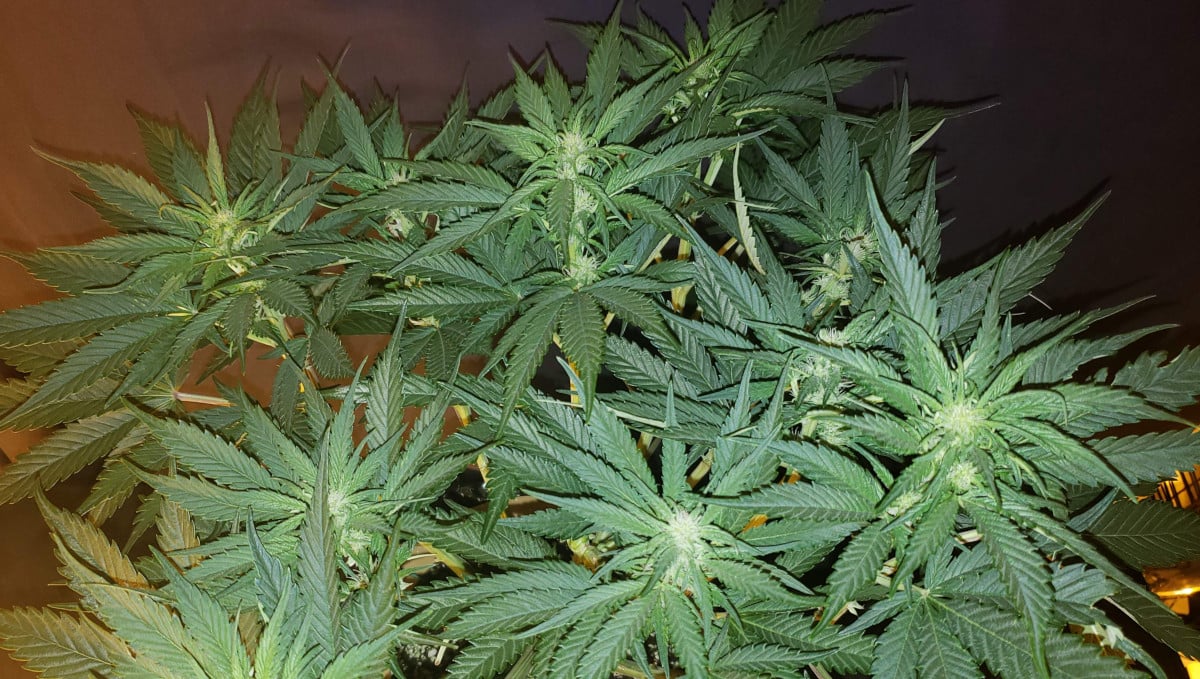
Nevertheless, the grower still continued with a nitrogen-rich diet and was planning to switch to flowering nutrients only at the end of week 6. At the same time, he noted that the stretch was now over (or so he thought). This puzzled him because the plants’ height was under 18 inches (46 cm) and they were supposed to grow as tall as 39 inches (100 cm).
He wondered if he had somehow stunted them. The truth is they were probably just too cold all the time. Remember that a heater was only used during the seedling stage. So the night temperature dropped as low as 60°F (16°C) while day temps steadily declined and, by this time, were down to 72-74°F (22-23°C). That’s a bit too low for cannabis, and the girls really didn’t look particularly lush.
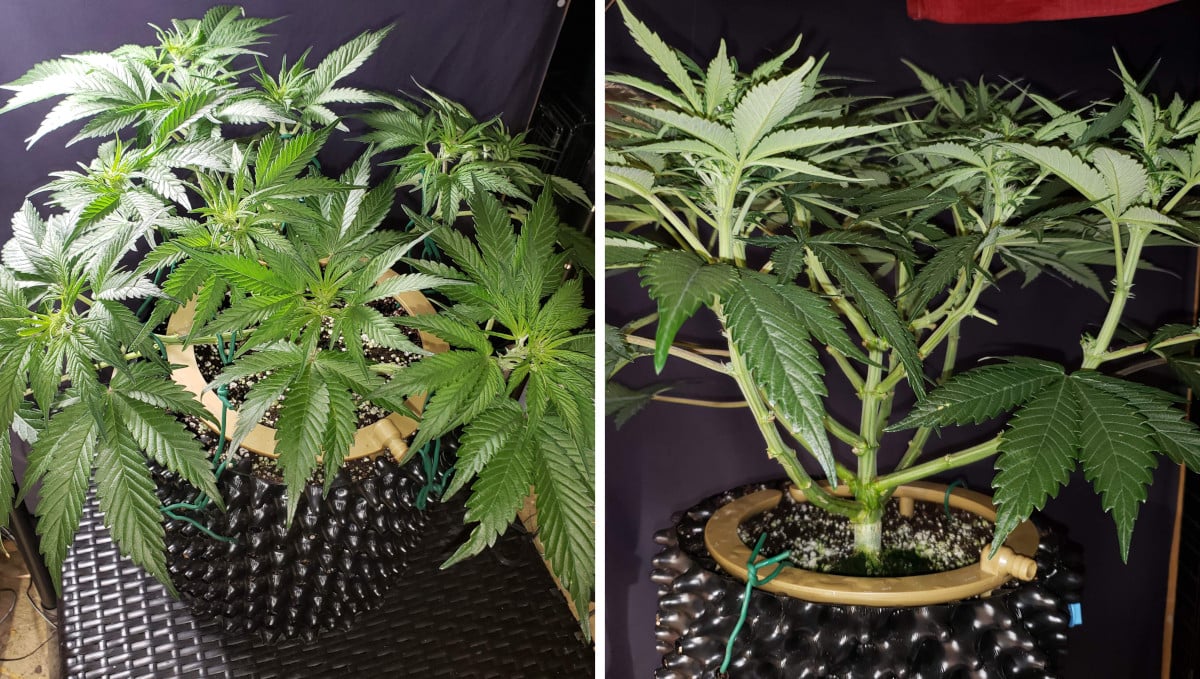
Be it as it may, the girls had still a lot of growth potential which they showed on week 7. They promptly gained another 8 inches (20 cm) and the formation of flower clusters went on full steam.
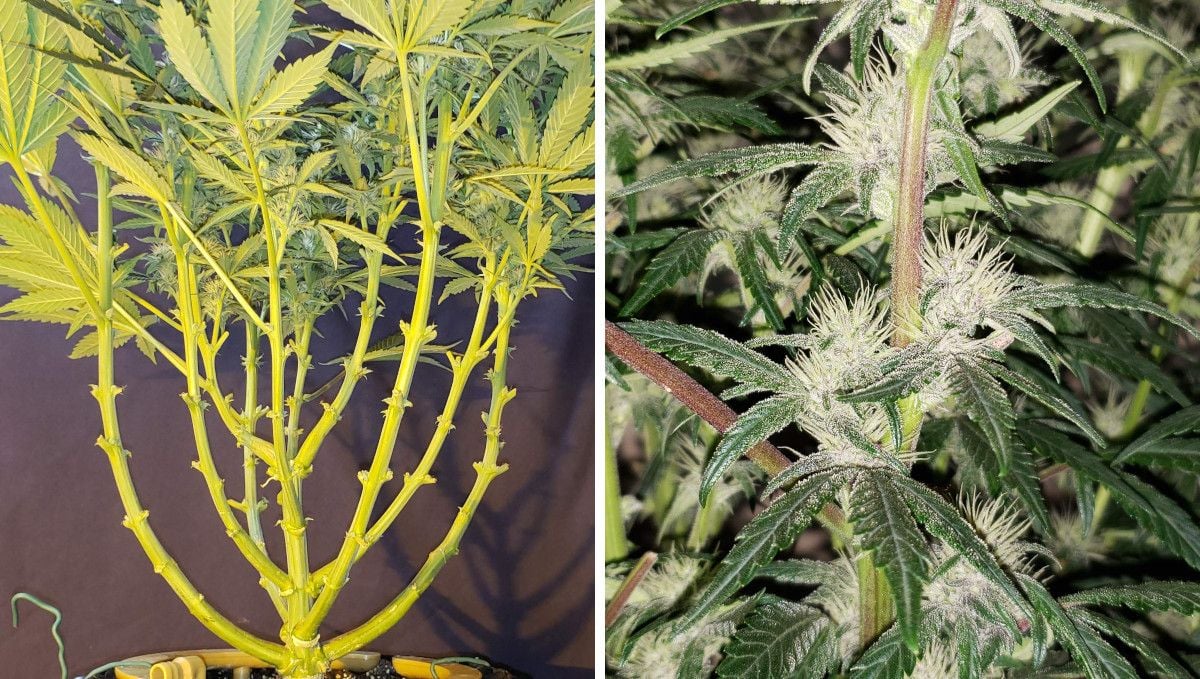
By this time the grower not only changed from MaxiGro to MaxiBloom (with much more potassium and phosphorus), but also replaced the 400W MH lamp with a 600W HPS. HPS has more red in the spectrum which facilitates the development of flowers, and the additional wattage also helps because autoflower flowering stages require much more energy.
B: A Lot of Breathing Room
The six Strawberry Pie autoflowers in this garden stretched considerably on weeks 6 and 7, and the grower took this opportunity to prune all lower fan leaves and bud sites that were now too far away from the light to amount to anything good.
This defoliation/lollipopping made the vegetation look rather scant, and the guy even thought he’d overdone it. At least, it seemed to him that buds were bulking up not fast enough, probably because the girls spent extra energy on recovery.
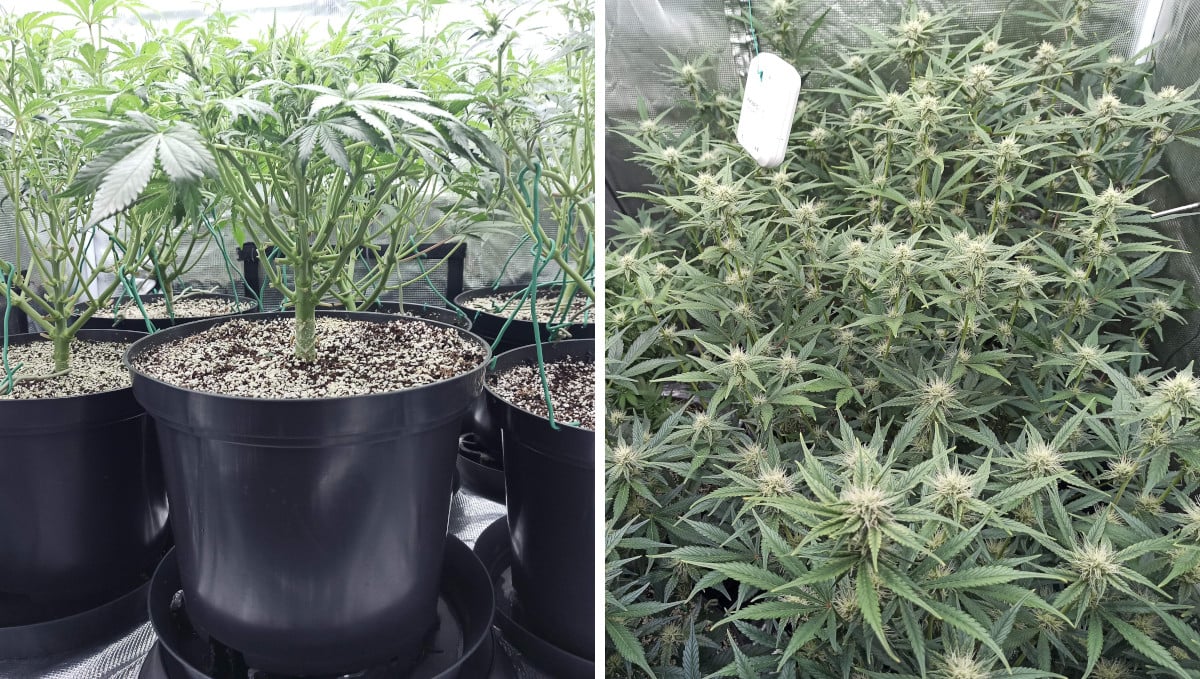
Nevertheless, he described Strawberry Pie Auto as a hardy variety that handled stress well and usually bounced back from training the very next day.
C: The Stretch is Finished
Now, 3 and 4 weeks into flowering, the Strawberry Pie Auto was as frosty as some strains are at harvest. It certainly had more trichomes than her peers although they were the same age. The smell was also getting very strong but was more like gas than strawberries. The grower removed a few leaves and re-adjusted the LST ties. However, the stretch was basically over, so the bush assumed its final shape and the only change moving forward would be the fattening of the buds.
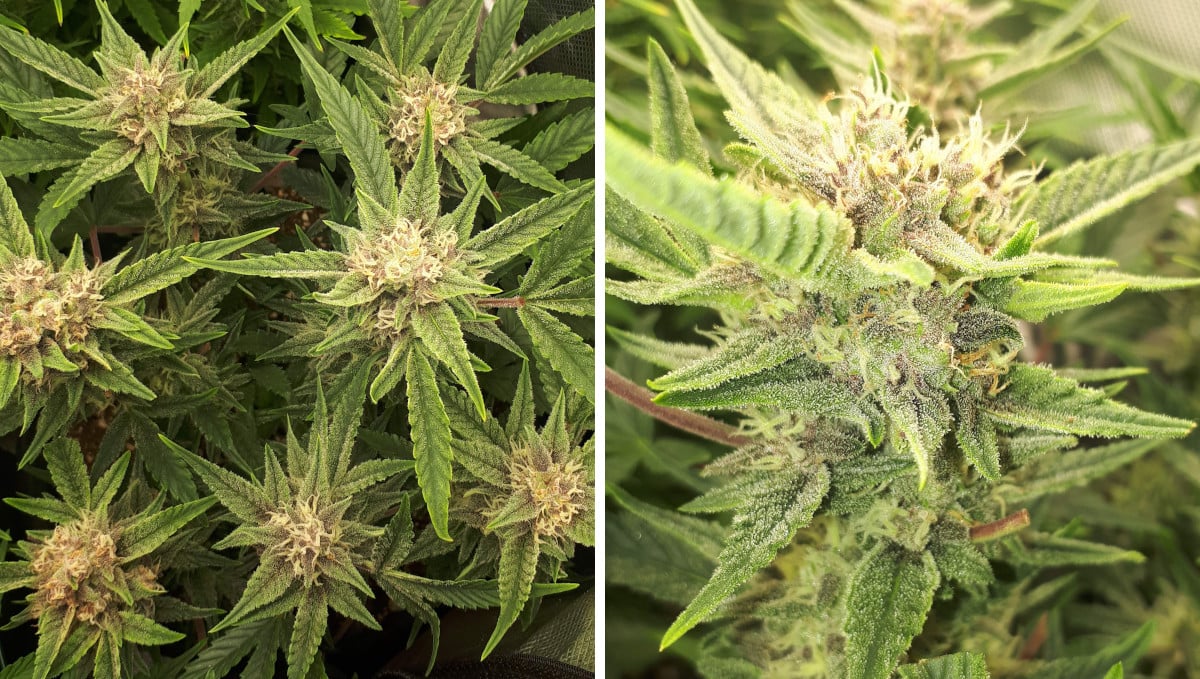
All the plants in the tent were of different heights, and the grower used takeaway tubs to even out the canopy. It was important because his light wasn’t very strong and consistency could only be achieved if every cola was at the same distance from it.
D: Untouched and Untrained
Now, 4 weeks into flowering, Strawberry Pie Auto remained a short and squat little bush, with highly developed side branches and a central cola that was still dominating the others but not by much. The buds and sugar leaves were frosting up already.
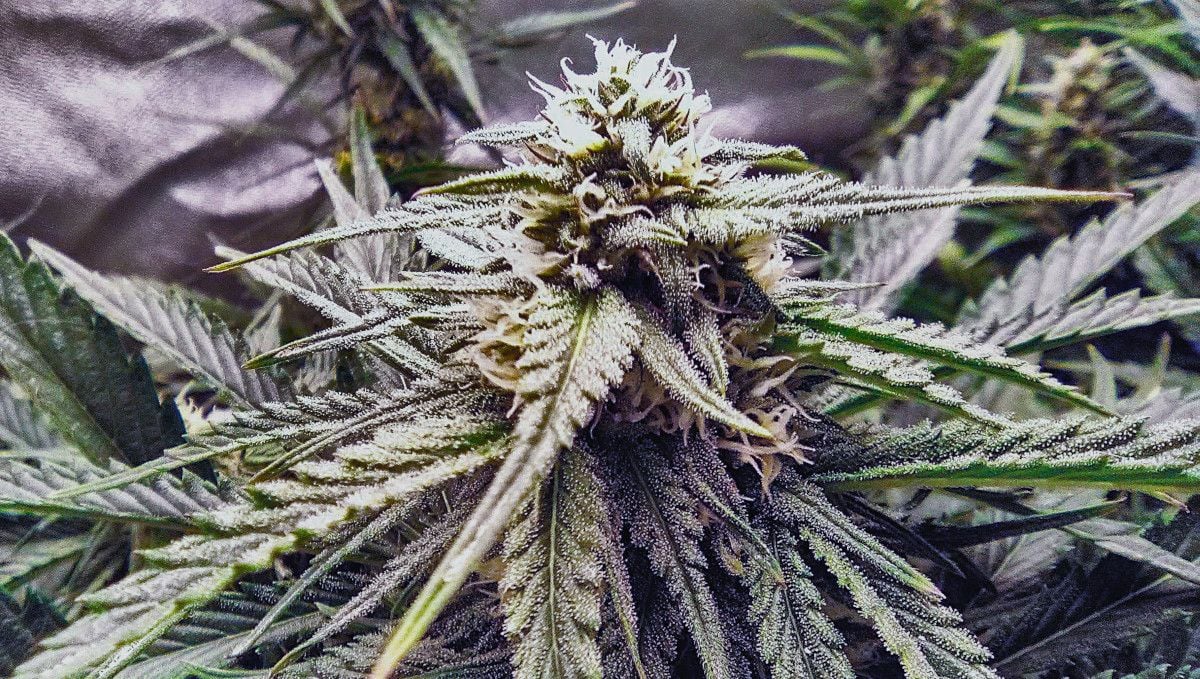
Because of how dense the garden was, the grower decided to increase airflow and installed a new fan. He wasn’t too afraid of mold though and continued to foliar feed his babies. This time he used MicroLife Maximum Blooms. With this organic formula, cannabis gets a full load of essential nutrients plus special bloom stimulators. At different stages of flowering, this either makes flowers pop everywhere or makes them swell up.
He also introduced FoxFarm Beastie Bloomz, another route to enormous flower clusters. This fertilizer, with its high levels of P and K, is used from mid to late flowering.
8. Mid Flower (Bulk Phase) | Weeks 8-9
Among cannabis flowering stages, this is arguably the most important one because, at this point in the timeline, stretching stops and weed directs all of its energy to stack up flowers. Another important thing happening in every four gardens in our review was the formation of an unusually high amount of trichomes.
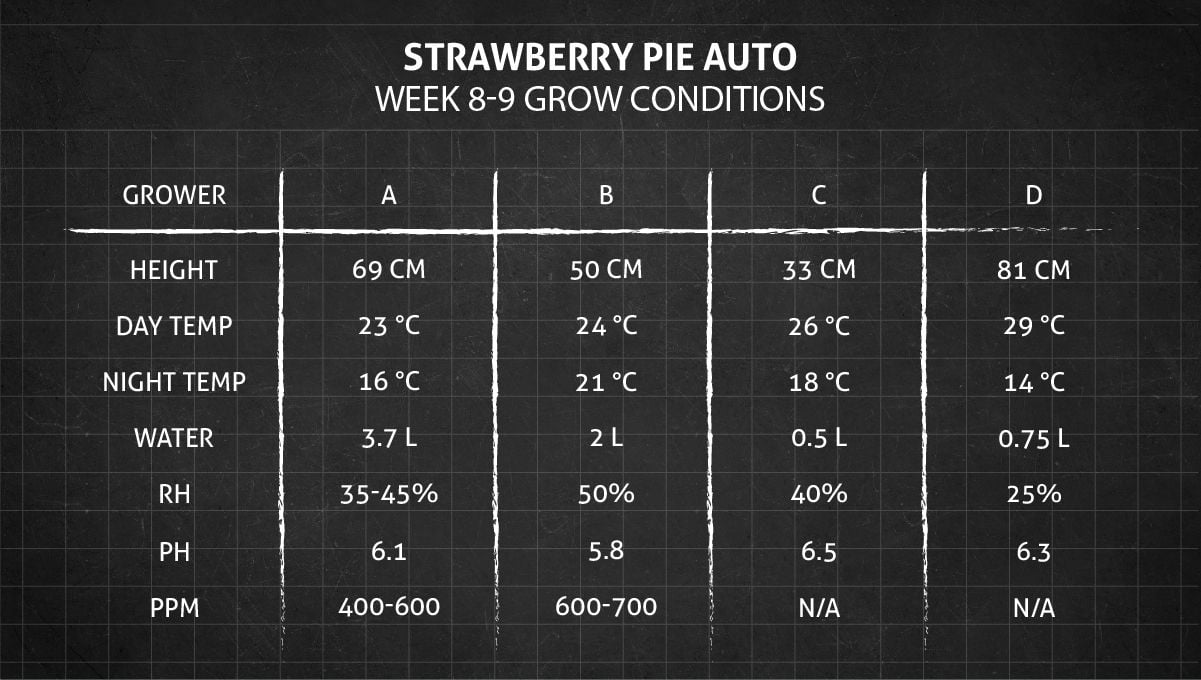
A: The Smaller of the Girls is a Purple Beauty
By week 8, the grower was confident that his trio presented two phenotypes one of which was shorter and slower but also looked like she’d become a purple-colored one. Truth be told, other girls also had very interesting colors going, something like blueberries and cream (see below). Probably, this coloration was due to colder temps. The buds looked mature enough now to introduce yet another amendment into their feed — Liquid Kool Bloom, also by General Hydroponics.
Liquid Kool Bloom & Dry Kool Bloom are two essential flowering supplements that make colas fat, dense, and heavy. The manufacturer recommends to start using the first one during the transition from the vegetative phase to flowering, the latter — in the last weeks before harvest. This addition to the diet—at 0.5 tsp/gal—brought TDS from only 400 ppm of the week before to a more serious level of 600 ppm.
Nevertheless, as you can see, these particular Strawberry Pie Autos were kept lean and hungry. Btw, they each drank about 1 gallon (3.79L) of nutrient solution per day.
B: Filling Out and Getting Frosty
Now, 4 weeks into flowering, the stretch had basically stopped. The flowers began to bulk up, and the trichomes gradually changed to 80% cloudy. The pistils were still white mostly, but some of them started to wither and become brown.
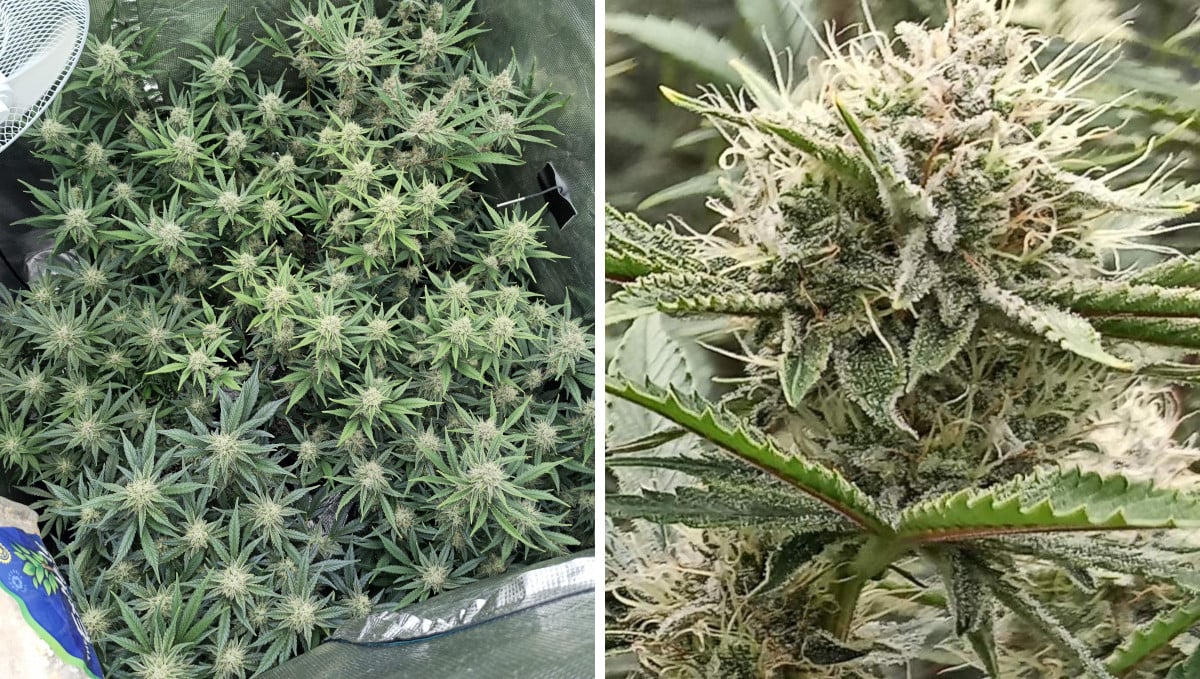
The grower thought that this would be the right moment to tweak the feeding schedule a little by adding more PK. He didn’t want to overfeed his girls, so when he increased the dose of one nutrient, he made sure to give them less of some of the other. He even started to lower TDS from its peak value of 700 ppm to just 550-600. As you can see he was rather frugal with the food. His garden looked great—very vibrant and with no deficiencies whatsoever—but maybe he would have gotten better yields if he used more nutrients.
C: Going into ‘Overdrive’
On weeks 8 and 9, the buds on Strawberry Pie Auto were approaching maturity, so that the grower completely cut the Nitrogen-rich ph Perfect Grow formula and added Overdrive by the same Advanced Nutrients instead.
Overdrive is given in the last two weeks before the final flush and has 10 to 15 times as much phosphorus (P) and potassium (K) as N. The abundance of P and K makes sure that the overall vigor of the plant does not decline and the buds continue to swell and mature.
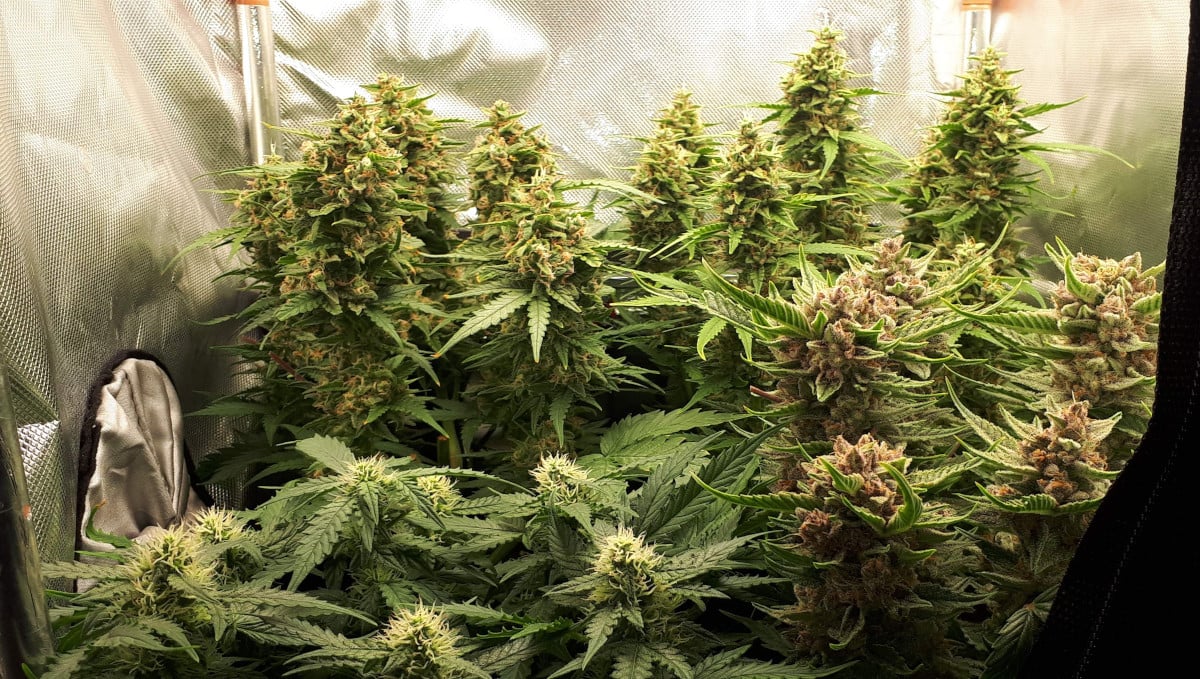
You may remember that the grower gave his girls nutrients with only every other watering and alternated this with plain water. So, toward the end of the 9th week, Strawberry Pie Auto got her last meal and then drank fresh water only. You can say that the 2-week long flush had thus begun. The guy was planning to flush for two weeks and chop at 11 weeks from seed. A rare occasion when things went exactly as planned.
D: As if She Needs Any Enhancement!
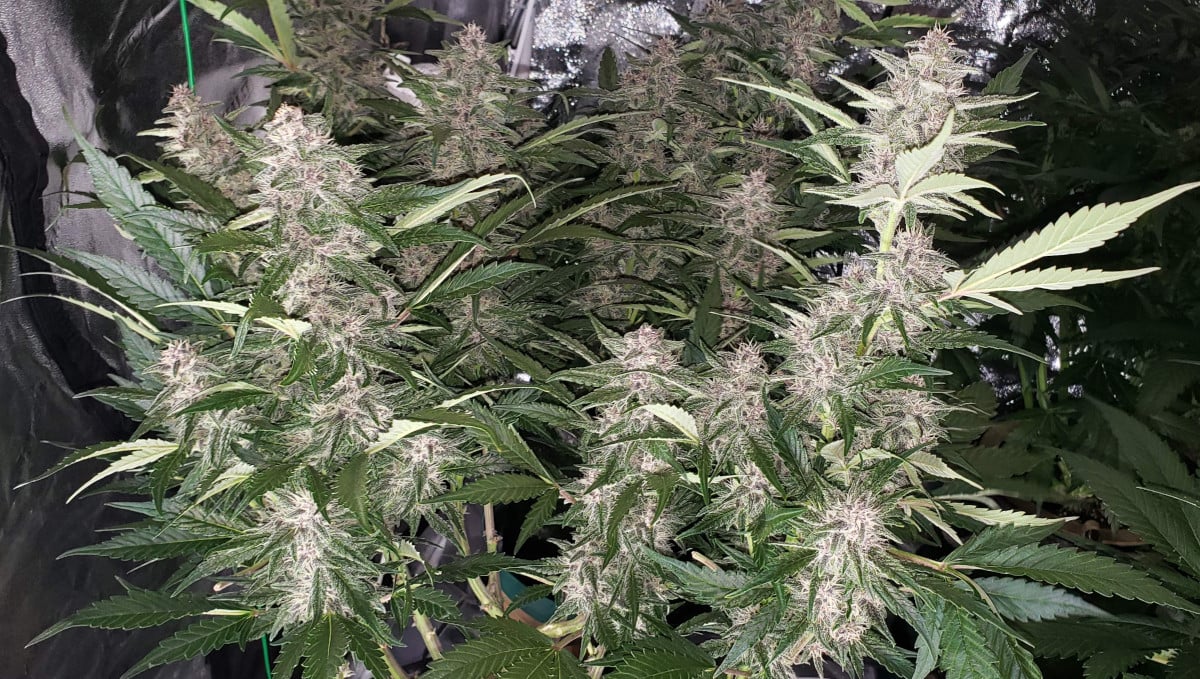
On week 8, the grower added a TNB Naturals CO2 Enhancer bottle which he squeezed in between the grow bags. This CO2 maker is supposed to “create a blast of CO2” of up to 1200 PPM in a 12x12x12 foot area for up to 2 weeks. It’s debatable whether all this extra CO2 didn’t just ‘fly out of the window’ with the ventilation working or really made the difference. (Let’s remember that the natural level of CO2 in a dwelling is around 400PPM, and it’s quite enough for amateur grows.)

Note how dense the lower part of the canopy is. There was no defoliation and no lollipopping. On one hand, this spares plants from a lot of minor stresses. On the other, the air circulation may become an issue and even lead to mold and bud rot.
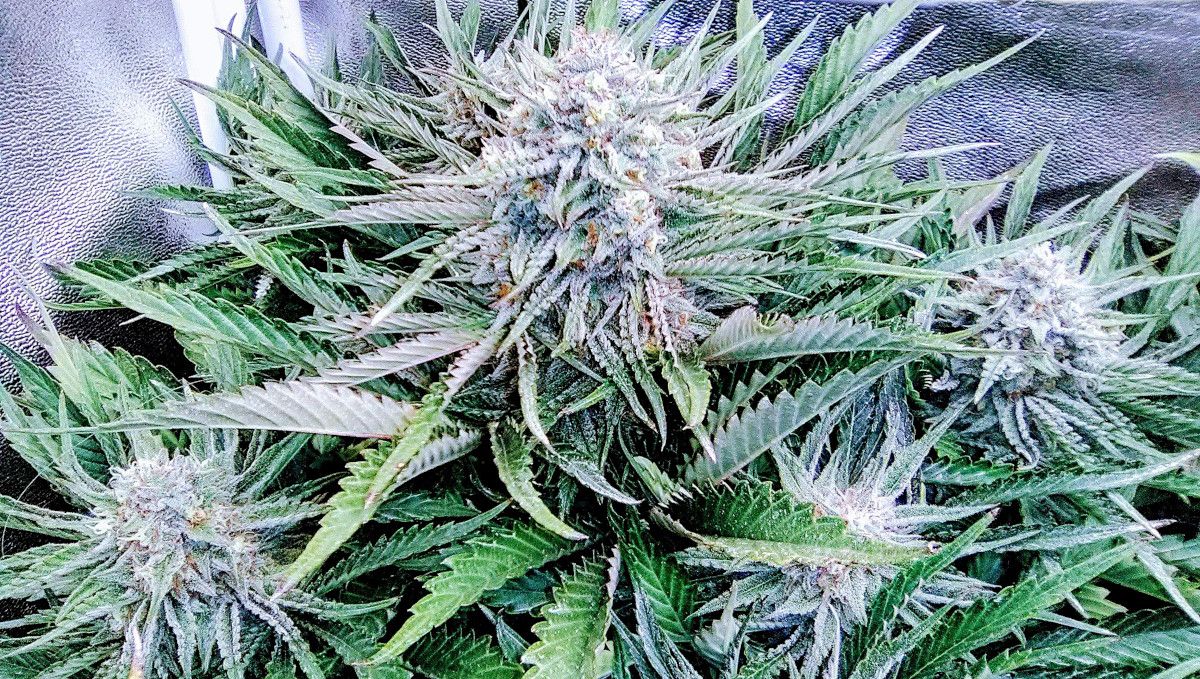
Be it as it may, things looked just beautifully ‘upstairs’. Strawberry Pie Auto was the most resinous in the tent.
9. Ripening And Harvest | Week 10 (And Beyond)
The flowering time of all Strawberry Pie autoflowers could have been cut to 10 weeks or less, but every gardener wanted to do everything ‘by the book’. Meaning they looked at the state of trichomes, not the fade of the foliage nor the size of the colas.
A: The Final Three Weeks of Autumn
On week 10, all three ladies were getting more gorgeous and enjoyed their full 600 ppm rations of CalMag, MaxiBloom, and KoolBloom (Dry KoolBloom this time). The grower was checking the trichomes in order not to miss the perfect window for the final flush, but the moment only came in the 11th week. He started flushing all three Strawberry Pies at the same time.
What he did was flush the medium down to 100 ppm (0.2 EC) and then feed them only plain water for 72 hours. One of the plants did finish within this timeframe—she had about 15% amber trichomes and was cut down.
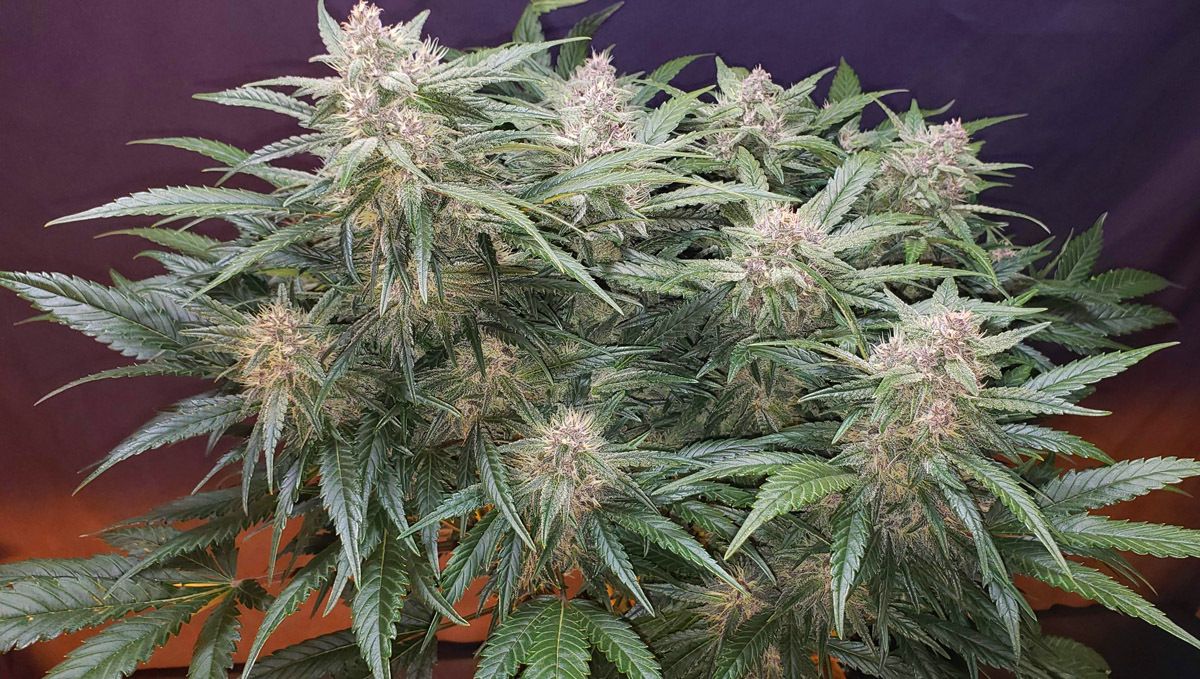
The other two crossed over to week 12 and were harvested one by one. The smaller of the plants (the deep purple pheno) was also the last to finish. She also smelled the most delicious.
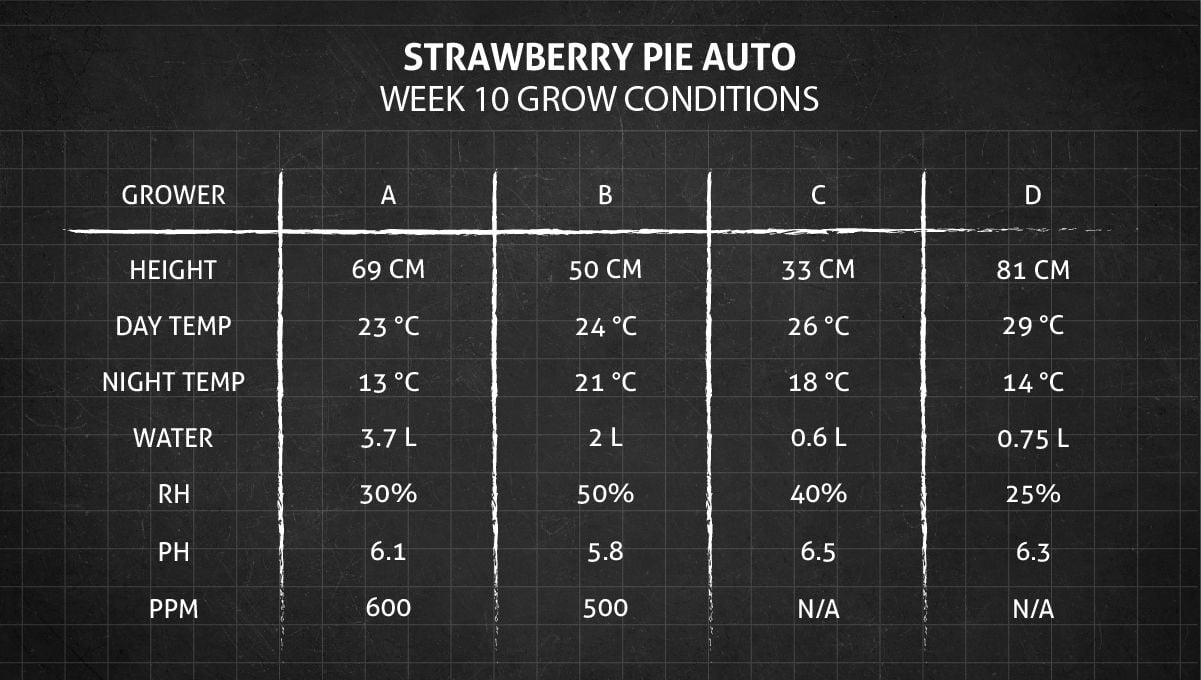
In the final weeks, it got very cold indeed. While the day temperature was okay at 23°C (74°F), at night it dropped by 10 degrees—the maximum allowed drop. When your thermometer shows only 13°C (55°F), all kinds of issues are possible, especially mold. However, the air was also very dry—about 30% RH, and this protected the buds from mold.
Besides, the most important characteristic for successful cannabis grow is not the temperature of the air but that of the medium. If the root ball is warm enough, the above-ground part can tolerate very cool weather. In this case, the gardener kept the temperature of both the medium and the watering solution at the comfortable 20-21°C (68-70°F).
B: Modern Autoflowers Never Fail to Impress
Week 10 was something of a milestone for the grower because his previous grow had been ‘feminized’ (photoperiod) strains and they took twice as much time to get to basically the same point. Seeing speed like this, he decided that he would be switching to autoflowers for a while.
There was some slight phenotypic variance among this batch of Strawberry Pie Auto, but all six were happy with the same feeding schedule, had practically the same flowering time, and gave no major trouble maintaining an even canopy because the height was also more or less the same. It’s not exactly like growing from clones but uniform enough to consider Strawberry Pie Auto as a serious candidate for large commercial grow-ops.
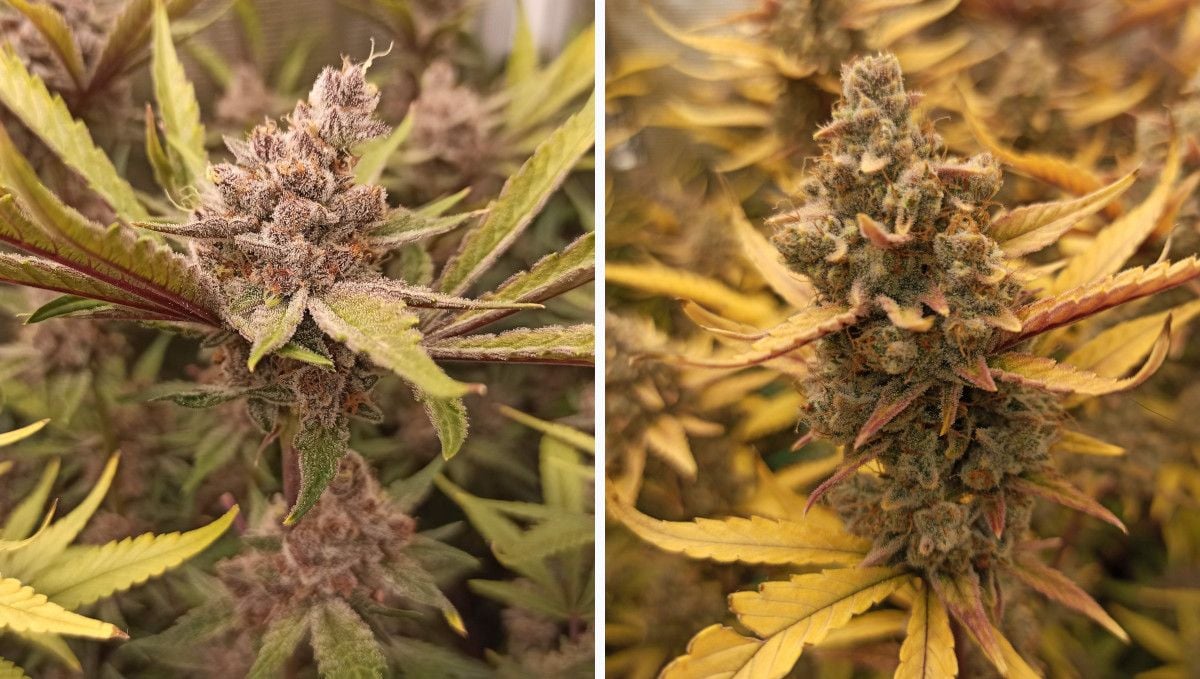
The grower began a gradual flush on week 11. At first, he removed from the diet everything but CANNABOOST Accelerator, then used only fresh water, and finally flushed with FloraKleen. The whole process took two full weeks (which was an overkill).
Coco coir can be considered a form of hydroponics, and this medium can’t accumulate many salts in the root zone. As a result, it only needs a week-long flush at best. Anything longer robs the buds of a chance to pack some more weight in the final weeks of flowering.
The guy planned to harvest his autoflowers with about 15% amber trichomes, but the flushing went on and on and the foliage began to fade too quickly for his taste. So he harvested his buds with practically all of the trichs cloudy and around 5-10% amber. It took his Strawberry Pie Auto exactly 12 weeks from seed to harvest.
Btw, the plants themselves have stopped gaining height for some time now. Have a look at how their size changed throughout their progress from seed to harvest in the image above.

C: A Promise of Great Bag Appeal
The last two weeks were more an exercise in patience than anything else. The colas had stopped bulking up or producing any more trichomes. The leaves didn’t fade all that noticeably either.
The only real change could be solely seen under a microscope. We mean the maturation of trichomes, of course. With a naked eye, the buds had long looked (and smelled) ready.
All of them are smelling great. They all look frosty but the Strawberry Pie is on another level.
HighFromHome
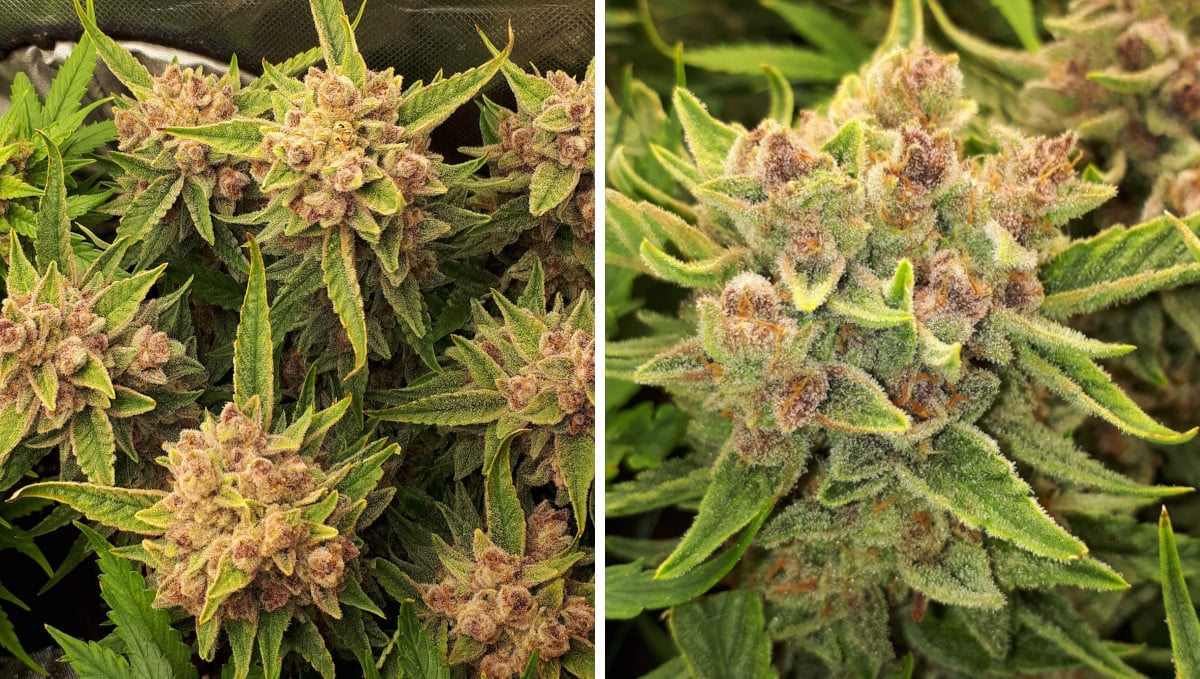
The Strawberry Pie Auto and her two neighbors were flushed with Flawless Finish on week 10 and with nothing but water on week 11. Even when grown in soil, two weeks of flushing is more than enough to get a perfectly clean finished product of connoisseur quality.
D: Stressed with Cold before the Harvest
In the beginning of week 10, Strawberry Pie Auto received her last portion of food which included:
- Fox Farm Cha Ching, provides a heavy dose of phosphorus, but quite a bit of K and even N as well; the manufacturer advises using this supplement from week 8 to 12,
- Humboldts Secret Sweet & Sticky, an organic blend of microbial food and carbohydrates, recommended for use throughout the life cycle,
- True Plant Science Signal, a proprietary organic formula made from 22 plant species that enhances water uptake in late flower, thereby increasing bud density and terpene production.
The grower gave his girls two days to process their last meal and then started the flush with 8 gallons of warm water and True Plant Science LiquidSOIL Remediator. Truth be told, LiquidSOIL is more useful to the medium itself than to the plants because it allows successfully reusing organic soil in future grow cycles. However, it also helps make organically grown weed even cleaner.
A very unusual thing the grower did was letting his autoflowers finish their life cycle in the greenhouse. It was rather cold there, being winter and all — as low as 58°F (14°C) at night. The gardener thought that the emulation of the late season cold would create just the right amount of stress to make buds even fatter, denser, and, of course, frostier. Cold temps also bring out the colors.
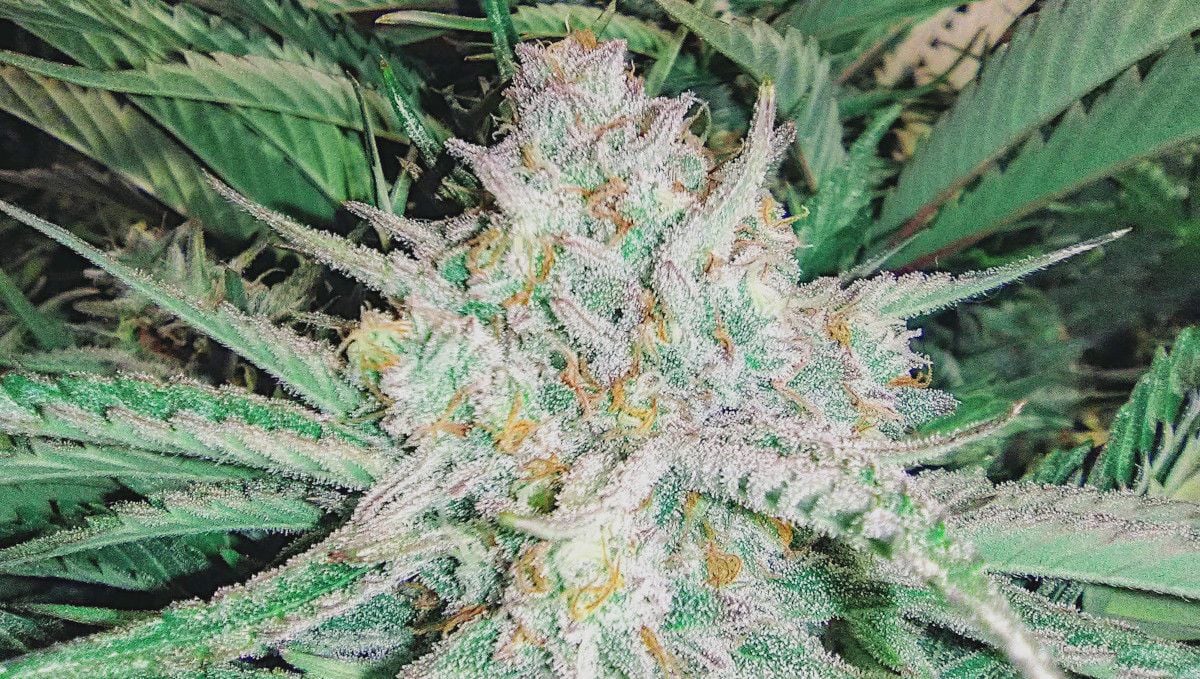
In just a day or two over 10 weeks, Strawberry Pie Auto and her neighbors were completely ready to be harvested, so the grower brought them inside, stripped of fan leaves, and let them stand in complete darkness for 18 hours. Then they all were chopped, given a nice bath, and hung out to dry.
Please note that most growers don’t wash their weed at harvest, but it’s not a bad way to clean the plants of dust and other particles, especially if you have foliar-fed them.
10. How to Properly Trim, Dry, and Cure your Cannabis Harvest
The trimming, drying, and curing stages of cannabis plants are super important post-harvest processes, especially if you’re trying to get the best quality final product possible because trimming improves the bag appeal while drying removes the moisture and curing enhances the flavor and effect of the flowers.
When drying and curing cannabis, there are a couple of things to consider such as temperature, humidity, and airflow as less-than-ideal conditions can affect the quality negatively so let's read along to understand the importance of drying and curing, and how to do it properly to enhance even more the flavors and aromas of your harvest.
Why Dry and Cure Your Cannabis Crop
After chopping down your plants, the work is not over yet because you still have to dry and cure the flowers. Drying is probably the simpler of the two post-harvest processes as it consists of placing the whole plant or individually cut buds in an environment with controlled humidity levels and temperature so that the buds lose their moisture. Drying cannabis plants not only prevent the buds from spoiling but also inhibits microbial growth, extends shelf life, and allows for an overall better experience when grinding, rolling, and consuming your harvest.
On the other hand, curing allows growers to get the buds to the optimal moisture and enhances the flavors and aromas of the flowers. In order to do this, it’s essential to keep the right conditions. In less-than-ideal conditions, the terpenes and cannabinoids could be affected negatively but in the right conditions, curing will enhance the flavor profile and reduce chlorophyll content, improving the smokability and eliminating that harshness that all cannabis consumers try to avoid.
This means that the curing and drying processes prepare your harvest for consumption by removing moisture and other compounds such as sugars that cause that harshness on the throat and are essential to bringing out the best of cannabis flowers. It’s extremely important to dry and cure your harvest as not doing it correctly can ruin all the hard work put into the growth cycle.
Drying Your Cannabis Harvest
The drying process starts immediately after chopping down your plants and it’s important to do it correctly. Keep in mind that the idea is to get the plant stable in the initial 24 hours after harvest by removing as much moisture as possible, then adjust the drying conditions to allow a slow drying which should last around 10 days, sometimes a little bit longer, depending on the density of the flowers, among other factors. Remember that the best drying method will depend on your trimming method, which can be dry trimming or wet trimming.
Dry Trimming
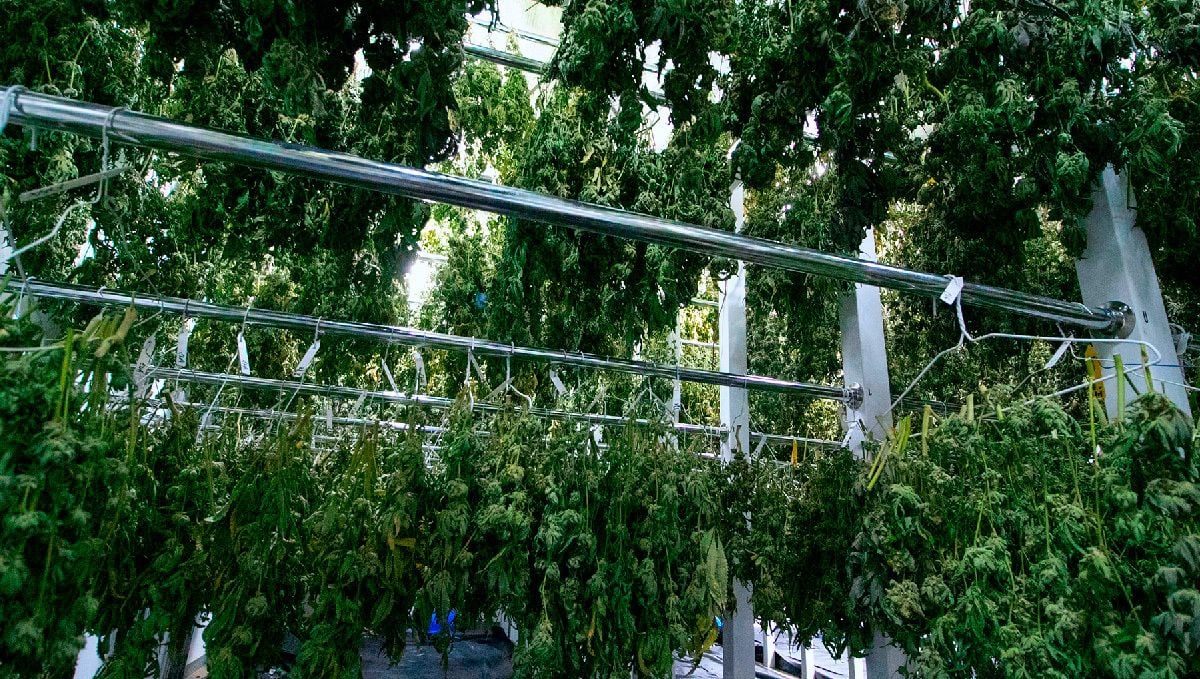
If you opt for trimming your cannabis plants after the drying process, you should hang the whole plant upside down from a hanger, for example. This is the preferred method by most growers as it prevents the flowers from being exposed to dirt and also helps buds dry more evenly.
After a couple of days of drying, you will need to test if the plants are ready for dry trimming, in order to do this, bend the branches gently. If they bend, your plants need more drying and if they snap, they’re ready for trimming and curing.
A better method to know if the buds are properly dry is to use a water activity meter, if the water activity is under 0.65 it means your harvest is properly dry and ready for the curing process. You can also use a moisture meter to measure the moisture percentage in the buds, if the moisture content is less than 13%, they're ready for curing.
Wet Trimming
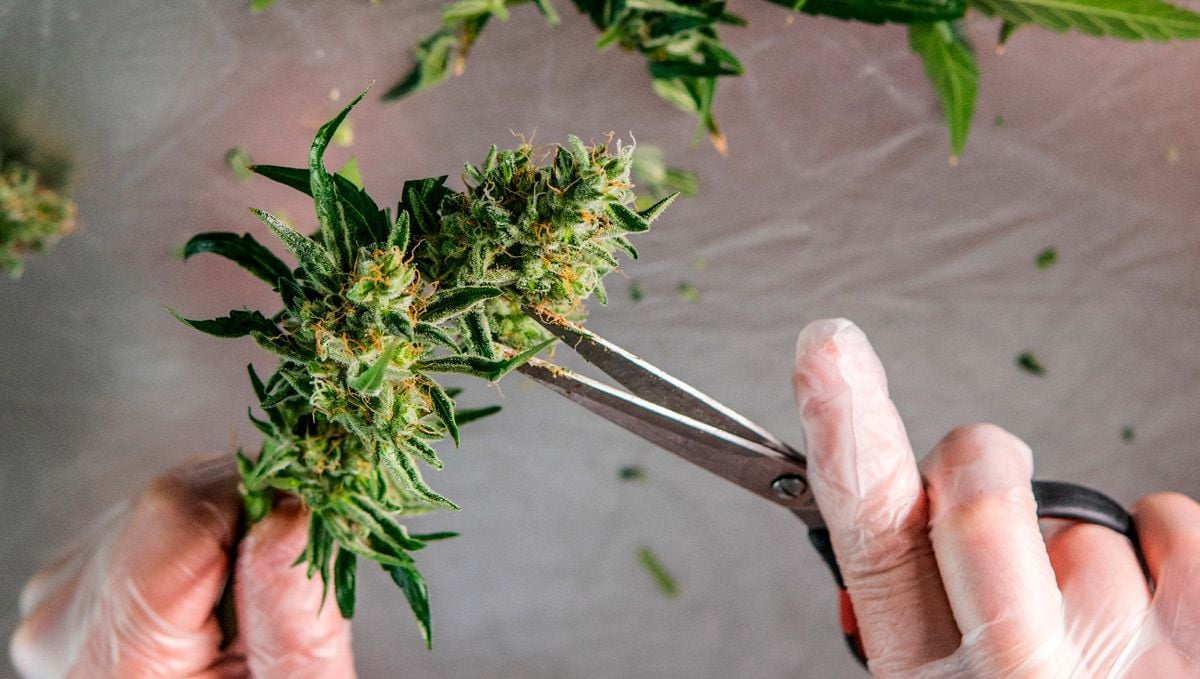
If you opt for trimming the plants before drying, you’ll have to cut each bud individually and will have to use a drying rack. Cannabis flowers dried on a drying rack can take anywhere from 4 to 10 days to be ready for curing and in order to know if the buds are ready for curing it’s just a matter of squeezing them. If they feel moist, they probably need more drying but a moisture meter or a water activity meter can be used too.
Keep in mind that the main factors to consider during the drying stage of cannabis flowers are:
- Temperature;
- Humidity;
- Airflow and;
- Lighting.
Meaning that the drying conditions are not exact but should be within acceptable ranges. As mentioned, the idea is to get the cannabis flowers ready for consumption, and ideally, should be done by reducing the moisture within the initial 3 days and then slowly dropping moisture levels over the next 1 to 2 weeks to the desired levels which usually range between 58 to 62%.
Why is it Important to Control and Adjust the Drying Conditions?
As mentioned, the drying conditions are not exact but need to be kept within acceptable ranges, which usually are temperatures between 15 to 22 °C and humidity levels ranging between 55 - 65%. But why? Well, the goal is to dry your flowers slowly enough so that the terpenes do not evaporate and you don’t overdry the flowers. It’s also important to keep the right balance between humidity and temperature as this will prevent mold from growing on your weed. And airflow is important too as the air needs to be exchanged to remove mold or bacteria in the air.
And finally, lighting. Because light will also cause the terpenes to degrade so you want the drying room to be completely dark. Obviously, you can and should check on your plants daily but avoid prolonged exposure to light. Remember that every cannabis variety requires a specific period of drying and curing which can differ depending on the conditions but on average, should take anywhere from 7 to 16 days.
How to Cure Weed?
After the drying process is finished, you can get your curing jars ready and begin the curing process. Keep in mind that even proper curing will not fix a low-quality flower but can definitely ruin (or improve) a good-quality flower so make sure to do it correctly. After properly trimming and drying your weed, go ahead and grab airtight glass jars such as mason jars and place the flowers inside. The curing process usually takes longer than the drying process as you have to provide the right conditions for the moisture in the center of the flowers to spread throughout the wed evenly. And just like with drying, make sure the temperature and humidity are controlled when curing.
The ideal conditions for curing are a humidity level ranging from 40 - 50% and a temperature below 21 °C but unlike drying, curing is not a set-it and forget-it process as you will need to check the flowers daily because you will have to “burp” the curing jars for 30 minutes up to a couple of hours.
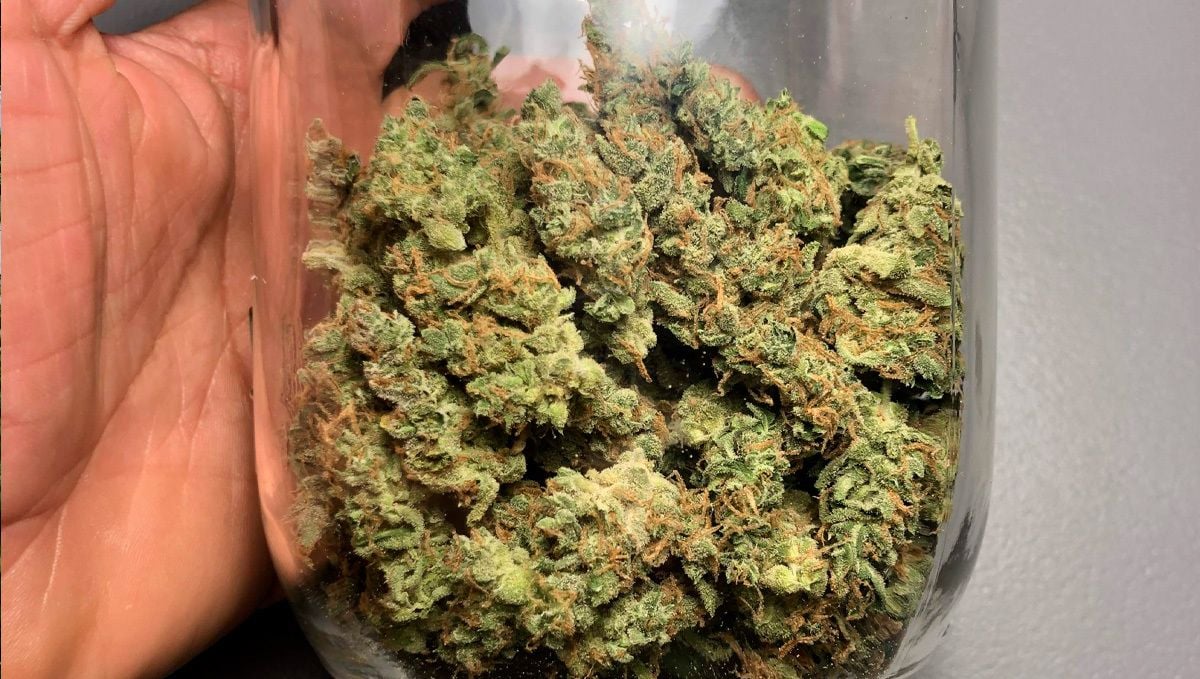
Burping consists of opening the curing jars to exchange the air, letting CO2 out and fresh oxygen in. On top of that, you also need to check the flowers for mold, especially in the first couple of days as it’s when the flowers contain more moisture. Remember that ammonia smell is a sign that there’s too much moisture in the curing jars and will most likely result in mold so check for mold daily and if you smell ammonia, burp the curing jars for longer. Remember that burping should be less frequent as curing progress. So after the first week of curing you can burp your curing jars every 2-3 days, and after another week you can burp your jars once a week, and then every 2 weeks, and so on until you get the curing jar reads 58 - 62% humidity.
In short, the drying and curing process should be low and slow, meaning that you need lower humidity levels and lower temperatures so that your cannabis flowers dry slowly and you don’t end up losing terpenes and cannabinoids. Be patient and never try to speed up the process as the low and slow approach will result in a cleaner, smoother, and more flavorful final product.
Cannabis Drying and Curing FAQs
How long does it take to dry cannabis?
As mentioned, the drying process can take anywhere from 5 to 7 days up to 16 days. The process is usually short when wet trimming adn longer when dry trimming. Remember that it doesn’t matter if you’re dry trimming or wet trimming, always make sure to check the flowers daily to prevent mold and overdrying your buds.
How do I Know if my Drying Room is Good Enough?
All you need to do is grab a hygrometer and check if the humidity levels are between 55 to 65% and temperatures between 15 to 22 °C. Also, make sure the drying room is completely dark as UV rays can degrade your harvest. Make sure to keep the temperature and humidity fluctuations to a minimum and remember to add a small oscillating fan to circulate air. In some cases, you will need to add a humidifer/dehumidifier and an AC unit to be able to keep the right conditions.
Why is it Important to Cure my Weed?
The curing process is important because it finishes off buds, meaning it improves their taste and smell while getting rid of the chlorophyll which gives cannabis flowers that plant taste. This means that without curing, the buds would be harsh on the throat and would taste like grass, literally.
Should my Flowers be Completely Dry for Curing?
No, the buds should be fairly dry but not completely dry as it will cause them to be harsh on the throat. Ideally, the buds should have a little moisture which will be eliminated during the curing process.
Will Curing Improve Bud Quality?
Well, curing will basically improve your flowers but cannot add flavor and smell if your bud doesn’t smell and taste good to begin with. This means that yes, it will improve the quality of the buds but don’t expect any miracles. You need good-quality bud if you want to end with excellent quality bud. And remember that the drying and curing process can affect quality negatively if you don’t maintain proper conditions!
It’s highly recommended to invest in a hygrometer and needed equipment for slow drying and proper curing as this will ensure the best possible quality. It’s not worth spending time, money, and lots of effort growing good weed if you’re not taking the same care when curing and drying so we highly recommend investing in the equipment necessary, it’s not expensive and will make a huge difference in the final quality of the product.
Can I Dry my Weed in Cardboard Boxes?
Yes, you can dry your harvest in any place you want, the important thing here is to maintain the right conditions. As long as you can keep the humidity levels between 55 - 65% and temperatures ranging between 15 - 22 °C there shouldn’t be a problem at all.
11. The Outcome
Strawberry Pie Auto Yield
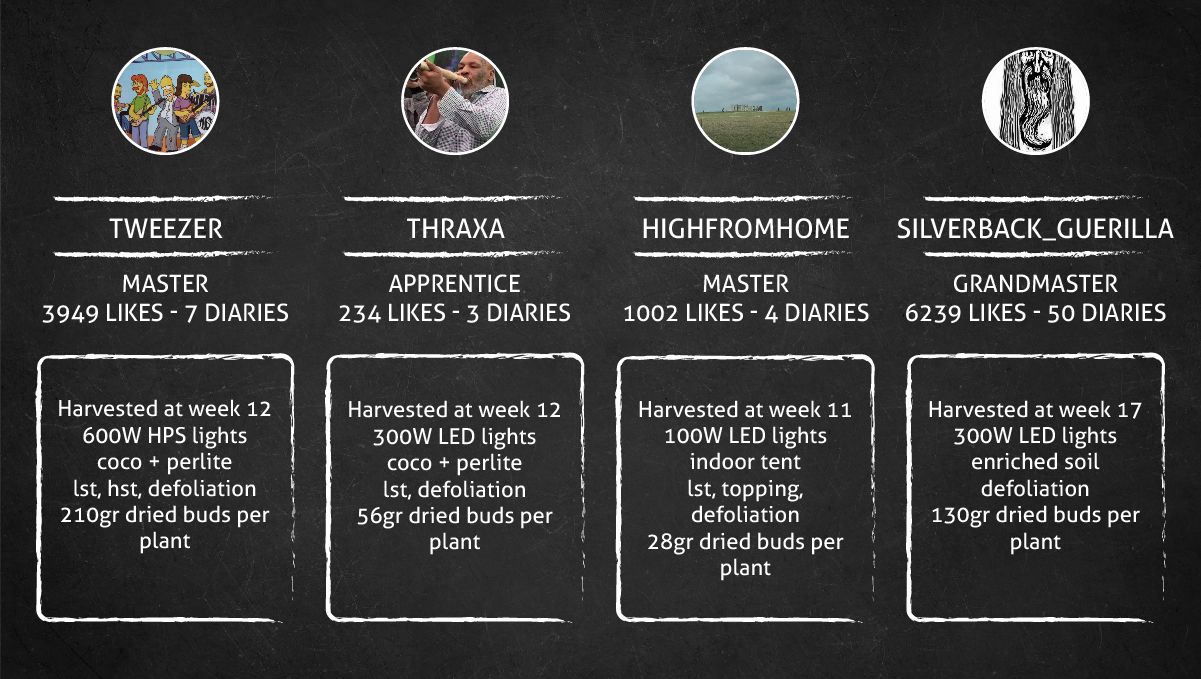
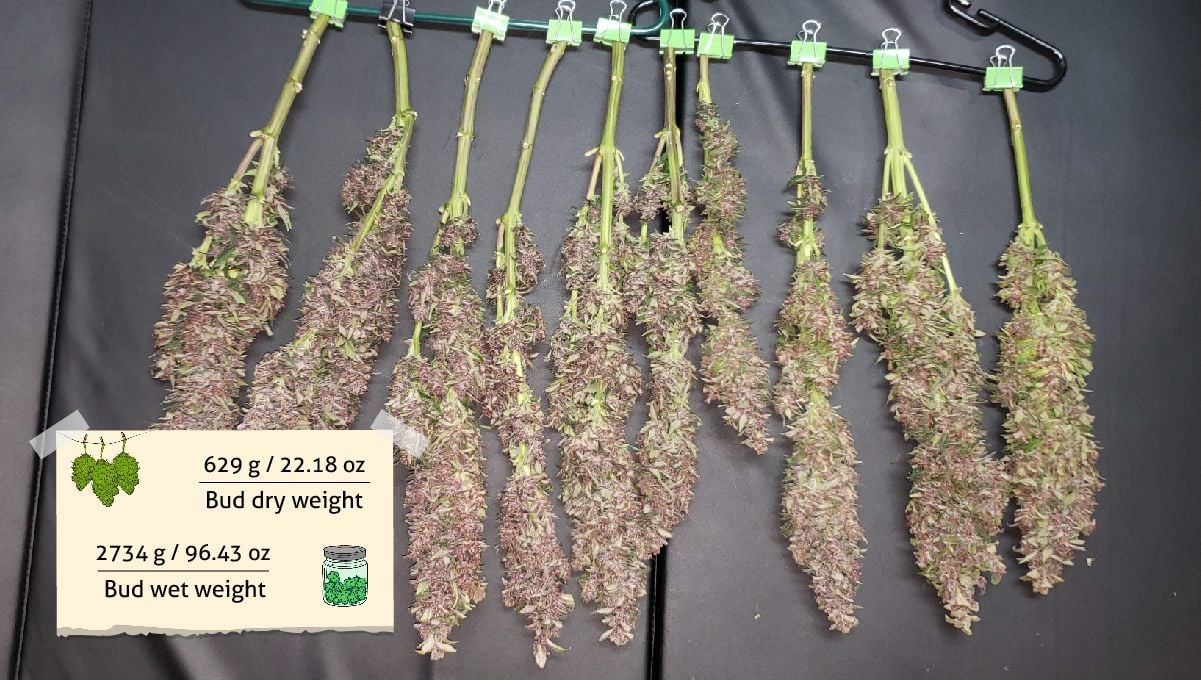
Tweezer was blessed with three bouquets of flowers that collectively weighed 629 grams (22.18 ounces). The colas looked like sticks of salami—long, dry, solid cylinders—and evidently packed a lot of weight each.
And don’t forget about the trim that the guy didn’t let go to waste either:
I ended up making bubble hash out of the trim, and I got 8 grams, which I pressed into 4.7 grams of rosin, and all I can is that this is some of the best tasting and strongest rosin I have ever tried, let alone grown.
Tweezer
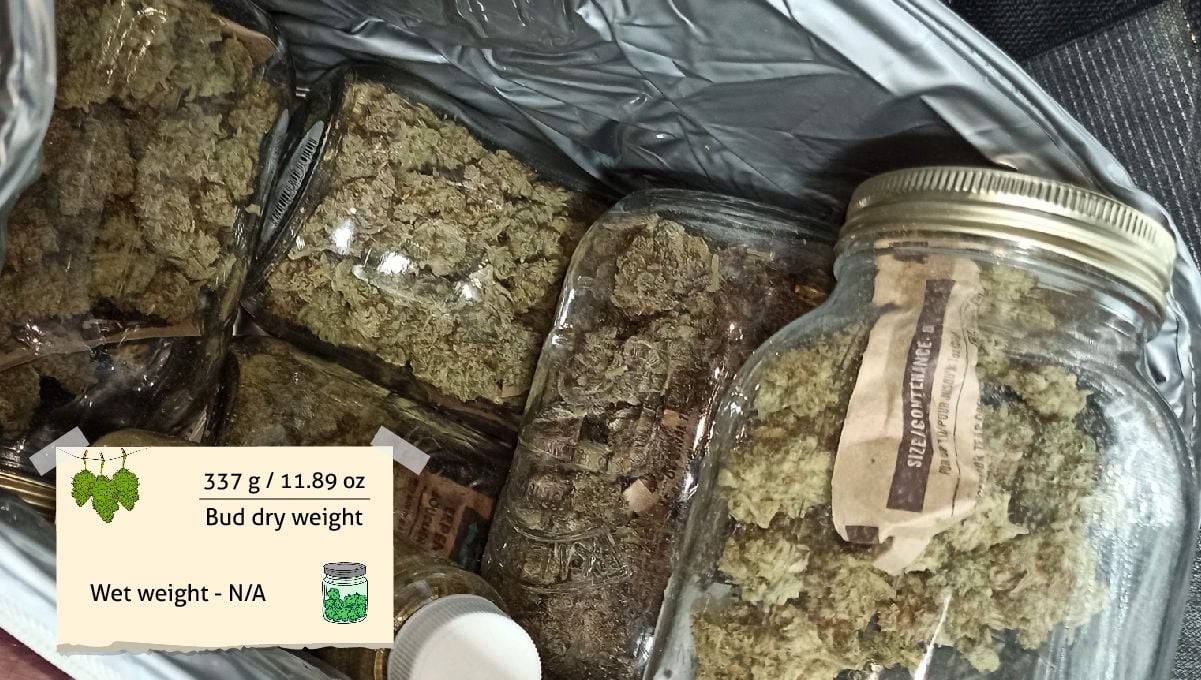
Thraxa’s six plants yielded him slightly more than he expected — 337g (11.89oz) of nice and dense nugs. The only fault that he found with Strawberry Pie Auto was some phenotypic variance. The rest was perfect, and he decided that he would definitely grow this strain again.
HighFromHome dedicated less than a square foot (20x20 cm) of surface area to his Strawberry Pie Auto, but this baby brought him 28.12g (0.99oz) of amazing-looking frost-covered buds. The three other strains in the tent yielded more or less the same which makes the gram-per-watt result for this grow as high as 1.14!
This is my favourite strain I've grown so far… Just over a oz of top shelf buds. I am over the moon and have already popped another Strawberry Pie to go in my next run.
HighFromHome
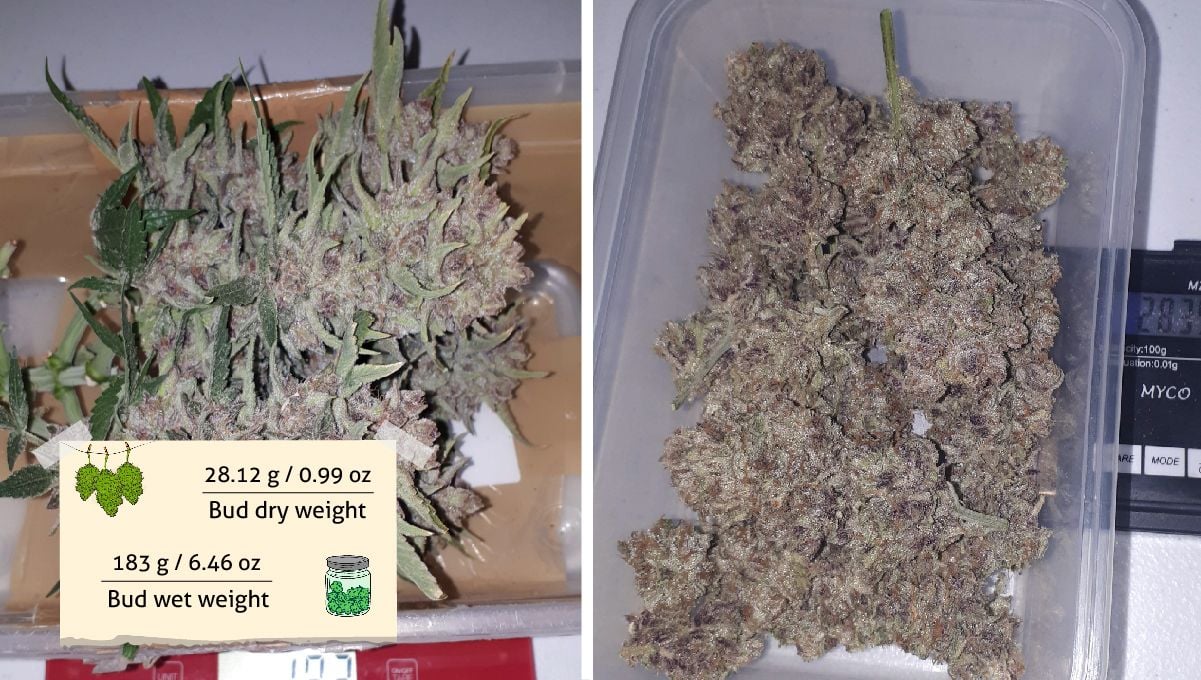
For Silverback_Guerilla, Strawberry Pie Auto wasn’t the highest-yielding plant in the tent, but still brought in 81g (2.86oz) of roughly trimmed bud. The gardener also found the pheno a bit too leafy, but the smoke was so outstanding (stay tuned!) that he was more than willing to overlook some minor imperfections.
It is destined to be a regular in my auto gardens… at least until some other strain supplants it as a perennial favorite...
Silverback_Guerilla
Strawberry Pie Auto Smoke Report
For Tweezer, this after-dinner dessert of a strain was definitely an evening smoke that any indica lover would enjoy. He was especially excited about the quality of rosin that he’d made from the trim and specifically mentioned the notes of berries, ice cream, and diesel fuel present in the flavor.
Thraxa was impressed with the flavor of the purple pheno, but liked the hints of strawberry in the other ones too. The smoke was smooth and long-lasting, perfect for an afternoon or evening relaxation with a giggling fit as a final nice touch. But if you smoke too much of it, you’ll be ready for bed.
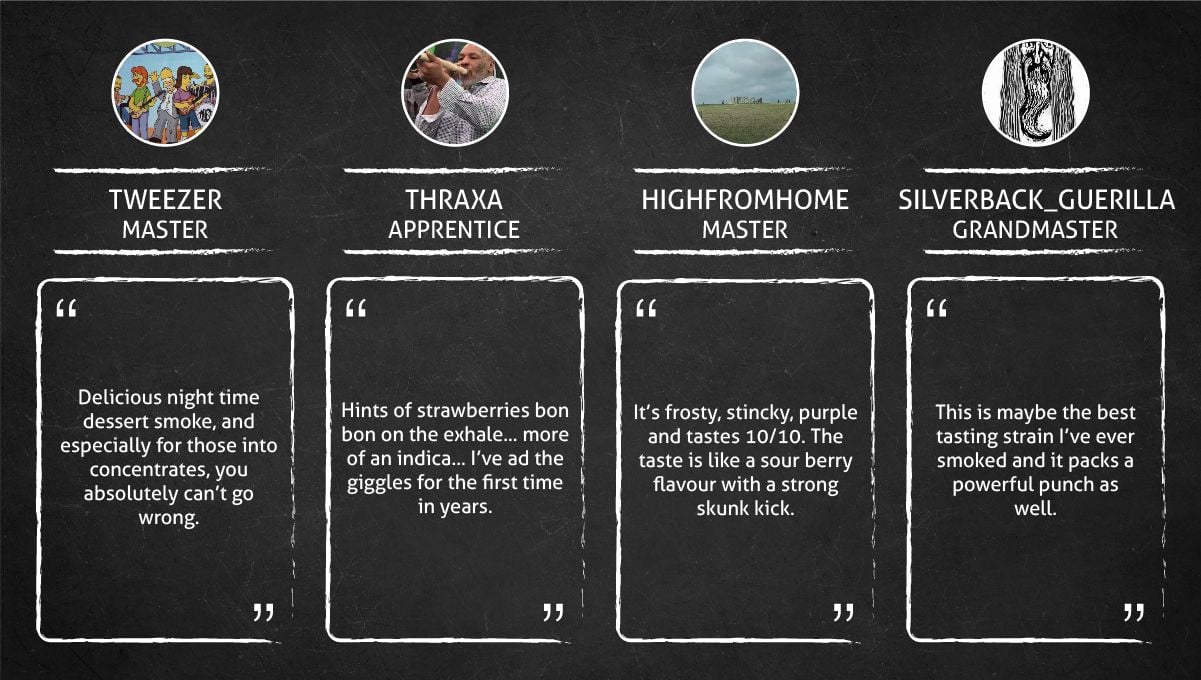
HighFromHome remembers a loud cheer he let out after smoking the first bud of Strawberry Pie Auto — it was by far the best smoke he’d had in a long time. He gave the taste 10 out of 10 because it had the unmistakable flavour of sour berries with a strong skunk kick. The plant also smelled amazing in the tent and fully retained her beautiful aroma after the harvest.
For Silverback_Guerilla, this was the second run of Strawberry Pie Auto and definitely not the last because he absolutely loved this weed’s flavor. The aroma was very dank and berry-like, though without any sweetness. What was sweet was the taste of the smoke, with a little bit of herbal spiciness on the exhale. The effect was also very strong which was to be expected from the most resinous plant in the garden.
12. Strawberry Pie Auto Cannabis Strain Grow Guide - FAQs
Well, here we are then. That has got to be one of the most exhaustive, fully covered week-by-week strain reviews ever written! Over 11000 words - CRAZY... in a good way! But, even though we have gone over Strawberry Pie Auto in such amazing detail, there will always be some lingering questions - especially for the noob growers out there. And that's okay. Cannabis cultivation is an ever-evolving beast, and as the months pass by more and more techniques become known to the general growing community.
And, with an article of this length, it's nice to have a section that breaks all the important points down in an easy-to-digest way, and explains in the simplest terms exactly what you have to do to make sure you get every last drop of sticky resin out of that Strawberry Pie of yours! If, by the end of this section, you still have any queries that have gone unanswered just drop a comment in the area below, or head over to our subreddit. Let's dive into the questions, yeah?
How many weeks, on average, does Strawberry Pie Auto take to go from germination to harvest?
Strawberry Pie Auto has an average grow time of around 8 to 10 weeks from germination to harvest. However, keep in mind that this is just an estimate - different factors can affect the grow time. There are so many variables that go into the growth timing of cannabis plants, and while these factors are cut down slightly when growing autos, there is still a heap of discrepancies that can affect the overall time taken.
What are the most common factors that can affect the total timing?
There are few major elements that can affect how long it takes for your Strawberry Pie Auto to reach the point of harvest. The first is whether you are growing your crop indoors, in a controlled environment, and with unlimited and unfettered access to the best possible light spectrum, or if yours is an outdoor crop. Outdoor crops, obviously, will be affected by the seasonality of the area in which you live, which can push the harvest date out by a week or two over indoor-grown pants. If you live in an area with perfect growing temps and humidity levels (22 to 27 degrees Celcius, and around 50% humidity), and more than 16 hours of sun each day then you shouldn't see too much of a difference. But, if your local climate is outside of these markers, and the sun only beats down for 12 or so hours a day then the crop will most likely need a little longer to mature.
If you are growing indoors, then you have total control over the light cycle. Playing around with the length of your light cycle can have a huge effect on the total growth time. With Strawberry Pie Auto, an 18/6 light cycle is ideal - that is 18 hours of light and 6 hours of darkness. But, if you want to get the plant to finish even quicker then bump that up to 20/4 (or even 24/0, although this can cause some issues if the crop isn't carefully managed). The second is the style of cultivation. For the quickest timing possible, you are going to want to run your crop in a hydroponic setting. Now, this isn't essential and Strawberry Pie Auto will do just fine in coco-coir (which is a hybrid of soil and hydro growing techniques), or even in pure soil for that matter. But hydroponics will cut down the total grow time, and allow you to really get a grip on those nutrient levels. Finally, the last consideration is the phenotype variation that occurs within cannabis strains.
What are phenotypes, exactly?
Phenotype is a fancy word used to describe the physical characteristics of each plant, such as its size and shape, leaf structure, growth speed, and bud production. Every cannabis strain will have its own natural variations, with some phenotypes growing faster than others, producing larger buds or flowers, or having a different smell and taste than others. While we do our absolute utmost here at Fast Buds to ensure that phenotypic variation is at an absolute minimum (through extensive back-breeding programs for every single one of our cultivars), this is just something that you have to accept in a certain respect.
And, while it can cause some difference in growth rates, even between seeds from the same batch, variety is the spice of life! one of the funniest things when growing weed is the excitement that comes along with never knowing exactly how the seeds will come out, and what kind of phenotypes you will produce. In the end, don't stress too much about how long it takes for your Strawberry Pie Auto to finish. The results will be fantastic, and worth the extra week or two to wait if that's what is needed.
What kind of yield can I expect from my Strawberry Pie Auto?
When grown to its fullest potential, Strawberry Pie Auto can produce harvests of up to 500–550g/m² indoors, or 150–200g/plant outdoors - which is more than enough for a few relaxing days with your friends. The buds are dense and coated in sticky trichomes with an unmistakable sweet strawberry aroma that just begs you to take a bite. Again, just like with timing, the yield size is totally dependent on the conditions the crop is grown in, and your skill as a cultivator. To maximize yields, there a few things you need to keep in mind.
What are the most important considerations when trying to maximize flower production?
Environmental control is a big one. Make sure you keep the temperature and humidity levels of your grow area within optimum parameters (18 to 28 degrees Celcius, with a relative humidity of between 40–60%) in order to get the best yields possible. Those ranges are actually a little wider than ideal, but should still produce a great quality product. If you can keep the temps between 20 to 25 degrees Celcius, and the humidity at 65% to start, with it slowly dropping down to 45% by harvest then you should see fantastic results.
You also want to ensure proper air exchange, as this ensures that the plants have enough oxygen to produce vigorous growth and healthy buds. A carbon filter is vital to help scrub the incoming and outgoing air and to keep the grow room environment clean and free of pests and disease. it also stops any of those delicious aromas from escaping. You will also want to ensure that the plant has adequate nutrition throughout the grow cycle. A good nutrient mix is vital for ensuring optimal flower production. Too much or too little of certain nutrients can stunt growth, or even cause deficiencies in your crop.
What is the best nutrient mix for Strawberry Pie Auto?
That really depends on what style of cultivation you go with. If organic, soil-based gardening is your jam then you actually don't have to worry too much about the nutes, at least not for the first half or so of the growth cycle. What we suggest is grabbing some cannabis-specific, pre-mixed soil. These options come pre-dosed with all the nutrients that the plants need to thrive in the first 5 or so weeks, but once flower production is in full swing you may need to top the substrate up with some flowering-boosting organic nutrients.
If you prefer hydroponics then you will need to do a bit more research into the best nutrient mix for your particular setup. We recommend looking into some of the top names in cannabis-specific nutrition, such as Advanced Nutrients, House and Garden, DynaGro, Botanicare, or Canna. This is just a small subsection of what's out there, and if you head into your closest hydroponic supplier they will probably have a few local brands that sell for a little less than the big dawgs. If coco-coir is our preferred substrate then make sure you use coco-specific nuts. While coco-coir is classed as a hydroponic medium, it has its own specific nutrient and pH requirements, so make sure you use nutes specifically designed for coco-coir.
No matter what method of cultivation you go with, always read the instructions on the nutrients that you are using and cut that dosage in half, if not further. This is to ensure that you don't overfeed your plants, and this is especially important with autoflowering genetics. Autos don't take kindly to overfeeding, and it can stunt growth.
What is the aroma and flavor profile of Strawberry Pie Auto like?
The flavor is absolutely delicious and is dominated by notes of strawberry, gelato, and a nice undercurrent of diesel to get the fullest and most well-rounded smoke, you are going to want to cure those buds for a minimum of three weeks, but up to 3 months if you have that kind of godlike patience.
The aroma is pretty otherworldly also. Strawberry Pie Auto has a sweet and pungent smell that is enhanced by notes of tart citrus, herbs, and spice. Again if you can wait for the full curing period, then you'll be rewarded with a complex and intense smell that is a true lingerer. During the last 3 weeks, Strawberry Pie Auto is a stanky son of a gun. You are definitely going to want to make sure your carbon filter is up to the job if you live in an area where cannabis cultivation is frowned upon (or worse).
What is the psychotropic effect of Strawberry Pie Auto?
In terms of effects, the high starts off with a boost to your focus and creativity before mellowing out into a relaxing body buzz that eases you into a peaceful sleep. Perfect for unwinding after long day. While we don't usually put this option at the top of our wake-and-bake list, it's definitely a good choice for when you want to relax in the afternoon or evening, and can really enhance social enjoyment. "You ever seen Scent of a Woman…ON WEED?" Well, you should, and that weed should be Strawberry Pie Auto
That being said, Strawberry Pie Auto is considered an all-around solid strain that is great for medical and recreational users alike. It's a perfect choice for anyone who wants to enjoy the psychoactive effects of cannabis without feeling overwhelmed. In terms of medicinal uses, Strawberry Pie Auto is great for sufferers of chronic pain issues, as well as people who battle with digestive problems. It can help reduce inflammation and ease the symptoms of insomnia, stress, and anxiety. It also helps alleviate nausea.
Is Strawberry Pie Auto a good strain to grow in a small tent?
Yep, sure is! Strawberry Pie Auto is a great strain for the small grower. It will finish flowering in as little as 9 weeks and requires only basic maintenance to thrive. With its compact height of around 1 meter (3ft), it doesn't take up unnecessary space, and it has an excellent yield that can reach upwards of 500g/m2 when grown indoors in the right conditions. It also works great for Sea Of Green cultivation, which helps maximize the yield output of a small growing area. What's Sea Of Green cultivation?
Sea Of Green (SOG) is an indoor growing technique used to optimize yield production. It involves planting many small plants, instead of a few large ones, and allowing them to flower at the same time. This helps increase the levels of light exposure and airflow in smaller tents or spaces, which in turn increases yield production. Strawberry Pie Auto grows well in SOG and is a great strain for growers working with limited space.
Is Strawberry Pie Auto a good option for novice growers to start out with?
100%. Strawberry Pie Auto is an easy-to-grow and forgiving cultivar that is a perfect introduction to the wonderful world of weed cultivation. It is relatively low maintenance, and won't require you to be a professional horticulturist to get good results. It also packs an intense smell and flavor and can give you a good yield for your first grow. A great option for the beginner cultivator!
Is Strawberry Pie Auto an Indica or Sativa dominant strain?
Strawberry Pie Auto sits heavily on the Indica side of the scales, with an 85% to 15% split. While that would usually suggest that the high is going to make you sink directly into the couch, it's actually a really well-rounded strain. The Indica proportions give it a relaxing body stone, while the small amount of Sativa helps keep you alert and focused. Perfect for a range of activities from chilling at home or getting creative. All-in-all, an excellent hybrid strain!
Can I expect the buds to turn out purple?
Yes, Strawberry Pie Auto is one of the auto strains that has a strong possibility of finishing up with those beautiful purple and magenta hues that myths are made of. If you want to strengthen those chances, we suggest dropping the overnight (or lights out) temperature to around 15 - 17 degrees Celcius in the last 4 weeks of flower. This should induce the dark purple shades, and you can expect your buds to look like something Snoop Dogg writes bars about. Give it a try and see how you go.
Are there any other ways to increase the chances of the buds becoming more red or purple?
Yes, there are many ways to increase the chances of your buds finishing up with a red/purple hue. These include: avoiding light stress, providing plenty of phosphorous and potassium to the plants during flowering, decreasing nitrogen levels, controlling temperatures correctly, and providing good airflow. If you manage to get all these factors right, then the chances of finishing up with a nice red/purple tone increase dramatically.
What sort of plant training techniques should I use with Strawberry Pie Auto?
When it comes to autoflowering genetics, it's always best to try and avoid imparting any high levels of stress. Unlike photoperiod strains, autos have a finite vegetative period. This is one of the factors that make them grow so quickly, but it does mean that they are more sensitive to stress. Stressing the plant will result in a short period of stunted growth, and since the timeframe is already so short, we want to treat all of our autos like the Queens they truly are. That being said, you can use some basic, low-stress training methods.
ScrOGgin is a great option, as is the simple tie-down method. Both of these training techniques work in essentially the same way and promote lateral growth over top-down development. This will help create a flat and even canopy, which allows for better light penetration, increased canopy airflow, and a more even distribution of the growth hormones and nutrients - which, when all put together will result in stronger yields. Just remember, be very careful with your Strawberry Pie Auto training. While their growth period is quick, there's no rush to smash the stem and branches into your ScrOG net. Wait until the plants have developed to the point where she is pushing back against the screen, and then cautiously weave her into place.
If you are going for the tie-down method, then the same principle applies. Start out by tieing down just above the third node, and slowly increase the amount of tension over the next week or so. Then, as the plant grows further nodes, continue the tieing down. You can slowly shape the plant into a spiral, and you can also tie the branches down as they overtake the plant's height to keep the whole canopy at one even, horizontal plane. So, no high-stress training at all?
Look, this is a contentious issue. There are a bunch of growers out there who swear by topping their autos, but there are also a bunch of horror stories also plastered across the growing forums from people who have tried, and failed miserably to increase their auto yields by using high-stress training techniques. What we can say with 100% certainty is that you don't what to try these types of methods if you only just started to grow, or if you have zero experience with the strain.
But if you are feeling adventurous, and you aren't too worried about losing a plant or two, then go right ahead! Growing is all about having fun, and experimenting with your crop is the best way to have an enjoyable experience. What we would suggest is to grow the strain a few times before trying out HST techniques, and make sure you have a solid understanding of the cultivar before diving into wild experiments. But, keep it within reason. You don't want to go super cropping your entire crop, or topping every single plant, as these types of approaches aren't all that beneficial for autoflowers. Stick to the basics and you'll be on your way to a successful harvest!
Is Strawberry Pie Auto a good option for extract producers?
Good lawd, there is almost none better! Not only is she a resinous, dank-as-all-f*** strain, but the terpene profile is also up there with the most interesting on the current market. The ridiculous amount of trichomes that Strawberry Pie Auto produces makes her one of the best options for all types of extraction. Even if oils and tinctures aren't your cup of tea, you should give homemade rosin a crack with this strain.
Home-made rosin? What's that?
Rosin hash is a form of solventless concentrate made simply by applying heat and pressure to flowers or buds. Rosin is quickly becoming a favorite among the cannabis connoisseur community because it offers a pure, terpene-rich taste without requiring the use of harsh solvents like butane or propane. This means that all you are getting is the pure, unadulterated cannabinoids and terpenes - a gorgeous, live resin that is full-spectrum and perfect for a bunch of uses. If you've never tasted rosin hash then you've got a surprise in store!
To make rosin from home all you need is some parchment paper, a hair-straightening iron, and some forearm strength. Put the flower or bud between two sheets of parchment and press it with the hair-straightening iron until you see oils seeping out of the sides. Collect those and voilà! You've made your own rosin - no expensive extraction equipment is required. Strawberry Pie Auto is an ideal strain for home extraction because of its high trichome content and terpene profile. Once you've made your rosin, you'll notice why this strain is so highly sought after - a true flavor fest! From earthy to sweet, fruity aromas to piney undertones - all without the use of solvents.
She also works perfectly for bubble hash or any other extraction method. And wait till you make some edibles with the coconut-infused oil she offers. The strawberry-heavy flavor works unbelievably well with chocolate treats.
13. In Conclusion
All four growers in our review agree that Strawberry Pie Auto is an outstandingly frosty plant. She starts producing thick layers of trichomes early and, by harvest time, becomes more resinous than most varieties. It means that after trimming you can produce good quantities of excellent bubble hash. Strawberry Pie Auto seeds also frequently produce purple phenotypes which, coupled with white 'frost' on every calyx, have a huge bag appeal.
Throughout all grows, we have also noted much consistency in terms of flowering times, height, and plant structure. Even with large batch of seeds, you can be sure that you won't have to worry about different feeding regimes or schedules. Each can be given exactly the same treatment. And even untrained or standing side-by-side with other plants in a light garden, Strawberry Pie Auto doesn't stretch much and remains comfortably compact. LST or topping produces extremely short but, at the same time, branchy and insanely high-yielding bushes. As for the end product, it's routinely described as the best weed grower has raised or even smoked — Strawberry Pie Auto is that delicious! So try this autoflower yourself. She may well become a permanent resident in your garden.
External References
- An Overview of Products and Bias in Research, David Gloss, Neurotherapeutics, Oct 2015
- Cannabis Systematics at the Levels of Family, Genus, and Species, John M. McPartland, Cannabis Cannabinoid Research, 2018
- Genetic tools weed out misconceptions of strain reliability in Cannabis sativa: implications for a budding industry, Anna L. Schwabe, Mitchell E. McGlaughlin, Journal of Cannabis Research, 2019
- The results of an experimental indoor hydroponic Cannabis growing study, using the 'Screen of Green' (ScrOG) method-Yield, tetrahydrocannabinol (THC) and DNA analysis, Glenys Knight, Sean Hansen et al., Forensic Science International, May 2010



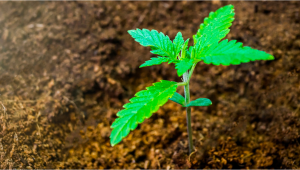
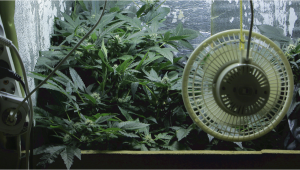
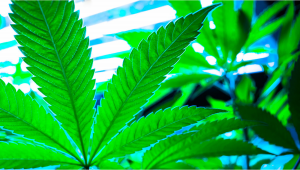


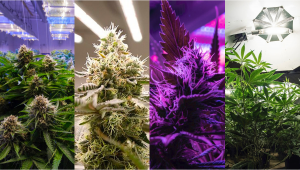

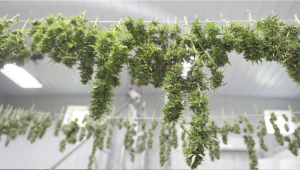
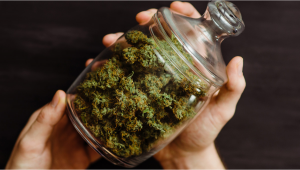
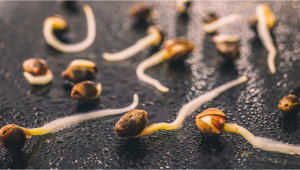

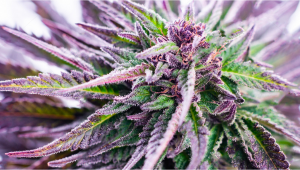


Comments