Tropicana Cookies Auto Cannabis Strain Week-by-Week Guide
- 1. Grow specification
- 2. Grow set up
- 3. Germination and seedling stage | week 1
- 4. Early veg | week 2
- 5. Mid veg | weeks 3-4
- 6. Transition (pre-flower) | week 5
- 7. Early flower | weeks 6-7
- 8. Mid flower (bulk phase) | weeks 8-9
- 9. Ripening and harvest | week 10
- 10. The outcome
- 11. In conclusion
Tropicana Cookies Auto is a truly remarkable strain that has won over the hearts of growers and smokers alike. This hybrid strain boasts a perfect blend of sweet citrus flavors and a smooth, relaxing high that's ideal for unwinding after a long day. What's more, Tropicana Cookies Auto is a breeze to grow, making it an excellent choice for novice and experienced growers alike.
If you're planning to grow Tropicana Cookies Auto, this is your ultimate guide. We've put together a detailed week-by-week breakdown of this autoflower's growth cycle, from seed to harvest. Follow our tips and you'll be rewarded with a bountiful harvest of sweet, fruity buds.
1. Grow Specification
With a 40/60 Sativa/Indica composition, this XL-sized strain can reach a height of 70-110 cm and has a flowering period of 8-9 weeks. Indoors, it can yield an impressive 400-500 gr/m2, while outdoors growers can expect 50-150 g/plant. And let's not forget about the THC level, which can reach up to a whopping 27% with CBD levels less than 1%.

But it's not just the numbers that make Tropicana Cookies Auto stand out. Its taste is also a real delight, with notes of lemon, sandalwood, and sweetness. This weed is perfect for those looking for a potent and flavorful experience. Overall, Tropicana Cookies Auto is definitely worth trying for anyone who wants a top-of-the-line strain that delivers on both quality and taste.
2. Grow Set Up
Tropicana Cookies Auto is a relatively new strain, but there's no shortage of grow reports already as the community has eagerly embraced this exciting new genetics. Below, we'll review in detail four of these grow diaries and will occasionally use photos from others. As a result, you'll have plenty of information to draw upon when you plan your own Tropicana Cookies Auto grow.
In the table below, you can see the setup and grow specifications for the four grows. All were done indoors, under medium-strong LED grow lights and provide good comparison between two principal mediums used in cannabis cultivation -- soil and coco coir.
| Grow Space | Light | Medium | |
|---|---|---|---|
| A | 1 m2 | 300W LED | Coco/Perlite |
| B | 0.3 m2 | 650W LED | Coco |
| C | 5.02 m2 | 400W LED | Coco/Perlite |
| D | 1 m2 | 360W LED | Soil/Perlite |
As you will see from the text below, this strain was strong enough to survive topping and besides it's a versatile cultivar that did great in all kinds of setups and under all kinds of conditions.
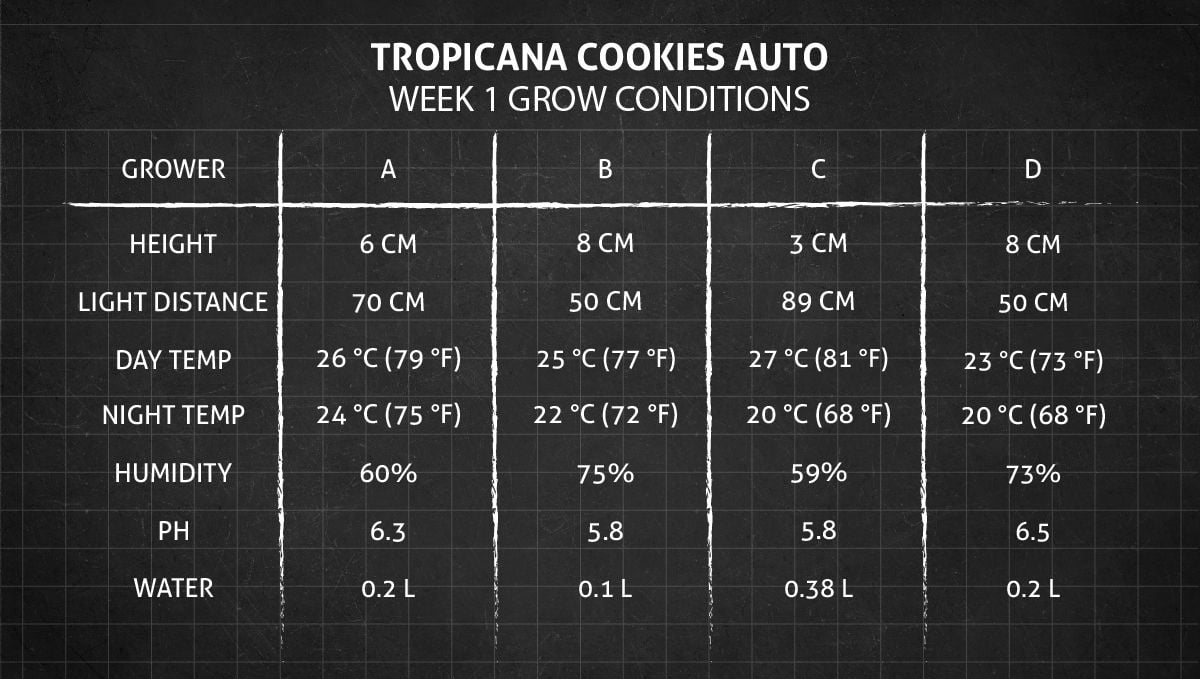
3. Germination And Seedling Stage | Week 1
During the germination process of an autoflower plant, it is important to maintain a warm and humid environment to encourage the seeds to sprout. A temperature range of 24-26°C (75-79°F) and a humidity level of around 70% are ideal. More or less the same conditions are also great for the seedling in its first week from seed.
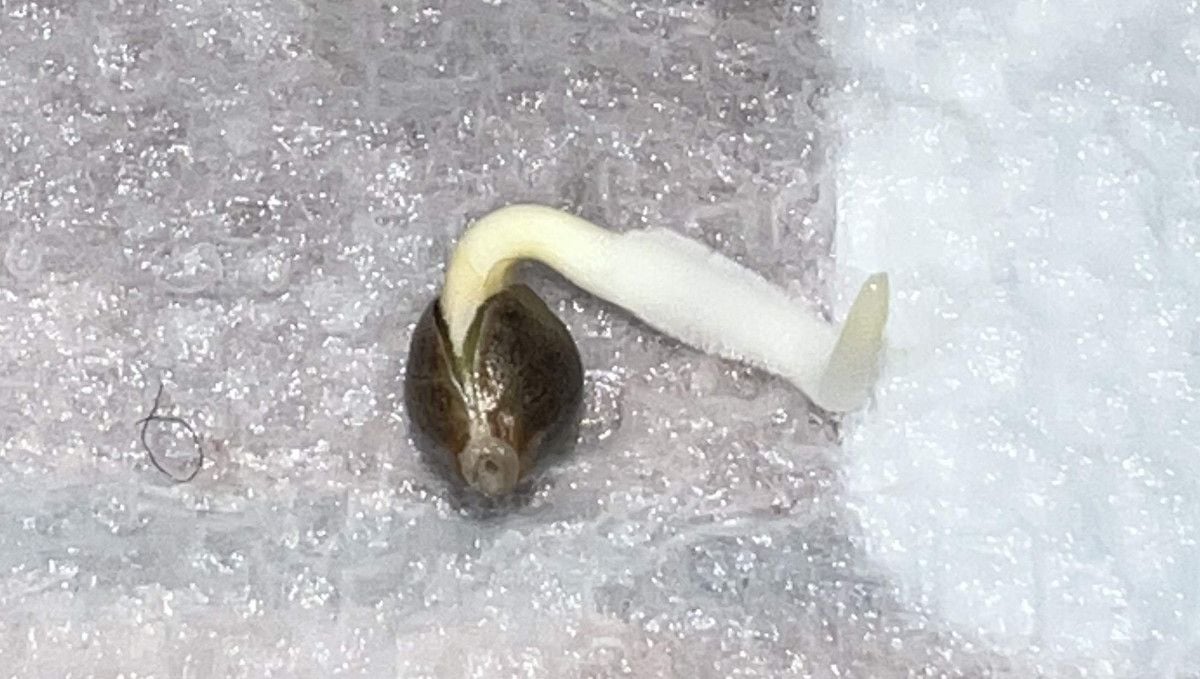
The germination process itself needn't be overly complicated. Most growers use the simplest and most straightforward method of keeping the seed between wet paper towels. This method allows you to monitor the state of your seed constantly, and when you see that it has cracked and shot out a taproot, you can immediately proceed to plant it into the medium.
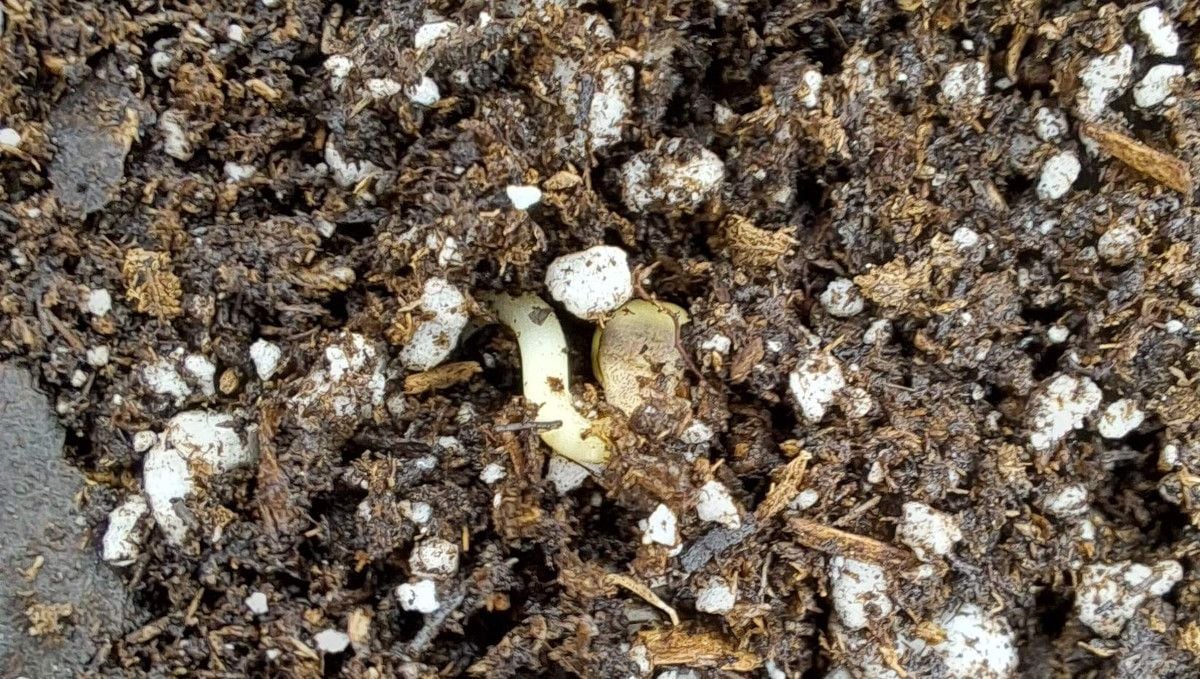
Bury the seed about a half inch (1 cm) or less in the soil and loosely cover it with moist medium. This way, the seed will be in the perfect environment for it to thrive: it will have enough moisture, and it will also be dark. Just don't leave the soil waterclogged -- otherwise you may suffocate the seed, depriving it of oxygen. After a while, you'll see the sprout emerging from the ground.
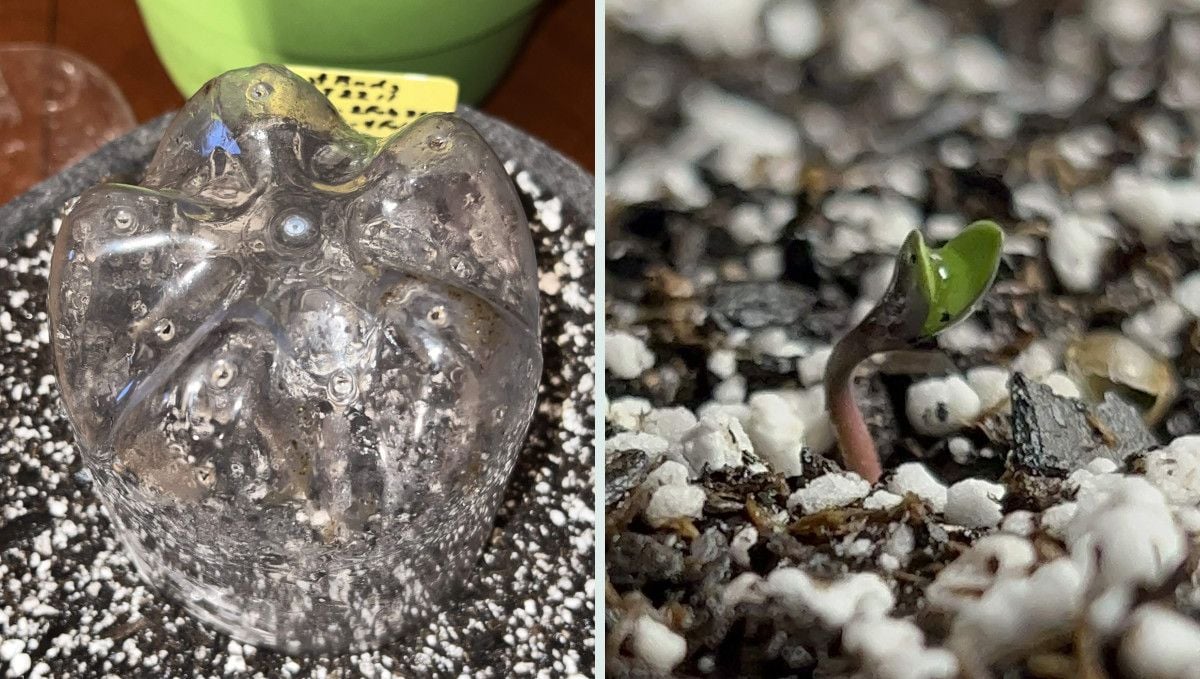
We should stress one more time that seedlings and young marijuana plants love humid conditions. So, if you don't know how to keep the right humidity levels in your whole grow room, you can use a humidity dome. It can be as simple as the bottom part of a plastic bottle, and it's enough to keep the environment very humid around the seedling. You can further raise the relative humidity by misting the ceiling regularly with plain water. If you do everything right, the little plant will emerge from the ground already without the seed shell.
When your seed has sprouted, you will face an inevitable question: whether to put it straight into the final container or use some kind of a starter pot. We can't give you a one-size-fits-all answer. You'll have to find something that suits your personal growing style. There are pros and cons for both methods. The final container means that you will never have to transplant your plant, thus causing potential stress. Using a starter pot means that you will have no trouble watering your little plant. (It's much more difficult to calculate a proper amount of water when the plant is little and the container in which it grows is huge.)
Whatever you choose, you'll need to put your cannabis plant into the final container around week one or two from seed.
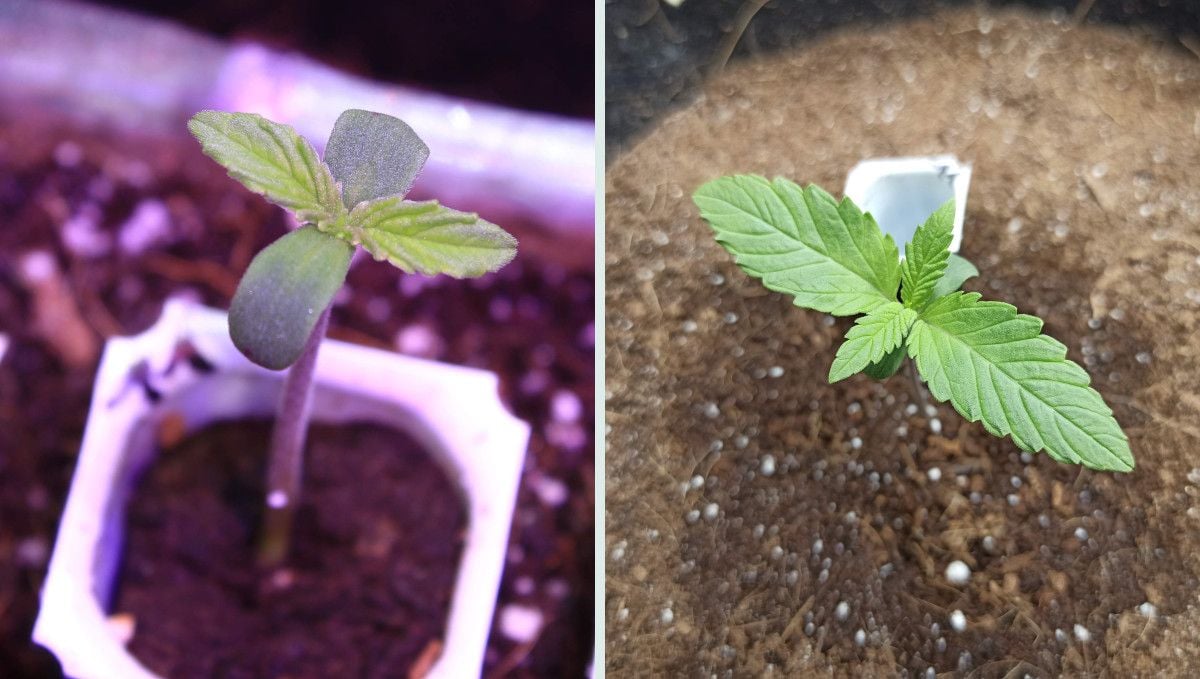
Remember that at this stage of the plants lifecycle it is still very small, both in its above-ground and underground part. We mean that the rootball has not yet extended to every part of the container, so you need to water your plant only around its base.
4. Early Veg | Week 2
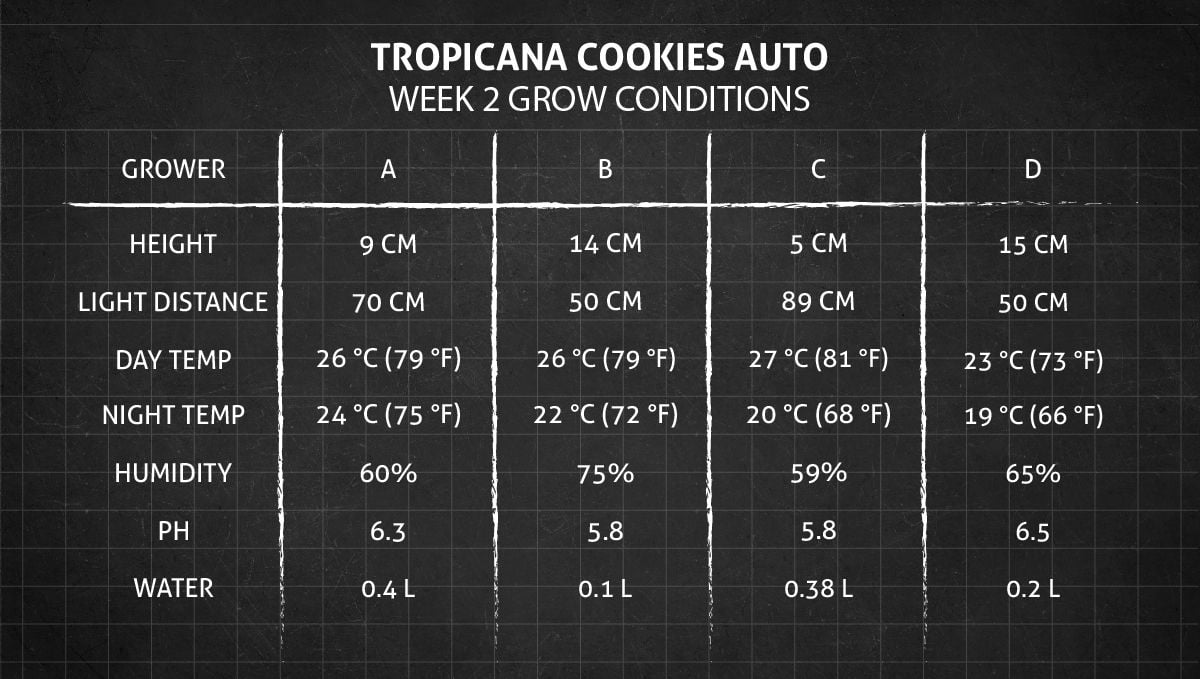
In the second week from seed, a weed plant is still not very strong and quite vulnerable. Its leaves are growing and evaporating more and more water, but it's root system may be too underdeveloped to provide it with enough moisture just yet. It means that you should keep the humidity higher than at later stages or its lifecycle. Cannabis seedlings also love the temperature to be at the warm side.
In week two, the above-ground growth is quite noticeable. The most conspicuous thing that you will see is of course the fan leaves that are growing at a good rate. However even at this early stage, you may already see some tiny new growth at the nodes -- where the future side branches will form.
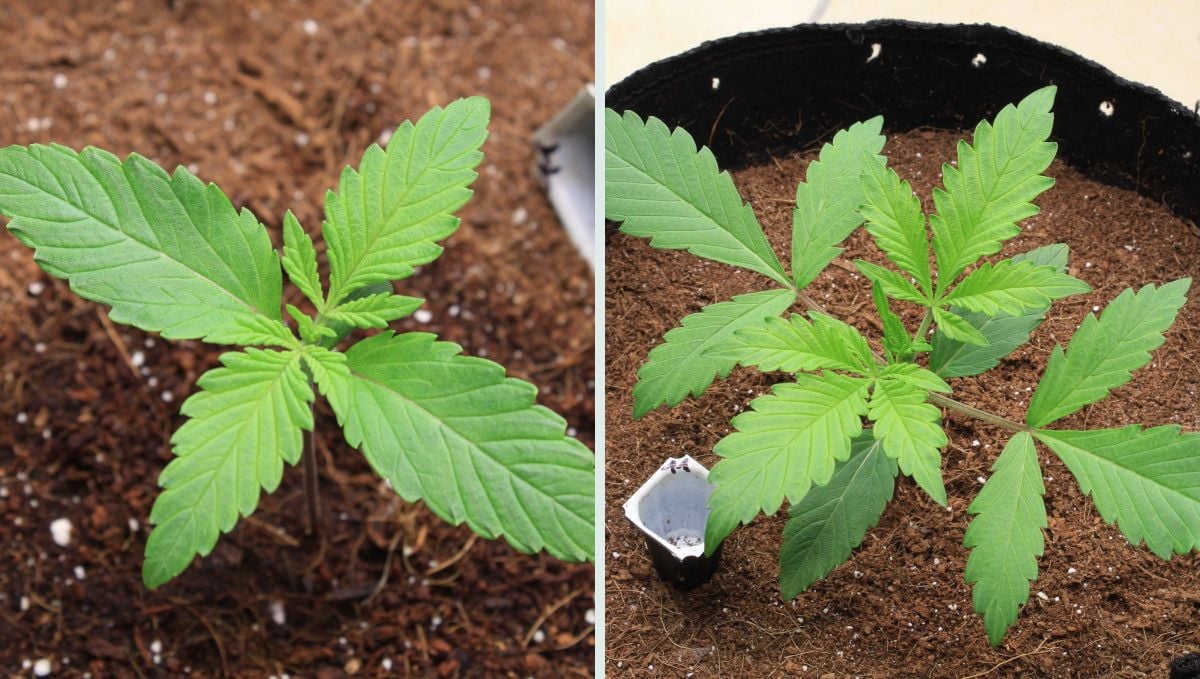
A happy cannabis plant has leaves that are uniformly green and perky. If they droop or curl, then maybe you are watering too much or not enough. In the pic below, you can also see burned edges on lower leaves. This symptom is often misdiagnosed as potassium (K) deficiency, but more often than not, it's just a symptom of light stress.
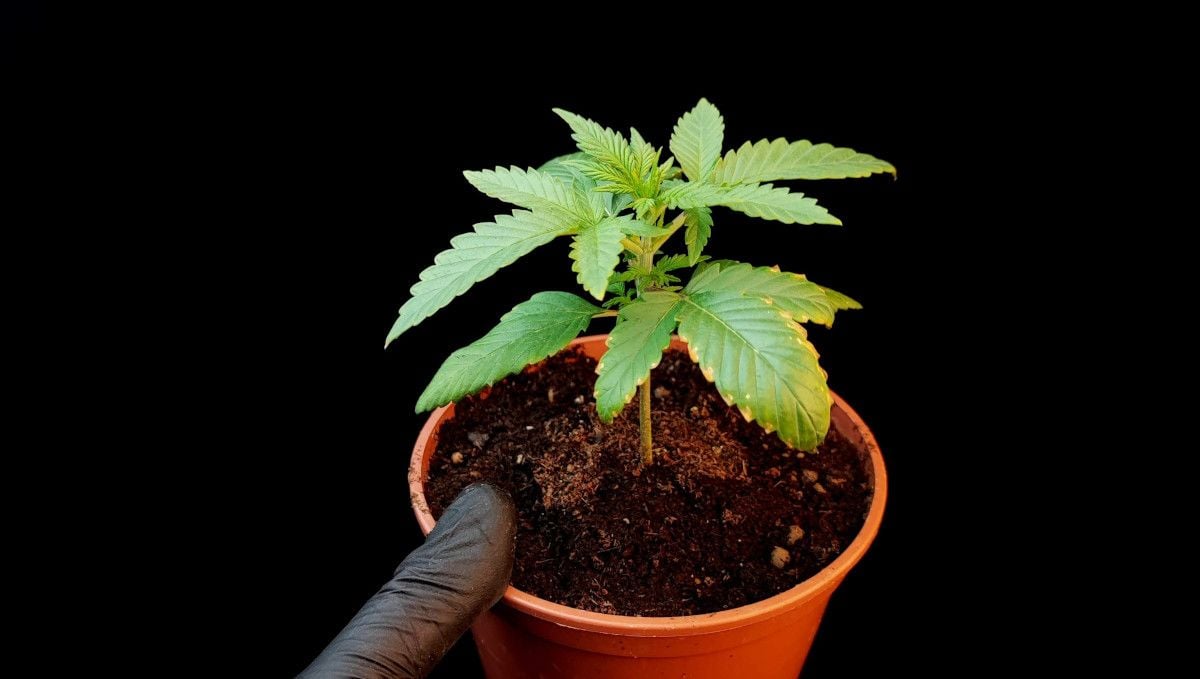
Also be sure to give your seedlings just the right amount of light. It's usually very easy to see if your light is powerful enough or too weak and whether it's too close to the plants or just at the right distance. The plants that are constantly pounded by too much light stay very close to the ground and do not develop very rapidly. If they stretch just a little, it's better. If they stretch too much and form too long internodes, maybe you should lower your light or dial it up (if it's dimmable).
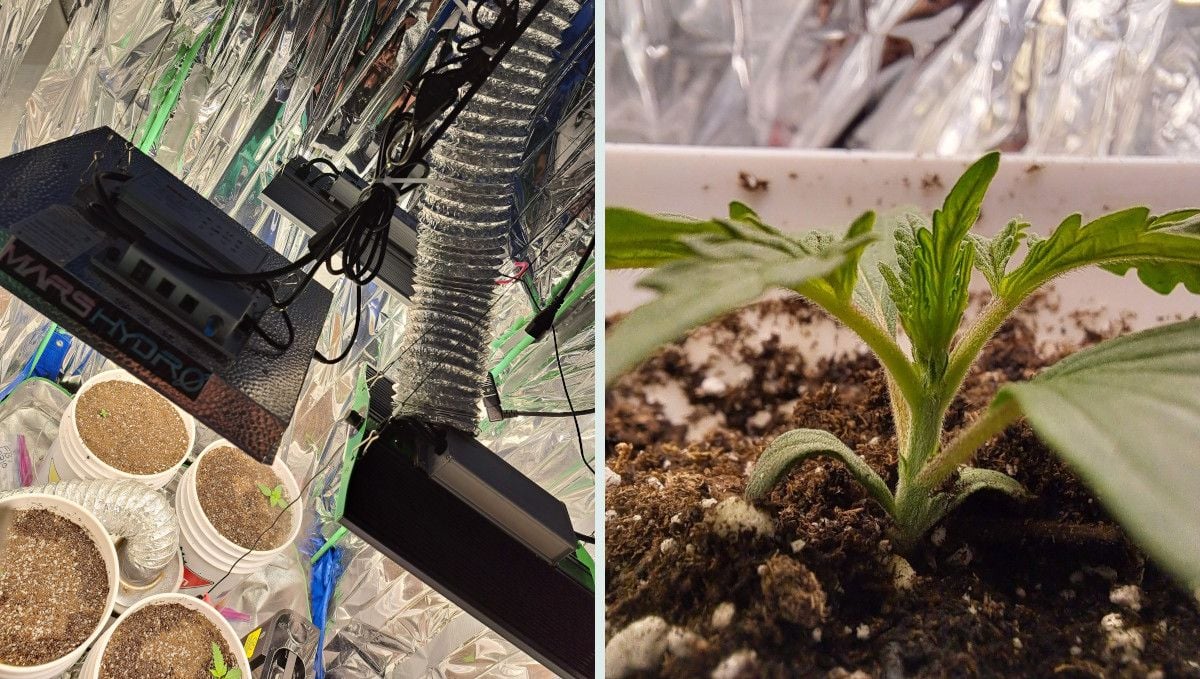
Of course, if you grow your autoflowers in hydroponics or coco, you will have to feed them extra nutrients from day one. However, your autoflower will thank you for that with vigorous growth unseen in soil.
5. Mid Veg | Weeks 3-4
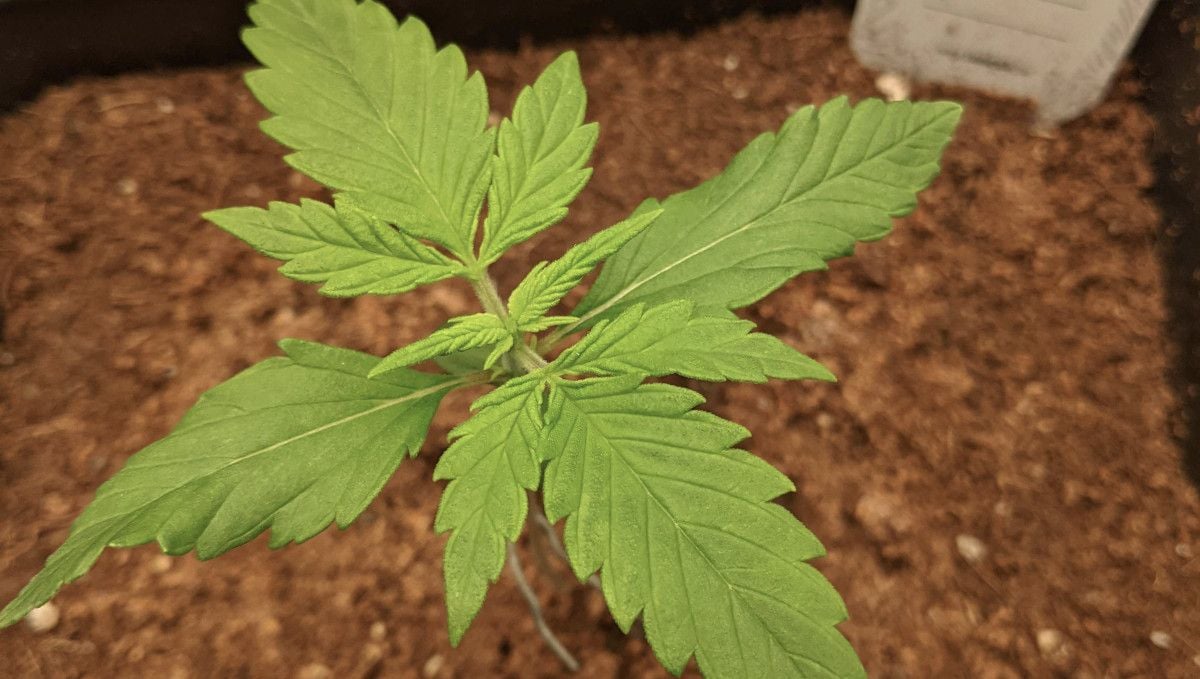
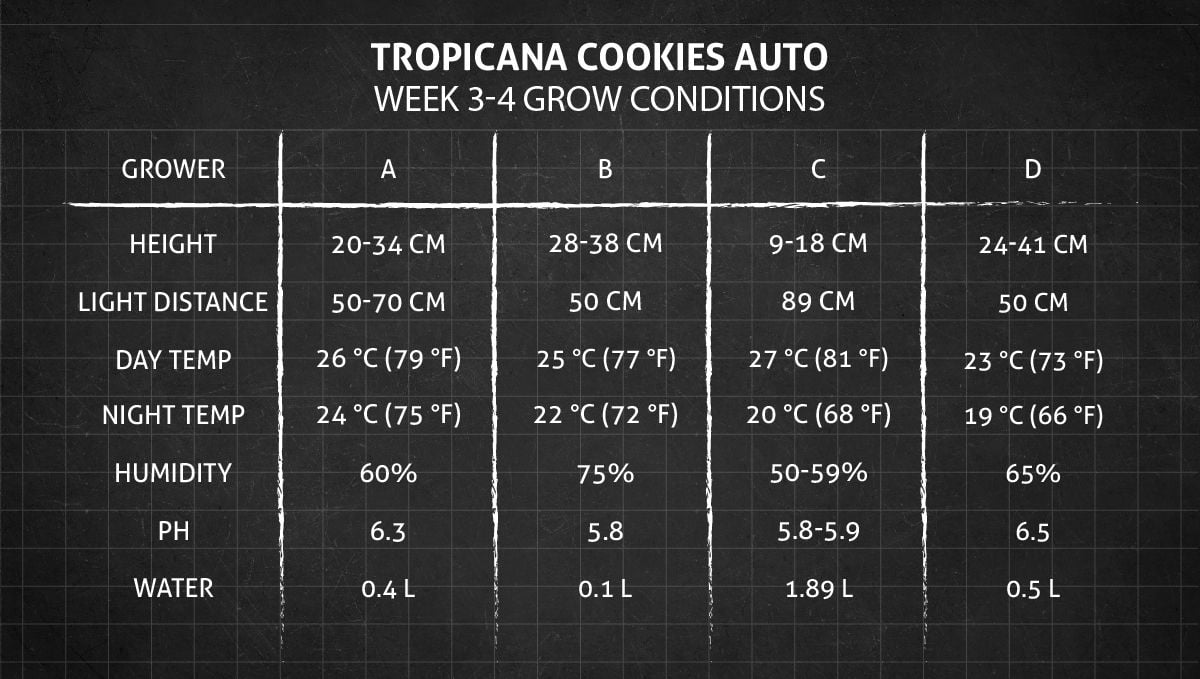
The second half of the first month from seed is the time when growth is the fastest. In these two weeks, you will see how huge fan leaves develop and how the growth of new side branches begins in earnest. Naturally, at this stage, your plant will need more water, more light, and more plant food. You won't have to worry anymore about keeping the perfect conditions as the plant will be strong and able to survive a wide variety of environments.
Around this time, many growers also choose to start training their autoflowers. It's because in most indoor grows, the vertical space is limited so it's necessary to keep the canopy short and flat. It also helps keep the growing points (and later, flowers) at the same distance from the light and thus utilize it fully. With autoflowers, you don't want to postpone this as the vegetative stage is very short. So, before the flowering starts in a week or two, you should already have the canopy in the shape you want.
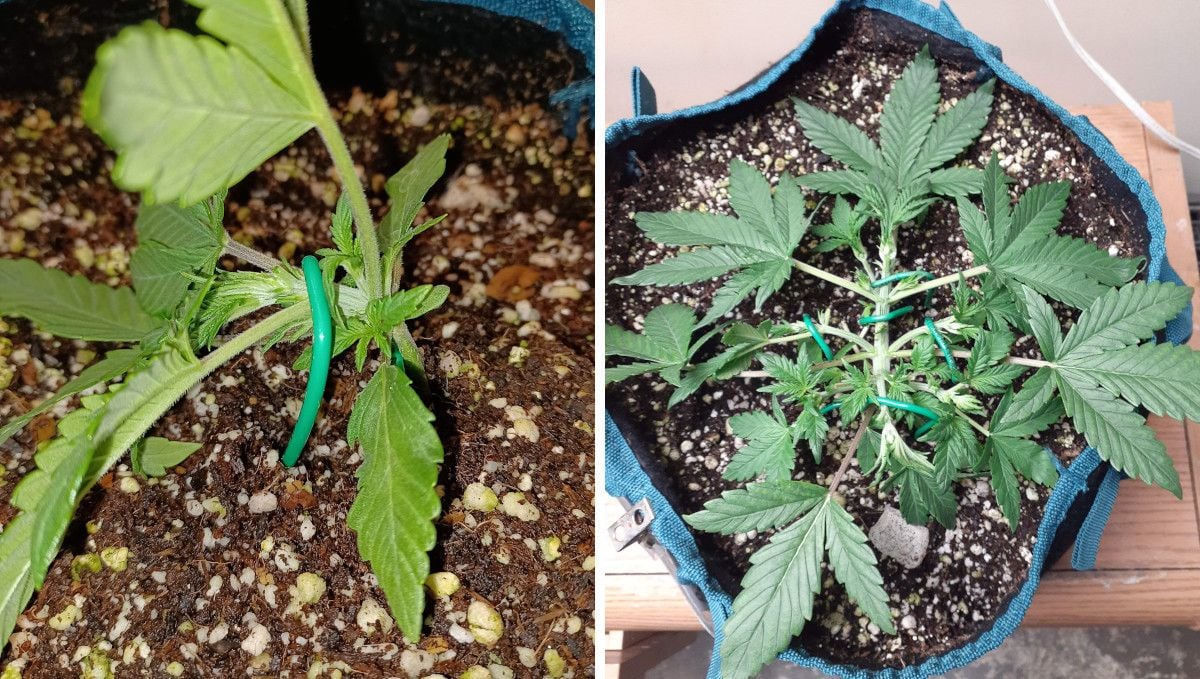
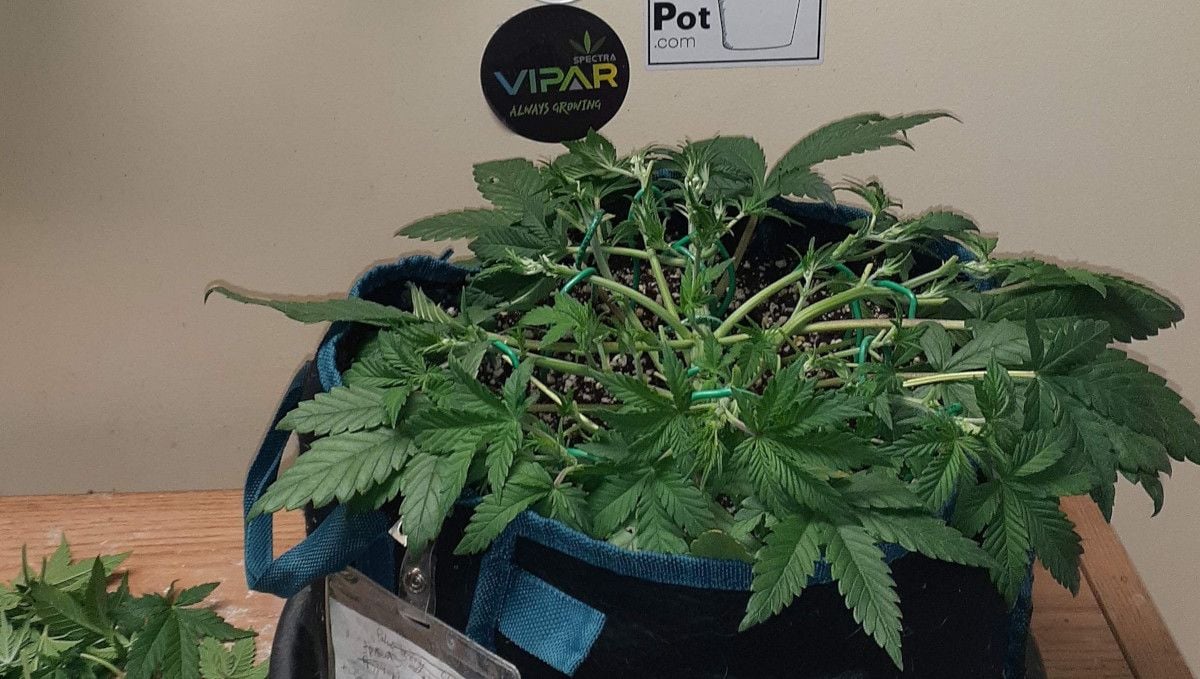
Training autoflowers indoors can be as simple as bending the main stem and securing it with braces. This is enough to reroute the energy from the central stem to the side branches. This training method, known as the tie-down method, is called low-stress for the simple reason that it does not cause much stress to the plant. As such, it's ideal for autoflowers. However, some of the more experienced gardeners also use high-stress training -- when they top or FIM their plants to stop the central stem from growing and to stimulate side growth.
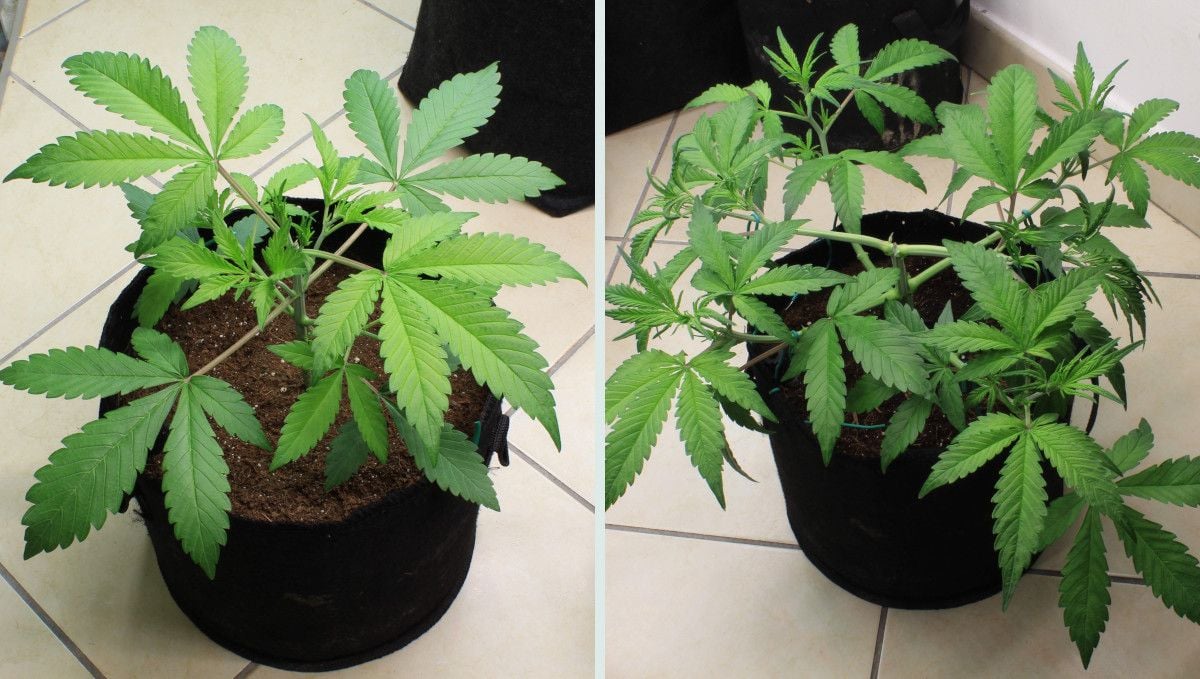
Unless you have a few successful grows under your belt, we advise you not to use high-stress training techniques on autoflowers. This type of plants is not very tall by nature, so simple LST is more than enough in most cases. Even less risky is letting your autoflower grow naturally in a SOG setup, meaning side by side with several othet plants in small pots
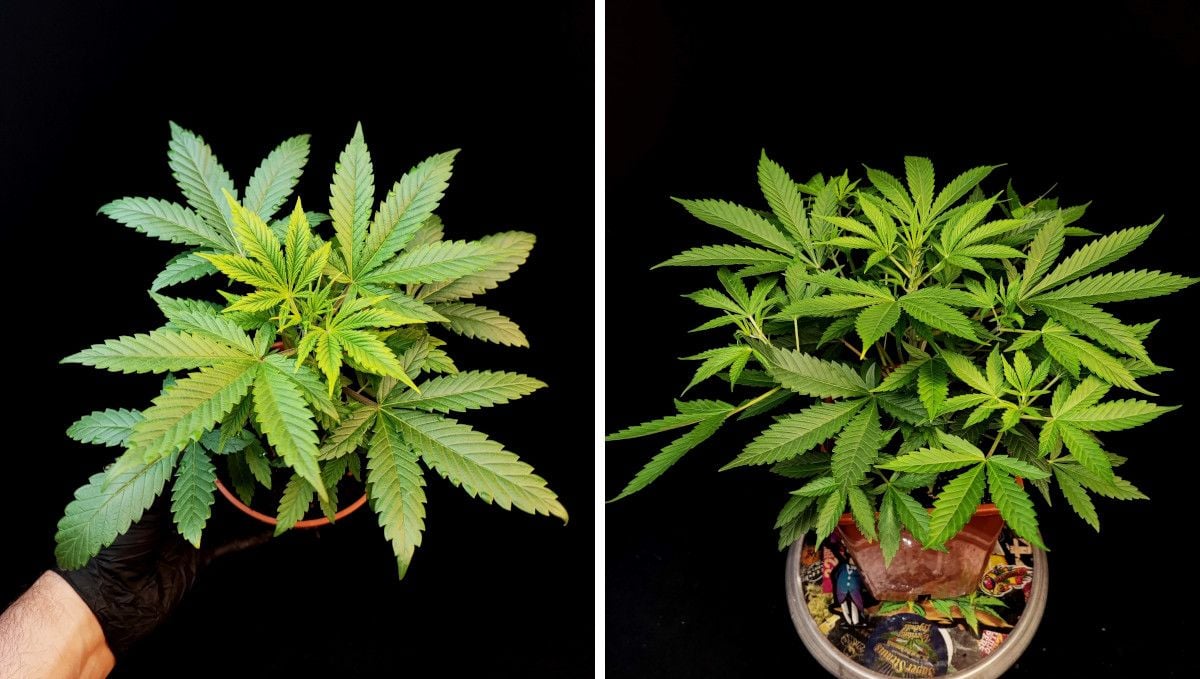
However, after you have gained enough experience and mastered all other aspects of marijuana cultivation, you may start experimenting with HST techniques, including topping. Your main goal is not to stress your Tropicana Cookies Auto in any other way, be it consistent environment or a feeding regimen that should be just right.

Some gardeners use organic super soil, and this allows them to give their plants no additional nutrients for most of the grow cycle, at least not till the flowering begins. However, in most other cases, you will need to give your plants extra nutrients starting from about the second or third week from sprouts. You don't need to buy any fancy nutrients, supplements, and additives. In most cases, you only need two bottles of nutrients: one for the vegetative phase and one for the flowering stage.
It's also the safest option as many beginner growers overfeed their plants and cause nutrient burn. So, a little goes a long way in terms of feeding your autoflowers. When you have gained enough experience, you can experiment with higher doses of nutrients and with different enhancers, boosters, etc. The only exception might be some kind of a Cal-Mag formula that you are encouraged to use from your first grow. The deficiencies of these two nutrients are very common, especially in coco grows.
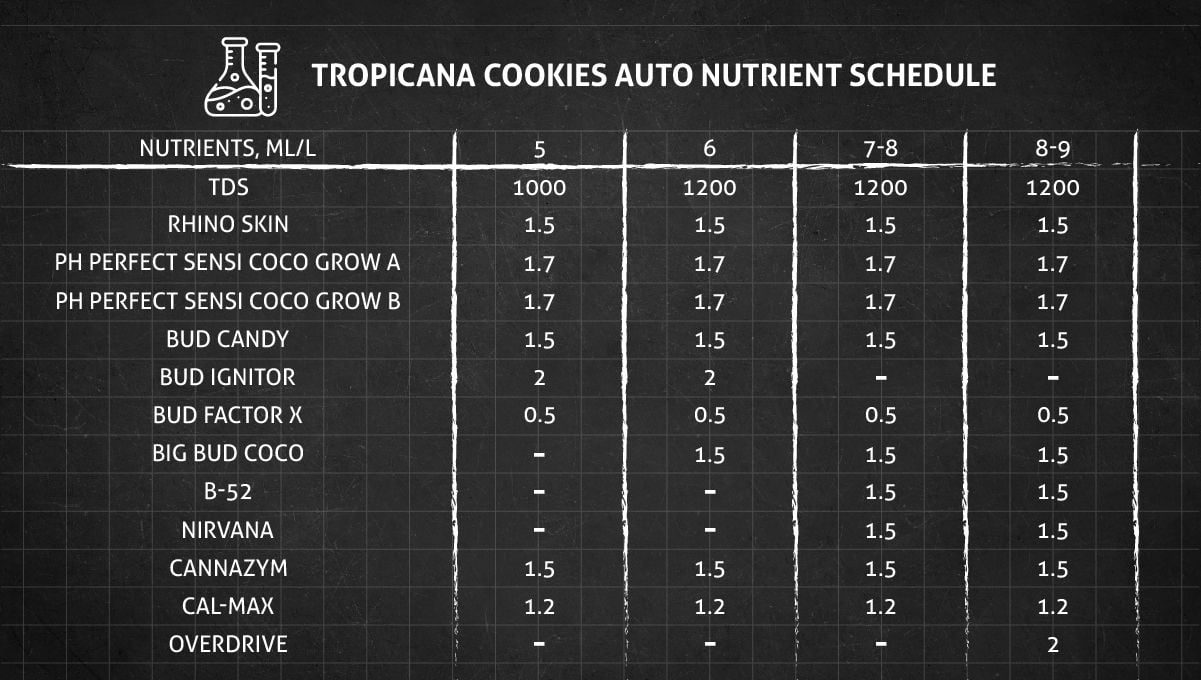
Please find below a simple nutrient schedule that you can safely imitate or use as a general guideline when you work on your own feeding regimen.
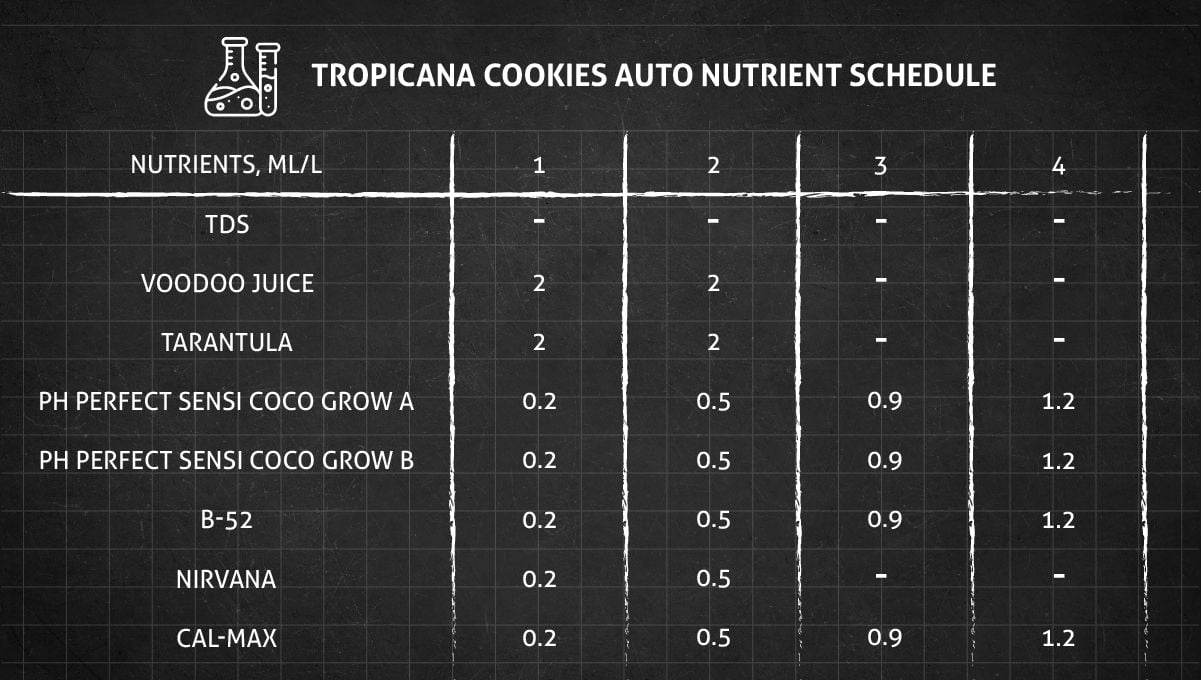
We also recommend to all newbies that they use organic nutrients whenever possible. There is a myth that organics don't bring you as much bud as when you use synthetic nutrients. But it's probably just that -- a myth. Organic growing is much safer and it leads to healthier plants and it doesn't cause you trouble with overfeeding and wrong pH, etc. Healthy plants, in their turn, always lead to higher yields.
6. Transition (Pre-Flower) | Week 5
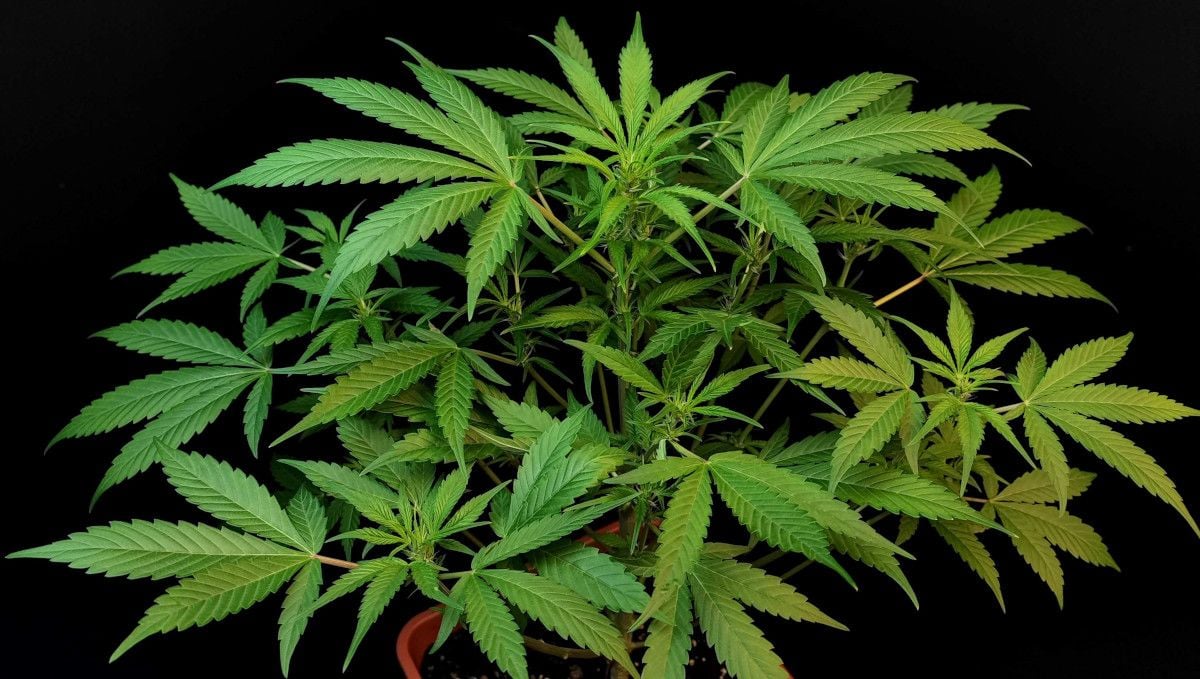
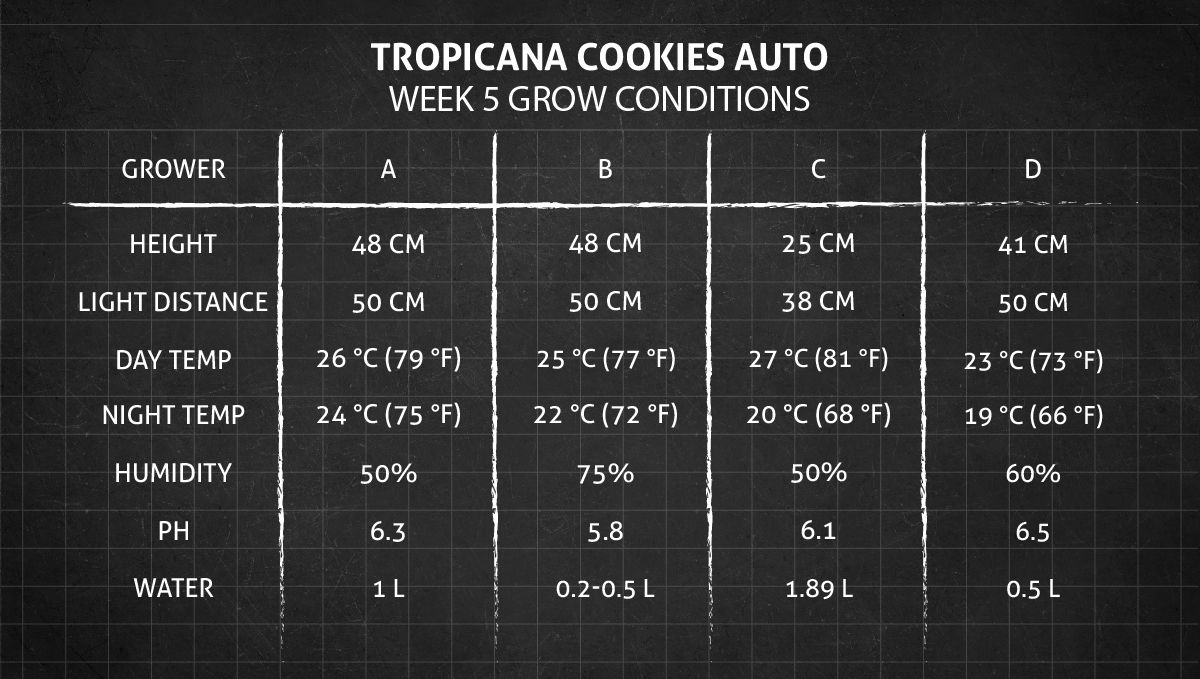
Week five from seed is an exciting time when all your previous efforts pay off and you see the first signs of flowers on your cannabis plants. You'll probably have to change your nutrients schedule around this time. Or leave it for later as the plant will continue active growth of branches for a couple of more weeks and at it will still need all the nitrogen that you can give it. What you can do is lower the day temperature a little bit and also decrease the relative humidity because cannabis plants love slightly cooler temperature and slightly drier conditions when they start to bud.
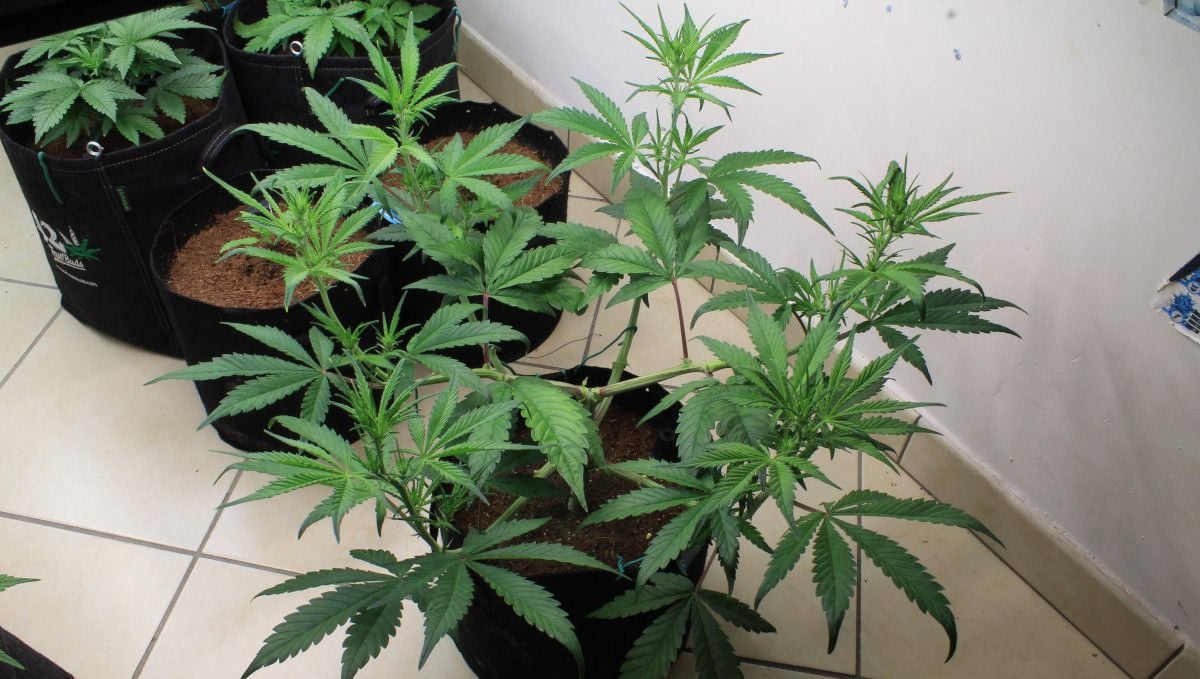
When your weed plants have started flowering or are about to do so, they will usually elongate their branches which will serve as real estate for later growth of flowers. Eventually, these branches will be all covered with bud although right now they don't look it.
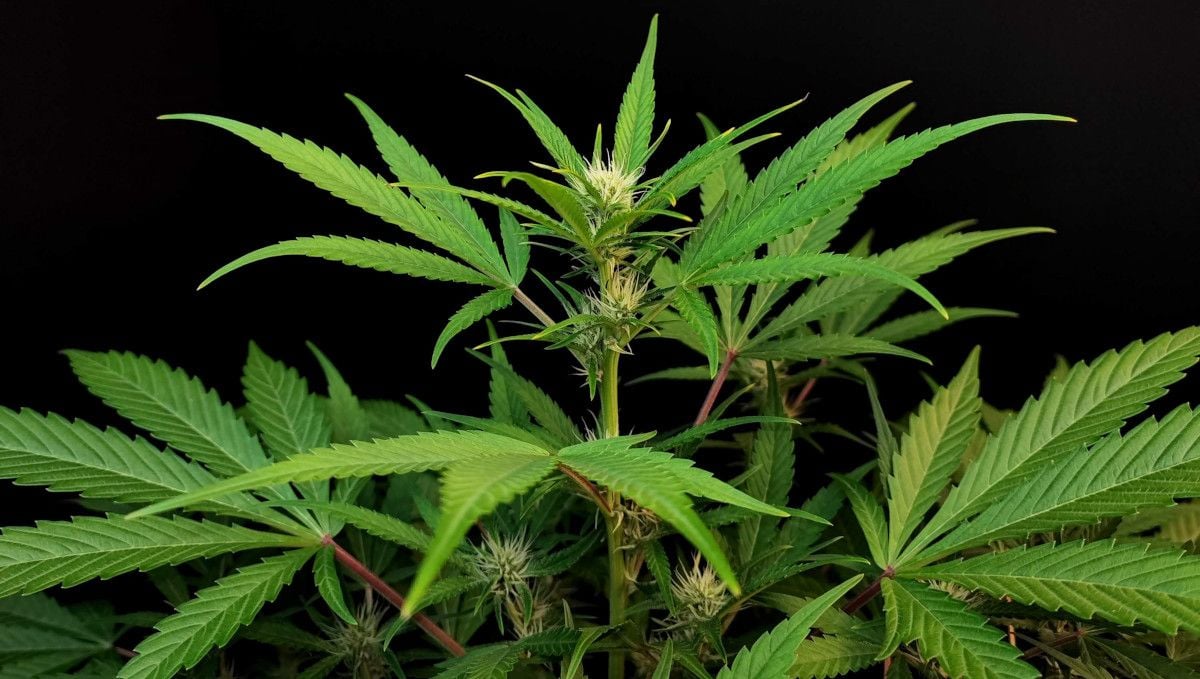
If you're attentive enough and look inside your canopy, you may see the first pistils at the middle nodes. Soon, you'll also notice the same white pistils and the tops. With autoflowers, you don't need to change the light schedule, so if it was 18/6 or 20/4, you may leave it like this, and still your plants will begin and finish flowering automatically.
Brace yourself for a lot of stretching as the branches will continue to elongate at the same time as the first flowers will form on tops and at the lower and middle nodes. Indoor autoflowers can easily double or even triple in size, especially if the genetics is predisposed for that. Don't worry: with autoflowers, this stretch will continue for a few weeks and then stop, usually long before you run out of vertical space.
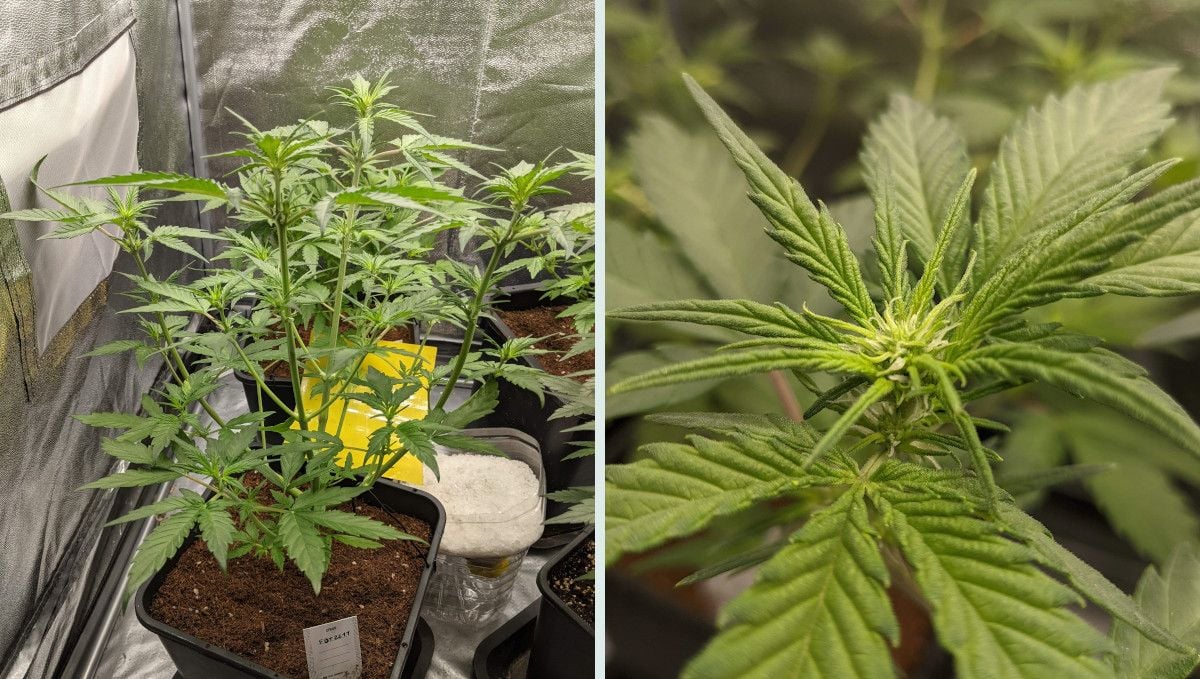
Of course, you may choose to grow your autoflowers not naturally but with a lot of training -- not only to save on vertical space but also to use the lights more efficiently and have very uniform buds of the same size and texture both on the top and middle nodes. If you have gone this route, you'll probably continue to train your plants even as they go into the flowering mode.
Sometimes, the canopy gets so dense that you need to remove many larger fan leaves which otherwise shade the lower buds from light. This is called defoliation. It's a rather stressful procedure and may slow down the progress of an autoflower for a day or two, so use this technique sparingly.
Besides, when you remove the foliage, it usually grows back within a week. If you don't have much experience yet, we recommend not defoliating heavily but only removing a fan leaf here and there, maybe one or two at a time and only those that are in the way of light.
7. Early Flower | Weeks 6-7
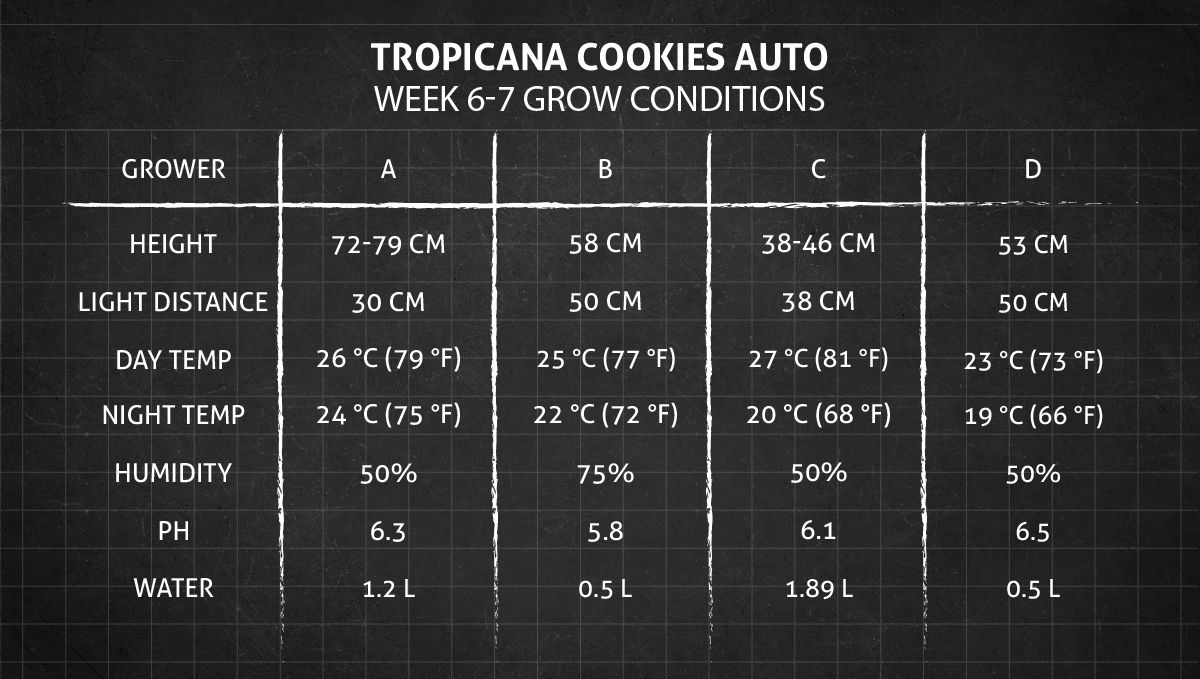
Soon, it will be very obvious to you that the budding has started. Now, in week six and seven from seed, an autoflower continues to extend its central stem and side branches and the flowers begin to finally stack up.
The flowers are yet very small, but a forward-thinking grower understands that sooner or later the buds will become huge and heavy and put a lot of stress on the branches (which will begin to bend). They can even break in extreme cases, so, think ahead of making some kind of support, for example a ScrOG net or simple stakes, trellises, yo-yos, etc.
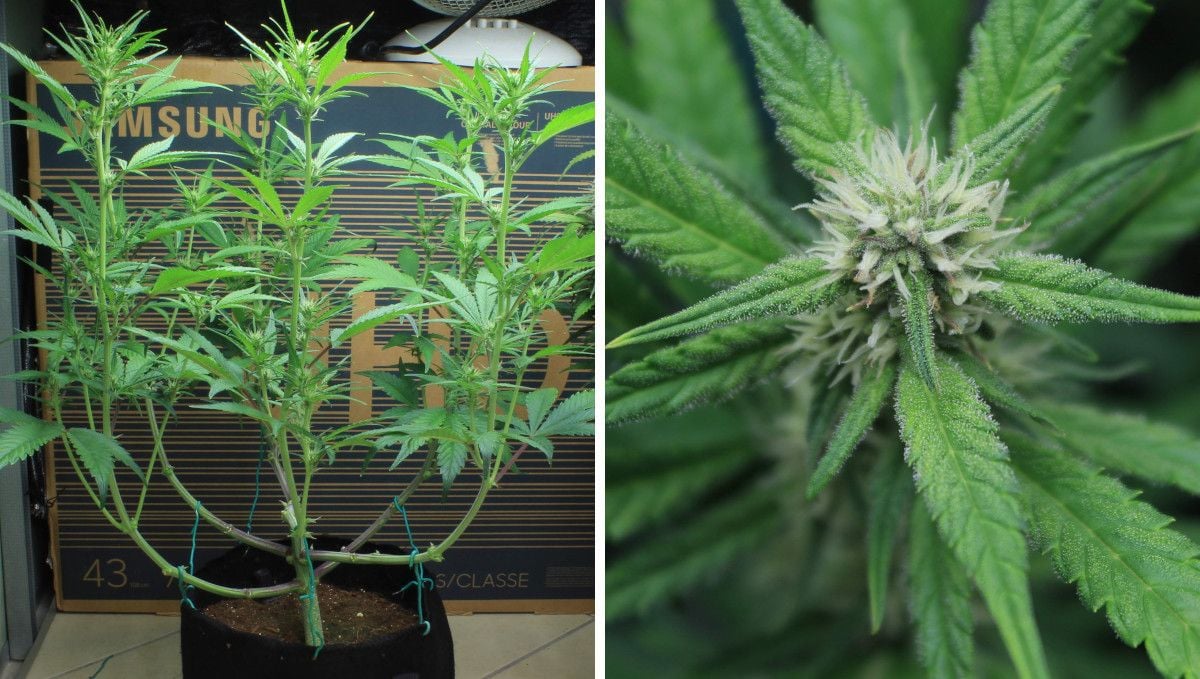
You'll see more and more white hairs on tops as your cannabis matures, and besides, the first trichomes will appear on the little leaves surrounding the buds. These trichomes are resin glands that contain the majority of cannabinoids and terpenes that a weed plants produces. Terpenes are very volatile aromatic substances, so you'll get a lot of smell starting about at this point in the timeline. You could have probably gotten away with the smell up until now, but if you don't want to advertise your hobby to all the neighbors, you should buy and install a carbon filter to get rid of the characteristic weed smell.
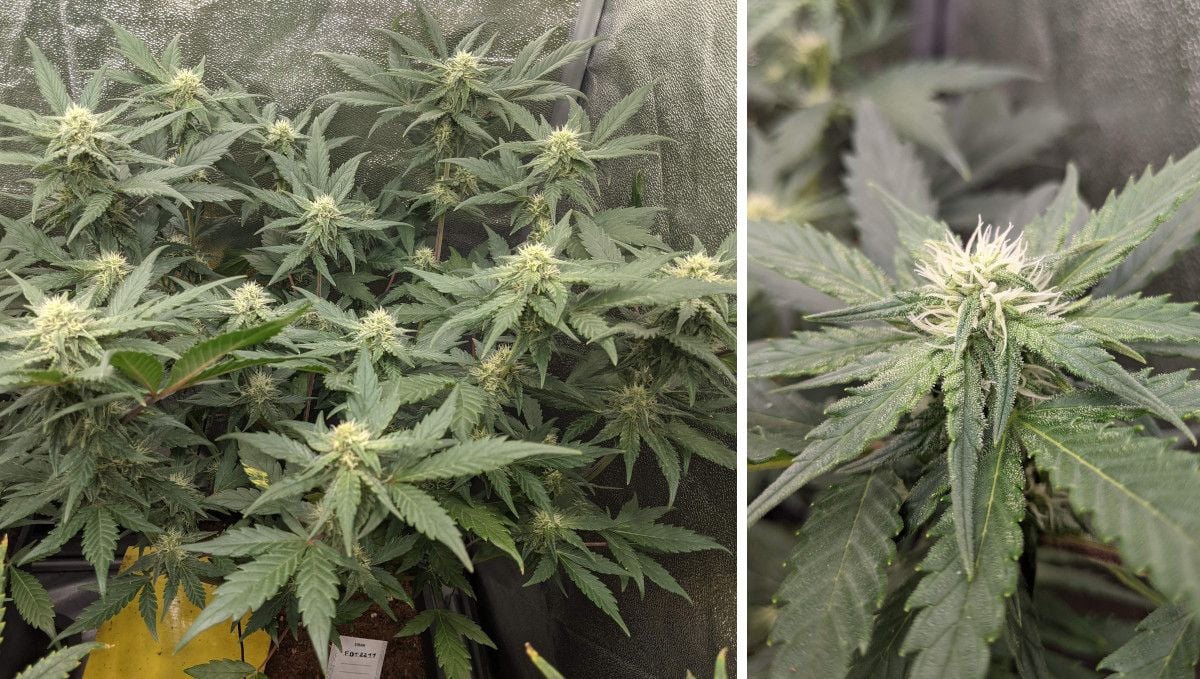
All through weeks six and seven, the branches of your weed plants will continue to get longer and the flowers fatter. However, you may get a slower phenotype that will give you an extra week or two of vegetative growth. Use this time to train and thus build a strong foundation for a record-setting harvest.
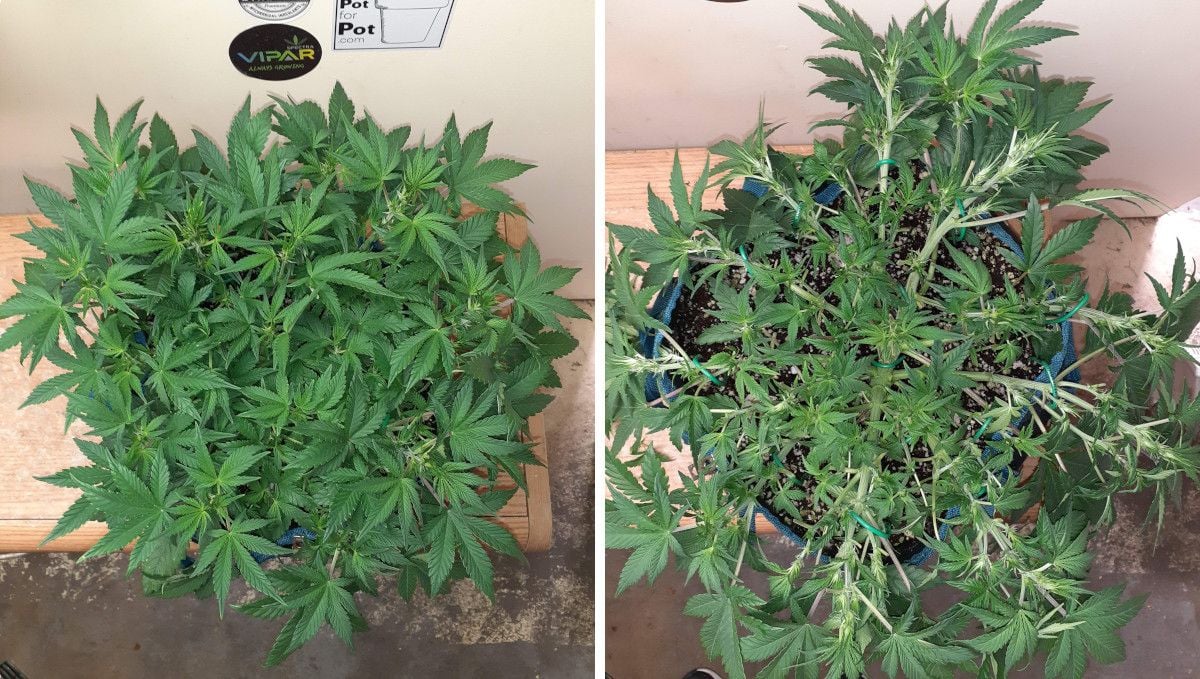
If your grow room is small, you will be glad you have trained your Tropicana Cookies so vigorously because you'll see that every bud site is at the same distance from the light. This ensures the same size and texture from every nugget at harvest.
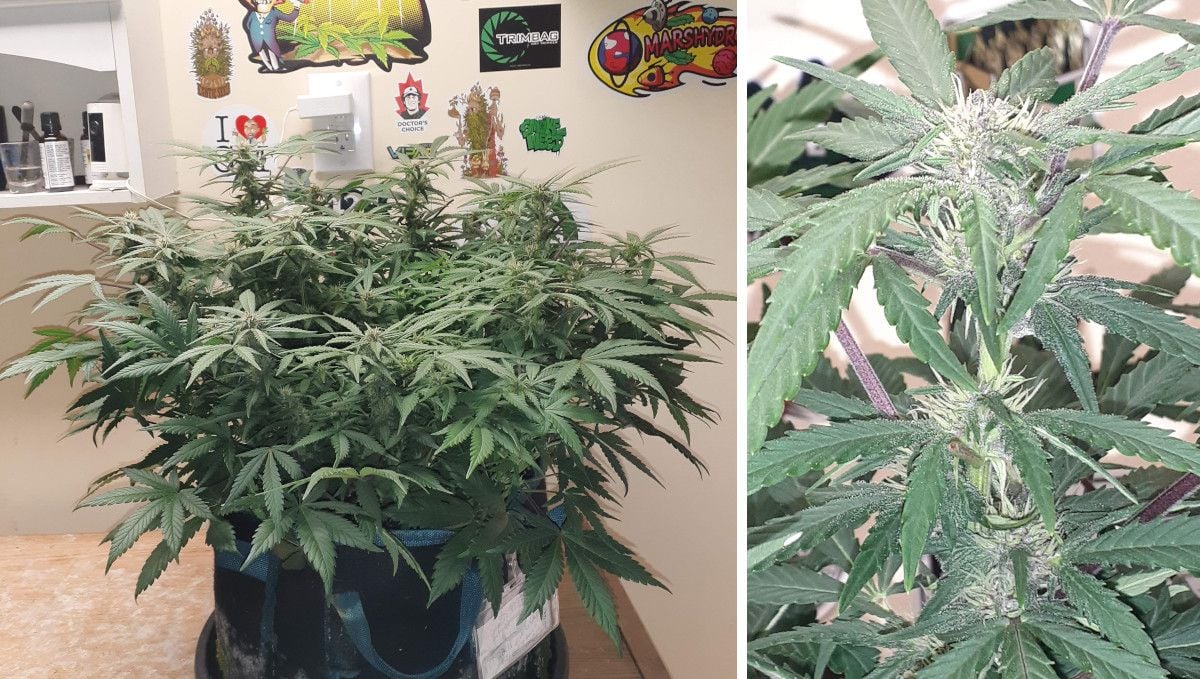
As you may imagine, at this time, the plants will also be very hungry and thirsty, drinking a lot of water and consuming a lot of plant food. Before, you probably have watered your pots once in two or three days, but now they will require daily fertigation.
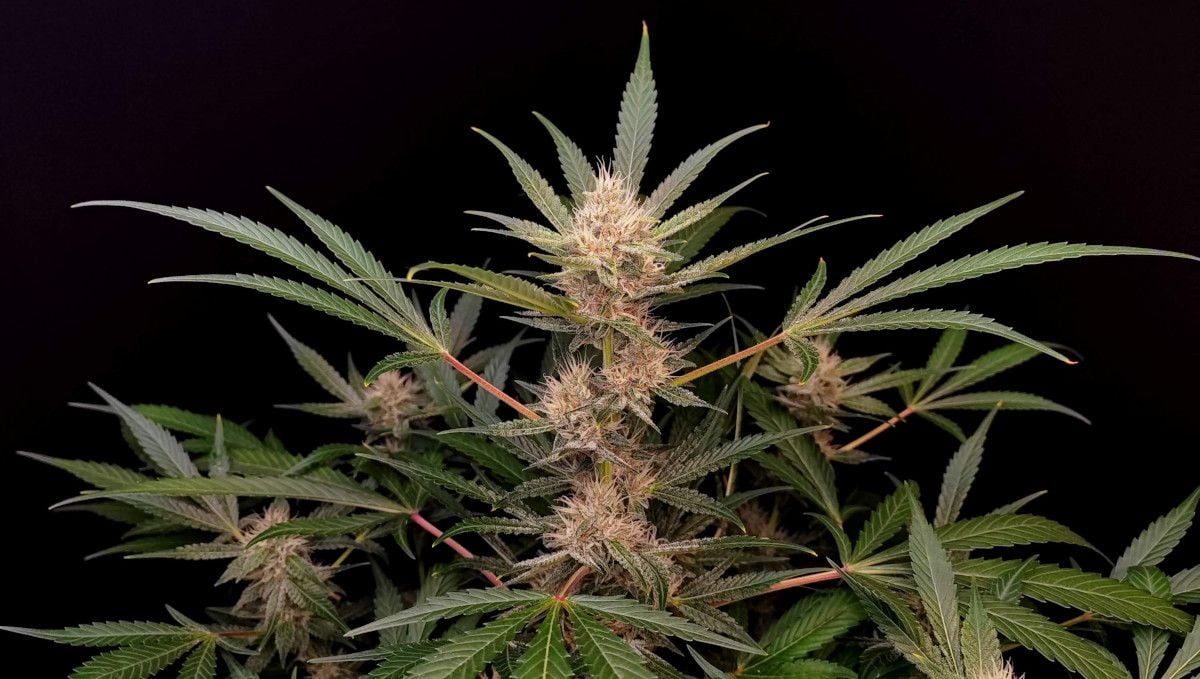
If you have allowed your autoflower to get tall but want to get fat buds not only on tops but at the middle nodes as well, make sure to provide plenty of light. It means using powerful bulbs or LEDs that are capable of penetrating deep inside the canopy, removing the leaves that are in the way, and keeping the canopy flat so that every flower is at the same distance from the light and gets the same amount of energy.
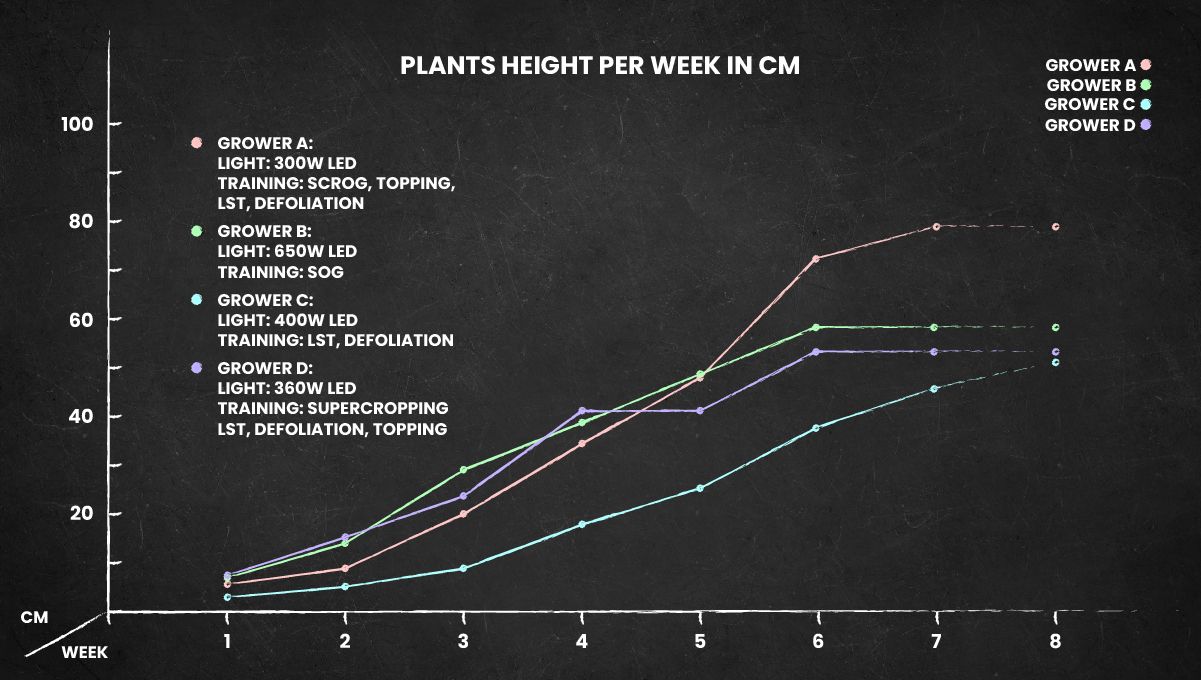
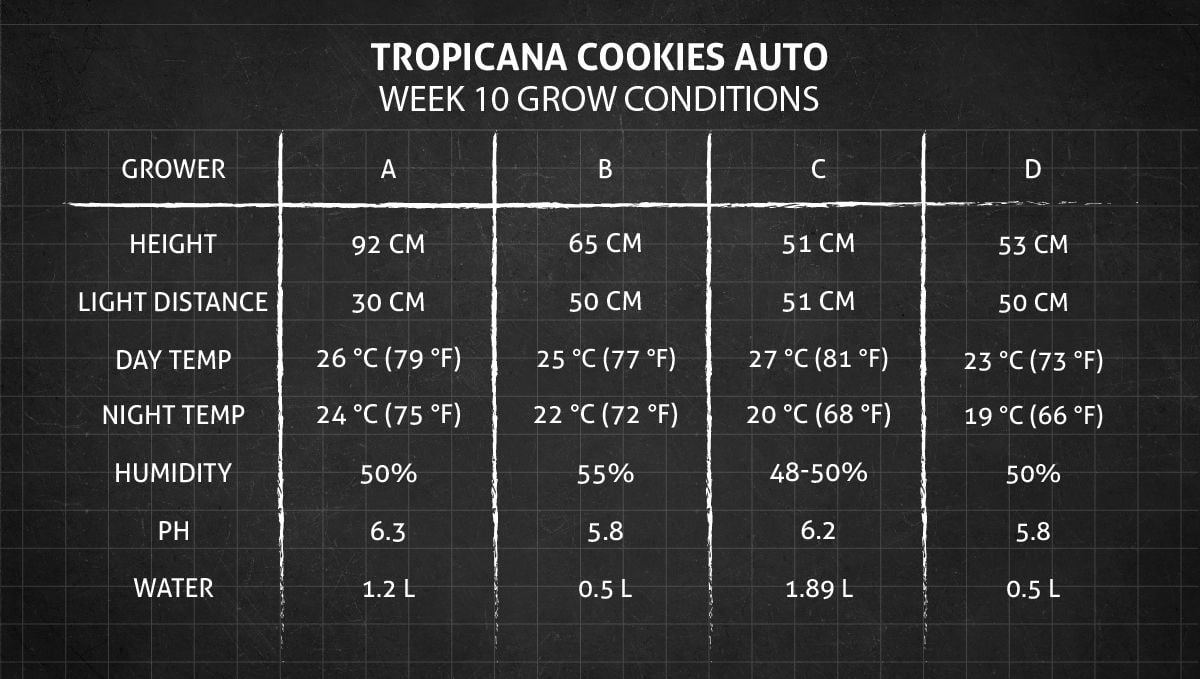
As you have probably already figured out, Tropicana Cookies is a wonderfully compact strain. At least none of the growers in our review encountered any size issues. Below is the height chart for Tropicana Cookies Auto from day one and till week 8 (when most autoflowers stop stretching).
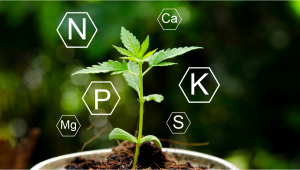
As soon as the flowering begins, the needs of a plant for nutrients changes drastically. Before, in the vegetative phase, your marijuana needed more nitrogen (N) than phosphorus (P) and potassium (K) for active growth. Now, it needs more of P and K because these two macronutrients are very important for the development of flowers while too much N actually impedes bud development.
Below, we give you a sample nutrient schedule for the flowering stage. Please note that this one was used by a very experienced grower who knew exactly what he was doing and knew how to calculate the concentration of his feeding solution so as not to overfeed his plants. We suggest that you use something simpler for the first couple of grows, for example, using only the staple nutrients from this table and saving some fancier products for later attempts.
When tackling the issue of feeding your cannabis, never forget about pH as its proper balance decides whether the roots will be able to absorb nutrients or not. With synthetic fertilizers, monitoring pH is a must; with organics, it isn't really necessary.
8. Mid Flower (Bulk Phase) | Weeks 8-9
When your autoflower really starts to bulk up, make sure you continue to feed it with high doses of nutrients and give it enough water, probably every day. At the same time, you will notice that vertical growth has basically stopped at this point and that the plant now channels all its energy into building bigger and denser flowers. It's a beautiful sight, but it also carries its risks because too high humidity coupled with too dense buds often results in mold and bud rot. So, be sure to control the relative humidity in your grow room.
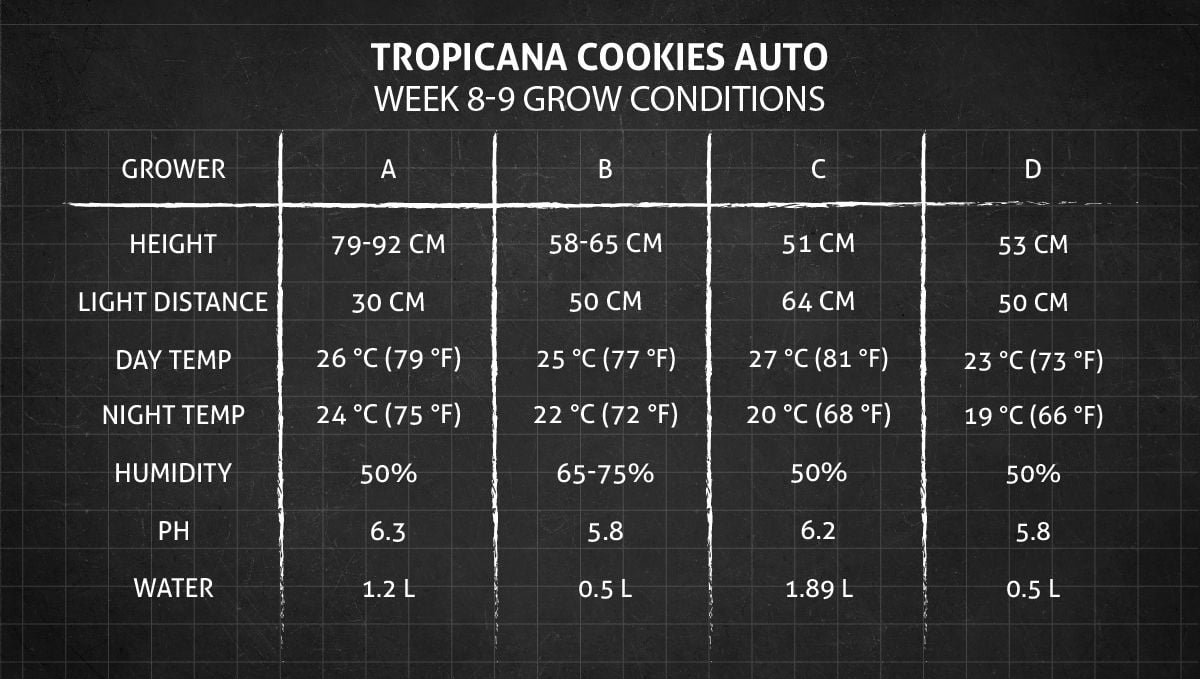
Also, don't forget that during flowering the temperature needn't be as high as before. It's better to keep things cooler now, both during the day and especially during the night. Higher temperatures lead to the evaporation of terpenes and the degradation of THC, and when the nights are relatively cool, those strains there that are predisposed to become purple will do so.
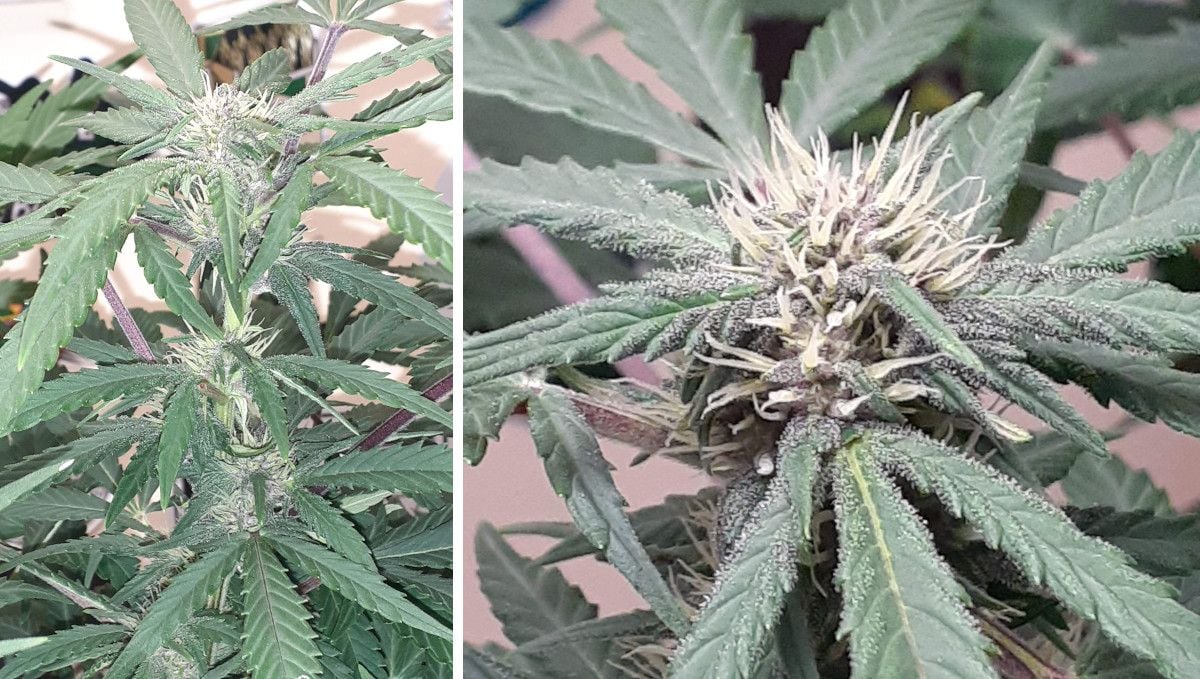
At this point in the growing cycle, weed plants can handle extra levels of light. They have probably grown into the lights by now and the tops are quite close, basking in the light and getting denser and more resinous by the day.
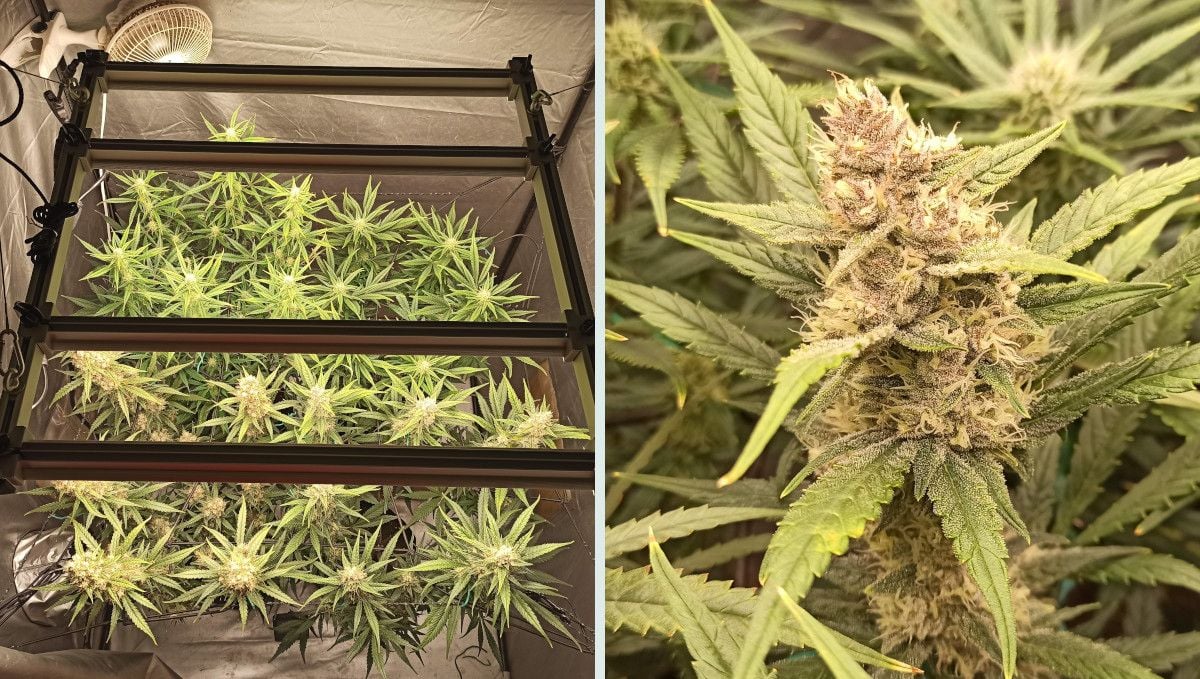
The proximity to the light is the single most important thing when it comes to the size and the texture of buds. This means that when you're using a weak light, your goal is to keep your autoflower as flat as possible. Or -- if you grow your weed SOG-style -- make sure your lights are powerful enough to ensure great light penetration all the way down the canopy.
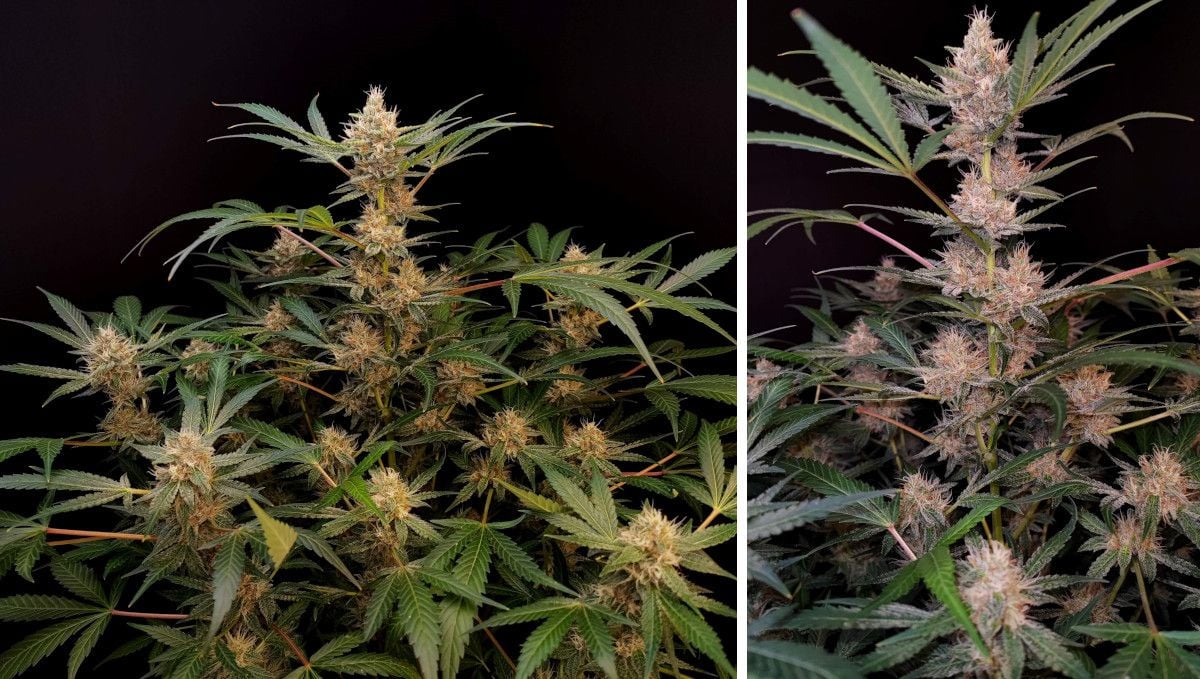
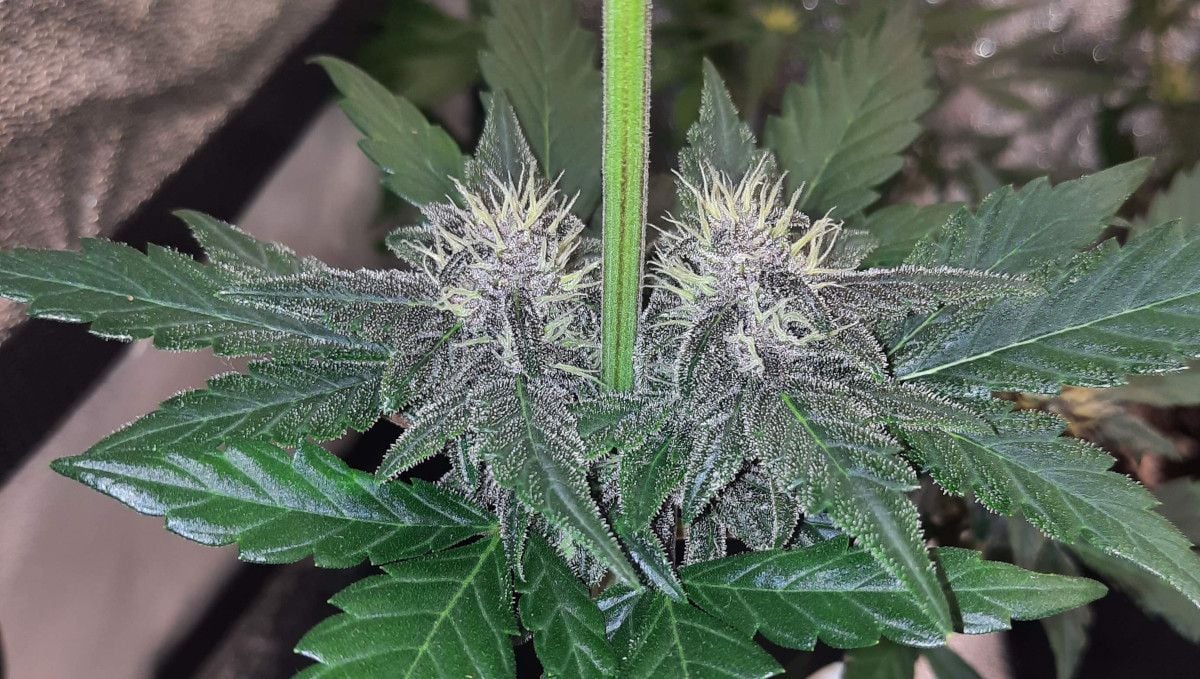
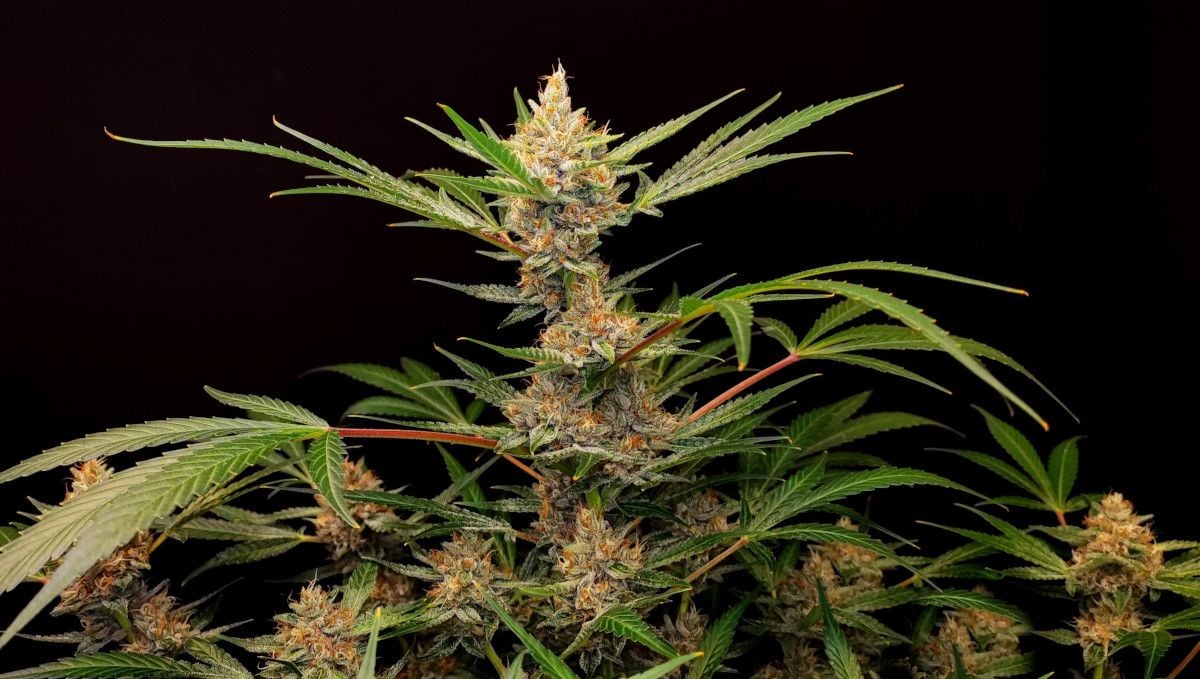
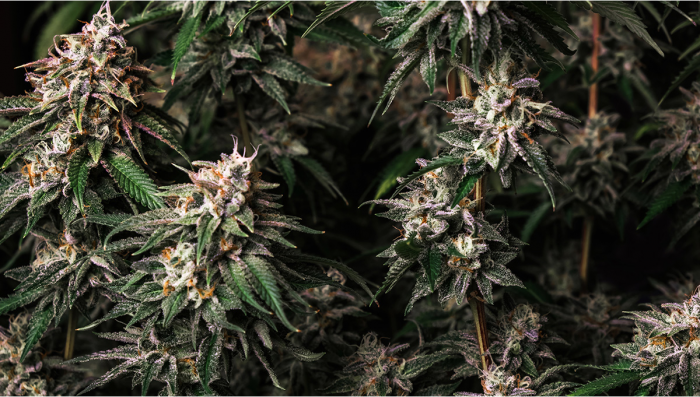
And even if your grow light is powerful enough, keeping the canopy flat will ensure no energy goes to waste and every one of the multiple tops becomes big and dense (like the one in the photo below).
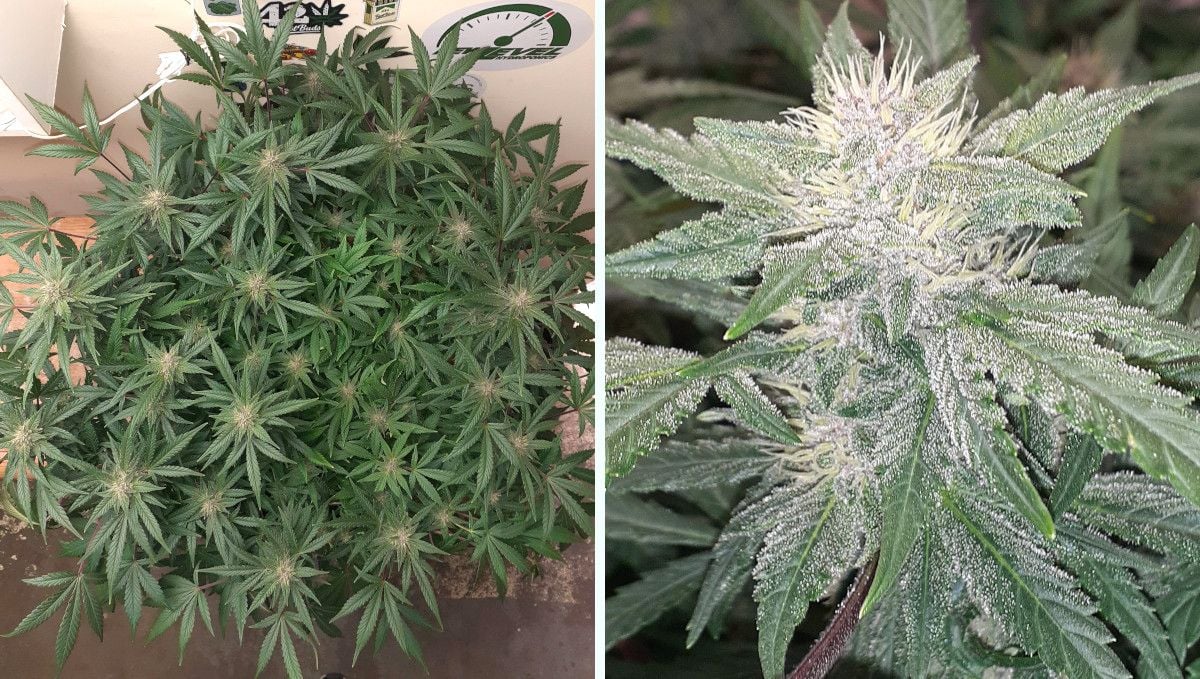
While the flowers are stacking up and filling out (and get very resinous in the process), they may also start to mature visibly druring this period, especially in the fastest Tropicana Cookies Auto phenotypes.
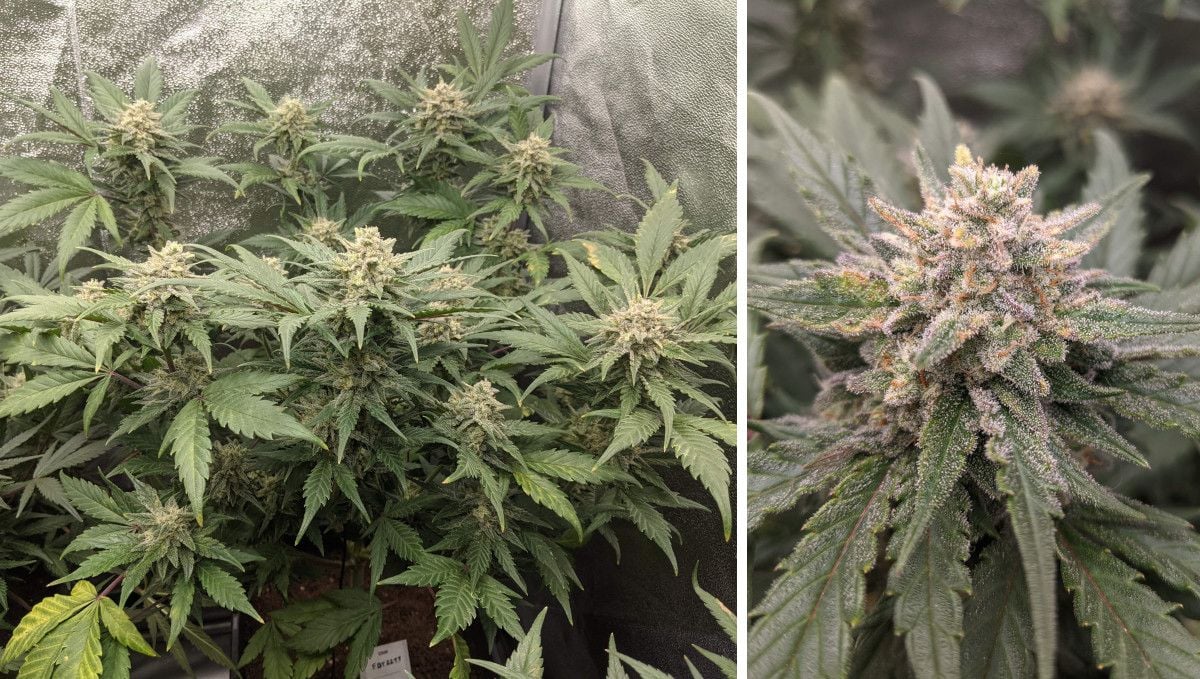
9. Ripening And Harvest | Week 10
The last two weeks leading to the harvest can be devided into two distinct periods. During the first of them, you give your plants the final boost of nutrients, especially those rich in P and K. During the second one, you switch to plain water, making your auto use up all internal resources and clean itself from the built-up salts in the process.
It's very easy to see that your plant matures. The pistils that start as pure white, gradually become brown and dry. The buds become visibly denser, and the branches bend under their weight. Moreover, counting the weeks from seed and comparing this with the breeder's specs, you realize that the time for harvest is nearing. Now, is the right moment to start using a more accurate tool to determine your auto's maturity. We're talking about something as simple and cheap as a 60x jeweler's loupe.
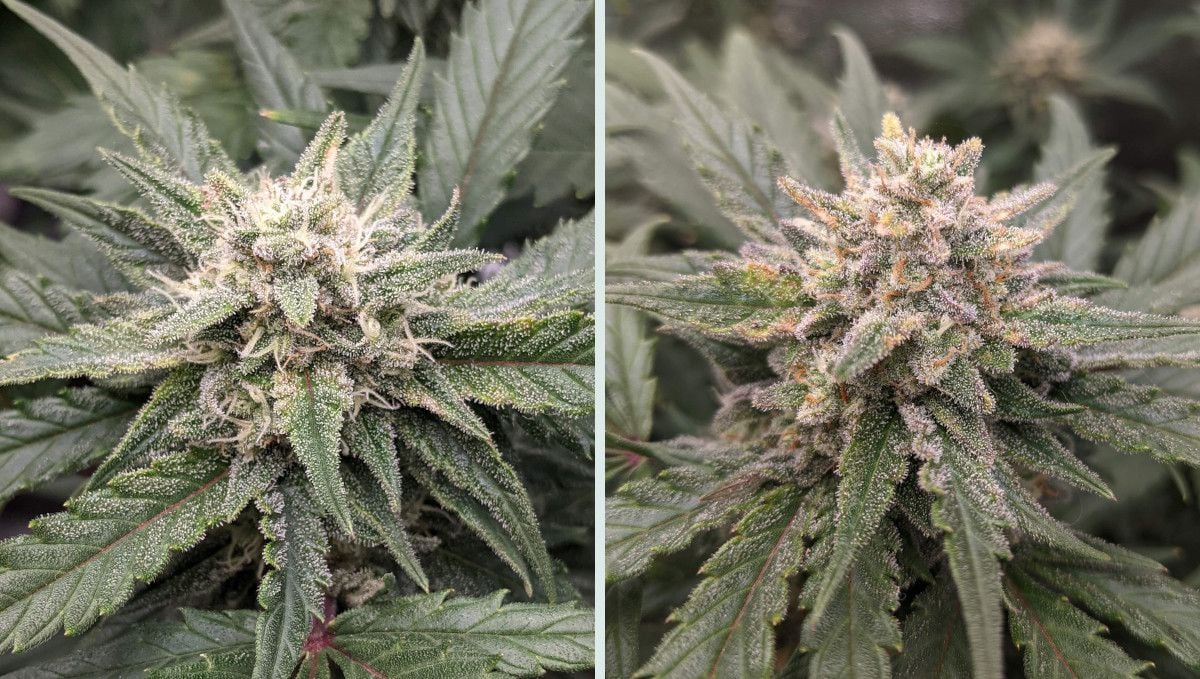
When seen under this hand-held microscope, the trichomes appear large enough for you to see their color. If most of them are clear but some have begun to turn cloudy, it's time to start flushing your growing medium with pure water. It may take two weeks in soil and about a week in coco or hydro, and while you do it, the trichomes will keep maturing. They reach the peak of psychoactivity when all of them are cloudy and a few have turned amber.
Watching trichomes under a microscope is the only reliable way to tell if your auto is ready. It's one of those tricks that set apart advanced growers from amateurs.
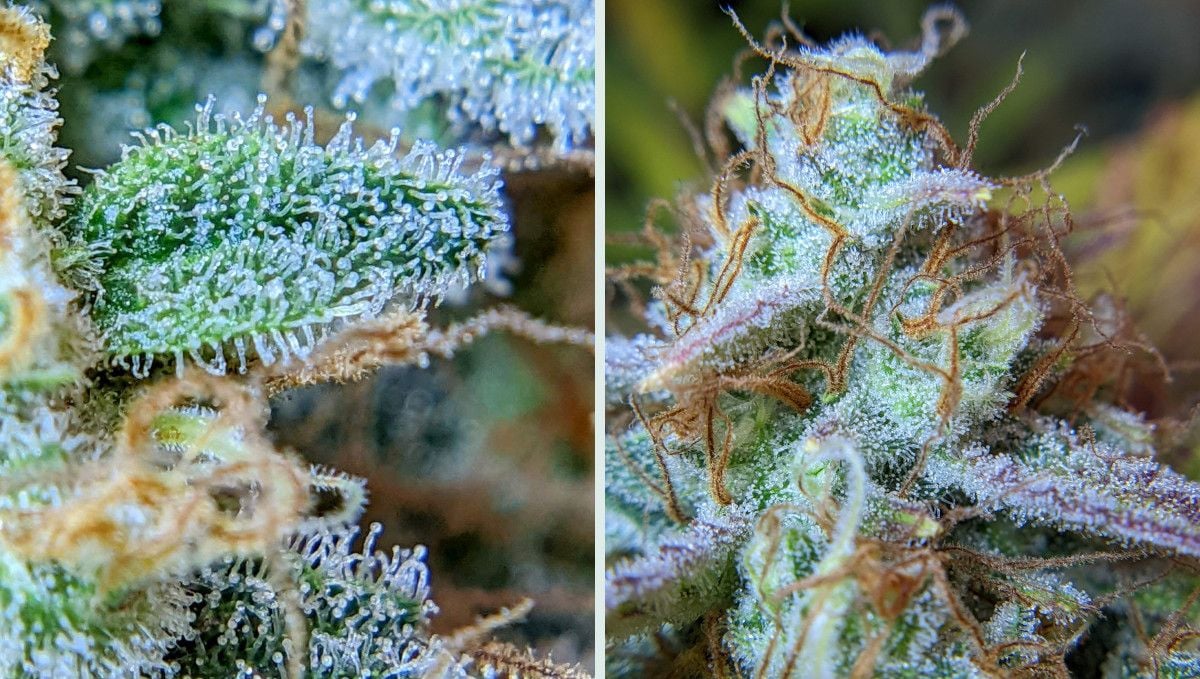
Of course, as you give your plants freshwater only, they will use up all internal resources and the leaves will start to fade. This process will also trigger many deficiencies, so, don't be afraid that some of the leaves or even most of them will become discolored. It would be a bad sign indeed at some earlier stage, but right now, so close to the harvest, it doesn't matter.
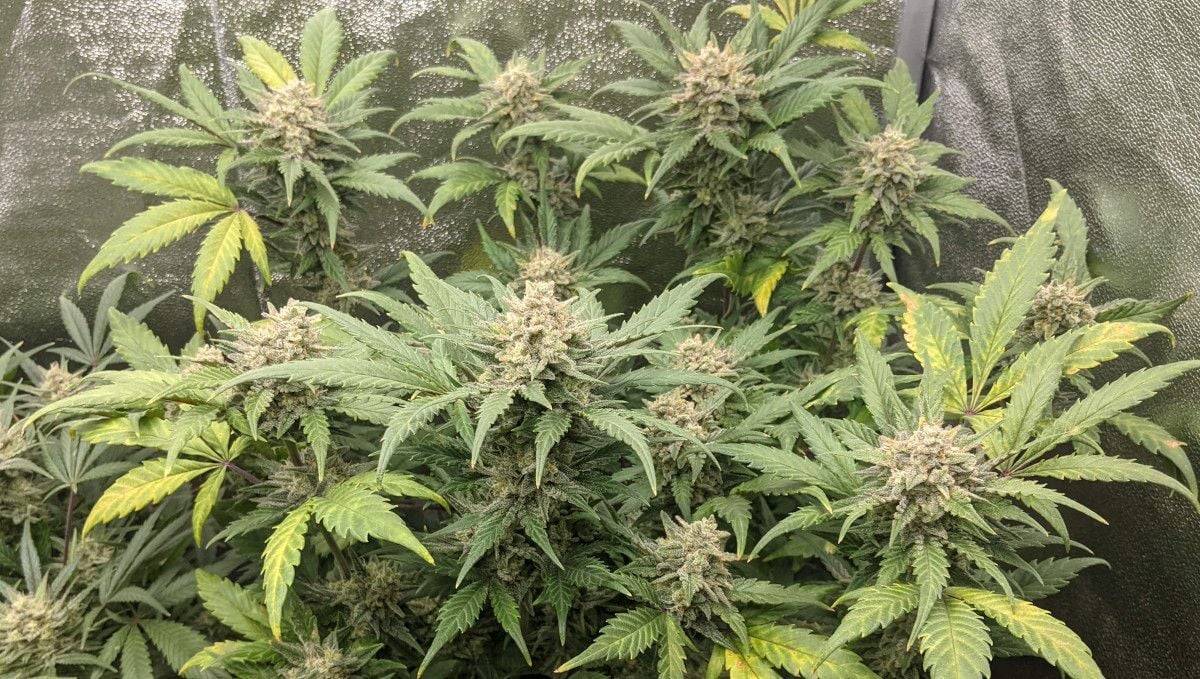
As the leaves fade more and more and different deficiencies become more pronounced, the buds will display a variety of beautiful autumn colors, contributing to the bag appeal of your future smoke.
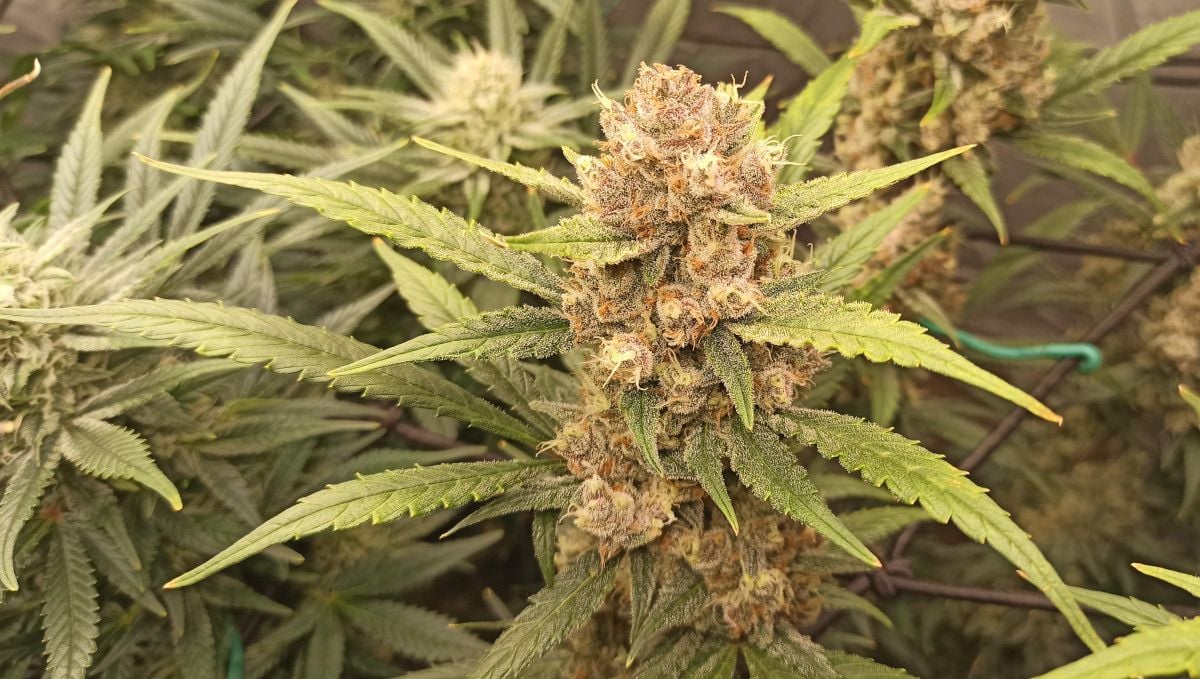
Of course, if you don't like to see the signs of deficiencies on your Tropicana Cookies Autoflower, you can give her a nitrogen-rich diet even after the flowering has started. This way, the leaves will look green and vibrant until the start of the final flush (like in the photo below). Just don't overdo it as nitrogen toxicity may interfere with the flowering process.
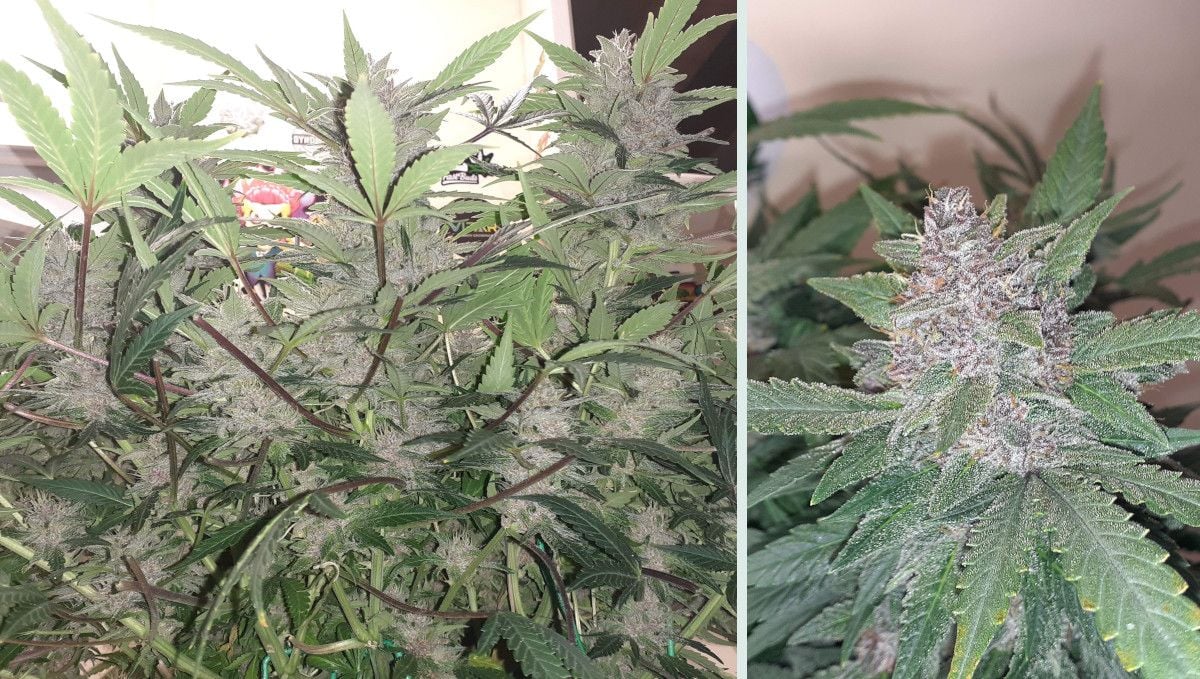
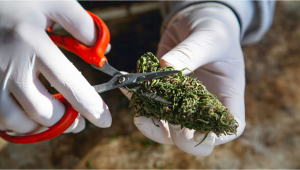
Experienced growers know that the road to the perfect smoke doesn't really end on the day you cut down your plant because the drying and curing of your buds is, arguably, as important as the growing itself. So be sure to learn all there is to learn about drying/curing -- it will really make a world of difference because when you do this properly, you will conserve precious terpenes and won't let THC degrade.
10. The Outcome
We looked at enough examples of people growing Tropicana Cookies Auto, and they all got really good crops. Some were even better than expected! You don't have to be an expert gardener, do fancy things, or spend lots of money on special plant food to get great results like this.
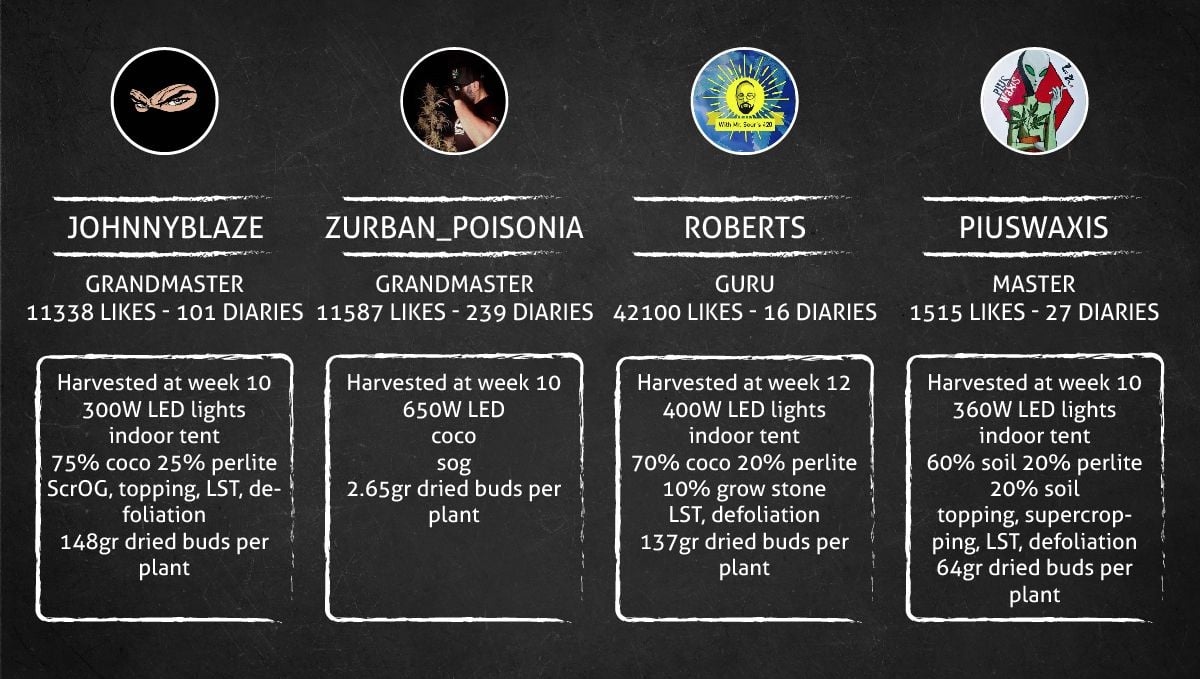
The first gardener in our review -- JohnnyBlaze -- praised his Tropicana Cookies Auto for to her low leaf-to-bud ratio and amazing production potential. The plant yielded 630 grams before drying and produced 148 grams (5.22 ounces) of dried nuggets after a month of curing. The buds were top-shelf -- they had a Sativa-like appearance with long, Christmas tree-shaped buds and very dense, swollen calyxes, giving them an outstanding bag appeal.

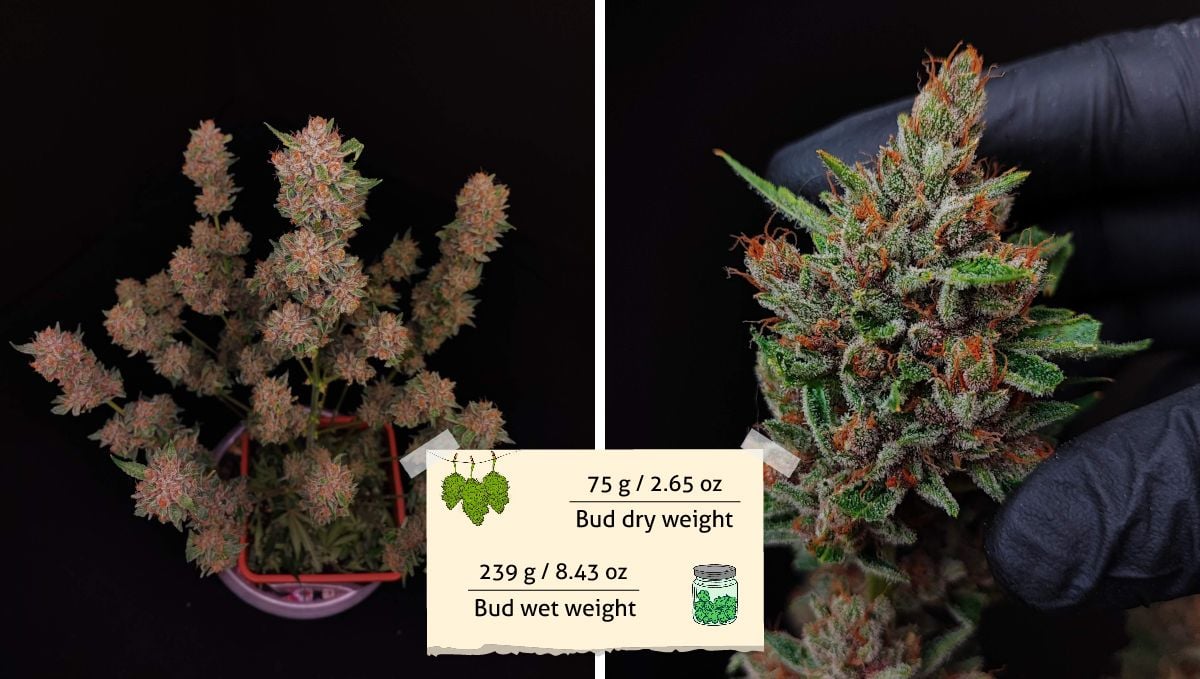
The outcome of Zurban_Poisonia was just a bit more modest -- 75 g (2.65 oz). Needless to say, the buds had a great bag appeal as they were tight, dense, and resinous.
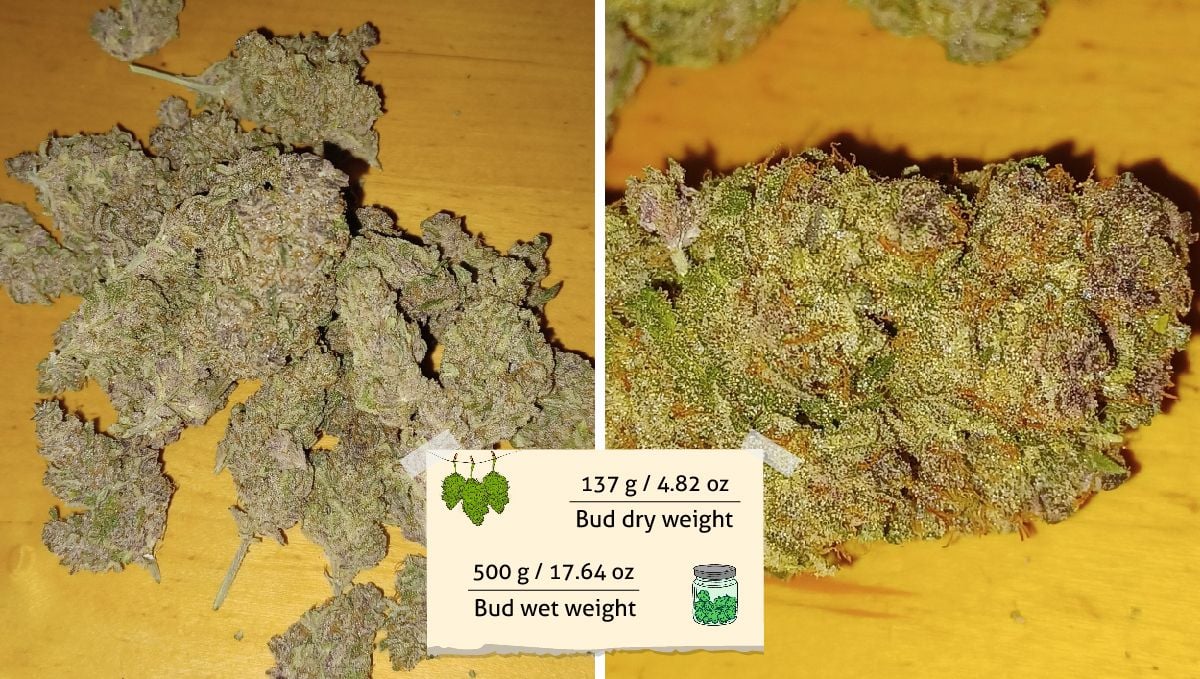
The grower with the nickname Roberts harvested 137g (4.82 oz) of closely trimmed buds from his one Tropicana giving proof that coco is a very rewarding growing medium.
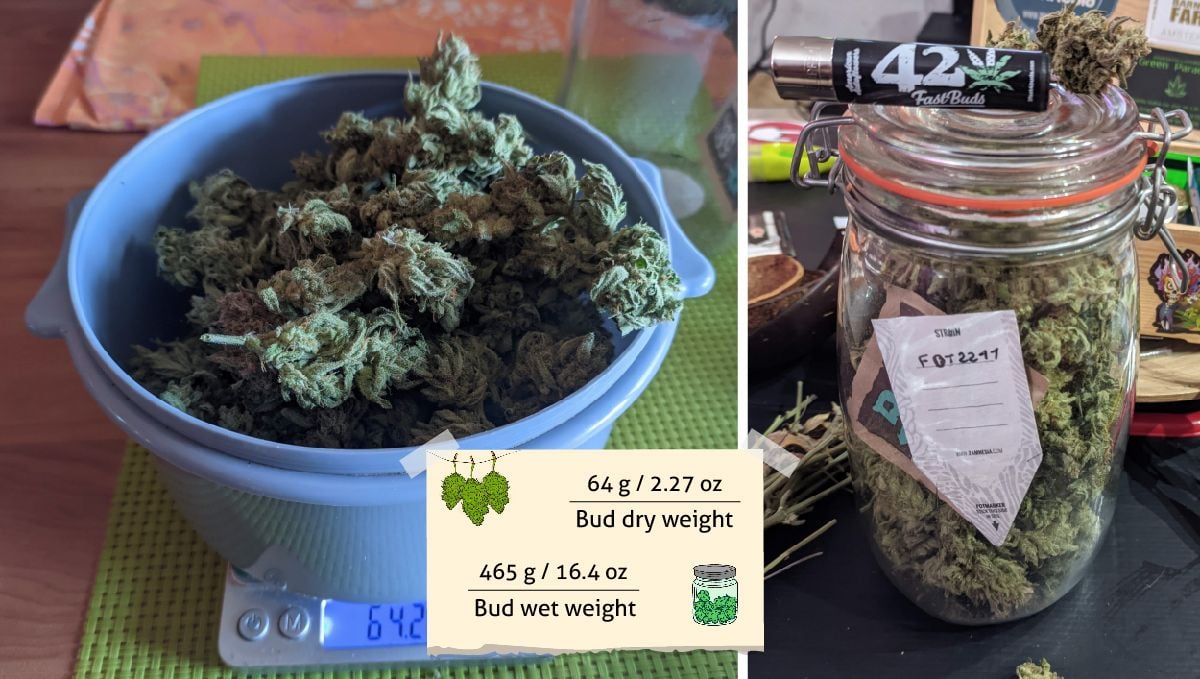
Finally, PiusWaxis got 64g (2.27 oz) although he didn't trim his nuggets so carefully -- with resinous strains like this, it isn't strictly necessary.
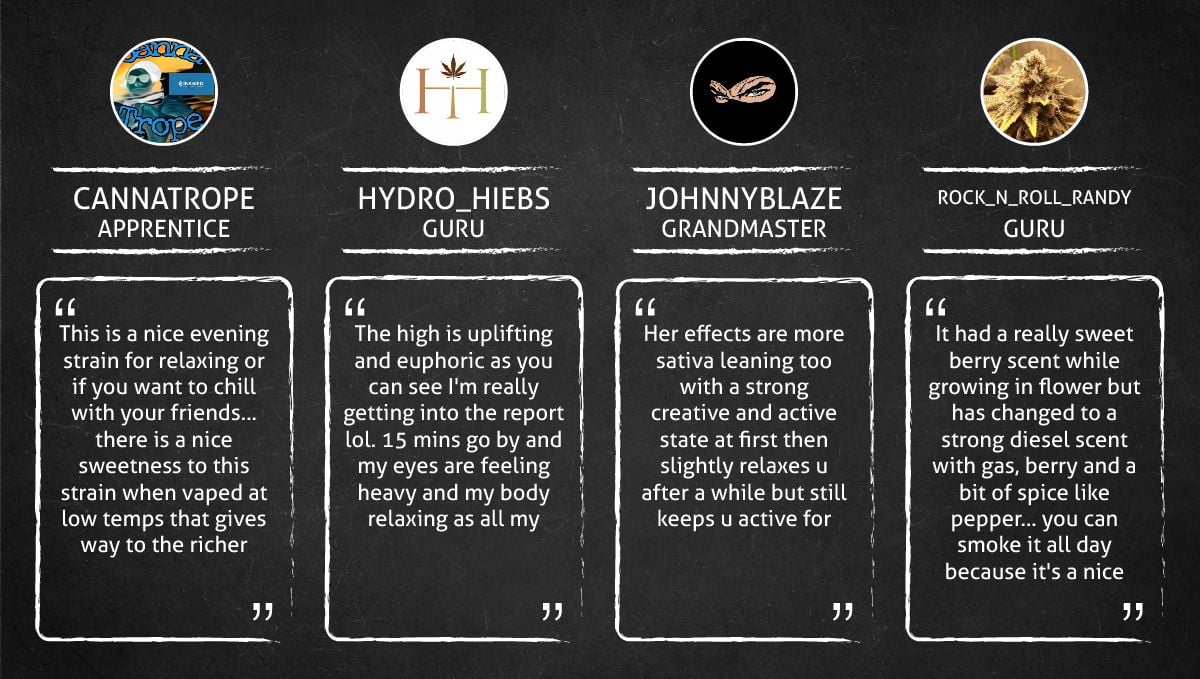
The majority of reviewers describe the aroma of Tropicana Cookies Auto as sweet, gassy, and with additional notes of fruit, spice, or cookies. Others describe the buds as fruity, gassy, and with creamy or woody notes. The effects of the strain are also consistently noted as uplifting and relaxing, making it suitable for evening use or for socializing with friends. It is also mentioned that the strain provides pain relief and a happy buzz without inducing fatigue.
10. In Conclusion
As you can clearly see from our Tropicana Cookies Auto grow guide, this strain is quite versatile and tolerant of stress as two out of four growers we review -- A and D -- have chosen to top their plants (which is a highly stressful procedure).
Although modern autoflowers, including Tropicana, are strong enough to survive such abuse, be sure you know why you’re doing it. The topping per se doesn’t guarantee you better yields – the most productive plant in our review was just low-stress trained but delivered big time nevertheless.
Also, Tropicana Cookies doesn’t get too tall (92 cm being the tallest plant out of four we've been following), so, you don’t need to go overboard with training to achieve outstanding results – use HST if you have very little vertical space indeed or if your grow light is weak and calls for a wide and flat canopy. Otherwise, the simplest of training methods would be enough.
Not surprisingly, coco (which was used by growers A, B, and D) is a more generous medium than soil as the only soil grow in our review (C) was also the least productive However, this is true for any weed strain, not just Tropicana. Otherwise, this autoflower is a perfectly beginner-friendly, easy-to-grow strain that just does its thing and doesn’t mind small mistakes. Everyone can try it and get great results. Happy growing!






Comments