DIY Organic nutrients: Korean Natural Farming (KNF)

- 1. What is korean natural farming?
- 2. The history of korean natural farming
- 3. Principles of korean natural farming
- 4. Benefits of korean natural farming
- 5. Basic steps on how to make korean natural farming
- 6. Fermented plant juice
- 7. Fermented fruit juice
- 8. Fermented mixed compost
- 9. Oriental herb nutrients
- 10. Water soluble calcium
- 11. Indigenous microorganisms
- 12. Korean natural farming for you
- 13. Knf feeding schedule
- 14. Knf - most common questions
- 15. In conclusion
Korean natural farming (aka KNF) is one of the most recent systems used to grow not only cannabis seeds but all other plants organically.
By using the microorganisms in your favor you can ferment the naturally occurring vegetation to make your own organic nutrients for cannabis.
1. What is Korean Natural Farming?
KNF is a way of growing organically which imitates the processes that already exist in nature and relies on microorganisms to improve the health of the soil. The KNF system is widely used in all types of crops including, most recently, cannabis.
KNF (aka Korean Natural Farming) was created by Cho Han Kyu from the Janong Natural Farming Institute, it focuses on producing a fertile medium and improves the overall yields and quality of the harvest without using synthetic fertilizers or pesticides.
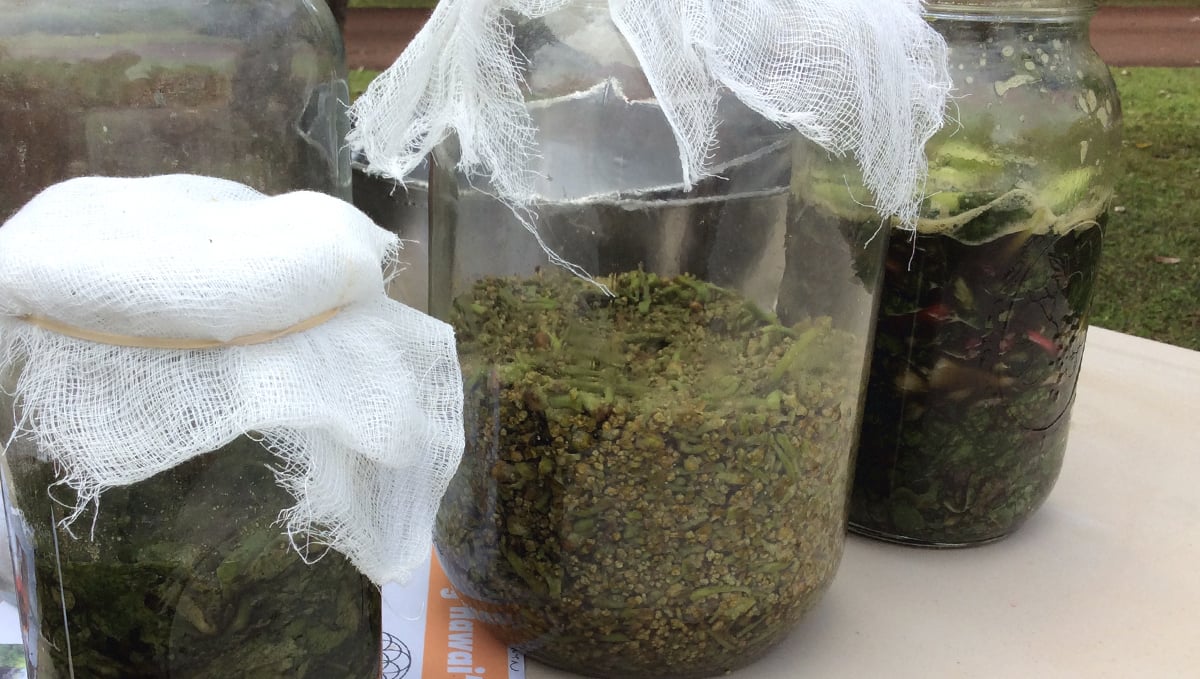
By using naturally occurring plants and microorganisms to decompose nutrients, you can turn them into a form that the cannabis plants are able to absorb, the cannabis plants then use those nutrients and as a result, produce food that the microorganisms feed on.
2. The History Of Korean Natural Farming
Korean Natural Farming (or KNF) was first established by Dr. Cho Han Kyu as a response to the country’s increasing dependence on synthetic, inorganic fertilizers. Born in 1935 in Suwon, Gyeonggi Province, Korea - Dr. Cho saw this dependence as a scourge to the natural farming habits that Korea had thrived during the preceding centuries. Dr. Cho came from a farming family and worked on the family farm throughout his childhood while his schooling took a backseat.
Always interested in higher education, he continued his schooling and was able to complete high school at the ripe age of 29 years old. A year after this, at the age of 30, he traveled to Japan as an agriculture research student. He spent the next three years studying under three natural farming experts - Miyozo Yamagishi Kinshi Shibata, and Yasushi Inoue.
He returned to his homeland in 1969, full of newly acquired knowledge that he planned to implement to help his country move away from unsustainable farming methods. He combined this new knowledge with his traditional farming background and with Korean fermentation principles to begin what is now known as Korean Natural Farming. He opened the Natural Farming Life School and Research Farm in Goesan County, North Chungcheong Province, and continued to refine his methods while also sharing his practices worldwide through various international publications and seminars.
In 1995 he was invited to present his finding to the Central Association of the Agricultural Cooperatives of Japan, which became the real starting point for international recognition. Now working hand in hand with his son, Dr. Cho has made it his life's mission to share his knowledge with as many people as possible, and as of 2014, they have trained upwards of 18000 students at his Janong Natural Farming Institute. KNF is now used in many a wide range of countries and is implemented for use across multiple industries.
3. Principles of Korean Natural Farming
The main goal of Korean Natural Farming is to boost every biological function related to plant growth in an organic way which, in turn, helps strengthen the productivity, yield, and quality of the final product. An offshoot of this practice is that the crop then needs less chemical intervention in cases of deficiencies and pest issues. KNF promotes the elimination of the use of manure as a fertilizer, which in some cases can transfer bacteria back into the growth cycle. There are several ways in which KNF promotes healthy growth without the use of waste products and chemical fertilizers:
- By capturing, and implementing the use of nutrients contained in seeds.
- By promoting conditions suitable for indigenous microorganisms (IMO).
4. Benefits of Korean Natural Farming
- KNF is a self-sustainable system suited for small and large-scale cultivations.
- KNF results in higher yields with fewer nutrients.
- Increases plant health and immune system.
5. Basic Steps on How To Make Korean Natural Farming
There are several KNF recipes that should be used in the different stages of plant growth, each one of them contributes to certain elements that are crucial to plant development and growth.
Even though the recipes are used on different occasions, they all consist of fermenting organic matter with brown sugar and are relatively cheap and easy to make.
Step 1
Collect the material you’re going to use, if it’s from nature it’s better to collect it before sunrise (when the plants are in respiration mode).
Step 2
Do not rinse the collected plant material to preserve the microorganisms on the surface and write down the weight of the collected plant material.
Step 3
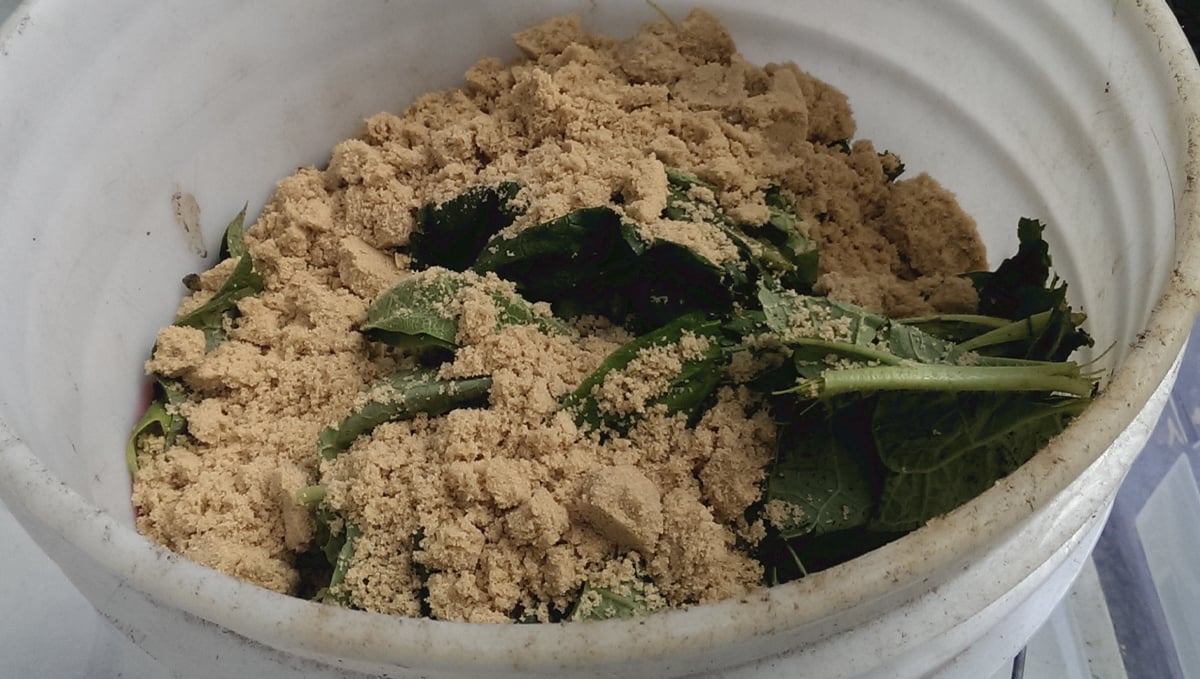
Cut the plant material in half and add brown sugar equal to the weight of the material then mix well.
Step 4
Use a glass or polyethylene jar to store the plant and sugar mix, pack it tightly and cover the “mouth” of the jar with cheesecloth, a towel, or any other breathable material.
Step 5
Store the container in a well-ventilated area, far away from light and extremely cold or hot. The jar should be ⅔ full after the green matter settles, if not, add more plant and sugar.
6. Fermented Plant Juice
FPJ1 aids in plant nutrition, it is made by fermenting the shoots of growing plants in brown sugar for around 7 days, this allows all the compounds in it to be released and then used by the microorganisms in the soil.
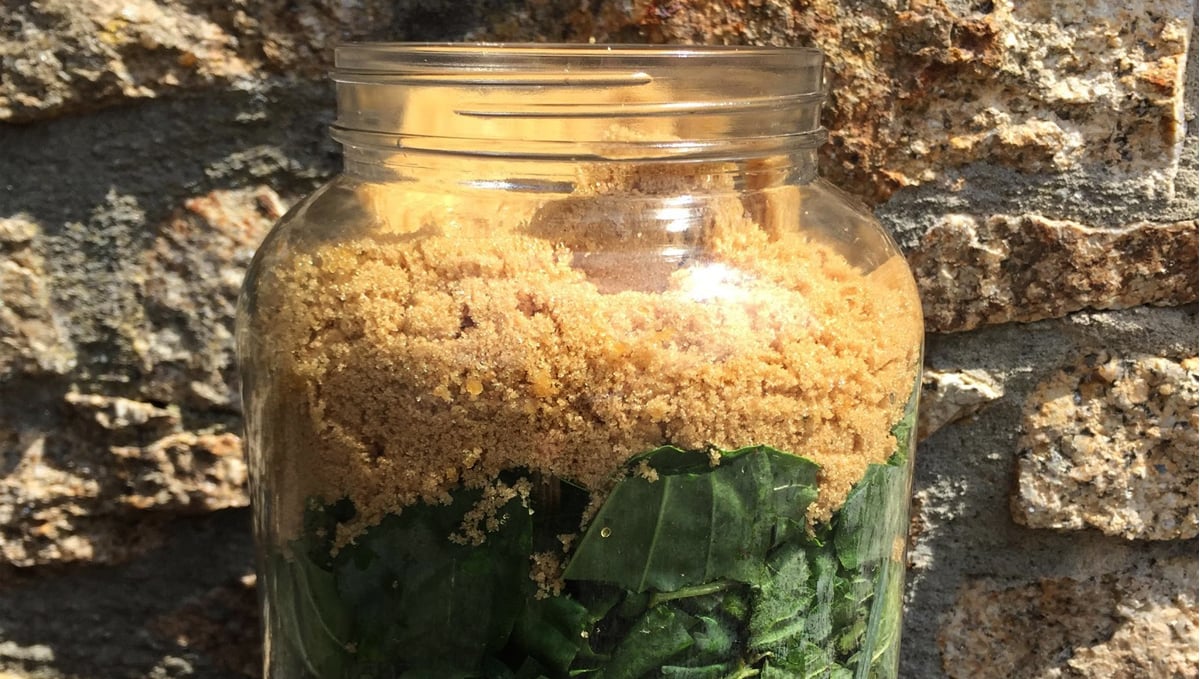
Fermented plant juice is usually made with sweet potato shoots, bamboo, or seaweed among others but can be made with anything you have available as long as the vegetation you want to collect is not flowering yet and are vigorous, grow fast, healthy, and not poisonous.
| Recipe | Vegetative | Pre-flowering | Flowering |
|---|---|---|---|
| Fermented Plant Juice (FPJ) | 2ml/L | 1ml/L | 0 |
FPJ can be used both as a foliar spray or to water the soil for plants, it should be mixed in a ratio of 2ml per liter in the vegetative stage and 1ml per liter in the pre-flowering stage, ideally after the sunset.
7. Fermented Fruit Juice
FFJ is basically the same as FPJ but it’s used for cannabis in the flowering stage. The process is the same as when making fermented plant juice but instead of fermenting plant tips, you will be using fruits.
We recommend fermenting banana, mango, squash, papaya, melon, grape, apple, and strawberry although you can use whatever you can as long as they’re fresh, locally grown, and free of pesticides.
Fermented fruit juice contains nutrients like potassium that increase energy levels and promotes the production of hormones which are used to increase the yields of cannabis plants in the flowering stage.
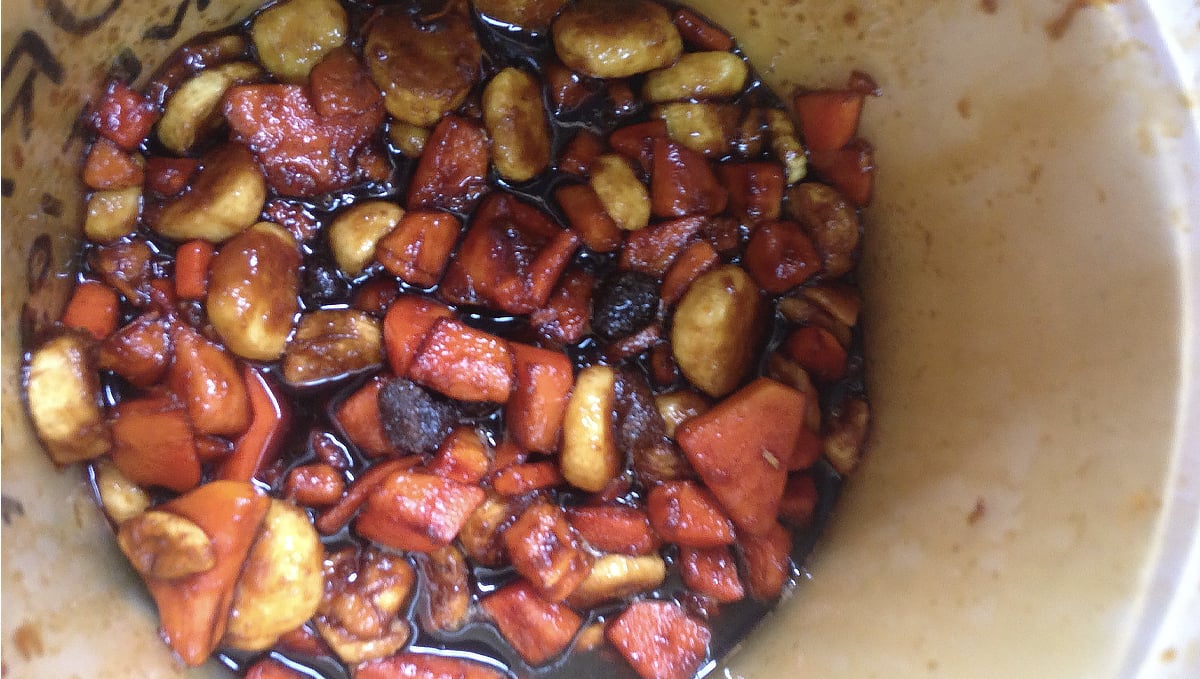
Just like when making fermented plant juice, make sure you weigh everything before cutting it into smaller pieces so you know exactly how much sugar to add, this way you avoid problems and can easily make FFJ in 7 days.
| Recipe | Vegetative | Pre-flowering | Flowering |
|---|---|---|---|
| Fermented Fruit Juice (FFJ) | 0 | 1ml/L | 2ml/L |
The amount of FFJ you use in your mix depends on how long you let it ferment, obviously the longer you let it ferment the stronger it will be but a general rule is to use 1ml per liter in the pre-flowering stage and 2ml per liter in the flowering stage.
8. Fermented Mixed Compost
Fermented mixed compost (FCM) is another common KNF technique that can be easily implemented into your grow op. If you are already using compost to feed your grow then you are already one step ahead. If you’re interested in organic growing and not using a compost heap then it's time to get started! So, how do you turn a normal compost heap into an FCM pile?
Well, the process is straightforward enough, but you have to follow the guidelines and keep a close eye on the compost to make sure everything runs smoothly. You want to start in the late fall, as this is when bacterial activation dips and the microbial life that is responsible for fermentation increases. Find a sheltered area away from direct sunlight. You want the compost to be in contact with the earth floor, and make sure the area has good drainage.
Start off by adding leave or fruit material, hay or straw, seaweed, and fish waste. You want the majority of the material added to be fish waste (make sure to remove all bones) with about 25% being made up of the rest. Be sure to keep the pile under about 50C during the fermentation process, as heat above this can result in over fermentation and bad smells, which could turn the whole heap bad. After a month or so you should have beautiful, healthy, ready-to-use Fermented Mixed Compost.
9. Oriental Herb Nutrients
Oriental herb nutrients (aka OHN2) are used throughout the whole life cycle of your cannabis plant, this mixture of aromatic herbs discourages the growth of pathogenic microbes, encourages beneficial microbes.
OHN brings a lot of benefits to your crop, it not only helps prevent and fight off pests such as powdery mildew, spider mites, fungus gnats, whiteflies, and aphids but also helps your cannabis plants increase their resilience to stress factors such as environmental conditions, increases plant robustness and encourages growth.
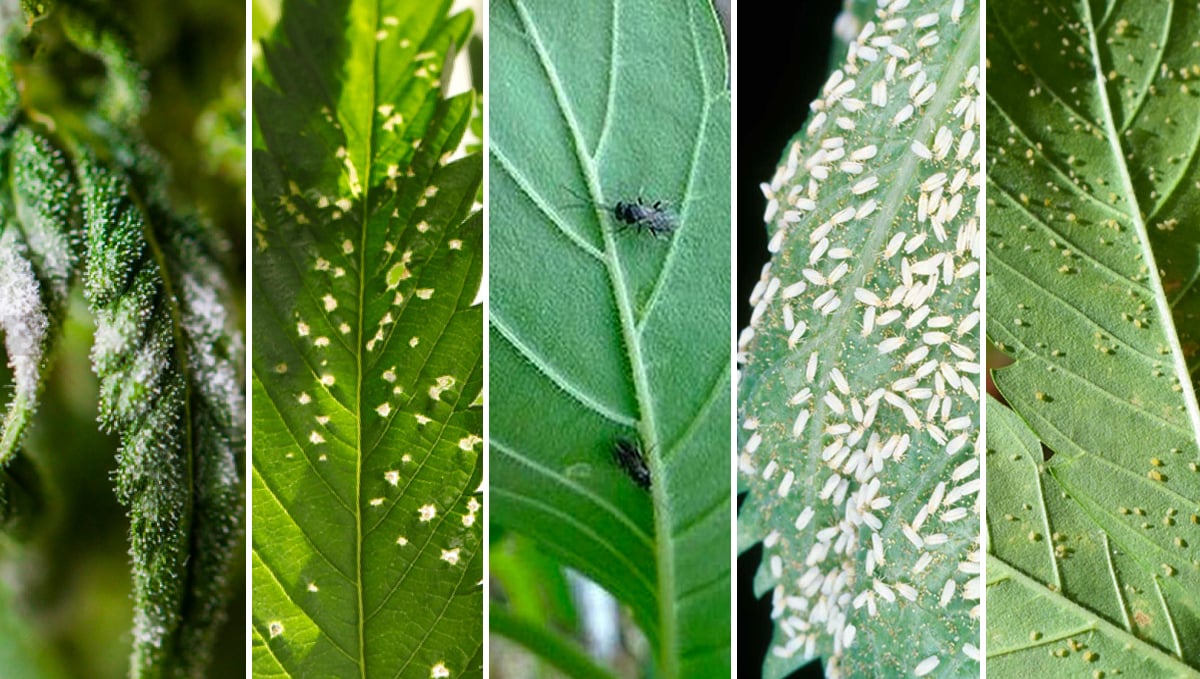
Oriental herb nutrients are made by following the steps mentioned above but with some differences.
OHN can be made with dehydrated or fresh herbs, even though you can get away with not using all of the herbs required, we recommend using Angelica Gigas roots, Cinnamon bark, Licorice roots, Garlic and Ginger to make a foolproof OHN.
Before starting have in mind that each needs to be in separate glass jars.
If you’re using dehydrated herbs you will need to soak the dry herbs separately in rice vinegar or beer for 2 days to allow them to rehydrate, if you’re using fresh herbs you can skip this step.
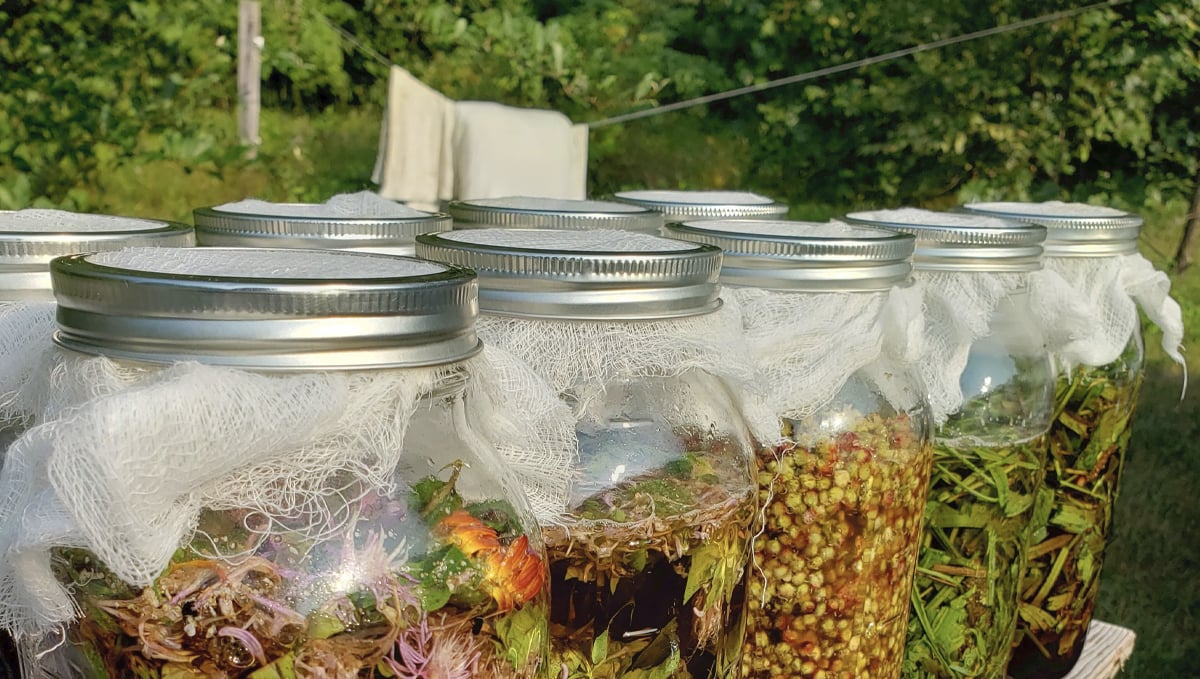
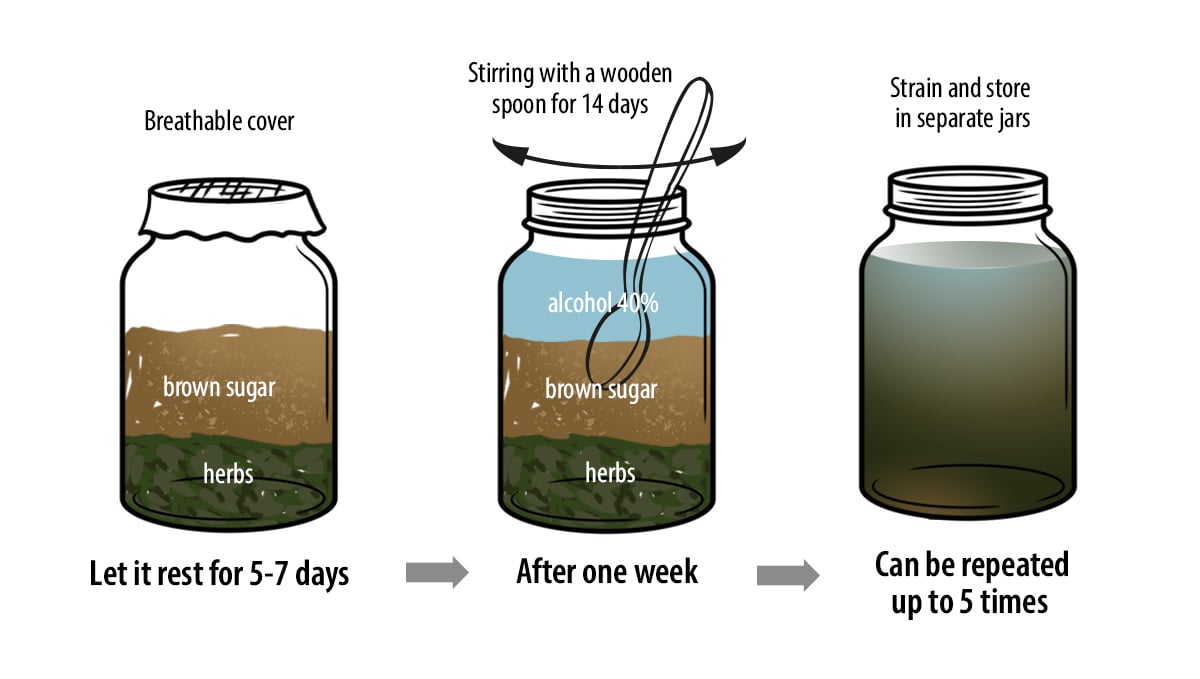
After letting your herbs rehydrate for around 2 days (or if you’re starting with fresh herbs) make sure the herbs fill 1/3 of the jar they’re in and add an equal amount of brown sugar by weight.
Now that you have added the sugar, your jar should be 2/3 full, let it rest for 5-7 days with a breathable cover like a paper towel or cheesecloth, this will allow the OHN to breathe.
| Recipe | Vegetative | Pre-flowering | Flowering |
|---|---|---|---|
| Oriental Herb Nutrients (OHN) | 1ml/L | 1ml/L | 1ml/L |
After one week has passed you will need to completely fill each jar with vodka or other liquor with more than 40% alcohol, stirring every morning with a wooden spoon for 14 days, then strain and store in separate jars, have in mind this process can be repeated up to 5 times before discarding the herbs.
Now that you have every herb extract ready to be used, you will need to mix 2 parts of Angelica extract with 1 part of Garlic, Licorice, Ginger, and Cinnamon extract, stir slightly and let rest for 6-12 months, it’s important to keep the jar loosely covered to allow the air to circulate and prevent the build-up of gases.
If your plant is stressed (from overfeeding, a bug infestation, or overwatering for example) you should use half of the recommended amount of OHN per liter to avoid stressing your cannabis plants even more. Have in mind that even though KNF is organic they're still nutrients and using them in excess or on already stressed cannabis plants can be bad.
10. Water Soluble Calcium
Water-soluble calcium (aka WCA) is a way of providing calcium to your cannabis plants using household items. Calcium encourages a plant’s cell processes, flowering (improves yield and quality), root growth, and prevents bud rot.
This recipe can be used as a foliar spray and is a good alternative to adding crushed eggshells into the soil or other slow-release amendments.
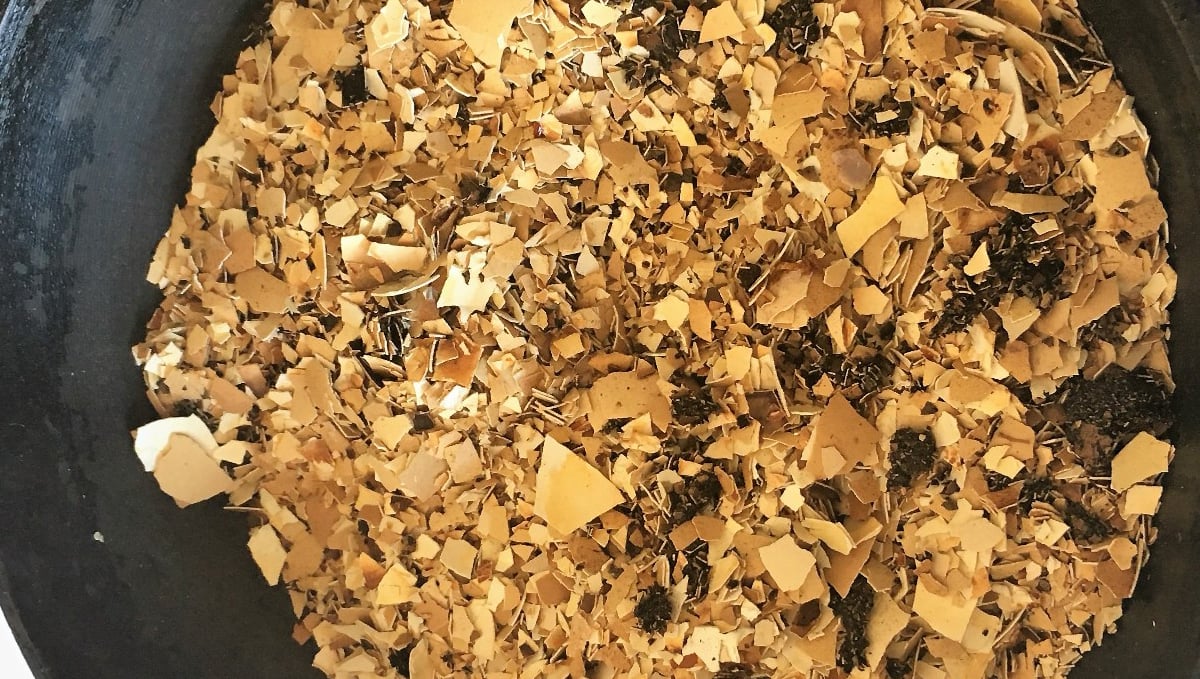
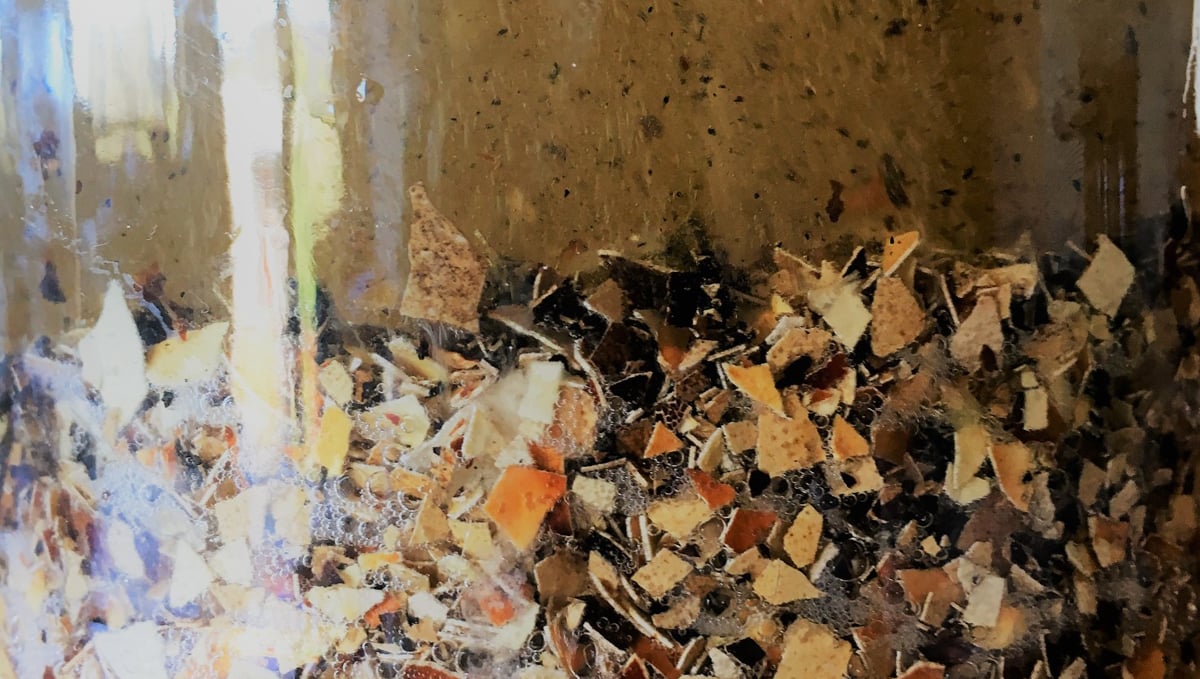
To make water-soluble calcium you will need to roast eggshells for approximately 45 minutes until they’re slightly tan and then cover them with brown rice vinegar in a ratio of 1:10, so if you have 10g of eggshells you will need 100ml of vinegar then cover the mouth of the jar with a cheesecloth and let it rest for 7-10 days.
| Recipe | Vegetative | Pre-flowering | Flowering |
|---|---|---|---|
| Water-soluble Calcium (WCA) | 0 | 1ml/L | 2ml/L |
You will see bubbles coming out of the eggshells, if you still see them after 10 days have passed, add more eggshells and repeat the process until the mixture is saturated and you can’t see any more bubbles, at this point your water-soluble calcium is ready.
WCA should be used as a light mist very early in the morning or just after the sun goes down to avoid leaf burn and allow time for absorption before it evaporates, remember that even though KNF is organic watering with a too strong solution or too often can burn your cannabis.
WCA should be mixed during the pre-flowering and flowering stage of your cannabis plant and should be used in combination with the other recipes to have optimal results.
11. Indigenous Microorganisms
Indigenous microorganisms, otherwise known as IMO, are the cornerstone of KNF. A diverse microbial population in the soil helps plants to thrive, and IMOs help to introduce many different species of bacteria, fungi, and other life forms. These tiny critters help to boost nutrient cycling and control disease. Instead of relying on compost alone, or pouring bottled products on your soil and keeping your fingers crossed, IMO allows KNF practitioners to collect microbes themselves from their local environment. Below, we’ll cover the simple steps that it takes to culture a diverse range of microbes close to your home, and how to inoculate your soil with waves of new life that will help your plants to prosper.
IMO 1: Collection
To kick things off, you need to collect those microbes. For this, you’ll need to cook up some white rice and find yourself a collection container. Small wicker baskets work the best. Either way, you’ll need something with small holes that the forest microbes can travel through. A bucket with air holes drilled into the side also helps to protect your collection box from rain and hungry animals.
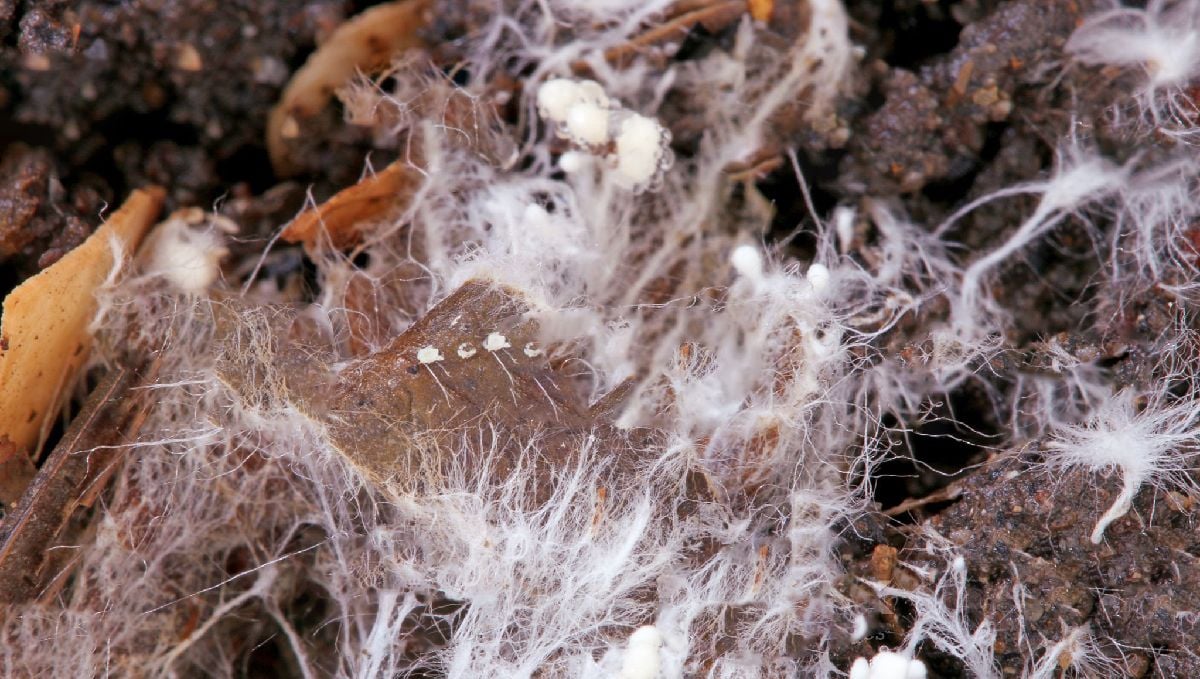
Fill your container ⅓ full with rice. Remove some leaves from the forest floor. Place your container down and protect it with your bucket. Leave the box for five days, and you should return to see your rice covered in brilliant white mycelium—the sign of a successful collection. If you notice a green, blue, red, or grey layer, discard the rice and try again in a slightly different location.
IMO 2: Cultivation
Next, you need to prepare your IMO collection for storage and future use. To do this, weigh your rice collection and then place it into a glass jar. Next, add the same weight of brown sugar into the jar (to achieve a ratio of 1:1) and thoroughly mix it together with a spoon. The sugar will serve as a food source to keep your microbes alive and enable them to multiply. Next, place a piece of kitchen towel over the opening of the jar and secure it in place with an elastic band. This will protect your IMO 2 while allowing it to breathe. Place in a cool and dark location and let your microbes feast for seven days.
IMO 3: Multiplication
Now, it’s time to expand your culture of IMO even further. You’ll need the following to carry out this step:
- 1 × 5-gallon bucket of wheat bran
- 1 × 5-gallon bucket of oats
- 1 × 5-gallon bucket of wood chips
- IMO 2
- OHN
- FPJ
- Brown rice vinegar
- Humic acid
- Sea water or salted water
- 3 gallons of water
- Compost thermometer
To begin, add the following to your 3 gallons of water:
- 23ml FPJ
- 23ml brown rice vinegar
- 11ml OHN
- 23ml humic acid
- 350ml sea water or salted water
- 1 heaped tablespoon IMO2
Next, find a sheltered spot in your garden and empty your wheat bran, oats, and wood chips into a pile and mix them together thoroughly. Then, pour your 3-gallon solution evenly over the pile and mix again. Stick your compost thermometer in the pile. Things will heat up quickly as the microbes begin to break down the ingredients. Ideally, you don’t want the temperature to exceed 45°C. To prevent the temperature from rising too high, you’ll need to grab a shovel and turn your pile every two days. Keep on top of this task during the week ahead, until aggregates (clumps) start to form and the temperature declines.
IMO 4: Inoculation
You’re ready for the final step! For this, you’ll need a 10L bucket filled with biochar. You can either purchase this material quite cheaply or make your own by charring enough small twigs in a drum or kiln in your garden. Next, mix your IMO3 thoroughly with the biochar, breaking all of the big pieces down into smaller chunks. Then, mix with soil at a ratio of 1:1. Leave this mixture in a pile to ferment for around five days, making sure temperatures don’t exceed 45°C.

There you have it! You’ve got IMO4 ready to use in your garden. To inoculate your soil with plenty of beneficial organisms, apply IMO4 as a top dress by sprinkling it over your beds and pots. Practitioners suggest a concentration of 150kg per 0.1 hectares. Finally, add a layer of mulch (such as leaf litter) to protect the applied microbes from sunlight.
12. Korean Natural Farming For You
As crazy as it may seem, all KNF recipes can be consumed by humans and even animals.
Maintaining a habit of consuming KNF every day is like having an extra layer on top of your immune system, you will be consuming beneficial microorganisms and bacteria which will live in a symbiotic relationship with the ones you naturally have, protecting you against malicious ones.
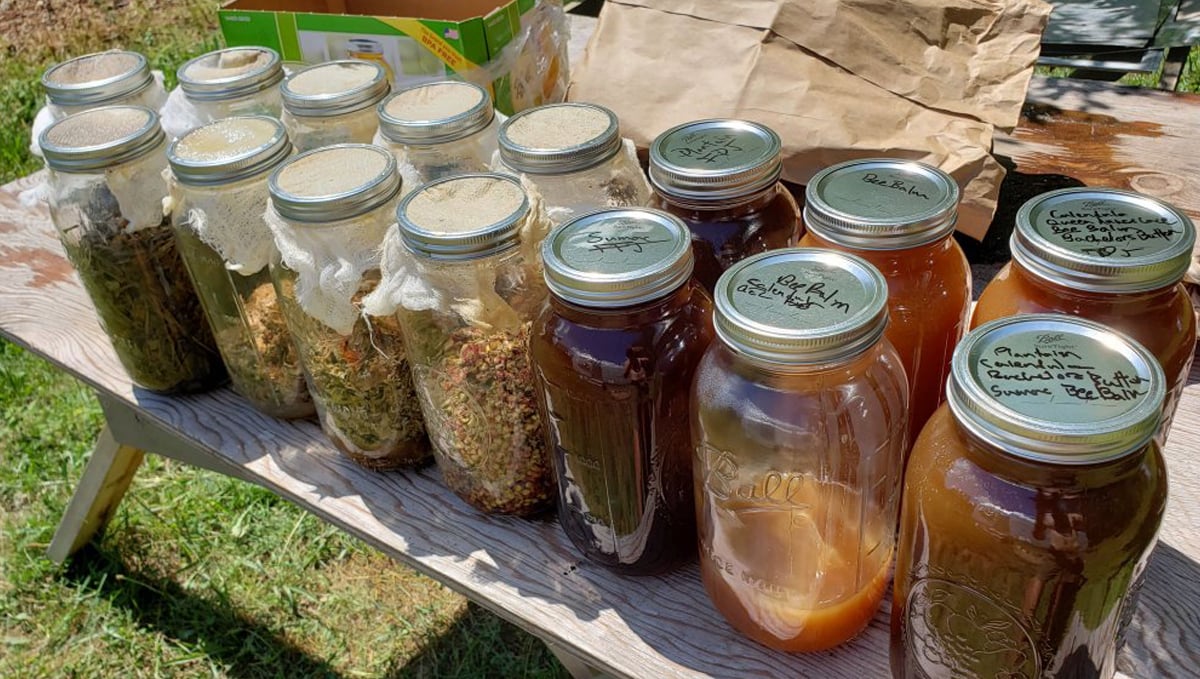
Have in mind that making KNF can take a couple of tries before it comes out the way it should, we recommend gathering a bit of experience before starting to consume your fermented juices, this way you’ll be able to differentiate fermentations that turned out bad and the ones that didn’t.
13. KNF Feeding Schedule
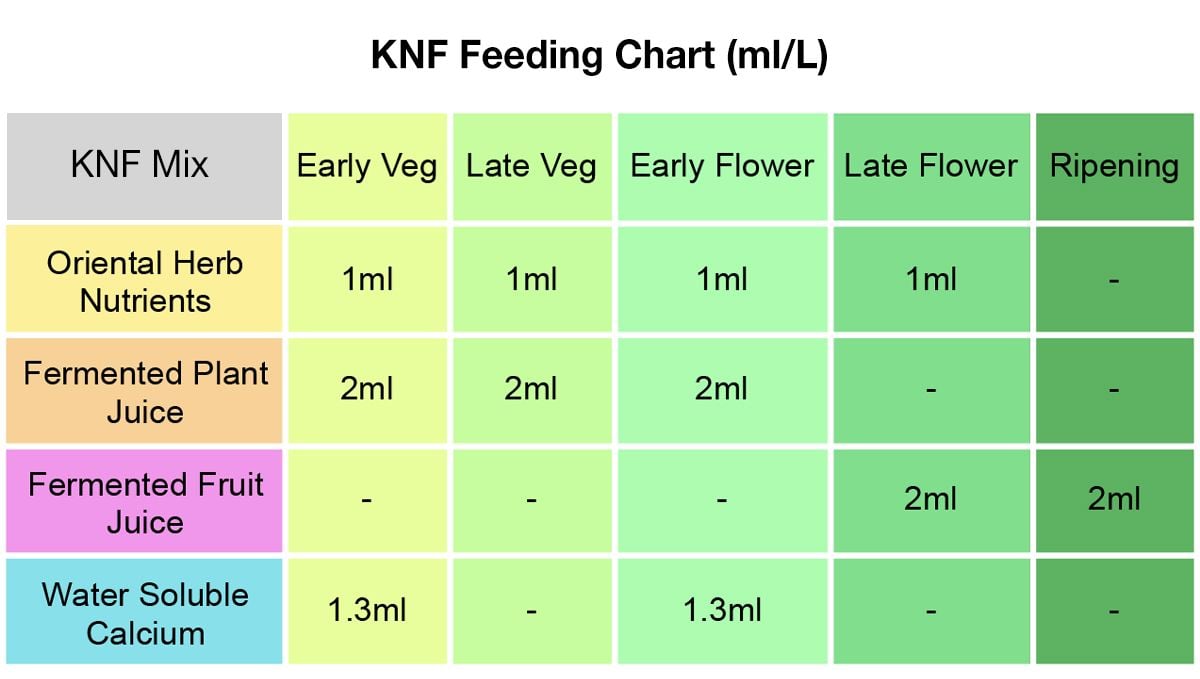
Just to make things easy for you, here’s a Korean natural farming feeding chart to help you out. Just have in mind that the amounts may vary according to your growing conditions and the specific strain you’re growing.
For those of you that still have a lot of doubts about KNF and how to use it, read along for the frequently asked questions and the answers!
14. KNF - most common questions
Can I freeze the fruits to make KNF?
You shouldn’t freeze fruits or plants because freezing them kills the microbes that’ll help make your KNF, so make sure to use fresh fruit, ideally right after harvest.
My KNF smells weird, did I do it wrong?
Different KNF mixes can smell and taste different and can taste from sweet to sour so it’s not unusual for a KNF to taste bad. Learning how to identify if your KNF is good or not by the smell and taste takes time so it’s a matter of seeing how your plants react and making changes accordingly. Always remember to trust your instincts!
Can I replace brown sugar with honey?
Osmotic pressure is what pulls the juices from the plants or fruits and sugar exerted osmotic pressure but honey does not so it’s not recommended to use honey. A good tip is to add 10% salt to your fermented plant juice in case your plant material is dryer than usual.
How long are FPJ and FFJ good for?
At room temperature, approximately one week, and in the fridge for up to 6 months, but it depends on several things. Make sure to check the bubbles in the FPJ or FFJ, the bubbles will become less intense as time passes. Less intense bubbling means that the microbe population is fading so make sure to check your KNF mix daily and once it smells like alcohol, then it’s already degraded.
Should I always use brown rice vinegar?
Any type of vinegar will do the job but the better the quality, the better the final product. If you can’t find brown rice vinegar, there’s no problem in using regular vinegar but have in mind that if you want a quality KNF you should use high-quality ingredients.
15. In conclusion
KNF is an organic and environment-friendly alternative to bottled nutrients, even though it can take a couple of months to be ready for use, you can effectively make your own KNF for very cheap. Have you ever tried any of the recipes? Share your tips and tricks, feel free to leave us a comment below!
External References:
- Natural Farming: Fermented Plant Juice - College of Tropical Agriculture and Human Resources, University of Hawaiʻi at Mānoa. (2013).
- Natural Farming: Oriental Herbal Nutrient - College of Tropical Agriculture and Human Resources, University of Hawaiʻi at Mānoa. (2013).
- Natural Farming: Water-Soluble Calcium - College of Tropical Agriculture and Human Resources, University of Hawaiʻi at Mānoa. (2013).






Comments