9 Mistakes To Avoid When Growing Autoflowering Cannabis
- 1. Knowing the basics
- 2. Time it right
- 3. Germination
- 4. Choose the right medium
- 5. What are the best substrate options for novice or inexperienced autoflower cultivators?
- 6. Choose good containers
- 7. Do not transplant
- 8. Over and under-watering
- 9. Overfeeding and underfeeding
- 9. a. Macro and micronutrients
- 9. b. Ph levels
- 10. Harvest at the right time
- 11. Frequently asked questions about autoflowers
- 12. In conclusion
Autoflower cannabis has always sparked debates among growers in the cannabis community. Due to a dearth of knowledge or experience, many growers avoid growing autoflowers. Beginners are expected to only grow photoperiod plants, and while the fear of something new and unexpected is understandable, you might discover something more amazing if you just try. Autoflowers are really easy to grow but there are basic guidelines you should know, just like when growing other plants or vegetables. All plants are different and even though you can successfully harvest the first time you grow cannabis, there are common mistakes that are better to avoid. If you're new to autoflower growing and are looking for an autoflower grow guide or want to know how to grow autoflowering strains, here are a couple of tips to have you growing in no time.
1. Knowing the basics
To set things straight, let's begin by saying that autoflowers are really easy to grow. In fact, beginners can try growing autoflowers with little to no experience as long as they understand the basics1. And this is true for all plants. Can you expect to grow tomatoes if you’re clueless about using nutrients? Or, can you harvest cucumbers if you don’t even know when to harvest them? No? Similarly, autoflowers need you to follow a few basic guidelines like other plants, and you’ll do just fine if you take the time to understand them.
But what makes autoflowering cannabis cultivars so easy to grow? Well, there are a few beginner-friendly traits that set them apart from their photoperiod cousins. For one, they descend from a type of cannabis—known as cannabis ruderalis—that adapted to the harsh conditions of Siberia. All autos possess Ruderalis genetics, which endows them with impressive hardiness, good pest and disease resistance, and rapid growing times. If you’re an indoor grower, you won’t even need to adjust the light cycle to get them to flower. Now that you’re more familiar with autoflowering genetics, let’s take a look at what mistakes to avoid to achieve the best outcome possible.
After all, a plant that gives you lip-smacking buds in just 2 months deserves some research, eh? Autoflowers may scare you at first, but if you avoid a few common mistakes, you’ll harvest much more than you can imagine, and it only gets better.
2. Time it right
Timing is everything if you’re planning to grow autoflowers outdoors. Since autoflowers don’t depend on light to flower, you don’t need to worry too much. But, planting too early will generate smaller yields and planting too late affects yields too.
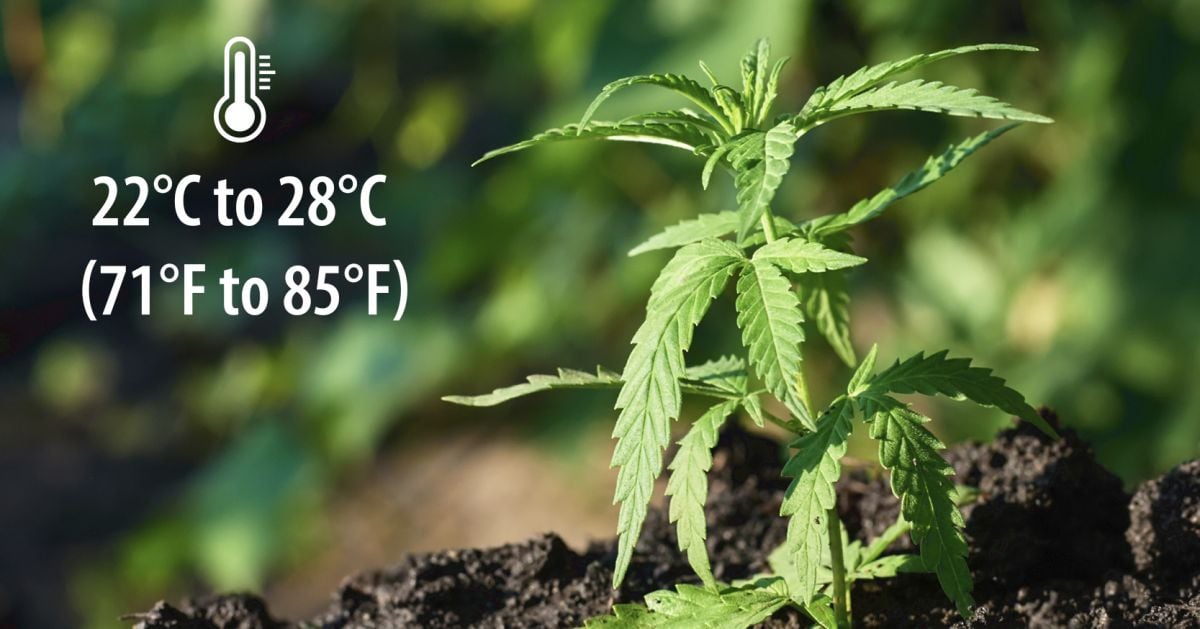
Frost must be avoided at all costs. Typically, most growers begin planting when spring is just around the corner. Depending on where you live, you can plant the seeds as soon as the frost clears. If you reside in a location that doesn’t receive any snow, go ahead and plant when the temperatures range between 22°C to 28°C (71°F to 77°F).
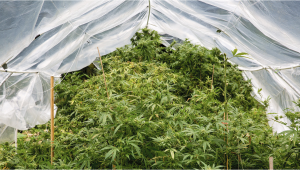
If you live in a particularly cold region, there are steps you can take to protect your plants from the threat of late frosts. Of course, starting seeds indoors will help here. Plus, doing so will help to speed up germination times. Moving them out into greenhouses and polytunnels will add an additional layer of protection as the seasonal frosts begin to wane. If you have no choice but to move them outdoors under the sky, consider covering young plants with bell cloches and mulching the surrounding soil with hay or straw as a form of insulation.
You can also leverage timing to take advantage of successive harvests. Staggering sowings by two weeks till break up the work that awaits come harvest time. It will help you space out all of that trimming, drying, and curing into easily manageable portions. Bigger plants can tolerate much higher temperatures but tender seedlings will succumb to extreme temperatures. Remember to avoid rainy seasons since the plant doesn’t receive too much light. Of course, the timing doesn’t matter if growing indoors, so sow those seeds whenever you wish!
3. Germination
For beginners, germinating the seeds is an important part of the entire process. To get better results, soak the seeds in plain water for at least 24 hours and wrap them in moist paper towels for a day or two. Use a ziplock bag to store the towels.
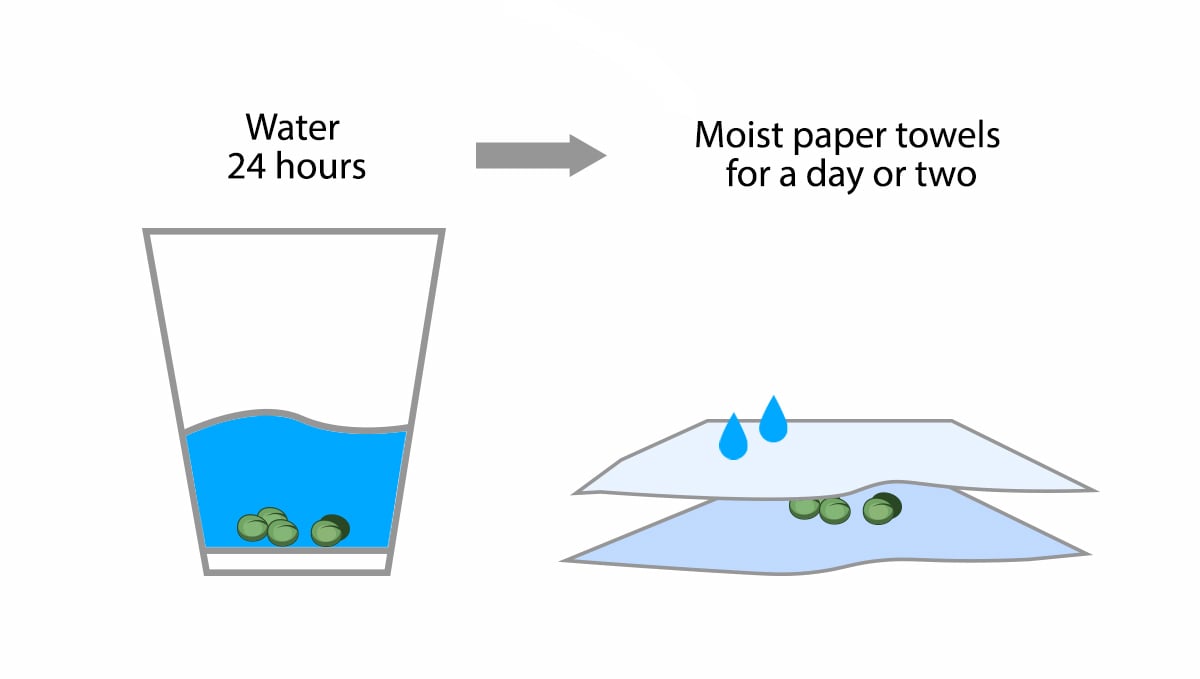
It’s important to keep the towels moist because the seeds can rot if there’s too much water. Similarly, the seeds won’t sprout if the towels are completely dry. Don’t make the mistake of directly planting the seeds, especially if you’re doing it for the first time. Once the seeds show a tap root, plant the seeds in the final container. Despite having to keep the seeds in damp paper towels, make sure they are not completely wet, too much water can rot the seeds. The best way to identify this is by smell if the paper towels start to smell like mold, immediately take them out and change the towels.
Depending on your experience, you can also germinate your seeds directly in the medium, just make sure you're not overwatering it because you can end up drowning your seeds. As you can see in the video, germinating in the soil is easy and doesn't require anything extra, just be careful and you'll see a seedling coming out of the ground in a couple of days.
4. Choose the right medium
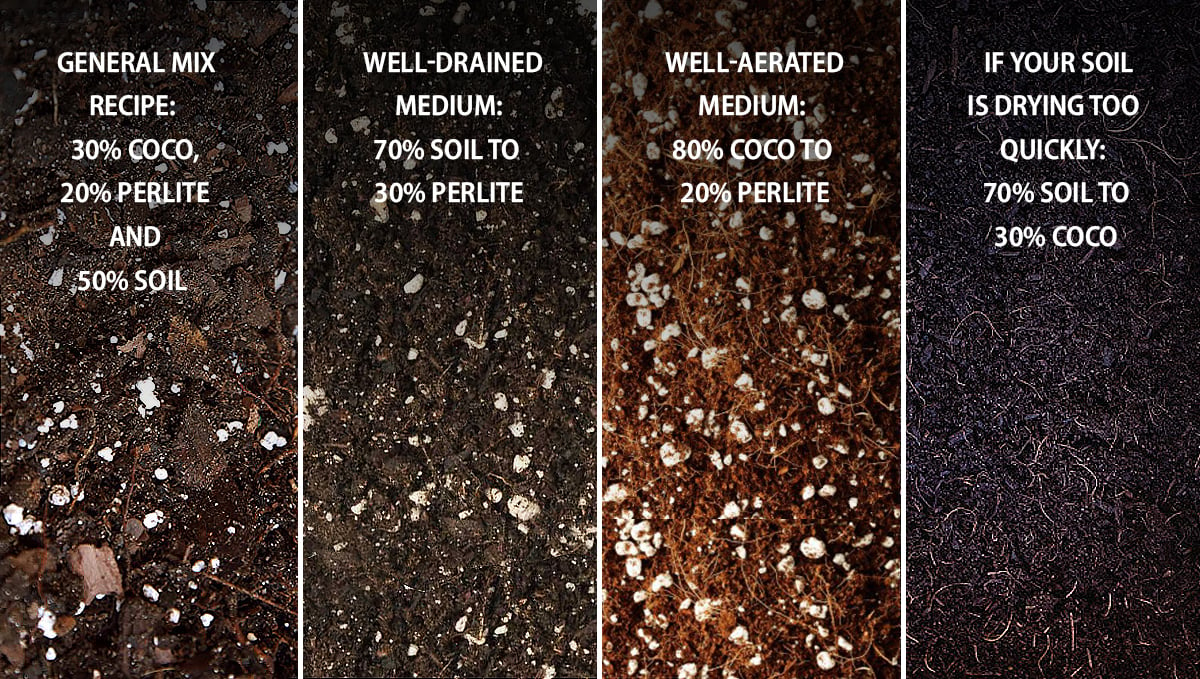
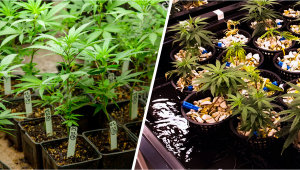
Growing plants in hydroponic setups seem very cool, but soil is your best bet if you have no experience. Avoid using clay soils that clump up because autoflowers thrive in well-aerated soil. A soilless medium of equal parts of peat moss or coco peat, perlite, some airy soil, and sand is the best potting mix for autoflowers. If you don’t want to bother about fertilizing at all, you can even try growing autoflowers organically. There are various ways to make your own organic soil, but you can buy some in your local store to start with. Organic soil is premised with nutrients, so it’s ideal for someone that doesn’t have a lot of time. For growers that don’t mind putting in the efforts, composting and building super soil is the best soil mix for autoflowers.
There are a variety of different techniques to create healthy compost loaded with organic matter and beneficial microorganisms. If you can get your hands on enough green (grass cuttings, food scraps, coffee grounds, manure) and brown materials (cardboard, paper, woodchips) to fill a compost bin immediately, you can create a hot compost pile that will produce an excellent growing medium in as little as a few weeks. Simply add 50% green material and 50% brown material, stack them in alternating layers, and turn and water occasionally.
If growing outdoors, till the soil well and amend it with organic nutrients to produce a happy, healthy plant. But, no matter what you do while growing indoors, stay away from old used soil or sterilize it before you plant seeds to prevent diseases. If you have the luxury of a garden, you can leverage biodiversity in your favor to produce incredible auto specimens. Consider sowing companion plants such as basil, chamomile, and yarrow nearby to attract beneficial insects that will help to keep pest species away. If you live in a hot climate, low-growing ground cover plants such as winter squash will help to cast a shadow over the soil and, in doing so, boost moisture retention and reduce the amount of watering you have to do.
5. What Are the Best Substrate Options for Novice or Inexperienced Autoflower Cultivators?
Before we dive into the best substrate options, let's list out all the options and look at the pros and cons of each.
Soil
Soil is probably the easiest option for most beginner growers, as you can just walk outside and dig a bunch up. But it is the best? In some ways, the soil is perfect for beginner growers. It will definitely be the medium that is most familiar, especially if you are used to working in a garden. But there are some things to keep in mind. Cannabis likes a light, well-aerated soil mix. It also likes soil that isn't to heavily fertilized, especially when in the seedling stage.
If plants seem to grow well in your garden then you can 100 percent use this soil to grow cannabis, but you might want to add some amendments before planting. Products such as perlite, vermiculite, or coco-coir can all be added to help with root zone oxygenation and drainage. You could also look at adding some nice organic compost to the mix, as well as a whole range of other amendments. For more info on creating the perfect soil mix click right here.
When it comes to downsides, there are a couple of main issues you should keep in mind. First up, soil is more prone to pest and disease problems. If you are growing indoors, then this shouldn't be a big issue, but it can still be a problem. Another downside to soil is that it can be more difficult to achieve the perfect watering/feeding schedule.
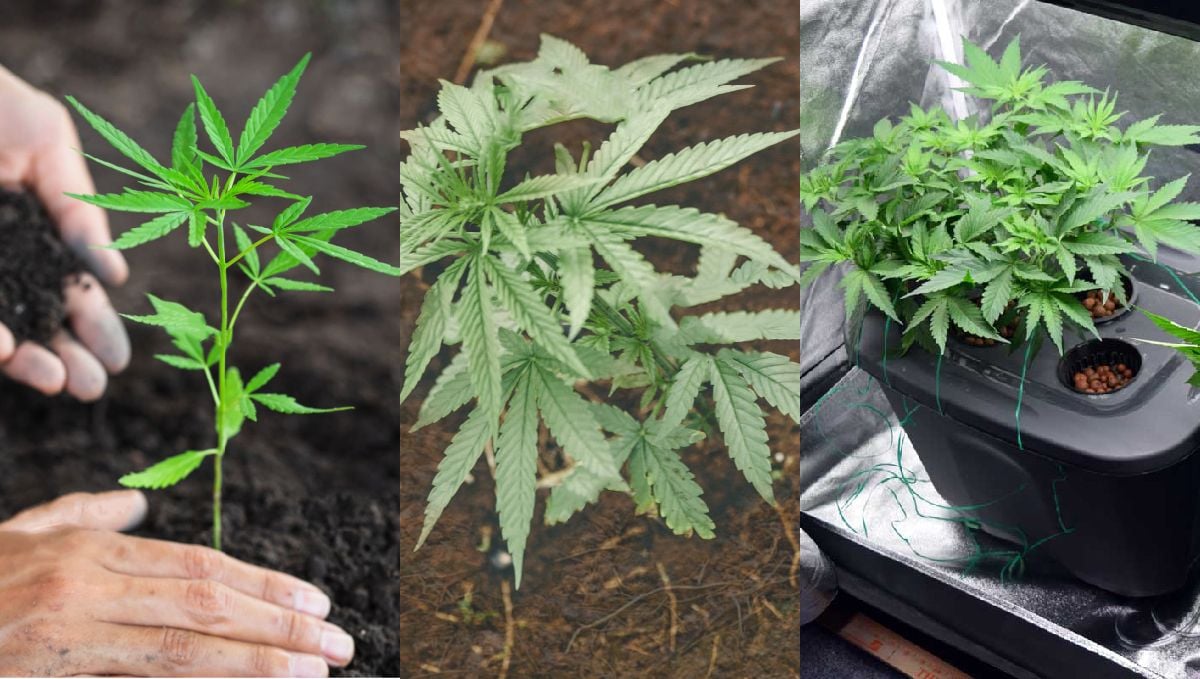
When growing in coco-coir or hydro, for example, you have much more control over how much water and nutrients your plant is getting. This can help to prevent over/under watering and feeding, which can be a big issue when growing in soil. Soil is also more difficult to work with when it comes to pH levels. Cannabis likes a slightly acidic root zone, between 6.0 and 7.0. Soil usually has a higher pH, which can lead to nutrient lockout and other problems. This isn't necessarily a deal breaker, but it is something to keep in mind.
Coco-Coir
Coco-coir is a fantastic substrate for cannabis cultivation and is often used by experienced growers as it offers a whole range of benefits. So, what is coco-coir? It is basically just a coconut husk that has been broken down and turned into a substrate. Coco-coir can be used on its own or mixed with other substrates such as perlite or vermiculite. It offers many of the advantages of both hydroponic and soil substrates while eliminating most of the downsides.
When it comes to benefits, coco-coir offers fantastic drainage and aeration, which is key for happy, healthy plants. It also has a naturally slightly acidic pH level, which is perfect for cannabis. Coco-coir is also very stable, meaning that it doesn't fluctuate in pH or EC levels like soil can. This means that you can easily control the nutrients your plant is getting, which is great for beginner growers. It offers far better root zone oxygenation than pure soil (up to 70% more) and is much lighter. if you have never grown before, the idea of moving large pots maybe hadn't crossed your mind. They can get heavy, really heavy. Coco-coir eliminates a lot of the weight of soil.
Coco-coir is also very forgiving, meaning that it is difficult to over or underwater plants. This substrate will hold onto moisture and then release it as the plant needs it, which takes a lot of the guesswork out of watering. It's also much easier to flush than soil. If you have any nutrient issues you can simply hit the plant with a bunch of fresh water and start again.
There are a few downsides though. Coco-coir can be a bit more expensive than soil, and it can be difficult to find in normal garden supply stores. Although, this isn't really an issue as you can buy it online very easily, or from any hydroponic specialist. Coco-coir can also harbor pests such as mites, so it's important to make sure that you get it from a reputable source. All the big nutrient companies make their own pre-buffered coco-coir blends these days, so just grab one of those and you should be good to go. Keep in mind, this is essentially a hydroponic medium, so you will need to feed the plants with nutrients.
Hydroponics
Hydroponics is the most efficient way to grow cannabis. It offers many benefits over traditional soil and coco-coir cultivation, but it does come with a few downsides too. Hydroponics simply means growing plants without any soil. The roots are instead suspended in water that is enriched with nutrients. There are many different ways to set up a hydroponic system, but they all work in essentially the same way. The water is kept circulating by a pump, and the roots are constantly aerated with oxygen. This allows the plant to grow much faster than it would in soil, as it has direct access to everything it needs.
Hydroponic systems are very efficient, as there is no need for the substrate to hold onto water or nutrients. The plants can take up exactly what they need when they need it. This also means that hydroponic systems use less water than soil systems, as there is no evaporation or runoff. The main downside to hydroponics is that it can be quite complex to set up, and things can go wrong very easily. If something does go wrong, the plants can very quickly become stressed, which can lead to nutrient problems or even death.
So, if you are thinking about growing cannabis hydroponically, it is important to do your research first and make sure that you understand everything that is involved. There are many great books and websites that can help you get started.
Soil vs Coco-Coir vs Hydroponics
So, which one should you choose? Well, it really depends on what you are looking for. For beginner growers, we usually suggest steering clear of hydro and going with coco-coir instead. Coco is much more forgiving than hydro, and it is also less likely that you will run into problems such as nutrient deficiencies or pH swings. Soil is also a great place to start, and while it is probably less work than coco-coir (since you don't have to mix up nutrient water to feed the crop) it does come with some downsides when compared to coco. So, if you are serious about growing amazing autoflowers from the very first crop, we reckon that coco is the way to go!
6. Choose good containers
Please don’t stuff seeds in plastic containers that make life hell for the poor roots. Use porous containers such as fabric pots or even Airpots to help the plants grow as much as possible. Autoflowers are typically small, but they need containers that are at least 5-8 liters in size.
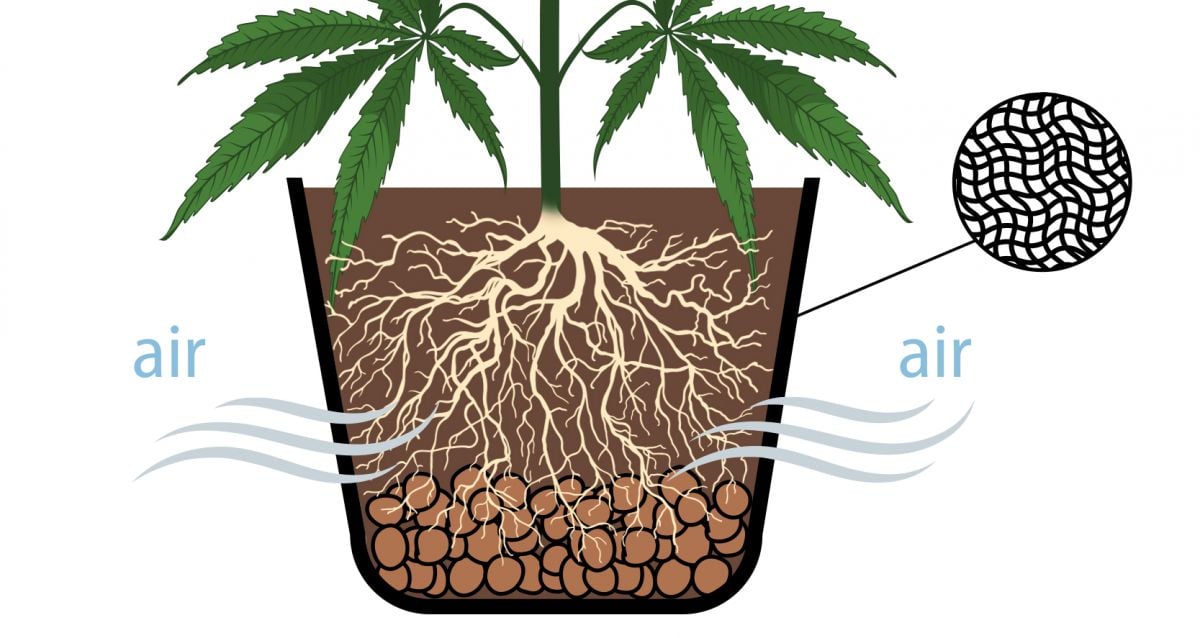
Bigger autoflowers need bigger containers, so make sure you check the description before purchasing seeds. Root aeration is often overlooked, but it’s an important factor in determining your yields.
The appropriate pot size can also help you control the height of your cannabis plants, usually, a 12L pot will allow your plant to develop to its maximum, an auto in a 7L pot will grow up to 70cm and in a 3L pot will grow around 40cm.
If you’re growing autos outdoors in a warm climate, your containers will dry out fast—especially during heatwaves. To help improve water retention, consider applying a layer of mulch onto the top of your growing medium. Straw, hay, or leaf litter helps to produce more of a natural growing environment—how much bare soil do you see when walking through the forest? As well as breaking down and feeding soil microbes over time, these materials shield the top layer of soil from the sun and reduce water loss via evaporation.
7. Do not transplant
It’s important to start autoflowers in their final containers rather than planting them in smaller ones and transplanting them later. Sure, growing cannabis is like growing tomatoes, but autoflowers have a limited time period and can’t afford to lose days while the plant settles and searches for roots.
Some growers use small plastic cups to plant seeds. While this method may work with photoperiod plants, it’s not recommended for autoflowers. If you’re already committed the mistake of planting them in small containers, try to transplant the plant only when the soil is moist. If the soil is too wet, the roots tend to break, and if it’s too dry, transplanting becomes a pain. Of course, experienced growers do transplant autoflowers but it’s not really necessary.
8. Over and under-watering
Most plants die if you over or under-water them. Yes, autoflowers need water to grow, but it’s critical to supply it only when the plant needs it. It’s obvious that the timing is important even when the plants need water.
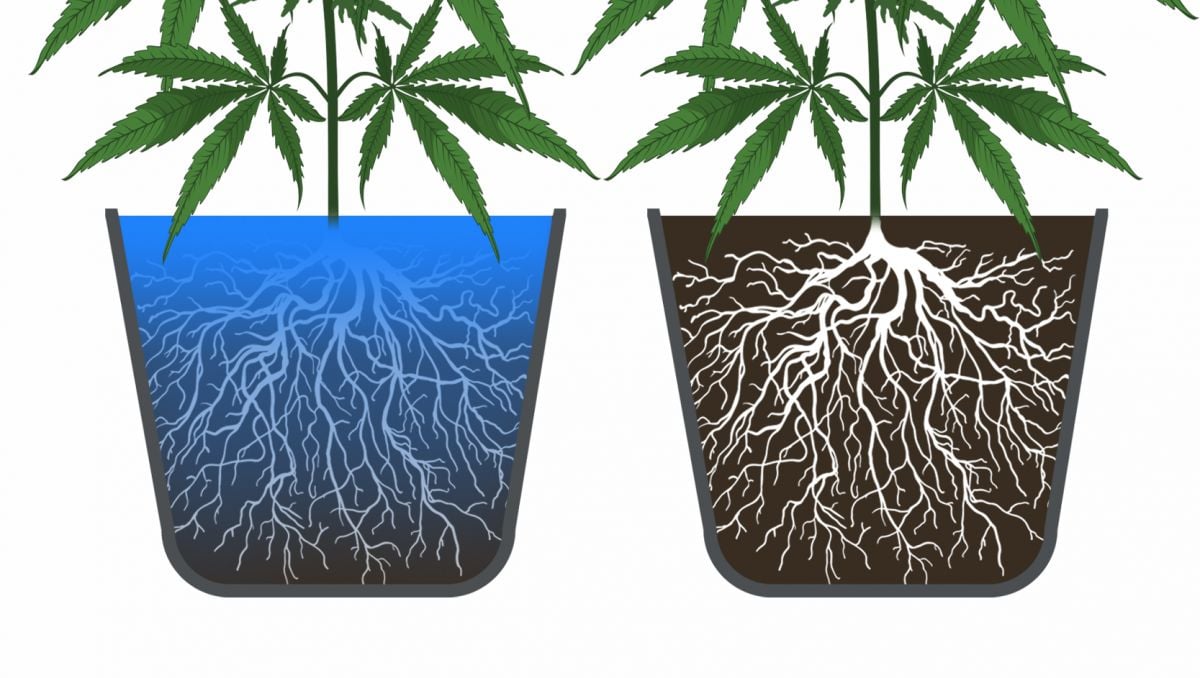
A way to check if the soil is dry is to use your index finger and stick it in the soil, if it comes out moist then the soil is still humid, although by doing this you won't be able to know if the bottom is still wet so in order to get the timing right, lift the pots and check the weight. A dry pot will be easy to lift whereas container with lots of water will be heavy. The trick is to not let the soil go too dry or too wet, so water the plants only when the pot isn’t too heavy or light.
9. Overfeeding and underfeeding
Nutrients play a big role in growing autoflowering cannabis strains. Autoflowers are compact, so they don’t need loads of nutes in order to survive. In fact, autoflowers grow best when light fertilizers are used. It’s also important to feed the right nutrients at the right time.
Macro and micronutrients
For example, cannabis needs more nitrogen in the vegetative stage. In the pre-flowering stage, nutrients with more phosphorous are preferred, and in the flowering stage needs a lot more potassium than nitrogen or phosphorous. If you’re wondering what the term “N-P-K” printed on fertilizer bags means, it’s nothing but Nitrogen-Phosphorous-Potassium. The plants also need other micronutrients along with calcium and magnesium, so it’s extremely important to get the dosage right.
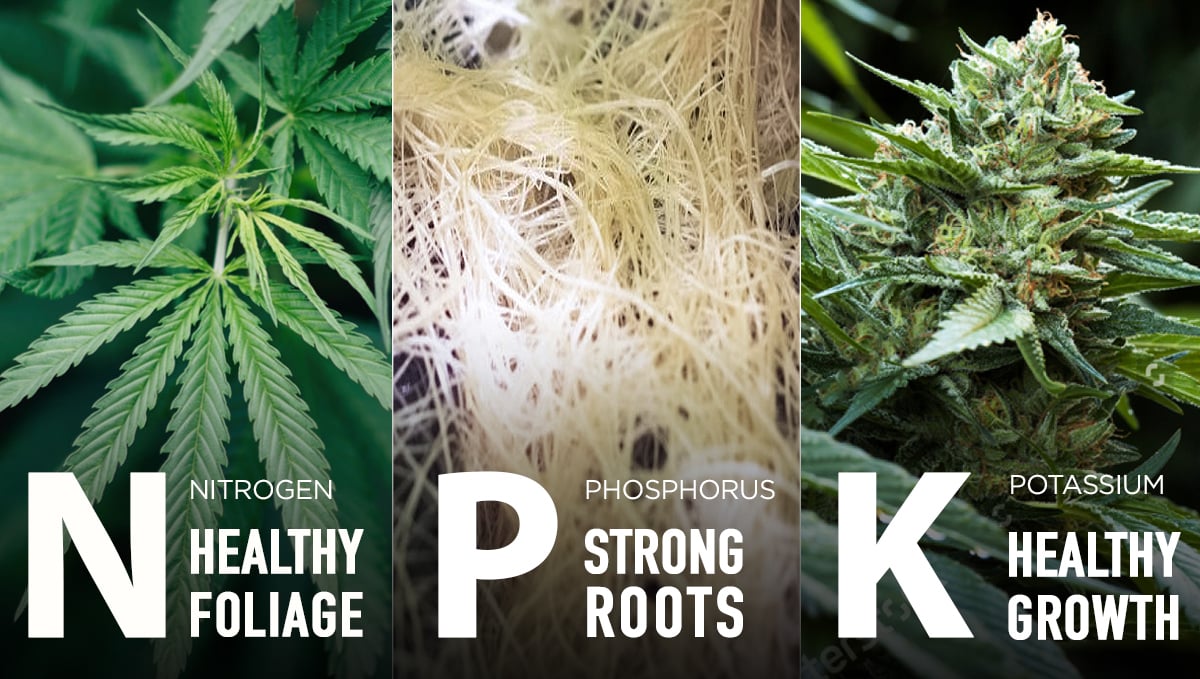
Don’t make the rookie mistake of using Miracle Grow or any other fertilizer meant to grow vegetables. Autoflowers will grow well even if you do that, but since they have special needs, you might as well stick to nutrients that supply everything. From humic to fulvic acid to enzymes, you can do a lot to make the plants perform to the best of their potential.
Talking about nutrients, some growers try to make their own nutes. While it’s completely okay to do so, you should avoid doing it if you’ve never done that before. Nutrients are expensive and it’s tempting to make your own, but try to attempt that after you’ve gained some experience. Why? Because cannabis plants require a good blend containing all micro and macronutrients in exact concentrations to thrive. It’s not as simple as diluting a random fertilizer and feeding the plants. You not only risk burning the plants, but the yields will suffer drastically since the plants have no time to recover.
PH levels
So, if it’s your first time, stick to commercial nutrients. And, the topic on nutrients is incomplete if you don’t talk about pH. Depending on the medium2 you choose to grow, the pH must be regulated accordingly. Cannabis plants love acidic soil, so the pH must be maintained between 5.5 to 7 in both soil and hydroponic setups. If the pH drops below 6, the roots will not be able to intake vital nutrients such as magnesium, calcium, and phosphorous. Similarly, if the pH is too alkaline and goes above 7.5, the roots cannot take up micronutrients like copper, manganese, boron, etc. It’s very important to regulate the pH at all times to prevent nutrient deficiencies.
Here’s a quick table to help you understand pH better:
| Nutrient | Ideal PH Level for Absorption |
|---|---|
| Nitrogen | 6.0-8.0 |
| Phosphorus | 6.5-7.5 |
| Potassium | 6-8 |
| Calcium | 6.5-8.5 |
| Magnesium | 6-8.5 |
Sometimes, it just so happens that the plant refuses to respond even if you’ve done everything. In such cases, flush the plants with lots of water (at least double or triple the size of the container) to reduce any nutrient or salt buildup so that the plants can breathe again. Flushing is typically done at the end, but it doesn’t hurt the plant even if you do it in between because it reduces buildups to a good extent.
Some growers also flush during the pre-flowering stage, when the plants are transitioning from the vegetative into the flowering stage so they can start feeding from zero, as said above, this won't hurt your plants but should be done properly.
10. Harvest at the right time
You’ve come all this way, and the end is almost near, so don’t screw this up now! Now you’re probably asking “how to tell if my autoflower is ready for harvest?” Well, after you’ve put in all the hard work, wait for the right time. Growers use microscopes to check the trichomes that usually indicate the right time, but you can harvest when at least 50 to 70 percent of the pistils are amber in color. While judging pistil colors works well for many growers, you can use trichome color as an accurate estimation for harvest time, too.
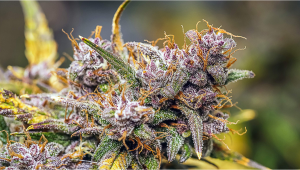
Have you ever noticed that white frosty layer on the surface of cannabis buds? They might not look like much to the naked eye, but these are tiny mushroom-shaped glands known as trichomes that produce all of the cannabinoids and terpenes that underpin the effects, aroma, and flavor of different strains. Low-cost forms of magnification, such as jewelers' loupes, offer an up-close and personal view of these little phytochemical factories.
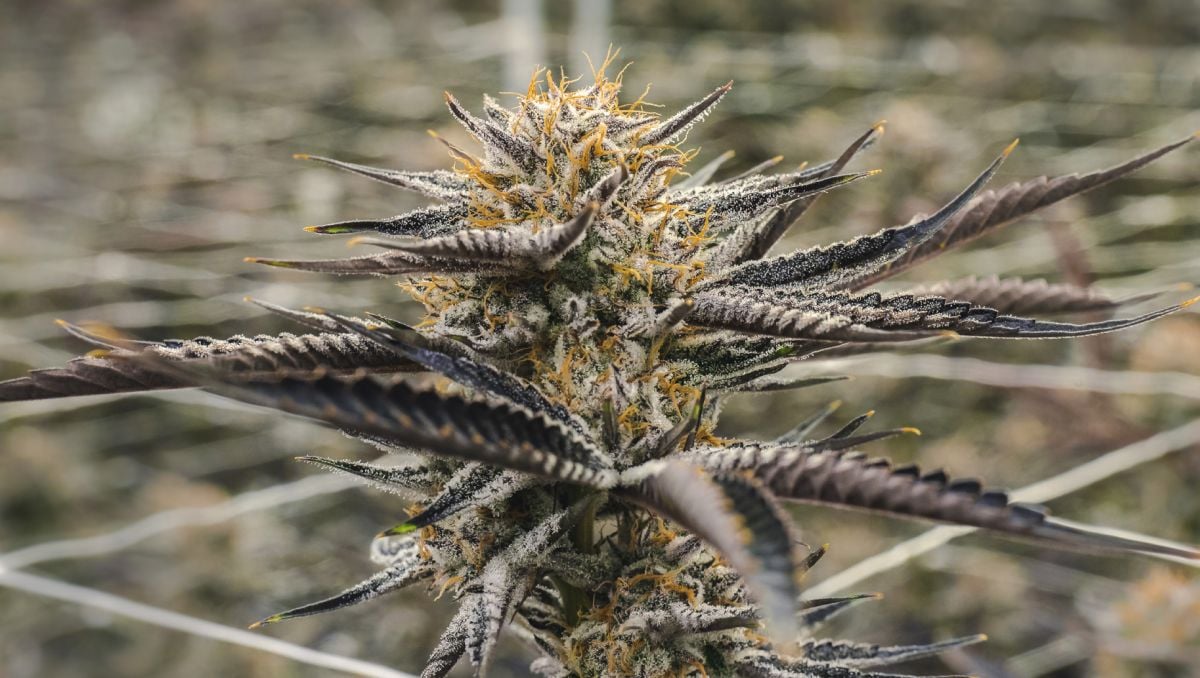
By assessing their color, you can get a good understanding of the maturity of your buds. Clear trichomes indicate that flowers are still too young and lack adequate levels of cannabinoids and terpenes. Aim to harvest when at least 50% of the trichomes you inspect are milky and opaque. If you wait too long, these glands will start to display an amber color, signifying the partial degradation of THC into CBN—a byproduct associated with a more physical and stoning effect.
If you wait too much, the buds tend to produce a couch-lock effect leaning more towards the Indica side while buds harvested too early generate unpleasant psychoactive effects. Also, the main colas ripen faster than the lower portions of the plant. Often referred to as popcorn buds, the lower portions stay small. However, harvesting the main colas and leaving the popcorn buds on the plant for a week more will increase yields dramatically. Be patient, and let Mother Nature do the rest for you! If you avoid these common mistakes when growing autoflowering cannabis, you’ll soon be rewarded with potent resinous buds that will last a long time if stored properly.
11. Frequently Asked Questions About Autoflowers
What’s the average autoflower size and how tall can they get?
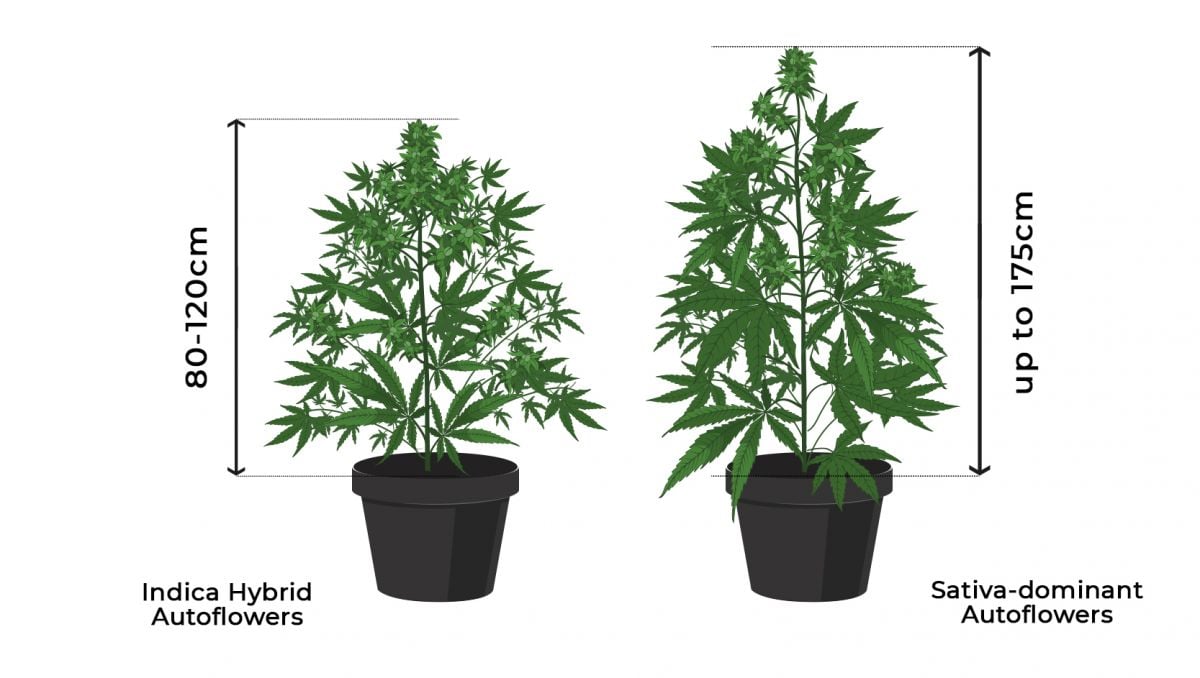
Most autoflowers reach a height of around 50-100cm but a plant’s size depends on the genetics and growing conditions. Also, all strains are different so you will find Sativa and Indica-leaning autos; Most Indica hybrid autoflowers will stay around the 80-120cm mark but Sativa-dominant autoflowers can reach up to 175cm tall.
Can I grow my auto on my window sill?
Yes, you can, although it’s not recommended if you want to get the best results possible but if this is the only way you have, make sure your plant gets at least 4-6 hours of direct sunlight a day and that you’re using at least a 10-liter pot.
Do autoflowers grow normal or smaller because of the Ruderalis genes?
The size of an autoflower can be influenced by several factors, genetics being the main one. More modern autoflower breeders breed their genetics to contain as little as Ruderalis genetics as possible, focusing on the more appealing characteristics such as size, structure, potency, and yields.
But when compared to a photoperiod plant, an autoflower has a limited lifespan so things such as stress, damage, or a bad environment can ultimately affect your auto’s height, so it's ideal to provide optimum grow conditions to get the best results possible.
When is the best time to plant autoflowers outdoors?
This solely depends on your climate, you need to remember that autos prefer dry sunny days so if you’re planning to have just one grow cycle, you can start them 1-2 weeks into Summer, and if you’re planning to have 2 harvests, start the next one right after finishing the first one.
What yield can I expect per autoflowering plant?
The yields depend on genetics, environment, stress, growers skills, and etc.. But in general, you can expect between 50-110 grams per plant.
How long will it take for my auto to start flowering?
In general, autoflowers stay for 4 weeks in the vegetative stage, so about 4 weeks. Then your auto will start developing flowers for 3 weeks, and fattening up the buds for the last 3 weeks.
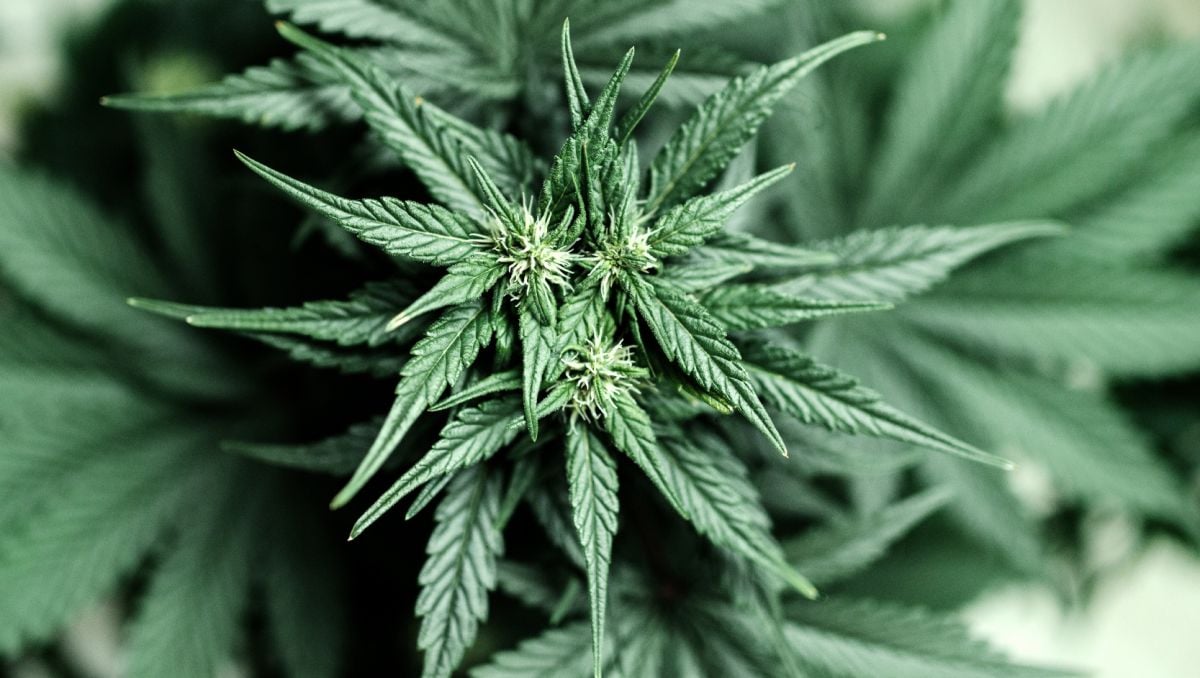
This may vary according to the genetics and growing environment, have in mind that it’s just to give you an idea of what to expect, some autoflowers may take less and others take longer.
Can you transplant autoflowers?
Yes, you can, although it’s not recommended because it can affect the yields. To prevent shocking your autoflowers and consequently affecting yields, it’s recommended to transplant 7-12 days after germination and if possible, use rooting cubes to prevent damaging the roots.
Can you grow autoflowering cannabis in a greenhouse?
Of course you can, you can grow autoflowers in a greenhouse all year round as long as you keep the inside temperature to a minimum of 15°C and there’s enough ventilation, airflow, and sunlight.
12. In conclusion
Autoflowers (aka self flowering seeds) are suited for beginner growers but it's crucial you know the basics if you want to have a successful harvest the first time you grow cannabis, although you can learn as you go, it can be disappointing if you waste time and money, and end up with nothing to smoke.
Now that you know the basics and what to avoid, you're all set up to start your first autoflower indoor grow.
If you've never grown cannabis before and are planning on growing our autos, feel free to ask us anything in the comment section below!
External references:
- Cannabis Indoor Growing Conditions, Management Practices, and Post-Harvest Treatment. - Jin, Dan & Jin, Shengxi & Chen, Jie. (2019)
- Coir-based growing substrates for indoor cannabis production. - Caplan, Deron & Dixon, Mike & Zheng, Youbin. (2019)




Comments