


How to grow autoflowering cannabis in coco coir?
- 1. What exactly is coco coir?
- 2. How is coco coir better than soil?
- 2. a. No limitations
- 2. b. Ph balanced
- 2. c. Versatile
- 2. d. Eco-friendly and sustainable
- 2. e. Yield
- 3. How to grow autoflowering cannabis in coco coir?
- 3. a. Break down the peat
- 3. b. Let the water soak in
- 3. c. Let the coco coir dry
- 3. d. Prepare your potting mix
- 3. e. Use porous containers to pot the plants
- 3. f. Provide nutrients without fail
- 3. g. Harvest buds when you wish
- 4. When, how, and why flush autoflowers in coco
- 5. The post-harvest routine
- 6. In conclusion
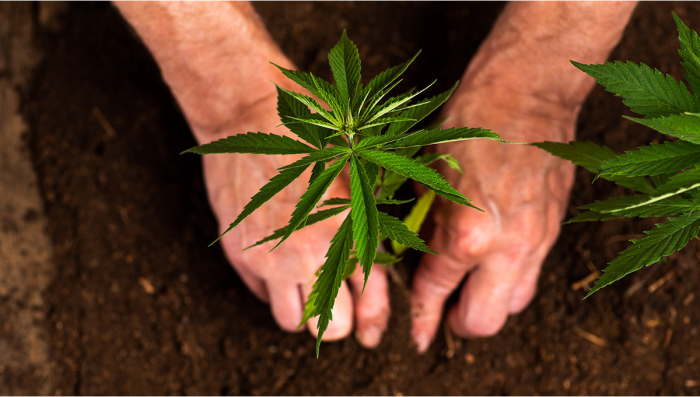
If you’re ever wondered how to grow autoflowering cannabis in coco coir, you’re at the right place! Coco coir – termed as the best medium to grow plants, especially cannabis – is not new. For centuries, farmers have used soil to grow a variety of crops, but the technique to grow anything without using soil is definitely new. Lately, the usage of coco coir has gone up, and so has the demand to produce more coir.
All cannabis plants grow perfectly well in coco coir, whether you use nutrients or grow organically. However, autoflowering cannabis strains especially thrive when grown in coir, all thanks to the aeration it provides. Autoflowers have a short lifespan to grow and produce dank buds, so you need to do everything in your capacity to provide the perfect environment meant for them, and that’s where coir comes in. For those who have no clue about coco coir, let’s first understand how it works...
1. What exactly is coco coir?
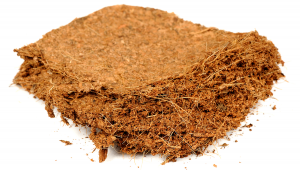
Also known as coco peat, coir is made out of coconut husks. The husks are processed and pressed in blocks that can be broken down before you plant seeds or plants in them. These blocks are usually available in most nurseries but you can also buy coir that’s broken down already.

If you purchase blocks, you need to immerse them in water until they soak it all and bloat. The blocks break down into small pieces of coir. It’s fibrous, and provides a lot of aeration to the roots, unlike soil which can be a little clumpy at times. The best way to grow healthy plants is to take care of the roots, and it's super easy to grow autos. In simple terms, healthy roots are equivalent to amazing plants. Thus, since coir keeps the roots happy, the plants ultimately grow well.

2. How is coco coir better than soil?
No limitations
The first thing that comes to mind when you think of growing crops is soil. It’s a common choice. However, it has its own limitations. For instance, soil can easily infect the roots if it’s infected. But, coco peat or coir can be reused without any issues. As mentioned already, coco peat is better than soil if you want to keep the roots happy. Also, autoflowering cannabis varieties grow faster in coco peat, compared to soil. And, that’s because the grower provides all the nutrients that can be used by the plant without any struggle. It’s like getting the benefits of soil and hydroponics at the same time. If you want large, dank buds in a short span of time, growing autoflowers in coco peat will be the best decision you ever made.
pH balanced
Like soil, coco coir is also natural, and contains nothing other than coconut husks. But, growing cannabis in soil can be a pain in the neck, especially when there’s so much to wrap your head around. Think about pH, for example. pH plays a critical role when growing cannabis, especially autoflowering varieties. When you’re growing in soil, pH can be a tad difficult to manage, but coco coir comes with preadjusted EC and pH, making it super easy for growers.
Versatile
Coco peat is extremely versatile and comes with numerous benefits. One can even mix a little soil or just coco by itself. The best way to grow autoflowering cannabis is to mix 70% coir and 30% perlite – an outstanding combination to provide the best environment for the roots.
Eco-friendly and sustainable
Coco coir lasts a long time and is also good for the environment. It doesn’t attract pests unlike soil were dealing with pests is common.
Yield
Although there's not much of a difference in the yield whether you grow in soil or coco coir medium, some growers say that coco coir produces a better yield and you can choose among the top 5 fastest growing autoflowers to produce amazing results.

3. How to grow autoflowering cannabis in coco coir?
Coco coir or peat is compressed into blocks that can be easily broken down. Step-by-step instructions to use coco coir to grow autoflowering cannabis:
Break down the peat
Purchase a coco coir block. The block comes in different sizes. Depending on your space and the number of autoflowering plants you’re growing, you can get either small or large blocks. Since the blocks come in different shapes and sizes, the total amount of coco coir derived at the end will also differ. For instance, a 5kg block of coir can produce anywhere from 20 to 25ltrs of coir.
Check with your manufacturer and determine the amount of water you can use. It’s safe to go with at least 2-3 times the size of the block, which means that you can immerse a 5kg block in at least 10 to 15 liters of water. Some companies compress blocks a lot more. In this case, even 30 liters of water can be used to break down a 5kg block.
Let the water soak in
Depending on the size and how the coco coir block is processed, it can take anywhere from 1 to 3 hours for the coir to break down completely. Small blocks need just 30 minutes whereas bigger blocks will need more time. Wait until all the coir absorbs all the water. Next, you’ll see the coir bloat right in front of your eyes! To fasten the process, break the blocks into smaller pieces before you begin soaking them, so you don’t have to wait all day.
Let the coco coir dry
If you’re anything like most enthusiastic cannabis growers, you will be tempted to use the coir as soon as it soaks up the water. However, don’t make this mistake. It’s important – nay, critical – to wait until the coir is dry.

Since coir has the ability to hold water, wet coco coir dripping with water will kill seedlings faster than you can smoke your favorite bud! It may take one more day for all the coir to break down. Most people use a huge drum to let the coir dry, but make sure you keep the lid open so the water evaporates as quickly as possible.
Prepare your potting mix
Many people mix coco coir with a bit of soil; however, you can make a potting mix without using soil at all to avoid pests and plant diseases. As mentioned already a 70% mix of coco coir along with a 30% mix of perlite will work fantastically well. If you are keen to add other additives, you can go with:
• 60% coco coir
• 20% perlite
• 10% vermiculite
• 10% soil
However, make note that this mix will be heavier than a simple 70:30 coco coir: perlite because vermiculite and soil can clump the mix.
Use porous containers to pot the plants
Once you’ve made the dry potting mix, fill containers up to 3/4th of their capacity. This is because coco coir tends to settle down a bit, and you can add more potting mix as you go. Also, make sure you use containers like smart pots or air pots since they work really well with coco coir. When you use a porous potting mix coupled with containers that allow the roots to breathe, the end result will be fantastic.
Provide nutrients without fail
Coco coir has one disadvantage. It’s a fact that it doesn’t contain any nutrients. However, this can be viewed as an advantage too because you can customize it exactly according to your needs. You will need to provide nutrients from the very first week, unlike soil where nutrients are already present. Agreed, this can be irritating if you’re not very punctual with that. However, if you want a medium that keeps your plant roots happy while delivering huge badass buds, there’s no match to coco coir.
Harvest buds when you wish
There’s no difference between soil and soilless mediums when it comes to the time period required to harvest the buds. Even beginners can grow awesome buds. Once you’re satisfied with the growth, harvest the buds just like you would when growing with soil.
As you can see, it’s pretty easy to grow autoflowering cannabis in coco coir. And, now that you know, you should try it too!

4. When, How, and Why Flush Autoflowers in Coco
Flushing weed before harvest is a very controversial topic, some growers swear by it and some don’t think it’s needed to grow top-shelf weed. So is flushing really needed?
What is Flushing?
Flushing basically consists of watering with large amounts of water but can also refer to the 1-2 weeks before harvest when the plant is only given pure water.
Why Flush Cannabis?
Flushing the substrate removes the excess nutrients (nutrient build-up) in the medium and can be done to remove excess nutrients during the grow cycle or before harvest to get smoother and tastier flowers.

Now, this does NOT mean that flushing will make terpenes magically appear if the plant didn’t produce them to begin with, but flushing will get rid of the chemicals that can make your bud taste harsh while enhancing the flavors and tastes of the flowers.
Flushing in Soil vs Soilless
There’s practically no difference between flushing soil and coco (or other soilless substrates), the process is the same (watering with large amounts of water). Now, it’s said that flushing with organics it’s optional so it’s not a matter of how to do it but rather if the fertilizers require it or not.
5. The Post-Harvest Routine
Great work, you've made it all the way through your coco-coir grow! But the work is not over, not by a long shot. There are three more steps to work through, and if you thought your patience was tested while the plants were growing, think again...
How to Trim Your Cannabis (Wet vs Dry)
The first thing to consider after cutting the crop down is which style of trimming will work best for you. There are two to choose from - wet or dry.
- Wet trimming is when you remove as much of the plant material as possible, as soon as you cut the plant down. There are a couple of reasons why you might choose to wet trim, chief among them being that you are worried that your plants may dry too slowly and be at risk of mold issues. By removing all of the buds from the plant structure, you are giving the buds the best chance at drying quickly - which is perfect of you are struggling to control the humidity in your drying area.
- Dry trimming is the process of leaving the plant totally whole (or bucking it down to the branches) and then hanging it up to dry. This is the preferred method for most cultivators, as it allows for a slower drying time and makes the process of trimming a fair bit easier.
You know that set of crusty, blunt old scissors that everyone has floating around in their kitchen drawers? Yeah, don't use them to trim - unless you want a pretty annoying experience. Trimming dank, resin-covered buds is a stick affair. Your best bet is to head to either your local hydro supplier, or Amazon, and buy a set of dedicated trimming scissors or shears.

Tips for Drying Your Cannabis Properly
Once you have harvested and trimmed your cannabis properly, it’s time to dry it out before curing begins. The drying process takes place over 7-14 days and should be done slowly in order to preserve terpenes (the compounds responsible for aroma and flavor). The best way to dry cannabis is by hanging the buds upside down in a cool dark room with plenty of airflow (a fan will help with this). This will help ensure that moisture evaporates evenly throughout each bud without any mold or mildew forming on them due to excessive moisture buildup during drying. Just be sure not to point the fan directly at the buds. Airflow in and out of the drying area is what you want to achieve, but if you do need to add a fan into the dry room then point it at the wall.
How to Cure Your Cannabis After Drying
Once you have dried out your buds completely (no more moisture visible), it’s time for curing. This will take place over several weeks or months depending on how long you want the curing process to last. Most cultivators cure for anywhere between 2 weeks to 3 months.
Curing preserves terpene content while helping remove harshness from smoke/vapor inhalation. This ensures the buds are much more pleasant to consume than the uncured buds would be otherwise. Curing also helps preserve cannabinoid content which makes them stronger as well as better tasting when consumed later on down the line once they have been fully cured properly. To cure cannabis, place the dried buds in an airtight glass container and store them in a cool dark place. During the first week, you want to 'burp' the jar by opening the lid twice a day. This is done to allow for some decent air exchange and will help prevent mold or mildew from forming due to excessive humidity buildup inside the container during curing. After the first week has passed, this burping can be reduced to once every couple of days until the curing process has finished.
6. In Conclusion
Growing autoflowers in coco fiber is basically the same as growing photos, although it can be fairly more difficult for beginners as soil tends to be more forgiving. Depending on the type of soil and products you’re using, soil can aid you with pH levels and substrate health. On the other hand, coco fiber is inert so you have to be more careful. It’s highly recommended to have pH and EC meters in hand when growing in coco. But don’t get it wrong, as long as you take all the precautions needed, growing in coco is just as easy as any other medium!

Comments