


Stardawg Auto Cannabis Strain Week-by-Week Guide
- 1. Grow specifications
- 2. Grow set up
- 3. Germination and seedling stage | week 1
- 4. Early veg | week 2
- 5. Mid veg | weeks 3
- 6. Transition (pre-flower) | week 4
- 7. Early flower | weeks 5-6
- 8. Mid flower (bulk phase) | weeks 7-9
- 9. Ripening and harvest | week 10-12
- 10. Yield and smoke report
- 11. In conclusion
Stardawg Auto is our take on award-winning genetics straight from California. This Sativa/Indica hybrid offers smokers the best of both worlds while its cultivators will be impressed by this plant's robust structure, great yields from her multiple colas, and one of the best calyx-to-leaf ratios you can expect from an autoflower. We just hope you have nothing against strong smells, as this one REEKS.
1. Grow Specifications
With a 40/60 Sativa/Indica composition, Stardawg Auto is a quite balanced hybrid, and it's evident in the growth patterns and the bushy structure of this plant. The central cola is huge, but side branches compete with it as they stretch towards light and form bulky and heavy colas on top. Just by looking at them in the weeks leading to harvest, you can see how generous this autoflower is. Indoors, she produces 400-500 gr/m2 (1.3-1.8 oz/ft2) which is more than some photoperiod strains bring in. Outdoor cultivation is no less productive at 50-200g (2-7 oz) per plant.

Stardawg Auto doesn't grow too tall, reaching just around 70-120 cm (27-47 inches), and her life cycle is comfortably short at 9-10 weeks from seed to harvest. This isn't such a long wait considering the quality of the smoke you get in the end – the buds reek of pine and diesel and leave a taste of lemon and earth on your palate. They're also as potent as they're stinky and pack up to 22% THC.
2. Grow Set Up
There's no shortage of Stardawg Auto grow journals online since this is a very popular autoflower. We picked one grow report that shows how to cultivate this plant indoors in the most straightforward way possible – without fancy growing techniques or complicated equipment.
The grower with the nickname Tubington9 had his Stardawg Auto and two other Fast Buds strains in a 3x3 grow tent equipped with a 300W Mars Hydro FC-E-3000 LED light. He had used a weaker, 100W light before, but the more powerful one made a world of difference. The only other equipment was an exhaust fan with a carbon filter and an oscillating fan.

This was a 100% soil grow – in 4-gallon (15-liter) fabric pots – and the light schedule was the classic 18/6 from seed to harvest. There wasn't anything fanciful about the use of nutrients either. Just a very simple feeding regimen with Future Harvest non-organic nutrients developed specifically for cannabis cultivation.
| Grow Space: | 0.28 m2 | Pot Size: | 15 l |
|---|---|---|---|
| Seed to Harvest: | 12 weeks | Medium: | 100% Soil |
| Flowering: | 8 weeks | Nutrients: | Synthetic |
| Light Cycle: | 18/6 | pH Levels: | 6.4 |
| Light Type: | LED | Day Temperature: | 24-27°C |
| Watts Used: | 300W | Humidity: | 45% |
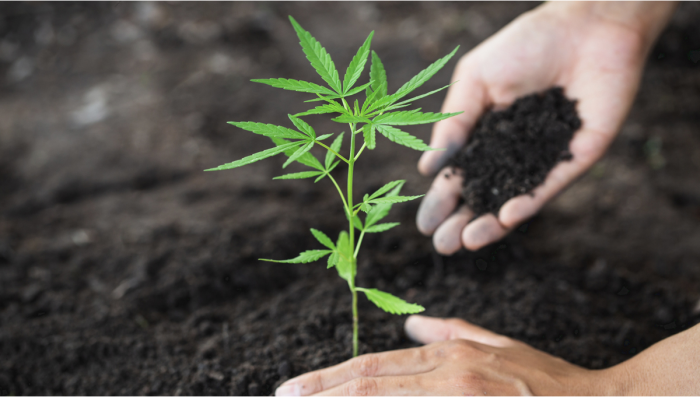
3. Germination And Seedling Stage | Week 1
To germinate his three seeds, including one Stardawg Auto, the gardener used hands-down the simplest and one of the most reliable germination methods where the seeds are placed between wet paper towels. To achieve close to 100% germination rates, just make sure that the paper towels are wet but not soaking wet, that the temperature is around 73-79°F (23-26°C), and that the autoflower seeds are protected from light. Good viable beans need anywhere from 12 to 36 hours to crack and show taproot, and when the taproot is about a half inch long (1 cm), just put in in the moist medium and wait for the sprout.
| Day Temp: | 24°C | Plant Height: | 2 cm |
|---|---|---|---|
| Night Temp: | 24°C | Distance to Light: | 61 cm |
| Humidity: | 45% | Water per Day: | 0.25 gal (0.95 l) |
Some gardeners run their lights while waiting for the sprouts to emerge and others save on electricity, but from the moment the seedlings pop from the ground, the lights must be on. If it's your first run, you'll need to watch your seedlings closely to determine the ideal distance from the light. It's when the seedlings stretch to a couple of inches but don't look spindly either. Having the light too close, on the other hand, prevents young cannabis plants from stretching but may also slow down their development. In the worst-case scenario, you may even see the symptoms of light stress.

If you're new to this game, the growth of your seedling in the first week may seem painfully slow to you, but don't worry – at this stage, most of the development, is happening underground where your young plant is growing the root system that will serve as a foundation for more rapid growth later on. Just make sure that your seedling has shed the 'helmet' on her own. Otherwise, help her to free the cotyledons by moistening the seed shell. If they remain stuck in the shell, it may seriously slow down growth at this vulnerable stage.
4. Early Veg | Week 2
In the second week from seed, the growth of an autoflower is still slow and basically comes to the second pair of true leaves catching up with the first one. (Which it does on the 10th day or so if all is well.) The seedling is still vulnerable and prefers the mildest conditions possible – with just the right distance from the light, comfortable day temps of around 78-80°F (26-27°C) and slightly cooler nights, and a rather high RH of 60%+. If it's much lower than that (like 45% in this Stardawg grow), you can use a humidity dome made of any transparent material to raise the humidity locally.
| Day Temp: | 27°C | Plant Height: | 5 cm |
|---|---|---|---|
| Night Temp: | 24°C | Distance to Light: | 61 cm |
| Humidity: | 45% | Water per Day: | 0.25 gal (0.95 l) |
If you grow in soil, the only thing your seedling will want from you is daily watering. You may use some rooting solutions, but nutrients aren't really necessary – there're enough of them in the medium, even if it's only a party cup with a handful of dirt. In the nutrient chart below, you can see that the grower only started to feed his plants in week 3.

If you use a big container with a rich potting mix, it may be enough for the whole trouble-free veg and even the beginning of flowering. Some autoflower growers fill big pots with supersoil and use nothing but pure water till harvest, but this is something to leave for your future experiments.

Give your seedlings about 50ml of water a day – just around the base if it's a large container. Just make sure your medium is moist by watering the whole volume a day or two BEFORE planting your seed.

If all is well, the leaves should look perky but not 'pray to the light' – that would mean that the light is probably too close. Wavy edges probably mean irregular watering, yellowing tips point to the soil being too 'hot', and burnt edges to the light being too close/intense. The Stardawg seedling in the photos above looks quite healthy.
5. Mid Veg | Weeks 3
Starting from week 3, the progress of a cannabis plan speeds up considerably as the main stem grows more and more nodes and side branches begin to form at each of them. For autoflowers, it's a very important stage as the flowering may start any time now, and then there'll be no more new branches (although the existing ones will continue to elongate and form new bud sites). Now, you may lower the day temperature by a degree or two and the relative humidity as well – to within 60%. The 35% that you see in the table below is too low to be optimal, btw.
| Day Temp: | 27°C | Plant Height: | 10 cm |
|---|---|---|---|
| Night Temp: | 24°C | Distance to Light: | 61 cm |
| Humidity: | 35% | Water per Day: | 0.25 gal (0.95 l) |
At this time of explosive growth, most gardeners start to give their weed plants extra feeding, but this Stardawg Auto had 4 gallons (15 liters) of soil all to herself and that gave her enough nutrients for now.

As you can see in the photos above, Stardawg Auto really took off but stayed very compact at the same time – perfect for an indoor grow with its (usually) limited vertical space.
6. Transition (Pre-Flower) | Week 4
The end of the first month from seed is usually the time when autoflowers 'flip' – changing the gear from veg to flowering. For some, it happens a bit later, for others, sooner, and this Stardawg Auto was among the fastest.
| Day Temp: | 27°C | Plant Height: | 15-25 cm |
|---|---|---|---|
| Night Temp: | 24°C | Distance to Light: | 61 cm |
| Humidity: | 35% | Water per Day: | 0.25 gal (0.95 l) |
Even first-time growers will find no difficulty recognizing the signs that the flowering is underway. Look at the pics below and you'll notice that the color of the tops changes to light green and they begin to bristle with white hairs and very narrow, almost thread-like little leaves.
 | week 4")
As you can see, the grower started to give his Stardawg Auto basic training by spreading the longest branches to the sides. When done like this, the training is only partly effective and won't give you a perfectly flat canopy. For that, you need to begin training earlier and start with bending the main stem and then every major branch – trying to keep each perfectly horizontal. But even perfunctory training results in increased yields.
7. Early Flower | Weeks 5-6
Once the flowering starts, many beginner growers are caught unawares by the stretching – when your autos can easily double in size in just a couple of weeks. Fortunately, this vertical growth then stops – and let's hope you haven't run out of space by then.
| Day Temp: | 27°C | Plant Height: | 30-55 cm |
|---|---|---|---|
| Night Temp: | 24°C | Distance to Light: | 61 cm |
| Humidity: | 35% | Water per Day: | 0.25 gal (0.95 l) |
The buds are starting to fill out too, but it's still hard to believe at this point that they will form those fat long spears eventually. Now, they're still well-spaced. You need to make sure that each bud site receives enough light. As you can see, this Stardawg has a comfortably open bush structure, so thinning the canopy isn't necessary. For more compact and denser cultivars, you will probably have to perform defoliation, prune the lowest branches, or even lollipop the bottom third.

One very important thing that you should do now is to change your feeding regimen to the one that is more suitable for flowering. In a nutshell, cannabis needs lots of nitrogen (N) in the vegetative stage and more phosphorus and potassium (P and K) for budding.

Many producers of fertilizers that cater to cannabis growers make products that contain all these three macronutrients in the right proportions plus every other essential nutrient. Some manufacturers sell two-part formulas – one for veg and one for flowering – others divide it into three parts – grow, bloom, and micro. This Stardawg Auto received a three-part Future Harvest Holland Secret product. You yourself may use any of the dozens available on the market. Again: the main thing is to give your plants proper nutrients at the right time.
In the chart below, you can also see how compact and short this Stardawg Auto was throughtout the cycle. The grower let it stretch from week 6 to 7, and then any vertical growth stopped:

8. Mid Flower (Bulk Phase) | Weeks 7-9
When the buds start to bulk up, they also start to smell – because of all those 'crystals' (properly called trichomes) that contain not only THC but dozens of terpenes, aromatic substances that give cannabis such an unmistakable aroma. To preserve this aroma, you better lower the temperature by a couple of degrees. This gardener did just that. Unfortunately, the night temps in his setup were exactly the same as the day temps. It isn't the best situation possible – lowering the temperature by 5-10 degrees at lights-off lets the plants rest better and brings out the coveted purple color in strains that have it in their genes.
| Day Temp: | 24°C | Plant Height: | 60 cm |
|---|---|---|---|
| Night Temp: | 24°C | Distance to Light: | 61 cm |
| Humidity: | 40% | Water per Day: | 0.25 gal (0.95 l) |
Look at the size of the colas in the pics below. They're a pleasure to behold, but to an experienced grower, they also look like something that can get moldy if there's insufficient airflow or too high humidity. In this case, the humidity was close to perfect at 40%.
 | weeks 7-9")
The open structure of this Stardawg Auto lets you see clearly how different are the buds on top and at the very bottom. You'll see this difference even outdoors where each bud gets the same sun, but indoors it can be striking because artificial lights have only so much effective distance. It's up to you to decide what to do with those small and popcorn-textured 'lowers'. You may want to keep them as they contribute to the final yield, but remember that their bag appeal will be very subpar compared with the uppermost buds.
9. Ripening And Harvest | Week 10-12
In the weeks leading to harvest, the buds continue to bulk up and get denser, so make even more effort to control humidity and continue to keep temperatures down to a comfortable 73-75°F (23-24°C) not to burn out precious terpenes.
| Day Temp: | 24°C | Plant Height: | 60 cm |
|---|---|---|---|
| Night Temp: | 24°C | Distance to Light: | 61 cm |
| Humidity: | 40% | Water per Day: | 0.25 gal (0.95 l) |
You'll want to continue feeding your plants and probably with even higher doses of nutrients at this stage, going especially heavy on phosphorus and nitrogen. (There are many PK boosters available on the market today.) At some point, you'll notice that the buds have stopped getting bigger and begin to wonder whether it means that you should just harvest them already. Don't be in a rush, though. Chances are that the flowers still continue to mature, storing more and more THC and other useful chemicals, and the only sure way of determining the exact best moment for harvest is to watch trichomes through a 60x hand microscope.

You'll need to look at the trichomes, those little resinous protrusions that make the buds so sticky. When all of them are cloudy rather than clear and some start to turn amber, your harvest day has arrived. Of course, you should pick the right moment a week or two before that happens – e.g. when you notice the first cloudy trichs – to stop using nutrients and flush your medium with pure water. This will purge your buds from any built-up salts and make the smoke clean and flavorful.

As we've mentioned before some strains are predisposed to assume a purple color of buds in the last weeks of their life cycle. However, they usually need a trigger for that – lower night temps. This is the same that cannabis gets outdoors when the autumn weather comes. Usually, the temps around 64°F (18°C) will do the trick), but don't go below 60°F (15°C) – it would be an overkill and an invitation to mold and bud rot.
Also, take a look at how many yellow leaves this Stradawg Auto has. This is called the fade, and it's completely normal and even desirable as you actually want the green chlorophyll in your smoke to degrade because chlorophyll gives it a nasty taste of hay. Maybe in this run, the fade started too early and went too far. Maybe there was some undiagnosed deficiency involved, like magnesium, but the grower kept his cool and just kept doing what he was doing, and you'll see how wonderfully his Stardawg performed in the end.
10. Yield and Smoke Report
At the end of a 12-week grow, Stardawg Auto produced the best harvest this gardener had seen – 6.75 oz (191 g) of perfectly trimmed, bulky, and resinous buds. Each of the colas weighed at least 17 grams dry, and the gram-per-watt yield was also outstanding, considering that this autoflower was just one out of three in a tent growing under a 300W light.

The smoke that these buds gave off was also incredible – very relaxing yet with a strong happy and giggly vibe. The flavor was also delicious as it offered a sweet fruity blast with a fresh citrus aroma.

11. In Conclusion
The first thing you notice about Stardawg Auto is her huge swollen colas with a minimum number of sugar leaves sticking out of them. 'Trimming jail' can be a real problem but not with this autoflower. It's great in many other respects – naturally bushy, with a towering central cola and many long side branches – so that with even half-hearted LST, you'll get multiple colas of almost equal size. Those are dense and resinous, pack some serious weight, and have a great bag appeal. The smoke is as pleasant as it's delicious, and what else can anyone want? We think that Stardawg Auto deserves to be in your garden. Happy growing, everyone!


Comments