


Basics of Growing Autos in Soil from Seed to Harvest
- 1. The best lights
- 2. The best soil mix
- 3. The best nutrients
- 4. Germination
- 5. Week 1
- 6. Week 2
- 7. Week 3
- 8. Week 4
- 9. Week 5
- 10. Week 6
- 11. Week 7
- 12. Week 8
- 13. Week 9
- 14. Week 10
- 15. Harvest
- 16. In conclusion
An autoflower is a special type of cannabis created by mixing the genetics of the Ruderalis with Indica and Sativa. Over the years, autoflowers have become stronger and sturdier enough to be grown by both commercial and home growers. The biggest difference between autoflowering and photoperiod plants is that autoflowers begin to flower indepndent of the light cycle provided. Therefore, an 18/6 light cycle from the very beginning until the end will work perfectly. Although autoflowers are easy to grow, it’s best to familiarize yourself with the basics before you start.
There are a range of different ways to cultivate autoflowering varieties, including hydroponics and aquaponics. However, we’re going to show you the best way to raise them in the most traditional growing medium of all: Soil. Many growers wrongfully view soil as an inert substance that merely provides roots with a place to anchor plants into the ground. However, soils are living and dynamic environments filled with billions of microbes that have either beneficial or detrimental effects on plant growth. Biology aside, soils also have critical chemical and physical properties that support plant life; they hold on to water and nutrients, they possess small air channels that allow roots to breathe and possess organic matter that feeds microbial populations.
So, you want to grow autoflowering cannabis in soil? But why should you grow autos in the first place? Well, there’s a whole host of important reasons. Firstly, these cultivars are seriously speedy. They explore from a young seedling into a mature plant ready to harvest in a matter of weeks. In addition to this, they maintain a compact and easy-to-manage structure throughout the entirety of the growing phase. As you can tell, these two traits together make all autoflowering strains very stealthy in nature. They are perfect for growers looking to keep a low profile, especially those that live in areas where growing cannabis isn’t accepted by the legal system. But you don’t need to be seeking discretion to grow autos. Ultimately, they're a superb option for any grower looking for a yield of strong and tasty buds as quickly as possible.
So, here’s a step-by-step guide to help you through the entire process of growing autoflowers in soil.
1. The Best Lights
When growing autoflowers indoors, even if you’re not growing in soil, light is a super important part of growing any kind of plant, including cannabis plants so it’s important you know what’s available and choose the best suited for your grow setup. However, the type of light becomes meaningless unless you get the intensity of the light you're using right. A lack of light intensity can cause several different problems. Early in the growing cycle, suboptimal levels of light result in leggy seedlings which can compromise plant shape and structure further down the line. In contrast, excess levels of light can burn leaves and cause a growing area to get too hot. This causes plants to lose their tragedy, begin to wilt and lose the ability to photosynthesize. To dial in your light intensity correctly, you need to hit the correct levels of LUX or PPFD at specific stages of growth.
As you probably remember from biology class, plants require light to survive. As autotrophs, they use a combination of water, carbon dioxide, and light energy to create their own food. If you really think about it, plants literally eat the atmosphere. How? They use the energy of the sun (or artificial lights) to convert carbon dioxide and water into a carbon-containing sugar that we all call glucose. Autoflowering cannabis plants use glucose for a range of physiological reasons. They use it as an energy source, and also as a structural unit in their cellulose tissue. However, astonishingly, plants send anywhere between 10–40% of the carbon that is obtained through photosynthesis down into the rhizosphere (the slither of space that covers the surface area of plant roots. Why on Earth do they treat such a valuable resource in this way? Well, they use it to both feed and farm microorganisms.

When growing autoflowering cannabis plants in soil, it helps to have a basic understanding of soil microbiology. There are countless species of bacteria and fungi in the soil. By pumping glucose out of their roots, plants attract these organisms into the rhizosphere. Here, they help to break down organic matter into plant-available nutrients. Additionally, larger predators (such as nematodes and protozoa) come along, eat bacteria and fungi, and poop out their nitrogen in a plant-available form.
With all of this in mind, it’s extremely important to provide your autoflowering cannabis plants with a powerful light source that enables them to manufacture as much sugar as possible. Outdoors, the sun does the perfect job. Indoors, you’ll need to select a powerful light to ramp up photosynthesis to optimal levels. Explore several options below.
HPS
High-intensity light bulbs have been used since the beginning of cannabis growing indoors and are the most common light fixture used due to their low cost and effectiveness for home growers.

Light bulbs are essentially found in two types, Metal Halide (MH) and High-Pressure Sodium (HPS), each one of them is used in different stages of plant growth due to the spectrum emitted and the results are quite good. A few years ago LEDs weren’t too good so growers didn’t even think about using them due to the high cost and because they weren’t as good as they’re nowadays.
LEDs
LEDs have been in the market for a couple of years now, in the beginning, they weren’t worth it but they have evolved a lot, and nowadays are considered the best not only by home growers but also by commercial growers. These light fixtures can cost up to 10x more than light bulbs but emit a full-spectrum so, despite the high price, you can get better results and higher yields which ends up being worth it.

Obviously, there are several brands and qualities but most LEDs consume up to 60% of energy and growers say that their plants produce more trichomes, so depending on why you’re growing and if you can afford it, it’s definitely a good choice.
Lights When Growing Outdoors
If you’re growing autos outdoors you cannot choose a light fixture but lucky for you, the sun is the best light source so despite not having to worry about light intensity and spectrum, you have to make sure your plants are getting enough sunlight for them to develop properly and to allow the buds to fatten up nicely. However, things aren’t always so straightforward. You need to consider several factors when growing cannabis outdoors to make sure that they receive enough light. If possible, you should transplant your specimens into a south-facing area of the garden. Because the sun rises in the east and sets in the west, a south-facing position will receive the most sunlight during the day. By this logic, placing your plants in a north-facing position means that they’ll be stuck in the shade for most of the day and therefore won’t receive enough light to allow them to express their full genetic potential.

However, before placing your plants in an area of your garden exposed to as much sun as possible, you need to consider the type of climate you’re growing in. If you live in northern latitudes with cooler weather and a shorter growing season, your plants will thrive in the most exposed area that you can place them in. However, if you live further south, such a high level of sun exposure can end up doing plants more harm than good, especially during droughts. Consider placing your plants in an area that gets some level of shade during the afternoon. If this isn’t possible, you can use shade cloth to protect your plants from excess sun and heat during particularly hot and harsh periods of weather during the peak of summer.
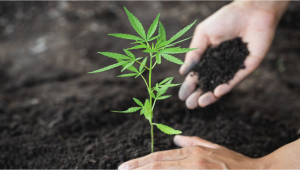
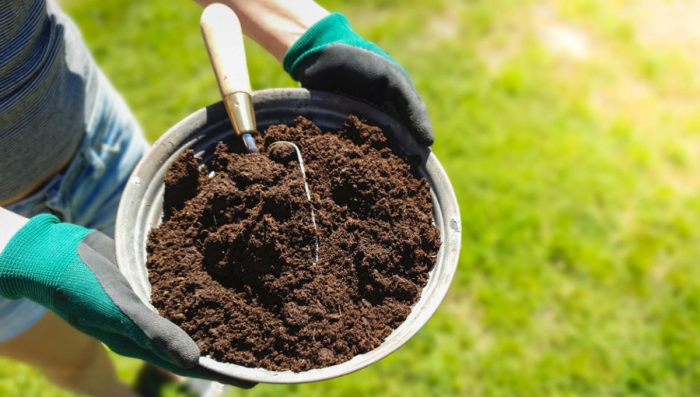
2. The Best Soil Mix
When growing autoflowers in soil, there are several mixes that can improve the medium in which roots grow, depending on the conditions you’re growing in, you may want to make your soil more oxygenated or provide more water drainage so you can find several additives that serve in different cases but all of them will end up improving your soil and consequently, plant growth.
| Additive | Advantages |
|---|---|
| Coco fiber | Retains water and helps avoid soil compaction. |
| Perlite | Helps dry the soil faster and increases oxygenation. |
| Vermiculite | Improves soil quality and helps keeps soil moist. |
We recommend a mix of soil, perlite, and coco fiber to provide enough water drainage and oxygenation, resulting in the best soil for autoflowers.
There are plenty of high-quality bagged soil and compost options on the market that will help cannabis plants to thrive in containers. Alternatively, outdoor growers can make use of the native soil in their gardens, providing it has a good profile. Soils that are mostly sand or silt provide good drainage and aeration but don’t hold onto nutrients very well, meaning they can get washed away. Ideally, you’ll have a good amount of clay in your soil. This fraction of the soil possesses a negative electric charge, which means it holds on to positively charged cations such as ammonium, calcium, magnesium, and potassium—all vital plant nutrients. If you have relatively poor soils lacking in clay, you can amend native soil with organic matter, such as compost, which also has a negative electric charge and holds on to even more cations than clay.
While these points are extremely important when growing cannabis successfully, any good grower knows that there’s much more to know about soil. The ratio of sand, silt, and clay play a fundamental role when it comes to structure, aeration, drainage, and cation exchange capacity. However, soil organic matter forms arguably the most important part of any healthy soil. This fraction of the soil consists of organic materials that are in varying different stages of decomposition. It’s largely made up of decaying plants that have ended their natural lifecycle, or those terminated by growers and turned into compost or mulch.

Soil organic matter also includes manures, which are essentially plants that have passed through the digestive tract of animals such as cows, horses, and chickens. These decaying substances are packed full of nutrients that enable cannabis plants to thrive, including the macronutrients nitrogen, phosphorus, and potassium, and micronutrients such as boron, zinc, manganese, iron, copper, chlorine, and molybdenum. However, unlike synthetic bottled nutrients, these compounds are tied up in decaying plants and are not immediately available to living plants. However, soil organic matter also includes living microorganisms such as bacteria, fungi, protozoa, and nematodes. These life forms break down the non-living organic matter and free up these nutrients for the use of plants. What does this tell you? That when growing cannabis, you should also carefully consider the life within your soil, not just the structural components, to get the best result when following organic methodologies.
3. The Best Nutrients
Nutrients are another vital factor for cannabis growers, there are several brands of synthetic and organic nutrients that offer basically the same results but they work differently and you should choose the best one based on your grow setup.
Synthetic nutrients
Synthetic nutrients are basically manmade nutrients extracted from minerals, they contain a specific ratio of macro and micronutrients, making it easier to use them, you just have to mix and water. But the way they work is completely different from organic nutrients, while organic nutrients focuses on maintaining a living soil, synthetic nutrients just feed the roots directly so despite being easy to use, it’s also easier to overfeed your plants and cause deficiencies.
Synthetic nutrients are delivered to the soil in the form of ionic salts (meaning they have an electric charge). As soon as they are applied near plant roots, they are taken up directly by plant root hairs, or the cations among them latch onto clay or organic matter particles. Because synthetic nutrients work so quickly, they do a great job at treating nutritional deficiencies. However, because they are in a mobile form, they can quickly leech out of poor-quality soils that lack clay and organic matter. Administering synthetic nutrients also skips the steps that convert organic matter into ionic nutrients (a process carried out by microbes) and therefore does little to build up a beneficial soil food web over time.

Organic nutrients
On the other hand, organic nutrients are derived from living sources and focus on maintaining the beneficial microorganisms in soil alive so they develop a symbiotic relationship with your cannabis plant, this way your plant feeds them and in return get more water and nutrients available for them to absorbs when they need to.
Organic matter simply refers to anything that was once living. This can include mulches such as wood chips, hay, straw, manure, and plant residues. All of these substances contain varying levels of carbon, nitrogen, and other elements and nutrients. When applied to the soil, microbes usually start off the decomposition process and kickstart nutrient cycling. Fungi and bacteria conduct digestion outside of their own bodies by exuding enzymes that break the bonds between complex molecules (polymers) and turn them into more simple chemicals (monomers). As these microbes consume the nitrogen from these materials, they immobilize it in their bodies, preventing it from leaching away. When they die or get eaten by predators, they release nitrogen in the plant-available forms of ammonium and nitrates. Adding organic matter to your soil means it takes longer for nutrients to reach plants, but those nutrients feed beneficial soil life and actually stay put in and around the rhizosphere.

Now, organic nutrients can be quite expensive but they’re fairly easy to make at home, it may take time and you will have to learn how to do it properly, but there are several ways to make your own organic nutrients that will not only save you money but you’ll also learn a lot about cannabis plants and the nutrients they need.
DIY Organic Nutrients
Super soil
Super soil is a technique used to make your own pre-amended soil that contains everything to feed your autoflower from seed to harvest, this method consists of only watering your plants to help the microorganisms break down the nutrients and make it available for your plants to absorb and grow.
Now, there’s no such thing as super soil for autoflowers, as long as you do it properly, you can use it to grow any kind of plant!
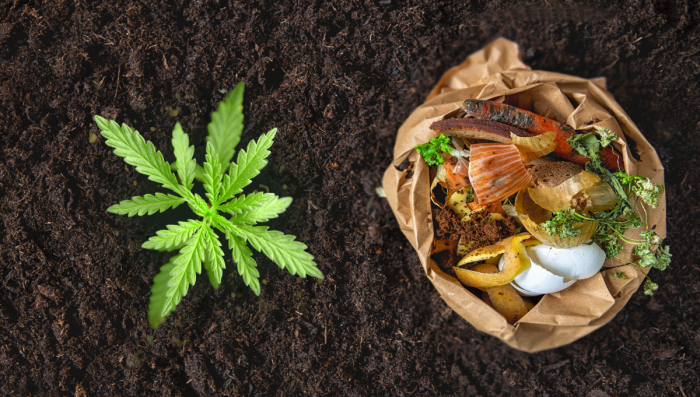
Composting
Composting is very similar to making super soil but it’s usually made with the food scraps you’re left with after cooking and basically consists of burying the leftover scraps in damp soil, this way you activate the microbial life and make the nutrients available for your plants, you can also add worms to accelerate the process, it’s a super-effective technique called vermicompost. Composting is an easy and free way to add fertility to your growing space. When composting, you are essentially converting kitchen scraps and garden waste into black gold filled with nutrients and microbes. It’s an easy process, but things can go wrong if you don’t know what you’re doing. When creating a compost pile, the most important thing you need to keep in mind is an even balance between green and brown ingredients. Green composting materials are high in nitrogen and include grass clippings, food scraps, coffee grounds, and manure. Brown materials are high in carbon and include dead leaves, cardboard, and wood chips.

When building a compost pile, you need to aim for 50% of green materials and 50% of brown materials. You should also layer green and brown materials on top of each other as you build your pile. A balance of these two kinds of materials will help to maintain aeration and drainage and keep things from going anaerobic. These also feed different kinds of microbes. Beneficiary bacteria have an appetite for green materials, whereas fungi prefer carbon-rich brown composting ingredients. There are also two different ways to compost: Hot and cold. Hot composting creates usable compost in a matter of weeks and requires that growers add all of their ingredients into their pile at once. This causes a sharp rise in microbial activity that breaks things down faster. You’ll need to turn your pile to aerate it once every couple of days to prevent things from getting too hot which can kill off good microbes. Cold composting, on the other hand, takes up to a year or more and involves slowly adding materials to a pile when you have them available.
KNF
KNF is another way to get minerals found in plants and vegetables but unlike super soil and composting, it consists of fermenting the vegetation that contains the nutrients your plant needs for each stage.
In this technique, you end up with a couple of liquids suited for the vegetative stage, flowering stage, others that act as natural pesticides, and natural sources of Calcium and Magnesium that are used just like synthetic liquid fertilizers but completely organic.

So, to start growing autoflowers in soil you'll need:
- Good quality autoflowering Seeds
- Potting soil containing equal proportions of peat moss or coco peat/coir, compost, perlite, vermiculite (optional), or a commercial potting mix
- Use fabric pots containers that are at least 12 Liters.
- Good quality light fixture like HPS or LED, or at least 12 hours of sunlight if you plan to grow outdoors. Use CFLs during the seedling stage
- Nutrients for vegetative and blooming phases.
4. Germination
It’s pretty easy to germinate cannabis seeds. You can sow the seeds directly in the pot, but if you don’t have a lot of experience or are impatient like the rest of us, soak the seeds in plain water for 24 hours. It’s common to see a tiny taproot after a day of soaking but it’s alright if you don’t see them.

Many growers use nail files to gently scratch the surface of the seeds, but do not do this if you’re fairly new. A scratch on the seed coating allows water to penetrate the shell and the seed develops a taproot faster. Place the seeds in moist paper towels for 2-3 days until you see long tap roots. The next step is to plant seeds in their final containers and wait for them to push through the soil.
Here’s a quick video to help you with germination:
5. Week 1
The first week is extremely crucial for autoflowers. It’s important to NOT use any fertilizers in the seedling stage since the plants are very tender. You risk burning them, and a single mistake now might prove very costly later. The seedling will have two cotyledons (sometimes 3) that are almost round in shape when they just appear.
There are various products that can be used on seedlings, but they are not necessary because they will be fine even if they are left alone. At this point, you can use CFLs or fluorescent lights to ensure that the seedlings don’t burn under powerful lights.

However, many growers wing this by adjusting the distance between the lights and the seedlings so that a single LED light is used for the entire cycle from seed to harvest. Water the seedlings sparingly only when the pots are almost dry. Overwatering or under-watering seedlings can either stunt or kill them, so it’s recommended that you water only when the plant needs it.
The seedlings develop at least two leaves apart from the cotyledons at the end of week 1.
6. Week 2
You can use nutrients at quarter strength once the seedling is comfortable with at least two leaves. Continue using nutes at quarter strength at this point, but regulate the pH and maintain the range from 5.8 to 6.5 at all times. Some growers use half-strength but it depends on how big the plant has grown.

If you see more than 3 to 4 nodes on week 2, use nutes at half strength. Monitor the plants carefully to detect lockout or deficiencies. As always, water the plants only when the pot is almost dry. Shift the lights closer to the plant if it starts growing too lanky.
7. Week 3
Now that the plant is on week 3, use the nutes at full strength. Some plants like LSD-25, for example, need a lot of nutes whereas others may not require too much. “Less is more” when it comes to nutrients in autoflowers, so use nutrients at full strength only if the plants have responded positively until now.
Autoflowering plants bounce back quickly if they receive fewer nutrients; however, they get stunted if an overdose occurs. Watch the plants carefully for any signs of deficiencies and water them as required.

If the plant has more than 4-5 nodes, you can “Top” it or use the FIMming technique. Both methods require you to cut the top of the plant to allow more colas. The lights must be at least 20 inches away from the top of the plant; however, it’s okay to reduce it to 18 inches especially if the plants are stretching.
8. Week 4
Now that the plant is a month old, it grows very vigorously if it’s healthy. Use nutrients at full strength now. It’s a good idea to start training techniques like LST at week 4, but if the plant has grown more than expected, you can start at the end of week 3.

Most autoflowers display their sex on week 4, but some may not do that. Continue watering the plants and feed nutrients meant for the vegetative stage. If you’re using a two-part commercial nutrient solution, only the “Grow” part along with micronutrients must be used.
9. Week 5
You’ll see more pistils now, start using the Bloom nutrients, this will provide Phosphorus and Potassium which will help your plant produce flowers and fatten them up, once it starts to.

Water as usual and check for deficiencies. It’s also a good idea to check the undersides of leaves to detect spider mites. Of course, this has to be done right from week 1 to prevent any pest attacks. Start preparing for training techniques like ScrOG to generate more yields.
10. Week 6
The plant may begin stretching like crazy now, by now you should already be feeding Bloom nutrients. Always remember to use products like CalMag or anything that supplies good amounts of Calcium and Magnesium.

You should use CalMag from the very beginning, but since the plant is preparing its buds now, micro and macronutrients are even more essential. If you're using light bulbs, make sure you're using more red light during the flowering stage.
11. Week 7
Continue using Bloom nutes during week 7. Other products meant for buds can be used right from the pre-flowering stage.

The lower parts of the plant need light too, so manage the plants with training techniques such as the tie-down method. The plants stop stretching and focus completely on buds now.
12. Week 8
Water as required and just keep the plants happy. Depending on the strain, your grow tent will smell quite strong. It’s best to use carbon filters to mask the smell as best as you can.

If you cannot afford or fit a carbon filter in your grow tent (or if you’re growing outdoors) you can use odor neutralizers or resort to companion planting which consists of having several aromatic plants that help mask the smell of cannabis.
13. Week 9
The leaves may begin to yellow slightly but they shouldn’t fall off entirely. It’s natural and you can continue to use Bloom nutrients and other supplements.

This happens because your plant knows it has almost finished producing flowers and soon enough she will die.
14. Week 10
It’s important to check the color of pistils now. By now you should start flushing which consists of providing a lot of water to remove salt buildups in the soil.
For instance, if you’re using a 5-gallon pot, start flushing with 15 gallons of water to force the nutes to leave the soil. The leaves will be mostly yellow now but that’s completely expected. Flushing also improves the taste of the buds to a large extent.

Some growers don’t bother flushing, but it’s necessary to prevent a harsh taste when you smoke the buds. Of course, curing the buds will take care of the harshness, but flushing shouldn’t be ignored. Continue flushing for at least 2-3 days to eliminate the salts.
Harvesting the buds has a lot to do with personal choice. For example, some growers harvest when at least 60% of the trichomes are amber in color. Waiting too long until all trichomes turn amber will produce buds that are very sedative.
On the other hand, harvesting too early when most pistils are white will give you buds that are very psychoactive. Therefore, wait until 60 percent of trichomes are amber. To be sure, use a magnifying lens to check whether 60 to 70% of the trichomes are cloudy.

15. Harvest
Go ahead and harvest the buds using clean and sterilized scissors. Allow the buds at the lower parts of the plant to continue growing if they are too small. Harvesting sequentially gives you a better yield. Drying and curing the buds is a very important part of the process.

So, that’s pretty much how you grow autoflowers from seed to harvest. It’s obvious that you need quality seeds to go through the cycle without any hassles.
16. In Conclusion
Growing autoflowers in soil is a cheap and effective way to grow cannabis, with a combination of the right genetics, nutrients, and growing conditions, you can successfully get top-shelf flowers with minimal effort.
If soil is your preferred medium, feel free to share tips and tricks with fellow growers, leave a comment in the comment section below!

Comments