How to Make a Bong - DIY Homemade Water Bottle Bong

- 1. Understanding the basics: parts of a bong
- 2. The bottle bong
- 2. a. Building the downstem and bowl
- 3. The gravity bong
- 3. a. Building a gravity bong
- 4. The tic tac bong
- 4. a. Building a tic tac bong
- 5. The ibong, or the apple bong
- 5. a. Building an apple bong
- 6. Mason jar bong
- 6. a. Building a mason jar bong
- 7. The waterfall bong
- 8. Comparing the homemade bongs
- 9. Bongs vs joints: pros and cons
- 9. a. Other ways to consume cannabis
- 10. Conclusion and recommendations
Have you forgotten your bong at a friend’s house? Maybe you never actually bought one, or perhaps you’re just feeling a little crafty. Whatever the case, don’t worry, we’ll help you build your own homemade bong, it’s an experience every true stoner should have at least once in their life, at least the water bottle bong.
1. Understanding the Basics: Parts of a Bong
In this article, you’ll find different options for making your own homemade bong, from the simplest to true art pieces. But let's cover the basics first, starting with the parts of a bong:
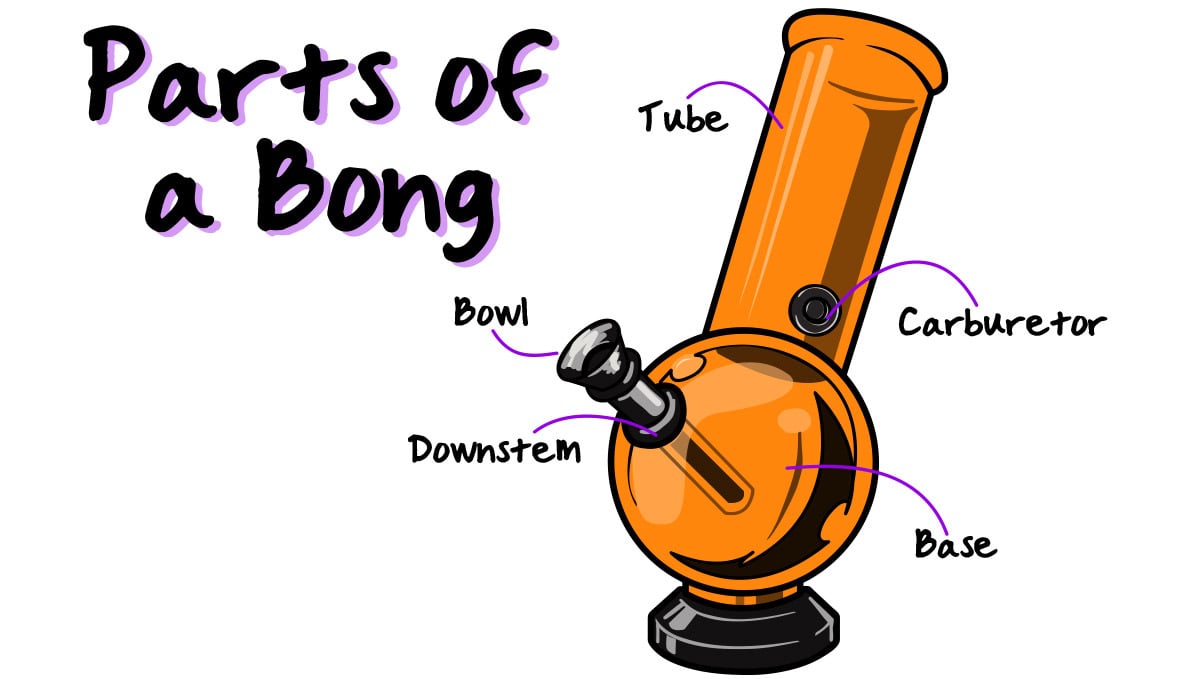
Tube:
It’s usually the neck of the bong in which the smoke rises all the way into your lungs and then wonderland.
Base:
The base is base-ically where the water goes.
Carb or Carburetor:
It’s the small hole on the side or back of the bong which helps you control the airflow with your index finger.
Bowl:
The bowl is the place where you pack your weed.
Downstem:
The downstem is the thinner pipe that's connected to the bowl, allowing the smoke to travel down to the base into the water and up through the tube.
2. The Bottle Bong
The water bottle bong is a pretty simple homemade bong, and it's good for recycling too. To make it you’ll just need to take any type of plastic bottle and a few more things, don’t worry if you don't have the bottle’s cap because you won't use it anyway. Keep in mind that the larger the bottle, the bigger the bong hits.
Take your chosen plastic bottle and fill up ¼ of it with water. Now, with a pair of scissors or any sharp object like a pen or screwdriver, poke a small hole just below the neck of the bottle to make the bong’s carb.
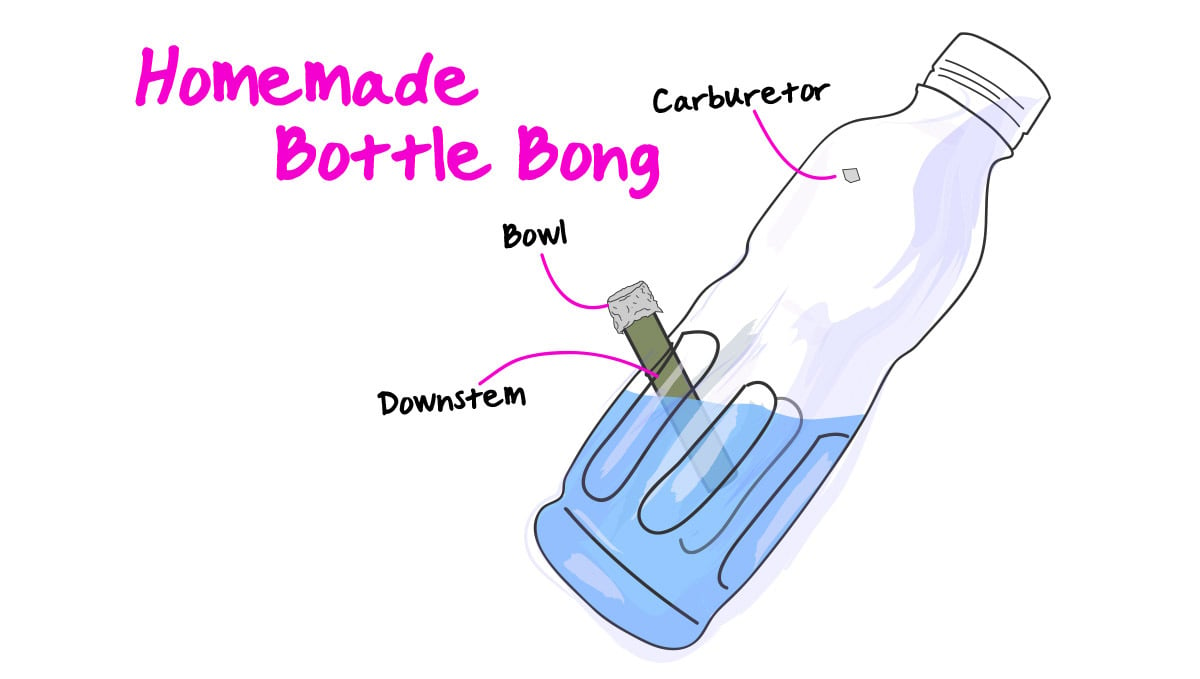
Then, add a second hole slightly above the waterline of your plastic bottle bong. This is where the downstem will be placed. Make sure the hole isn't too big that the stem is dancing or even falling inside.
Building the downstem and bowl
You’ll need a tube-like object, like an old marker or a pen, and some aluminum foil. The wider the marker’s diameter, the more space you’ll have for placing your buds on the bowl. First, get rid of the marker/pen’s inner parts, keeping just the hollow tube. Taking the aluminum foil, cover one of the edges, and press softly in the center to create a bowl-like shape. It’s important that the foil doesn't break because we don't want the plastic below getting burned while smoking given it’s highly toxic.
All you’ll need before you can light up your new homemade water bottle bong is to bring the pieces together. Take your downstem and stick the open edge into the bottle through the lower hole you’ve previously made, angling it down into the water. Now pack your bowl and fire it up!
3. The Gravity Bong
The Gravity Bong is a cool, scientific-looking method for making a homemade weed bong and it also requires just a few simple things you can find at home:
- a plastic bottle;
- a needle or a toothpick;
- some aluminum foil;
- any kind of container, as long as it's bigger than the bottle.
Building a Gravity Bong
To start with, take the bottle, toss the cap, and cover the mouthpiece with the foil in order to make the bong’s bowl. Now with the needle or any thin stick, poke small holes into the bowl so that the smoke can travel through and into the bottle.

Then, take the bigger container, fill it up with water and sink your half bottle with the foil inside, with the aluminum bowl looking up, of course. Pack up your bowl and light it up as you slowly lift up the bottle of your gravity bong, making sure you don’t pull it out completely as it gathers the smoke inside.
Keeping the bottle at the same level, carefully take off the aluminum foil and absorb the smoke gathered inside as you push the bottle down. If you can’t smoke it all in one hit just cover the mouthpiece with your hand until you're ready to take another one.
Extra Tip: If you want to make your homemade gravity bong look more professional, take the bottle’s cap and make a hole in the center. Then, cover it with foil and pressing softly in the center make the bowl shape through the cap’s hole. Add the small holes with a needle and then put the cap back on the bottle.
Now when you light up your buds, instead of taking off the foil you can unscrew your cap.
4. The Tic Tac Bong
So you’re at home at 3 am, you ran out of rolling papers, you’re googling for any smoking device alternatives you can make at home but you’re so unlucky you don't even have any plastic bottles at home. There’s no need to panic, turns out a small recipient like a Tic Tac box can be your best ally. Or you can even go big and use a Pringles empty box.
Building a Tic Tac Bong
It’s easy: take the empty Tic Tac box and with a couple of scissors drill a small hole near the bottom, where you’ll stick the downstem in. If you don’t know how to build a downstem, you can follow the same instructions from the Bottle Bong method.
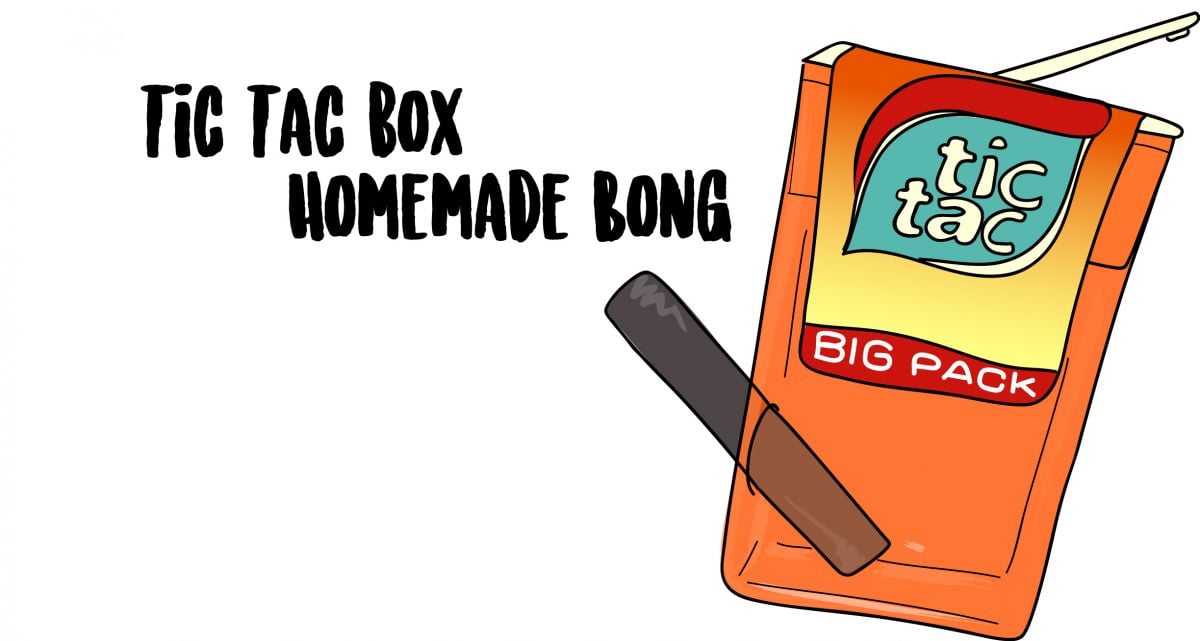
Now, make another small hole closer to the upper edge of the box, which will work as the carburetor. Finally, fill the small bong with water, it should be enough to cover the stem’s edge, and using the already existent hole in the Tic Tac box as the tube, inhale as you light up.
5. The iBong, or the Apple Bong
Who knew you could even get bongs at Apple. Just kidding. The homemade apple bong (although it’s more of a pipe) is a true classic. And the best part is that this method is cheap and easy to do: it requires only an apple, or any other fruit or vegetable, and a pencil, plus it adds good flavor.
Building an Apple Bong
The first step is getting a ripe apple and removing the stem. Stick the pencil, or any pointy object, through the top until you reach the center of soon to be apple bong to create your downstem and bowl.
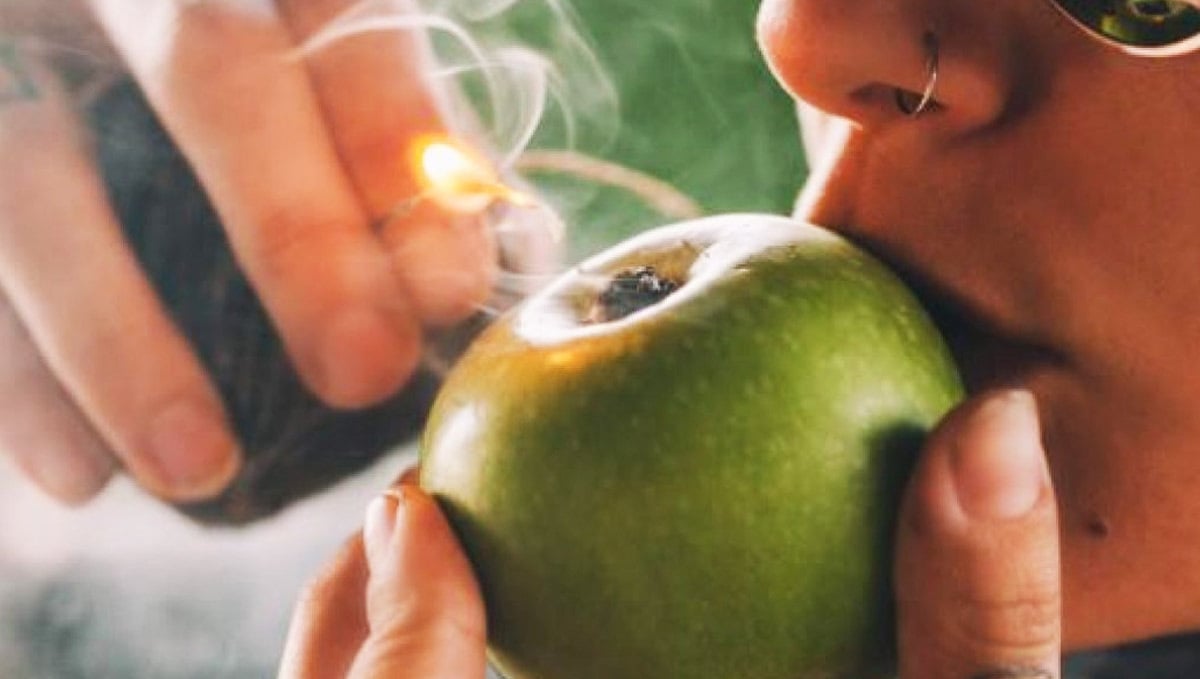
Now with the same pencil stick a hole through the side of the apple, also until you reach the center, aiming to make both holes meet in the middle. This one will be your carburetor. Lastly, make a hole by the front of the apple, also meeting the other two holes in the middle, this will act as the tube.
Extra Tip: Apple pipes are great, yes, but don’t get stuck only with apples though! You can use many types of fruits and vegetables as a bong, such as bananas, pumpkins, pineapples, cucumbers and even combine more than one together, get creative!
Voilá, your apple bong is ready to go, light it up!
6. Mason Jar Bong
We know jars are the favorite object for DIY crafts of the decade so of course, we had to include them in this list. This is a good method for those who are feeling inspired and want to put dedication to build a homemade bong that lasts.
Building a Mason Jar Bong
The first thing you’ll need to do is take any jar you find at home and cut three holes into the lid, two of them equally sized and a smaller one for the carb.
Then, grab any tubes you find at home, or old markers as we did in the plastic bottle method, and stick them into the jar through the bigger holes. Keep in mind one of the tubes should be long enough to be covered by the water in order to work as the downstem.
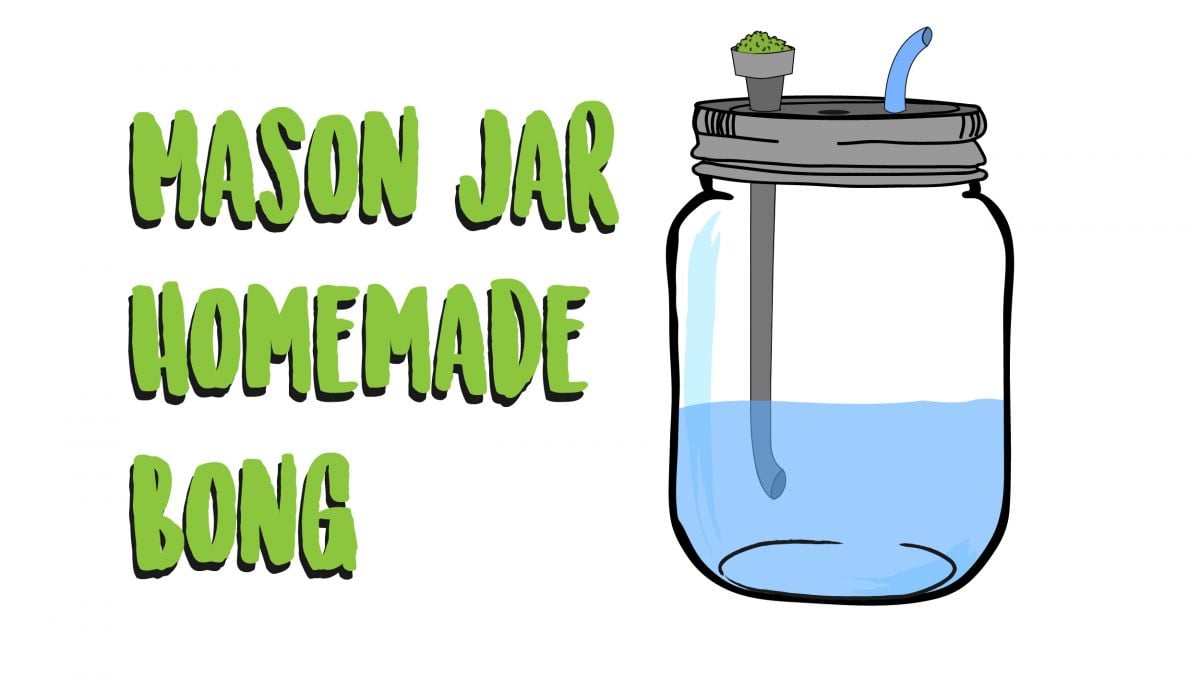
If you’re feeling inspired, then purchase a couple of transparent tubes to turn your homemade bong into a professional-looking bong. Make sure the holes and the tubes resemble in size.
Extra points: to avoid air from sneaking out through the lid’s holes you can also add some rubber grommets around the tubes to seal the air properly.
Finally, you’ll need to build a bowl on the edge of the longer tube. You can do this the easy way, by covering it with aluminum foil, or you can attach a metal bottle cap to it -which you could get from olive oil bottles, alcoholic bottles, or anything that comes useful- then add some small holes inside to let the smoke through.
7. The Waterfall Bong
Waterfall bongs work on the same principle as gravity bongs but in a slightly different way. They are also easier to make, use fewer materials, and are less messy to use, although they are a little more wasteful if you are using new water for each bowl (but not by very much).
They produce a fantastic smoking experience though, so if you have never had the opportunity to smoke from a waterfall bong then we honestly cannot recommend it more highly. They are really simple and easy to construct and take just a few minutes of work to be ready to go. To make a waterfall bong, you will need:
- A two-liter (64-ounce) plastic bottle
- A small bowl piece (usually made from aluminum foil)
- A lighter or matches
- A knife/scissors
- A pin or needle
- Some of your favorite sticky-icky
Ok, so to make your very own waterfall bong -
1. First things first - find yourself a decent-sized plastic bottle (2 liters or 64 ounces works great). This is the main piece of equipment that you will need to get started. Once you have your bottle, take the knife or scissors and cut a small hole in the bottom of the bottle. This hole needs to be small enough so you can plug it with a finger. you can also use your lighter to make this hole, but do so carefully.
2. Next, take the bottle cap off. This is where we are going to be putting the aluminum bowl to hold the weed. To make the bowl, grab your aluminum foil and rip off a piece around 10 x 10 inches. Fold it over symmetrically twice, so you have a square that fits over the mouth hole of the bottle with some to spare. Using your thumbs, carefully push the foil into the mouthpiece to create the bowl, and make sure there is enough to cover the entire mouthpiece.
3. Once your bowl is shaped, use the pin or needle to push 5 or so small holes in the base of your bowl.
4. Chop up your weed and fill the bowl with however much you intend to consume.
5. That's it, you have everything ready! Now comes the slightly tricky part...
So, waterfall bongs work by filling the bottle about 75% full with water (while plugging the hole at the bottom with a finger, then placing the weed-filled bowl over the mouthpiece. Still confused? don't be, the next part is a little fiddly, but easy enough. While lighting the bowl, let go of the hole. The process of the water draining out of the bottle creates a vacuum that pulls the weed smoke into the bottle, filling it up with all the cannabis goodness! Remember that a smaller hole is much better than a bigger one, as you want the vacuum action to be slow and steady.
Once the water has drained, remove the bowl, place your mouth over the opening, and breathe in all of the smoke!
8. Comparing the Homemade Bongs
Now that you’ve learned the 5 different options to make a homemade bong, it’s time for you to choose which one you’d like to build. We’ve built this comparison table in order to aid with this oh-so-life-changing decision.
| Water Bottle Bong | Gravity Bong | TicTac Box Bong | Apple Bong or Pipe | Mason Jar Bong |
|---|---|---|---|---|
|
Easy to make, takes a few minutes; |
Fun and crazy science bong; | Save the day, Spontaneous; | Build homemade bong with stuff from home; | Long-lasting homemade bong; |
|
Made with materials you have at home; |
Easily made within minutes; | Cheap to make & Portable; | Easy; | Crafty; |
|
Cheap and good for spontaneous crafting. |
Cheap, spontaneous. | Easy, takes only a few minutes; | Tasty & Ecological; | Requires some more dedication. |
However, why shouldn’t you try building all of these? Today it could be the apple bong, tomorrow the TicTac box bong and so on until you can decide which one is your favorite. Furthermore, you could even create your own personalized masterpiece of a bong and surprise everyone else with your creations, think outside the box!
9. Bongs vs Joints: Pros and Cons
Now that you know how to make your own bong at home, let’s compare it with joints which is probably the most common and popular way of consuming cannabis.
Pros of Joints
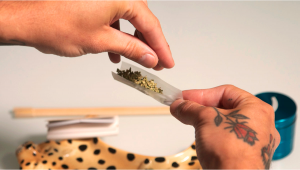
Although rolling joints may not be the most convenient way to consume cannabis, most consumers actually enjoy the whole process of grinding, rolling, and lighting up the joint, especially because you don’t need fancy equipment, all you need is papers, filter tips and a lighter. Joints are also a great way to bond with friends (or complete strangers), whether you’re at the beach, forest, or at a friend's house, you can enjoy 1 joint with multiple friends without the need to fill the bowl every couple of hits (like you would with a bong). On top of that, you can enhance your joint in many ways, meaning you can add kief, hash, and concentrates to make your joint even stronger!
Cons of Joints
Despite all the cons of joints, there are a couple of drawbacks. The main drawback is that not everyone enjoys or knows how to roll a joint. Rolling a joint may seem easy but it takes a certain time to grind the weed, make the filter tip, and actually roll the joint. A huge con of joints is that the filter tips do not filter or purify the smoke, so the smoke may feel harsh and make you cough a lot.
Pros of Bongs
There are many pros of using bongs, the first of them being that their structure allows you to inhale more smoke with every hit, so you can get super high with as little as 1 hit. Also, bong hits are healthier as the water helps filter out the impurities while making the smoke cooler and smoother. On top of that, you can find bongs in every size, shape, and form so you will definitely find a bong that's right for you.
Cons of Bongs
But the pros also come with cons….One of the biggest cons of bongs is their size, which makes them not the best option for smoking on the go. And yes, you can find mini bongs but they’re fragile and not as convenient as just carrying rolling papers and a lighter. Another con is that you might find bongs a bit too hard-hitting, and sometimes you just don’t want to get extremely high. So if you’re looking for a more mellow high, joints may be better.
So what’s better, joints or bongs? In Short, it depends. If you’re looking to smoke quickly, joints are perfect but if you’re looking to have a long-lasting smoke session with friends, bongs may be the right choice.
Other Ways to Consume Cannabis
While smoking cannabis is the most common form of consumption, it is anything but the only way to get those cannabinoids running around your system. And while it is the most common, there are a range of reasons why some people may choose not to indulge in smoking. So, what other ways are available to consume cannabis?
Vaporizing
Vaporizing is becoming increasingly popular, as it’s believed to be healthier than smoking (although the jury is still out on this one. This method involves heating cannabis to the point that the trichomes (the crystals that cover the buds - this is where all the cannabinoids and terpenes are contained)vaporize, without burning up any of the plant material itself. There are a huge number of vaping options on the market, but the two most common are -
- Dry herb vaporizers - these have a chamber where you can place regular cannabis flower, and then the device heats it up until it is at the right temperature to vaporize.
- Oil/extract vaporizers – these devices are specifically designed for vaping thick oil concentrates. They often come with small cartridges which contain the extract, and then you simply insert this into the device and hit the button. These extracts are much more concentrated than your typical buds (up to 99% THC), so proceed with caution. The high produced is potent, but also extremely 'clean'.
Edibles
One of the most popular forms of consuming cannabis is via edibles. This method involves infusing food with cannabinoids (usually THC or CBD), then digesting it. The effects of edibles tend to be much more intense than when smoking, and therefore it is usually recommended to start with a very small dose and work your way up.
Edibles can be made at home using either butter or coconut oil. We prefer coconut oil, as it has a higher fat content and is, therefore, better able to absorb the cannabinoids during the cooking process. It's also healthier, delicious, and vegan-friendly. To make a batch of cannabis-infused coconut oil -
- Grab 7 to 14 grams of cannabis flower
- 500 ml of coconut oil
- 1 liter of water
- A strainer
After grinding your weed, place all of the ingredients into a saucepan and bring it to a boil. Once boiling, reduce the heat to a very slight simmer and leave for 1 to 2 hours. Then, simply strain the contents to remove the plant matter and put the remaining liquid into the fridge. The oil will separate from the water and solidify on the top. This oil contains all the cannabinoids and terpenes, and can be used to make any dosed recipe you like!
10. Conclusion And Recommendations
You don’t really need to be an engineer to build a homemade bong, and the most fun part is that you can use basically anything your mind can think of to do it too! The main thing you’ll need is some creativity and patience.
We hope these ideas helped to spark up both your imagination and bowls! Please remember to be careful that you don't smoke any plastic while testing your smoking device and you should be good to go. Enjoy and don't forget to send us photos of your masterpieces or guides to make a homemade bong your style!





Comments