Chemdawg Auto Cannabis Strain Week-by-Week Guide

- 1. History
- 2. Specifications
- 3. Week-by-week guide
- 3. a. Week 1 - germination
- 3. b. Week 2 - vegetative stage
- 3. c. Week 3 - vegetative stage
- 3. d. Week 4 - vegetative stage
- 3. e. Week 5 - pre-flowering stage
- 3. f. Week 6 - flowering stage
- 3. g. Week 7 - flowering stage
- 3. h. Week 8 - flowering stage
- 3. i. Week 9 - harvesting
- 4. What to expect?
- 5. Drying and curing your chemdawg auto harvest
- 5. a. Drying cannabis flowers
- 5. b. Curing cannabis flowers
- 6. Chemdawg auto cannabis strain grow guide - faqs
- 7. In conclusion
1. History
The history of the Chemdawg strain starts in the early 90s when a group of cannabis breeders from Colorado were following a band on tour and took some of their weed with them, they had named this weed “chem bud” due to the unique chemical and diesel flavors. When they got to one of the shows, they sold a couple of grams to a group of friends who quickly realized those were some special buds and, lucky for them, the buds had a couple of Chemdawg seeds (before they actually knew what they were) which they stored.
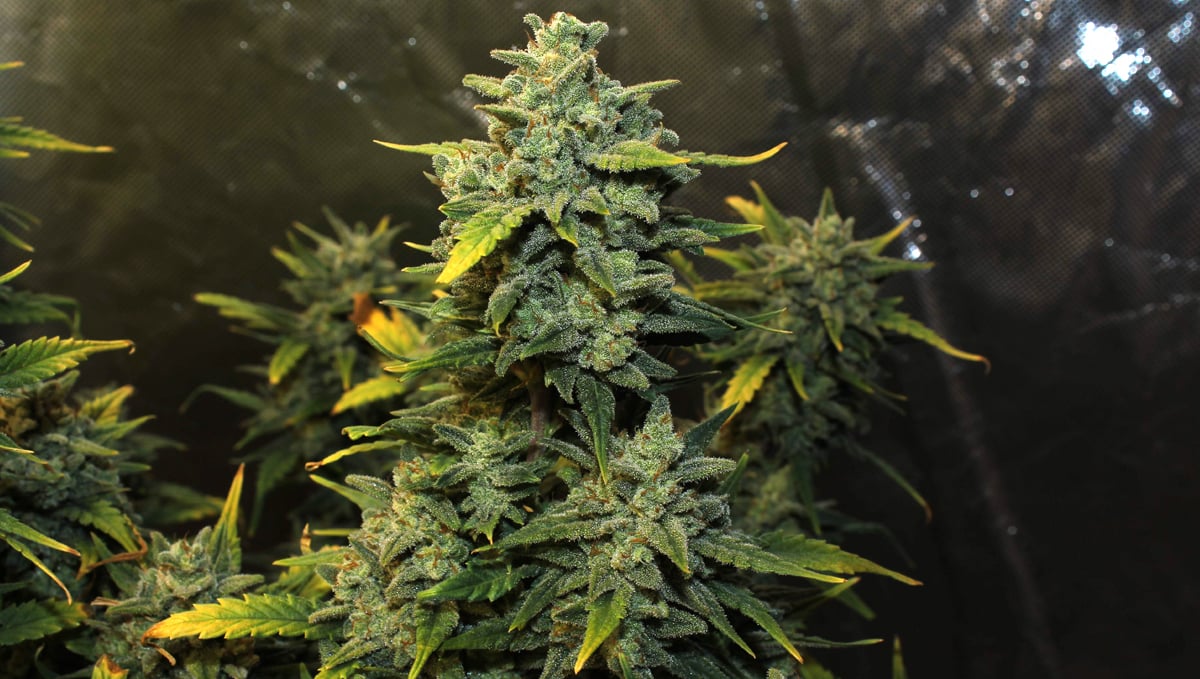
When one of the friends, who was also a cannabis grower, went back to his home on the East Coast, he germinated some of the seeds and started selecting the best phenotypes to continue developing those genetics even further. As you may know by now, his effort paid off, and soon enough there were two versions of this strain going around, one was Indica-dominant and the other was a Sativa-leaning hybrid.
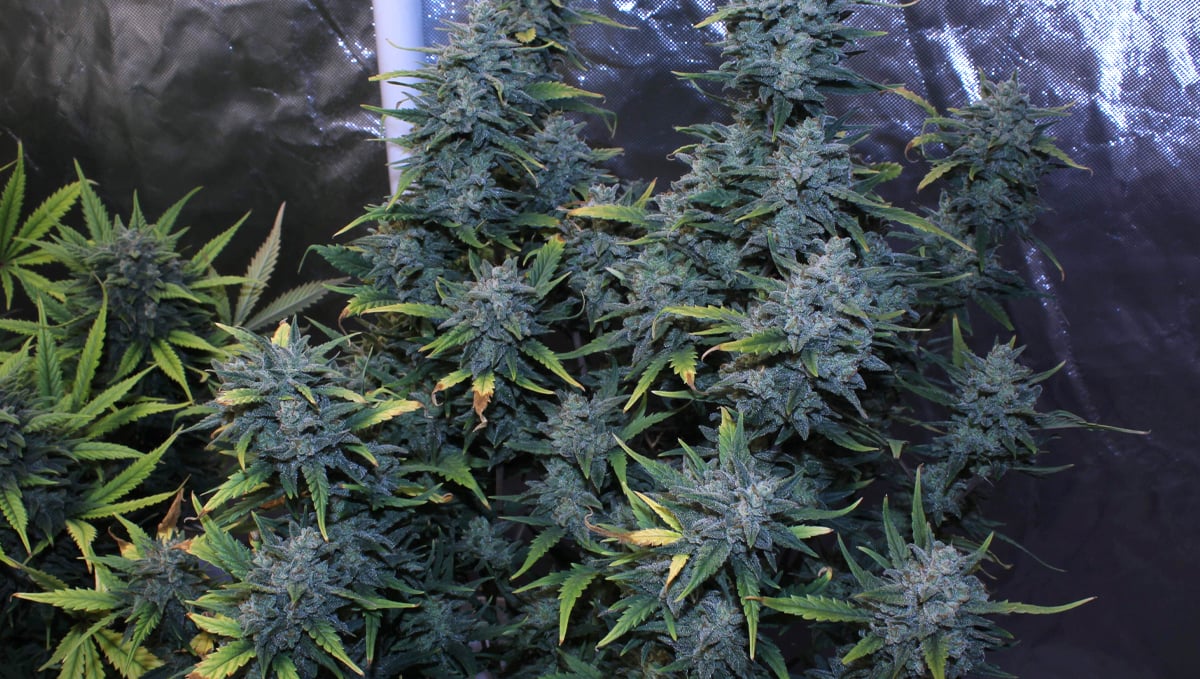
Both of these versions quickly spread around and several breeders developed new strains with these genetics, including excellent autoflower versions that soon would get known by almost every cannabis consumer, becoming extremely popular and giving birth to a lot of famous strains such as Sour Diesel and OG Kush, although this isn’t confirmed, several old-school growers swear by it.
2. Specifications
These precious genetics were boosted by the Fast Buds team to provide a super tough, potent, and easy-to-grow strain. Our Chemdawg Auto from our Originals line grows around 90cm and is very resilient to diseases and colder climates but watch out because if you’re growing outdoors, your neighbors will be able to smell it easily.
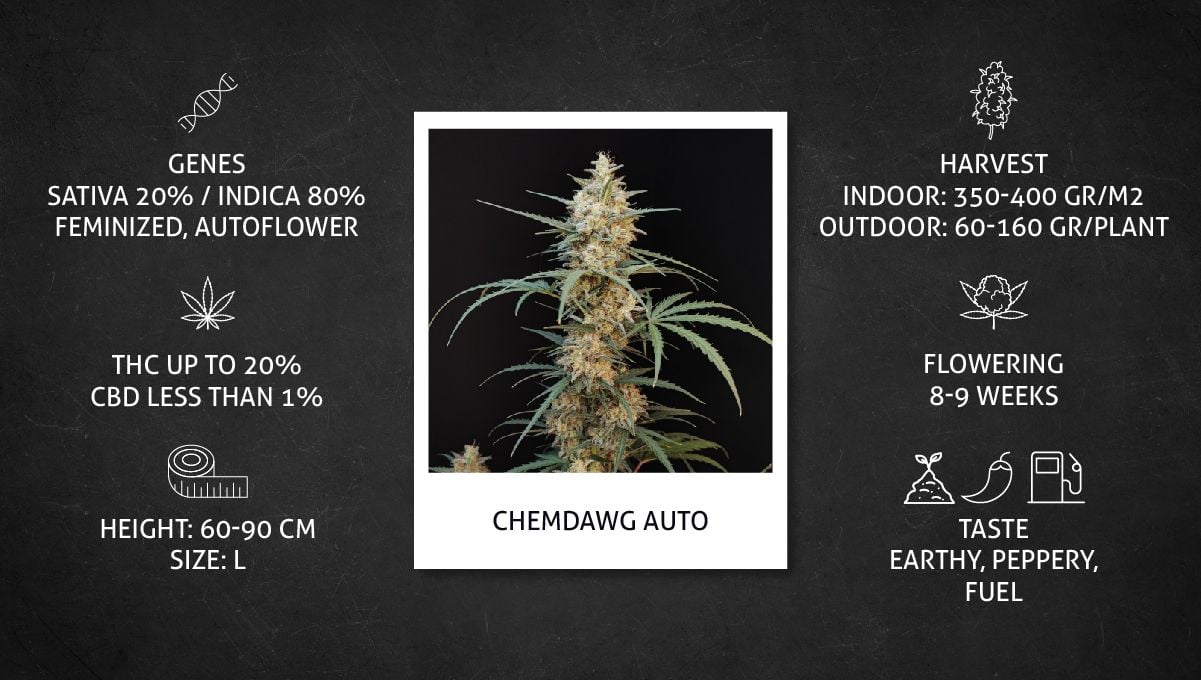
This strain can be cultivated even by beginner growers due to it requiring minimal maintenance and can produce up to 400gr/m2 in 8-9 weeks, this is one of the shortest varieties we have to offer and can be the perfect choice for those growing on a balcony or in a limited grow space. As soon as the trichome production starts, you can expect a terpene profile that resembles a mix of chemicals that is a delicious blend of diesel, gasoline, and petroleum. With up to 20% THC, you can expect a super potent high that will take you into another world and leave you there, while you relax with a strong corporal high that will leave your whole body melting, a perfect effect to relax after a long day of work or inducing a good night of sleep.
3. Week-By-Week Guide
This post serves as a general guideline on the conditions kept throughout this grow cycle, our week-by-week serves to give cultivators an idea of what to expect when growing this flavorful genetics.
| Grow Specifications |
|---|
| Light Fixture: LED |
| Light Cycle: 18/6 |
| Humidity: 50-75% |
| Temperature: 20-27°C |
| Grow Space: Indoor |
| Nutrients: Synthetic |
| PH level: 5.8-6.5 |
| Seed to Harvest: 8-9 weeks |
Remember that this timeline has been written to help you and the results may differ depending on your ability to grow cannabis and the conditions provided, have in mind that you should adjust the conditions depending on your growing setup.
Week 1 - Germination
Week 1 is where this grow journal starts, the growers started by germinating the Chemdawg Auto seeds directly into the soil and in a few days the seedlings came out of the soil, but the grower fed them with a light nutrient solution which was too much for the fragile seedlings and they presented minor signs of nutrient deficiency.
| Height: 2.54cm |
|---|
| pH: 6.0 |
| Humidity: 50% |
| Temperature: 26°C |
| Watering: 100ml |
Have in mind that this isn’t the germination method we recommend but if you’re not a beginner and know what you’re doing, there shouldn’t be a problem at all as long as you maintain proper conditions which should be a temperature between 18-25°C and a relative humidity of around 70%.
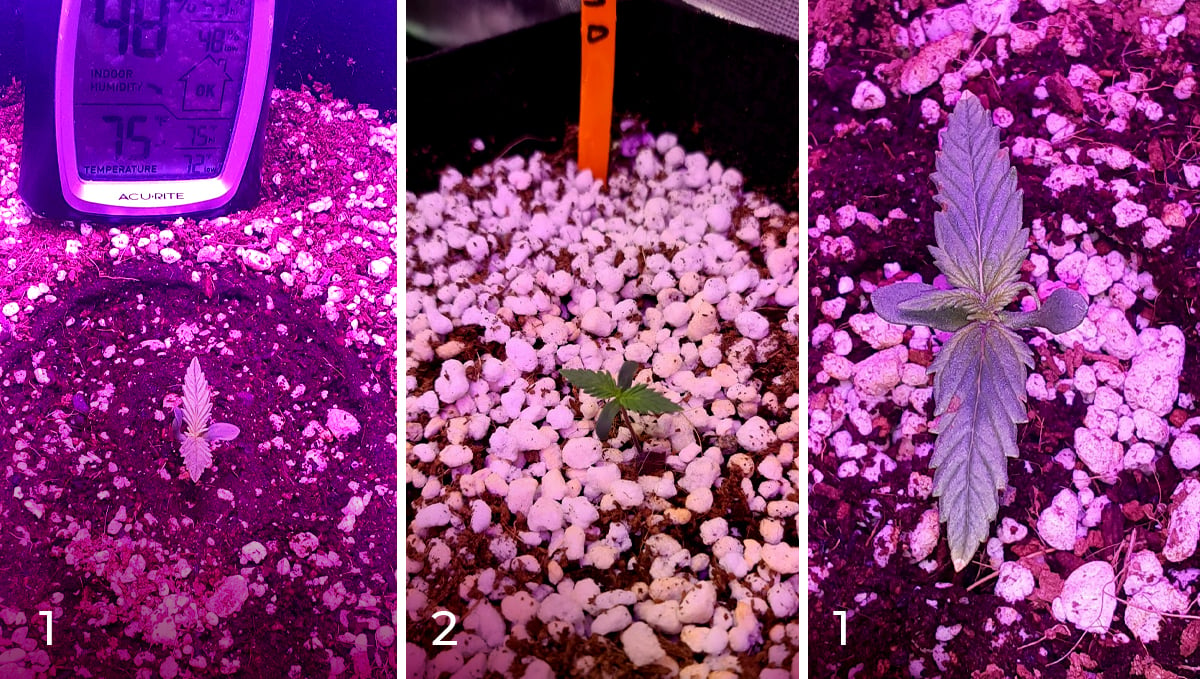
This week starting out rough. I thought full seedling strength would be fine to start since my medium has no nutrients in it I was wrong. Showing signs of nute burn so i did a small flush -Cbalderson60
As you can see, the seedling has the leaves tips yellow due to overfeeding, now, this will not cause problems because they were burned lightly but if the nutrients dose was stronger, it could end up killing the seedling.
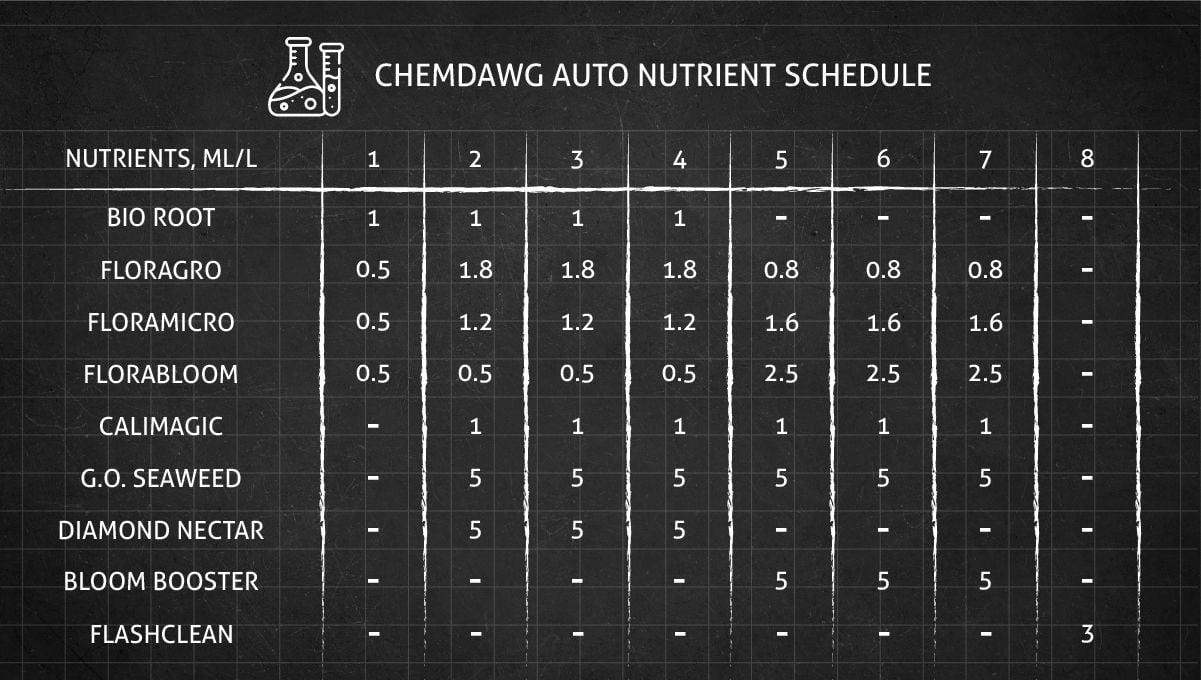
As a general rule, we suggest starting with small doses of nutrients, gradually increasing them if the plant is reacting well. Every nutrient manufacturer catering to the cannabis cultivation market includes a recommended feeding schedule for their products. Either follow them strictly or, better yet, give less than the manufacturer recommends. Below, is a simple nutrient schedule from one of the Chemdawg Auto grows that is quite safe to reproduce:
Week 2 - Vegetative stage
After your plant has developed the first pair of true leaves, you can go ahead and start feeding Grow nutrients in a 3-1-2 ratio, meaning the feeding should contain mora nitrogen which is the macronutrient cannabis plants need to develop green matter such as leaves and stems, just have in mind that you should start with a lower dose to avoid overfeeding.
| Height: 5cm |
|---|
| pH: 6.0 |
| Humidity: 50% |
| Temperature: 25°C |
| Watering: 200ml |
This week was great. Once she received the proper watering and nutrients she bounced back with no problems. I also backed light up 2 inches. She is healthy now (new growth) and a good resilient strain so far no signs of stunting. Real compact plant too showing 4th node and only 2 inches tall. -Cbalderson60
As you can see from the grower´s comments, after flushing, he started feeding again and his plant recovered with no problems, remember that to avoid problems you should check the pH and PPM if possible, this is the best way to avoid nutrient lock.
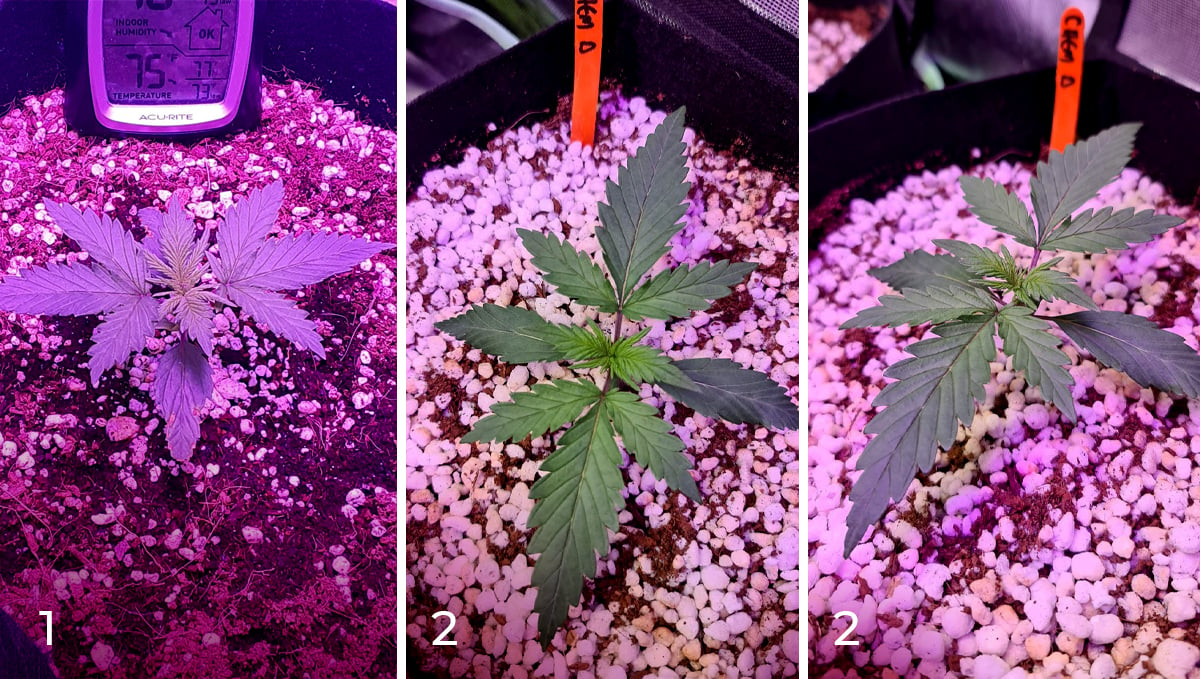
As you can see from the photos, the plant has not shown any more symptoms of nutrient deficiencies and is now looking perfectly healthy. Remember that cannabis plants need a couple of days to recover from stress so by providing the best conditions that you can, your plant will recover and continue to grow with no problems at all. At this stage, you should check and adjust the growing environment to be at 18-25°C and relative humidity of around 65%.
Week 3 - Vegetative stage
By week 3, the roots should have established and you will see new growth day after day, if you wish to apply any form of plant training, now would be the best time to do it, although this strain develops a short internodal space you should think about what will work best with our Chemdawg Auto.
| Height: 7.6cm |
|---|
| pH: 6.0 |
| Humidity: 50% |
| Temperature: 25°C |
| Watering: 300ml |
A Lot has happened this week. Let's start out with the light I'm using it lacks red. She wasn't growing the fastest. Also I wanted to get bigger leaves and stretch that's where red comes in.... I decided to do lst this week she a small one though. I almost just let her grow but more tops more yield -Cbalderson60
As said above, due to the short internodal space it may be hard to tie down the branches but if you do it properly, you will benefit from it so the grower decided to go ahead and try it.
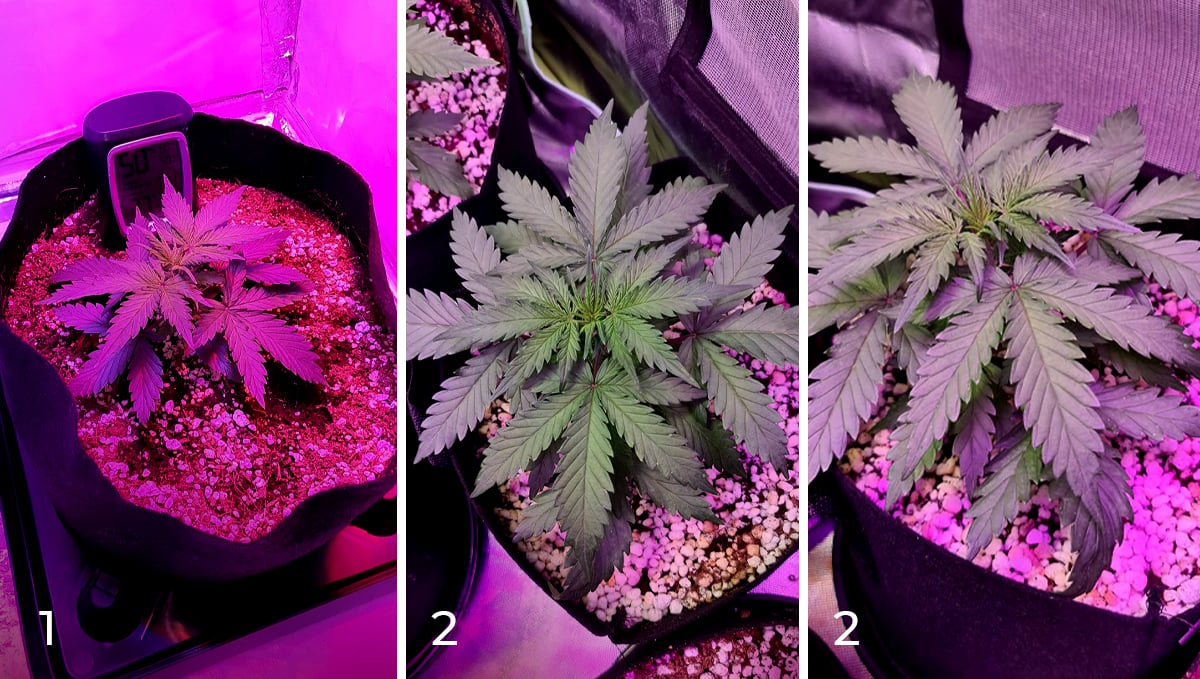
When applying any form of plant training, even low-stress training, it's vital you do it slowly and carefully because you don't want to stress your plants, as you may know by now, cannabis plants need some time to recover and when talking about autoflowers, it can end up ruining your harvest because they have a limited lifetime.
Week 4 - Vegetative stage
The fourth week marks the week before the pre-flowering stage and by now you will see the flowering sites slowly turning light green, as you will in the images further down, the grower tied the branches to expose all of the flowering sites so the light can reach them equally.
| Height: 12.7cm |
|---|
| pH: 6.0 |
| Humidity: 50% |
| Temperature: 25°C |
| Watering: 500ml |
A lot of growth happened this week. She is transitioning to flower. I have been tucking leaves and lsting her for the last two weeks. I was able to get 8 to 9 colas come up. She is a short one though. Hope the stretch will get her over a ft tall will see -Cbalderson
If you´re growing feminized seeds like the ones being grown in this grow journal, there's no need to worry but if you´re growing regular seeds (meaning they can be male or female) you should keep an eye on all of your plants because male plants will develop pollen sacs and can end up pollinating all of your buds, producing seeds.
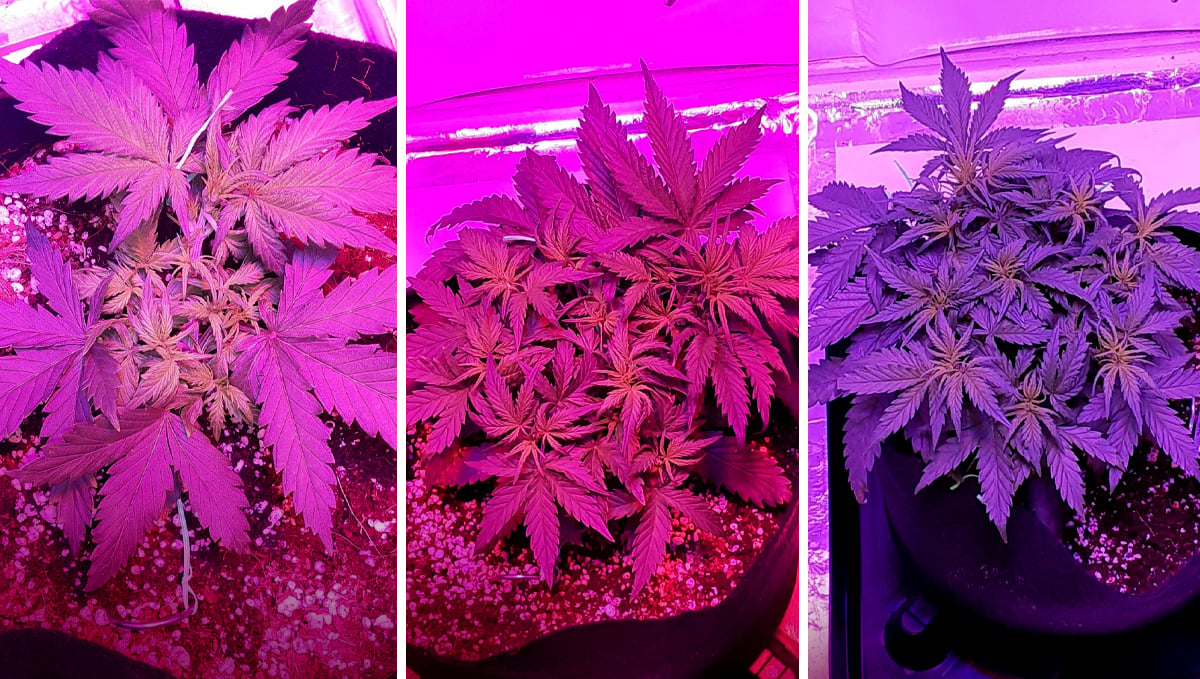
Also, it's completely normal for the flowering sites to turn light green at this stage, if this was happening during any other part of your plant´s grow cycle you should worry but if you´re nearing the pre-flowering stage it's completely normal, it's a sign that your plant is getting ready to develop stigmas which are the white hairs that appear when your plant is starting to flower.
Week 5 - Pre-flowering stage
The fifth week marks the pre-flowering stage and this stage marks the transitioning from the vegetative to the flowering stage. As soon as you see the first stigma appearing you should slowly start feeding a low dose of Bloom nutrients because after the first stigmas appear your plant will start to develop the flowers and Bloom nutrients provide Phosphorus and Potassium which are the macronutrients your plant needs at this stage.
| Height: 30cm |
|---|
| pH: 6.0 |
| Humidity: 79% |
| Temperature: 23°C |
| Watering: 800ml |
This week was just to feed her and let her grow. I didn't do any training this week. She’s stretching nicely...Hope to get a bit more stretch out of her next week then defoliate towards the end just to get more light to bottom. -Cbalderson60
As you can see in the pictures, white hairs started developing all over the flowering sites, now, this may take a while with other strains but this one grows relatively faster so from a week to the other the growth is easily visible.
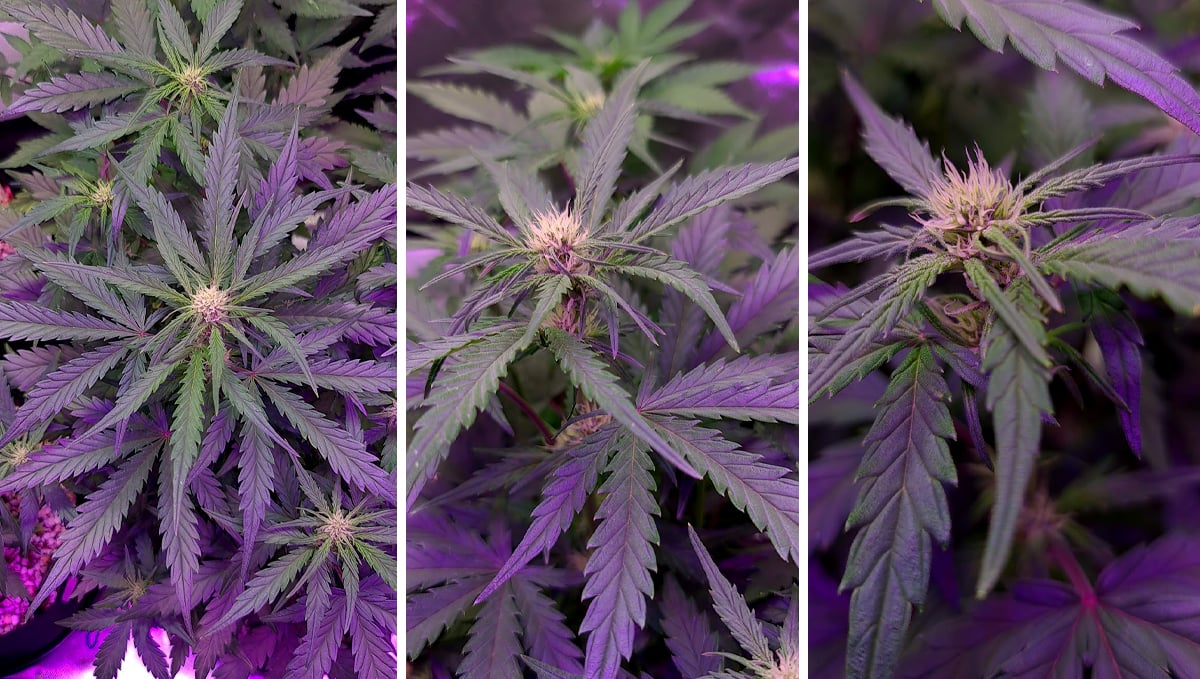
As the grower commented, at this stage you should stop training your cannabis plant because it may end up stressing her and at this stage, it can compromise the yields so make sure that you don’t do it and if you do, do it very carefully.
Week 6 - Flowering stage
By week 6 from germination, your plant is in full-flowering mode and it should be reeking of a delicious smell but unfortunately, not everyone enjoys it so you should get your carbon filter and exhaust fan ready to install if you haven’t already.
| Height: 38cm |
|---|
| pH: 6.0 |
| Humidity: 74% |
| Temperature: 24°C |
| Watering: 1000ml |
She is officially in the early stage of bloom when flowers are forming. I did a little defoliating this week just a few leaves here in there just to get more airflow through her and light. Also, feed her grow nutrients halfway through this week then dropped to 1/4 tsp. I'm trying to get this short autoflower as big as I can. -Cbalderson60
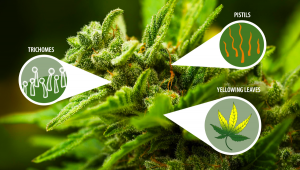
The smell is due to the trichomes that should already start to appear in abundance, the trichomes are where the terpenes, cannabinoid, and flavonoids are produced and stored so the more trichomes your plant produces, the stronger the smell.

Usually, the sweet weed smell attracts all types of bugs so if you’ve grown in the same space before and have had problems with bugs, it’s better to take preventive measures to avoid them and finish your grow cycle without any kinds of problems. So you can place yellow sticky traps all over or spray your grow tent with a bit of organic insecticide to prevent, also, it’s essential you keep the humidity at the right levels because buds are mostly made out of water and if the humidity increase drastically, you may end up with bud rot or powdery mildew.
Week 7 - Flowering stage
The seventh week marks the second half of the flowering with our Chemdawg Auto, by now the buds should be almost completely formed and you will see a lot of resin all over the buds and surrounding foliage.
| Height: 43cm |
|---|
| pH: 6.0 |
| Humidity: 59% |
| Temperature: 22°C |
| Watering: 1200ml |
Have in mind that apart from the macronutrients, cannabis plants also need micronutrients (aka “trace elements”) which are also essential but needed in much smaller amounts so depending on the type of medium you’re growing in, you should provide them. These micronutrients can be easily found in grow shops and usually come as a supplement that provides Calcium, Magnesium, and other important trace elements.
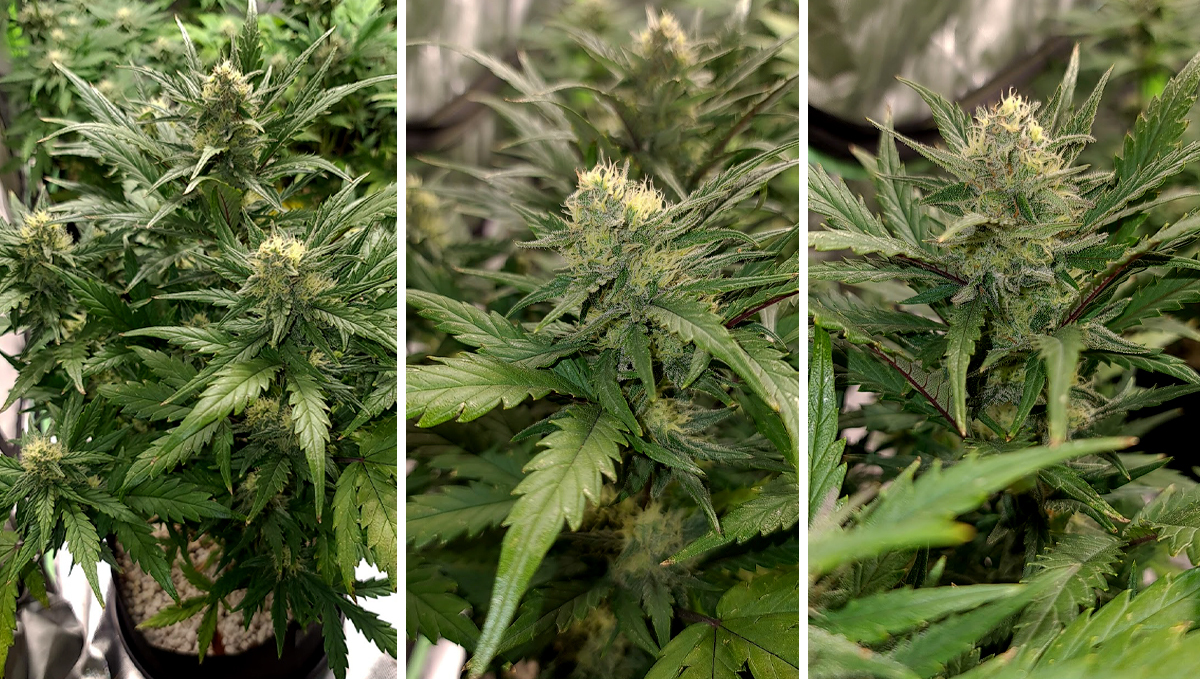
As you can see, the buds look like they’re ready to be chopped but don’t get anxious, even though the buds are dense they will get even denser so be patient, there’s only a couple of weeks left.
Week 8 - Flowering stage
Week 8 from harvest marks the week before the last an should be extremely frosty, with some of the stigmas already turning brown but wait, the standard practice to harvest at the correct time is to check the state of the trichomes so even though some of the pistils may be turning brown, don’t harvest yet.
| Height: 44cm |
|---|
| pH: 6.0 |
| Humidity: 51% |
| Temperature: 21°C |
| Watering: 1300ml |
To see the trichomes clearly you will need a jeweler’s loupe or a microscope but don’t worry if you don’t have one, you can use your phone's macro mode, even though it won’t be the same it should give you an idea.
Also, depending on the type of nutrients you’re using (synthetic or organic), you should think about starting the flushing process, flushing will remove the excess nutrients on the roots and medium and will result in a smoother smoke, better flavor, and stronger aroma.
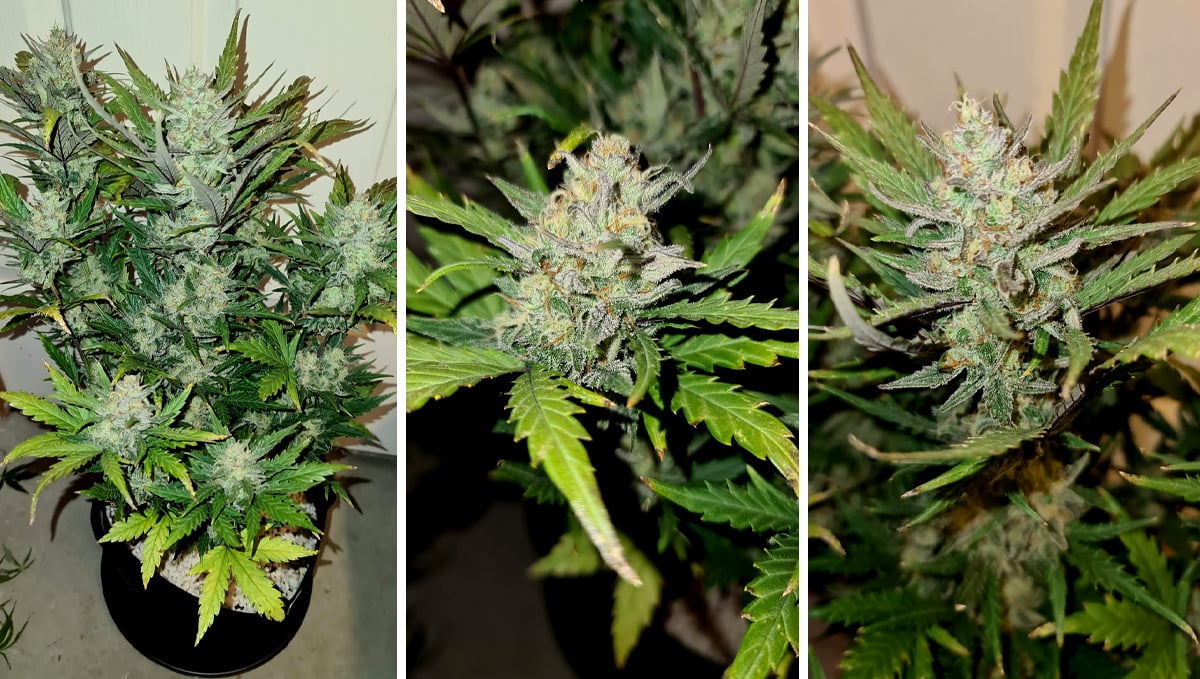
As you can see in the photos, some stigmas have already turned brown and the plant looks ready for harvest but as you will see in the next week (which is the last) the buds still have to ripen and fatten up a bit more.
Week 9 - Harvesting
This is the last week, you’ve made it. At the end of this week, you’ll be harvesting your long-awaited Chemdawg Auto, now, if you’ve already started the flushing process most fan leaves can start to yellow and die but don’t worry, this is a sign that you’ve flushed properly.
| Height: 44cm |
|---|
| pH: 6.0 |
| Humidity: 51% |
| Temperature: 21°C |
| Watering: 1400ml |
As specified in the second topic, this strain grows around 90cm but due to the training performed, it stayed at 43cm, now, this shouldn’t be a problem at all because if you LST properly, all the buds should have received proper light and should be really dense and covered in resin.
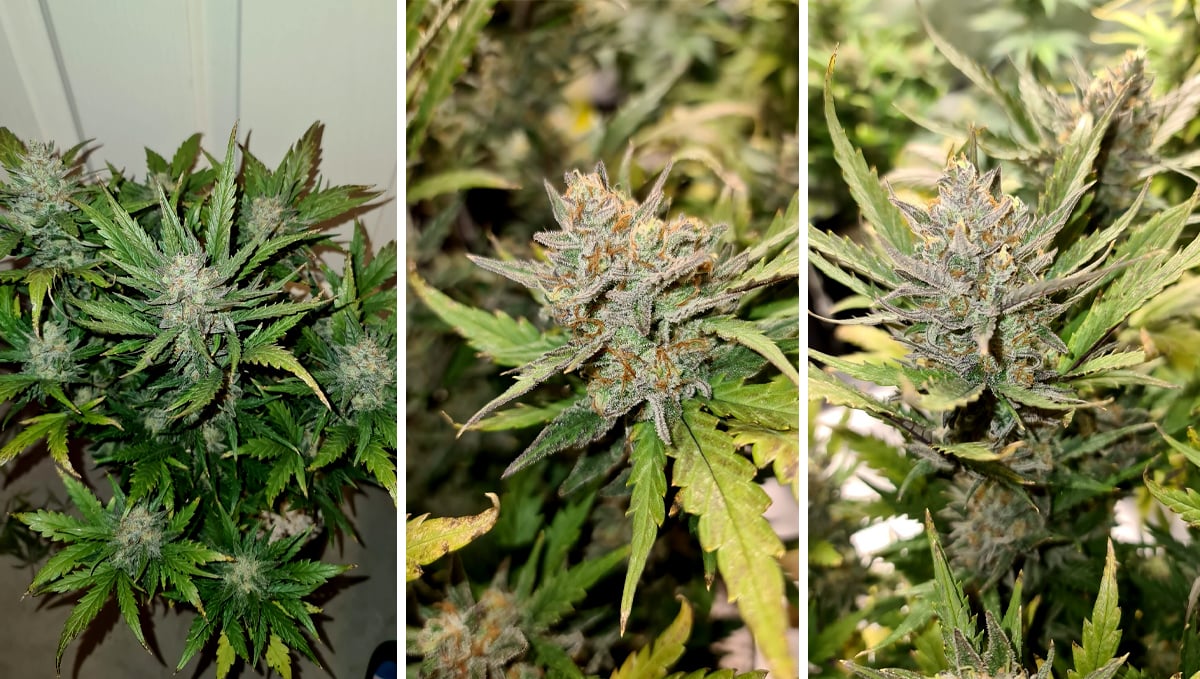
Now that your plants are ready for harvest you can clearly see how the bigger fan leaves have yellowed and how most of the stigmas are brown, at this stage you should think whether you prefer a cerebral effect or a more corporal one, and depending on which one you want, you should harvest accordingly, remember that cloudy trichomes provide a more cerebral high while amber a more relaxing body effect.
4. What To Expect?
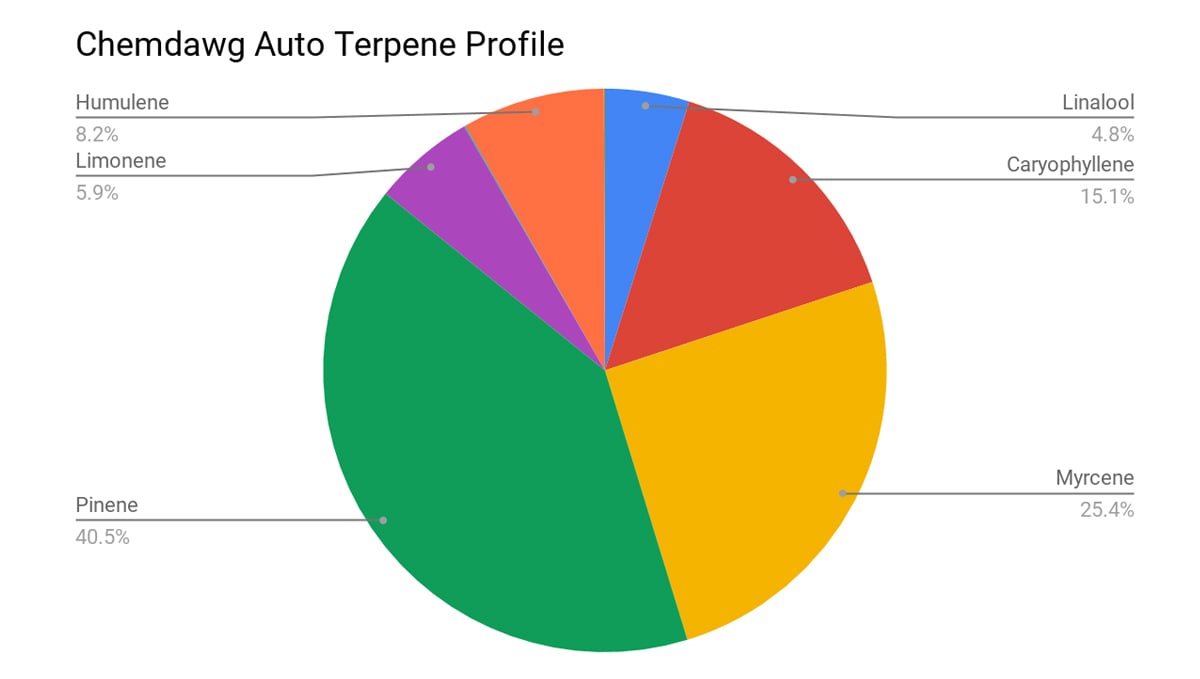
Now that your plants are already drying you’ll only have to wait a couple of weeks before smoking them for the first time, but if you are curious to know what to expect, here are our growers’ reports. As you may have smelled throughout the growing cycle, this is a true representation of chemical, gassy, and diesel terpene profiles thanks to the following main terpenes:
- Pinene
- Humulene
- Myrcene
- Caryophyllene
Our Auto Chemdawg effects is a fusion of chemicals with earthy essences that will leave a long-lasting gassy concoction in your mouth with a kushy aftertaste.
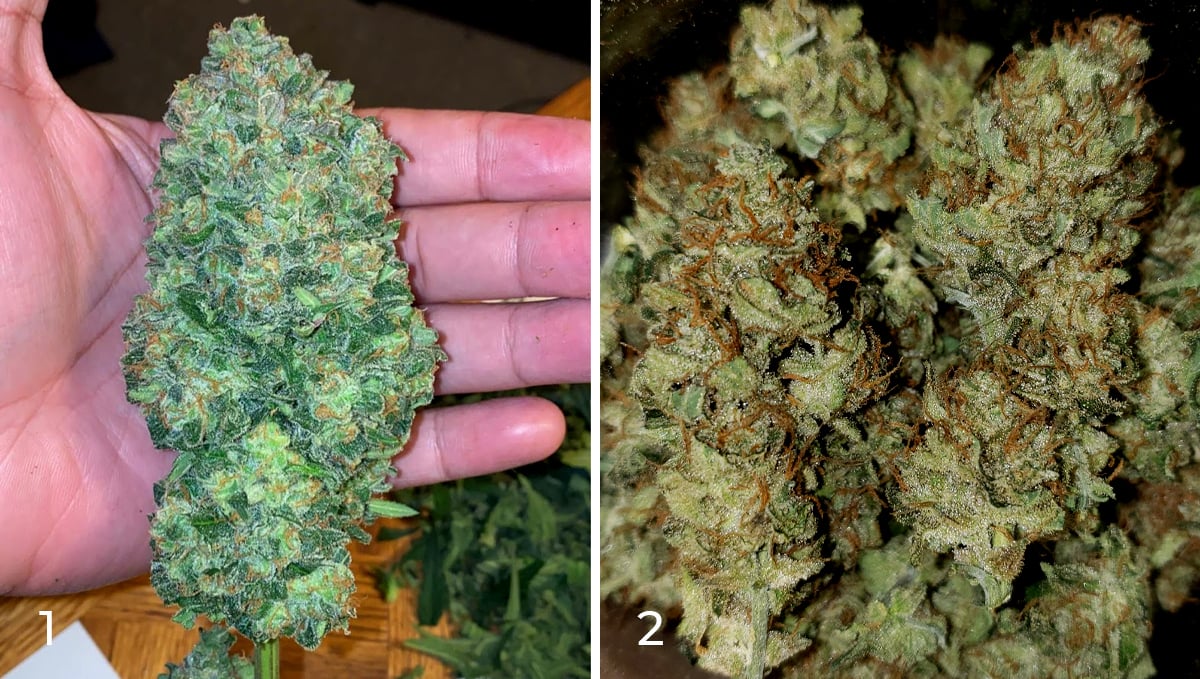
The terpene blend results in an 80% Indica and 20% Sativa effect that provides a nice sense of relaxation and can alleviate pain, growers have reported feeling creative, uplifted and overall happiness with the negative effects only being a really dry mouth.
5. Drying and Curing Your Chemdawg Auto Harvest
So I’ve taken care of my plant from seed to flower and the plants are ready for harvest, can I smoke them now? Well….no, your job as a grower is not over yet. Freshly harvested buds contain up to 80% moisture and will not carburate so you need to dry and cure them. Drying and curing will not only ensure your harvest is good for consumption but also preserve the cannabinoids and terpenes for a smoother and more flavorful smoke. So read along to learn how to best dry and cure your cannabis harvest.
Drying Cannabis Flowers
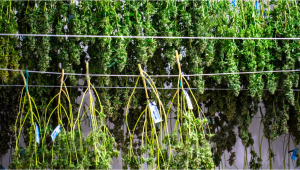
The drying process is essential and more complex than it seems if you care about bud quality as failing to do it correctly can ruin the whole harvest and even result in moldy buds, making them unfit for consumption. Drying reduces the moisture content in cannabis flowers to around 10-15%, and the ideal way to do this is to be able to control and adjust the temperature and humidity in the dry room. Now, drying in a controlled area does not only serve to preserve the taste and smell but also avoid mold.
In case you’re not familiar with terpenes, they are aromatic oils found in most plants and even insects, and are used by cannabis plants to repel predators and also attract pollinators. Terpenes are volatile and can evaporate easily, this is why it’s so important to dry your flowers correctly because, as you may know, terpenes act in combination with cannabinoids to provide a more enjoyable effect. So here are a couple of Do’s and Dont’s that’ll help you dry your flowers perfectly.
Do’s when drying cannabis
- If you don’t have a dry room, place your weed in a wooden or cardboard box for drying, just make sure to leave them spaced out to improve airflow between them.
- Make sure the grow room is cool with light breeze to prevent stale air.
- If needed, use a humidifier or dehumidifier to get the humidity to optimal levels.
- The temperature should range between 15 to 21 celsius and the humidity levels between 55-65%.
- The whole process should take a minimum of 7 days up to 16 days.
Dont’s when drying cannabis
- Do not place buds on top of each other as this will most likely cause mold.
- Do not dry the flowers too fast as this will cause terpenes to evaporate, resulting in buds that taste and smell like hay.
- Make sure the dry room is completely dark as direct light will degrade your flowers.
Curing Cannabis Flowers
After the whole drying process, your buds are dry but the smell and taste will not be at their full potential, in order to enhance the aromas and flavors, you have to cure your harvest. Curing cannabis buds is very simple, all you have to do is place the flowers in a glass airtight jar for a minimum of 2 weeks. But during the initial week, it’s vital you burp the jars which consists of removing the lid of the curing jar once or twice for around 30 minutes for 7 days in order to exchange the air and remove moisture excess. After 7 days of burping, your buds should be ready for long-term storage and you can finally try them but keep in mind that the longer they cure, the better they will taste. So after the curing process, make sure to burp the jars at least once a week to keep them in top shape and that’s it!
6. Chemdawg Auto Cannabis Strain Grow Guide - FAQs
There we go then, pretty much every single thing there is to know and understand about successfully growing the Chemdawg Auto Cannabis strain. But, with the rate at which cannabis cultivation is evolving right now, and with new growers hitting the scene every day, there will always be a bunch of extra questions relating to growing any specific strain.
In this section, we will run through the most commonly asked questions, and answer them in the most straightforward possible way. And, don't worry, we will come back and update this list regularly so you can be sure you're not going to miss anything vital. If there's anything you think we missed, hit us up in the comment section down below, or head over to our subreddit! Let's get into the questions -
How long does it take this strain to go from seed to harvest?
Chemdawg auto is one of the quicker autoflowering options on the market right now, with an average flower time of 8-10 weeks. That said, it is important to remember that genetics and the environment you are growing in can have a massive effect on this number, so keep an eye on your plants and don't be afraid to adjust accordingly if necessary.
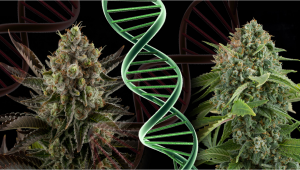
There are also variations due to phenotypes to take into consideration. While we always put every single one f our cultivars through a rigorous back-breeding program to ensure the smallest amount of phenotypic difference, this is something that is just inherent to autoflowering strains to a certain extent. What are phenotypes? The term "phenotype" is the physical and biological characteristics of an organism, which are determined by both the environment it grows in, as well as its genetics. In a nutshell, phenotypes are what give your cannabis plant its unique look and smell; and because autoflowering strains have a particularly wide genetic pool to draw from, they are slightly more likely to have different phenotypes than regular, non-autoflowering strains.
As an example, some plants may finish flowering quicker than others and will produce slightly heavier buds because of this. In the same way, some Chemdawg Auto plants will probably end up with bigger leaves or calyxes than others.
There is also phenotype variation due to the ancestral path to take into consideration. Just like humans, cannabis seeds inherit a set of traits from both their parents and their grandparents, which can have a big effect on the final outcome. For example, if Chemdawg Auto was bred with another strain that is known to produce heavy sticky buds, then there’s a chance this trait will be passed down to the offspring. There is no way of knowing which phenotypes will emerge from any given seed, and this is one of the great things about growing cannabis – you never really know what to expect! So make sure you always keep your eyes open for anything unexpected.
What kind of yields can I expect with Chemdawg Auto?
The typical yield of Chemdawg Auto is around 500-550g/m2 indoors and 80g per plant outdoors. However, as we've already stated, there is a huge range of possible outcomes due to phenotypic variation and the environment you are growing in, so don't be surprised if your results differ slightly from this figure.
How can I give my Chemdawg Auto the best chance at producing the highest yield possible?
There are a few ways that you can boost your chance of finishing with that type of bumper yield we all dream of. Plant training can have a dramatic effect on the final yield, but as this is an autoflowering strain, you need to be very careful with any and all training techniques - and be very picky with the techniques you employ.
What training methods work best with Chemdawg Auto?
As with all autos, you want to steer clear of any training techniques that will heavily stress the plant. Why? Because autoflowering cultivars just simply do not have time to bounce back from heavy stress in the same way that photoperiod strains do. This is due to the fact that they have such a short life cycle (roughly 8-10 weeks from seed to harvest) and just don’t have enough time to bounce back from any growth stunting that can (and will) occur when using methods like fimming, super cropping, topping, or any other high-stress training techniques.
So, what methods should be used? It's best to stick to low-stress training options. Things like timing the plant down, Screen of Green (ScrOG), and even progressive pruning techniques can be used with Chemdawg Auto, as long as they are done so carefully and with a light hand. You want to try and flatten out the canopy, and force lateral instead of vertical growth. This will open the canopy up, allowing for more light to get to the lower sections of the plant and allowing your Chemdawg Auto to reach its full potential. It also boosts the canopy airflow and tricks the plant into distributing the growth hormones and nutrients more evenly. By using the right training techniques you can drastically increase your yield potential, so it is well worth the effort.
I have a small tent – will Chemdawg Auto be a good strain for me?
Yes! Chemdawg Auto is actually one of the better strains to have in a small tent, as it grows relatively short and produces dense buds. This makes it ideal for smaller tents where you want to maximize your yield per square meter. This is obviously a great strain for those with limited space, as it doesn’t get too tall and can be grown with minimal equipment.
Can I grow this strain outdoors?
Yep, you sure can. Chemdawg Auto is a great strain to grow outdoors, as it finishes quickly and can handle some colder-than-usual temperatures. This makes it perfect for those of us who live in colder climates, but don't have the space to grow indoors. Just remember to get her in a spot with the most amount of sunshine hours possible, and to keep a close eye on her throughout the grow.
Do I need to use a lot of nutrients?
No, you don't. Chemdawg Auto (like most autoflowering strains) is quite a light feeder. You certainly don't need to over-fertilize her, as she doesn't respond well to that kind of treatment and you could end up with nutritional burn issues. A good quality grow nutrient like Canna Terra Professional or General Hydroponics Flora Series will be more than adequate for all stages of growth, and you don't need to use any additives either (although they can help boost flower production and weight). Just follow the simple feeding schedule above and your Chemdawg Auto will thank you for it.
What growing medium should I use for my Chemdawg Auto crop?
Chemdawg is a super versatile cultivar and will work perfectly in all growing substrates. With that said, if you are looking to maximize your bud count with the best terpene profile possible it's best to use a soil-based medium with some added organic matter. A well-aerated, high-quality potting mix will create a balance of aeration and nutrition while allowing beneficial bacteria to thrive. Adding some extra perlite or coco coir will also help to keep the roots nice and oxygenated. Alternatively, you can also grow your Chemdawg Auto in hydroponics if you're looking for faster growth and higher yields, but the aroma and flavor levels may drop slightly.
7. In conclusion
If you’re looking for truly gassy genetics, this strain is a must for you! The good blend of Indica and Sativa genetics provides a really pleasant high that will leave your whole body melting and will put you in a cannabis coma, perfect for after a long day of work or when you want to relax or meditate.
If you have grown this strain before and want to help fellow growers with tips to improve their growing experience, please leave a comment in the comment section below.
External references
- Stomata and Trichome Development. - V, Vadivel. (2020).
- Terpene Synthases and Terpene Variation in Cannabis sativa. Plant Physiology. - Booth, Judith & Yuen, Mack & Jancsik, Sharon & Madilao, Lina & Page, Jonathan & Bohlmann, Joerg. (2020).




Comments