Critical Kush Auto Cannabis Strain Week-by-Week Guide
- 1. Grow specifications
- 2. Grow set up
- 3. Germination and seedling stage | week 1
- 4. Early veg | week 2
- 5. Mid veg | weeks 3-4
- 6. Transition (pre-flower) | week 5
- 7. Early flower | weeks 6-7
- 8. Mid flower (bulk phase) | weeks 8-9
- 9. Ripening and harvest | week 10 (and beyond)
- 10. Yield and smoke report
- 11. In conclusion
Critical Kush Auto is a game-changer for both growers and smokers in the cannabis community. This strain, born from the fusion of Critical Kush and cutting-edge autoflowering genetics, offers a swift and rewarding cultivation experience. The earthy pine and Kush flavors make it a treat for the taste buds, especially for Indica enthusiasts.
In our Critical Kush Auto week-by-week growing guide, you’ll gain valuable insights into the strain’s timeline, its requirements during the different stages of growth, and its few quirks. Master all that, and you’ll get the best plant this autoflowering marvel deserves.
1. Grow Specifications
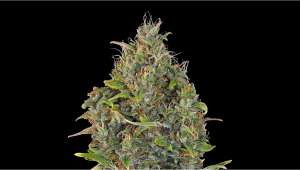
When it comes to growing, Critical Kush Auto boasts an impressive genetic lineage, a blend of Critical Kush and BF Super Auto #1. This harmonious fusion results in a strain that's 90% Indica and 10% Sativa, making it a dream for growers seeking those delightful Indica qualities. From seed to harvest, it takes a mere 70-80 days to enjoy the bountiful yields this beauty provides. Indoors, it stands at a manageable 70-80cm, making it suitable for a variety of setups. Expect indoor yields of up to 550 gr/m², a testament to its productivity. Outdoors, it reaches heights of 70-100cm, thriving under open skies.
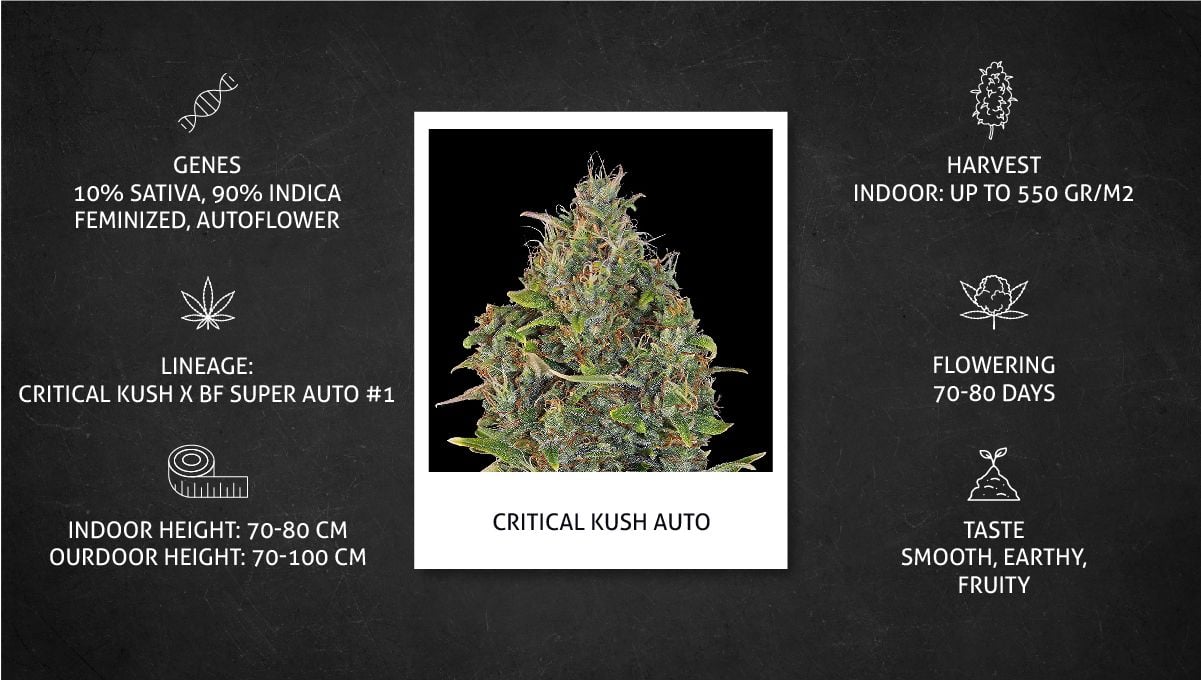
But it's not just about the growing experience; the real treasure is the product itself. Prepare your senses for a symphony of pine wood and Kush aromas, culminating in a smooth, earthy, and slightly fruity flavor profile. When you indulge in Critical Kush Auto, you'll be greeted by a calming, cerebral journey that eases you into a relaxed and sleepy state. It's the perfect companion for winding down after a long day or simply seeking a tranquil escape.
2. Grow Set Up
Critical Kush is a tremendously popular genetics, but it's also true that there are dozens if not hundreds of versions of this strain, both photoperiod and autoflowering. We have found only a handful of grow reports for this particular version bred by Barney's Farm. Luckily, judging by what we saw, Critical Kush Auto is a stabilized, uniform variety, and so we can form a very clear picture about the strain's growth patterns based on these few reports. We've been following closely two of them and taken data from one.
| Grow Space: | 1 m2 (10.76 ft2) | Pot Size: | 12 l (3.17 gal) |
|---|---|---|---|
| Seed to Harvest: | 10 weeks | Medium: | Soil/Perlite |
| Flowering: | 6 weeks | Nutrients: | Organic |
| Light Cycle: | 18/6 | pH Levels: | 6.3-6.5 |
| Light Type: | LED | Day Temperature: | 27°C (81°F) |
| Watts Used: | 300 | Humidity: | 60% |
Rest assured that in the rest of the grow diaries that we have studied, Critical Kush Auto was very similar, and there's no reason for you to doubt that these plans will be much different in your own grow setup.
3. Germination And Seedling Stage | Week 1
Successful indoor cultivation starts with creating and maintaining ideal conditions for your plants to thrive. The proper environment is especially important for the first few weeks when the seedling (and later young plant) is still too small, with underdeveloped root structure, and so its growth can be stunted by adverse conditions. So, aim at temperatures of around 25-28°C, with relative humidity way above 60%, preferably as high as 80%. Also make sure the young plant receives enough light but not too much of it so that it takes off but doesn't stretch excessively.
| Plant Height: | 7 cm | Day Temp: | 27°C (81°F) |
|---|---|---|---|
| Distance to Light: | 50 cm | Night Temp: | 20°C (68°F) |
| pH: | 6.3 | Humidity: | 60% |
When growing autoflowers, it's especially important to give your plants the best start in life, and it all begins with cannabis seeds germination. It may seem daunting for beginner growers, but there is nothing inherently difficult about the process. Just make sure it's warm, moist, and dark, and your seeds will sprout all right. There are quite a few germination methods, but most gardeners prefer the very straightforward wet-paper-towel technique.
The beauty of sprouting seeds between wet paper towels is that you can monitor the state of the seed until it sprouts. You'll never have to dig out the seed from the soil to see if anything has happened. Many growers also raise the chances of their precious 'bean' sprouting by pre-soaking it in a glass of water.
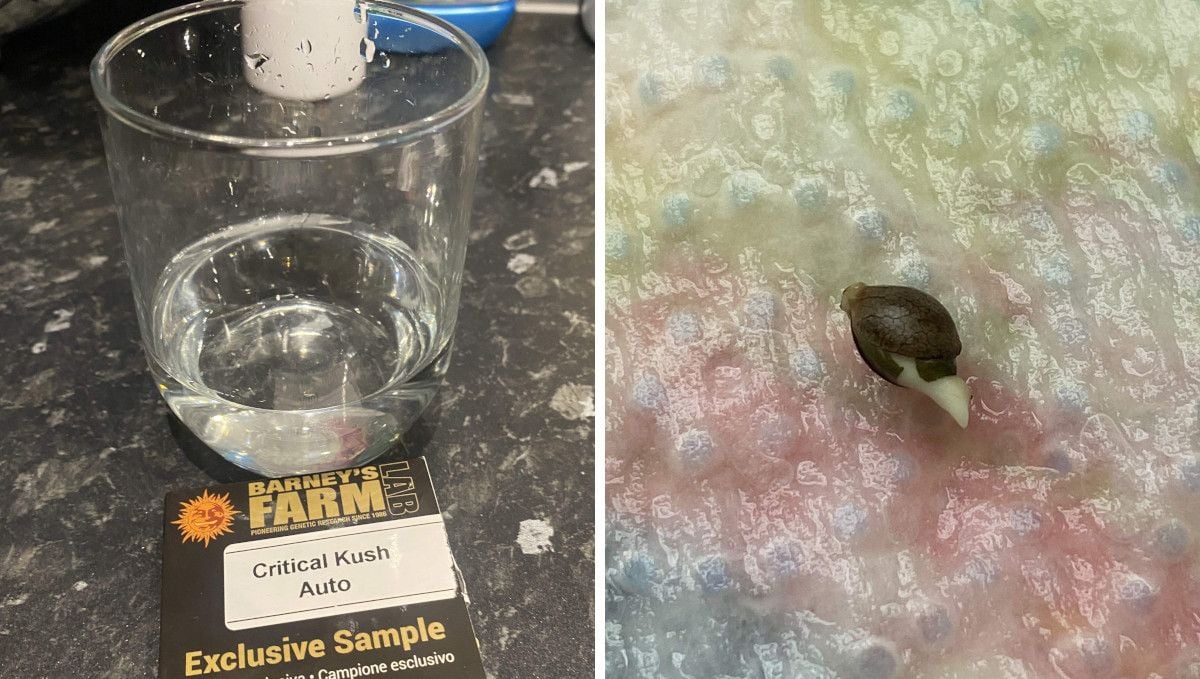
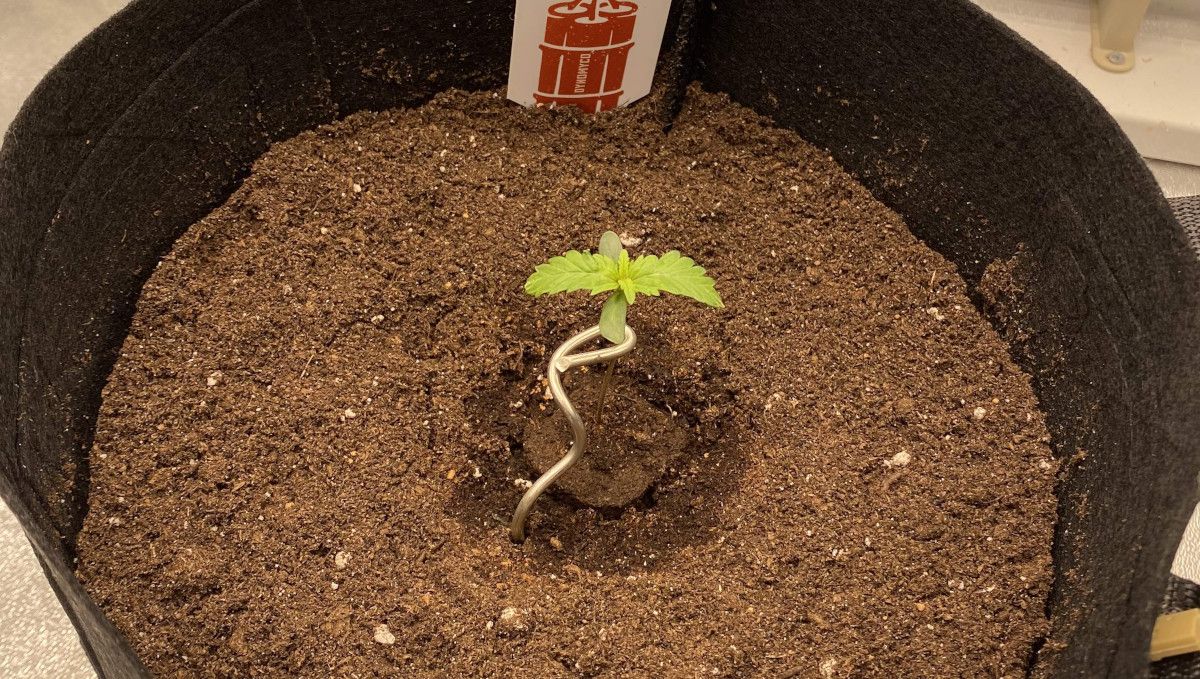
You can put the seed in the medium as soon as it cracks, but judging by our previous experience, the seelings become more vigorous when you plant them with a taproot reaching about 1 cm (0.5 inch) in length. On the flipside, the root may grow very curvy, but if it's straight and long, it's an ideal scenario. Bury it about a quater of an inch (1 cm) deep and cover with moist medium. Keeping the seed hull moist will help the sprout get rid of it while coming up from the ground. Otherwise, it may become stuck.

In the photos below, you can see what happens if a seed sprouts with its hull still attached. Since its leaves don't get any light, it stretches more than normal. Besides, in most cases, it's up to the grower to remove the seed shell with their fingers. As days pass, the shell becomes drier and harder, making it virtually impossible for the seedling to shed it on its own. To successfully remove the shell, first moisten it thoroughly using a spray bottle.
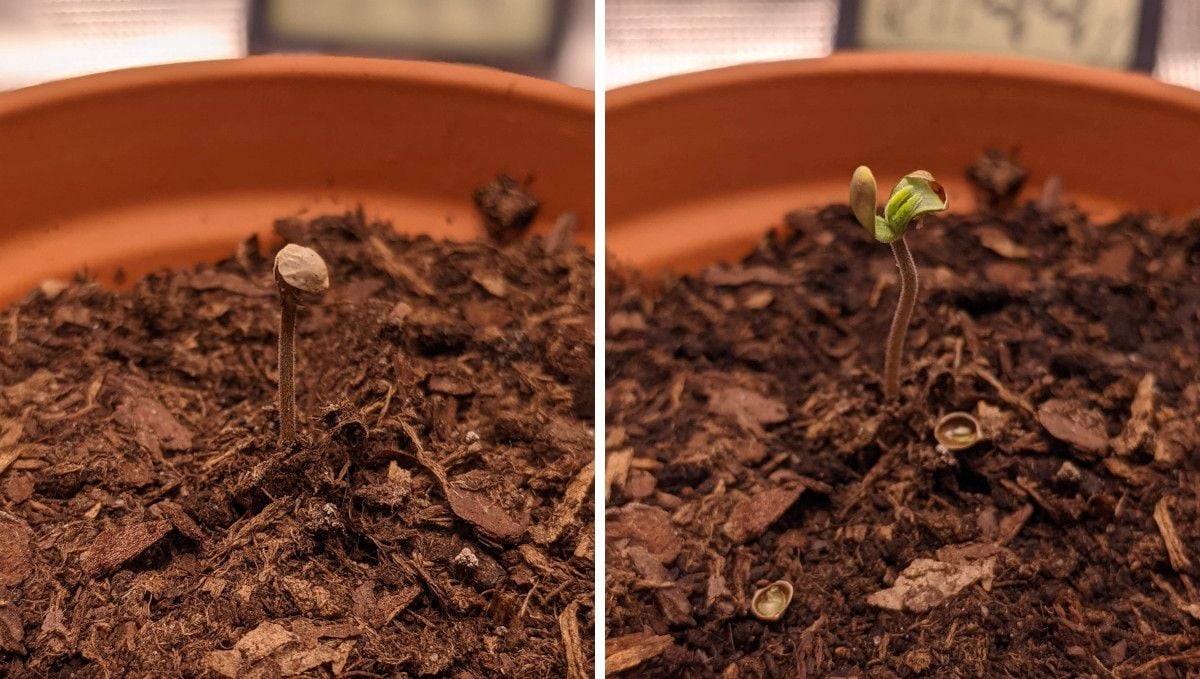
Traditionally, weed growers used to start their seedlings in small pots or solo cups and transplant them into bigger containers in a couple of weeks from sprouts. However, with autoflowering strains such as Critical Kush Auto, this is a potentially stressful approach. You need to know what you're doing to perform this procedure as gently as possible, without disturbing the sensitive roots. Planting straight into the final container is less risky, but it makes watering more difficult. Basically, you need to use a small amount of water just around the base of the plant.
4. Early Veg | Week 2
All through the second week from seed, the seedling doesn't boast extensive root structure; that's why it's still sensitive to heat, cold, and low relative humidity. If the conditions are too adverse, it might even start to wilt. That's why your goal as a grower is to provide the same mild warm and humid conditions as in the previous week.
| Plant Height: | 8 cm | Day Temp: | 27°C (81°F) |
|---|---|---|---|
| Distance to Light: | 50 cm | Night Temp: | 20°C (68°F) |
| pH: | 6.3 | Humidity: | 60% |
If you have used a starter pot for your seedling, sometime around week two, you'll need to think about transplanting. Most of the times, the need to transplant becomes obvious to you when you see little roots sticking from the drainage holes in your pot. With autoflowers, multiple transplants aren't recommended. So, make a single repotting into the final container in which your plant will be staying for the rest of its life cycle.
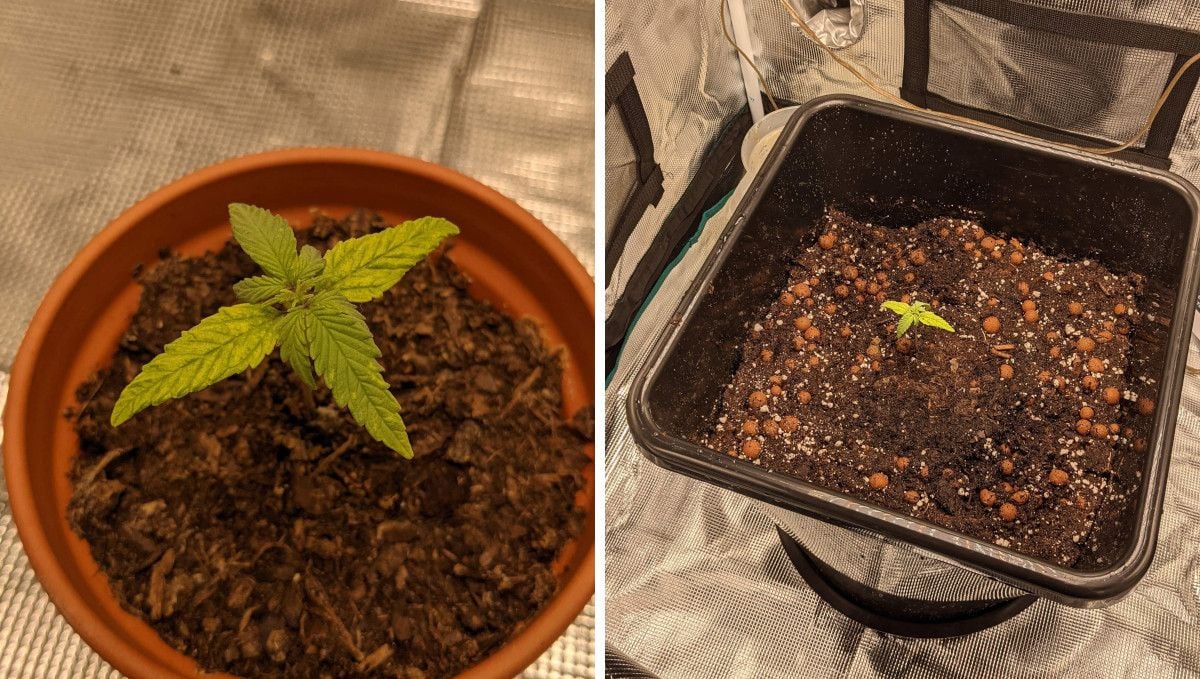
As you can see in the photographs below, this little Critical Kush Auto was still looking sickly in week 2. Probably, it was the aftermath of the situation with a stuck seed shell. However, the seedling looked big enough for its small initial container, but when transplanted into the final pot, it started looking quite pathetic. As you will see from our week-by-week guide, Critical Kush Auto has strong enough genetics to overcome this initial trouble and grow into a healthy, big, and high-yielding plant.
Of course, a weed sprout soon uses up all nutrients stored inside its embryo and requires extra fertilization. However, it doesn't automatically mean that you need to provide nutrients with water from day one. It all depends on the medium you choose. In coco coir or hydroponic setups, you'll need to start fertilizing your plants right away. In soil grows, the bigger your container is, the later you can start using extra nutrients. It's because the soil itself is usually pre-amended with fertilizers. The limiting case is using nothing but water from seed to harvest with super soil.
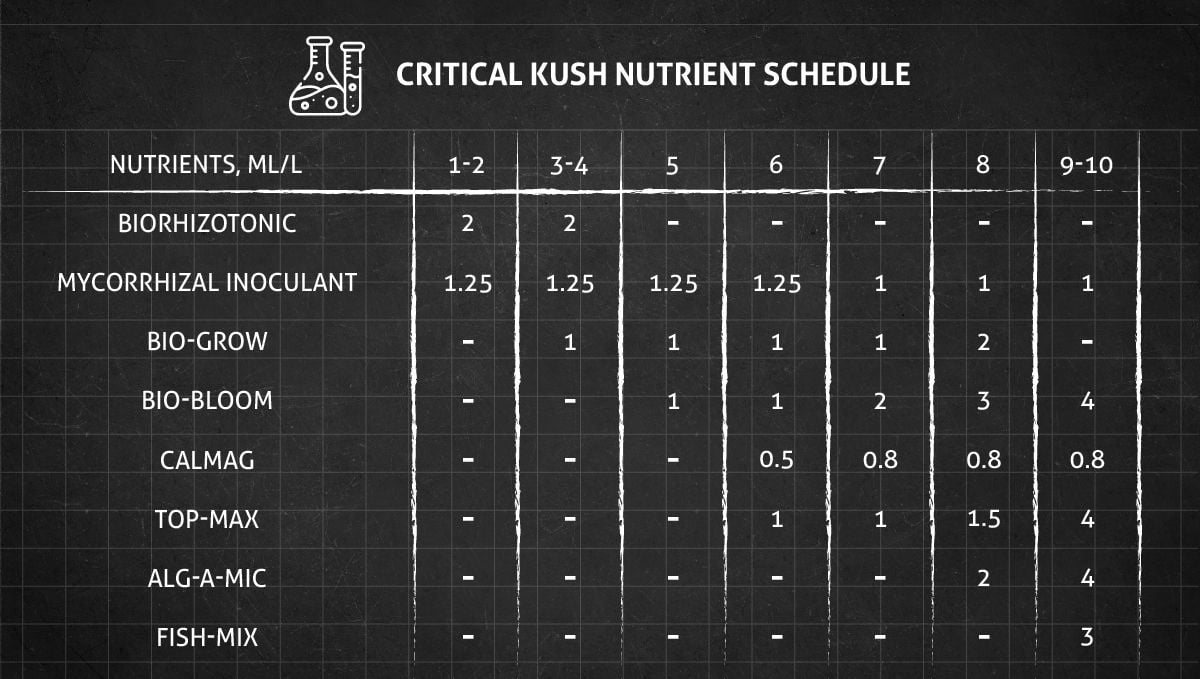
Please find below a sample nutrient schedule that you can use for reference. Obviously, you do not need to copy it exactly.
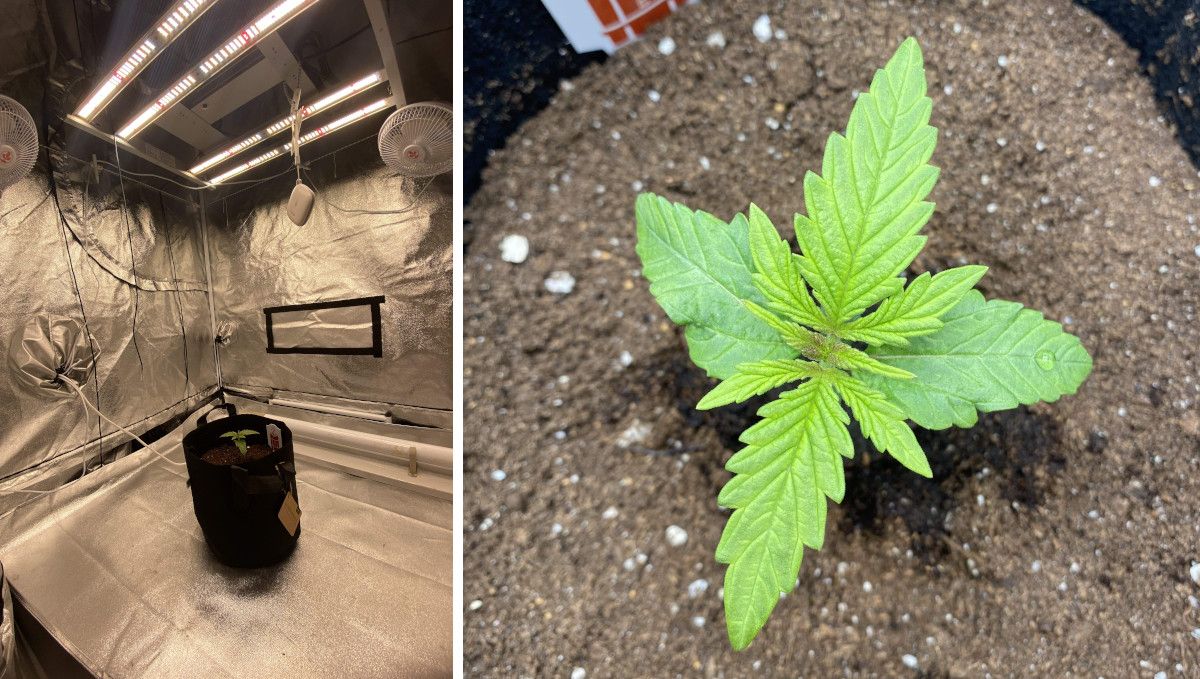
Providing right environmental conditions and giving your plants enough water and food usually translates into rapid development. However, Critical Kush Auto doesn't demonstrate rapid vegetative growth (at least, that wasn't the case in the several grow diaries that we have seen). Frankly, it usually starts very slowly. Don't worry. Your autoflower will pick up the pace during the flowering stage.
5. Mid Veg | Weeks 3-4
The Goldilocks conditions for cannabis plants (for the most part of its life cycle) include day temperatures at around 25°C, with a 5-10-degree drop during the night, and the relative humidity between 40 and 60%. While in the previous weeks, you should have probably kept things a little bit warmer and more humid, now that your young plant is more robust, it's safe to lower them.
| Plant Height: | 11-14 cm | Day Temp: | 27°C (81°F) |
|---|---|---|---|
| Distance to Light: | 50 cm | Night Temp: | 20°C (68°F) |
| pH: | 6.3 | Humidity: | 60% |
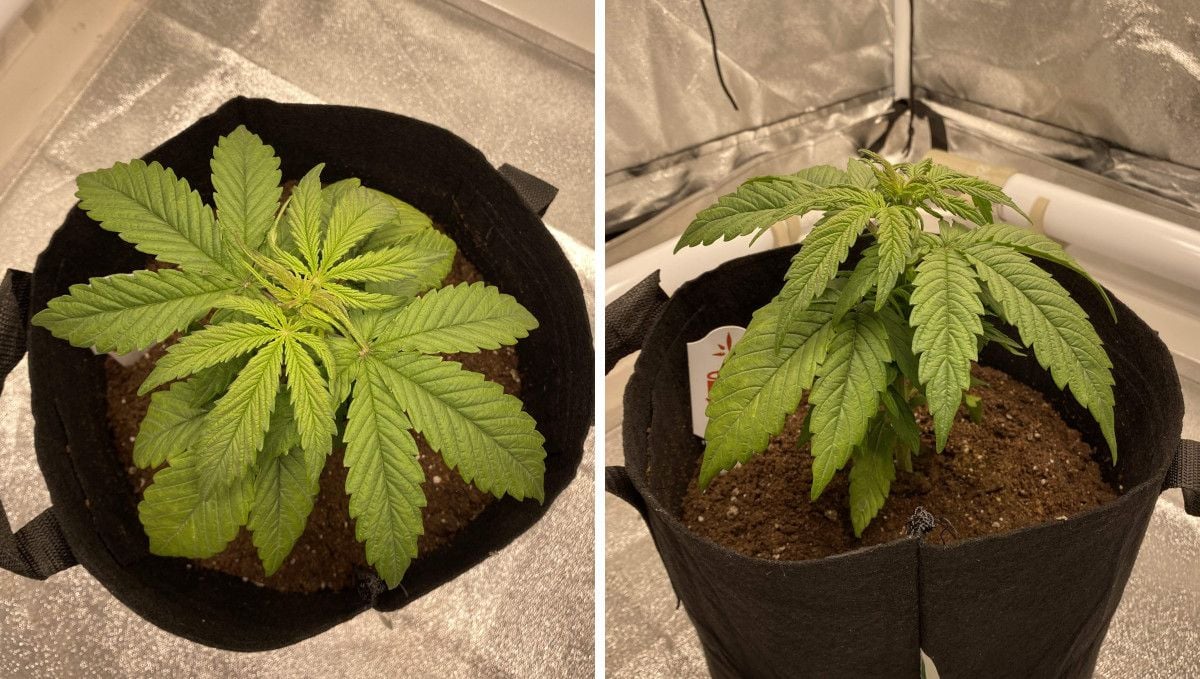
Weeks 3 and 4 are usually the time when autoflowers enter the most rapid vegetative growth and develop new leaves and side branches at a breakneck pace. However, Critical Kush Auto showcases a rather slow start. In the picture below, you can see that the plant isn't very bushy. However, it has very big, wide leaves, resembling more a photoperiodic variety than an autoflower.
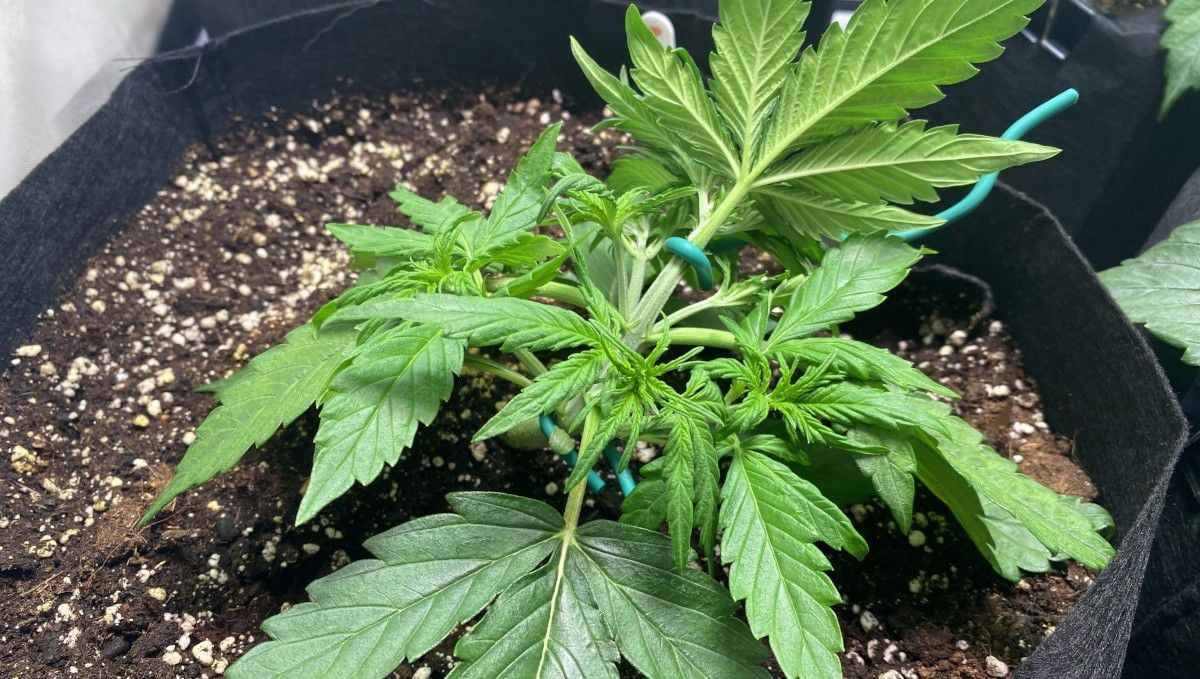
It's questionable whether one should train such a small and low-profile plant. However, some growers do just that: they bent and tie down the main stem to expose side branches to light and stimulate their growth.
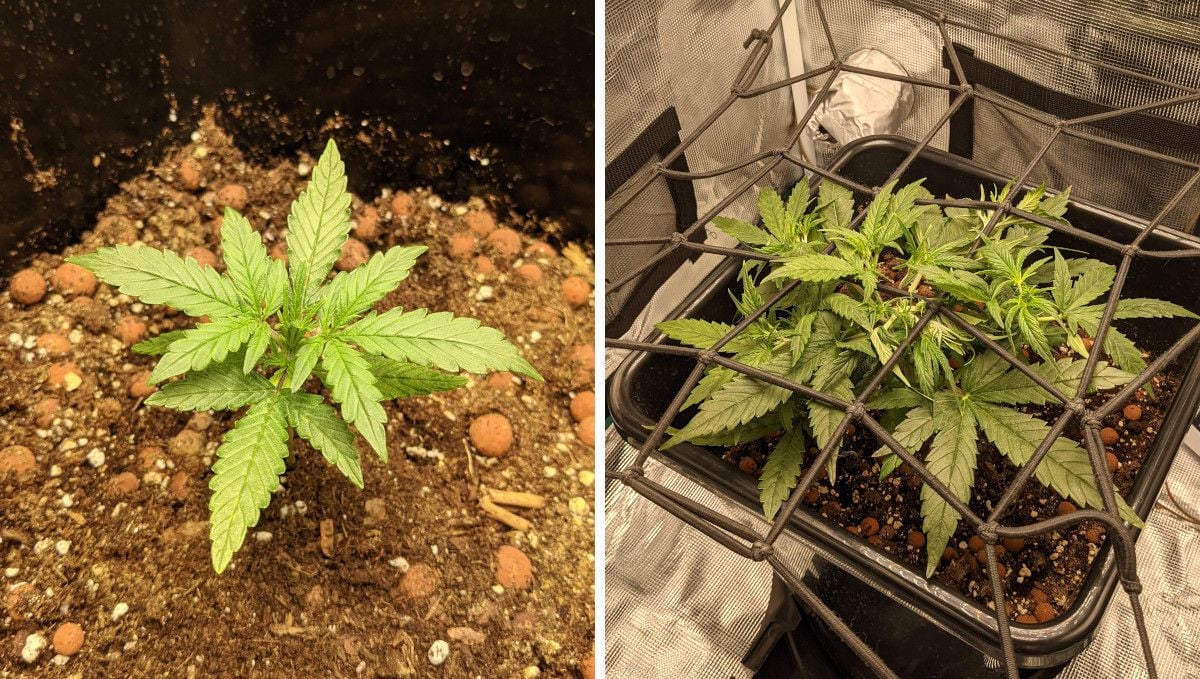
Gardeners with tight grow spaces or those who want to utilize the available light to the fullest use more sophisticated training methods, such as ScrOG nets. Tucking in the main stem and the side branches under the mesh allows you to achieve a flat canopy where every bud site will be at the same distance from the light, receive the same amount of energy, and get the same dense texture.
6. Transition (Pre-Flower) | Week 5
When weed plants start transitioning to flowering, you should keep the conditions in your grow space more or less the same, maybe just lower the day temperature by a degree or something and start decreasing the relative humidity. More importantly, your flowering plants will also start to stretch, sometimes gaining a few inches overnight, and you should be vigilant and keep the right distance from the lights, or else your plant tops may get burned.
| Plant Height: | 36 cm | Day Temp: | 27°C (81°F) |
|---|---|---|---|
| Distance to Light: | 50 cm | Night Temp: | 20°C (68°F) |
| pH: | 6.3 | Humidity: | 60% |
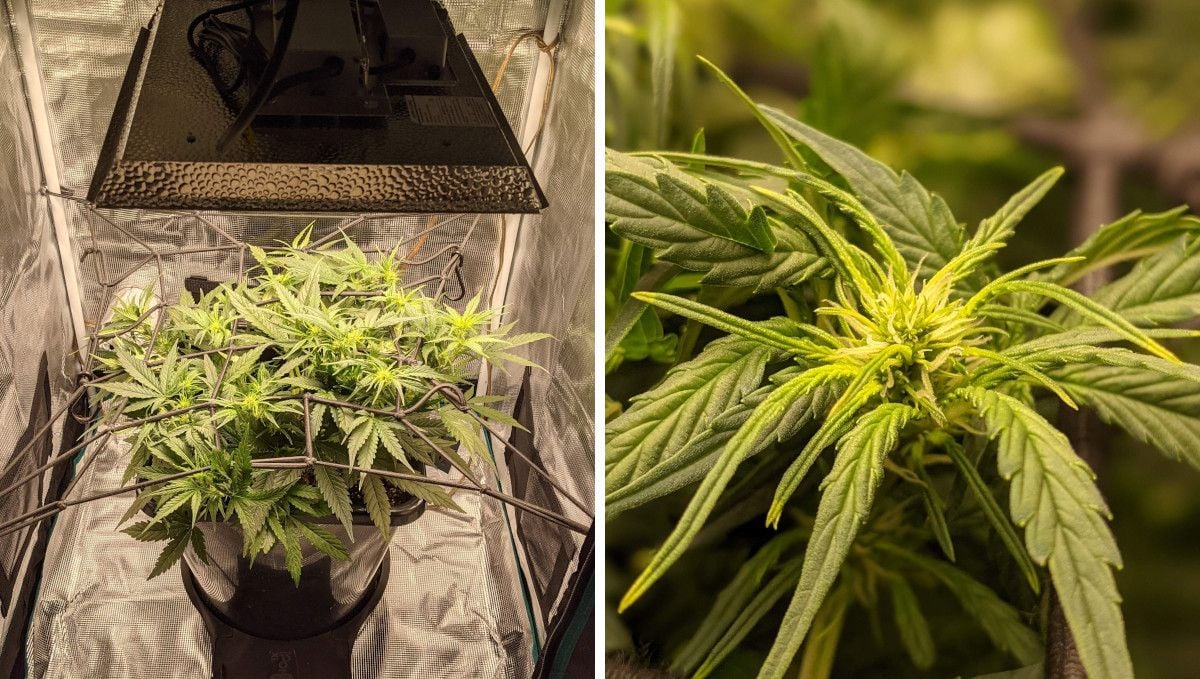
The start of the flowering stage will be quite obvious when the leaves on tops of the plants become thin and curvy. Those of you who know that cannabis flowers are covered in white hairs known as pistils could even think that these are in fact pistils. However, they aren't. Pistils will start to develop on tops in another few days.
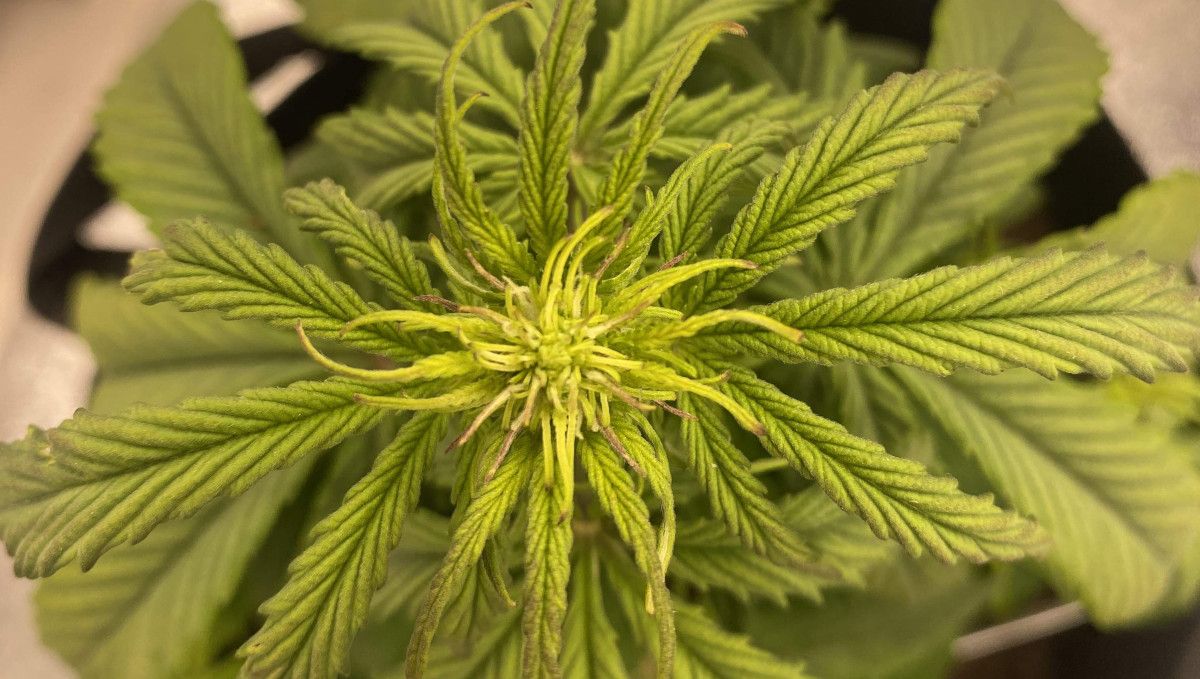
In the photographs below, you can see these white hairs intermingled with thread-like little leaves. You can also see that the color of the tops slightly changes – now, instead of deep green, they look light green or even yellowish.
When marijuana plants transition from the vegetative growth to flowering, their needs in nutrients radically change. Before, you were probably using products that are rich in nitrogen as it's needed in large quantities for the development of branches and foliage. However, now, the plant needs more phosphorus and potassium. These two macronutrients are essential for forming big and dense flowers that we are all craving.
7. Early Flower | Weeks 6-7
During this stage, your autoflowers will continue to reach for the light, so keep a watchful eye to the distance between the lights and the tops. Also pay attention to proper ventilation of your grow room as the plants will take up more and more space and evaporate more and more more moisture, and all this may result in trouble with fungal infections down the road.
| Plant Height: | 65-70cm | Day Temp: | 27°C (81°F) |
|---|---|---|---|
| Distance to Light: | 50 cm | Night Temp: | 20°C (68°F) |
| pH: | 6.3 | Humidity: | 60% |
In the first few weeks of the flowering stage, your autoflower may double or even triple in size – it all depends on the particular genetics as well as your usage of training methods. Growing indoor plants without any training, SOG-style, is a valid and quite effective method if you have enough headspace and your lights are powerful enough to penetrate all the way down to the lowest nodes or the plant.
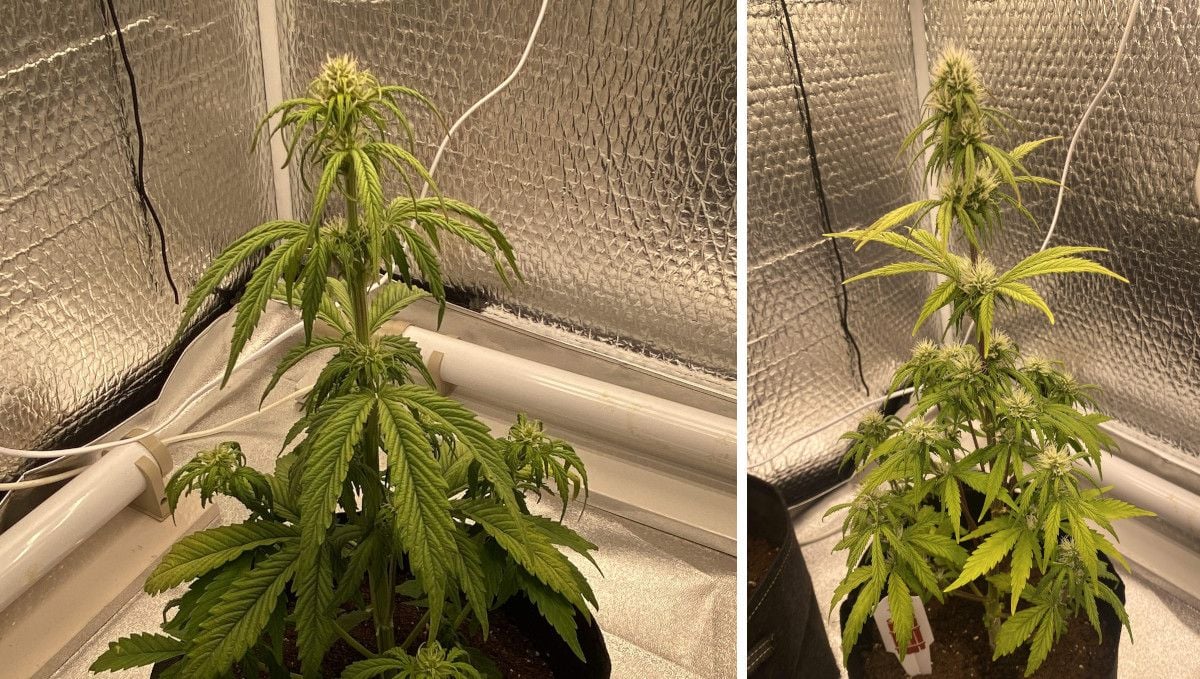
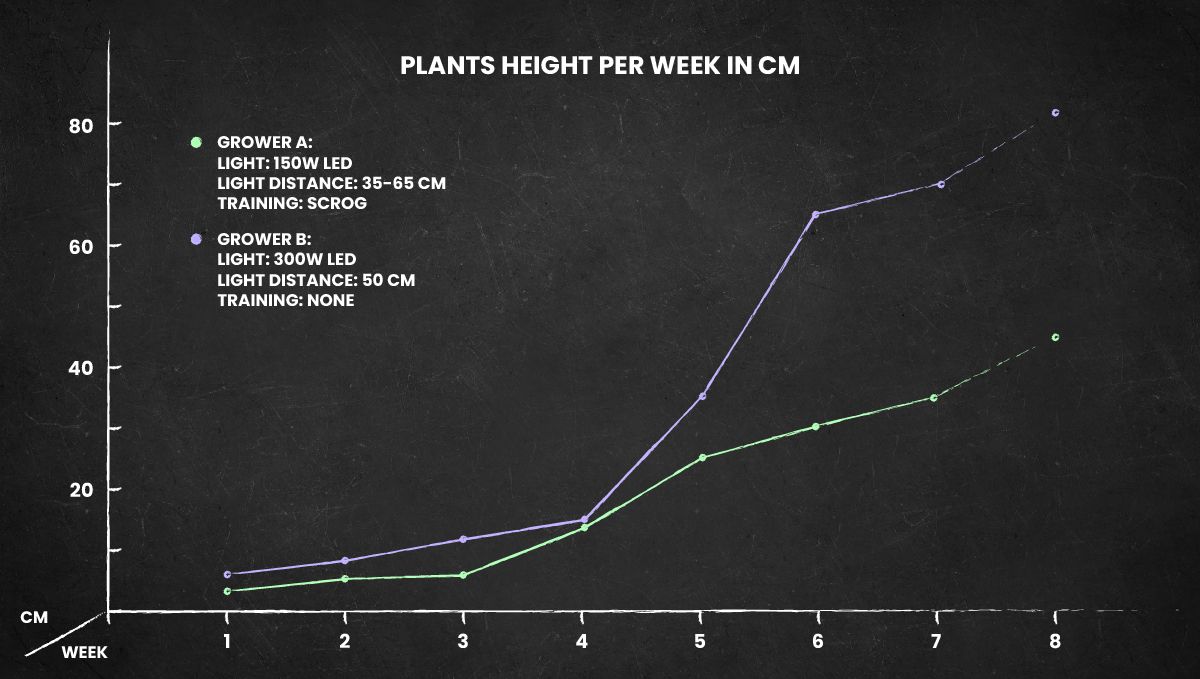
Just bear in mind that in some cases, letting your plant grow naturally is a risky approach as some plants get too tall and grow too close to the lights. However, with Critical Kush Auto, it's seldom the case. It doesn't get very big even if left untrained. In the graph below, you can see how differently the two plants fared: one of them didn't receive any training and the other one was heavily trained with the ScrOG method.
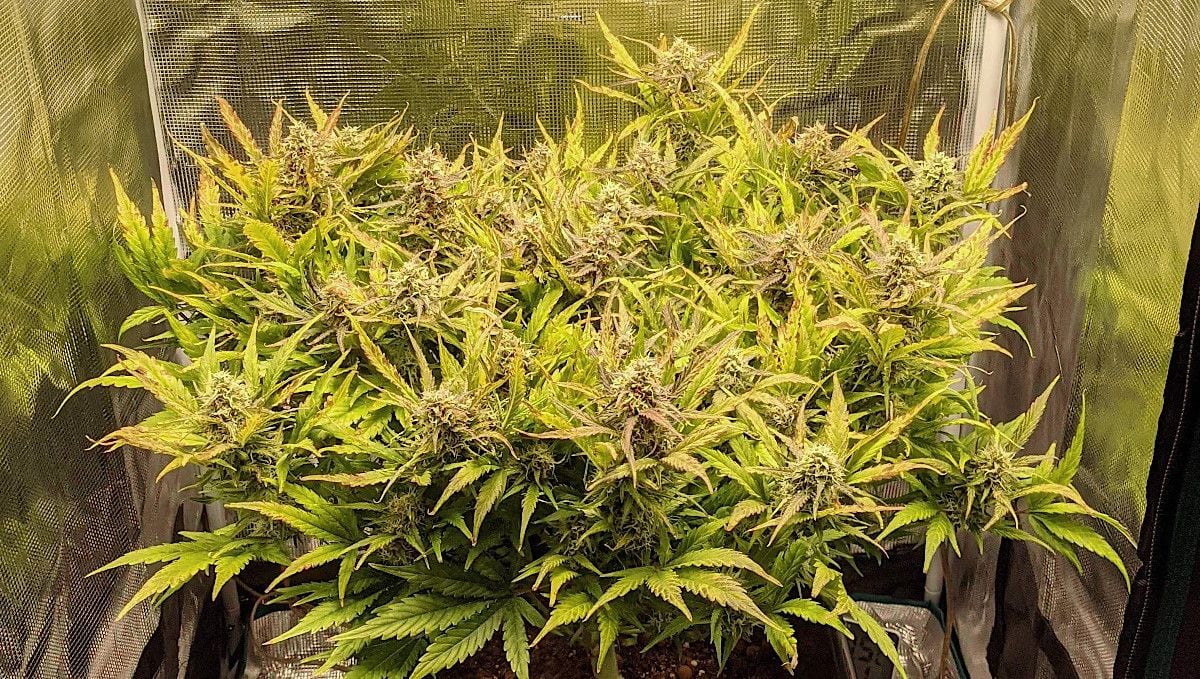
Looking at the photograph below, it's quite hard to believe that it's the same plant that looked so pathetic in the first two weeks from seed and didn't impress with its size in the second half of the first month either. This only shows that Critical Kush Auto is a strain that reserves most of the growth for the latter stages. In other words, it really takes off only after the initiation of flowering.
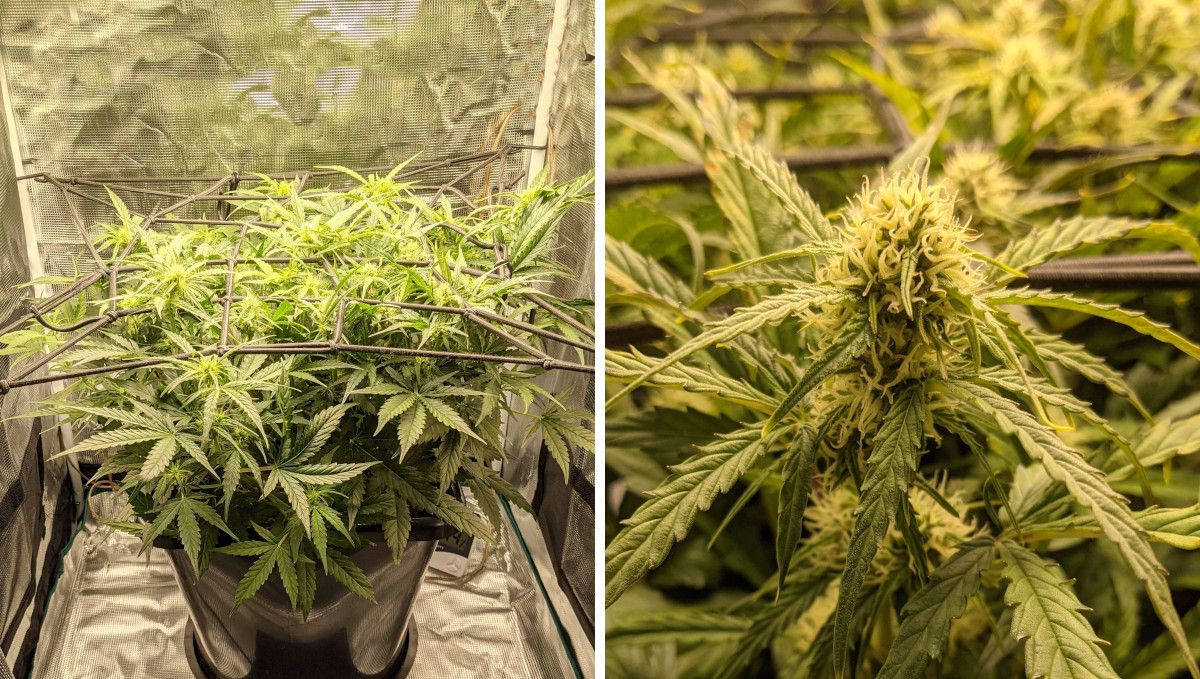
In the photos above, you can also see that the buds start to pack on serious weight around this time. Of course, to achieve this, the plant will need a lot of resources, starting with the powerful light, so dial it up to the max and maintain a proper distance from the plant tops. The needs for water and nutrients will also be the highest during these and subsequent weeks.
8. Mid Flower (Bulk Phase) | Weeks 8-9
When talking about requirements for cannabis cultivation, we haven't yet mentioned pH. At the same time, pH is one of the most important parameters that you need to keep an eye on. For soil grows, keep it within the range of 6.0-6.5 while in coco coir and hydroponics, it should be lower – 5.5 to 6.0.
| Plant Height: | 80 cm | Day Temp: | 27°C (81°F) |
|---|---|---|---|
| Distance to Light: | 50 cm | Night Temp: | 20°C (68°F) |
| pH: | 6.5 | Humidity: | 60% |
In many grow reports that we have seen, Critical Kush Auto plants started to show nitrogen deficiency quite early in the cycle. This deficiency results in the yellowing of leaves, starting from bottom and gradually moving up. There's nothing wrong with some yellowing at the end of the cycle because it means that chlorophyll in leaves degrades, and chlorophyll is something that gives the smoke an unpleasant hay taste. However, it's not the best scenario when the plants start to lose chlorophyll too early on as chlorophyll is what is involved in photosynthesis.
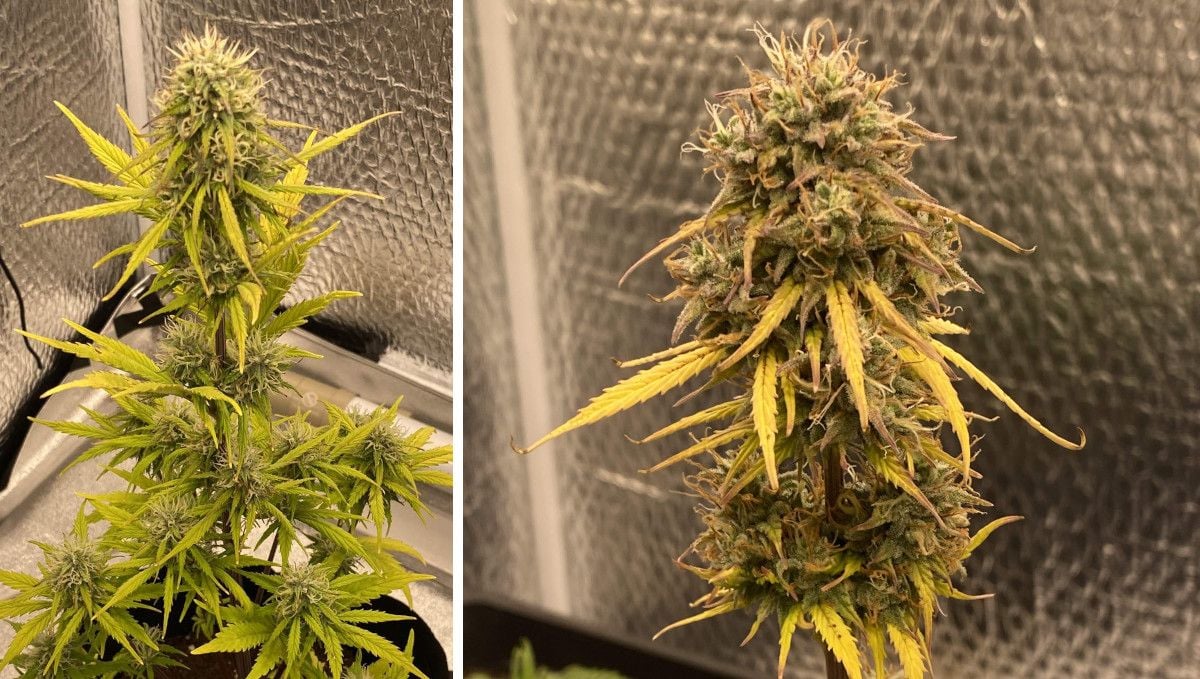
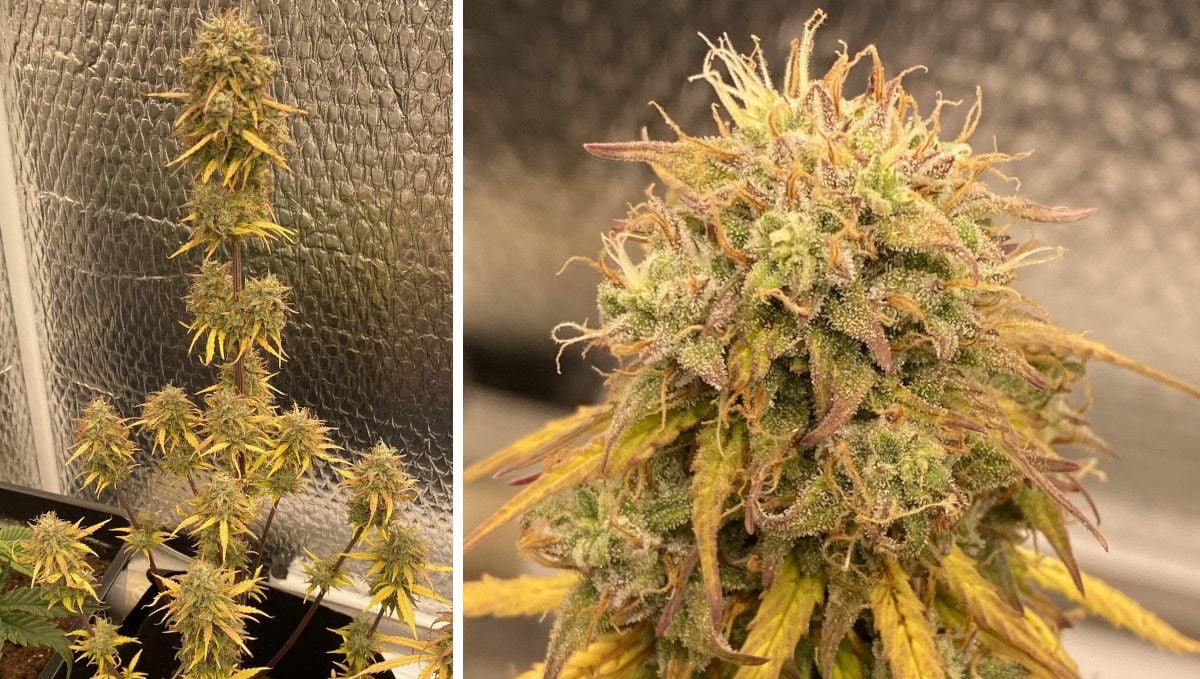
As the plants mature, the buds start to bulk up. This process manifests in their getting bigger and denser. Their color also changes. First of all, the pistils that used to be only white before now start to turn brown one by one. The little leaves sticking from the buds – they are called trim leaves – start to lose their vivid green color and assume different, often exotic-looking hues.
9. Ripening And Harvest | Week 10 (And Beyond)
As the buds get bigger and denser, it becomes more and more important to keep the relative humidity as low as possible, within the optimal range, of course, i.e. around 35%. Along with ventilation efforts, this will prevent, or at least lower, the risk of mold, bud rot, powdery mildew, and other fungal infections from developing inside the flowers.
When deciding on the optimal conditions in your grow space, it's also a good idea to lower the temperature to something like 23°C, plus or minus, as this will help conserve terpenes, THC, and other cannabinoids from evaporation and degradation. It's especially difficult since the plant tops are the closest to the lights now, and the temperature here, at the tops may be too high.
| Plant Height: | 80 cm | Day Temp: | 27°C (81°F) |
|---|---|---|---|
| Distance to Light: | 50 cm | Night Temp: | 20°C (68°F) |
| pH: | 6.5 | Humidity: | 60% |
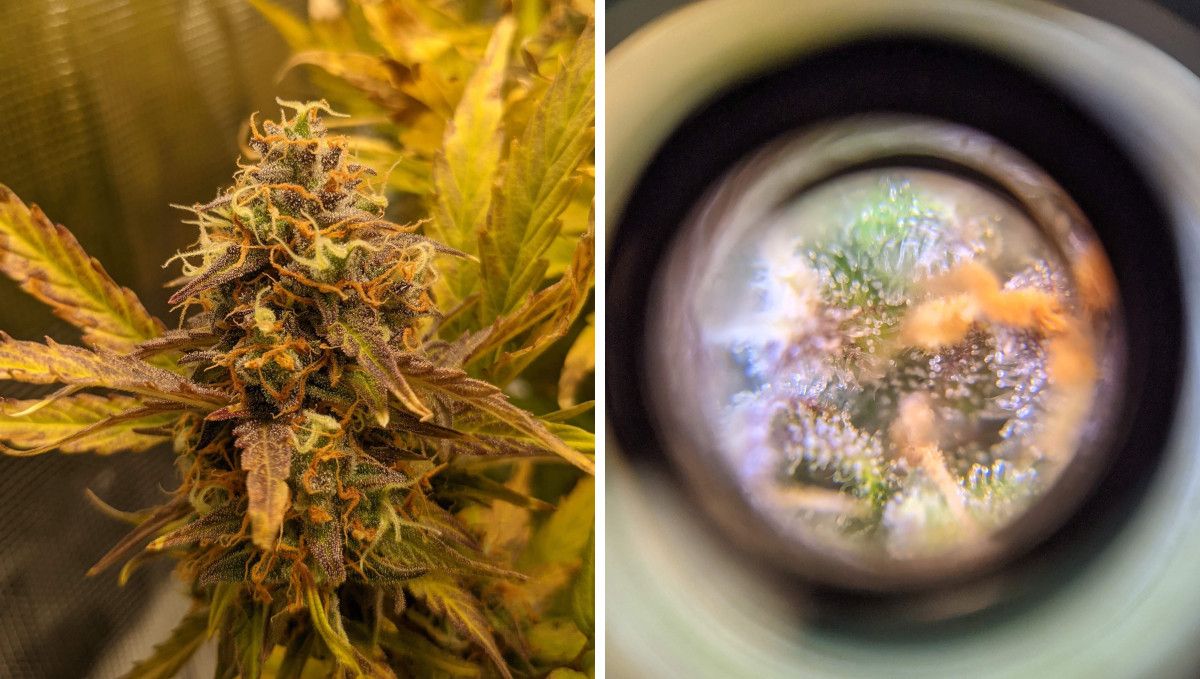
Now that the harvest time approaches, your main concern is not to miss the perfect window to start flushing your plant. There are a lot of preliminary signs that the plant is nearing the end of its life cycle. First of all, it's the fading of the leaves and the change in color in pistils: they start out as greenish-white and then become withered and brown. However, these are very unreliable symptoms, and you'll need a hand microscope to determine the perfect time to cut down your marijuana plants.
By all means, buy a 60x hand microscope, or a jeweler's loupe. Use it to regularly check the state of the trichomes, very small resin glands that cover the buds and trim leaves and make them so sticky. When the trichomes are clear, the plant is still immature. When they are all cloudy and there are some amber ones dispersed among them, the buds have reached peak potency and should be cut down immediately.
However, about a week or two before that happens, you should stop giving your plants any nutrients and use only pure water till the end. This procedure of cleansing your plants from residual chemicals is called flushing.
When the day to cut down your plants finally arrives, maybe you should use a technique that many growers swear by. We mean keeping your autoflower in complete darkness for up to 48 hours. The rationale here is that light degrades THC and its levels only replenish at night, when it's dark. So, when you keep your plants in total darkness, they begin to store up THC and other cannabinoids, and your buds will be the most potent when you finally harvest them. Besides, prolonged darkness is a kind of a stress, and cannabis seems to react to stress with the higher production of THC.
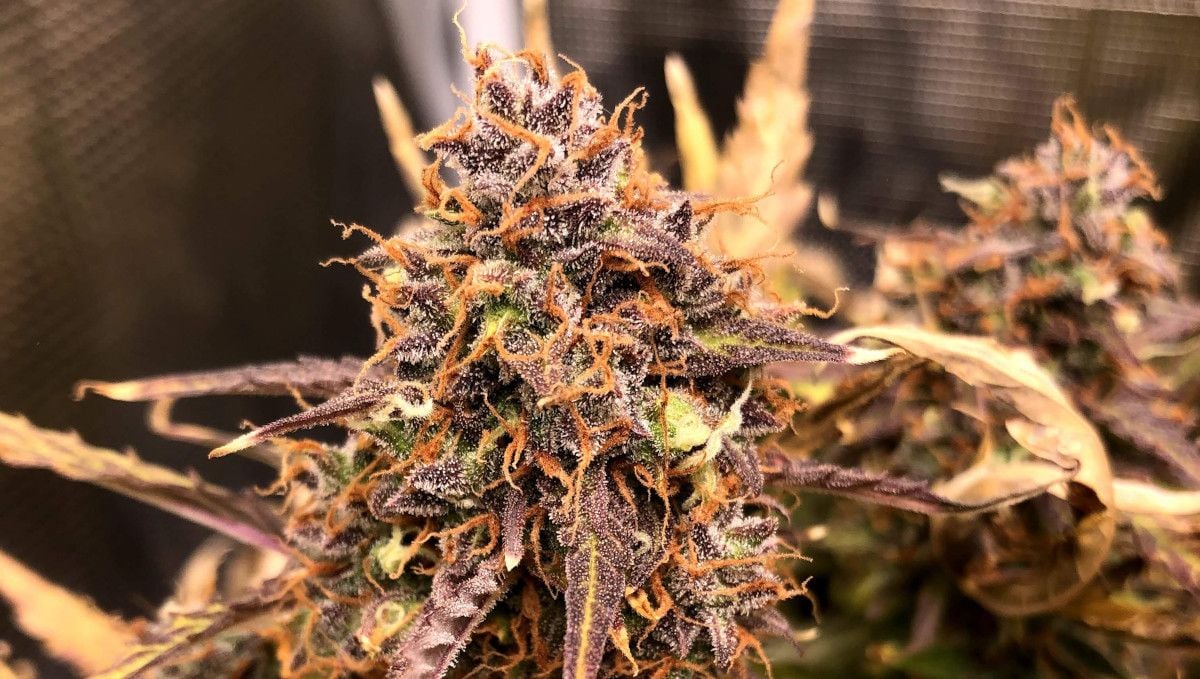
The post-harvest processing of your buds is arguably even more important than cultivation. To ensure the highest quality of the smoke, start with slowly drying the plants in a dark, cool, well-ventilated room for 7-10 day, then cut the half-dry buds from the branches and put them into glass jars to cure. Daily burp them to let out excess moisture, and in 2-3 weeks, you'll get the stuff that will be tastier and even more potent than it was on the day of the harvest.
10. Yield and Smoke Report
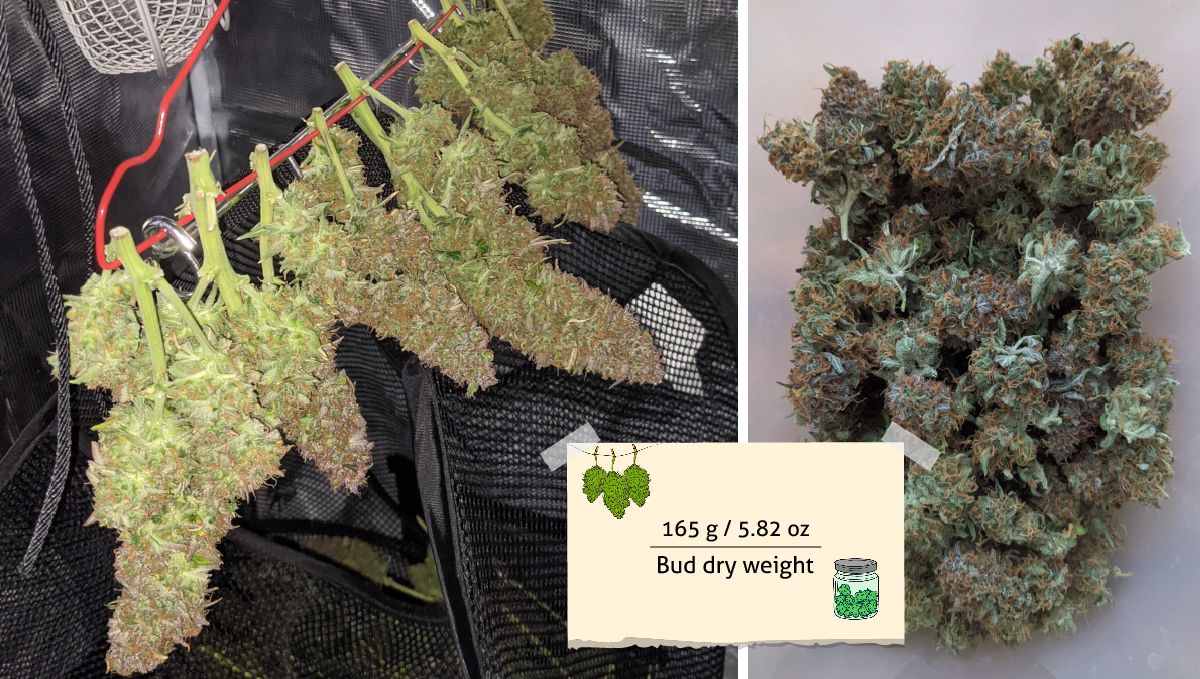
The yield of the first grower in our week-by-week guide was the most impressive – 165g (5.82 oz) from one plant. You can look at the size and texture of the buds in the photographs below – that's what we call bag appeal!
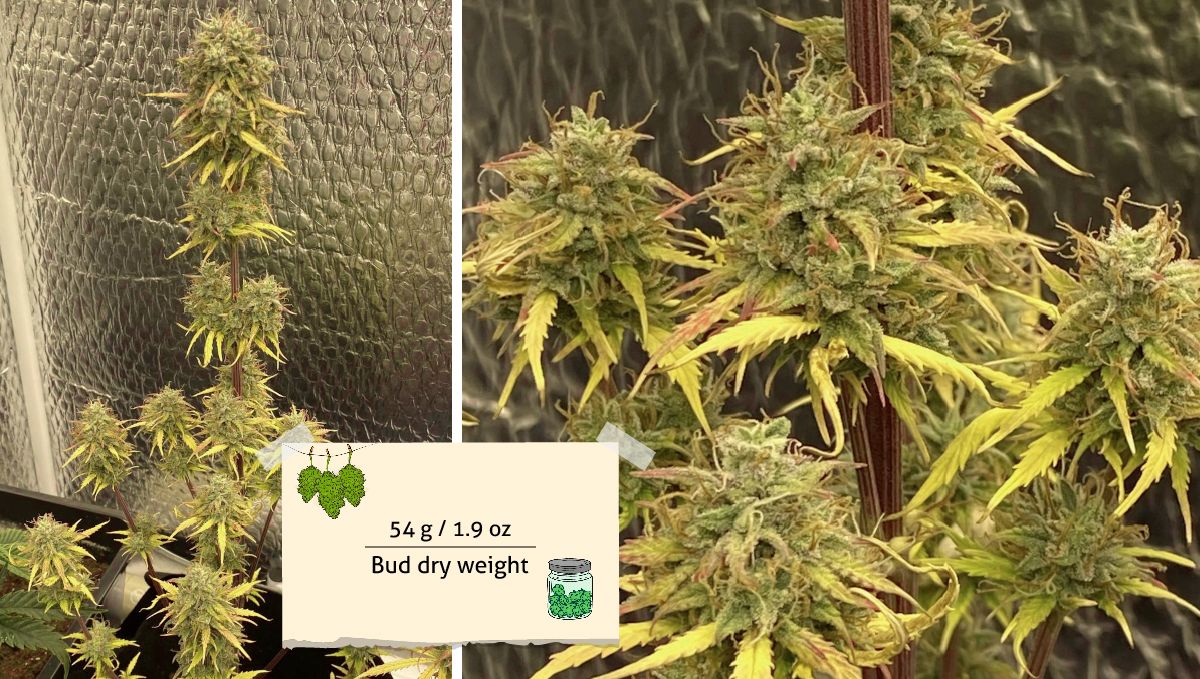
The second grower – with his lack of experience and deliberately low-tech approach – still managed to harvest a decent amount of buds – 54 g (1.09 oz). He must have been quite happy as Critical Kush Auto was just one plant in a SOG garden.
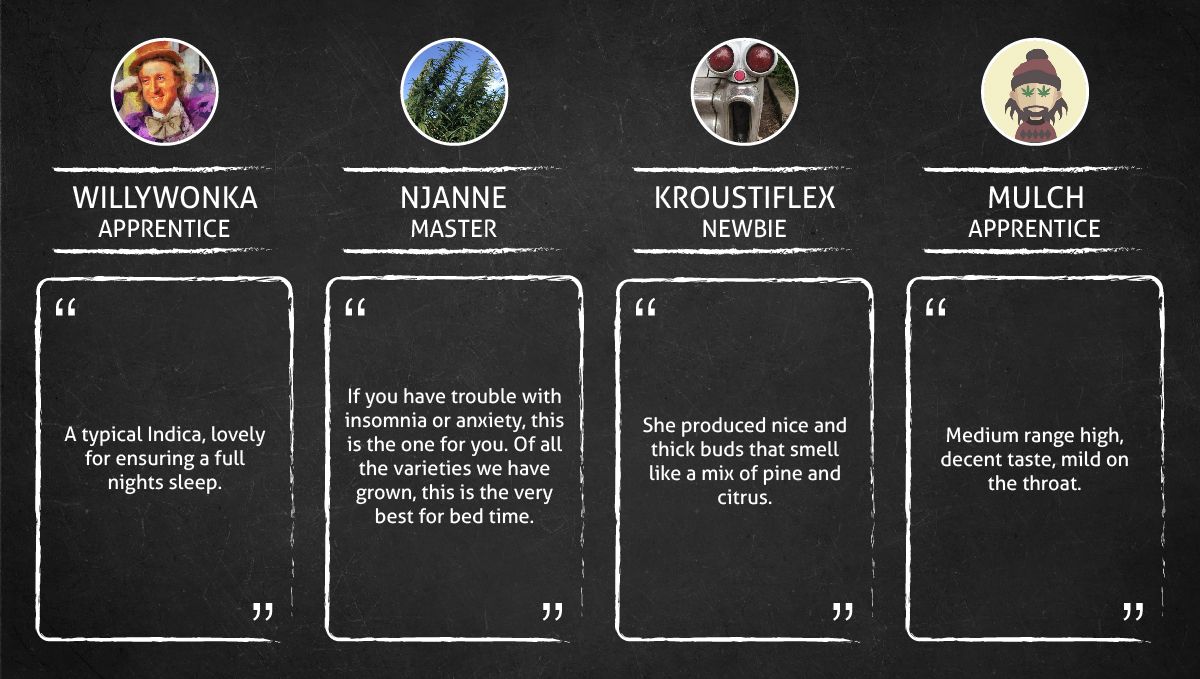
Based on a few reviews we found online, Critical Kush Auto consistently delivers a potent and soothing experience. Users frequently mention its earthy and pine aroma, which sets the stage for what's to come. The strain is renowned for its impressive potency, making it an ideal choice for those dealing with insomnia or anxiety. Most users agree that it's best suited for bedtime use, as it induces a classic Indica high, ensuring a full night's sleep. The taste is often described as a delightful mix of pine, citrus, and skunky flavors, with a smooth and mild throat hit. In summary, expect a strong, relaxing, and flavorful journey with Critical Kush Auto, making it a top choice for winding down and achieving a peaceful night's rest.
11. In Conclusion
We have seen enough of Critical Kush Auto grow journals to get an impression that this is a short but sturdy plant, perfectly fit for cultivating it in confined indoor spaces. It consistently shows the same growth pattern: a disappointingly slow start in the seedling stage and vegetative strange and then the quickening of the pace when the budding starts as if the plant tries to compensate for the time lost in veg.
The strain also demonstrated a tendency to fade early. Probably, you can counteract this by switching to the flowering nutrients later than usual or leaving some nitrogen-rich product in your overall diet till quite late into flowering.
Low-stress training seems all that's needed to keep the height in check, even if your grow tent is very small. In any other respect, Critical Kush Auto is just another great modern autoflower that is easy to grow and productive. Happy growing!






Comments