Mexican Airlines Auto Cannabis Strain Week-by-Week Guide

- 1. Grow specification
- 2. Grow set up
- 3. Germination and seedling stage | week 1
- 4. Early veg | week 2
- 5. Mid veg | weeks 3-4
- 6. Transition (pre-flower) | week 5
- 7. Early flower | weeks 6-7
- 8. Mid flower (bulk phase) | weeks 8-9
- 9. Ripening and harvest | week 10 (and beyond)
- 10. The outcome
- 10. a. Mexican airlines auto yield
- 10. b. Mexican airlines auto smoke report
- 11. In conclusion
If you are looking for a Sativa-dominant strain that will take you on a trip to the sunny beaches of Mexico, look no further than Mexican Airlines. This strain is a cross between Mexican and Colombian Gold, two legendary Sativas that produce a powerful and uplifting high. Mexican Airlines has a delicious flavor of earth and citrus, with a hint of other exotic fruits. It is easy to grow and has compact buds and blue-white trichomes. Whether you want to boost your creativity, have fun with friends, or experience some psychedelic effects, Mexican Airlines is the strain for you.
You should try growing Mexican Airlines Auto yourself if you want a strain that will reward you with a huge mass of amazing buds. In this article, we will show you how this strain progresses from a sprouted seed to a fully grown plant with heavy branches full of resinous flowers. This will inspire you to achieve similar results and savor the spicy, citrusy flavor and uplifting effects of Mexican Airlines Auto.
1. Grow Specification
Mexican Airlines is a hybrid with 65% Sativa and 35% Indica genetics. It is easy to grow, with an XL size and a height of 60-120 cm. It can yield 400-500 g/m2 indoors, and 50-200 grams per plant outdoors. It takes about 10 weeks to flower, but the wait is worth it.
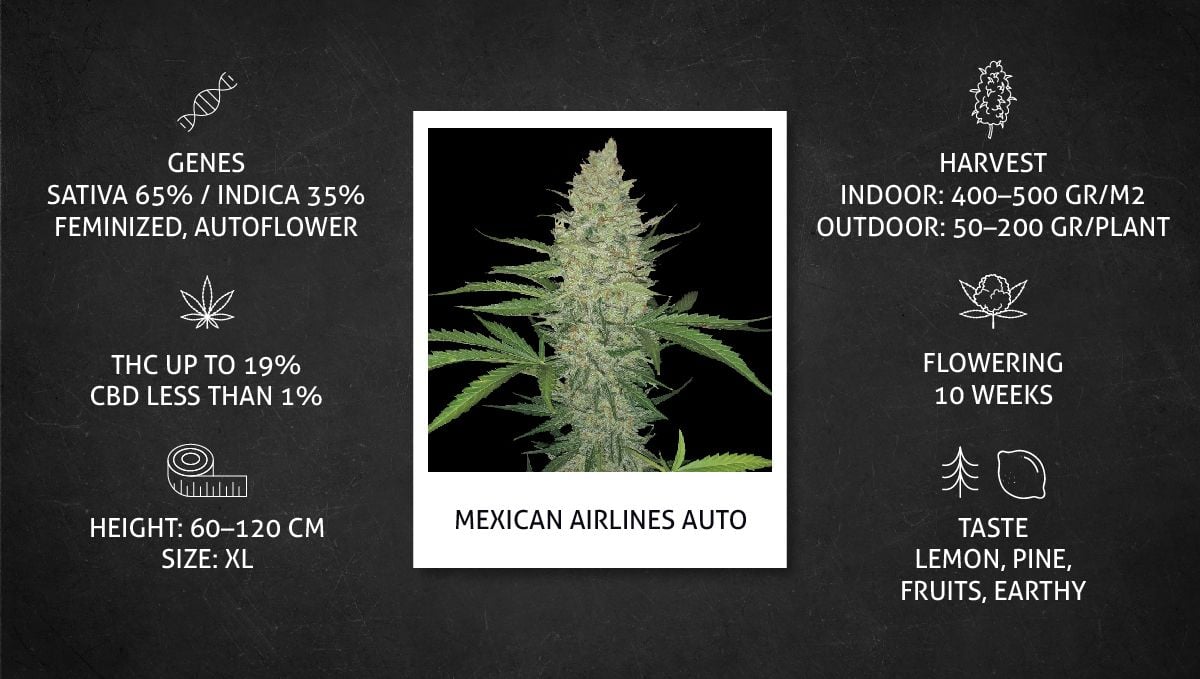
Mexican Airlines Auto has a high THC level of up to 19%, and a low CBD level of less than 1%. This means that you can expect a powerful and uplifting high, with some psychedelic effects. Mexican Airlines has a delicious flavor of lemon, pine, fruits, and earthy notes.
2. Grow Set Up
Mexican Airlines Auto is a popular strain from Fast Buds that growers have cherished over the years. The great news for you is that there's a wealth of information available online if you're interested in cultivating this autoflower yourself. In this guide, we have handpicked four grow diaries from the numerous options out there. We specifically chose diaries where growers implemented the best cultivation practices, ensuring you can confidently follow their methods and achieve exceptional results too.
| Grow Space | Light | Medium | |
|---|---|---|---|
| A | 1 m2 | 600W HID | BioBizz Coco |
| B | 0.9 m2 | 240W HID | Soil |
| C | 0.24 m2 | 125W LED | Coco |
| D | 2.25 m2 | 1000W LED | Soil |
Moreover, the examples we have included showcase various settings and setups. Our aim was to assist you in adapting this fantastic autoflower to suit your unique growing style. However, rest assured that Mexican Airlines Auto has consistently proven to be a versatile plant capable of producing high-quality yields in any conditions and for growers of any expertise level.
3. Germination And Seedling Stage | Week 1
Creating optimal conditions in your indoor grow space is crucial for successful cannabis cultivation, particularly during the seedling and young plant stage. Paying special attention to temperature and humidity is key to ensuring the health and resilience of your seedlings.
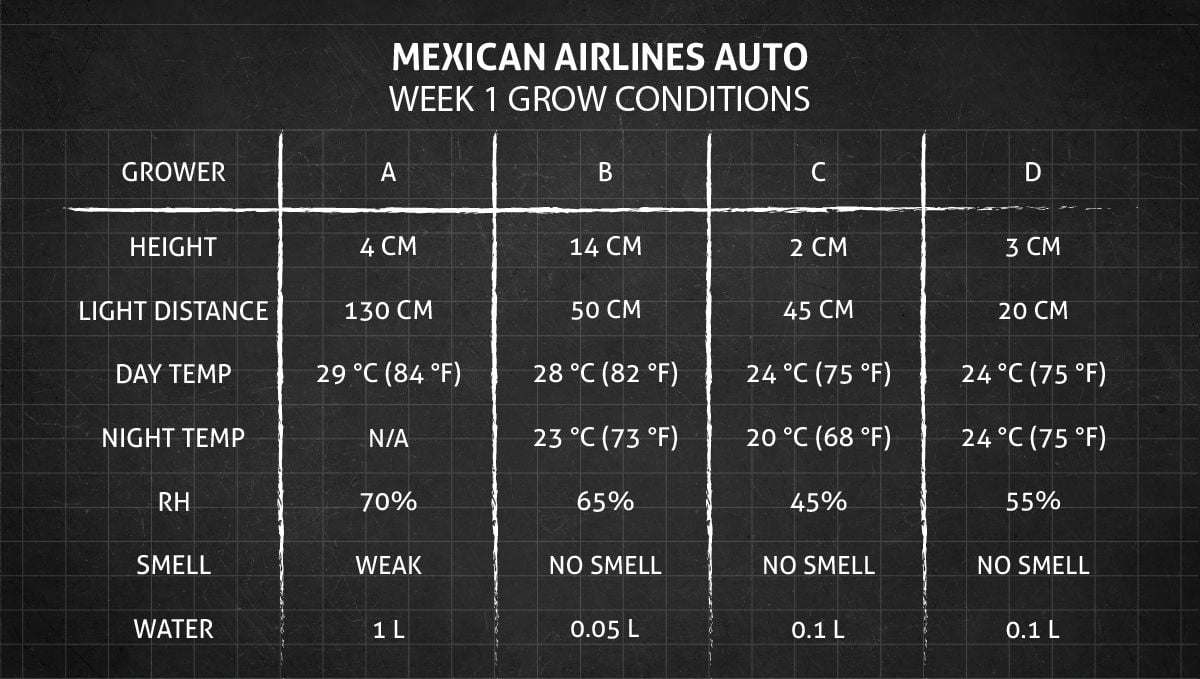
For beginner gardeners, germinating cannabis seeds can be a source of concern and anxiety. We understand the value of your precious seeds and the desire to avoid any mishaps. However, rest assured that high-quality seeds from reputable breeders, such as Fast Buds, possess remarkable durability and vitality, making the germination process relatively straightforward.
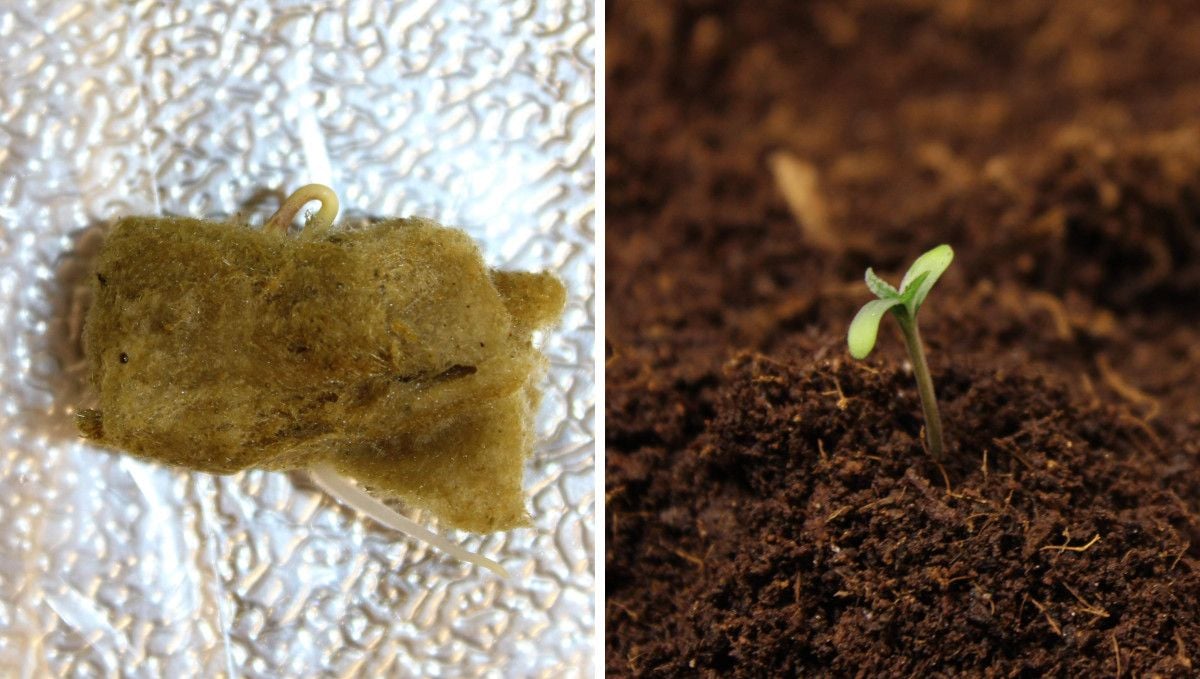
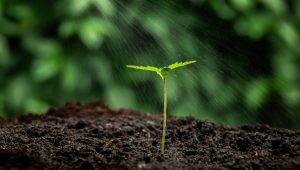
In reality, you only need three essential elements: warmth, moisture, and darkness. By providing these conditions, your seeds can sprout within a span of 1-3 days. Numerous methods can create these conditions, but one of the simplest involves placing the seeds between moist paper towels and enclosing them between plates in a warm, dark location.
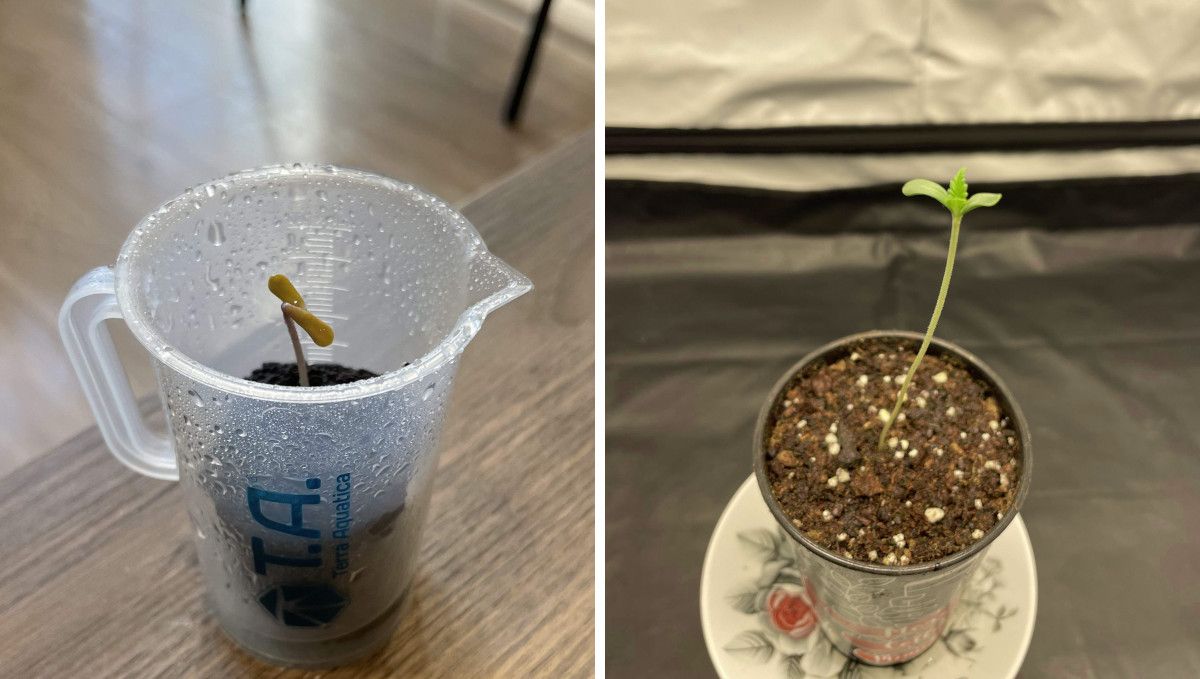
Some growers prefer to pre-soak their seeds in a glass of water (sometimes, allowing them to float until they crack open and reveal the taproot). This is also a legitimate germination technique. Whichever method you choose, remember that warmth, moisture, and darkness are the common requirements across all approaches.
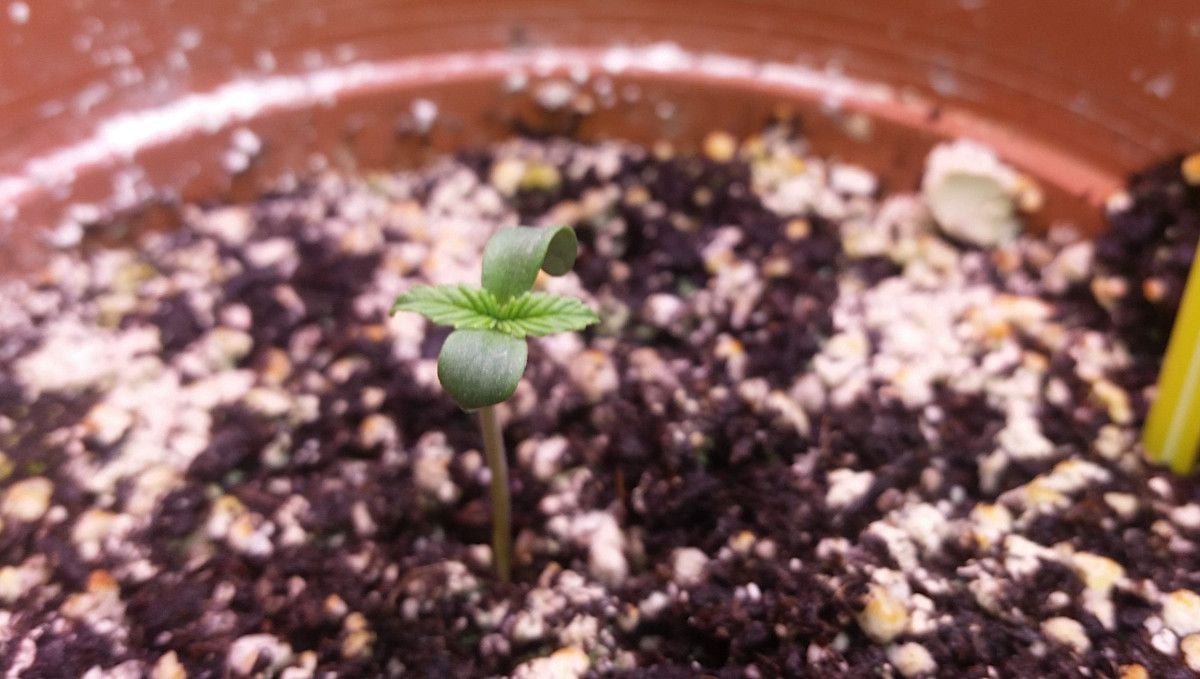
Once the seed has successfully sprouted, with the taproot reaching approximately half an inch (a little over 1 cm) in length, it's time to transplant it into your chosen growing medium. When cultivating autoflowers, it is advisable to use the final, larger pot right from the beginning. This eliminates the risks associated with repotting.
However, with some experience and skill, you can also start your autos in smaller containers like solo cups, offering certain advantages such as easier watering and increased convenience.
4. Early Veg | Week 2
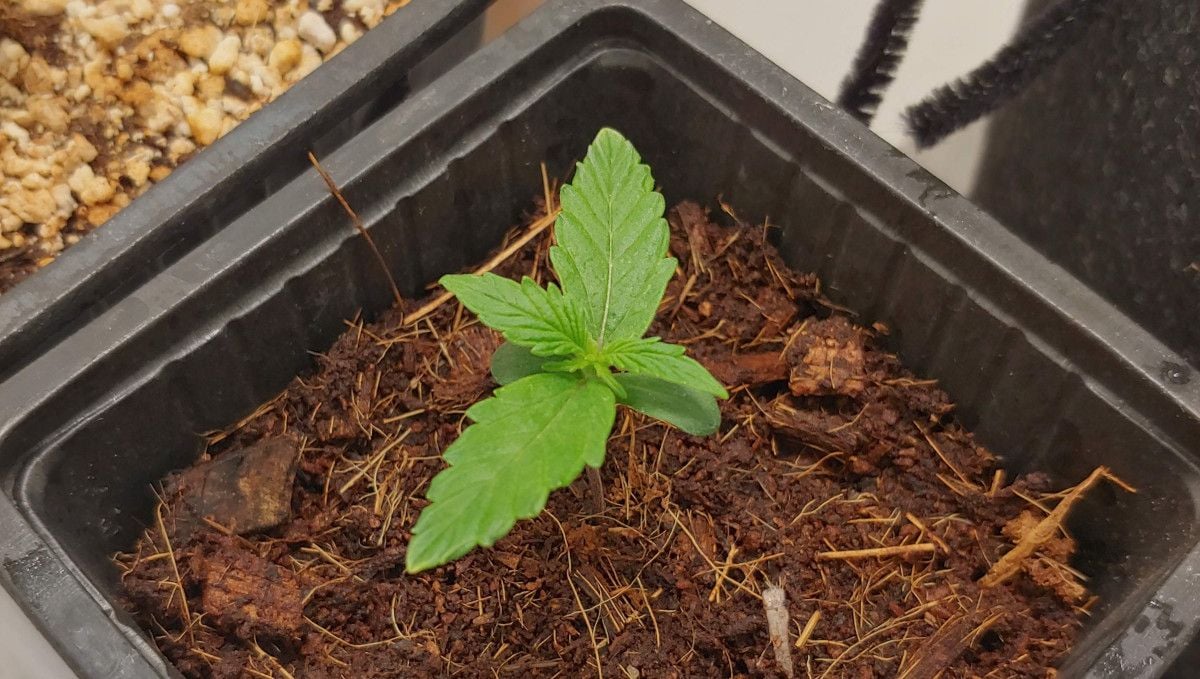
As you enter the second week from seed, although the seedling may still appear small to you, the root ball has significantly developed, providing increased resilience to the above-ground portion of the plant. This allows it to tolerate slightly cooler temperatures and lower relative humidity compared to earlier stages.
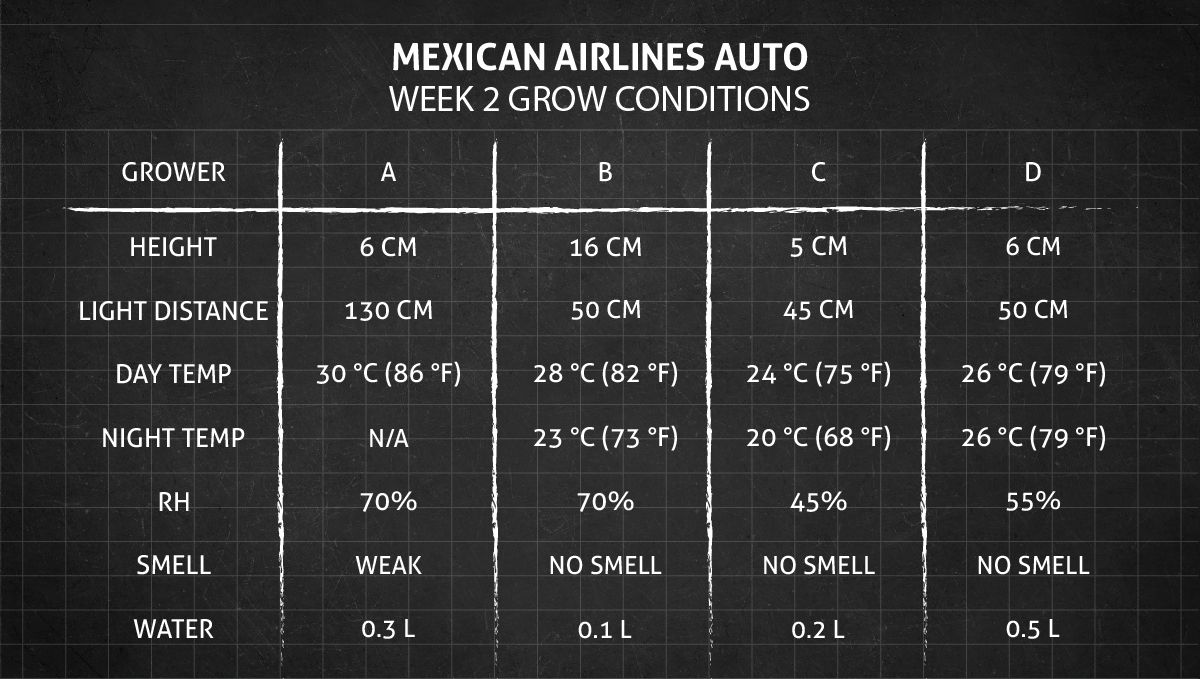
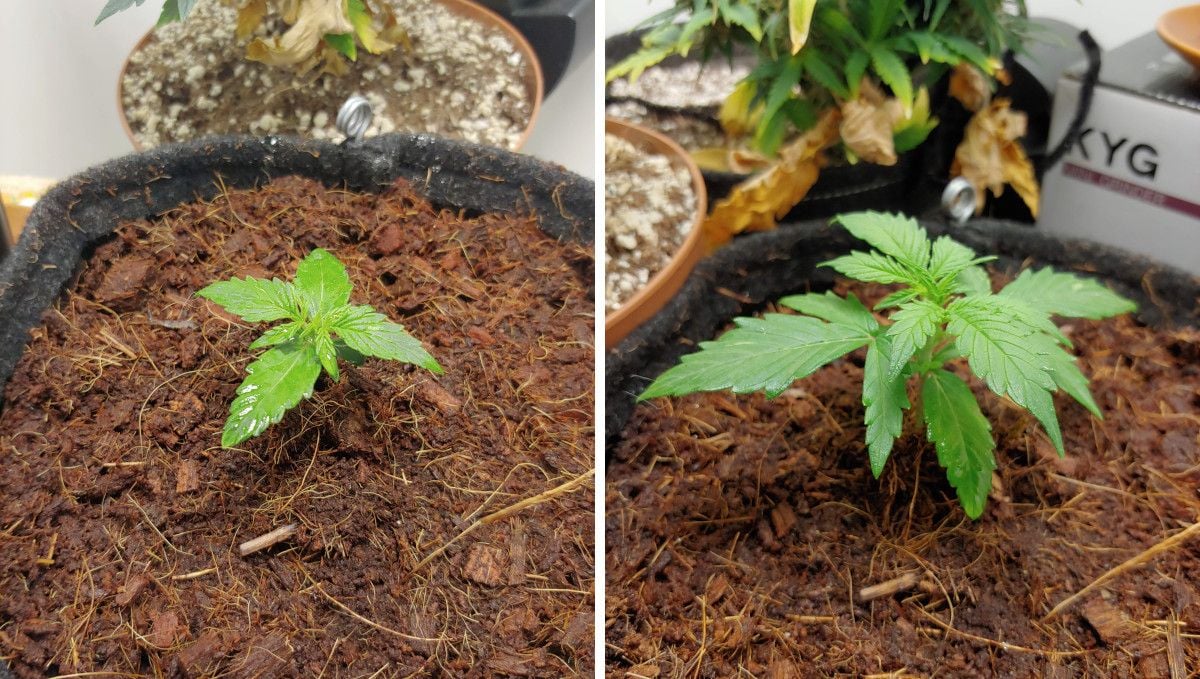
During week 2, you'll see a noticeable acceleration in the plant's growth rate. By day 10, the second set of leaves should catch up in size with the first set and then surpass it. This serves as a helpful benchmark to evaluate whether the conditions you've provided are favorable for your autoflower.
Continuing to monitor your light setup is crucial at this stage. You want to avoid the seedling growing excessively tall and spindly, as it may droop and require support.
Conversely, you also want to prevent the plant from becoming too short, as this may indicate that it's exposed to too much light. Adjust the height or intensity of your light accordingly.
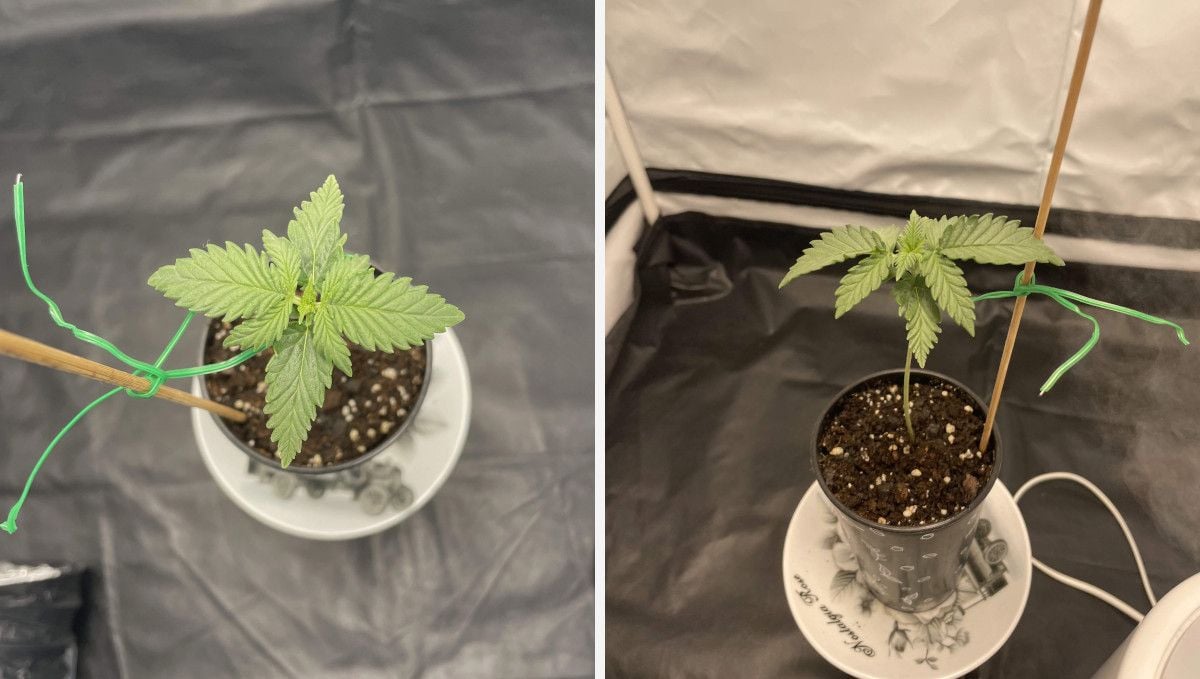
Many growers prefer to refrain from training their plants during this period, allowing them to grow naturally. However, if you have limited vertical space in your grow area, you may consider implementing canopy management techniques even at this early stage. For autoflowers, the safest approach is to gently bend and tie down the main stem. Experienced growers may experiment with more advanced methods such as FIMing or topping, but it's essential to ensure the plant is robust and healthy before subjecting it to any stress.
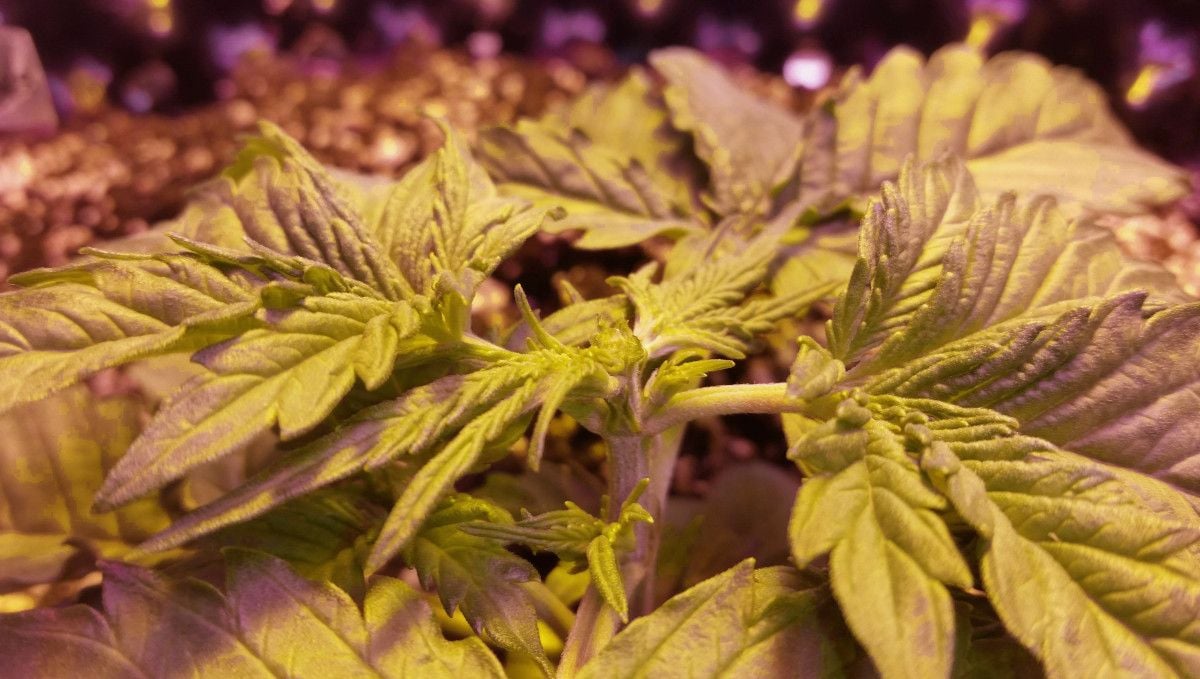
In the first week, soil growers typically refrain from adding nutrients to their watering routine. However, starting from the second week, some gardeners opt to introduce nutrients. By this time, the seedling may have already utilized a portion or all of the stored nutrients within the medium, potentially causing nutrient deficiencies, especially if you're using a small starting container like a solo cup.
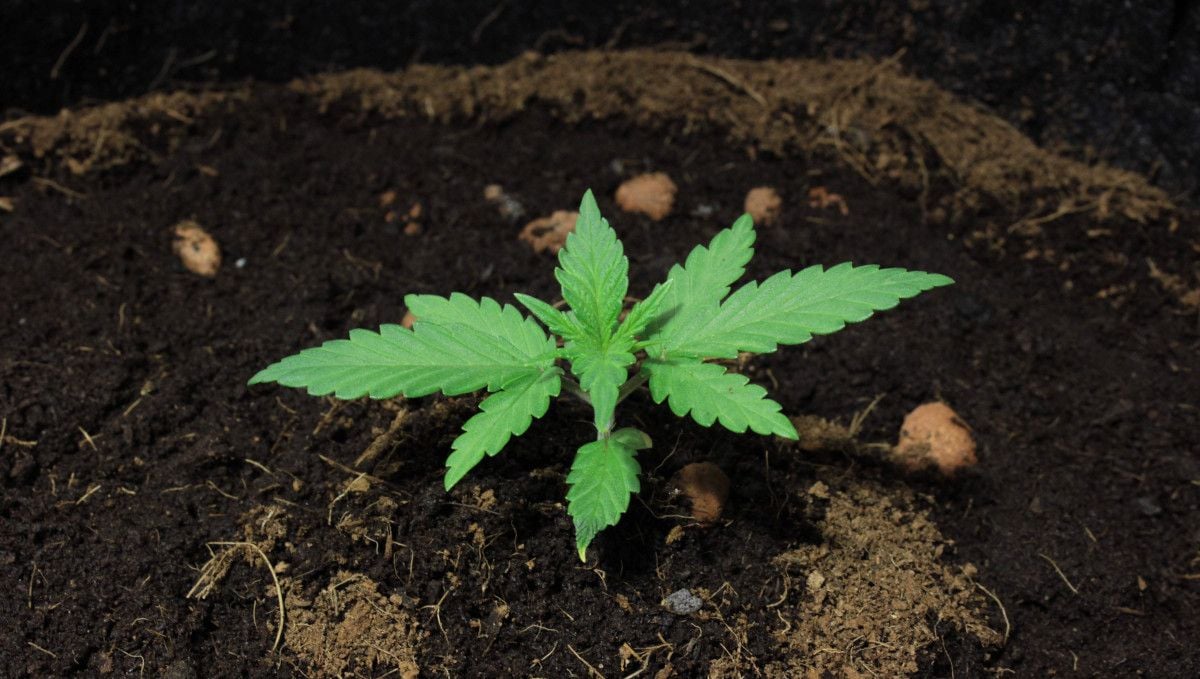
In larger pots with nutrient-rich soil, plain water can sustain the plant throughout the vegetative stage and even well into flowering. Some organic cultivation enthusiasts take it a step further and create "super soil," which allows them to rely solely on compost teas from seed to harvest, eliminating the need for additional nutrients.
5. Mid Veg | Weeks 3-4
In weeks 3 and 4, your autoflower enters a stage of explosive vegetative growth. While maintaining a consistent indoor environment is beneficial, don't fret if you struggle to achieve perfect temperature and humidity levels. Your plant has matured enough to adapt to a broader range of conditions.
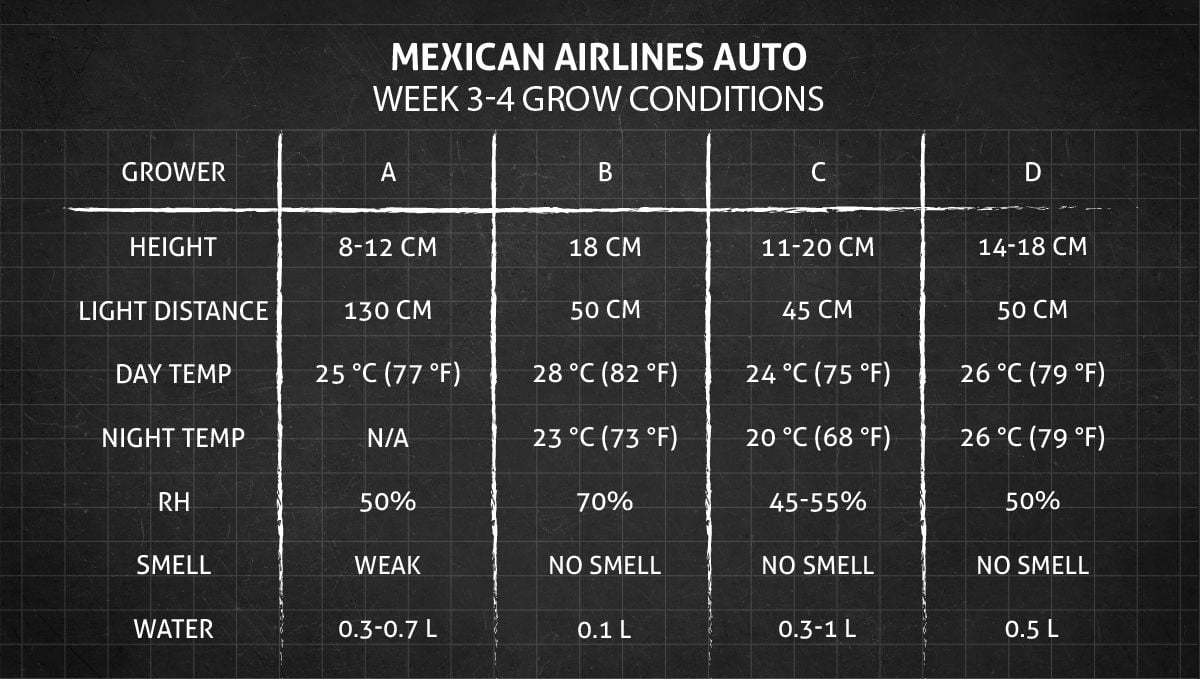
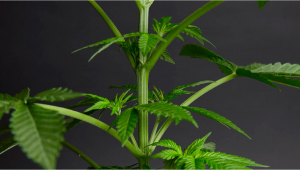
During this phase, you'll witness remarkable development in your autoflower. The fan leaves grow larger, and the number of branches multiplies. Your tiny seedling transforms into either a tall, slender plant or a compact, dense bush.
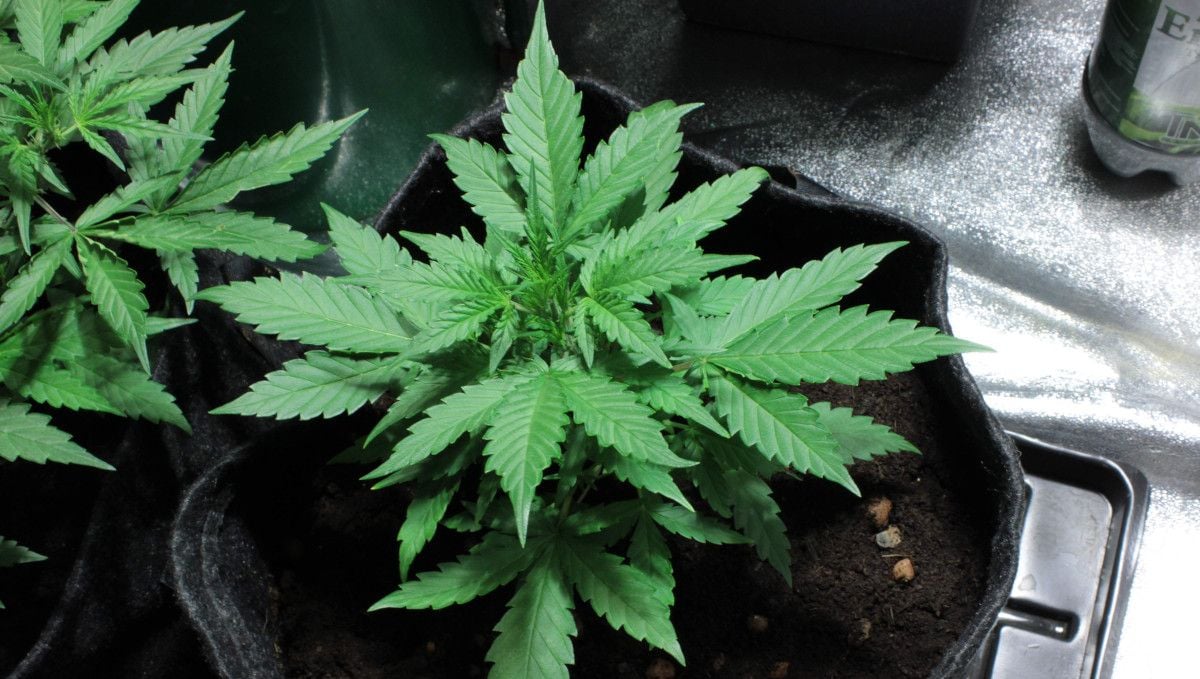
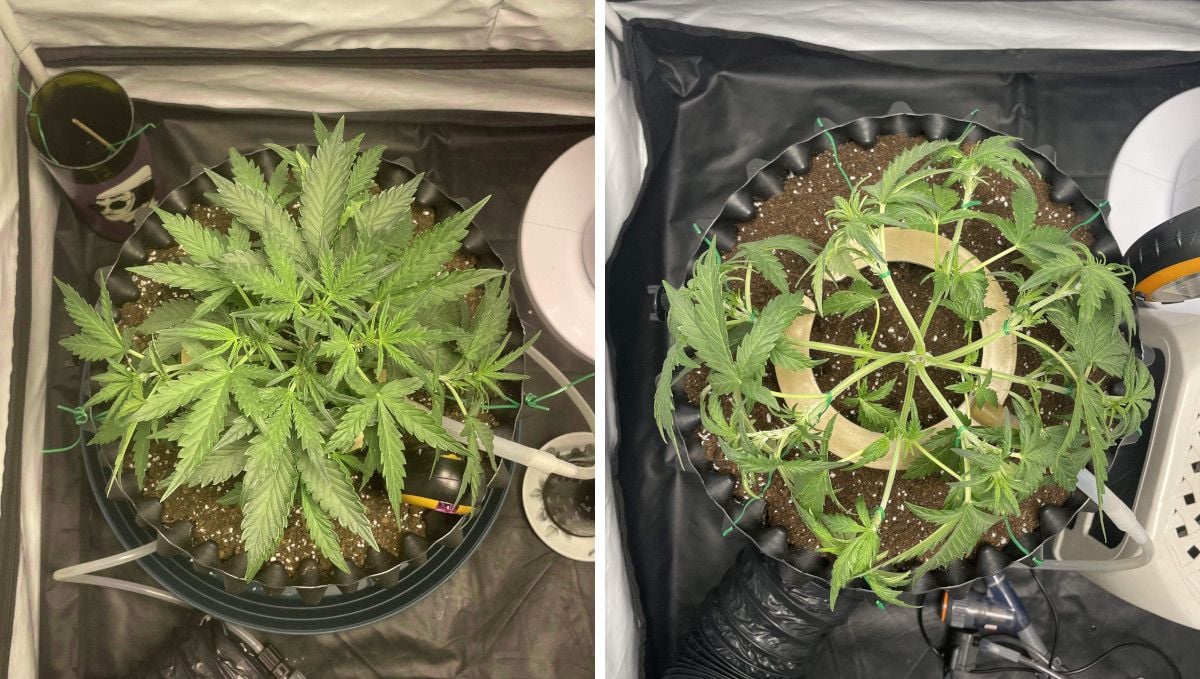
If you enjoy training your plants, now is the opportune moment to shape your canopy according to your preference. This not only prevents space constraints during later stages but also ensures that every future bud site receives optimal light coverage, resulting in firm and resinous flowers.
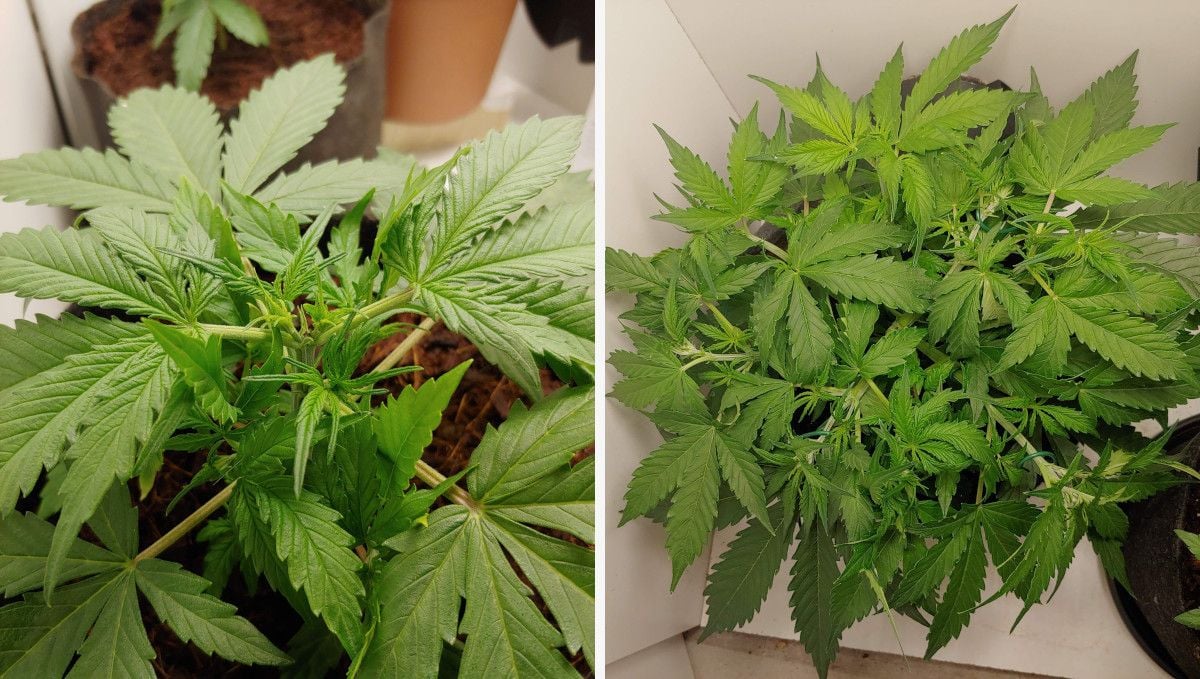
Modern autoflower strains, like the exceptional Mexican Airlines, exhibit remarkable resilience and adaptability to various training methods. However, it's important to note that low-stress training (LST) techniques are the safer choice for autoflowers, while high-stress training (HST) methods should only be employed when necessary or if you possess confident growing skills.
Feeding your cannabis plants becomes a significant consideration as their growth accelerates. During the vegetative stage, cannabis has a voracious appetite for nitrogen (N), with phosphorus (P) and potassium (K) also playing important roles but in smaller quantities. Remember to check the NPK values on fertilizer bottles to ensure the right product selection for the vegetative phase.
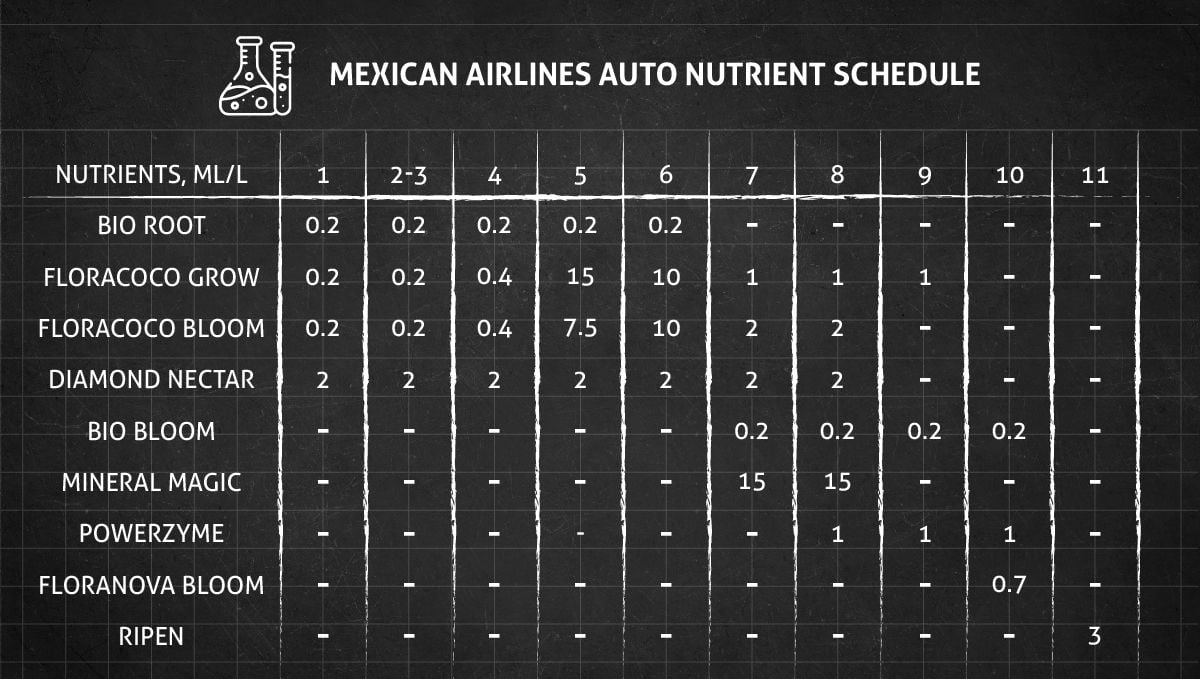
Maintaining a straightforward feeding regimen is advisable, particularly for beginners. Generally, investing in two formulas—one for vegetative growth and another for flowering—suffices. As you gain experience, you may explore additional products that stimulate, enhance, and regulate growth. Refer to the table provided above for a sample nutrient schedule from one of our featured grows.
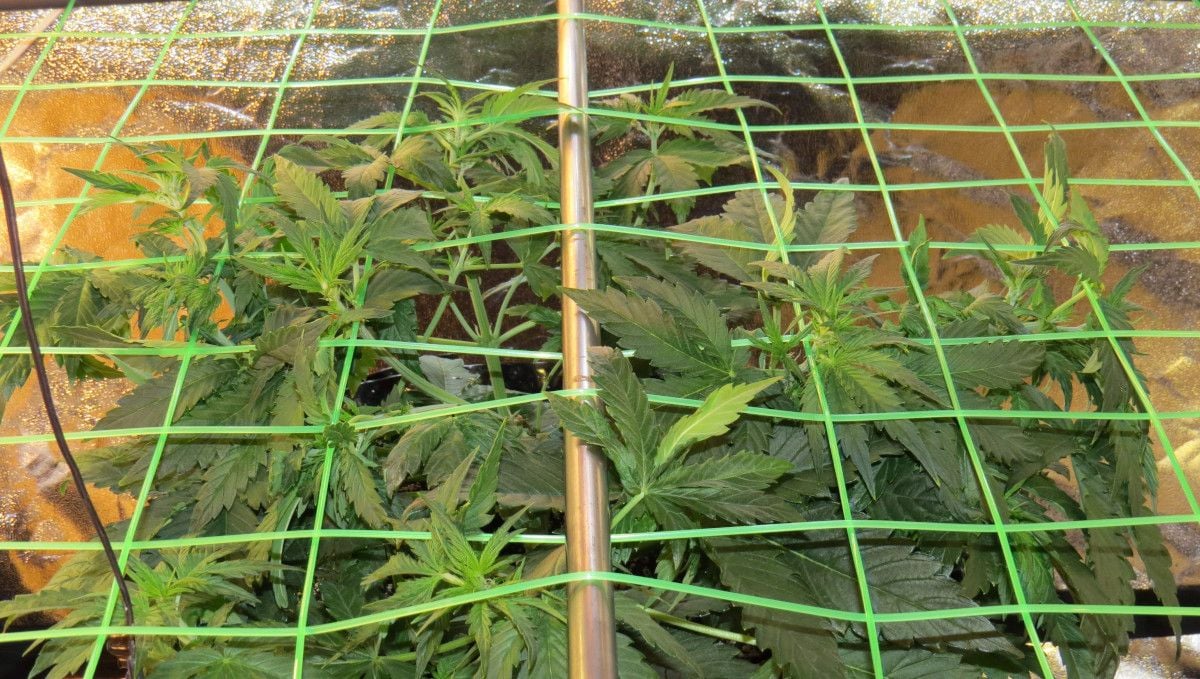
Regardless of the fertilizers you choose, remember that with cannabis, especially autoflowering varieties, it's better to err on the side of caution and provide a conservative nutrient diet. Overfeeding can be detrimental, so it's wise to exercise moderation and prioritize the health and well-being of your plants.
6. Transition (Pre-Flower) | Week 5
During the pre-flowering stage, it's still essential to maintain a consistent environment. Aim for temperatures between 73-77°F (23-25°C) during the day and slightly cooler at night. Relative humidity can be decreased to around 40-50%. As for light requirements, continue providing 18-24 hours of light per day as you did in the previous stages – autoflowers don’t need a change in the light schedule to start budding.
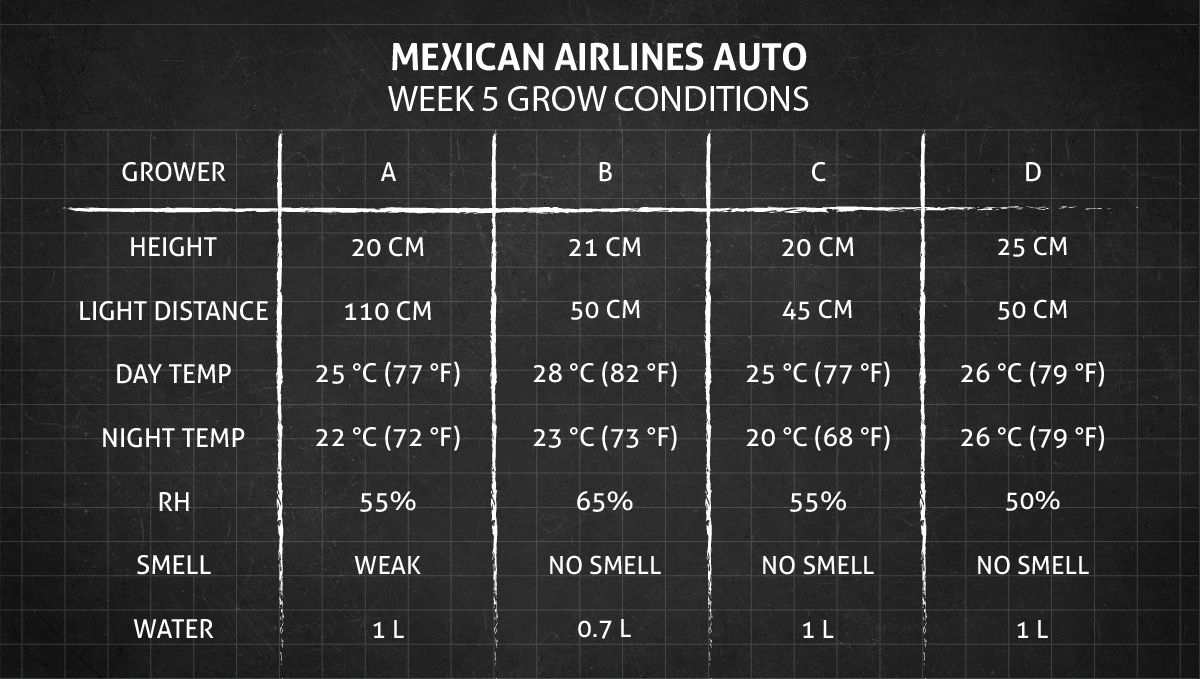
Pre-flowers that give the name to this stage are tiny white hairs that you will see first in the middle nodes and later at the tops. In photoperiod strains, this stage can continue indefinitely – if you give your plants more than 14-16 hours of light a day. But autoflowers, regardless of the light schedule – will begin flowering in earnest soon after.
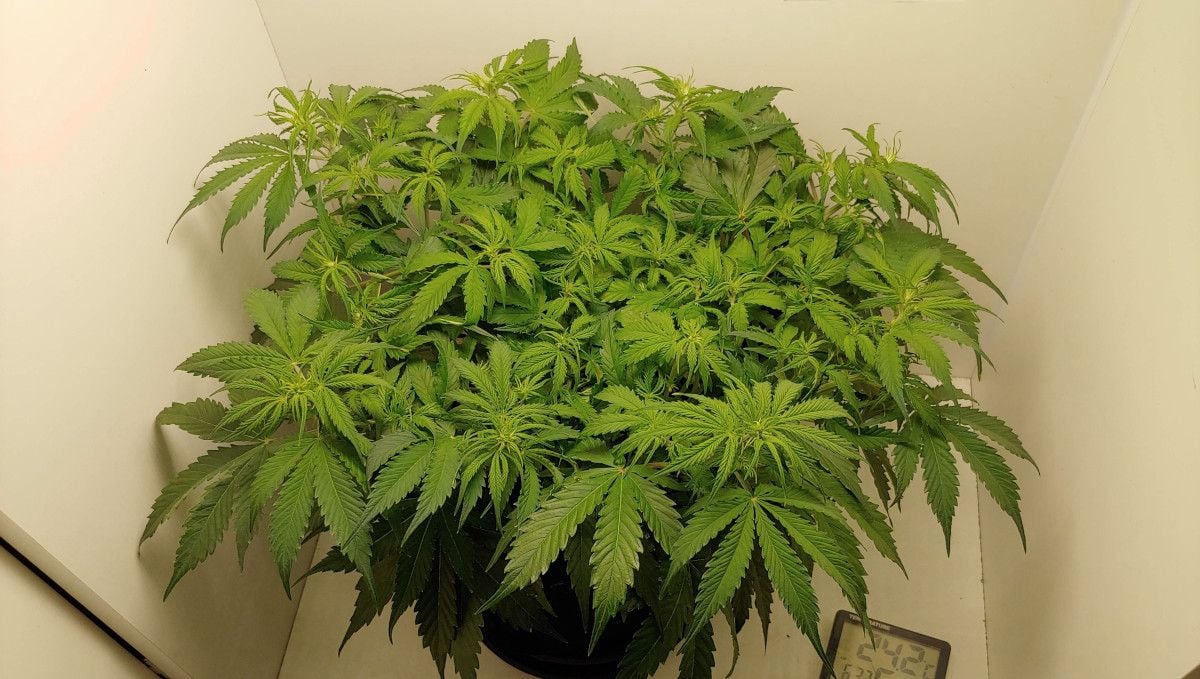
It’s just a matter of days before the tops become first yellowish and then begin to bristle with all those white hairs and thread-like thin leaves. For you, it will be a clear sign that your autoflower has come on the last leg of its journey to harvest – the flowering stage.
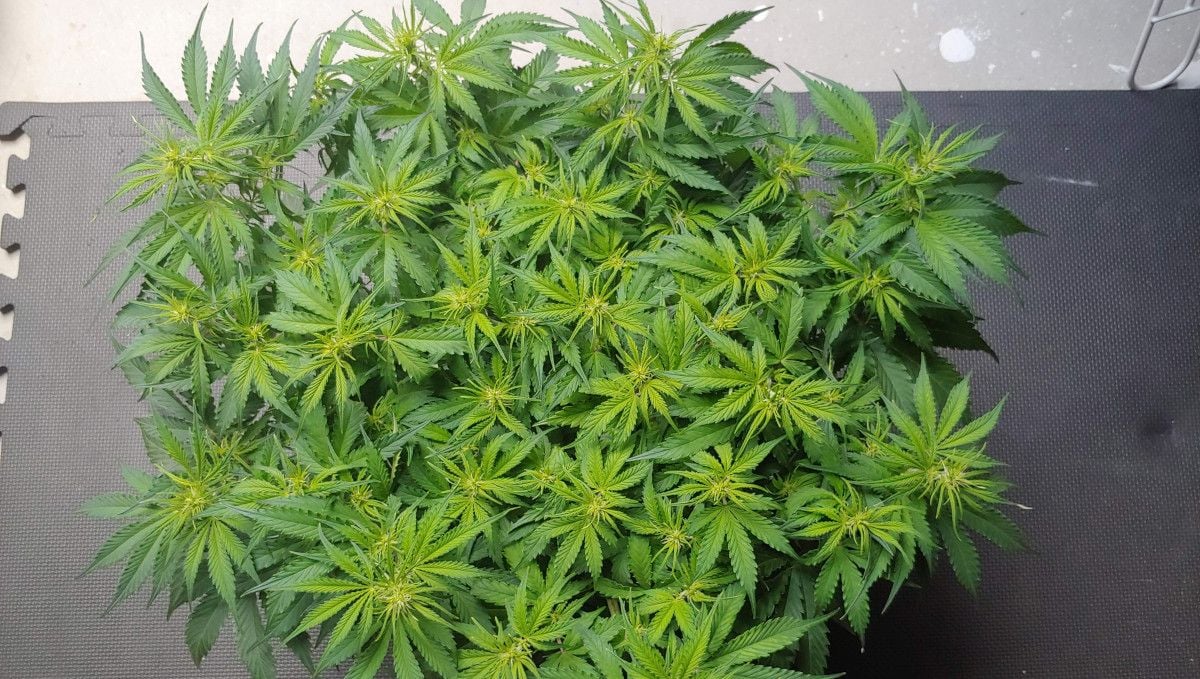
There might be some phenotypic difference between different autos, but modern breeders feel the pressure to come up with faster and faster varieties, so Indicas, Sativas, and hybrids all start to flower around this time.
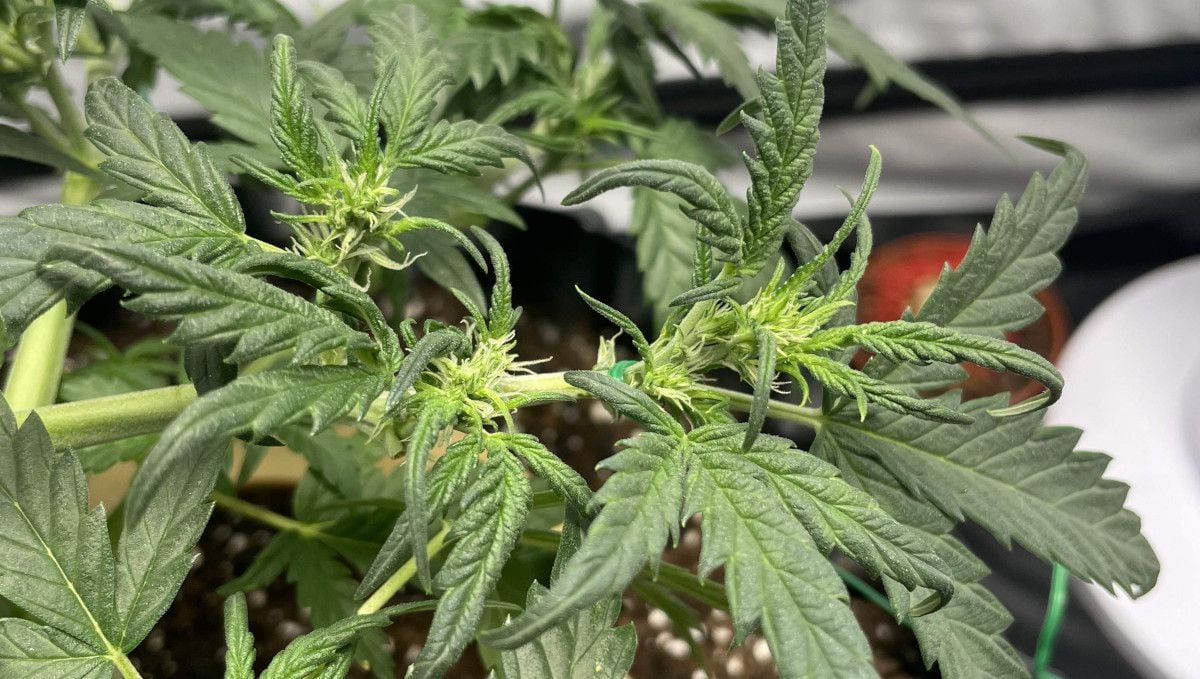
It’s not strictly necessary to change your nutrient regimen to something more suitable for flowering yet – it’ll be a must in the following weeks – but many growers do that: they replace the N-rich formula for the one that has more P and K.
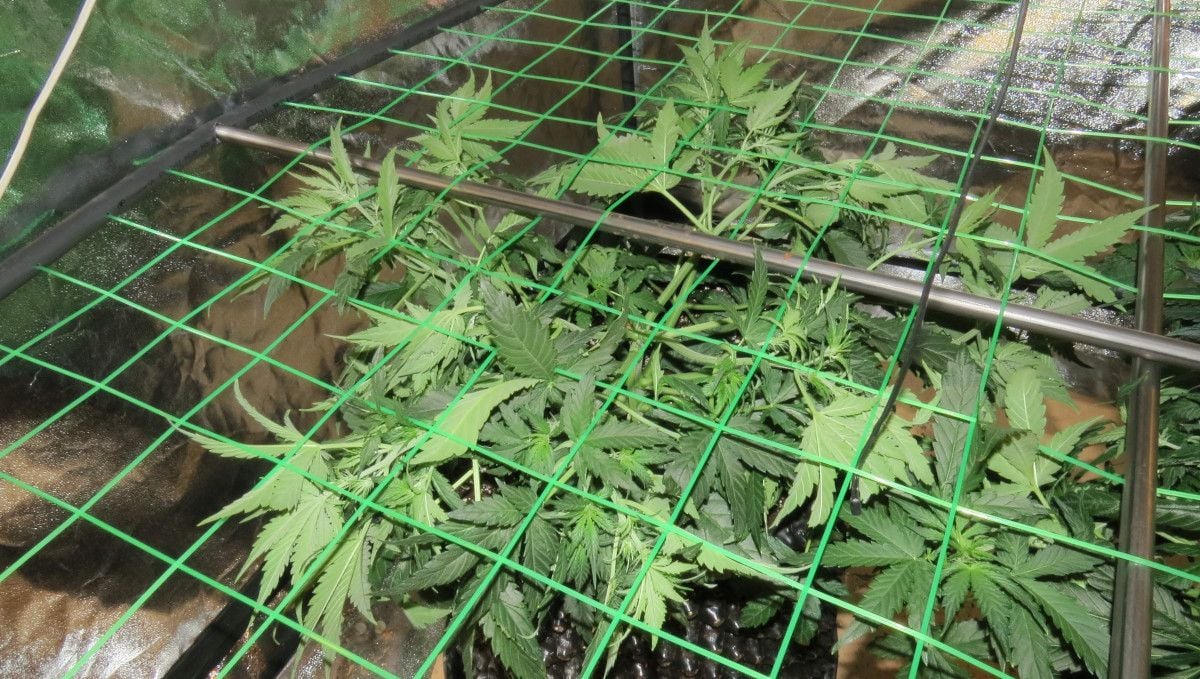
In many cases, the canopy of your auto will get super dense and even tangled by this time. You’ll probably need to do something about it: from leaf tucking to defoliation to pruning of some branches in the bottom and middle part of the plant. Don’t postpone this to the later stages of flowering to spare the plants additional stress when all they should focus on is the production of flowers.
7. Early Flower | Weeks 6-7
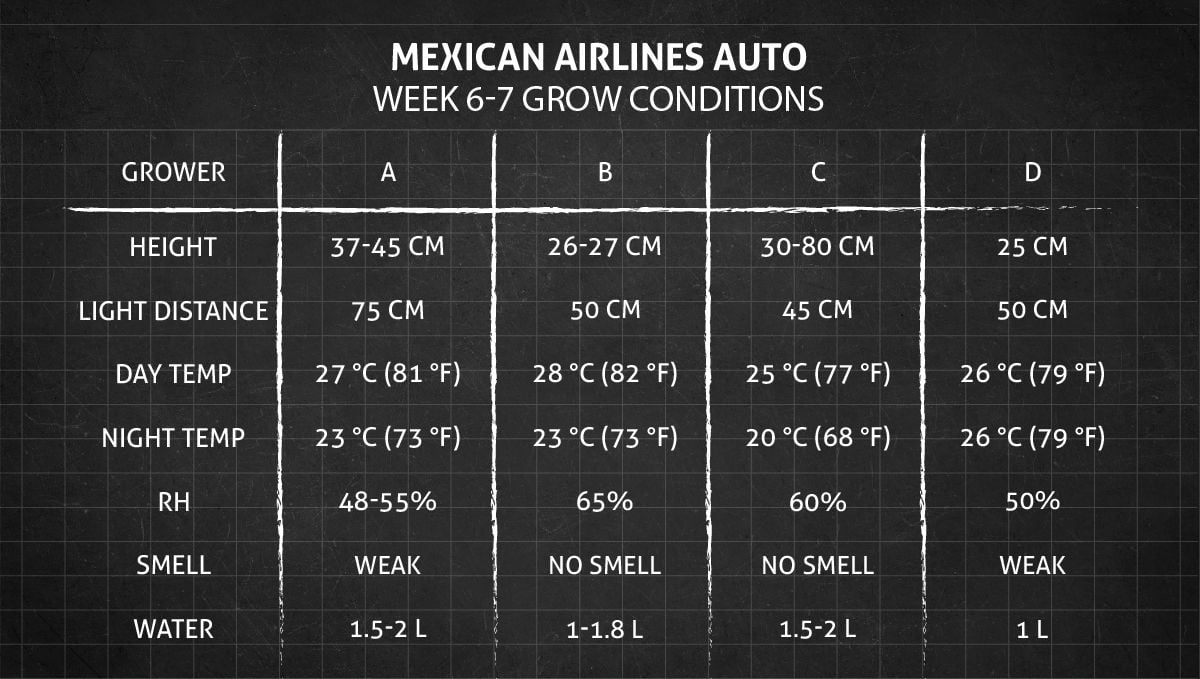
Throughout the life cycle of cannabis, the environmental conditions remain relatively consistent, but experienced growers understand the importance of fine-tuning these conditions for each stage to optimize results. When the flowering stage begins, we recommend lowering the day temperature by a few degrees. The reduction in relative humidity will become crucial later on when the buds start filling out more substantially.
For those who haven't witnessed cannabis in the flowering stage, it may come as a surprise that the initial response of the plant is to stretch its branches. During the first couple of weeks, the branches can easily double in size, although a gain of around 50% is more typical.
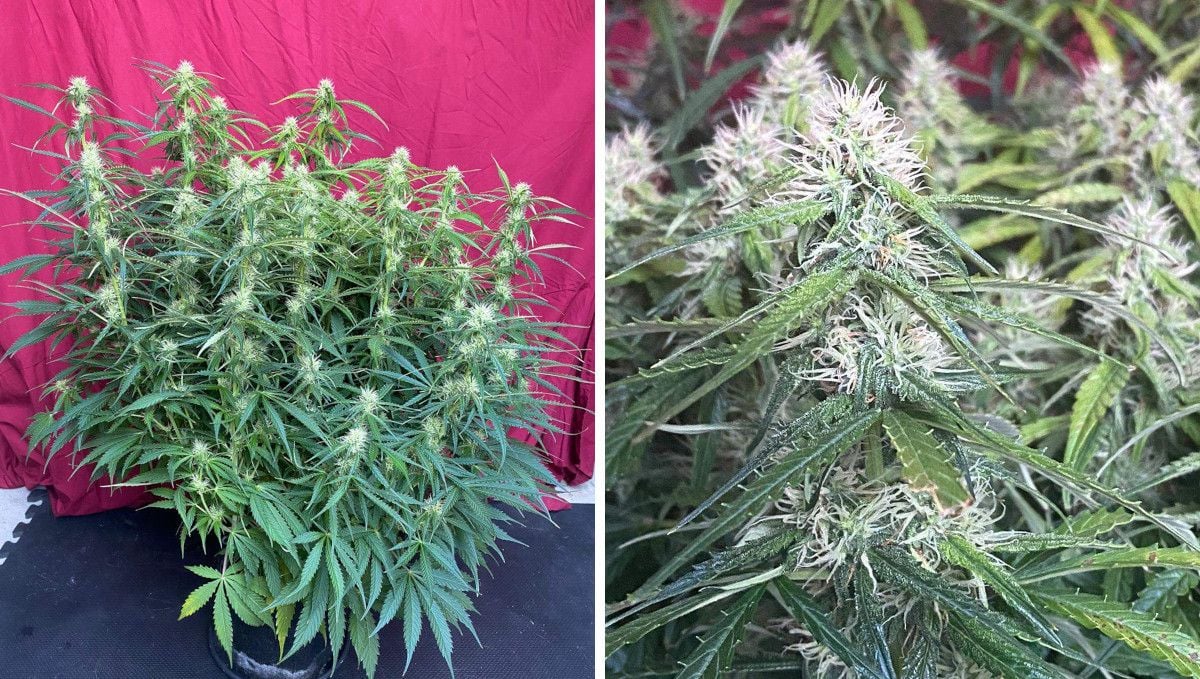
While it may be too late to continue training the plant at this stage, you can still selectively remove excess foliage if it obstructs airflow within the canopy or shades lower bud sites. However, exercise caution and prune sparingly to avoid subjecting your plant to unnecessary stress.
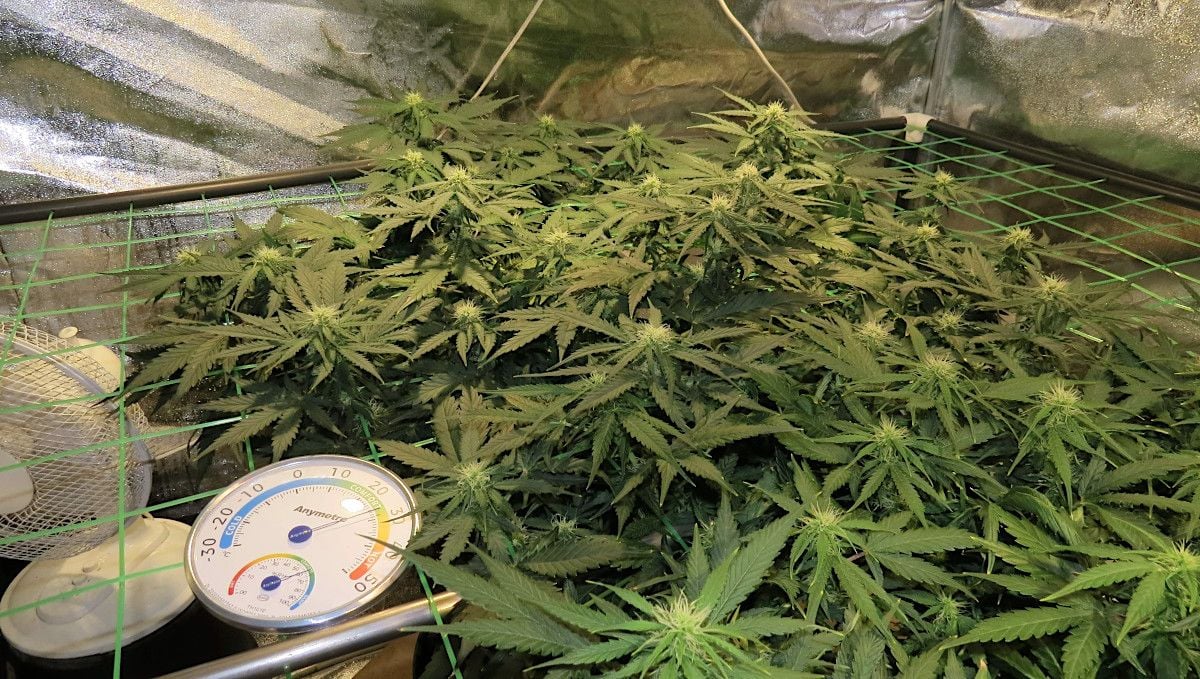
Initially, the size and texture of the flowers may not live up to your expectations. You might even suspect that you have a low-yielding phenotype. But rest assured, those seemingly lightweight and insubstantial flowers will eventually develop into the large, dense colas you see in product photos. Just be patient and give your autoflower the time it needs to flourish.
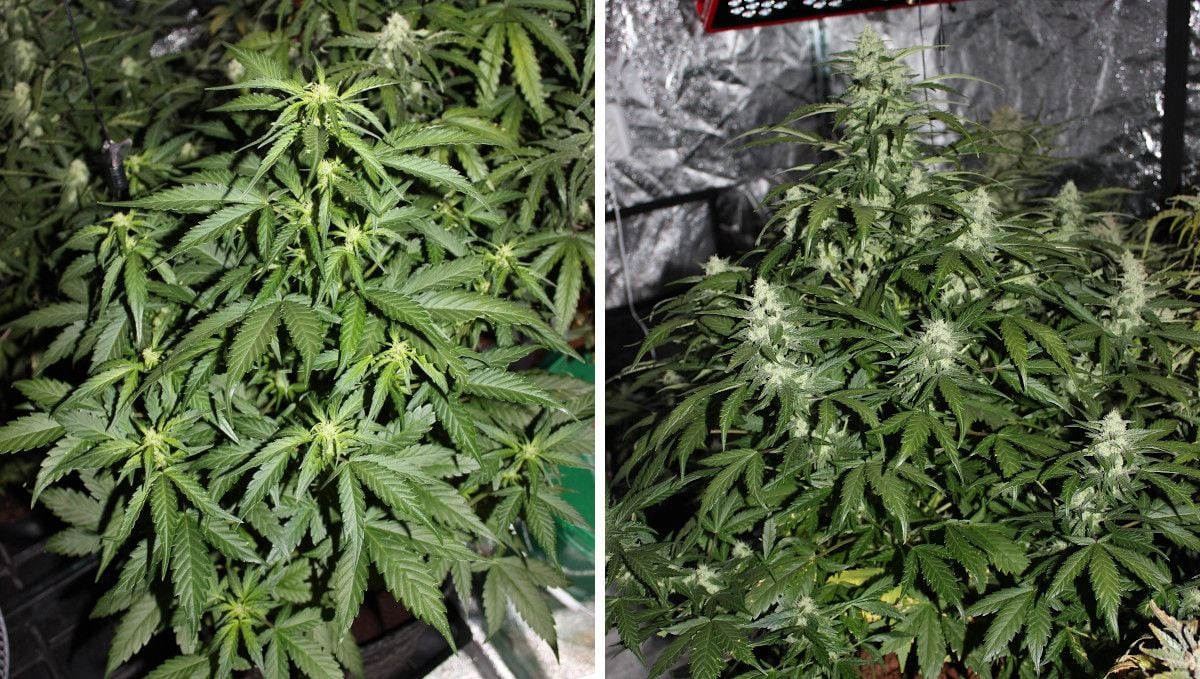
As your plant grows, its thirst will increase accordingly. Younger plants may require watering every few days, while mature ones may need watering every other day or even daily. Simply lift the container to assess its weight – if it feels light, it's a clear sign that watering is due.
The plant's appetite for nutrients will also intensify. Hopefully, you began with a conservative dosage of about 1/4 the recommended amount during the plant's early stages. Now, you can gradually increase the dose, monitoring the health of your plants closely to avoid overfeeding.
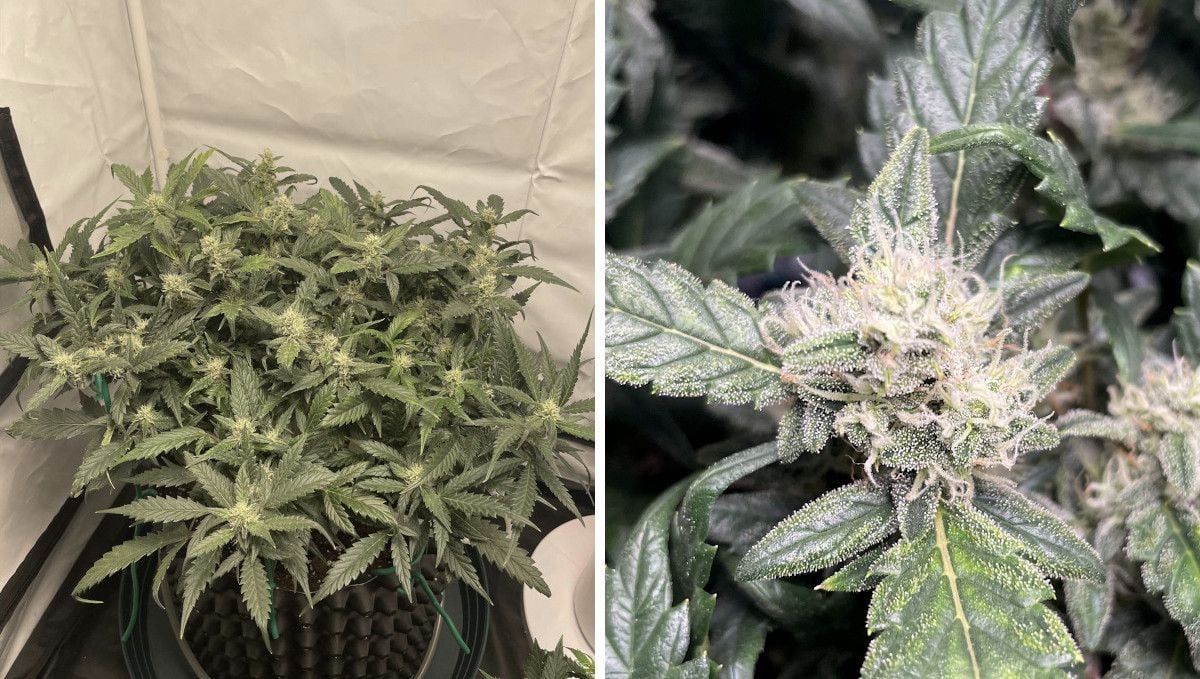
Your cannabis plants will now benefit from nutrient formulas specifically tailored for the flowering stage. These formulas typically contain higher levels of phosphorus (P) and potassium (K), with nitrogen playing a diminished role compared to the vegetative stage. It's important to avoid excessive nitrogen during this phase, as it can be detrimental to the plant's development.
8. Mid Flower (Bulk Phase) | Weeks 8-9
As we enter the phase where cannabis flowers start to plump up, it becomes paramount to prioritize adequate airflow and maintain lower relative humidity levels. We cannot overstate this, as stagnant air creates an ideal breeding ground for mold, bud rot, and other fungal infections. The compact and dense nature of these blossoming flowers provides an inviting environment for such issues to thrive.
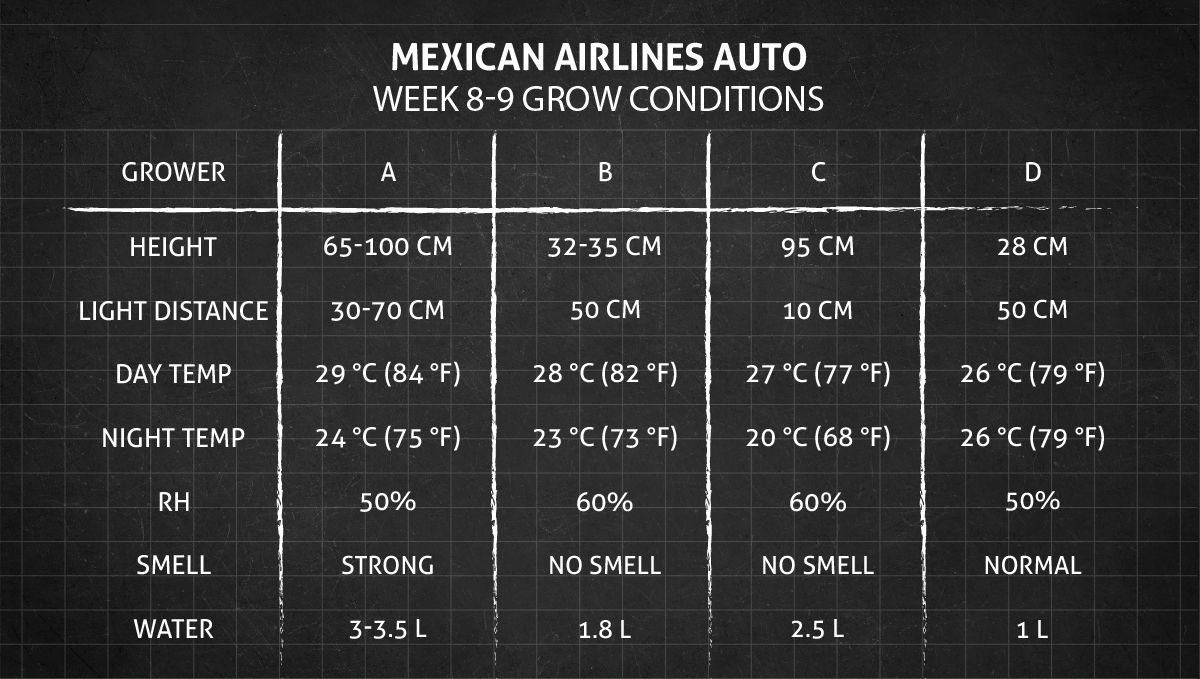
During this remarkable stage, the flowers gradually extend along the branches, transforming into long and robust colas that ignite our enthusiasm. While their growth becomes visibly apparent, the internal density also increases.
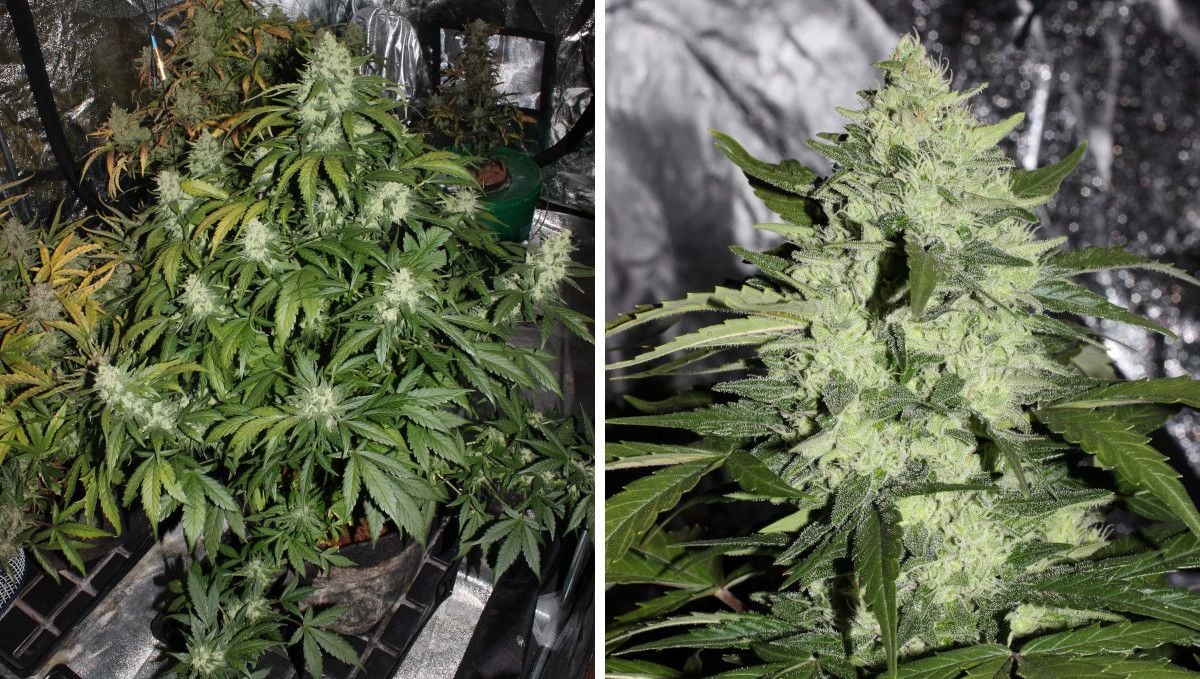
However, it is important to note that despite all those promising signs, harvest remains some time away, as the pistils continue to exhibit an immature greenish-white appearance.
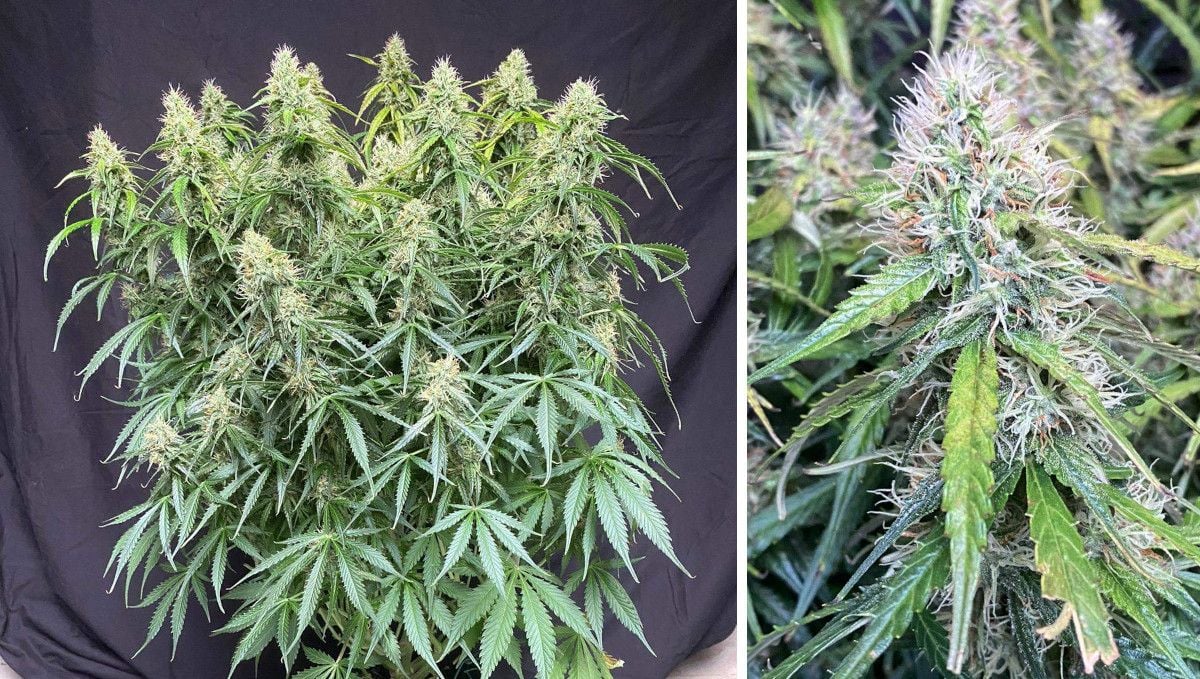
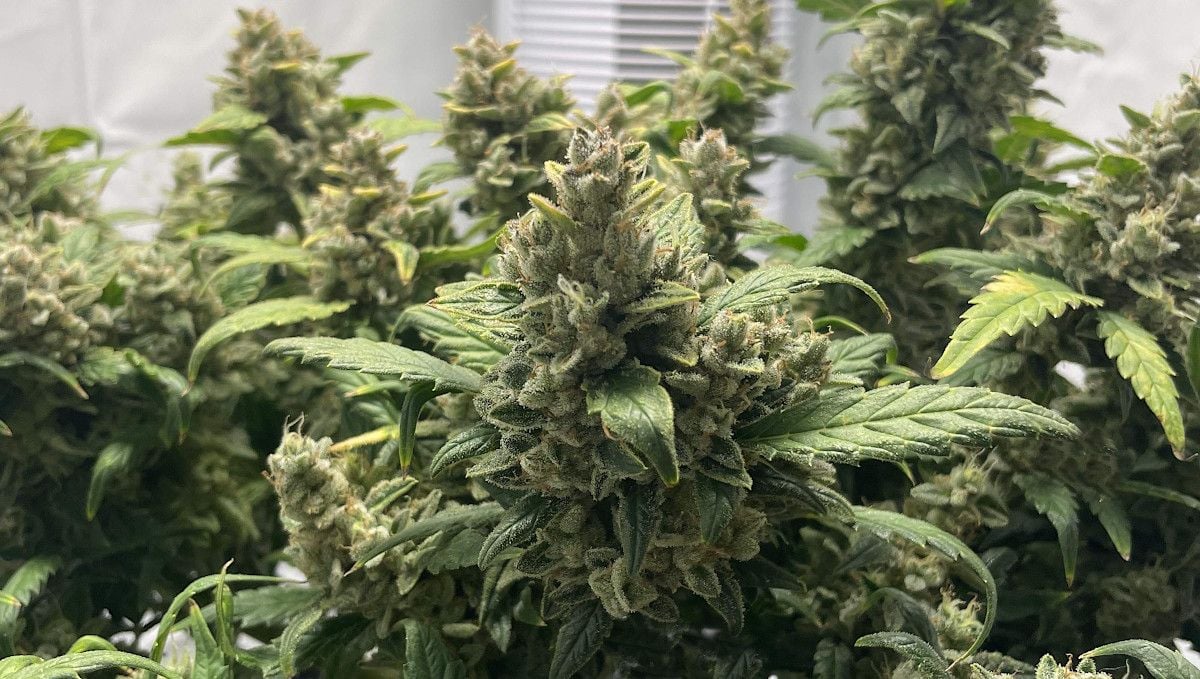
Even now, exceptional autoflowers, such as Mexican Airlines, begin to unveil their captivating frostiness. Resin glands, known as trichomes, emerge on the calyces and adjacent small leaves.
These trichomes serve as the primary reservoirs for THC and other cannabinoids, providing a glimpse into the potential potency that will reach its zenith at harvest time. Furthermore, these trichomes brim with aromatic substances called terpenes, giving rise to a pronounced and captivating scent that permeates your grow room.
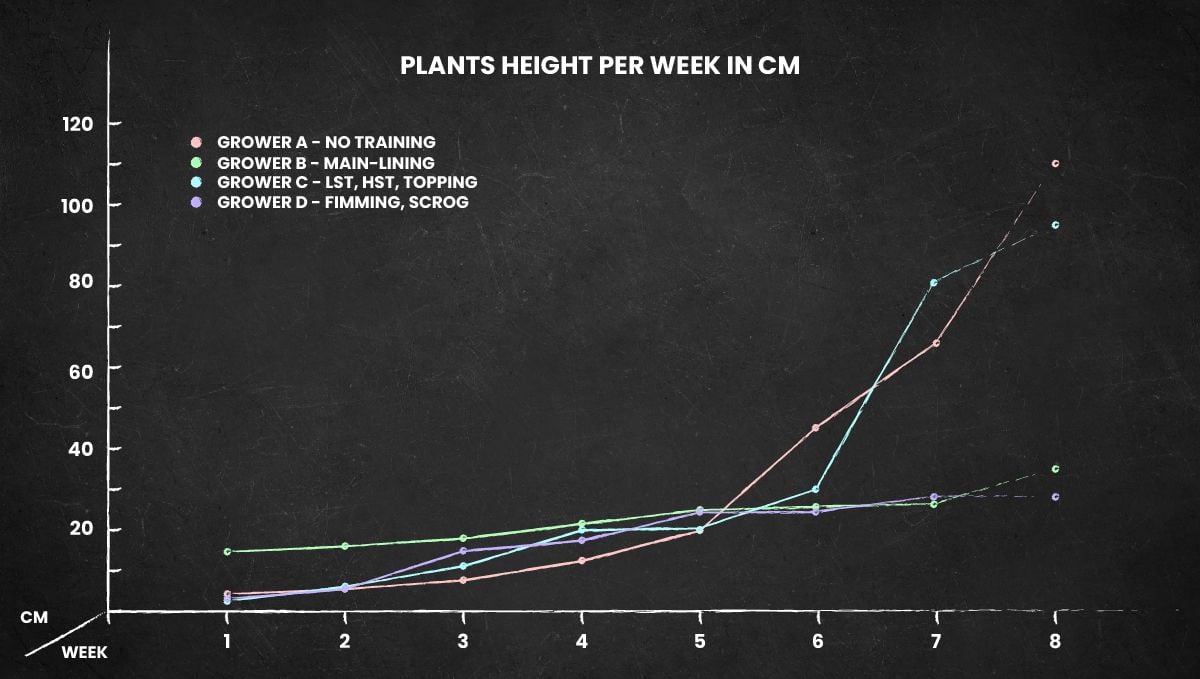
As the flowering stage progresses, marijuana plants typically cease their upward stretch, maintaining a consistent size until harvest day arrives. Refer to the table below to gain insight into the week-by-week expectations for Mexican Airlines Auto when cultivated indoors.
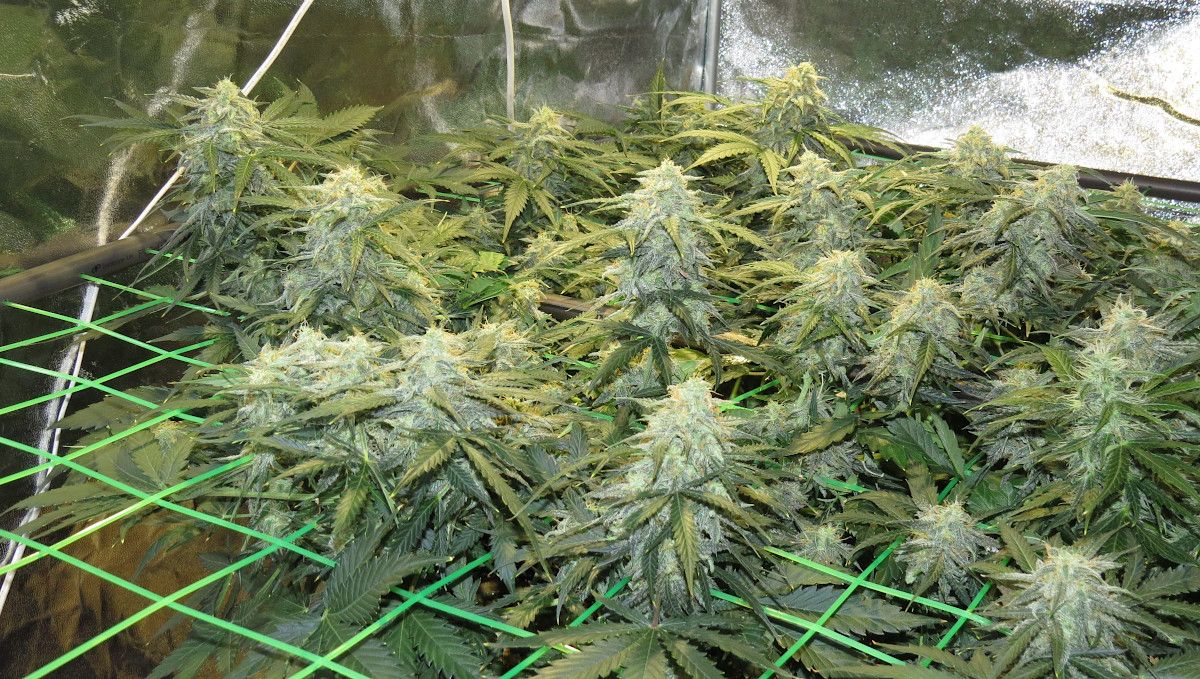
Now that the worries of excessive stretching and plants outgrowing their allotted space have gone, your focus should shift to the crucial elements of proper watering and a nutrient regimen tailored to this stage.
Feeding is extremely important now as this is your last chance of providing ample nourishment to your cannabis plants. Emphasizing phosphorus and potassium, whether integrated into the base formula or supplemented with a dedicated PK-booster, becomes paramount. As we proceed to the subsequent stage, we will gradually reduce feeding until ultimately providing plain water alone.
9. Ripening And Harvest | Week 10 (And Beyond)
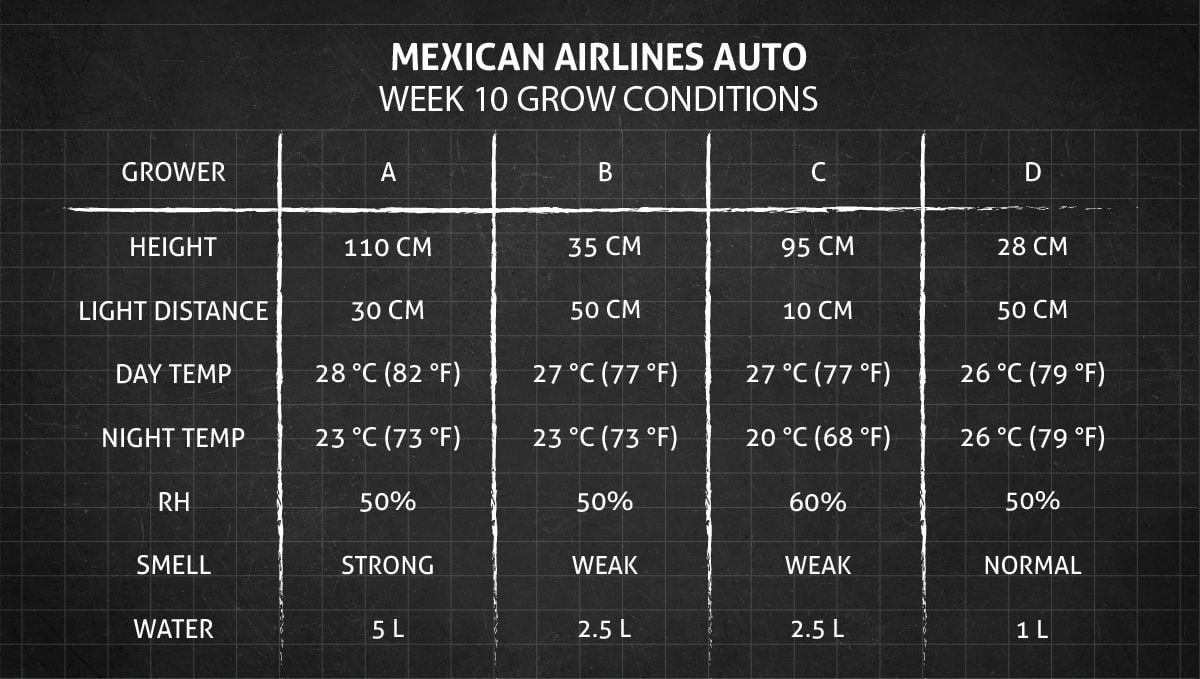
In the final weeks leading up to harvest, it's crucial to maintain the right conditions for your plants. Keep a close eye on the relative humidity (RH) and aim to maintain a cool temperature both day and night. While the impact of heat on THC degradation is still debated, it's generally believed that higher temperatures can speed up this process. Additionally, terpenes, the aromatic compounds in cannabis, tend to evaporate more rapidly in warmer environments. This period also presents a higher risk of fungal infections due to increased humidity.
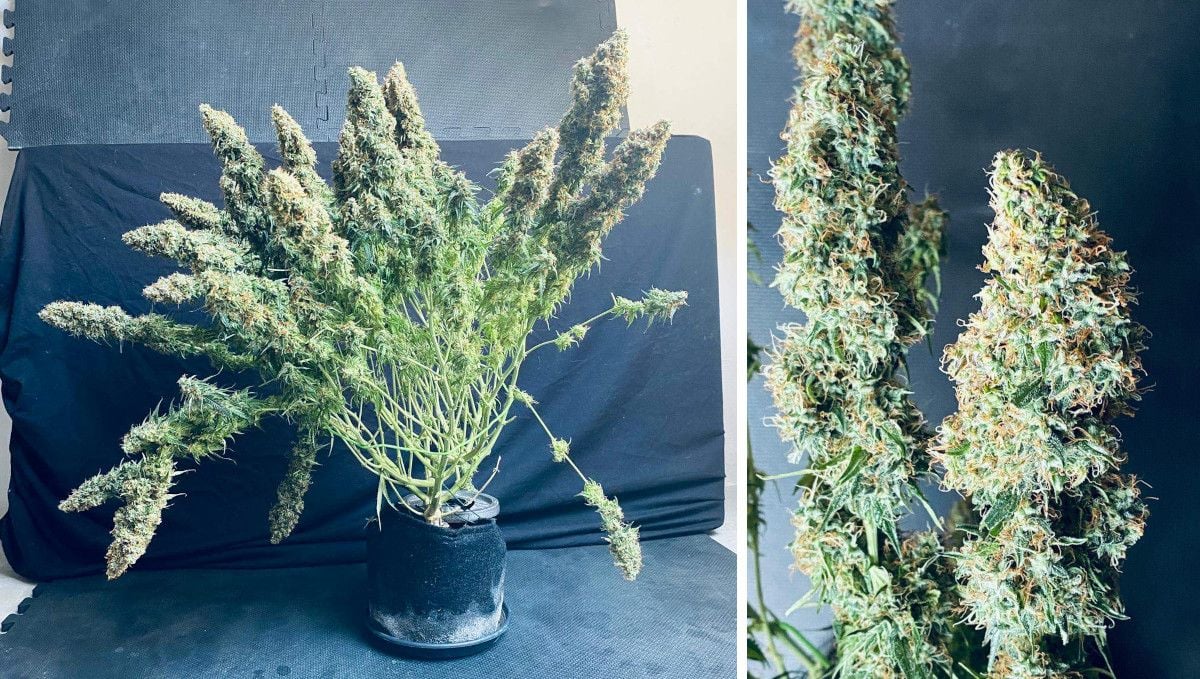
As the maximum duration of your autoflower's life cycle, as specified by the breeder, approaches its end, you'll find yourself eagerly observing the buds, which will progressively mature each day.
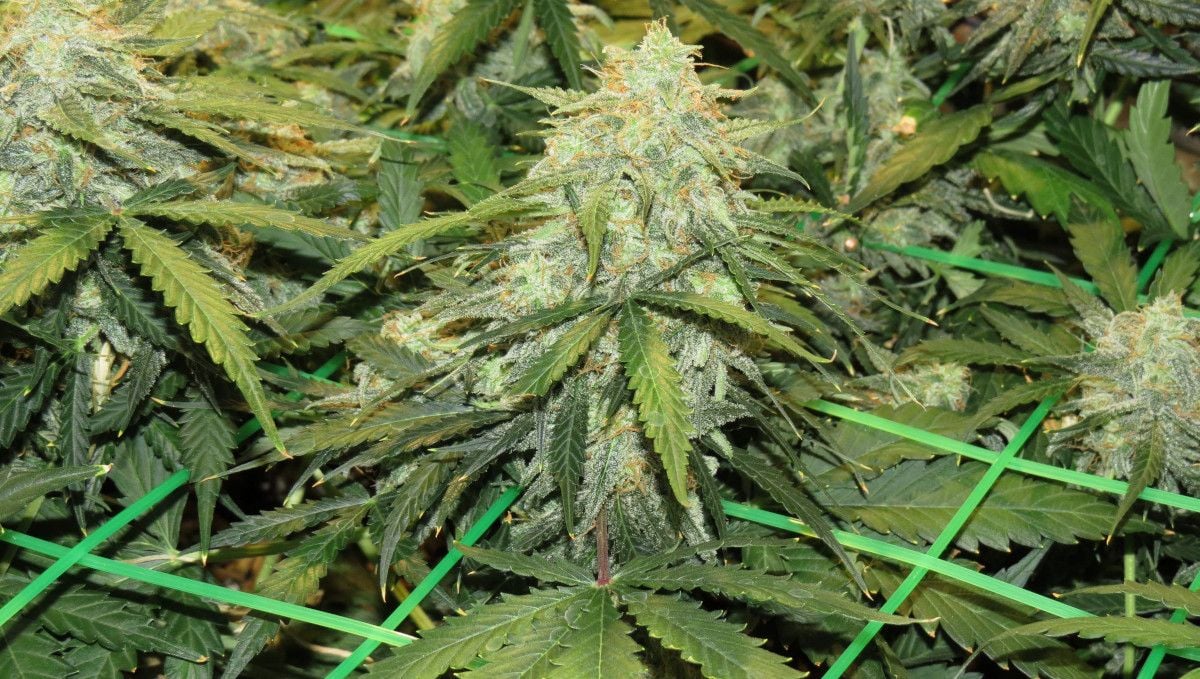
Relying solely on the breeder's timeline for harvest may not provide the most accurate indication, as plants of the same strain can exhibit variations in growth. A more reliable method involves observing the pistils. If they remain white, the buds are not yet fully mature. However, if they turn brown or orange, it's a sign that the optimal harvest time is approaching. Additionally, as the plant nears the end of its life cycle, the leaves may start to fade and take on an "autumnal" appearance.
To harvest your buds at their peak potency and flavor, the most foolproof approach is to examine the trichomes under a microscope. Use a hand loupe to inspect the trichomes covering the calyces. When they have turned from clear to cloudy and some have progressed to amber, this signifies the optimal moment to harvest your cannabis.
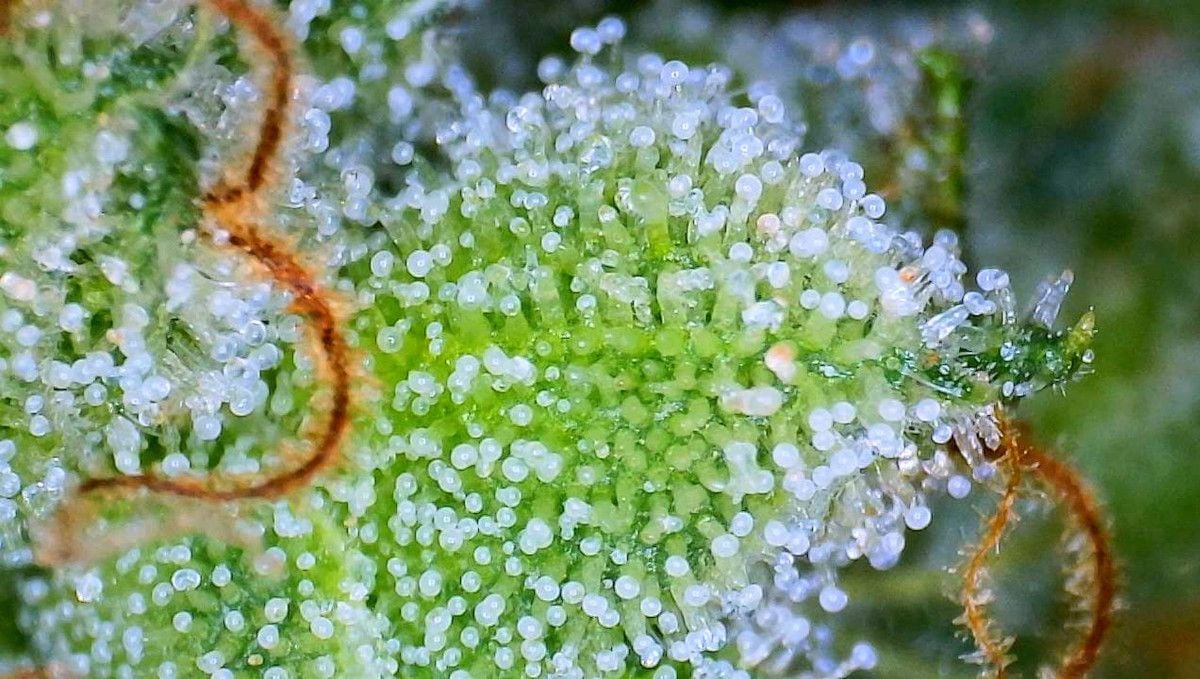
However, there's an important step to take before reaching this peak maturity. Some time prior to that moment, you should cease giving any plant food to your autoflower and flush the growing medium with ample water. This flushing process eliminates accumulated salts and other unwanted chemicals that could potentially compromise the taste or even the safety of your buds.
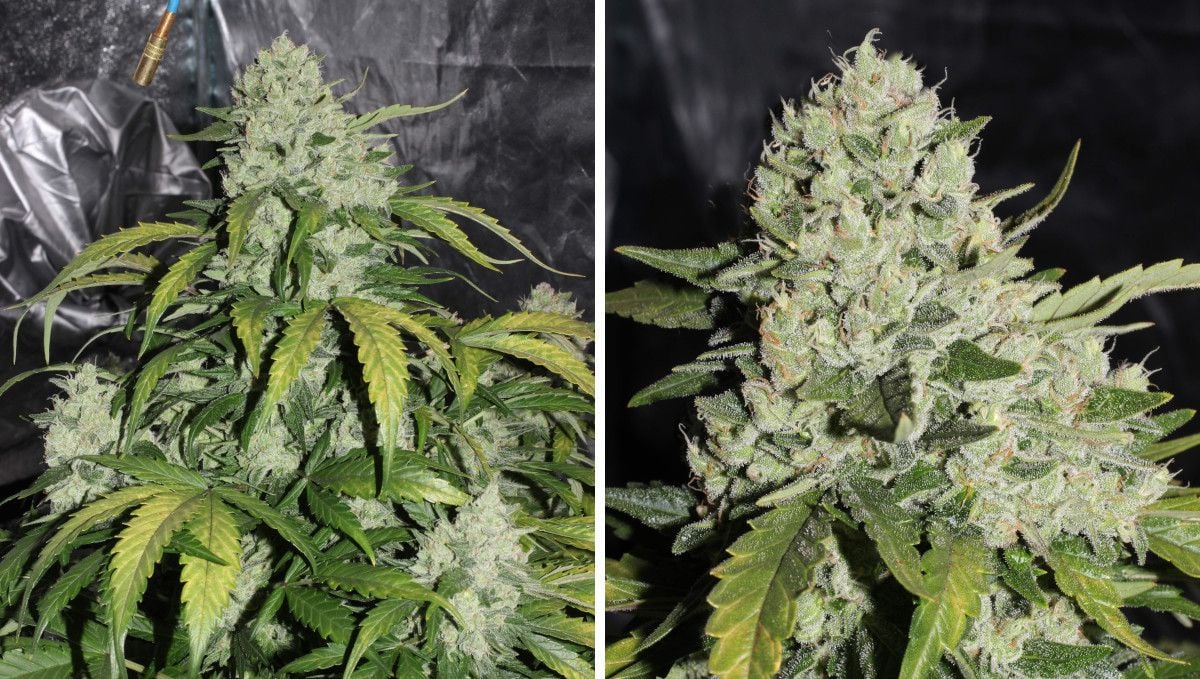
This flushing procedure, known as the final flush, typically takes up to 2 weeks in soil grows and around a week in hydroponic setups. Timing it correctly ensures that your buds are fully cleansed before harvest. Good luck with achieving the optimal timing!
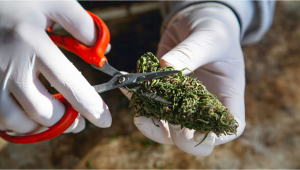
Keep in mind that the quality of your smoking experience also depends on two additional factors: drying and curing. For optimal results, avoid rushing through these steps. Allow your cut branches to slow-dry for approximately 5-7 days before snipping off the buds. Then, proceed to cure the buds in glass jars for an additional 2-3 weeks, ensuring to regularly open the jars to release any excess moisture.
10. The Outcome
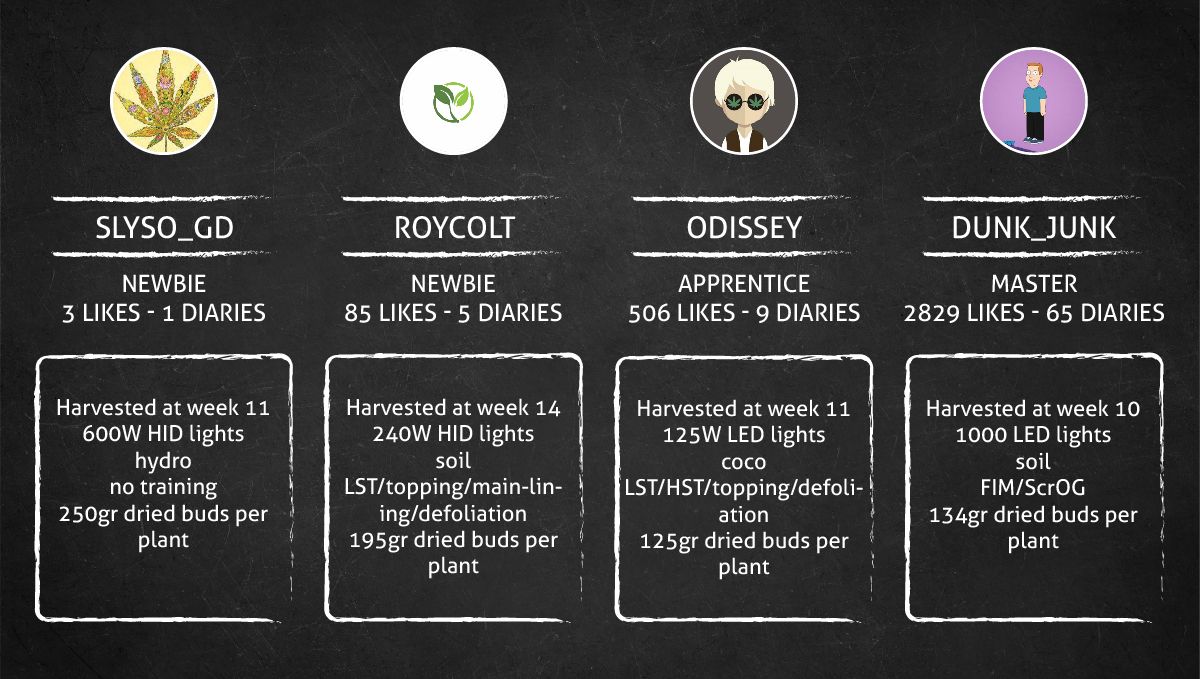
In the world of modern autoflowers, only the most high-yielding of them have any chance of making the cut, and Mexican Airlines Auto is no exception. High yields are one of the reasons this classic has been popular for so many years, and the table above shows the outstanding results of this strain in diverse setups and conditions.
Mexican Airlines Auto Yield
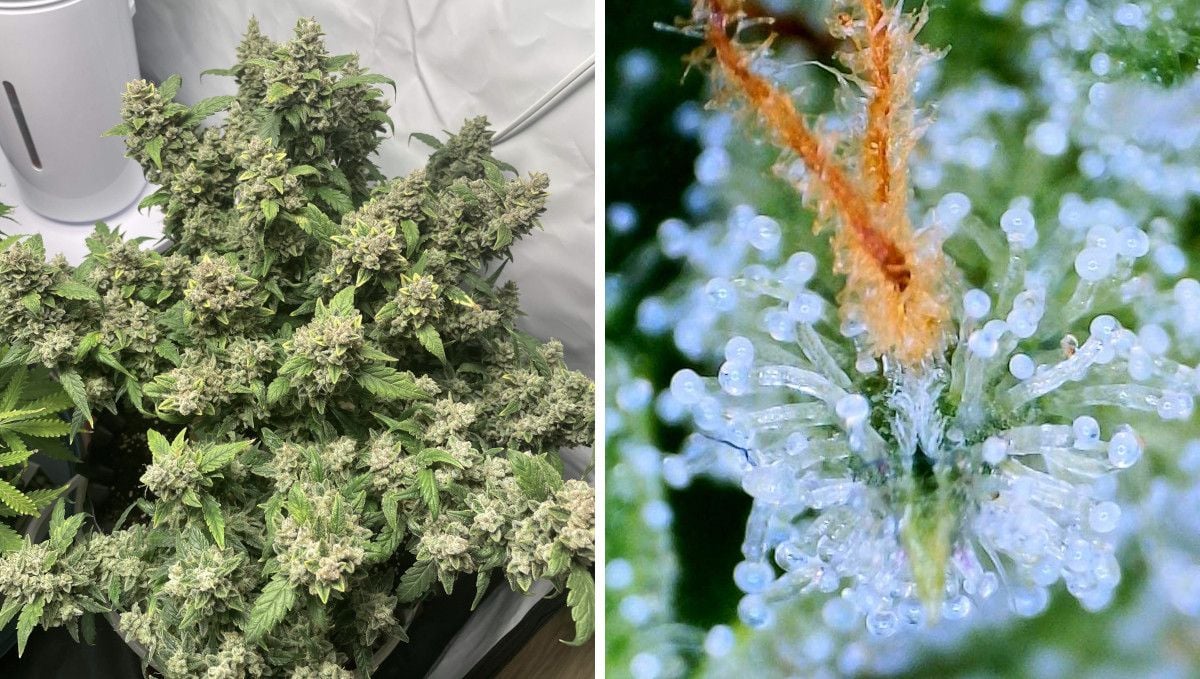
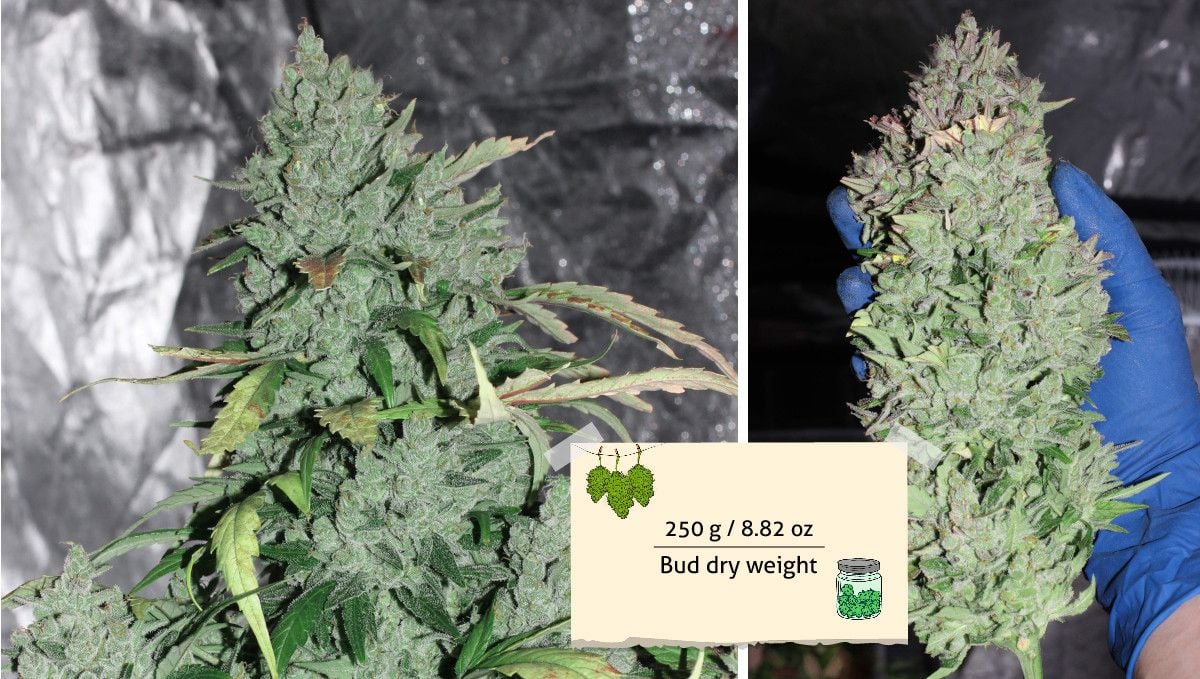
Grower A's plant doesn't look big in the photos, but only because you don't expect its main cola to be so huge. When you see it in the grower's hand, it provides a frame of reference, so you won't be surprised to learn that this Mexican Airlines Auto yielded 250 g (8.82 oz) of dry bud.
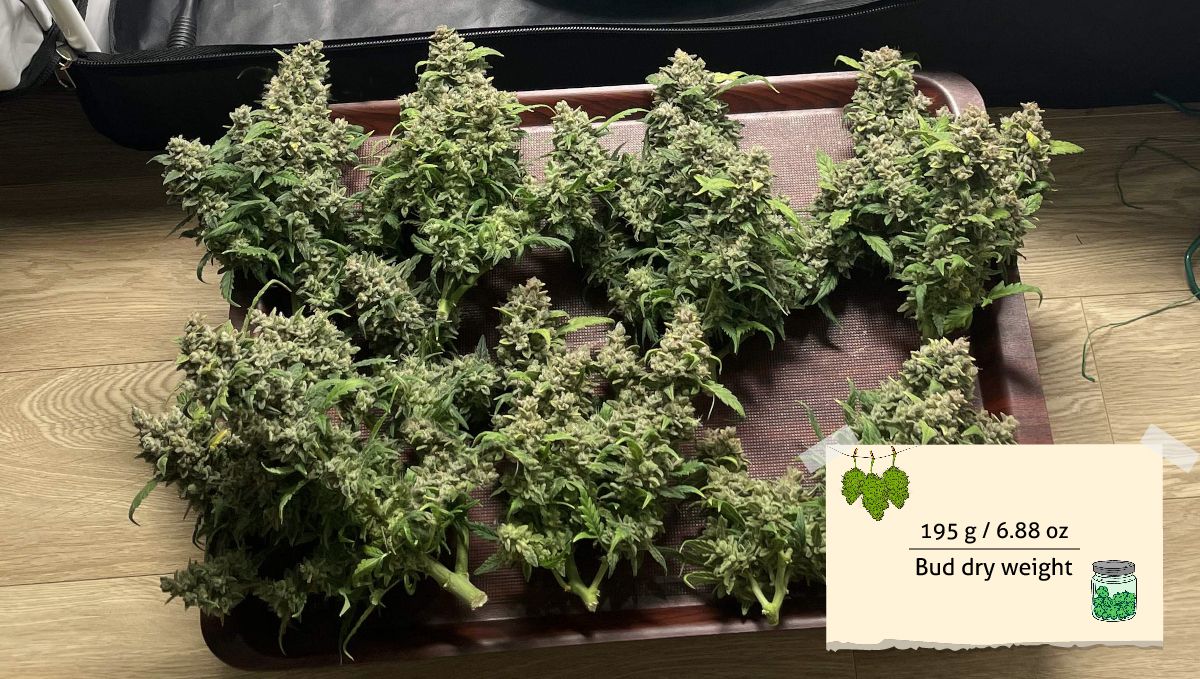
Grower B's result was a surprise for us as his plant looked so small. However, the buds had such a bulging appearance and such a dense texture, that they yielded an incredible 195 g (6.88 oz) when dried and cured.
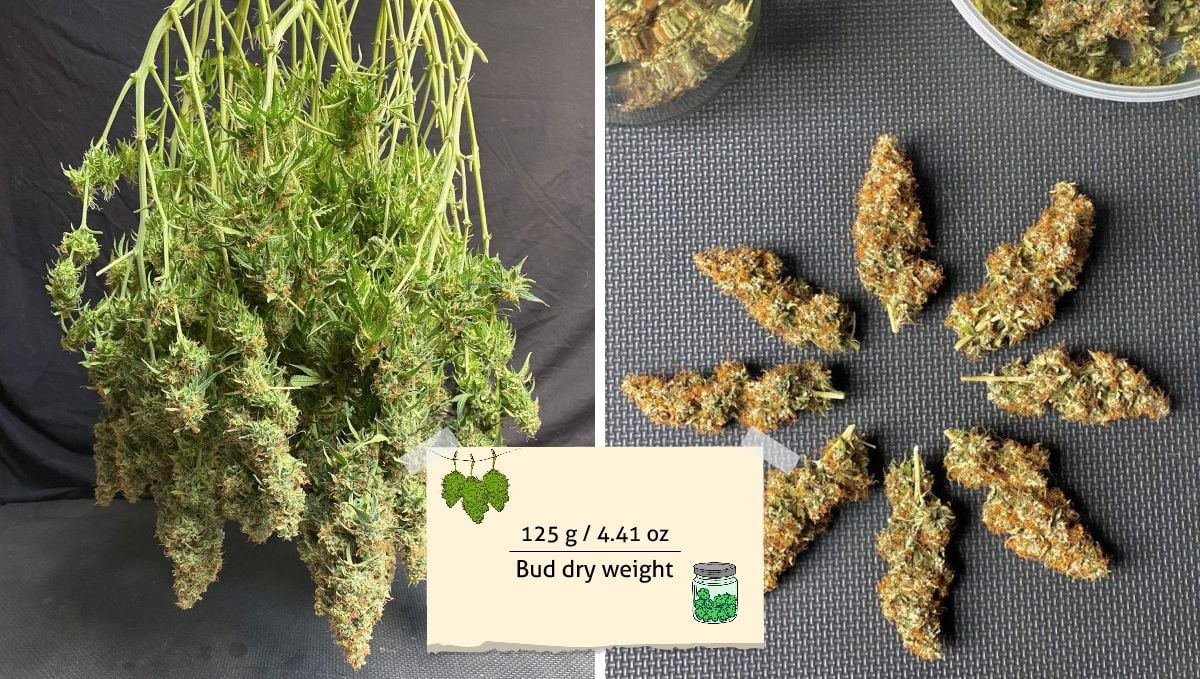
Grower C's buds had a much airier Sativa-like structure, but there were so many of them that they collectively weighed 125 g (4.41 oz) -- quite a respectable result for an autoflower.
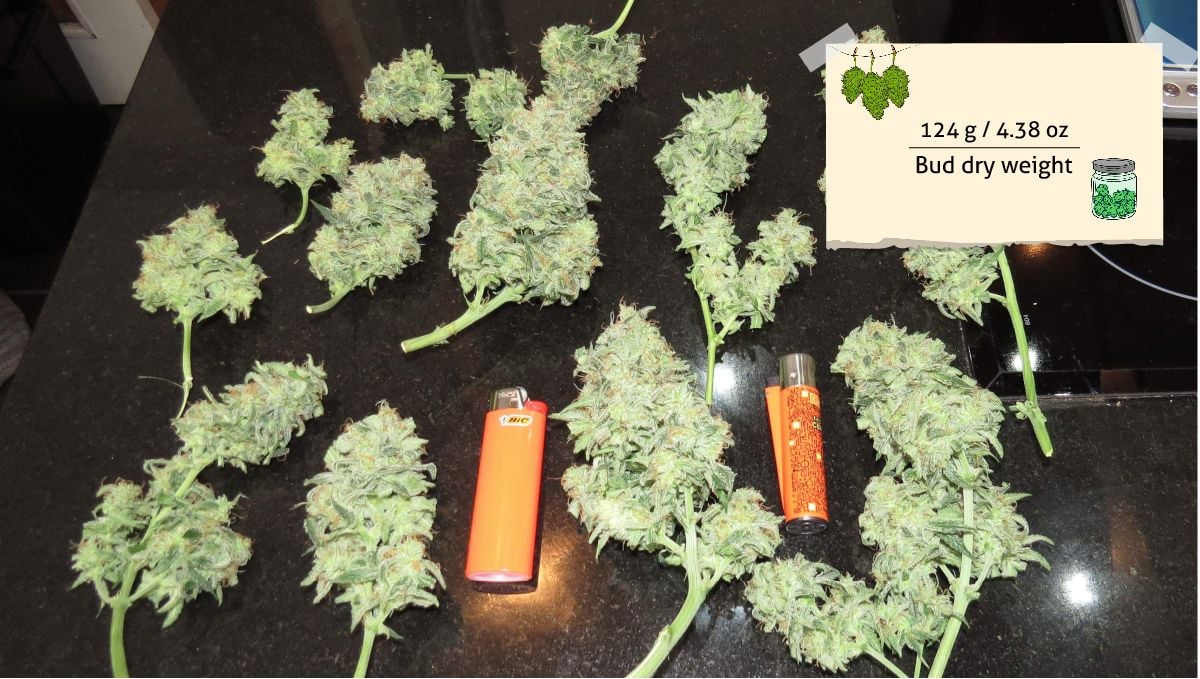
Finally, Grower D harvested practically as much as Grower C -- 124 g (4.38 oz) dry, and his buds were compact and tight nuggets.
Mexican Airlines Auto Smoke Report
The smoke reviews for Mexican Airlines Auto consistently highlight its potency and uplifting effects. Smokers describe a cerebral high that relaxes the mind and boosts mood, making it an ideal daytime strain. The aroma and taste profiles are often described as citrusy, sweet, and with hints of spices and herbs. The strain is known for its clean smoke and a Sativa-leaning effect that provides a heady experience without inducing couch lock. Users suggest enjoying Mexican Airlines Auto during lunchtime or early afternoon for a delightful and uplifting experience that stimulates deep thoughts.

10. In Conclusion
We hope that our Mexican Airlines Auto week-by-week guide will serve as a reassuarance to those growers who are afraid to cultivate Sativas indoors. Although this autoflower has the tendency to grow large (and yield big in the process), there's nothing easier than keep it short with proper training and still achieve outstanding results.
Grower A didn't train his Mexican Airlines Auto at all and got the best yield from his tall and natural-looking plant. If your space allows and your light is powerful, that's the way we recommend.
Grower B clearly overtrained his lady -- main-lining isn't the most promising method for autoflowers. His result was also great, but we believe that with less training, it would have been even better.
Grower C had the most Sativa-leaning pheno, and his decision to top was absolutely right -- he got several same-size colas and the height of the plant didn't get out of hand.
Grower D chose ScrOG as the primary training methods. It probably meant much more work than simple LST but ensured spectacular results.
As you can see, Mexican Airlines Auto is versatile enough, so you can adapt its growth patterns to any setup and cultivation technique. Happy growing!








Comments