Northern Lights Auto Cannabis Strain Week-by-Week Guide

- 1. Specifications
- 2. Week-by-week guide
- 2. a. Week 1 - germination
- 2. b. Week 2 - vegetative stage
- 2. c. Week 3 - vegetative stage
- 2. d. Week 4 - vegetative stage
- 2. e. Week 5 - pre-flowering stage
- 2. f. Week 6 - flowering stage
- 2. g. Week 7 - flowering stage
- 2. h. Week 8 - flowering stage
- 2. i. Week 9 - harvesting
- 3. How to properly trim, dry, and cure your northern lights auto harvest
- 3. a. Trimming your harvest
- 3. b. Drying your harvest
- 3. c. Curing and burping your harvest
- 4. What to expect?
- 5. Expert opinion by jorge cervantes - co-author:
- 6. Northern lights auto cannabis strain grow guide faqs
- 7. In conclusion
Preface
Warm greetings to our cherished readers as we embark on an enlightening journey through cultivating the Northern Lights Auto cannabis strain! This article, co-authored by Enzo Schillaci and Jorge Cervantes, unfolds a meticulous week-by-week guide, illuminating the path from the initial seedling stage to the bountiful harvest of this iconic strain. Tailored to be a steadfast companion for growers at every level of expertise, this guide ensures that each growth cycle phase is navigated with utmost confidence and enriched knowledge.
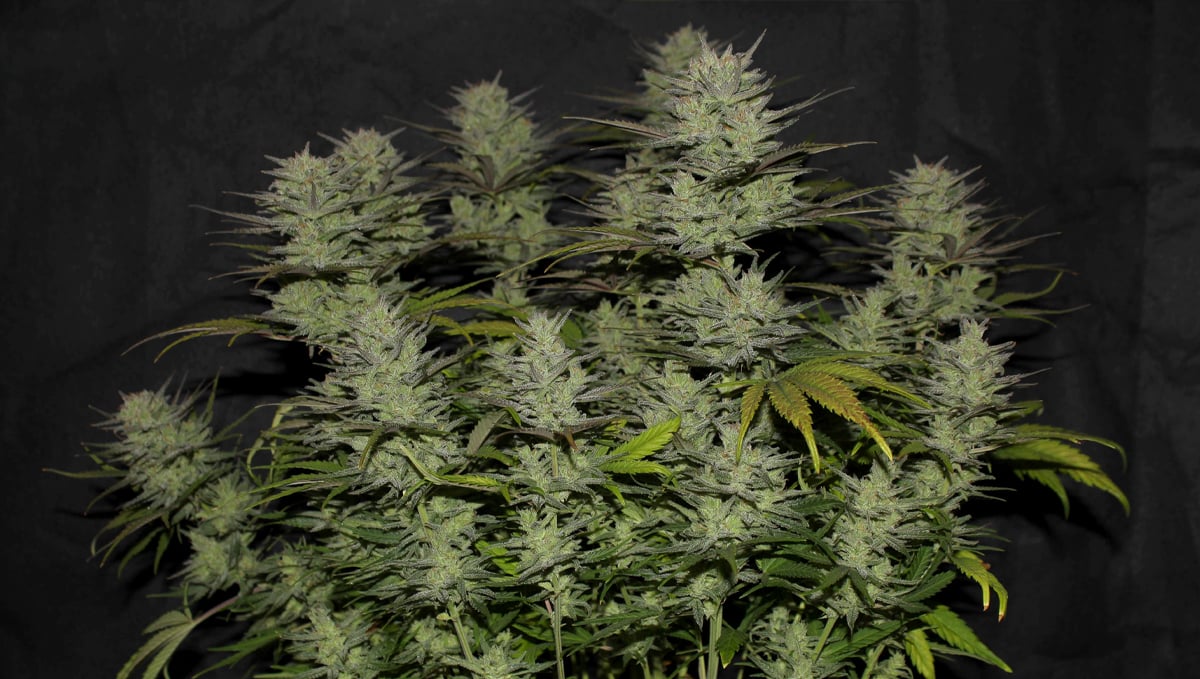
Immerse yourself in a reservoir of wisdom as we unravel the secrets behind the thriving growth of the Northern Lights Auto strain. This guide navigates through the pivotal stages of its life cycle, stressing the significance of light, nutrition, and meticulous care at each stage of life and offering insights into maximizing yield and potency. From the germination stage to the final harvest, this article lights up your path with practical tips and expert advice, ensuring your cultivation journey is both rewarding and enlightening.
2. Specifications
Our auto version of this incredibly resistant old-school strain is a must for all growers trying to grow famous classic strains. Northern Lights Auto is an exceptionally tough autoflower that requires very little maintenance while being able to withstand harsher climates with ease, this plant can grow up to 120cm and produce around 600gr/m2 in less than 65 days.
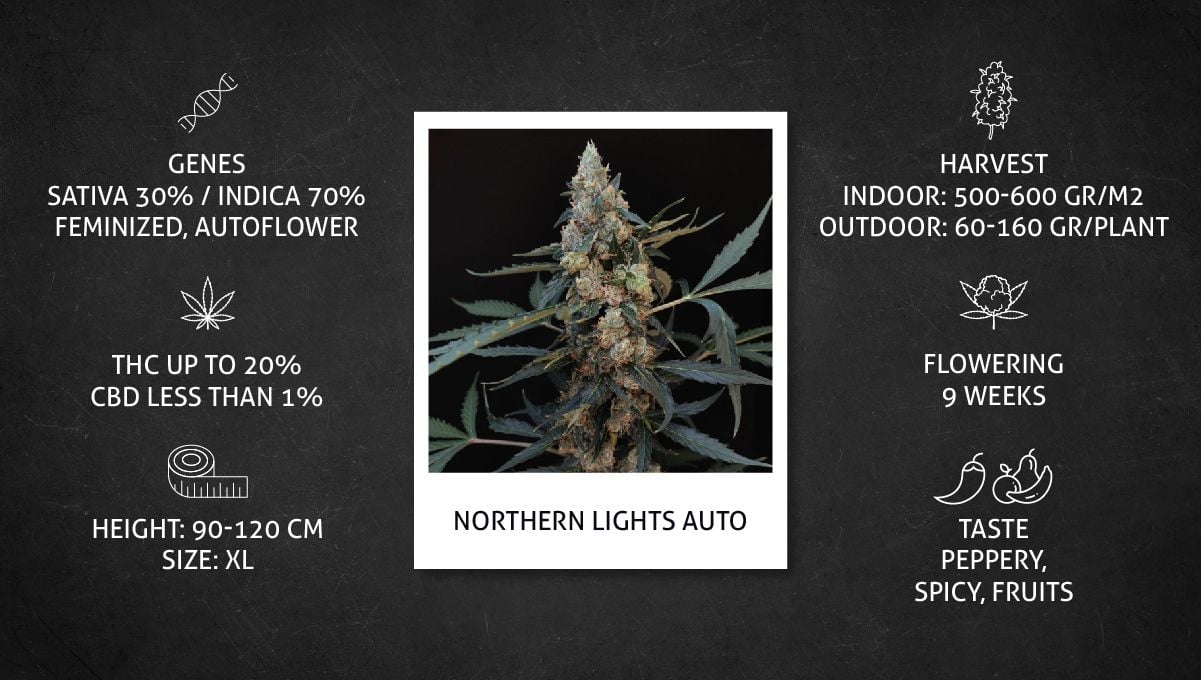
Thanks to the great genetics, you can easily grow this strain outdoors all year long and enjoy a nostalgic effect that old-timers will love. This strain provides a potent effect that will leave your whole face melting as soon as you take the first puff, you’ll feel your eyes getting heavy and a strong couch-lock effect on your whole body which comes along with a deep savory terpene profile that consists of spices, pepper, and a mild fruitiness.
3. Week-by-week guide
As you will see further into the grow cycle, this Northern Light Auto started a little bit on the smaller side apparently due to overwatering but after a couple of weeks she came through and ended up producing beautifully frosted flowers.
Grow Specifications
| Light Fixture: | LED |
|---|---|
| Light Cycle: | 18/6 |
| Humidity: | 40%-80% |
| Temperature: | 20-30°C |
| Grow Space: | Indoor |
| Nutrients: | Synthetic |
| PH level: | 6.1-6.7 |
| Seed to Harvest: | 9 weeks |
The grow specifications are the basic information on how the plants were cultivated. This grow guide serves as a written timeline to give you an idea of what to avoid and what to expect when growing this autoflower.
Week 1 - Germination
In this grow journal, our growers started by germinating a couple of Northern Lights Auto seeds in a paper towel, this isn’t the method we usually recommend, soaking the seeds allows the water to soften the shell, thus increasing the chances of germination.
| Height: | 1cm |
|---|---|
| pH: | 6.0 |
| Humidity: | 70% |
| Temperature: | 25°C |
| Watering: | 100ml |
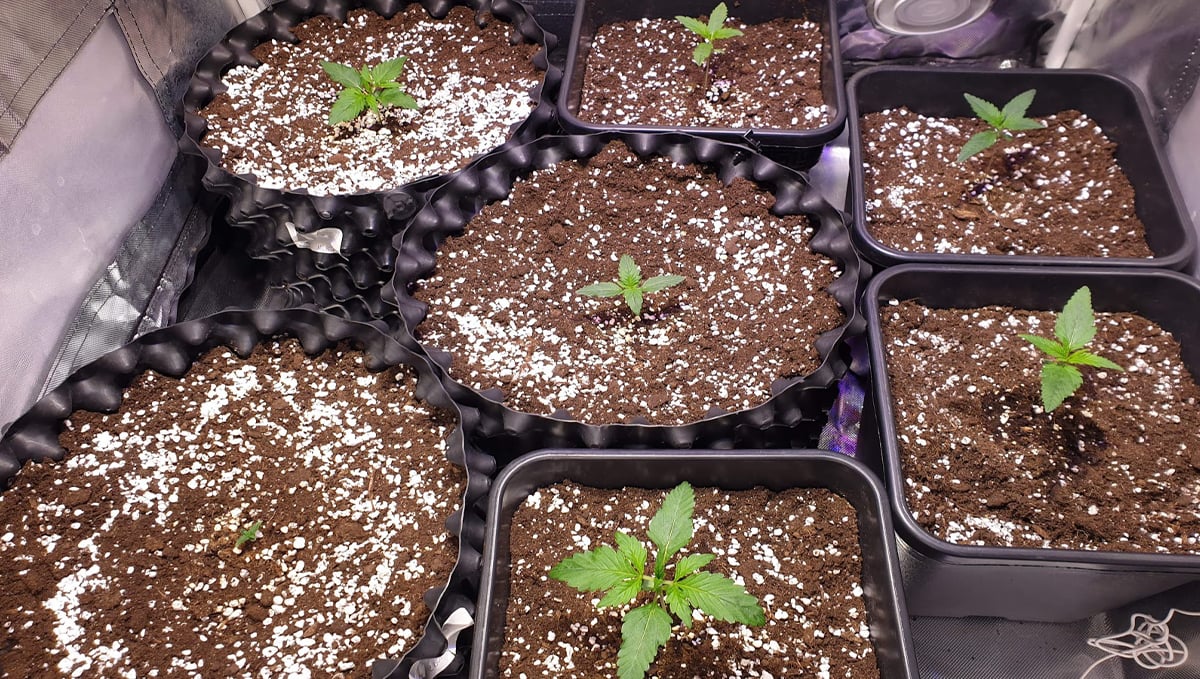
In this growing cycle, as soon as the taproot (radicle) was around 3cm long, it was planted in a coco fiber and perlite mix, have in mind that both of these substrates are sterile so as soon as you see the first pair of true leaves, you’ll have to start feeding with a nutrient solution or your plant will start to show signs of deficiencies.
It really doesn't matter the medium you want to grow in (soil, hydroponics, or coco), this strain will perform well as long as you take good care, feed it well and provide good growing conditions.
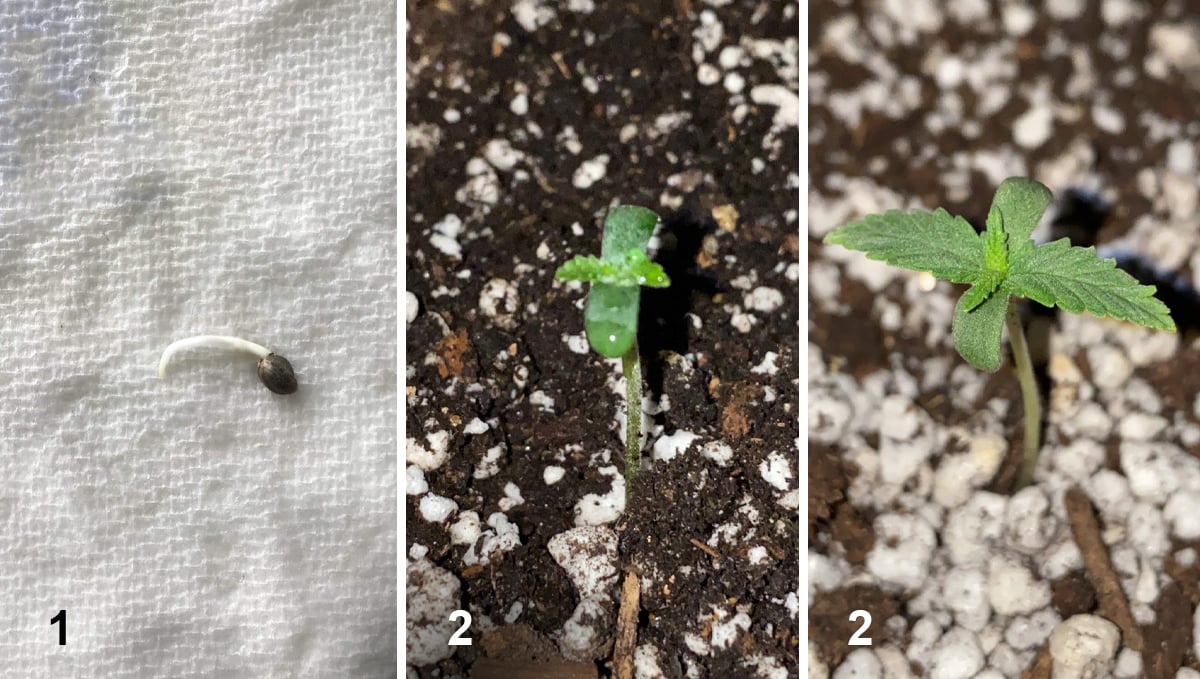
Even though the seed has already germinated, it can take a couple of days for the seedling to come out of the medium but after it’s come out and you see the small rounded leaves, you have officially started your growing cycle.
“So I germinate my seeds in a paper towel soaked in water between two plates, I put it on top of my cable box because it’s just perfectly warm. 24 hrs later the seed has popped open and is ready for planting. I just make a hole with a pen and then drop the popped seed in. I cover the seed with some soil and then water it a bit more.” - Johnnyronco
Remember that seedlings are extremely fragile so you should keep the right conditions; A temperature of around 23°C, and a relative humidity ranging from 60-70% is ideal if you want your baby plants to survive, if you can’t maintain these conditions you should place a plastic dome over them to keep a high humidity and protect them from the cold or strong wind.
Week 2 - Vegetative stage
The second week from seed marks the beginning of the vegetative stage, at this point, your plants should already have developed the first to third pair of true leaves and they’re ready to be fed with a light nutrient dose.
| Height: | 6cm |
|---|---|
| pH: | 6.5 |
| Humidity: | 65% |
| Temperature: | 23°C |
| Watering: | 200ml |
We recommend always starting in the final pot but if you started in a solo cup or a similar container, now is the time for transplanting. Remember that transplanting can be quite stressful for autos so you have to do it very carefully so you don’t stunt their growth, and even though you do it properly, it may still take a couple of days for your plant to adapt and continue growing normally.
Also, make sure to adjust and maintain a proper environment for your plants to grow in, at this stage the temperature should be kept around 18- 20°C and the relative humidity as close to 60% as possible to ensure your plant’s survival.
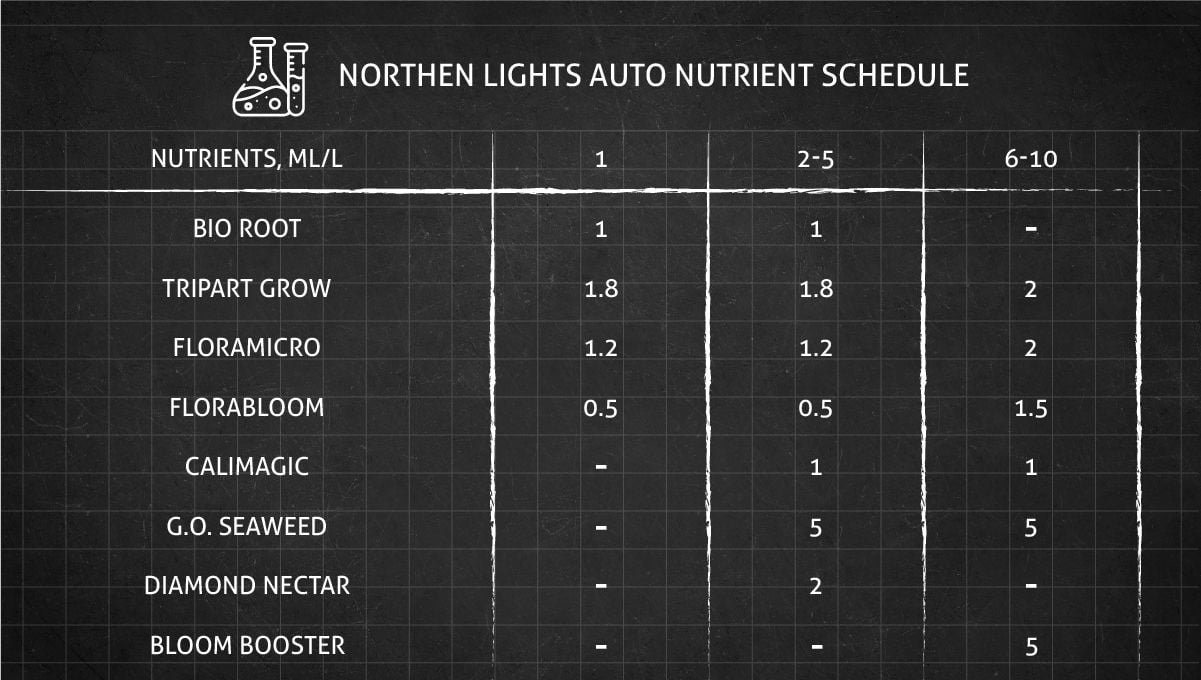
Depending on the type of medium, there are several ways to feed your plants, in this case, the growers used synthetic bottled nutrients with proper caution to not overfeed the seedlings, which can cause nute burn and in the worst cases, kill your plant.
This stage is also when you want to start with the LST, it doesn't matter if you're doing SoG, Scrog, or tying the branches, when your plant has 3-4 pairs of leaves you can carefully start your plant training, if your plant hasn't developed at least 3 pairs of leaves, it doesn't hurt to wait a couple of days more.
Week 3 - Vegetative stage
By the third week from seed, your plant should already have established its roots and should have developed at least 4 nodes so if you didn't start training before, now is a good time to start; It doesn’t matter if you want to top or tie down the branches, as long as you see at least 3 pairs of leaves, you are ready to go.
| Height: | 10cm |
|---|---|
| pH: | 6.0 |
| Humidity: | 65% |
| Temperature: | 25°C |
| Watering: | 300ml |
Have in mind that plan training can stress your plants so if you’re going to do it, make sure you maintain good conditions, the stress from any kind of plant training with stress from bad conditions can really affect your plant’s growth.
In the vegetative stage, your plants need more nitrogen than phosphorus and potassium, although they still need them but in smaller amounts, so try to feed the macronutrients at a ratio of 3-1-2, this means your plant will get more nitrogen but will still be getting the other nutrients she needs to grow.
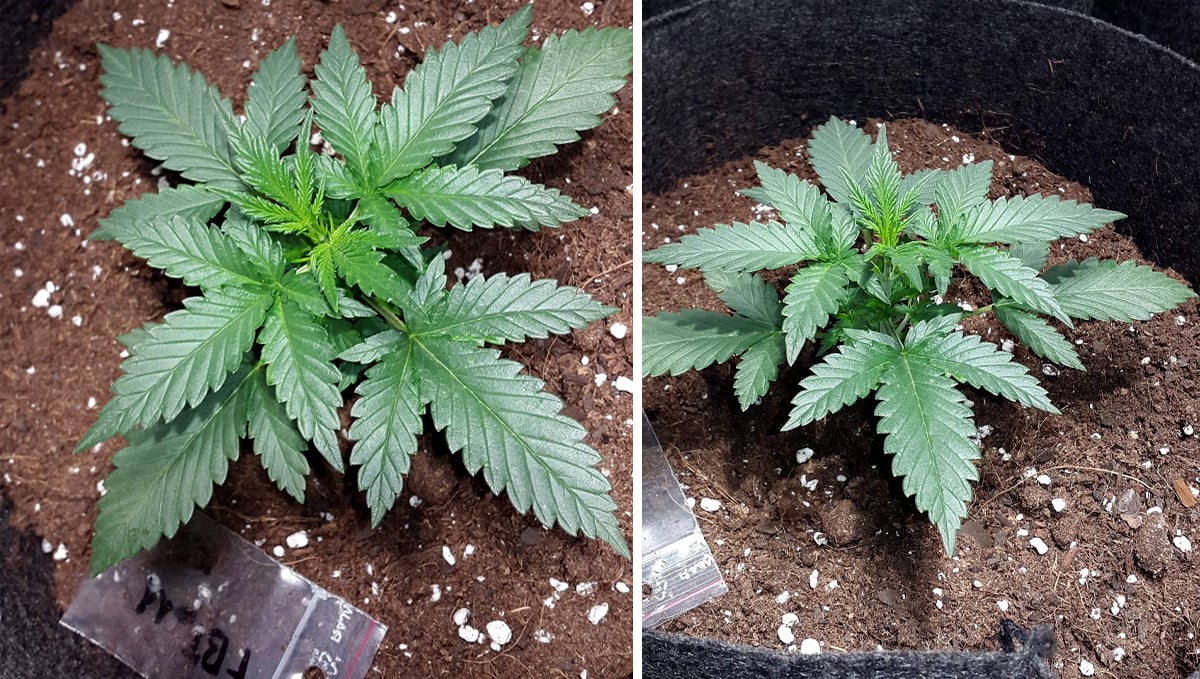
Also, depending on the medium, you will have to provide the micronutrients your plants need, in this case, the grower had to mix calmag in the nutrient solution, this happens because coco fiber and perlite are sterile and unlike soil, they don’t contain the micronutrients a cannabis plant needs.
Week 4 - Vegetative stage
During week 4 of the vegetative growth, you will see the flowering sites starting to turn light green, this means the pre-flowering stage is coming, by now, you will clearly see the difference in size overnight when your plants are fully growing, you’ll see up to 2 pairs of leaves fully developed per day, this is a sign that your plant is thriving
| Height: | 20cm |
|---|---|
| pH: | 6.5 |
| Humidity: | 60% |
| Temperature: | 25°C |
| Watering: | 400ml |
Throughout the next couple of days, you’ll see your plant absorbing more and more water but don’t worry, it’s completely normal, just have in mind that as soon as you see the first white hairs you will have to start gradually transitioning from grow to bloom nutrients.
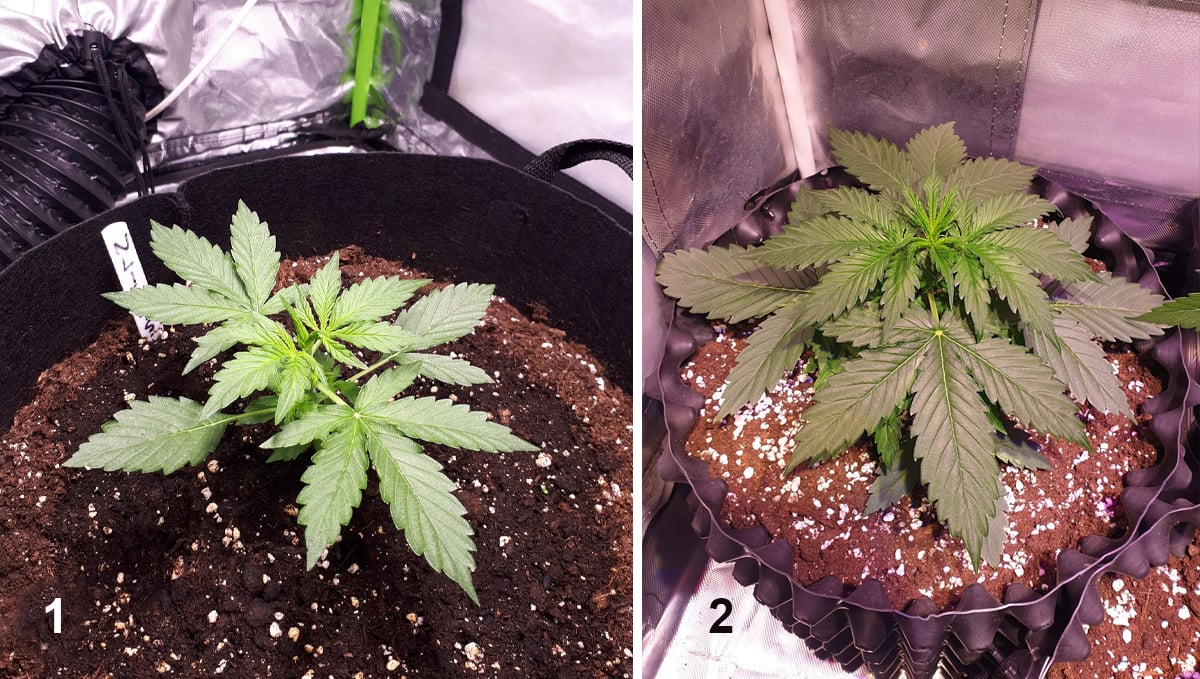
Also, if you are tying down the branches, make sure you are reaching the desired shape or size because when your plant enters the pre-flowering stage, you’ll have to remove the ties to avoid stressing your plant.
Week 5 - Pre-flowering stage
On the fifth week, your plants are officially in the pre-flowering stage, even though it may take a couple of days, you will see the stigmas (white hairs) appearing on all of the flowering sites that were turning light green a couple of days ago, that is, if you are growing feminized seeds, if not, your plant may grow pollen sacs, meaning it’s a male plant.
| Height: | 30cm |
|---|---|
| pH: | 6.3 |
| Humidity: | 65% |
| Temperature: | 24°C |
| Watering: | 600ml |
Remember that our Northern Lights is an autoflower so there's no need to change the light cycle, this type of cannabis grows from start to finish under the same light cycle, you can choose to grow under an 18/6, 20/4, or 24/0 light cycle, depending on what suits you better.
When your plants have entered the pre-flowering stage you’ll have to slowly start feeding bloom nutrients, if you’re growing organically, it’s better to start adding bloom nutrients the week before because organic nutrients are released slowly with each watering, so it’s essential your plant gets what she needs (more phosphorus and potassium) as soon as she starts producing stigmas.
The minerals needed during flowering should be used in a 1-2-3 ratio, and if you’re growing in a sterile medium such as coco fiber or clay pellets, you will also have to provide the micronutrients like calcium and magnesium, if you do not, the leaves will start to get brown spots.
“Flowers start to appear... I added a low dose of PK nutrients...I’m afraid to add some extra nutes because the coco has been supercharged at the beginning of the grow and the plants still didn’t show any deficiencies so I’m watering with the flood method in order to don’t leave any stuck salts around the roots from the previous watering. Also, the first watering from the 6th week will be just with CalMag and flooding ( 5 l each plant ) to help to clean the coco.” - serinboy
Also, have in mind that the environment can affect the processes your plants need to grow so make sure you’re checking and adjusting the environment, at this stage, the humidity should be around 55% while keeping the temperatures in between 18-25°C.
Week 6 - Flowering stage
If everything goes like it should, your plants will be officially in the flowering stage in week 6 from seed, you will see the buds fattening exponentially, and with flowering comes the trichomes which are responsible for storing the cannabinoids and terpenes so your plant will start to smell, so make sure you have a carbon filter installed, or, if you're growing outdoors, a good idea is to have aromatic plants around to help mask the smell.
| Height: | 55cm |
|---|---|
| pH: | 6.2 |
| Humidity: | 60% |
| Temperature: | 24°C |
| Watering: | 700ml |
By now, you should already be feeding at least half the dose of blooming nutrients and slightly increasing the dose with every watering, always paying attention to signs of deficiencies that your plant will surely show if you overfeed.
Providing the right nutrients will allow your plants to grow properly, when a cannabis plant starts flowering it will stretch quite a lot (depending on the genetics), this is called the "flowering stretch" and some plants may even double their size but as you may see further into the grow cycle, this Northern Lights didn't stretch much due to a bit of overwatering and also due to its genetics because most Indica-dominant strains usually stay shorter.
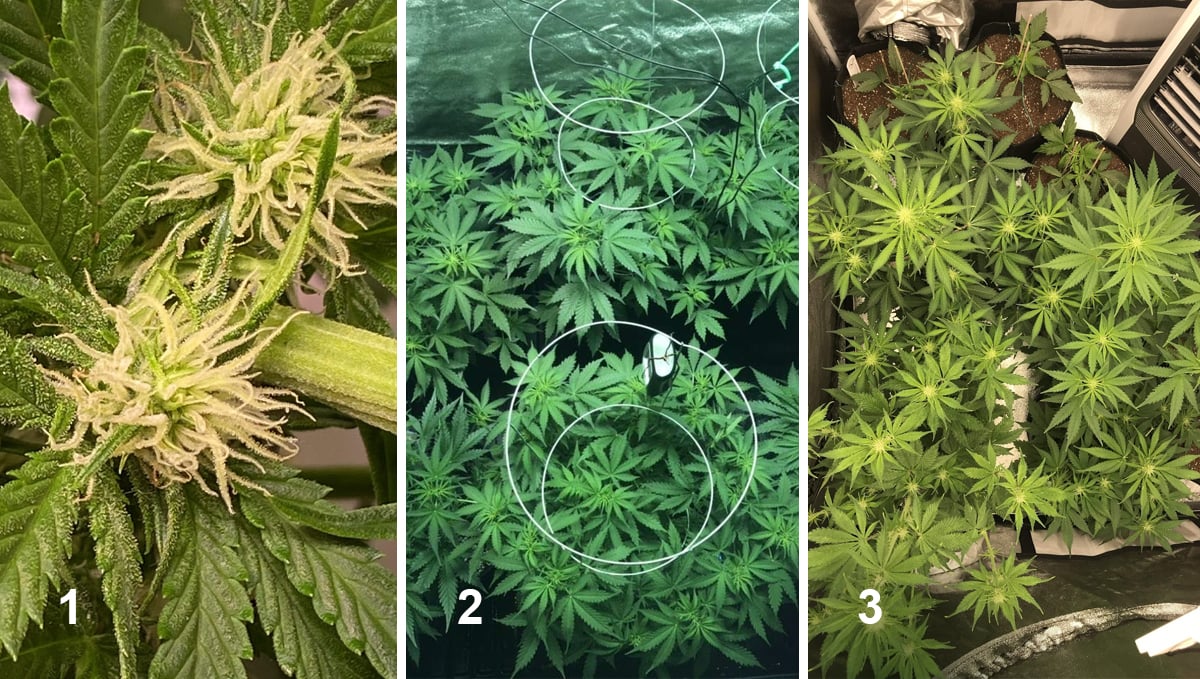
“Major development this week... All the plants are in flower.” - Dreamer 420
As you may know, autos have a limited time to completely mature so even if the manufacturer provided a feeding schedule, you have to adjust the amount to what your plants really need. Remember that if your plant had signs of deficiencies during the vegetative stage, like brown or yellow spots, it could be easily be fixed but now that you're in the flowering stage it's vital you do everything properly because it can not only affect yields but also if left untreated for long, end up affecting the buds so keep an eye on them, ideally, check the leaves thoroughly at least once a day, especially a day after having watered with the nutrient solution.
Week 7 - Flowering stage
The seventh week marks the second half of the flowering stage, this is the last week that you’ll be feeding your plants because, in order to make the terpenes really stand out, you should flush at least 2 weeks before harvesting.
| Height: | 65cm |
|---|---|
| pH: | 6.5 |
| Humidity: | 55% |
| Temperature: | 24°C |
| Watering: | 800ml |
You may see some of the white hairs starting to wilt and turn brown but don’t worry, that’s completely normal, your plant still needs a couple of weeks to fatten up and mature. By now, your plants should be reeking of a strong smell that can be hard to eliminate so make sure you take the proper actions to not risk it.
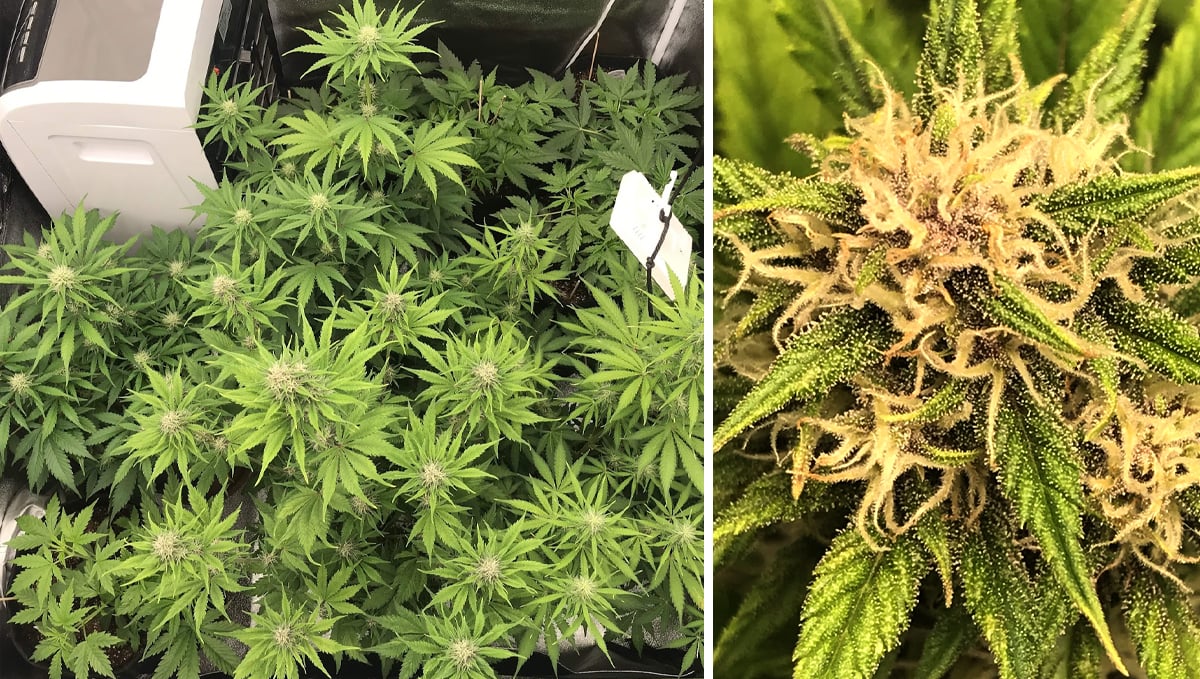
It’s also essential that you check your plants every day, any kind of pest infestation could easily ruin your entire harvest so make sure you keep good conditions, as always, the temperature should be in between 18-25°C but the humidity should be around 55%, this will ensure that pests don’t attack your plants.
Week 8 - Flowering stage
Week 8 is when your buds will be kinda dense and properly formed, if you have not performed any training maybe the lower buds are not receiving proper light so you may want to defoliate slightly if you don't want aery buds.
| Height: | 75cm |
|---|---|
| pH: | 6.3 |
| Humidity: | 40% |
| Temperature: | 20°C |
| Watering: | 900ml |
Also, you should start flushing, at this stage, your plant won’t grow much more but the buds still need time to ripen, you will see an abundance of trichomes all over the flowers and surrounding leaves, and the smell should be amazing.
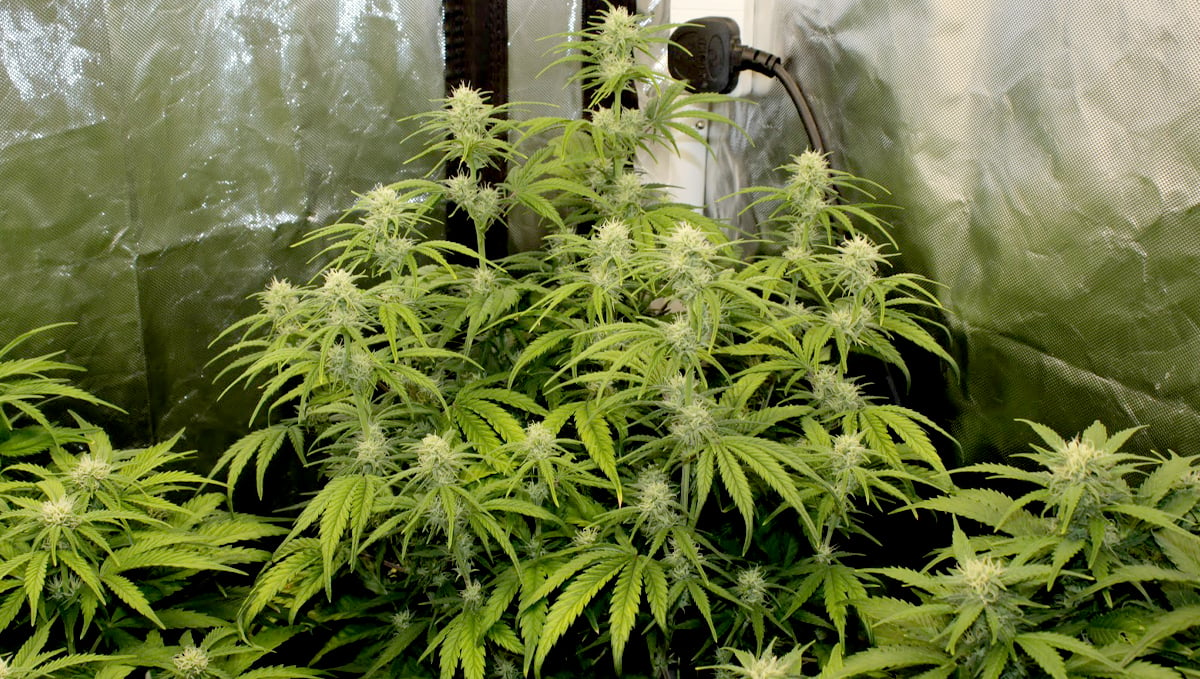
By flushing, you’re removing the excess nutrients that make your buds taste harsh and also improve the smell and flavor so if possible, use filtered water or at least leave water in a bucket under the sun for around 48hs to evaporate all of the chlorine in it to avoid stressing your plants.
Week 9 - Harvesting
Week 9 marks the last week of your growing cycle, by now you should have an idea of how potent and resinous your buds will be when they’re ready for consumption, by the end of this week you’ll be harvesting your plant so make sure you continue flushing until the end.
| Height: | 70cm |
|---|---|
| pH: | 6.2 |
| Humidity: | 60% |
| Temperature: | 24°C |
| Watering: | 1000ml |
Around 2-3 weeks before harvesting, let the soil dry out, these couple of days is the time you have to prepare and make sure your drying room is good to go, as soon as you harvest your plants they’ll have to be hung upside down in the drying room so get everything ready.
“The smell on this is gorgeous...Don’t know how to describe the smell, just something else, I also cannot believe how dense and short it is, buds are apple-sized in a strawberry shape.” - BigDaddyK
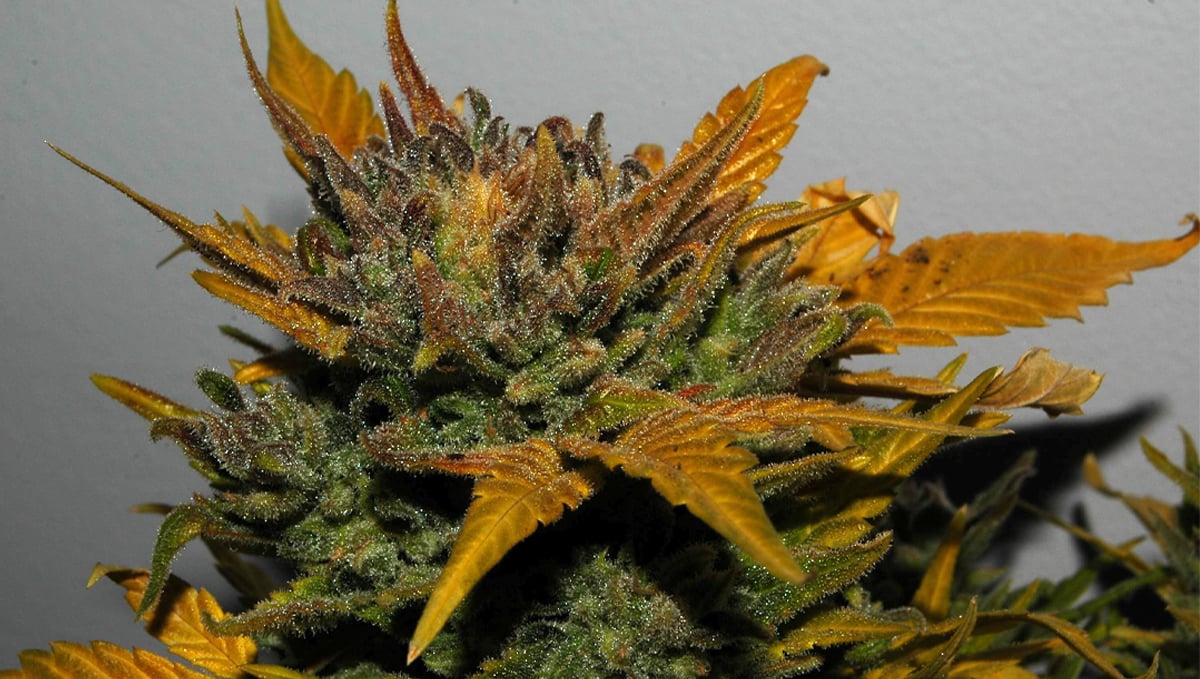
Also, if the leaves started to turn yellow, don’t worry, yellow leaves are normal during the flushing process, now if the leaves are yellowing through the growing cycle then it’s definitely a problem.
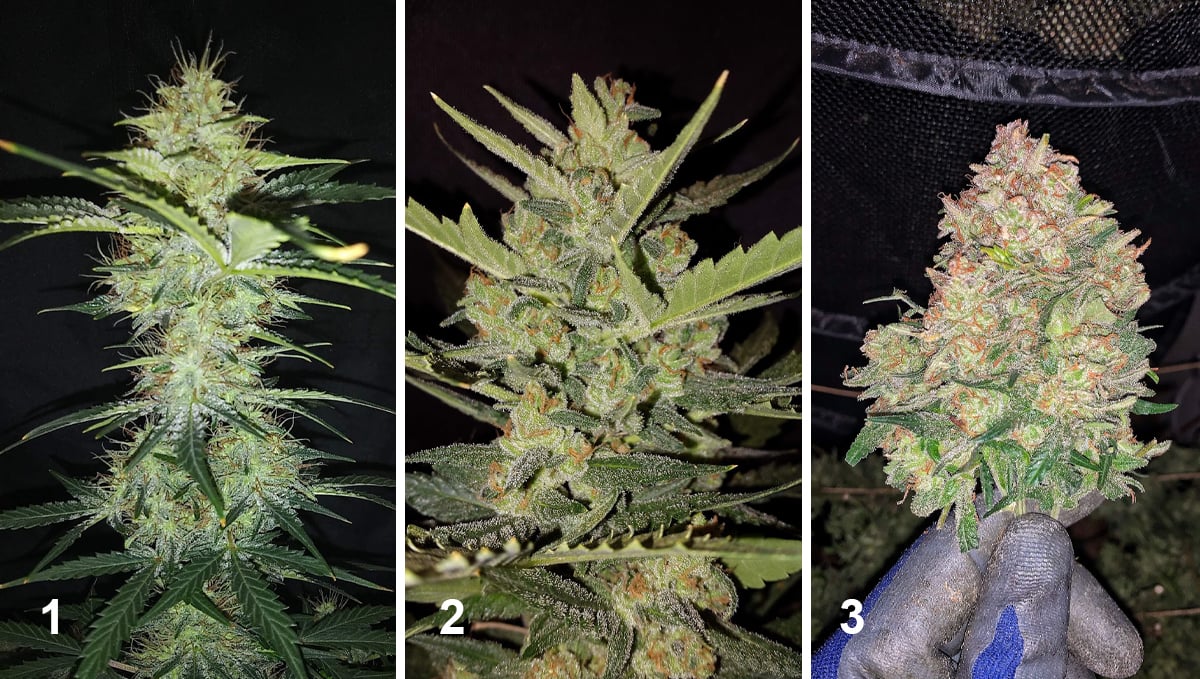
After you’ve got everything ready, it’s now time to trim and dry, take your time, it can be exhausting to trim properly but once you’ve cured your buds and they’re looking beautiful, you’ll see it’s definitely worth it.
4. How to Properly Trim, Dry, and Cure Your Northern Lights Auto Harvest
After harvesting your cannabis crop, proper trimming, drying, curing, and burping is very important processes that play a big role in the final quality of the buds. When done correctly, all of these processes will preserve and enhance the flavors and aromas while at the same time eliminating the harshness caused by chlorophyll.
Trimming Your Harvest
Trimming cannabis consists of removing the little sugar leaves on the cannabis buds, and it’s an important part of a cannabis grow cycle because it will not only help prevent mold but also improve the bag appeal, and overall smoking experience (aka grinding, rolling, and enjoying the flowers). The trimming process can be done before or after drying, this means there are two ways of trimming; Trimming your harvest before drying your plants (aka wet trimming) or when drying your harvest (aka dry trimming).
Pros and Cons of Wet Trimming
Pros
- Can potentially prevent mold;
- Flowers dry faster;
- Dry more flowers in less space.
Cons
- Dry sugar leaves can stick to the flowers;
- Harvest can potentially dry too quick, leading to loss of flavor and smell;
Pros and Cons of Dry Trimming
Pros
- Can help maintain correct humidity in low-humidity environments;
- Flowers dry slower which helps maintain the complete flavor and smell.
Cons
- Can result in moldy flowers in high-humidity environments;
- Dried sugar leaves can stick on trichomes, making it tougher to remove.
Drying Your Harvest
The next step is to dry your harvest, remember that this plays a huge role in the final quality as doing it too slowly can cause the flowers to get mold, and doing it too fast can cause terpenes to evaporate, which makes flowers taste like hay. After 10 weeks or more of taking care of your crop, you definitely don’t want to ruin it now so read along to learn more.
Hang Plants Upside Down
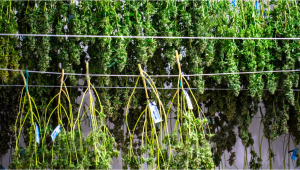
Hanging the plants upside down is the preferred method of drying for most growers, including commercial growers. As the name suggests, this consists of hanging the whole plant upside down for seven to sixteen days. This will take a bit longer than cutting each branch or bud individually but helps preserve flavors and smell, so always hang whole plants when possible.
Drying Racks
Drying racks are flat surfaces stacked on each other, this means that you can dry much more in the same space you would hang whole plants. Drying your harvest on drying racks usually takes anywhere from four to seven days but it’s not recommended unless it’s the only option because flowers may dry too fast and end up losing flavor and potency.
Curing and Burping Your Harvest
Now that your flowers are properly trimmed and died, it’s time to cure and burp the buds. In order to properly cure the flowers you will need:
- Airtight glass jars;
- A small hygrometer.
So to start the curing process all you have to do is place your flowers in the glass jar, making sure you don’t compact or press them too tight and seal the jar. During this process, the moisture will travel from the center of the buds outside it’s necessary to burp the jars. During the first week of curing you will need to open the jar (aka burp) once or twice a day anywhere from 30 minutes up to a couple of hours. This will help get rid of the excess moisture. After the first week of burping, continue to burp the jars but only once every three to four days and after this, you can do it once every couple of weeks, just keep in mind that this will depend on the environment and density of the flowers.
After 2-3 weeks of curing your buds are ready for consumption but remember that you should smell the flowers every day as it’s fairly easy for flowers to get moldy during curing, so if your flowers smell like ammonia it could be an indication that mold is starting to form. If this happens, take the lid off for a couple of days to remove the excess moisture and continue burping as usual.
5. What to expect?
After the drying and curing process, you’ll be left with beautifully frosted flowers, you can expect a peppery, spicy, and mild fruity terpene profile that makes for a potent Indica effect.
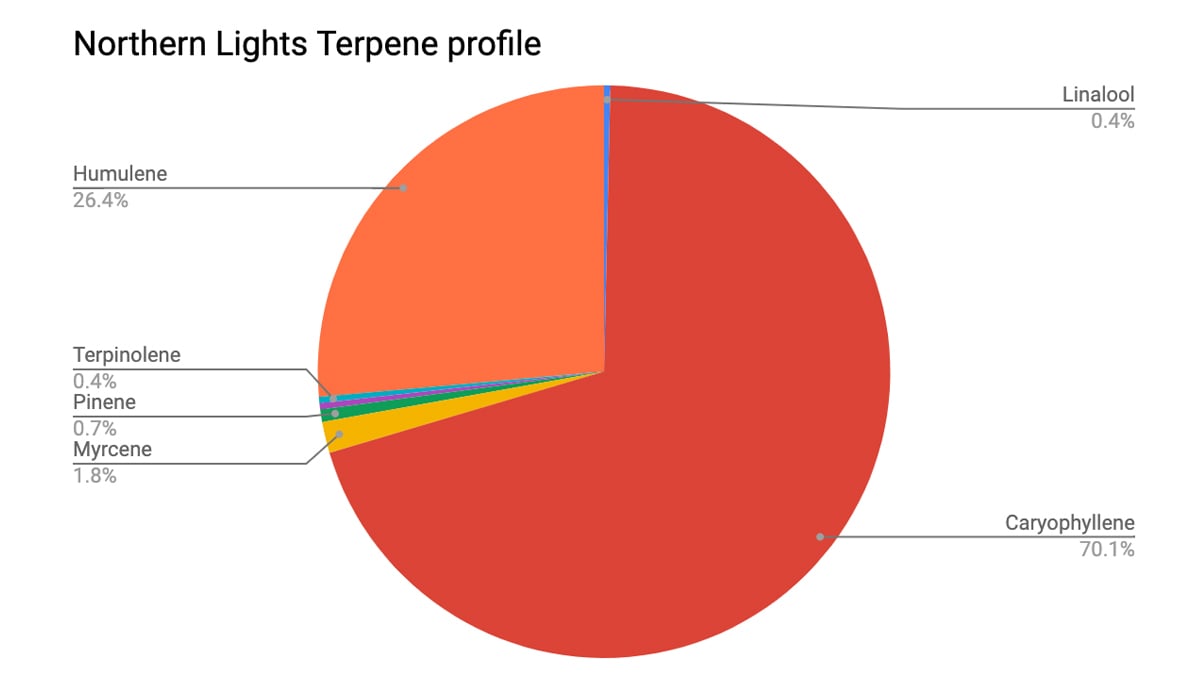
This savory combination results in an almost 100% Indica couch-lock effect with a light cerebral high, great for relaxing or having a good night of sleep.
After trying it for the first time, the grow reports shows that there really aren’t any negative effects other than a strong couch-lock effect, and having dry eyes and mouth, other than that, they’ve said that it’s a powerful nighttime smoke that will elevate your mood while leaving you deeply relaxed.
6. Expert Opinion by Jorge Cervantes - Co-Author:
Embarking on the cultivation journey of the Northern Lights Auto strain is a venture that promises both excitement and rewarding challenges. With over four decades of navigating through the intricate world of cannabis cultivation, I, Jorge Cervantes, am thrilled to share insights and wisdom that have been nurtured through years of hands-on experience and exploration.
The Northern Lights Auto strain, celebrated for its robust characteristics and history, offers a unique cultivation experience that is accessible to both novice and seasoned growers. However, it demands a keen eye and a willingness to adapt to its specific needs. Understanding and respecting each stage of its growth is paramount to ensuring a healthy and bountiful harvest.
In my extensive career, I’ve always championed sustainable and organic growing practices. The cultivation of Northern Lights Auto, like any other strain, benefits significantly from an approach that prioritizes the health of the plant and the environment. Employing natural solutions, understanding the delicate balance of nutrients, and ensuring optimal light conditions are pivotal in realizing a bountiful harvest.
I extend my encouragement and support to all the growers embarking on this journey with the Northern Lights Auto strain. May your endeavors be met with flourishing growth and abundant yields. Remember, the path to cultivation success is paved with patience, understanding, and a genuine connection with the plants. Let this guide be your compass, and may your cultivation adventures be evergreen!
7. Northern Lights Auto Cannabis Strain Grow Guide FAQs
Although we have given a super detailed guide above, there are always going to be extra questions thrown our way by eager new growers, and that's a good thing! Cannabis cultivation is an ever-changing landscape, and there is a pretty steep hill to climb if you want to start off with a decent knowledge base. So, let's run through all of the most commonly asked questions when it comes to growing Northern Lights Auto.
How long does it take to grow Northern Lights auto?
The average time it takes to grow Northern Lights from seed is around 10 weeks. However, this can vary depending on the growing conditions and environment. If you are growing indoors, you can expect a shorter timeframe of around 8-9 weeks. Outdoors, the plant may take a little longer to mature, with an average time of 10-11 weeks.
This is also phenotype dependant. While we pride ourselves here at Fast Buds on always offering the very best genetics available, this is just the way cannabis works. There will always be some differences between phenotypes within a strain, so don't take timeframes as gospel. Always use a handheld microscope to get a good, in-depth look at the trichomes before making any decision to cut a plant down.
What are the ideal growing conditions for Northern Lights auto?
Northern Lights is a fairly easy plant to grow and can thrive in a variety of different environments and conditions. She works really well in a range of climatic conditions and can be grown all year round in tropical areas. However, for the best results, it is recommended to grow this strain in a warm and sunny climate with a minimum of 12 hours of daylight per day. She grows super dense buds, so you want to try and stay clear of the more humid months. This will ensure that the plant has enough light to produce a good yield, and won't succumb to any bud rot issues.
If you are growing indoors, Northern Lights Auto works best under either 18 or 20 hours of light per day for the entire lifecycle. If you can keep the temps between 18 - 26 degrees Celcius (64 to 79 degrees F) with a relative humidity of 55 - 65% during the vegetative growth stage, and drop the RH slightly to 45% - 55% for flowering then you should see fantastic results.
What is the ideal nutrient regime for Northern Lights auto?
As with all plants, cannabis needs a certain amount of key nutrients to grow and thrive. However, the precise amount of each nutrient will vary depending on the stage of growth, as well as the specific strain. For Northern Lights Auto, we recommend using a base nutrient of around 15-20% Nitrogen (N), 3-5% Phosphorus (P), and 2-4% Potassium (K). This should be applied during the vegetative stage, with the Nitrogen levels being decreased and P+K levels boosted during the flowering stage.
It's always best to start with a lower concentration of nutrients and then increase as needed, rather than going in too heavy from the start. This will help reduce the risk of nutrient burn and will ensure that your plants get exactly what they need when they need it.
What is the ideal pH level for Northern Lights Auto?
The ideal pH level for growing cannabis will vary depending on the medium being used. For example, if you are growing in coco coir or hydro, then a slightly higher pH of around 5.5 - 6.5 is recommended. This is because coco and hydro are naturally more alkaline media. If you are growing in soil, then the ideal pH range is around 6.0 - 7.0. However, it's always best to test your medium before adding any nutrients, as different brands and types of soil can have different pH levels. Remember to check the pH of the runoff to see where the pH levels are at the root zone.
How many grams of dried bud can you expect to yield from each Northern Lights Auto plant?
Again, this is super variable depending on the style of cultivation, the climatic ranges, the type of nutes, and a whole bunch of other variables. When growing outdoors in absolutely prime conditions you should expect to get anywhere from 4 to 8 ounces from each plant. For indoor cultivation, she can reach the golden 500 – 600 gr/m2 mark.
What size pot should you use for Northern Lights Auto?
As with all autoflowering strains, it's important to try and stress the plant as little as possible. The autoflowering mechanism has a bunch of positives, but one of the things to be careful of is that autos don't have much time to bounce back from any overstressing.
So, with autos, it's always best to start them in the pot you are going to finish them in. Every time a cannabis plant is transplanted they go through a significant amount of stress, and so growth will be stunted by at least a few days. By starting the plant in the pot you intend to finish her in, you remove this stress. As a general rule, we like to grow our autos in pots that are at least 11 liters or so (that's 2.5 gallons). This size pot allows for maximum root growth, meaning the plant will reach its potential in terms of size - as long as you have everything else dialed right in.
What type of pot should you use for Northern Lights Auto?
The type of pot you use will be largely dependent on your own grow setup. But the gold standard for cannabis cultivation is fabric pots. They allow for the highest levels of oxygenation to the root zone, great drainage, and are easy to transport. Air pots are also really good. But what if you can get your hands on these pots?
No worries! Just make sure that whichever pot style you choose has adequate drainage. Most plastic pots on the market will work just fine, but they may need a few extra holes drilled in the bottom to help the feed water escape at a decent rate. PROTIP: Line the bottom of your pots with a small layer of pebbles before you add the growing medium. This helps massively with drainage, just be sure they are nice and clean.
How close to the OG photoperiod Northern Lights is the Northern Lights Auto Strain?
We are extremely proud of this strain and worked for years to perfect her. Her genetic lineage is a cross between the OG Northern Lights and our prized autoflowering genetics which was one of our first 'super autos'. We think this strain is 100% worthy of carrying the Northern Lights name and stands up to the original in both taste and effect. The only real difference is that she will be ready to harvest in around 9 weeks from seed to harvest, as opposed to the 11-12 week flowering time of the original (and that doesn't include the vegetative growth time).
7. In conclusion
Northern Lights Auto is a truly classic Indica strain that everyone should try, it’s powerful effect is a great way to unwind after a long day of work and can be consumed by medicinal users that will reap their rewards in just 9 weeks. If you're planning on growing Northern Lights Cannabis and have any doubts or have grown it before, feel free to leave a comment in the comment section below.
External References:
- Cannabis indica. - Nash, Eugene & Wilbrand, Rainer. (2015).
- Cannabis sativa and Cannabis indica versus “Sativa” and “Indica”. - McPartland, John. (2017).






Comments