


White Widow Auto Cannabis Strain Week-by-Week Guide

- 1. History
- 1. a. Shantibaba’s version
- 1. b. Ingemar’s version
- 2. White widow myth
- 3. Specifications
- 4. Week-by-week guide
- 5. Week 1 - germination
- 6. Week 2 - vegetative stage
- 7. Week 3 - vegetative stage
- 8. Week 4 - pre-flowering stage
- 9. Week 5 - the flowering stage
- 10. Week 6 - the flowering stage
- 11. Week 7 - the flowering stage
- 12. Week 8 - the flowering stage
- 13. Week 9 - harvesting
- 14. Terpene profile
- 15. Type of effect
- 16. Drying, trimming, and curing your white widow auto harvest
- 17. Expert opinion by jorge cervantes - co-author:
- 18. White widow auto cannabis strain grow guide faqs
- 19. In conclusion
Preface
The article from “420 Fast Buds” provides a meticulous week-by-week guide on cultivating the White Widow Auto cannabis strain, a variant famed for its potent effects and resilient nature. The guide is not merely a cultivation manual but a comprehensive journey through the plant's life cycle, offering insights into its growth patterns, nutritional needs, and potential challenges encountered during its development. From germination to harvest, the article thoroughly details each phase, ensuring that novice or experienced growers can navigate the cultivation process with an informed perspective.
The article's authors demonstrate a profound understanding of cannabis cultivation, mainly focusing on the White Widow Auto strain. Their expertise is reflected in the detailed descriptions, clear instructions, and provision of alternative approaches to potential challenges encountered during the growth cycle. The article is not just a guide but a reflection of extensive knowledge and experience in cannabis cultivation, ensuring that the information provided is accurate and practically applicable.
The guide is structured in a manner that is both accessible to beginners and valuable to seasoned cultivators, ensuring a wide range of audiences can derive value from the content. It provides a balanced blend of simplicity for easy comprehension and technical depth to ensure the integrity and accuracy of the information provided. The article also incorporates visual aids, such as images and charts, to provide a visual representation of the growth stages, thereby enhancing understanding and application of the guide.
If you are just curious or are currently growing the White Widow and want to compare it check any problem you might have, this is just for you. Here you can see how this strain develops, what to expect week-by-week, and take a look at this beautiful old-school strain. We've come up with a week-by-week grow guide, starting off with the world-famous classic White Widow. This beloved old-school strain will make even avid consumers fall in love with it due to its insane trichome production and potency.
1. History
White Widow is one of the most successful commercialized strains, this strain has won awards since it’s appearance in 1994. This cannabis variety was created by Dutch breeders and became known all over the world for it’s potent high and extremely resinous buds, becoming present in almost all respectable seed banks even nowadays. Despite its fame, no one knows exactly where it originated, but there are two theories.
Shantibaba’s Version
Shantibaba is a very respected Dutch breeder, it is said that he got a couple of seeds in one of his trips to India in the ‘90s. After he returned to the Netherlands, Shantibaba crossed one of them to a unique Brazilian landrace called Manga Rosa, the cross resulted in the famous White Widow, which he stabilized and developed for years before making it available to the public.

Ingemar’s version
The other version comes from another well-known breeder from the Netherlands, he says the seed that originated the White Widow was found accidentally in a hand-rubbed hash. After cultivating it and seeing the gem he had in his hands, he continued to develop it for 6 years until he met the owner of a very famous Dutch seed bank. He became very close friends with Arjan Roskam and after seeing the potential his seed bank had gifted the original White Widow to him.
2. White Widow Myth
Even though it’s known by growers that if you leave your plants up to 48hrs in complete darkness before harvest they will produce more trichomes and fatten the buds in one last attempt to preserve the species before dying, it’s said that if you leave the White Widow in complete darkness you’ll be able to hear her cry and in one last attempt to preserve the species before dying, it will produce an insane amount of resin and end up completely covered in trichomes before harvesting.

You’ll probably won’t hear your plants cry but this practice is common when growing cannabis knowledge and you will surely see a huge difference when doing this, when you leave your plants in the darkness they realize winter has come and focus all the energy on the buds, ending up with fatter and more resinous buds.

Specifications
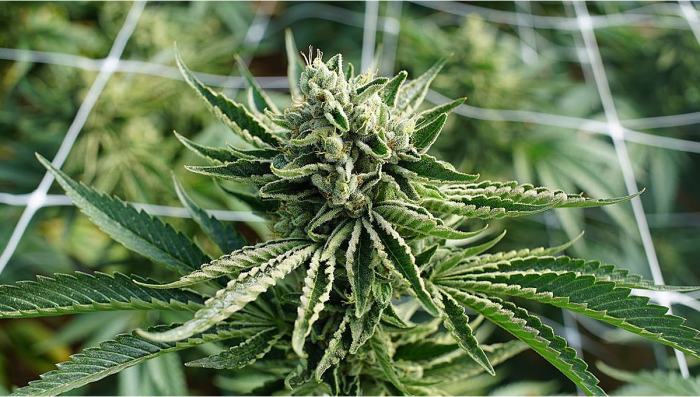
The classical and beloved White Widow has been upgraded to an auto version by the Fast Buds team. We’ve been developing this old-school autoflowering strain for some time and the results are amazing, you can expect to harvest up to 500gr/m2 of extremely dense silver coated buds in around 9 weeks from start to finish.

Our auto version of this classic strain grows up to 110cm with super resinous large-sized buds produced all throughout the main cola and long side branches. The 20% THC translates into dark green buds which are extremely sticky and can develop pink and magenta hues near harvest, where the trichome production will be at its peak and will reek of a pungent spicy, earthy and sweet aroma with mouth-watering fruity undertones.
3. Week-by-week guide
In this grow cycle, the White Widow has been grown under specific conditions, as you can see, the temperature, humidity, and pH were controlled closely.
| Grow Specifications | |
|---|---|
| Light Fixture | HPS/LED |
| Light Cycle | 20/4 |
| Humidity | 60% - 40% |
| Temperature | 20-23°C |
| Grow Space | Indoor |
| Nutrients | Synthetic |
| PH level | 5.7-6.2 |
| Seed to Harvest | 9 weeks |
In the table above you can find exactly how this cultivar was grown and you'll see more information in the timeline per each week. Obviously, you don't have to follow it when growing this same strain but can be helpful for those who are starting to grow cannabis now.
Week 1 - Germination
In this week-by-week grow journal one seed of our White Widow Auto was germinated in a cup of filtered water for 12hrs until it sank to the bottom when your seed is germinating you’ll see a white taproot (radicle) coming out, and after it has around 2-3 cm you can place it in the medium of your choice.
| Height | 4cm |
|---|---|
| pH | 6 |
| Humidity | 60% |
| Temperature | 20-22°C |
| Watering | 100ml |
In this case, after the seed showed the radicle it was moved to a rapid rooter plug, you don’t necessarily need a rapid rooter plug to do this, you can plant it directly into the soil or any other medium you prefer, even in hydroponics. At this stage, you shouldn’t water with nutrients, but you can use rooting hormones or mycorrhizae if you wish to, this will help your plant develop the roots faster and start with an advantage.

Once your seed has come out of the medium, the first thing you’ll see is two little rounded leaves, these leaves are called cotyledons which absorb sunlight and hold the nutrients your seedling needs to start growing. In this stage you should maintain a 60% relative humidity and a temperature around 23° C, a high humidity is ideal for baby cannabis plants because it helps them develop the roots better. After your seedling comes out of the soil, the leaves should be completely green, if you see the cotyledons yellow or if you don’t see the one-fingered cannabis leaves, then something’s wrong.

Week 2 - Vegetative Stage
As soon as your plant starts developing, you’ll see one-fingered leaves start to develop. You’ll see the number of fingers gradually increase throughout the vegetative stage until they reach 5-7 “fingers” (or even more with some strains). When you see the first true leaves developing it means they have already adapted to the pot (especially if you transplanted) and now the roots will start to grow exponentially.
| Height | 7cm |
|---|---|
| pH | 6 |
| Humidity | 55% |
| Temperature | 20-22°C |
| Watering | 150ml |
Depending if the medium is amended or not, you will have to start feeding lightly and maybe use a root stimulator, letting the medium dry a little bit in between waterings so the medium gets oxygenated. Once the roots have established, you’ll see one pair of leaves completely developed overnight, this means your plants are happy and growing as they should.

It’s crucial you maintain the humidity quite high and provide air circulation from an early stage so your plant can strengthen the stems, this will facilitate plant training techniques like LST, Scrog, and SoG and the second week is when you should start to do it.

Week 3 - Vegetative Stage
In week 3 from germination, your plants have already established the roots and should be developing a lot of foliage, this is when you want to start increasing the nutrient dose. To better develop the leaves and branches you should provide a higher amount of nitrogen, in an approximate ratio of 3-1-2.
| Height | 16cm |
|---|---|
| pH | 6 |
| Humidity | 50% |
| Temperature | 20-22°C |
| Watering | 250ml |
At this stage you can clearly see the traits your plant inherited from its parents, Indica-dominant strains develop short and bushy and Sativa-dominant develops long and with less leaves, this means your plant will develop according to its genetics, but because the White Widow is a hybrid, the difference will be more visible in the leaves. Around the third week, you’ll clearly see the leaves develop a number of apexes (“fingers”), with this strain you’ll see the leaves developing between 5-7 apexes.

Your plant is now growing so fast that you’ll be able to see the difference from one day to another, you’ll also be able to notice the bud sites slowly starting to turn light green, this means your plants are getting ready to enter the pre-flowering stage.
"Plants had their first nute feeding after the week of PH'd water. So far so good and they seem to love it. The WW's are bushing a lot, more than what I expected - FrankieBones ".
Week 4 - Pre-flowering Stage
The pre-flowering stage is when your plant will show it’s sex, all of our autos are feminized so you’ll see white hairs appearing, this means your plant is officially in the pre-flowering stage and it’s transitioning from the vegetative to the flowering stage, when this happens you should start to slowly change from growing nutrients to bloom nutrients.
| Height | 42cm |
|---|---|
| pH | 6 |
| Humidity | 50% |
| Temperature | 23-25°C |
| Watering | 400ml |
The transition from growing to blooming nutrients should be done slowly throughout the pre-flowering week in an approximate ratio of 1-2-3, increasing the blooming nutrients a little bit per day and decreasing the growing nutrients at the same rate. Don't overcomplicate things for the first few grows. To give you an idea of how simple yet efficient a nutrient schedule can be, we give you this nutrient chart from one successful White Widow Auto run.

Even though it may take a couple of days for the bud sites to start developing fast, as soon as you see the stigmas you know you’re on the right path. Remember to always look for signs of overfeeding or deficiencies, these signs will help you adjust the nutrient dose you’re giving your plants.

This stage is when your plant will start the trichome production so even if it’s not smelling too much now, it’s better to install a carbon filter or other method to mask the smell because it will start to get stronger and stronger as the days pass. Also, make sure you’re gradually decreasing the humidity levels, you need to lower the relative humidity throughout your plant’s life cycle, starting at around 60% for seedlings, 50% for vegetative plants and 40% for flowering cannabis.
Week 5 - The flowering Stage
On the fifth week, your White Widow Auto is officially flowering and you will start to see trichome production, during this week you should be feeding only blooming nutrients, although you should control the environment throughout the entire growth cycle when the buds start to form you should be especially careful because the right combination of humidity and temperature can attract bugs and mold.
| Height | 60cm |
|---|---|
| pH | 6 |
| Humidity | 50% |
| Temperature | 23-25°C |
| Watering | 700ml |
Bugs and mold feed on cannabis plants and the buds, rotting not only the leaves but the buds also, making them unsafe to consume and easily spreading to the plants around, that’s why you need to check every day for insects or signs of mold. If you’ve fed your plants properly and don’t see any signs of deficiencies, you’ll see a big difference in the development of the buds from one day to the other.

This is also when you’ll see your plant grow exponentially, this is called the “flower stretch” and it happens after the pre-flowering stage, how much your plant grows will depend on the genetics but it’ll definitely grow a lot, some strains even doubling in size. When you reach week 5 you should stop training your plant and remove the ties (if you used the tie-down method), your plant should already have the desired structure, training it while it’s developing the buds can stress her so it’s better to avoid it.

Week 6 - The flowering Stage
The sixth week is where your plant will start to smell the most, if you haven’t installed a carbon filter at the beginning of the flowering stage, now it’s the time.
| Height | 75cm |
|---|---|
| pH | 6 |
| Humidity | 50% |
| Temperature | 23-25°C |
| Watering | 1200ml |
You’ll start to see the flowers starting to take form and an abundance of trichomes all over them. At this point, you should already be feeding a full dose of nutrients and you will see your plant absorbing more and more water, this happens because your plants need quite a lot of water and nutrients to develop the buds.

From a week to the next one you’ll see a lot of white hairs appearing and getting quite long, those hairs are where the buds will form and are a sign that the buds are growing correctly.

Week 7 - The flowering Stage
When growing our White Widow Auto the seventh week marks the beginning of the second half of the flowering stage.
| Height | 80cm |
|---|---|
| pH | 6 |
| Humidity | 45% |
| Temperature | 25°C |
| Watering | 1500ml |
This is the last week of nutrient feeding before starting the flushing process, as your plant gets closer and closer to being completely mature you will be able to see the pistils turning brown, the trichome’s cap starting to swell, and your plant reeking of a super pungent and delicious smell.

It’s super important you check your plants for bugs every day because at this stage a bug infection can affect your buds and seriously affect your harvest. At this stage, you won’t see much plant growth other than an increased trichome production and fattening of the buds.

Week 8 - The flowering Stage
This is the week before the last week of your White Widow’s life cycle, you won’t see much growth but the buds are almost done so you will see the flowers a lot fatter than the week before, the trichomes should be slowly starting to turn cloudy and you’ll see most of the stigmas turning brown.
| Height | 80cm |
|---|---|
| pH | 6 |
| Humidity | 45% |
| Temperature | 25-26°C |
| Watering | 1500ml |
In this stage of plant growth is when you should start the flushing process, if you wish to, you can use flushing products but using dechlorinated tap water works well too.

To dechlorinate tap water you can fill up a bucket and leave it under the sun or leave an oxygen pump in the water for up to 48hs to dechlorinate it.
"She's grown another inch and has started going trichome crazy, along with showing brown pistils, which means she's getting close to finishing up, at this point she's doing nothing but adding mass to her bud sites - Mr_Weeds_Autos ".
Week 9 - Harvesting
The ninth week is the last week of the entire grow cycle, if you followed this grow report and you took good care of your plants, your auto should be extremely dense and resinous, at the end of this week is when you will harvest your White Widow so you should keep flushing until the last day, this will help you get a better aroma and smoother flavor.
| Height | 80cm |
|---|---|
| pH | 6 |
| Humidity | 40% |
| Temperature | 25-26°C |
| Watering | 1500ml |
A couple of days before harvesting you should also prepare your drying room for the amount of plant’s you’ll be harvesting, it’s also a good time to plan how you are going to harvest and trim, you can choose to harvest partially, cut branch by branch or cut the whole plant, and depending on the conditions of your drying room you will have to decide between wet trimming and dry trimming.

If you flushed properly, you will start to see the leaves yellowing, this is not a problem before harvesting but it is a problem if you’re not near harvest.

4. Terpene profile
After harvesting this beauty, it’s now time to enjoy the long-awaited White Widow flowers. We had a lot of growers cultivate this classic strain and have collected their reports.

When smoking our White Widow Auto, you can expect a delicious combination of sour, citrusy, earthy, sweet, spicy, herbal, floral, and piney flavors which are composed of the terpenes described in the chart.

5. Type of effect
That old-school combination of terpenes results in a slightly Sativa-dominant effect, consumers can expect a 70% Sativa and 30% Indica type of effect.

The Sativa heritage offers consumers a really uplifting effect, users have reported feeling happy, energetic, giggly and creative after consuming our White Widow, while the Indica heritage slowly turns the slightly euphoric effect into a more relaxed type of high, with some users have reported feeling a little bit hungry. We haven’t received reports of paranoia or other negative effects other than dry eyes and mouth.
6. Drying, Trimming, and Curing Your White Widow Auto Harvest
The first thing you need to consider is whether you will wet or dry trim the nugs. In almost every single situation we recommend dry trimming. Wet trimming is good if you live in a very humid area and don’t have access to a dehumidifier, but if you are able to control the environment (or live in an area where you do not need to) then just go ahead and break the plant down however you like, let it dry out slowly, and trim afterward. Dry trimming allows way more control over the drying timing which allows for a better end product in most situations. From here on in we are going to assume you are dry trimming.

How long should you dry your weed?
Ask 50 cannabis cultivators this exact question and you’ll probably receive about 30 different answers. We have spent years trialing different drying timings with various temperature and humidity levels, and reckon we have come up with a rock-solid protocol. Anywhere between 8 to 14 days is usually perfect, depending on the strain and how the harvest came out. Controlling the ambient temperature and the relative humidity is 100% needed. To warm and moist and you’ll end up with moldy buds, too cold and dry and the full terpene profile will not survive. It’s all about slow and controlled drying. To achieve this you may very well need to buy a few pieces of equipment, or steal them out of your grow room. In fact, your grow room may double as a perfect dry room, but only if you haven’t started the next run yet.

You might need an AC unit, some oscillating fans, a heater, a humidifier or dehumidifier, and a couple of hygrometers - it all just depends on your current climate. If you live in a non-legal state or country you may also want to grab a high-quality carbon filter and extraction fan to deal with the beautiful aromas. A range of 60-70°F (that’s 15-22°C) with a relative humidity level of 55-65% is what you should be aiming for, and its really not that hard to achieve if you have the right kit. Remember to always evenly space out the drying branches or full trees, making sure to leave enough space for them to breathe while they dry. Never, ever point your fans, heater, or AC unit directly at the buds, and be sure that the drying room is nice and dark.
Ok, so the harvest is now nice and dry. What’s the next step?
Time for you to grab ya scissors and get snipping! But not just any old pair of scissors, no sir. What you need is a dedicated set of bud trimming scissors, or maybe a couple of sets if you really want to get down. Do not, we repeat do not use that old set of crappy scissors that your mum used to use to cut your hair terribly. Trimming bud is a messy, sticky, annoying job - so make it as easy as possible and grab yourself some dedicated trimming snips like these or these, and don't forget to also grab a trimming tray.
These great trays help in kief collection, and if you have grown some decent weed then during trimming you will lose a lot of kief without a tray. There are a bunch of options available, but we have always used the original Trim Bins. You should also grab some isopropyl alcohol to help keep the scissors clean. Be careful not to “shave” the nugs while trimming, as this is super wasteful. Instead, use the tips of the scissors to get right inside and snip the leaves at their base while leaving the rest of the bud structure intact.

Now comes the time for curing…
What? You thought it was time to smoke up that sticky-icky? Not just yet. Look, there is nothing wrong with the buds at this point. They are more than smokeable, but if you are wanting to get the very best smoke and terpene profile possible then you are going to have to wait for the curing process to finish up. How long does curing take? Another contentious issue, and very much related to the strain that you are trying to cure. It can honestly take anywhere between 2 weeks to 6 months. To cure correctly you are going to need to grab a few resealable glass mason jars, a hygrometer for each jar, and possibly some two-way humidity control packs. To get the best results try to keep the jars less than 75% full, in a dark area, at 70°F (22°C), and with a humidity level of 60-65%. The jars need to be burped at least once a day for the first 10 days, and then 2 to 3 times per week for the rest of the curing period.

If at any point during the curing period you smell an ammonia-like aroma then quickly get the buds out of the jar and back into the dry room. This is a tell-tale sign that the jar is too humid and mold has started to take hold. If you dry it out quick enough you may be able to save the jar, but never smoke moldy weed. It can cause pretty serious health issues. The curing period is done with. Can you smoke now? Finally, yes you can go right ahead and smoke that good stuff!
7. Expert Opinion by Jorge Cervantes - Co-Author:
Ah, the White Widow Auto is a classic strain that’s been a favorite among cultivators and users for decades! This article by 420 Fast Buds is nothing short of a treasure for any grower looking to dive into cultivating this beauty. The week-by-week guide is not just a cultivation timeline but a story, narrating the life of the White Widow Auto with such precision and detail that it’s almost poetic. The authors have done a commendable job of breaking down each growth cycle phase, ensuring that even a novice grower can confidently step into the cultivation journey.
The visuals—oh, they’re not just pictures but a visual feast—give growers a real-time peek into what to expect as their plant matures. It’s like having a mentor guide you through each leaf and bud's development. The article doesn’t shy away from getting into the nitty-gritty, discussing potential challenges and offering solutions, which is crucial for any cultivation guide. It’s not just about the good times and the harvest; it's about navigating the challenges that make the journey worthwhile.
The cultural and historical nod to the White Widow strain, its potency, and its resilient nature resonates deeply with me. It’s not just a plant; it’s a legacy passed down through generations of growers. And this guide, my friends, honors that legacy by providing a thorough, well-researched, and beautifully illustrated guide to cultivating it. The authors have shared a guide and a piece of cannabis history intertwined with practical, hands-on advice rooted in genuine experience and a profound understanding of cannabis cultivation.
And to all you excellent growers out there, remember, each plant tells a story and grows a chapter in your cultivation journey. So, dive into this guide, soak up the wisdom, and embark on your adventure with the White Widow Auto.
8. White Widow Auto Cannabis Strain Grow Guide FAQs
While the above week-by-week grow guide for White Widow Auto is about as detailed as they come, there are always a few burning questions thrown our way - especially from novice growers. In this section, we will run through our most frequently asked questions, and try to answer them in simple, easy-to-understand terms. Here at Fast Buds, we love helping our customers with any and all queries, so if there is something we have missed be sure to leave a comment below and we will get back to you ASAP!
How many weeks does White Widow Auto take to go from seed to harvest?
This really varies depending on the environment and cultivation style, but as a general guide, White Widow Auto will be ready to harvest 9-11 weeks after germination. White Widow rarely takes longer than 63 - 65 days when grown indoors in optimal climatic conditions. For outdoor cultivators, you can expect this strain to finish up around the 69 - 77 day mark. Keep in mind that there will always be some slight variations between phenotypes, and while we pride ourselves on always supplying the most genetically stable autoflower seeds on the market, there is a possibility that two seeds from the same batch may finish a couple of days apart.
The only surefire way to tell if a cannabis plant has reached its potency potential is to use either a jeweler's loupe or even better a portable microscope to have look at the trichome development. You want to harvest those delicious buds when half are amber in color, and half are cloudy.
What is the best medium for growing White Widow Auto?
This comes down to personal preference really. White Widow will work super well in any medium, but for novice growers, we usually suggest starting out with coco-coir. Why? A couple of reasons, actually. Coco-coir offers many of the benefits from both soil and hydro cultivation styles and is pretty easy to work with. It holds up to 70% more oxygen than pure soil, can be flushed really easily if any nutrient issues arise, and is much more forgiving than a pure hydro setup.
Every single top-shelf nutrient company has its own range of coco-coir specific nutes these days, which makes the whole job a lot easier. That being said, if organic is the route you wanna go down, then go right ahead! Whipping iup a quick soil mix is so easy and takes away all of the nute mixing work that hydro or coco grows come with.

What climatic conditions work best for White Widow Auto?
One of the main reasons why White Widow has been a mainstay on Amsterdam coffee shop shelves since the mid-90s (it won the High Times Cannabis Cup in 1995) is that it is a very easy strain to grow. She is a hardy plant that can grow in colder conditions than many other strains, but she really shines in a Mediterranean climate. As we said before, if you are growing indoors you can get away with a bit of a cooler temperature, but as always the ideal range is 21-26C while the lights are on and 18-21C at night. You will want to keep the relative humidity at around 60% to begin with, and then drop it down to 50% around week 3, and then again to 45% when the buds start to form properly.
If you are growing outdoors, then make sure that your plants have access to plenty of sunlight - at least 6 hours a day, but if you can have her in the full sun for 10+ hours then she will really reward you come yield time. White Widow can handle a bit of heat, but anything above 30C for extended periods will make her stretch quite a bit and may even cause her to start flowering early.
What are the ideal nutrient levels for White Widow Auto?
For the actual nutrient levels, you will want to start out with a light feed for the first couple of weeks, and then increase the dosage as the plants get bigger. A good general guide is to start with a quarter or half the recommended dosage on the bottle and see how the plant reacts.
You will want to keep an eye on the plants, and if you see any signs of nutrient burn (leaf tips turning brown or yellow) then you should back off on the nutes a bit. As always, make sure you are using high-quality nutrient solutions that are designed for coco-coir or soil, as autoflowers really don't respond well to cheap, synthetic nutes. We recommend using Canna, House and Garden, Advanced Nutrients, or Dutch Master Gold.
What is the ideal pH for White Widow Auto?
Again this is dependent on the cultivation style, but DO NOT overlook the pH. for some reason, many novice growers seem to think that watching the pH isn't super necessary, but they could not be more wrong. The reason that we pH or feed water is so that the pH of the root zone is in the correct range for optimal nutrient uptake. If the root zone is too alkaline or acidic, the plant will not be able to uptake the nutrients from the soil/coco/hydro solution, and this will lead to nutrient deficiencies which will limit growth and yield.
The ideal pH range for soil is between 6.0 and 7.0, with 6.5 being the perfect number to aim for. For coco-coir or hydro systems, the ideal pH range is 5.8 - 6.2, with 6.0 being the perfect target number. Remember to always water until you see around 25 - 40% of the water running out of the pot, and to regularly check the pH of the runoff. This will give you the best indication of the pH at the root zone.

What is the normal yield size for White Widow Auto?
Once again, this depends on a bunch of factors, so it is almost impossible to give a 'normal' yield size. What we can do is tell you how many grams we usually get when growing White Widow Auto. When grown in perfect indoor conditions, you can expect to finish up with about 400 – 500 gr/m2. That means in a 3 foot x 3 foot tent you should be able to pull about a pound from each run. We recommend 4 plants in a 3 foot x 3 foot area.
For outdoor growers, each plant should offer anywhere between 50 – 170 grams. We usually find that she hits the 4 ounce mark when grown outdoors in good conditions, so again 4 plants will give you a pound of resinous dank buds. White Widow Auto is renowned for being one of the most trichome-covered strains ever created, so make sure you don't waste any of that trim. You can use it to make hash, rosin, or even just dry-sift it to create some extremely potent kief. White Widow Auto is a fantastic strain for first-time growers and those with little experience, as she is incredibly resilient and easy to look after. With a bit of love (and the right conditions), she will reward you.
What type and size pot should you use for White Widow Auto?
Thanks to the restricted vegetative growth time, autos do not respond kindly to transplanting, so we always recommend growers start their crop in the pots they expect them to finish in. Fabric smart pots offer the best root zone oxygenation and great drainage, and air pots are also pretty good. But, if all you can get is plastic pots then just make sure to drill some extra drainage holes and you should be all good!
For all our autos, we use pots that are at least 11 liters or so (that's around 2.5 gallons). This size is big enough to ensure the plant reaches its full potential.
9. In conclusion
The legendary White Widow strain is a trichome machine, without too much hassle you can successfully harvest trichome-drenched and extremely potent buds in around 9 weeks. We hope this autoflower grow journal helps you in future grow cycles or at least provides the information you were looking for about this classic old-school strain.
If you have grown our White Widow before or are planning to and have any doubts, please leave a comment in the comment section below!


Comments