Strawberry Cheesecake Auto Cannabis Strain Week-by-Week Guide
- 1. Grow specifications
- 2. Grow set up
- 3. Germination and seedling stage | week 1
- 4. Early veg | week 2
- 5. Mid veg | weeks 3-4
- 6. Transition (pre-flower) | week 5
- 7. Early flower | weeks 6-7
- 8. Mid flower (bulk phase) | weeks 8-9
- 9. Ripening and harvest | week 10 (and beyond)
- 10. Yield and smoke report
- 11. In conclusion
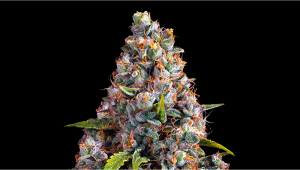
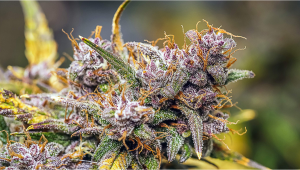
Strawberry Cheesecake Auto is a tantalizing delight for both growers and smokers. For growers, it boasts rapid growth, impressive production capabilities, and a robust structure that forgives minor mishaps. But it's the resin-rich, trichome-covered buds that steal the show. They glisten like delicate icing on a cake, exuding a mesmerizing aroma of sweet goat's cheese, aged earthy skunk, and subtle hints of strawberry hash and wild berries. Strawberry Cheesecake Auto is a must-try strain, offering a unique and delectable experience for cannabis enthusiasts.
To help you on your journey to a bountiful and high-quality harvest, we have compiled this week-by-week growing guide, complete with the seed-to-harvest timeline, description of different growth stages, and tips on how to achieve the best results while growing Strawberry Cheesecake Auto.
1. Grow Specifications
Strawberry Cheesecake Auto is a feminized cannabis strain whose impressive genetics include Strawberry Pie, Afghan OG, and BF Super Auto #1. This plant boasts a 25% Sativa and 75% Indica composition, making it well-suited for a range of climates, from cool to hot and temperate. What's truly exceptional about this strain is its autoflowering nature, allowing for a quick and convenient harvest just 75-80 days from seed.
When it comes to cultivation indoors, it reaches a manageable height of around 100 cm, making it suitable for discreet growing spaces. You can expect a bountiful yield of up to 650 grams per square meter indoors, ensuring a rewarding harvest. Outdoors, Strawberry Cheesecake Auto can stretch up to 140 cm in height, with outdoor yields matching those of indoor cultivation.
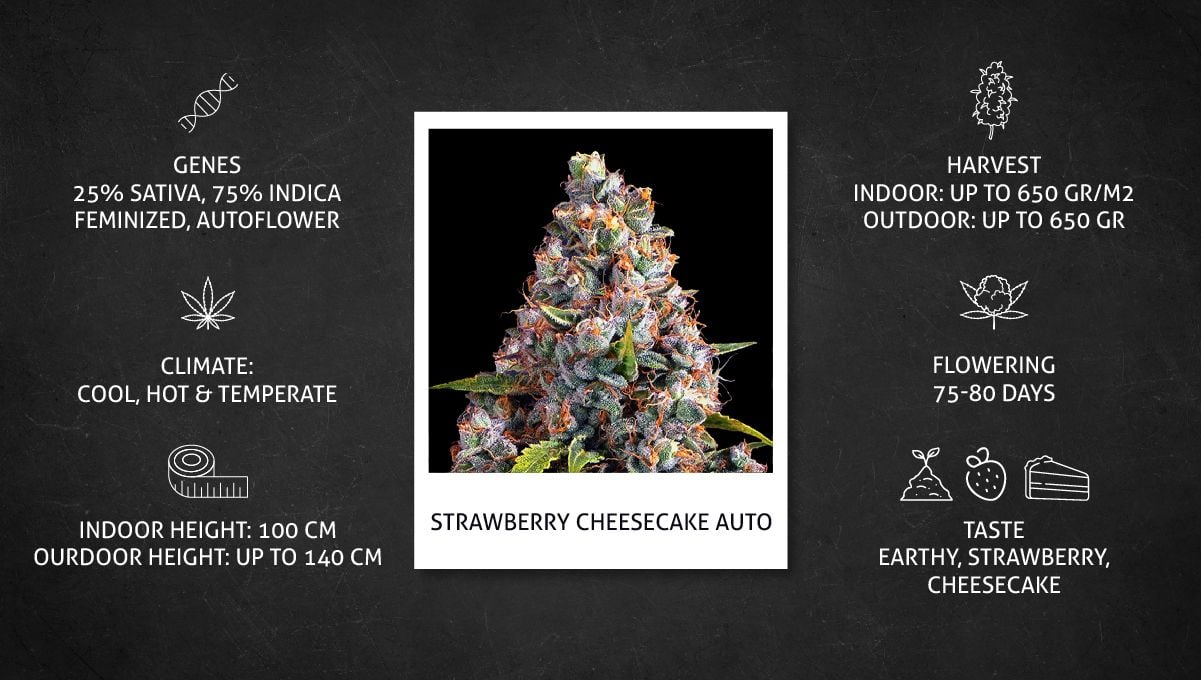
As for the taste and aroma produced by Strawberry Cheesecake Auto, prepare to be blown away by the earthy, strawberry, and cheesecake flavors that create a truly delightful experience. Strawberry Hash and Cheesecake aromas further enhance the sensory journey, making this autoflower a must-try strain for cannabis enthusiasts seeking a unique and flavorful adventure.
2. Grow Set Up
There are just enough Strawberry Cheesecake Auto grow diaries available online to showcase this strain's abilities indoors. We have chosen a grow report by a weed gardener with the nickname Further and follow it week-by-week, providing data on environmental conditions and yield. We also use pictures from a few other grow diaries to better show this strains progress from seed to harvest and demonstrate how uniform and stable this autoflower is. Please find below the data for the setup and environment for Further.
| Grow Space: | 2.25 m2 (21.53 ft2) | Pot Size: | 15 l (3.96 gal) |
|---|---|---|---|
| Seed to Harvest: | 11 weeks | Medium: | Coco/Perlite |
| Flowering: | 6 weeks | Nutrients: | Synthetic/Organic |
| Light Cycle: | 24/0 | pH Levels: | 6.0-6.3 |
| Light Type: | LED | Day Temperature: | 24°C (75°F) |
| Watts Used: | 600 | Humidity: | 40-50% |
Needless to say, Strawberry Cheesecake Auto is as versatile as any modern autoflower should be, so you don't need to replicate any of the conditions from the table above to achieve a stunning success with this plant. It will definitely thrive in a lot of setups and environments, including outdoor cultivation.
3. Germination And Seedling Stage | Week 1
As any experienced weed gardener will tell you, creating consistent and optimal conditions for your indoor garden is most important. This is especially true for autoflowering varieties, such as Strawberry Cheesecake Auto. Their grow cycle is very short, and every day counts. For the first few days, be sure to create warm and humid conditions as they are least likely to put additional stress on your small and vulnerable seedling. We would say that some parameters given in the table below are subpar. Aim for slightly higher temperature at around 26-28 Celsius and higher relative humidity – up to 80%.
| Plant Height: | 3 cm | Humidity: | 40% |
|---|---|---|---|
| Distance to Light: | 80 cm | Water per Day: | 0.5 l |
| Day Temp: | 24°F (75°C) | pH: | 6.0 |
| Night Temp: | N/A | Smell: | None |
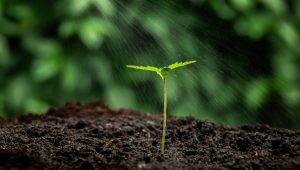
Good seeding material will give you no issues with germination. Viable seeds from reputable producers will germinate in about 1-2 days from the moment you put them in warm, moist, and dark conditions. One of the most straightforward methods of cannabis seeds germination is to place them between wet paper towels.
Some gardeners also pre-soak their seeds in a glass of water. You can either keep them there for 12 hours to make enough moisture seep inside through the seed hull, or you can let the seed float on the surface or water until it actually cracks and shows the taproot.
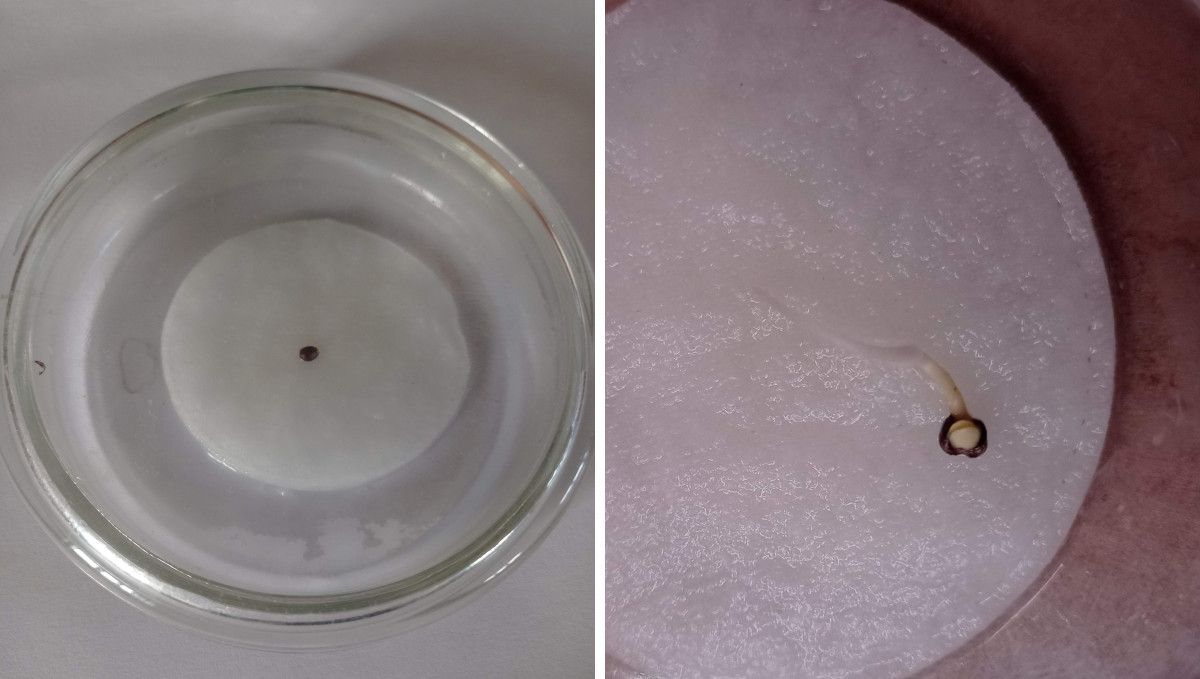
The wet-paper-towel method is very convenient in that it allows you to regularly monitor your seed and make sure it has sprouted. When that happens and you see that your bean is alive and has cracked, don't rush to plant it right away. Your seedling will become healthier and more vigorous if you first let the taproot grow to about 1 cm (0.5 iches) in length.
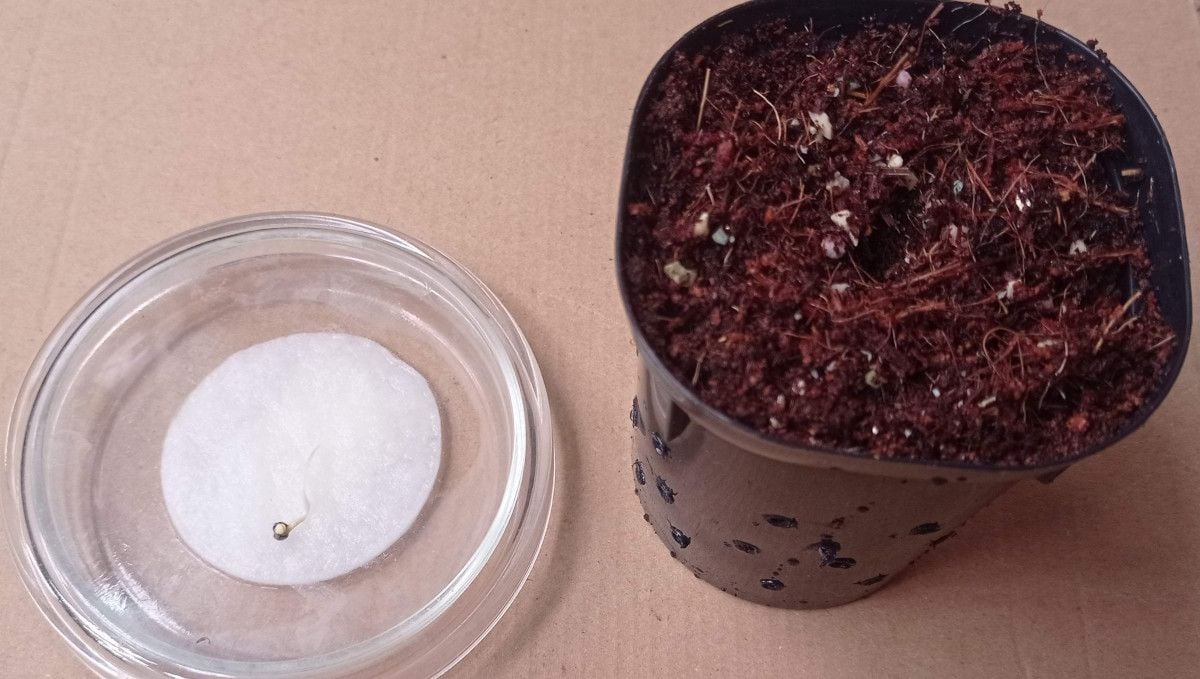
Once the sprouted seed is in the ground, there's no need to turn on the lights right away. Until the seed has come up, it can spend these first several hours in complete darkness. However, once the seed has emerged from the ground, it's time to turn on the lights. Don't keep them too close, or else your sprouts may get stunted or even burnt.
Also pay special attention to high relative humidity, otherwise, your sprout may be put in a position where it evaporates too much moisture for it's underdeveloped root system to handle successfully. If you fail to establish high enough humidity in the grow room itself, you can create it locally using a humidity dome.
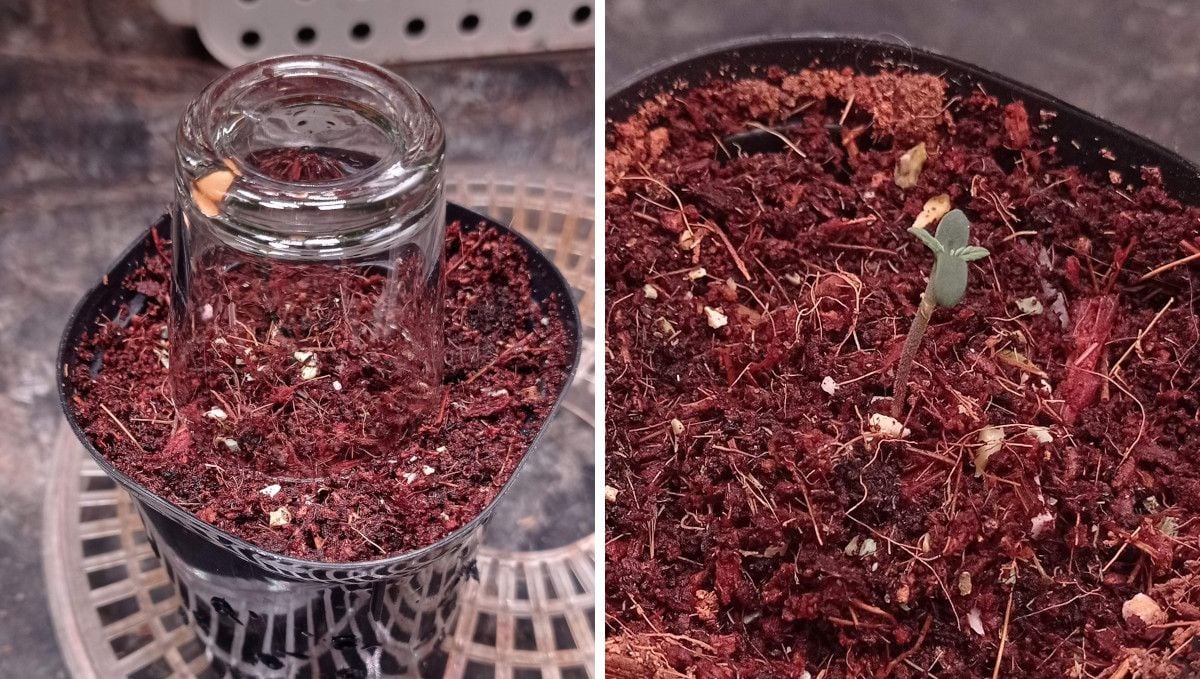
This grower has used a small starter pot for the first few days in the lifecycle of his Strawberry Cheesecake Auto. It's probably the safest approach to growing autoflowers as they not always handle transplanting without issues. On the other hand, it's much easier to water your small plant when it sits in a small container. About 50 mL a day should be sufficient. When the seedling is robust enough to handle repotting, you may transfer it to a bigger and final container.
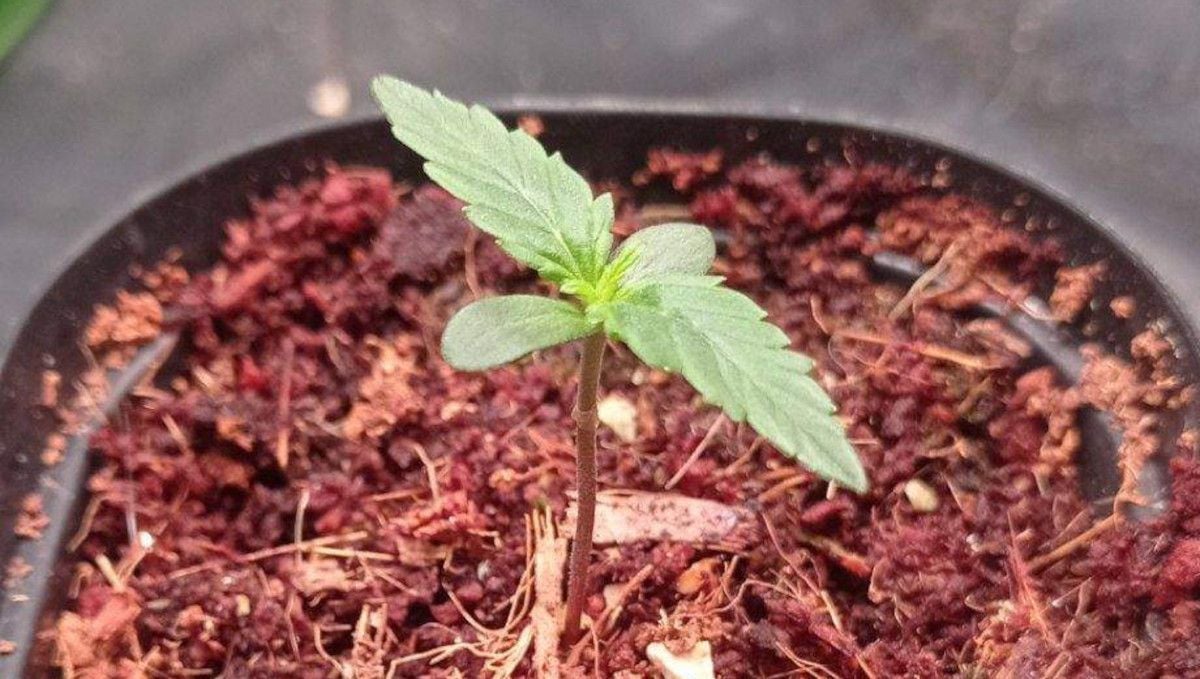
4. Early Veg | Week 2
Week 2 isn't really that different from the previous week in terms of environmental conditions. Keep trying to maintain a stable and consistent temperature of about 26-28° during the day with a slight drop of no more than 5° at night. The relative humidity should also stay high enough – about 70-80%. Of course, your young plant is now hardy enough to handle a wider range of conditions. However, try to give it a better start in life by providing the best possible environment.
| Plant Height: | 5 cm | Humidity: | 40% |
|---|---|---|---|
| Distance to Light: | 80 cm | Water per Day: | 0.5 l |
| Day Temp: | 24°F (75°C) | pH: | 6.0 |
| Night Temp: | N/A | Smell: | None |
The second week from seed marks the time when your young plant picks up the pace of development. You will see pairs of true leaves growing bigger and bigger. When the next pair of leaves gets bigger than the previous one, it's a clear sign that your autoflower is doing great. You may also see little green things appearing at the nodes. These are the future side branches forming.
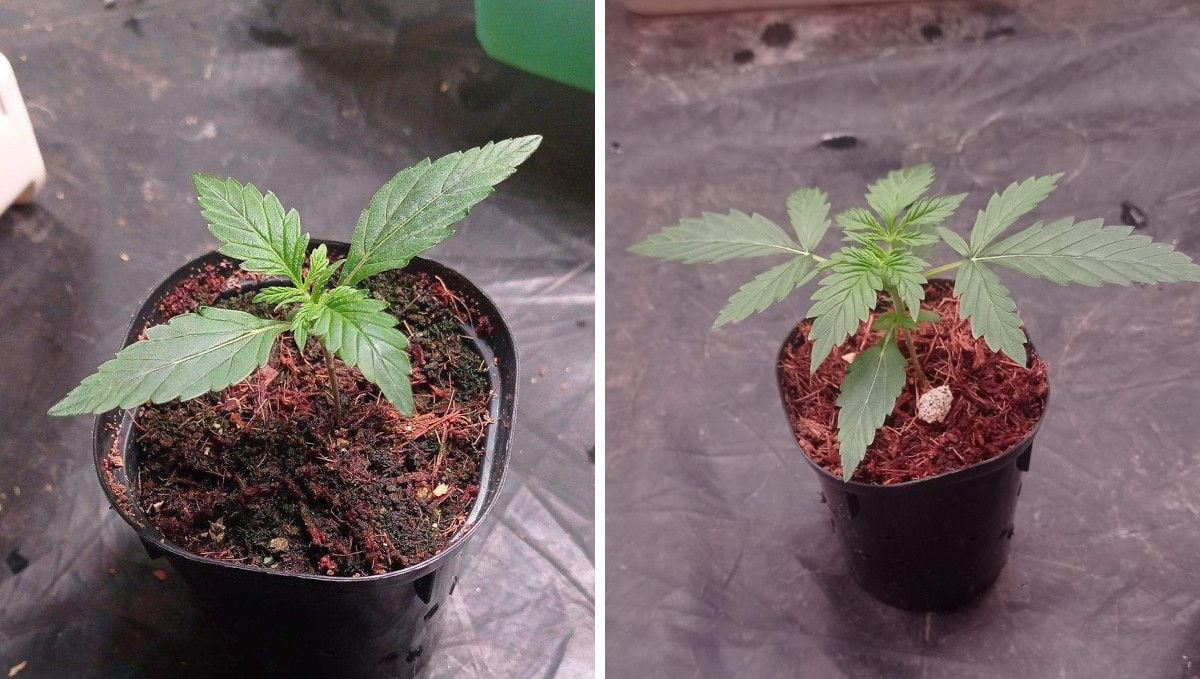
We have already mentioned repotting and its potential dangers. When you see that the leaves of you plant span far beyond the edges of the small pot or party cup you've been using so far, it means that you should transplant your autoflower right away. If you miss the perfect moment, you may find the roots starting to grow along the walls of the container. It means that the root system has become root bound.
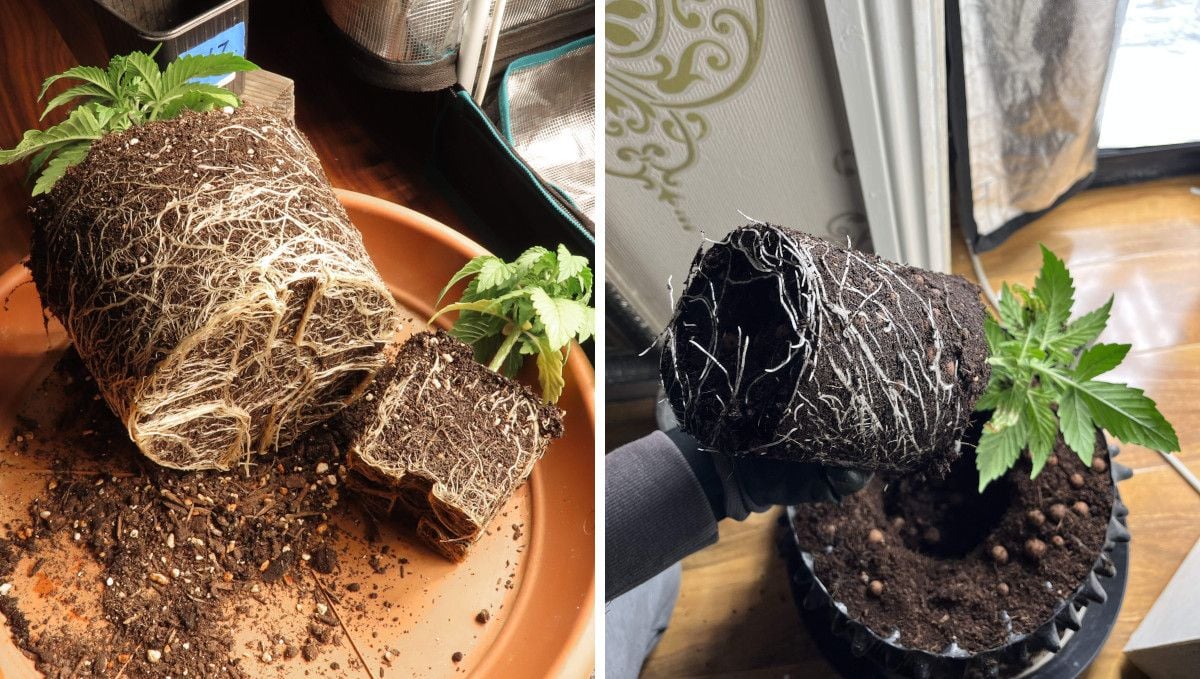
One of the perks of planting your autoflower straight into the final pot is that you do not need to give them any extra nutrients for at least a couple of weeks. The reason is that they will get enough plant food from the soil mix which is usually preloaded with fertilizers. However, in inert mediums, such as coco coir or hydroponics, this won't do. Here, you will need to feed your plants with every watering right from the start. Look in the graphic below at a sample nutrient schedule for the vegetative phase for Strawberry Cheesecake Auto.
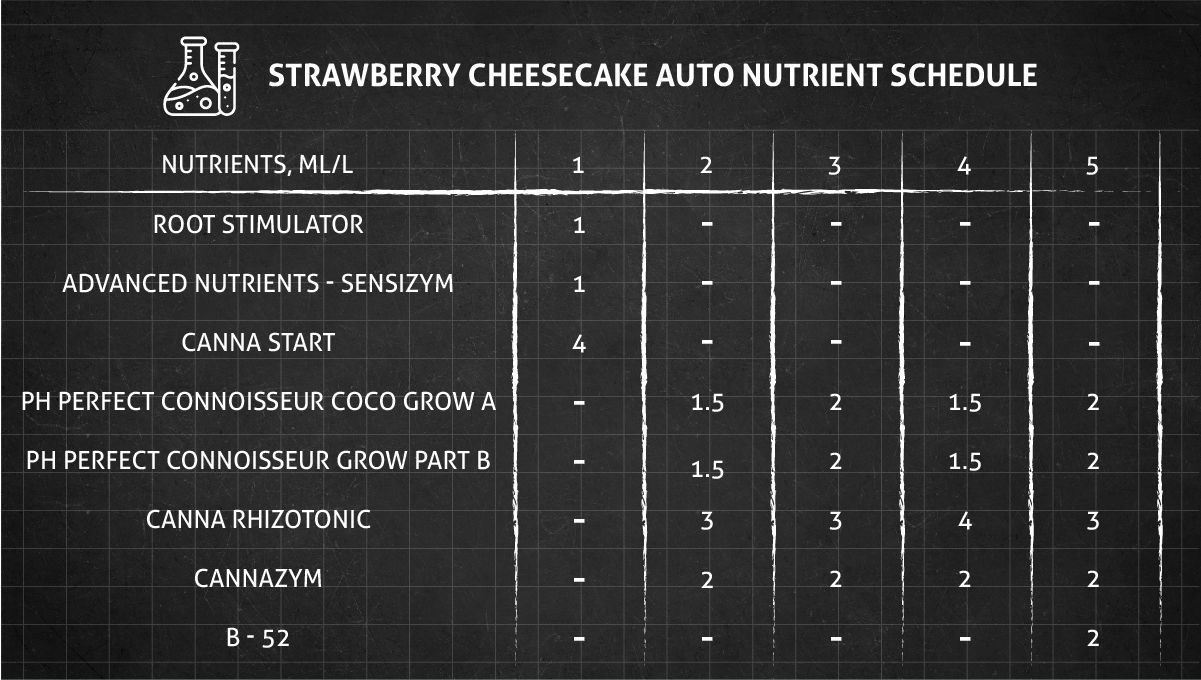
There are plenty of nutrient lines available on the market today, and you can use any of those. Just make sure that the bottle that you use for the vegetative phase has more nitrogen (N) than phosphorus (P) and potassium (K), while for the flowering stage, these proportions should be reversed.
5. Mid Veg | Weeks 3-4
Once active vegetative growth starts in weeks 3 and 4, you should stop being nervous about maintaining ideal conditions in your grow room. At this point in the timeline, the plant is vigorous and resilient enough to handle different conditions, even if they are far from perfect. You may lower the temperature to somewhere around 25°C, while the relative humidity should be between 40-60%, probably closer to 60% for now.
| Plant Height: | 10-15 cm | Humidity: | 40% |
|---|---|---|---|
| Distance to Light: | 80 cm | Water per Day: | 0.5-5 l |
| Day Temp: | 24°F (75°C) | pH: | 6.0 |
| Night Temp: | N/A | Smell: | None-Weak |
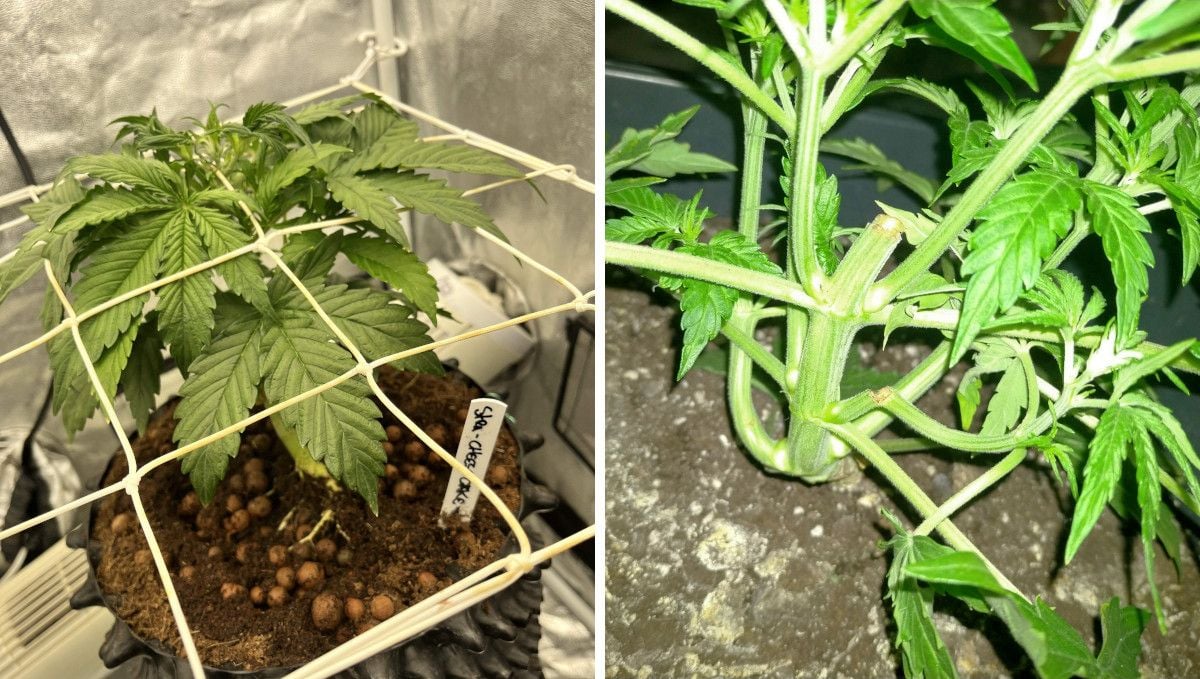
If you ever worried about your weed plant developing too slowly before, you will stop worrying now, as your autoflower will change noticeably every day, with new leaves and side branches developing at a rapid pace. This is the time when a forward-looking grower thinks about the size of their plant at later stages and begins to train it, forming a canopy shape they want. Unfortunately, we can show you almost no training pictures for Strawberry Cheesecake Auto, as most gardeners preferred to grow this strain naturally, without messing with its canopy.
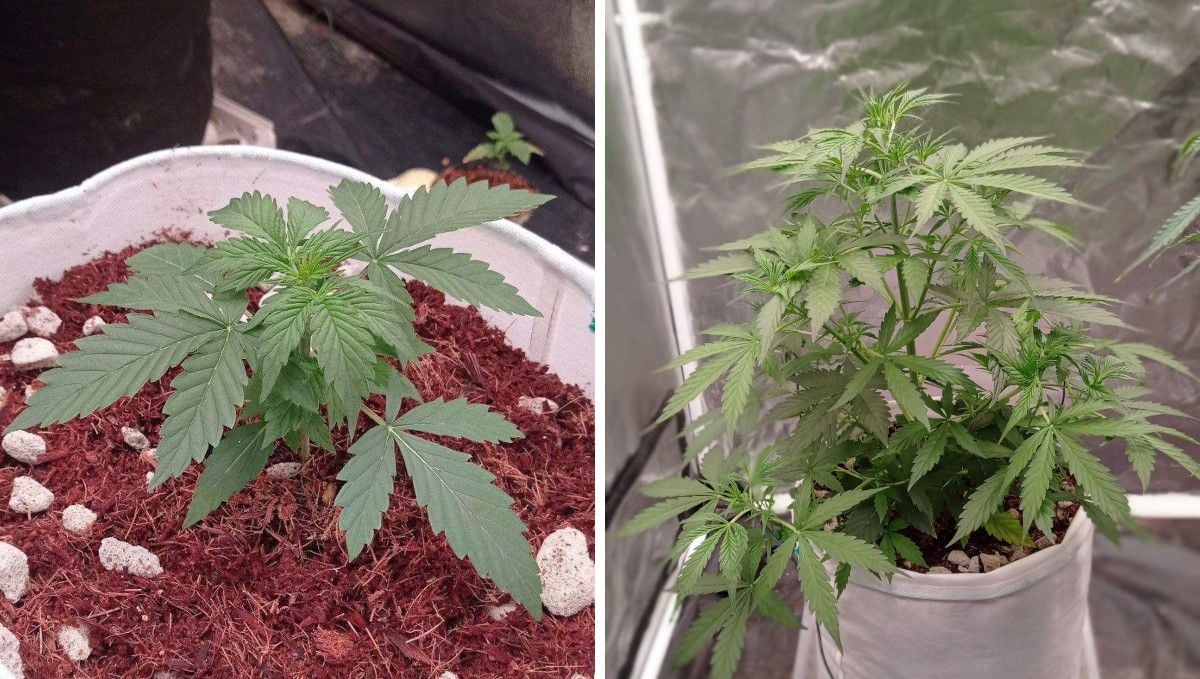
Training is a double-edged sword. On one hand, it allows you to keep your plans low profile in a limited indoor space. On the other, it's a potential source of stress for your cannabis plants. For autoflowers, we suggest using only low-stress training (LST) techniques, such as tying down, at least until you gain some experience. As your cultivation expertise grows, you may start to use more high-stress training (HST) methods, such as topping and FIMing or even super cropping.
6. Transition (Pre-Flower) | Week 5
As your autoflower gets bigger, it can handle higher levels of lighting. On one hand, it will get more light by simply growing closer to it. Or the other, you may help it by dialing up your dimmable LED quantum board or lowering it closer to the plant tops. You may want to slightly decrease the day temperature and keep decreasing it for the subsequent stages of flowering and do the same for the relative humidity.
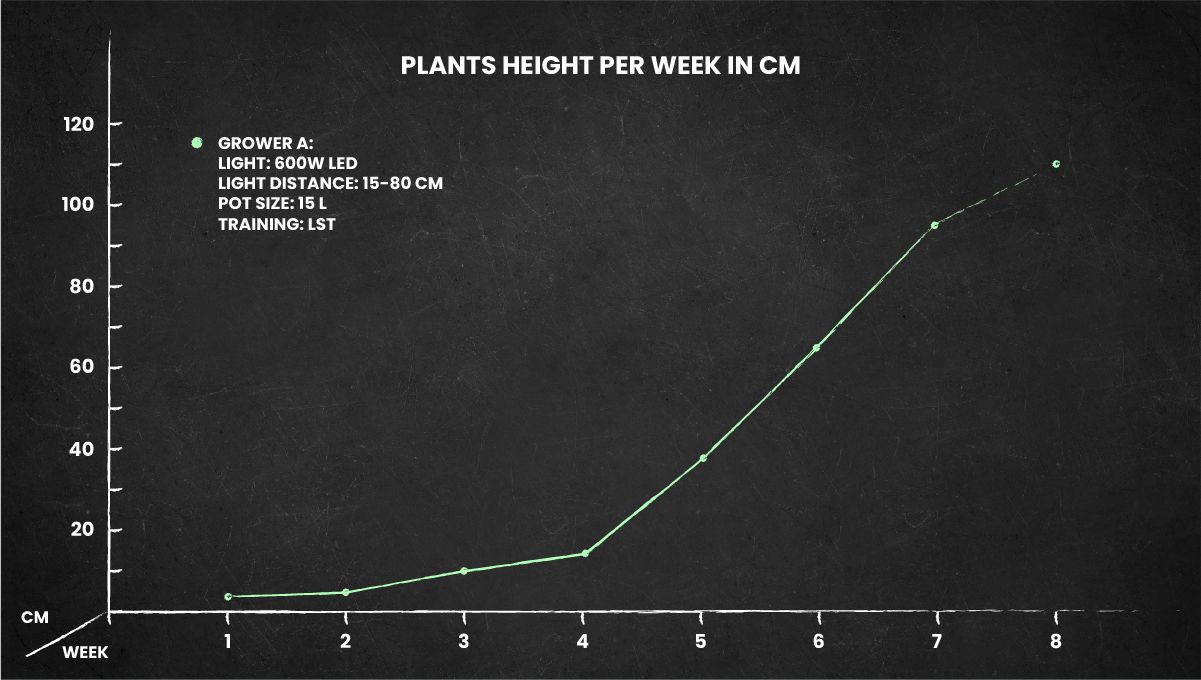
| Plant Height: | 38 cm | Humidity: | 40% |
|---|---|---|---|
| Distance to Light: | 80 cm | Water per Day: | 5 l |
| Day Temp: | 24°F (75°C) | pH: | 6.0 |
| Night Temp: | N/A | Smell: | Weak |
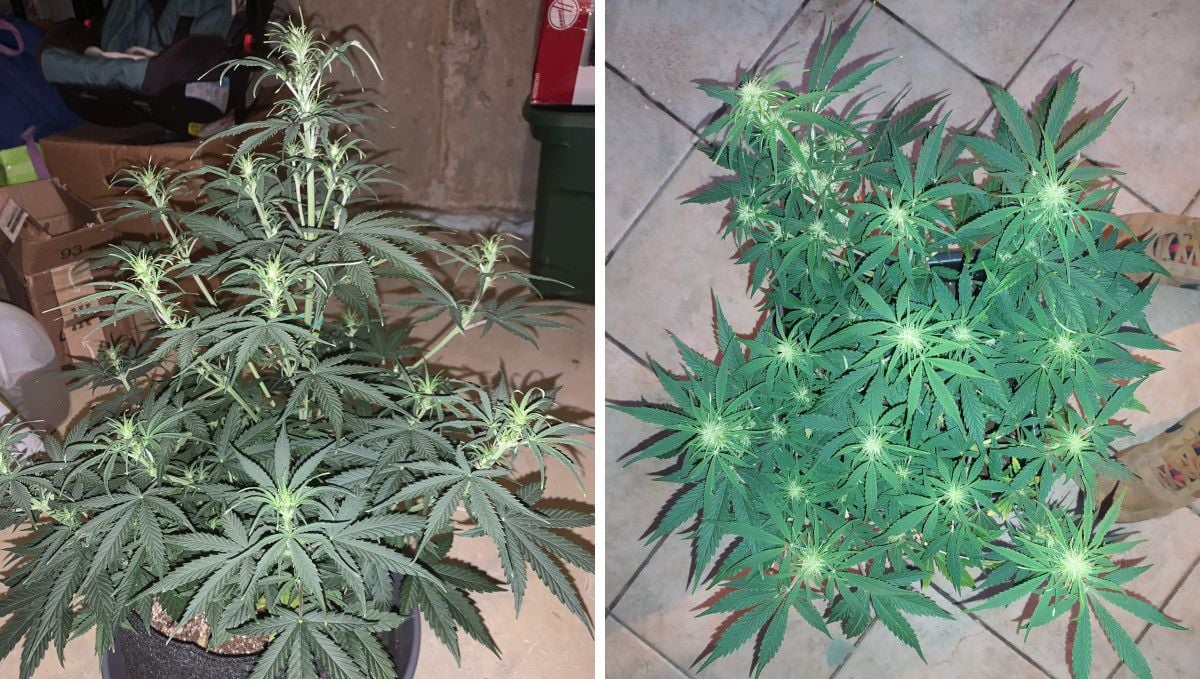
The transition from vegetative growth to budding starts at the middle nodes of the plant, and if you look closely enough, you'll see tiny female hairs called pistils appear where the stalk of a leaf is attached to the stem. In a few more days, you will see the same pistils forming at the tops. At the same time, the little leaves growing here will change their shape and color. They'll become more yellowish and thin, sometimes twisted, in fact, almost indistinguishable from the pistils themselves.
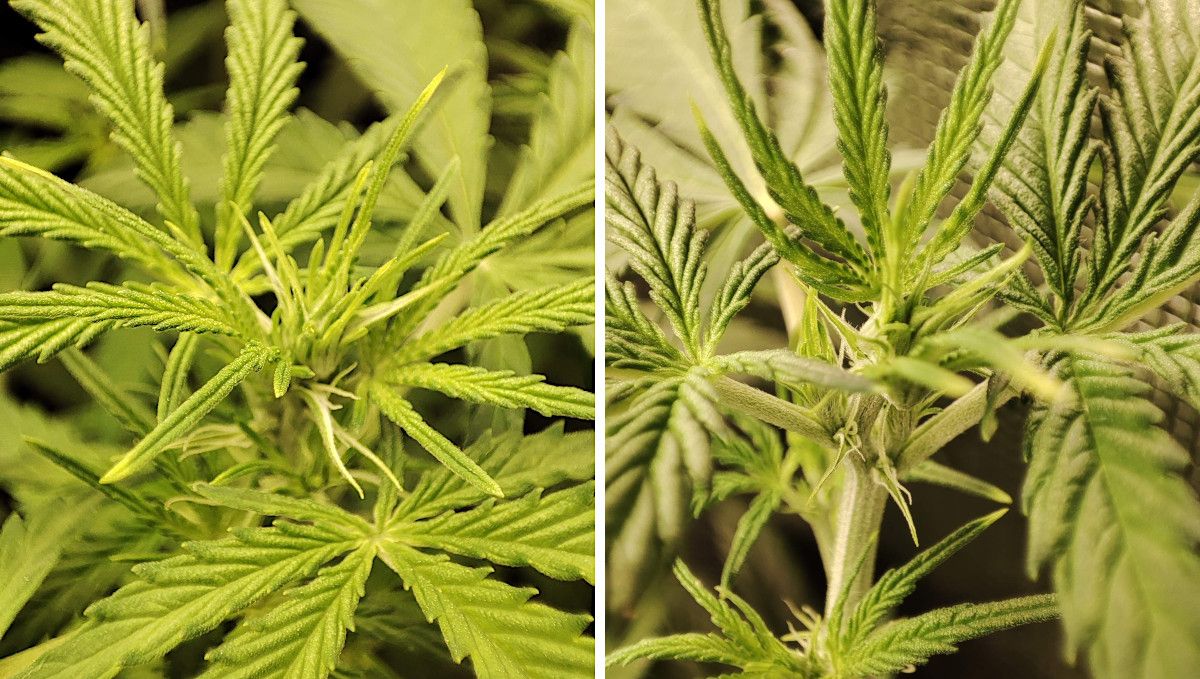
Another process that begins simultaneously with the budding and often catches newbies by surprise is the so-called flowering stretch – when the main stalk and the side branches begin to get longer and longer. Some plants can gain from 50% to 150% in height during this period. This is seldom a problem for autoflowers, though, as they are usually small when they begin flowering. However, with photoperiod varieties, the height issue can quickly get out of hand, especially in smaller grow spaces.
To remedy this problem, you should switch to flowering in time and use various training techniques to keep your plant nice and short. As you shall see later in our guide, Strawberry Cheesecake Auto strain would have benefited from training as this variety tends to grow quite a tall main cola and substantially long side branches.
7. Early Flower | Weeks 6-7
Looking at our week-by-week tables, you may have noticed that we do not specify the night temperatures for this grow. It's because the gardener chose to grow his Strawberry Cheesecake Auto plants on a 24/0 schedule, meaning he didn't turn off the lights for the night. As you can see from the pictures, that didn't prevent his autoflower from starting to bud in time nor from developing big and dense flowers.
| Plant Height: | 62-95 cm | Humidity: | 40% |
|---|---|---|---|
| Distance to Light: | 20 cm | Water per Day: | 5 l |
| Day Temp: | 24°F (75°C) | pH: | 6.3 |
| Night Temp: | N/A | TDS: | 600 ppm |
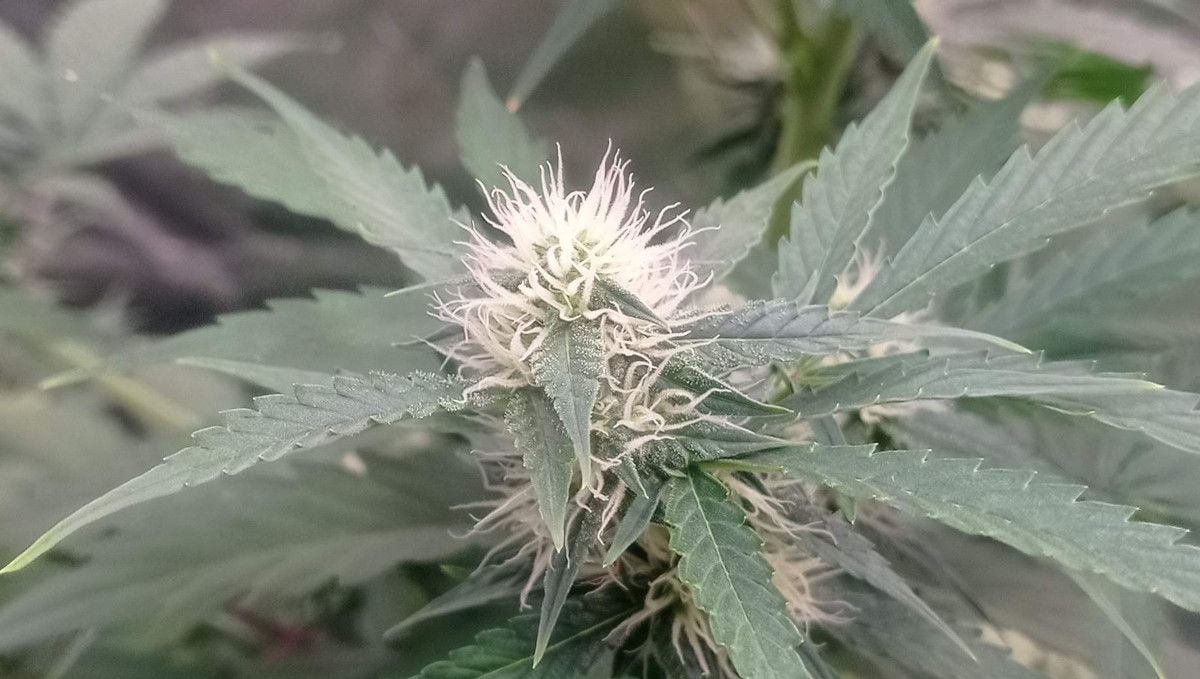
As the branches keep extending in early flower, the buds start to develop at the nodes. At first, they don't look like much, but give them time, and they will grow bigger and bigger and fuse together to form long, continuous colas that we take for granted from modern autoflowers.

The pistils are still white, but the first trichomes are already appearing on the little leaves surrounding the flowers. These resin glands are full of terpenes, aromatic substances that make your weed plants smell quite noticeably at this stage. Most growers install a carbon filter to scrub the odor from the air, and we suggest you do the same.
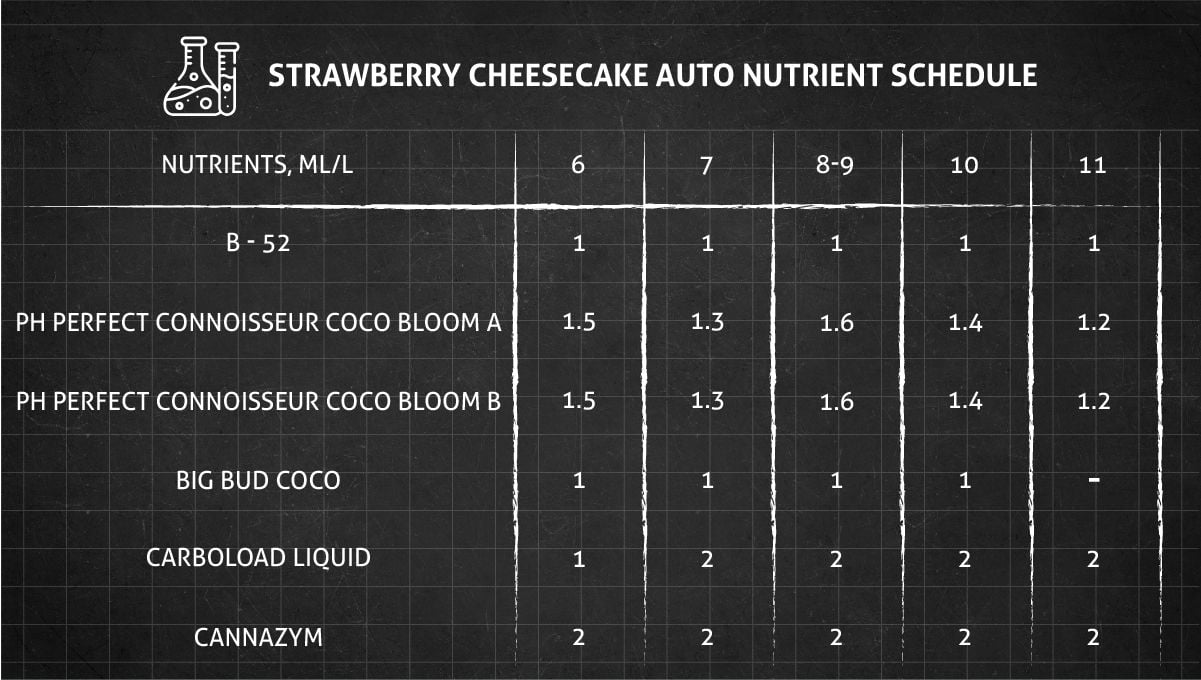
As we already mentioned, flowering plants require a different set of macronutrients when they have transitioned to flowering. At this point, nitrogen is not that important, and higher levels of this nutrient are even bad for flower development. As for phosphorus and potassium, they come centerstage. In the graphic below, you can see a simple yet effective feeding schedule used for the Strawberry Cheesecake Auto in this grow.
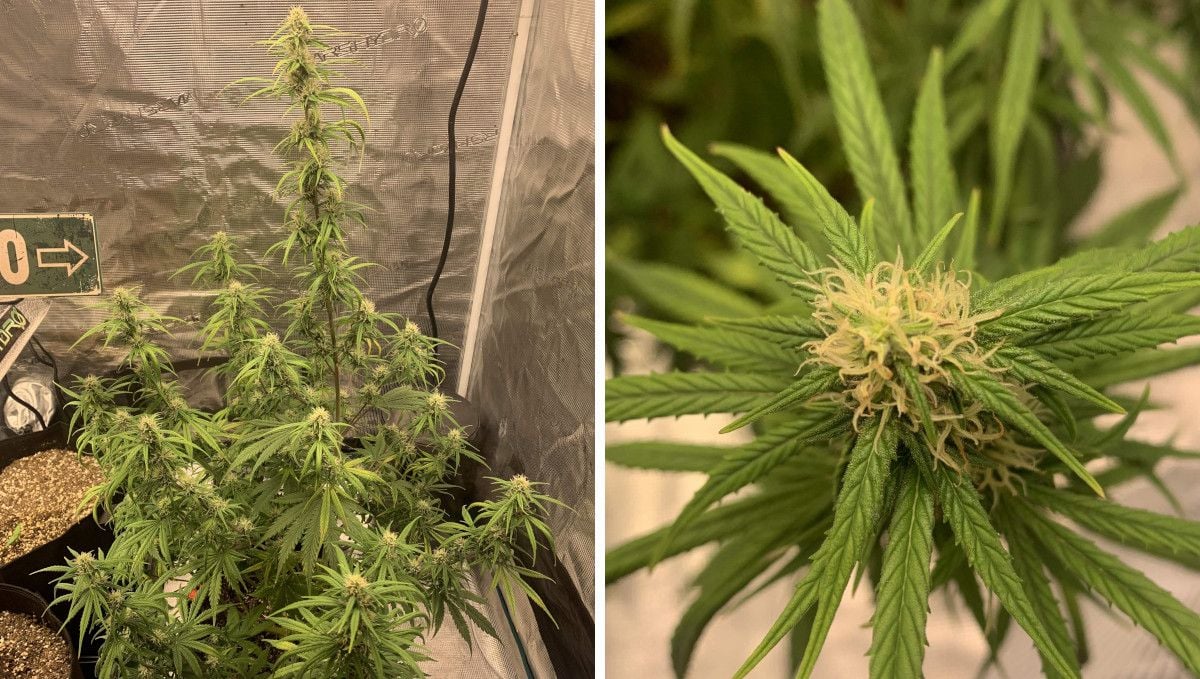
If you provide your plans with enough light, nutrients, and just the right amount of water, they will flourish, and their buds will fill out and get frosty.
8. Mid Flower (Bulk Phase) | Weeks 8-9
When the flowers start to stack up, it becomes more crucial than ever to provide adequate ventilation and remove the excess moisture from the grow room. If you haven't monitored the relative humidity before, now it's time to start doing it, especially if you live in a warm, humid climate. If you overlook this issue, you might end up with your buds full of mold or bud rot – these two fungal infections, as well as powdery mildew, are very common in moist conditions with too little airflow.
| Plant Height: | 100-105 cm | Humidity: | 50% |
|---|---|---|---|
| Distance to Light: | 20 cm | Water per Day: | 10 l |
| Day Temp: | 24°F (75°C) | pH: | 6.3 |
| Night Temp: | N/A | TDS: | 700 ppm |
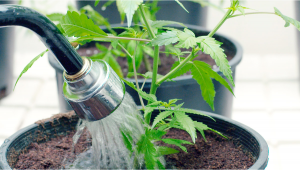
When your cannabis plant is 3-4 weeks into flowering, it doesn't require much attention, but it needs regular watering and feeding. In fact, the plant will be the hungriest and thirstiest at around this time. If you grow your weed in soil, you can still water it once in two days, sometimes every day.
However, the gardener whose grow diary we've been following chose coco coir as his medium, and so his garden required watering multiple times a day. It's not very convenient to water that often manually, and you will be better off using some form of automatic drip system.
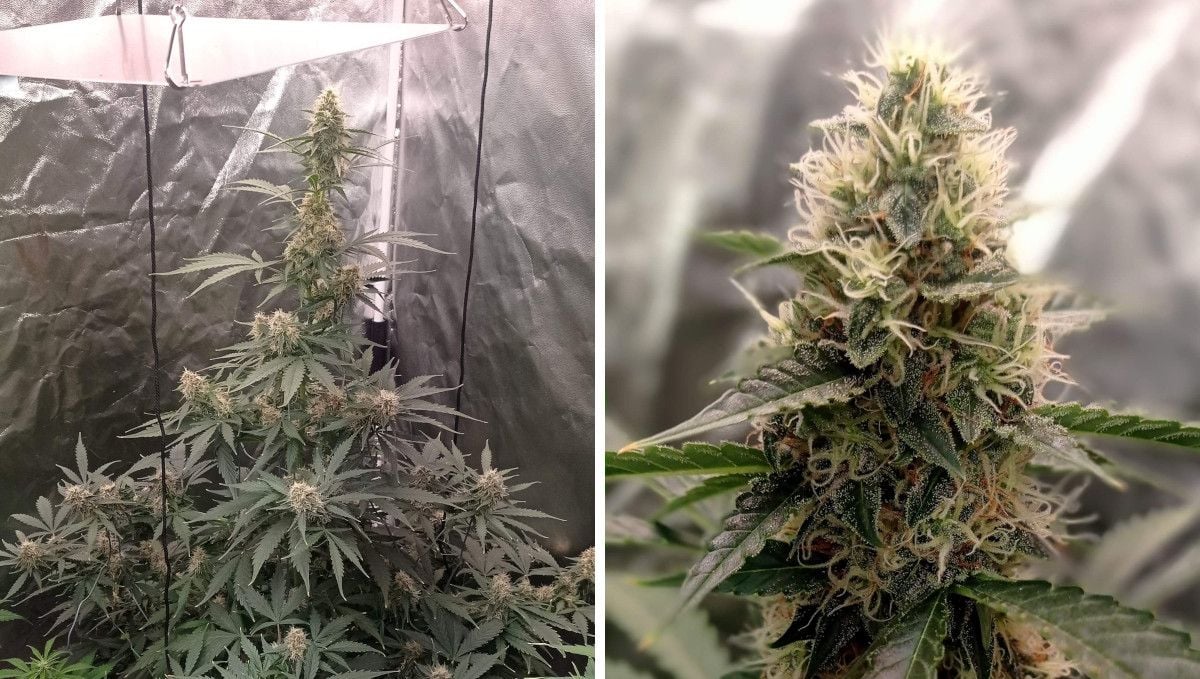
As you can clearly see in the photo above, Strawberry Cheesecake Auto grew quite tall and it's central stem was towering head and shoulders above the rest. It still shouldn't be a problem if your light is powerful enough to penetrate all the way down and give enough energy to lower bud sites. However, it would have probably been better if the grower trained his autoflower so that the main shoot were at the same level as the rest.
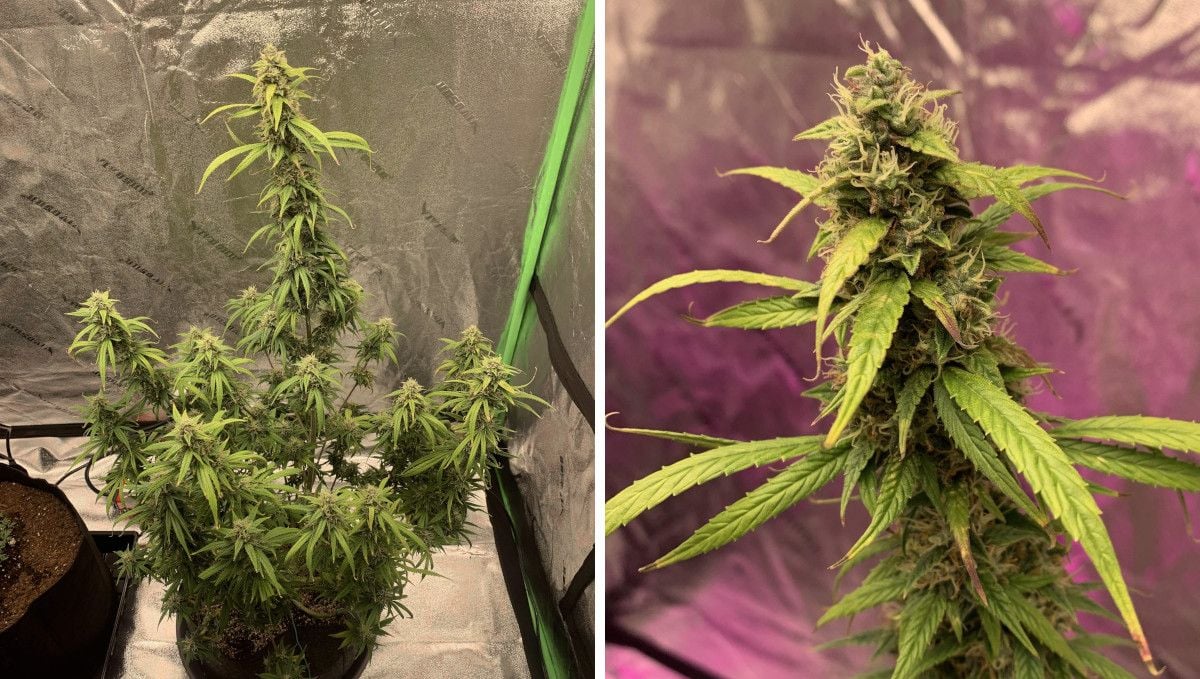
Usually, the stretch associated with flowering comes to an end around week 7 or 8, but Strawberry Cheesecake Auto kept stretching all the way through week 9 in most grow reports that we saw. Please keep that in mind. This autoflower is quite a tall variety.
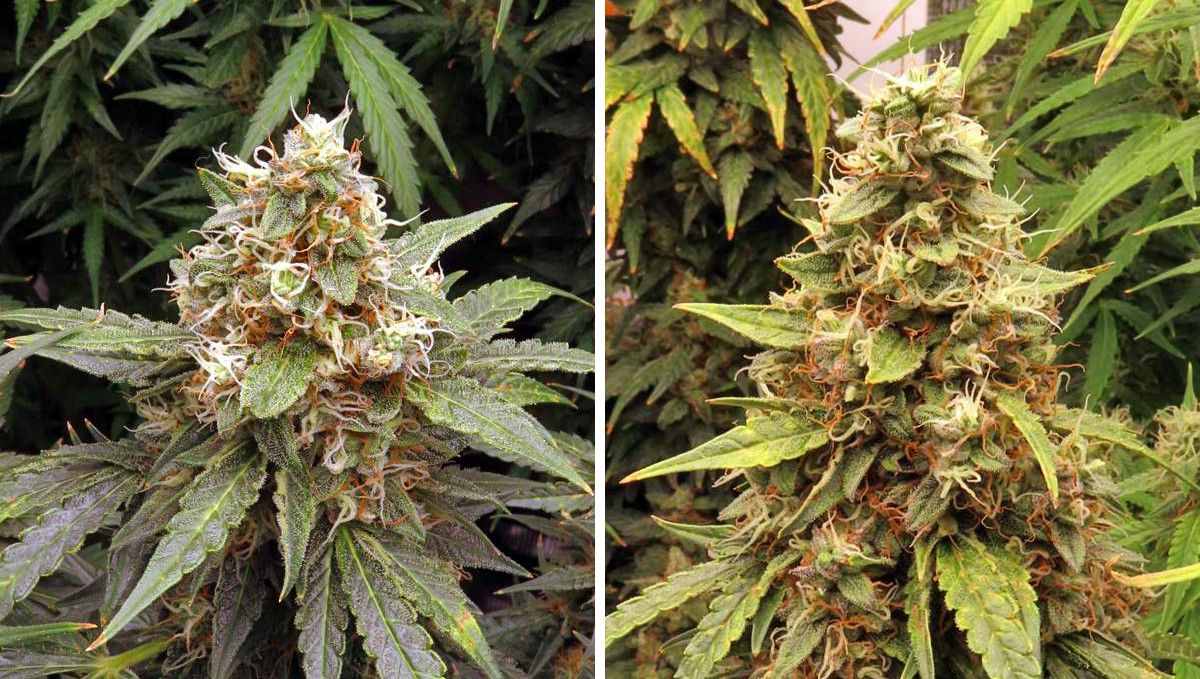
If the plant is happy with the food it received, the watering schedule, the light, and the rest of the conditions, the buds will fill out nicely and begin to mature. The most obvious signs of maturity are the drying out of some of the pistils and the fading of the leaves.
9. Ripening And Harvest | Week 10 (And Beyond)
In the last weeks leading to harvest, maintaining the ideal condition becomes almost as important as in the first week from seed. Back then, it was crucial because the sprout was weak and vulnerable. Right now, keeping the temperature and relative humidity within acceptable range helps you ensure that your buds don't get affected with such trouble as fungal infections. Besides, too high temperatures are probably bad for the accumulation of THC and other cannabinoids in buds.
| Plant Height: | 110 cm | Humidity: | 50% |
|---|---|---|---|
| Distance to Light: | 15 cm | Water per Day: | 10 l |
| Day Temp: | 24°F (75°C) | pH: | 6.3 |
| Night Temp: | N/A | TDS: | 700 ppm |
The question of when to harvest your cannabis plant isn't that simple. The most impatient growers cut down their plants as soon as they see that the flowers have stopped growing. However, it's not a very reliable sign. The buds may stay the same size, but they are still getting heavier because they keep getting denser.
More experienced gardeners look at the color of pistils. In most weed varieties, their greenish-white color means that the buds aren't mature enough. However, in many Strawberry Cheesecake Auto grows that we have seen, the plants kept producing more and more white pistils practically till the end.
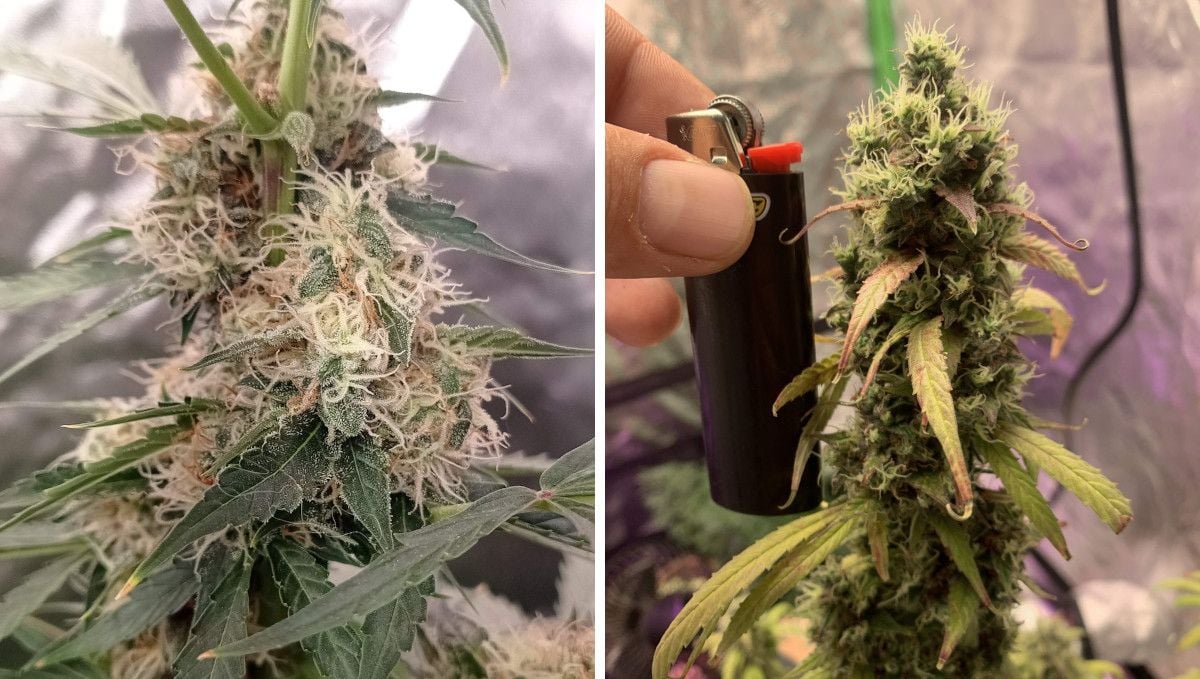
This brings us to the only surefire way or determining the perfect harvest window. Buy a hand microscope, such as a jeweler's loupe, and as soon as you think that your plants are nearing harvest, start to inspect the buds daily, looking at the color of trichomes. Clear trichomes mean immaturity. When they become cloudy, it means they have stored up a peak amount of THC, other cannabinoids, and terpenes. If you cut down your plants now, they will give you the most potent and flavorful product.
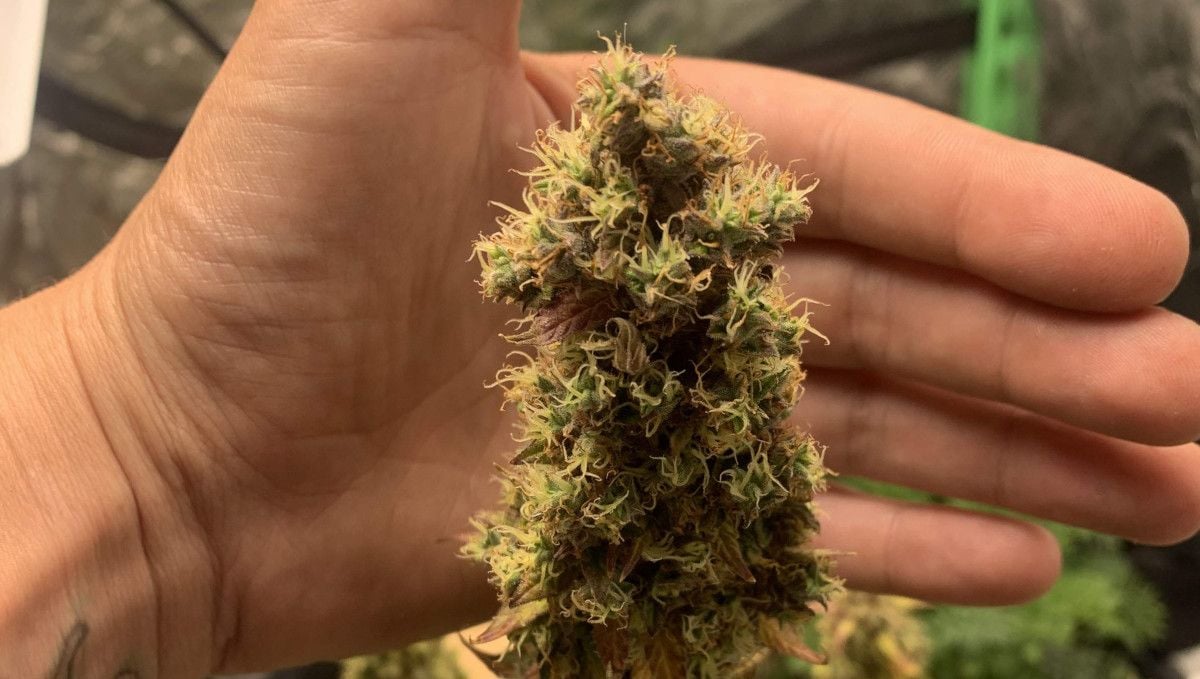
Just don't forget another important thing: about a week or two before you plan to cut down your plants, start flushing the medium with pure water. You don't even have to give extra large amounts of water, but make sure you stop feeding your cannabis any nutrients. This will clean the medium and the plant itself from any residual salts, making the smoke healthy and tasty.
Slowly drying and curing your flowers for at least 2-3 weeks is also a must. This will help you get rid of an unpleasant hay smell and taste and make the flowers reveal their true flavor profile. Slow drying and curing also contributes to an increase in potency.
10. Yield and Smoke Report
Although at first sight the Strawberry Cheesecake Auto plant in the grow diary we've been following didn't seem that large and fat, it brought an astounding 150 g (5.29 oz) of very good bud. In the other grows, the figures were just as impressive.

The reviews of Strawberry Cheesecake Auto consistently highlight its potency and unique effects. Smokers have described its aroma and taste as a delightful combination of fruity notes, including mango, orange, and strawberry, along with hints of cheesecake.
In terms of effects, this strain appears to be a versatile choice for different times of the day and occasions. It starts with a euphoric and uplifting Sativa influence, making it suitable for evening use. However, as time progresses, the Indica dominance becomes more pronounced, providing long-lasting potent relaxation.
Absolutely evening stuff. Afghan and Cheese will make good euphoria for hour, but then you will get powerful stone effect. All it longs for 2-3 hours.
Further
11. In Conclusion
From what we have seen in several grow reports, Strawberry Cheesecake Auto plants grow quite vigorously in veg but stay rather short and compact. However, as soon as the flowering starts, they begin to stretch and eventually grow into quite tall plants. The structure seems more or less uniform - with a lot of side branches that are much shorter than the central cola.
Only a few growers that we have been following chose to train their plants. The others just let their autoflowers grow naturally, and we think it was a mistake. Training these plants would have not only improved their structure, but would make the use of lights more efficient and this would result in better yields.
Another thing that we have noticed is that it's absolutely impossible to judge the maturity of Strawberry Cheesecake buds by the color of their pistils. They tend to stay white till the end and may look immature when in fact they are ready to be harvested. Please keep that in mind and always use a hand microscope to determine the best time to harvest. Otherwise, Strawberry Cheesecake Auto seems a very easy-to-grow and low-maintenance cultivar and shouldn't present any issues even for a beginner gardener. Happy growing, everyone!





Comments