


The Lifecycle of the Autoflowering Cannabis Plant
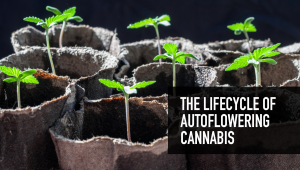
- 1. Germination
- 2. Seedling stage
- 3. Week 1 to week 3
- 4. Week 4 to week 6
- 5. Week 7 to week 9
- 6. Week 10 to week 11
- 7. Harvest
- 8. Drying, trimming, and curing
- 9. Expert opinion by jorge cervantes - co-author:
- 10. Autoflowering cannabis faqs
- 11. In conclusion
Preface
Embarking on the journey of cannabis cultivation, especially with autoflowering strains, demands a comprehensive understanding of the plant's life cycle. The article "The Lifecycle of the Autoflowering Cannabis Plant" by Enzo Schillaci, meticulously unfolds the stages of growth, from seed germination to the final harvest, providing growers with a roadmap to navigate through the multifaceted phases of cultivation. The piece not only delves into the technical aspects of growing but also intertwines practical advice, ensuring that cultivators, whether novices or seasoned, are well-equipped to nurture their plants through each critical stage, optimizing for a bountiful harvest.
Schillaci, with his articulate and detailed writing, guides the reader through the various stages of an autoflowering cannabis plant’s life. From the initial germination, where the seeds begin their journey, through the seedling stage, where meticulous care is paramount, to the vegetative and flowering stages, where the plant reaches its full potential, the article provides a thorough exploration of each phase. The piece doesn’t merely stop at the harvest but extends into the crucial stages of drying, trimming, and curing, ensuring that the cultivator can maximize the quality of the final product. The article is not just a guide but a companion in the grower’s journey, providing insights and tips that are grounded in a deep understanding of cannabis cultivation.
The author, Enzo Schillaci, brings forth a blend of scientific understanding and practical expertise in the field of cannabis cultivation. His writings have consistently demonstrated a profound knowledge of plant biology, coupled with hands-on experience, making his insights not only reliable but also applicable in real-world cultivation. Schillaci doesn’t just present facts; he provides a guide, crafted from both knowledge and experience, ensuring that readers are not merely informed but also guided through their cultivation journey. His authority in the subject matter is evident through the depth and applicability of the insights provided, making the article a valuable resource for any cultivator.
Growing cannabis is an art that requires patience. Only growers that understand the science and lifecycle of the plant will succeed. The rest either fail miserably or simply give up. It’s not uncommon for beginners to fail. And since practice makes a man perfect, keep at it until you finally harvest a big bunch of nugs that remind you of all the hard work.
I promise that it’s all worth it in the end. But first, you must understand how the plant grows. Not only will this help you save time, but you’ll also be able to bounce back even if you face setbacks. So, let’s take a look at the lifecycle of the autoflowers to make it a little easier for you.
1. Germination
The first step of the plant’s cycle starts with germination. Now that you’ve grabbed your favorite seeds, it’s time to plant them. People use different ways to germinate the seeds, but it’s important to stick to a method that works for you. Ideally, the seeds should be soaked in a glass of water for at least 24 hours. Some growers use a nail file to scratch the seeds gently before soaking them.

This ensures that the seeds soak in more water, but you shouldn’t attempt this if you’re a beginner. The seeds can then be transferred to a wet paper towel and stored in a zip-lock plastic bag. Within 1-2 days, the taproot emerges and the seeds are ready to be planted. Note that many growers simply stick their seeds in the soil, and you can follow the same route if you prefer. For the most part though, we do recommend sticking with the paper towel method. This method allows for more control, which is what we are always looking for as cultivators. Be sure that the paper towel you use is totally unscented, unbleached, and without any sort of dye - all three of these can cause issues with germination and can even kill the seed.
When using the wet paper towel method, be sure to check the seeds daily to see if there has been any progress. The last thing you want is to leave germinated seeds for multiple days without planting, as this is a true recipe for disaster. Depending on the state of the seed, and the strain, it can take anywhere from 2 to 10 days for the tap root to emerge, but for most seeds, it should take no more than 3 or 4 days especially if you have soaked them to begin with. Remember to always check the pH of the water, and amend it to between 5.5 and 6.5 for the best chance of germination success. The EC or TDS should be low. For germination, the perfect temperature is around 80°F but anywhere within the 70°F – 90°F (21°C – 32°C) range will work just fine.

2. Seedling Stage
The seeds can be transferred to the soil at this point. It may take another day or two for the seeds to emerge from the soil and break their hull. Be patient and stop messing with the plants. You might be tempted to assist the seedling since it looks so fragile, but it will do fine without you. Also, remember to regulate the pH as it’s very important.

The seedling stage is the most important stage. The plant will take a long time to recover if there’s a mishap at this stage, so be very careful. If growing indoors, hang the lights at least 17-20 inches above the seedling (if using HID lighting, this is less important with LED and CFL panels as they produce much less heat). Reduce the distance as the plant grows bigger. CFLs, LEDs, MH, and HIDs will do as long as the seedlings are comfortable.
3. Week 1 to Week 3
The seedlings begin with only two true leaves. After a couple of days, a third leaf will appear. The plants don’t need any nutrients on the very first week if you’re growing in soil. For those growing in hydroponic setups, reduce the strength of the nutrients by half to allow the seedlings to adjust to them. You can kill the plants faster by overwatering them. Not a myth; it’s a fact. So, go easy on watering. And, make sure that you supply enough water to keep the soil moist. Moist, not dripping wet or dry. As the process of photosynthesis goes on, new sets of leaves will appear.
The seedlings become a little stronger during week 2. You can now introduce nutrients unless you’re using premade organic potting soil. Again, the nutes should be mild as the plants are still fragile. The distance between the lights and the seedlings should be reduced if the seedlings grow lanky.

By week 3, the seedlings show more leaves popping up. Some autoflowers may display their sex at this stage, but if you’ve planted only feminized seeds, you don’t need to worry at all. If using regular seeds, however, it’s important to distinguish between male and female plants. While female plants show their pistils, the males will produce little pollen sacs. It’s a good idea to remove the males since sensimilla buds are preferred. Nutrients can be used at regular strength now, but be cautious to check the plants for any nutrient burn. The seedlings will suffer a bit with low doses of fertilizer or nutrients, but they don’t recover quickly from an overdose or nutrient burn.
4. Week 4 to Week 6
This is the phase that determines how big the plants grow. You can use several training techniques including LST, Topping and FIMing to increase yields. Many growers make the mistake of introducing bloom nutrients as soon as the plant produces a few pistils, but that’s not how you do it.
Note that some plants may still be in the vegetative stage and nutrients must be provided at full strength based on autoflower feeding schedule recommendations. Also, this depends on the type of fertilizer you’re using. For instance, if you’re growing organically, use organic nutrients according to the manufacturer’s instructions, but make sure that it contains more nitrogen. If you’re using a brand that has two parts of Growth and Bloom fertilizers, use only the “Grow” part during week 4. Most brands of fertilizers provide the numbering of N-P-K to make it easy for you.
For example, if you’re using General Hydroponics, only FloraGro and FloraMicro (micronutrients) should be used during this stage. Remember to regulate the pH constantly when using nutrients, but if you’re using something like the pH Perfect from Advanced nutrients, for instance, pH can take a back seat.

Week 5 begins with the plants producing lush leaves with a few buds appearing slowly. Continue with the “Grow” nutrients even at this stage lest you want the plants to stop growing vertically. This is the stage where an explosion of growth occurs and you need to support it with nitrogen. Using more phosphorous or potassium at this point will force the plant to focus more on the buds rather than growing.
Many growers use bloom nutrients as soon as they enter the 5th week because they are satisfied with the growth of the plants. Some plants like Green Crack and Gorilla Glue have the tendency to grow very large, so you might be tempted to use flowering or bloom nutes. However, the yields can reduce significantly if the plant isn’t allowed to grow to its full potential.
As you enter week 6, the appearance of buds is even more apparent. A little defoliation doesn’t hurt now. Defoliation is the process of removing extra leaves to provide more light to the lower parts of the plant. Don’t overdo it, though, because the plant relies on the leaves to receive nutrients. Continue with nutrients meant for the vegetative stage as the plant will shoot up vertically.

5. Week 7 to Week 9
The plant is all geared up for its flowering stage and bloom nutrients can be used at full strength. The buds will begin to swell and the unmistakable aroma of sweet cannabis will fill up your tent. The pistils will slowly change colors from white to a light brown or red, depending on the strain.

It’s also a good idea to use nutrients to boost buds to improve the quality. Organic soil growers can use dried and powdered banana peels to introduce more potassium to the soil. The vertical growth stops sometime during week 7 but the plant does everything in its power to increase the size of the buds.
As you enter week 8, the leaves start yellowing a bit, but there’s nothing to be alarmed. This is just a natural way of the plant indicating that it’s nearing the end of its cycle. Continue to use flowering nutrients even as you step into week 9. Don’t forget micronutrients that are added right from week 2. Defoliate the plants again if the bottom parts of the plants display small buds.

6. Week 10 to Week 11
The plant is almost at the end of its lifecycle. Stop using nutrients and use plain water to remove any chemical buildup. This practice is known as flushing, and it’s very important if inorganic nutrients are used. Flushing also ensures that your buds don’t taste or smell like chemicals and improves the quality of smoke dramatically.

By week 11, all the leaves start turning yellow. Most of the pistils turn amber, indicating that it’s almost time to harvest. Admittedly, many seed companies including Fast Buds tell you that the plant will finish its cycle in 8-9 weeks. And yes, they do finish in 9 weeks if you grow in a good growing environment. However, your plants may take a little bit longer depending on the growing conditions you provide.
7. Harvest
You can harvest the plants now by chopping them all one by one. Use sharp sterilized scissors to prevent infecting the buds. Don’t forget to use gloves, especially if you’re harvesting buds of the Gorilla Glue as they are notorious for oozing resin all over. You have a couple of options when it comes to harvesting, and it all really depends on the size of your plants and the environmental conditions at play. If you have grown plants that are smaller than about 1 meter tall and live in temperate conditions then you can probably get away with cutting the plant at the base of the main stem and just hanging the entire thing. On the other hand, if you have grown massive beasts and live in hot, humid conditions then you probably want to break the plant down branch by branch and hang them all separately to dry.
8. DRYING, TRIMMING, AND CURING
This is the last stage where the buds are dried, trimmed, and then stored in mason jars. The first decision you have to make is whether you want to wet or dry trim the weed. In almost all circumstances we suggest dry trimming, with wet trimming only being suggested when the ambient temps and humidity is high and you are unable to control the drying environment. There are a bunch of ways to control the temps and humidity, from AC units and dehumidifiers (or humidifiers depending on the conditions) to heaters, and even your regular oscillating fans. You want the drying period to be in the goldilocks zone - not too fast and not too slow. The ideal timing is strain-specific to a certain extent and is also dependent on the denseness of the bud, but anywhere between 7 to 14 days is great.
To achieve this you want the temps to be anywhere in the range of 60-70°F (that’s 15-22°C) with a relative humidity of 55-65%. If after 2 to 3 days of drying you are not seeing much of a change in the moisture levels in the buds then you need to reassess your setup, as the buds are going to be at dire risk of developing mold issues. Once they are all nice and dry it’s time to trim. But hold up there cowboy, the last thing you want to do is dive in headfirst with that old sh**ty pair of scissors that have been hanging around your kitchen drawers for the last decade. Trimming is a tedious and annoying job, so do yourself a favor and grab a pair of dedicated trimming scissors to catch all the falling keif. The first time we used a proper trim tray we almost fell off our trimming seat when we realized just how much kief we had been wasting trimming without one.

Curing comes at the last stage, but it’s the most important one if you want top-quality buds. Do not skip this process because all your hard work will be for naught if you skip this one. Again, environmental control is paramount to the success of the curing period. We cure weed to allow the terpene profile to fully maturate and for the captured chlorophyll to dissipate.
For this process to properly take place we need to keep temps around 70°F (22°C) with a humidity level of 60-65%. Place the weed into your resealable glass mason jars, and remember to not overfill them. You want the jars to be no more than around ¾ full so the buds have space and air to breathe. Last but not least, wait for at least 2 weeks to cure the buds even if you’re tempted to smoke them immediately. Doing so will reduce the harshness of the flower and your lungs will certainly thank you for it!
Not all strains will have fully cured in two weeks though, with some flowers taking up to 6 months to finish the maturation period. For the first 10 to 14 days you want to burp each jar once or twice a day to allow the remaining moisture to escape, and then twice a week for the rest of the cure. Can you smoke those buds as soon as they have dried? Of course, you can, but if you really want to get the best out of all of your hard work then be as patient as possible and let the curing process work its magic. It's quite surprising how much difference just leaving the buds to cure can make to the end of smoke.
9. Expert Opinion by Jorge Cervantes - Co-Author:
In the realm of cannabis cultivation, understanding the lifecycle of the autoflowering cannabis plant is pivotal, and Enzo Schillaci’s article serves as a complete guide through this intricate journey. The comprehensive exploration of each stage, from the delicate moments of germination to the critical phases of drying and curing, reflects a deep-rooted understanding of cannabis cultivation. Schillaci doesn’t merely present a guide; he walks alongside the cultivator, providing insights that are both scientifically sound and practically applicable.
The article beautifully intertwines technical knowledge with practical advice, ensuring that the information is not just absorbed but can be effectively applied in the cultivation process. The detailed exploration of each stage, coupled with practical tips and considerations, reflects a holistic approach to cannabis cultivation, something that I, Jorge Cervantes, have always emphasized. The importance of understanding your plant, from seed to harvest, is essential to optimize both yield and quality, and this article serves as a valuable companion in this endeavor.
Schillaci’s insights into the nuances of nutrient provision, light management, and environmental control during the various stages of growth demonstrate a meticulous understanding of the plant’s needs. His emphasis on not just the how, but the why, behind each practice resonates deeply with my approach to cultivation – understanding your plant at every stage. The article doesn’t just guide; it educates, ensuring that cultivators are empowered with the knowledge to navigate through the challenges that the cultivation journey may present.
In conclusion, "The Lifecycle of the Autoflowering Cannabis Plant" stands out as a comprehensive, detailed, and practically insightful guide for any cultivator embarking on the journey with autoflowering cannabis. The blend of scientific knowledge, practical insights, and a genuine understanding of the plant’s life cycle makes it a must-read for anyone keen on mastering the art and science of cannabis cultivation. Schillaci has crafted not just an article but a companion for your cultivation journey, ensuring that every stage, every moment, is understood, appreciated, and optimized.

10. Autoflowering Cannabis FAQs
How does autoflowering cannabis differ from regular, photoperiodic strains?
Autoflowering cannabis plants, like their photoperiodic counterparts, have some cannabis Sativa or Indica genetics. The difference is, they also contain Ruderalis genes. It is these Ruderalis genes that give modern autoflowers their inbuilt genetic timer that automatically switches the growth stage, no matter the lighting conditions.
Where and when was cannabis Ruderalis discovered?
Cannabis Ruderalis was first found in the northern parts of Russia and Eastern Europe way back in the early 1920s. It is believed that it adapted its autoflowering capabilities due to the severe temperatures and lack of light for long periods of the year in these areas. Its ability to flower regardless of light cycle makes it an ideal plant for colder climates with shorter growing seasons.
These early Ruderalis strains were very low in THC potency and were small plants that produced tiny yields. It has taken decades for autos to become what they are today, and while there is still some stigma surrounding the autoflowering world, autos can now match the best photoperiod strains in terms of potency, terpene production, and yield potential.
How long does it take for an autoflowering strain to go from seed to harvest?
That is dependent on a few key factors:
- It is strain specific - There is no one size fits all answer here, as each strain will take a slightly different amount of time to be ready for harvests. Sativa strains will always take a little longer than their Indica brethren, and there will even be some difference in timing between different phenotypes of the same strain.
- Different cultivation methods produce different timings - If you are growing indoors, and are able to offer the crop everything it needs in terms of lighting, temperature, humidity, C02 levels, and space then it will finish quicker than if grown outdoors in sub-par conditions. A strain that may take 63 days indoors could push out to 70 when sun-grown.
- It depends on the medium - Soil-based cultivation methods will always take slightly longer than plants grown in coco-coir. Coco crops will usually take a few days longer than pure hydro setups.
In general, most autoflower beans will finish up in around 8-10 weeks from seed. Some can be done a little quicker than this, and some may take longer depending on the factors discussed above. Once you get a few grows under your belt and start to understand the lifecycle of an autoflowering cannabis plant, it’ll be easier for you to time the chop.
How will you know when the crop is ready to be chopped down?
The only surefire way to know when a cannabis plant has reached its potential is to study the trichome state. Trichomes go through three distinct stages - clear, cloudy, and finally amber.
Cannabinoid potency is at its peak when the trichomes are cloudy, but since the plant never stops producing resin once it begins, it's impossible to have all the trichomes cloudy. Most cultivators like to chop the plants down when they can see around 70% cloudy trichomes, with the other 30% being amber. This is just a rough little guide though.
How are you supposed to see the coloration of such tiny things?
Easy, grab a tool! There are a few options out there
- A jewelers loupe
- A magnifying glass
- A smartphone camera adapter
But, if you are serious about telling when the time to cut the crop down is, you should really grab a portable, handheld USB microscope. This will allow you to inspect the trichomes in detail, and see exactly what stage they are at. It will also allow you to take photos of the trichomes which helps immensely in seeing exactly what's going on. This also allows you to share photos with other growers.

What are the biggest advantages of growing autoflowering strains?
Autoflowering strains are favored by many growers for a number of reasons. The main advantages to be aware of include:
- Speed - Autoflowering strains will be ready to harvest in less time than their photoperiod counterparts, usually around 8-10 weeks from seed.
- Discretion - Autos are more discrete than photoperiod crops, as they remain small and take up less space. This makes them perfect for stealth grows.
- Ease of growth - Autos are quite hardy and half the time, you can chuck one in the ground and it will just get on with it. They don't require a lot of TLC to perform, but you can give them extra nutrients if you want to increase yield.
- Perfect for the tropics - For people living in tropical areas (like Thailand), where the length of sunlight in one day never goes above about 13 hours, autos are great. You don't have to worry about adding supplemental light to keep the plants in veg, and autos tend to handle the hotter, humid climate a little better than most photoperiod strains.
- Great for growers wanting to set up a one-room perpetual harvest - Unlike photoperiodic strains, autos can go through their entire lifecycle under one lighting schedule. In fact, they thrive under either 18/6 or 20/4 through both the veg and flower growth stages. Setting up a single-room perpetual harvest with photoperiods is impossible, but with autos it couldn't be easier. we recommend setting up a small separate germination area, but as soon as the plants enter veg they can be chucked straight into the main grow room with the other vegging and flowering plants.
11. In Conclusion
The lifecycle of autoflowering cannabis plants is basically the same as photoperiods. There are a couple of differences in how fast they develop and how they grow but most cannabis growers with a couple of grow cycles under the belt can definitely grow autos without any problem at all.
If you've grown autoflowers before feel free to share your experience with fellow growers by leaving a comment in the comment section below!


Comments