


A Full Guide to No-Till Cannabis Farming
- 1. What is the no-till farming method?
- 2. The pros and cons of no-till
- 3. No-till cannabis farming… a mis-understood artform?
- 4. No-till cannabis growing week-by-week guide
- 4. a. Preparing the soil
- 4. b. Week 1 - seedling / rooted clones
- 4. c. Week 2 - vegetative stage
- 4. d. Week 3 - vegetative stage
- 4. e. Week 4 - vegetative (one week before pre-flowering)
- 4. f. Week 5 - pre-flowering (transition from veg. to flower)
- 4. g. Week 6 - flowering
- 4. h. Week 7 - flowering
- 4. i. Week 8 - flowering
- 4. j. Week 9 - flowering
- 4. k. Week 10 - flowering
- 5. No-till cannabis farming faqs
- 6. In conclusion
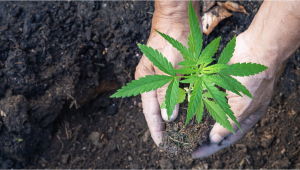
No-till is an agricultural technique used for cultivating without disturbing the soil, which prevents erosion and increases the soil’s health and nutrient retention. This method is known for increasing the variety and amount of life in the soil while requiring minimal labor, and despite not being popular amongst cannabis growers, is a great way to grow cannabis seeds organically!
1. What is the No-Till Farming Method?
No-till farming (aka zero tillage) refers to a land where no tillage is applied between harvest and germination, meaning that there’s no disruption in the soil between one crop to the other.

This technique is more common when growing in sandy or dry soils, this technique reduces erosion while increasing water infiltration, the retention of organic matter, and nutrient cycling, which ends up increasing life in the soil while using mulch and stubble to control herbs and pests, or if necessary, use 100% organic products to do so which results in an overall healthier soil.
2. The Pros and Cons of No-Till
Pros
- Less use of water and nutrients due to having more organic matter and microorganisms.
- Improves soil structure which results in better soil oxygenation and water retention.
- Reduces soil erosion which allows you to recycle the soil.
- Much more budget-friendly than other cultivation methods.
- Much less effort is involved during a run and between crop cycles. If done correctly, there should be almost zero need to add any synthetic nutrients or pesticides, which allow the plants to grow as naturally as possible. This natural growth promotes full-spectrum terpene production and the best genetic expression possible in every other aspect.
Cons
- Increased risk of carrying over diseases to your next crop.
- It takes time to reap the benefits due to having to activate soil beneficial microorganisms.
- The premium organic nutrients used to activate the soil can be expensive.
3. No-Till Cannabis Farming… A Mis-Understood Artform?
No-till farming, also known as direct drilling, may sound a little backward. As cultivators, we are usually pretty focused on using new fertilizers, compost, and all the other components that make up a great soil for each and every new crop. Rightly so, many people new to the no-till may be of the belief that zero-till farming will just have zero chance of producing the same results as more conventional cultivation methods. How is possible to produce the same results in terms of overall plant health, potency, and final yield with no-till cannabis cultivation?

Well, think about how it works in nature. some of the most bio-diverse and rich natural soil regions are those that have the least human disturbance to them. The Amazon rainforest is the most naturally biodiverse region in the world, and this is a direct result of the lack of human interaction with the region. Cultivators may also worry about the increased possibility of pest infestation issues when using no-till farming methods. But fear not, as with any thriving ecosystem the symbiosis formed between the lifeforms will help create a biosphere that thrives and is naturally well balanced. The help from beneficial bacteria, fungi, and insects can not be understated. Beneficial nematodes hunt down and eliminate their less desirable cousins. Ladybugs, Green Lacewings, and Praying Mantis help control the macro pests, and beneficial fungi and bacteria help promote the healthiest and most vigorous growth possible.
4. No-Till Cannabis Growing Week-By-Week Guide
Well, before starting you need to know that you will need big pots; It’s recommended to use 120L pots (or raised beds) but you can get away using 60L, 30L, or 15L pots, obviously, you don’t need a 120L pot for each plant, you can grow 2-3 plants in each container (depending on the size) so don’t worry, you won’t’ need one huge container per plant.

After you’ve filled the pots, you have to water the soil. The amount of water will vary according to the substrate mix but as a general guideline, water with 6L of water for every 60L of soil.
So now that you’ve chosen the pot size and watered the soil, it’s time to start preparing the soil for your grow cycle.
Have in mind that for the rest of the guide we’ll use the quantities needed for a 60L pot, if you are using bigger (or smaller) containers you’ll have to adjust the quantities.
Preparing The Soil
With the pots filled and watered, you want to add the following per 60L container:
- 2 tablespoons of cover crop (spread well);
- 32-64g of premium quality alfalfa meal (NPK ≈ 2.3 - 0.29 - 2.4);
- 43g of diverse grain bokashi per plant;
- 2.5-7.5 cm of barley straw mulch (water the mulch and remove the excess water before using).
Once you have prepared the soil, you need to give it time for the ingredients to dissolve and the soil to activate so it will need a minimum of 7 days, up to 1-2 months depending on the size of the container.
| Yellow Sweet Clover | 15% | Carter Flax | 15% | Indianhead Lentils | 6% | White Proso Millet | 2% |
|---|---|---|---|---|---|---|---|
| White Dutch Clover | 15% | Crimson Clover | 10% | Hairy Vetch | 6% | 4010 Forage Pea | 2% |
| Medium Red Clover | 15% | Iron & Clay Cowpeas | 7% | Common Vetch | 5% | Mancan Buckwheat | 2% |
A good way to know when to start your grow cycle in this pot is to wait until the cover crops have sprouted, if you don’t know which cover crops to use, we recommend the ones in the table above.
After the cover crop has come out of the soil you can go ahead and plant your cannabis seeds (or transplant your seedlings) into this pot.

Week 1 - Seedling / Rooted Clones
Right after your seedling comes out of the soil it will be pretty small and the roots won’t have established yet so during the first week you have to provide a good amount of beneficial microbes and fungi to provide a good environment for the roots to develop healthily and thrive.

As said above, baby plants don’t need much food so in the first week you’ll only be providing beneficial microorganisms; So on day 1, you should be introducing all of the following (or as much as you can) beneficial bacteria and fungi:
| Arthrobacter | Bacillus | Rhodopseudomonas |
|---|---|---|
| Azospirillum | Glomus | Streptomyces |
| Azotobacter | Pseudomonas | Trichoderma |
As you can see in the schedule, one day after you can go ahead and introduce some digestive enzymes to help the beneficial microorganisms make the nutrients available for your plants to absorb.
| Amylase | Galactosidase | Invertase/Sucrase | Peptidase | Phytase |
|---|---|---|---|---|
| Cellulase | Hemicellulase | Lipase | Phosphatase | Protease |
Now that you’re done for the rest of the week there’s nothing left to do other than keeping the soil moist to allow everything to dissolve and the microorganisms to do their thing.
Week 2 - Vegetative Stage
Starting from the second week, you have to take care of your plants for them to grow strong enough to withstand the weight of the buds but you’ll also need to avoid mold and pests so during the following week you will be doing two different applications.

As you can see above, you should apply the first mix as a foliar spray during the beginning of the second week of the vegetative stage, and 3 to 4 days after, apply the second mix.
Make sure the ingredients for the second application are properly combined before applying it.
Have in mind that the fish protein hydrolysate should have (ideally) 14.9% water-soluble nitrogen and 0.1% water-insoluble nitrogen.

Week 3 - Vegetative Stage
To obtain the best results possible, you want to introduce microbes every 15 days so during the third week you’ll be adding the same microbes added during the first day of the first week.

For the best results possible, the premium organic 3-5-2 NPK should contain as much as possible of the following ingredients:
| Kelp meal | Calcium | Crustacean meal | Soybean meal | Magnesium | Micronized basalt |
|---|---|---|---|---|---|
| Karanja cake | Phosphate | Fish meal | Sulfate | Malted barley | Gypsum |
| Alfalfa meal | Camelina meal | Fish bone meal | Potassium | Calcium montmorillonite | Oyster flour |
Also, have in mind that if you are looking to keep mother plants or your plants need more time in the vegetative, you can continue alternating between week 2 and week 3 until one week before pre-flowering, then continue with the next feeding chart.
Week 4 - Vegetative (One week before pre-flowering)
One week before your plants start pre-flowering you need to give your plants some extra nutrients for them to have what they need to grow big dense buds.

For this week, you will have to brew an alfalfa meal tea; The tea should be done with 16.3g of high-quality alfalfa meal per 1L of water, letting it soak for 24-48hs with an airstone to help aerate your tea.
Then you’ll want to add the layer of premium organic compost and the soil inoculant, and right after brewing your tea, mix the enzymes in it and water in the amendments.
Remember that you can use any product but for the best results you want the soil inoculant to contain all the following beneficial bacteria or as much as you can:
| Arthrobacter | Bacillus | Enterobacter | Micrococcus | Rhodospirillum |
|---|---|---|---|---|
| Azotobacter | Brevibacillus | Lysinibacillus | Pseudomonas | Streptomyces |
Also, if you were planning to prune some leaves to allow more airflow and light to reach all the buds equally or remove any branches to promote bud growth at the top, now is the time to do it.

Have in mind that for your plants to be properly fed, the Super phosphate should be preferably derived from rock phosphate and contain the following:
| Avail. phosphate | 7% | Iron | 1% |
|---|---|---|---|
| Calcium | 21% | Manganese | 0.05% |
| Sulfur | 1% | Sodium | 0.3% |
And the CalSil should preferably be derived from wollastonite and contain the following:
| Soluble potash | 1% | Carbon | 11% |
|---|---|---|---|
| Calcium | 16% | Silicon dioxide | 27% |
As said before, don't worry if the product you find doesn't contain everything described in the tables, as long as it contains the main ingredients your plants will be fine.

Week 5 - Pre-Flowering (transition from veg. to flower)
This week is when most plants will stretch quite a bit so make sure you adjust your lights accordingly and, due to your plants needing much more nutrients for the buds to develop, you’ll be feeding them quite a lot.

All of the products except the micronutrients + humic acid have already been used in the last weeks so you already know what they should have, but for this new ingredient you should look for a product with a high Iron content but very low Manganese, Boron, Cobalt, Copper, Molybdenum, and Zinc content.
Week 6 - Flowering
In the sixth week from seed, your plant will be in full-flowering mode so there’s not much to do other than maintaining the best conditions possible and continue feeding your cannabis plants.
Make sure you keep an eye out for bugs or mold but you shouldn’t have a problem at all.

All of the products mentioned in this week’s schedule except the bloom booster have already been used in the last weeks so you already know what they should have, but for this new ingredient you should look for a product made with the following:
| Non-GMO micronized soy meal | Water-soluble fulvic acid and gypsum |
|---|---|
| Micronized soft rock phosphate | Horticultural epsom |

Week 7 - Flowering
Reaching the seventh week your buds should be taking shape and looking beautiful. Due to having fed quite a lot during the last week, you’ll mostly foliar spray during this week to avoid any minor nutrient deficiencies and keep your plant with that beautiful healthy appearance.

Week 8 - Flowering
During this week you'll be feeding quite a bit of nutrients to provide your plants what they need for thick dense buds.
This week is critical if you want to get beautifully frosty and chunky buds so make sure you provide everything your plant needs and keep an eye to ensure she's growing healthy.

By the eighth week your buds should be looking almost finished, now it’s just a matter of providing that last boost before reaping the rewards. Try to check every day for bugs, due to the neem oil sprayed during the last weeks there shouldn't be a problem at all but it won't hurt checking just to make sure.
Week 9 - Flowering
Before starting your grow cycle you should already know approximately how long the strain you’re growing will take so you can tweak the schedule a bit and make sure you can flush properly. Remember that this article just serves as a guideline and may differ depending on your growing conditions.

Ideally, you should flush for 3 weeks (obviously, when possible) due to the amount of nutrients in the pot but if it’s not possible in your case, try to flush for 1 week at least (the next one).

Week 10 - Flowering
In the last week of flowering you can continue watering with the freeze-dried coconut water if you think it's necessary and only if you think your buds could fatten up a bit more.
During this last week, you’ll have to take into account several factors such as the state of the trichomes and stigmas to know when your plant is ready for harvest according to the type of effect you prefer, but this could take a couple of days so make sure you check every day.

Once your buds are 100% it’s just a matter of harvesting, drying, curing, and smoking your sweet organically grown buds!
5. No-Till Cannabis Farming FAQs
Is Indoor No-Till Cannabis Cultivation Possible, And Recommended?
Although more commonly practiced by outdoor cultivators, no-till cannabis farming can be used in indoor growing environments. It is possible to grow the best tasting and smelling weed of your life using that’s strong as all hell in rich, organic soil that can be reused season after season. All it takes is a little time and care, but in the long run, you will save not only a bunch of cash on bagged soil and nutrients but also a heap of time!
How Does No-Till Farming Save You Money and Time?
By creating a living, healthy, and thriving biosphere with our super soil we take care of the macro and micronutrient needs of the plant. Sure, we may add some organic additives at certain and specific times during the lifecycle, but these can be cheaply sourced or even made at home. They are also not 100% necessary but will help promote the best traits possible and ensure a potent and delicious final product that will impress in yield size. In terms of time savings, it’s pretty simple. The super soil does a lot of the work for you, meaning you have more time to tend to the plants themselves. Gone are the days of laboriously mixing up a nutrient solution every day, then checking the EC or PPM, and then pH'ing the solution before you are finally ready to feed the crop. With no-till, the substrate provides most of the nutrients (if not all), and so all you have to worry about is the pH of the water. And then there is the period between crop cycles. With no-till, the substrate should be ready for replanting almost immediately.
Is No-Till Cannabis Cultivation for Everybody?
Yes and No. Although it is essentially quite an easy cultivation method once everything is set up and in place, it does take some prior knowledge and a good understanding of plant life to get it right. In general, for novice growers at least, we recommend using coco-coir and bottled synthetic nutrients for the first couple of crop cycles at the very least. But, if you have a garden patch ready to go that has all the hallmarks of healthy, thriving soil then go ahead! What do you have to lose?
What we would say is to start small. There is no need to go balls to the wall and start a huge, multi-strain crop straight away. In general, it’s probably best to start your no-till with no more than about 10 plants of the same strain. This allows you to fully understand the differences between no-till and whatever other cultivation methods you have experience with. This also takes some of the strain away if things do not go to plan, and can be the difference between losing and saving the crop.
How Important is Mulch?
We can not understate the importance of covering any and all bare topsoil with organic mulch. You want to heavily mulch all areas with a wide and diverse range of materials, as this is one of the best ways to promote the bio-diversity and activity of the growing area. With no-till farming methods, we are essentially trying to perfectly recreate how it works in nature. The most fertile areas of our planet have natural ways of mulching themselves. As the seasons change, the trees drop their leaves and let their dense, nutrient-rich bark fall. Trees die, as do smaller plants, and all of this turns into natural mulch. It acts as a protective barrier between what lives above, and what lives below the soil. Give your soil the best chance of thriving, and mulch away!
Should you Add Worms and Worm Castings to Your No-Till Cultivation Area?
One of the absolute best ways to promote a thriving and healthy biosphere within your no-till grow space is to amend your super soil with worms and worm castings. Its one of the most efficient ways to promote the production of fresh compost, otherwise known as “vermiculture.”
Worms break down any and all organic material and through the magic of digestion, they produce the highest quality compost you could ever hope for. This means that there will never be a lack of organic nutrients available to your crop, and will eliminate the need for the use of any synthetic fertilizers whatsoever.
How Much Money Can No-Till Farming Save You?
This is a pretty tricky question to answer, as it really depends on the scale of the grow, and whether you are going indoors or out. However, it is safe to say that you could save quite a bit of money in the long run when employing no-till farming methods. Generally speaking, you will need fewer nutrients and additives than with more traditional cultivation methods - or none at all, depending on your setup and the quality of the soil you use. You can also recycle much of the material used in your growing environment for multiple cycles. This means less waste, and less money spent on buying new materials for each crop cycle. Overall, no-till farming can be a great way of saving money whilst still providing your plants with all the nutrients they need to thrive. Let's look at an example.
A typical home indoor setup can cost somewhere between $300 - $3000 in start-up costs, depending on the scale of the project and what materials you decide to use. This includes everything from lights, ventilation systems, pots, and soils. Now, you're still going to need to buy all the equipment, but once those costs have been absorbed, no-till farming should help to keep the cost of subsequent grow cycles down. Additional nutrients and additives are usually necessary when using no-till methods, so this is a great way of saving money each cycle.

Top-shelf cannabis nutrients are often ridiculously priced, especially when you look at what's out there for regular gardening. Take CANNA for example. If you are wanting to start a hydro grow, the base nutrients alone will come in at around $200 for the full setup. This can be a huge financial burden on anyone who is just starting out in this field, which is why no-till farming can be such a great money saver - and that's not even taking into account all the additives. A single 1 liter bottle of CANNA RHIZOTONIC retails for around $70, as does their most popular additive, BOOST ACCELERATOR. That's $150 gone, and we haven't even started talking about growth media yet.
No-till farming is a great way of keeping costs down and using what nature has already given us to produce the best results. So, if you're looking for an efficient and cost-effective way of growing cannabis, no-till farming could be just what you need.
Are There Any Major Downsides to No-Till Farming?
No-till farming does come with a few drawbacks, most of which revolve around the fact that it can be quite time-consuming and labor-intensive - at least to begin with. As previously mentioned, no-till farming requires a healthy balance of organic material mixed in the soil, so you will need to make sure this is balanced properly from cycle to cycle.
Composting and general compost maintenance can be a time-consuming task and requires patience and dedication. The same is true for any organic pesticides or fungicides that you might decide to use - they need to be applied at the right times, in the correct amounts, and monitored closely. This can take up a lot of your valuable grower’s time, but with patience comes rewards.
No-till farming also requires a good understanding of how the natural environment works. As mentioned earlier, no-till farming relies on beneficial microbes and fungi to do its work, so having a solid grasp of mycology can go a long way in helping you achieve your goals with no-till farming.
Do Organic Cultivation Techniques Produce Higher-Quality Cannabis?
That depends on what you class as high quality. This is a hotly debated topic in the cannabis world and there are still many arguments for each side. Some people believe that organic methods of cultivation can produce higher-quality bud due to the fact that it is free from any unnecessary chemical fertilizers and other additives. On the other hand, some growers argue that synthetic nutrients and additives can be just as good as organic options, with the specific nutrients being far more concentrated than their organic counterparts. This argument could be further backed up by the fact that laboratory tests have shown that synthetic nutrients can produce higher yields and more potent harvests when compared with their organic alternatives.
But, most growers agree that organic cultivation produces the best tasting and smelling buds, with just slightly smaller yields than their synthetically-fed counterparts. In the end, it all comes down to personal preference and what you believe produces the best end product for your desired outcome.
In a recent blind study conducted out of one of the largest dispensaries in LA (not peer-reviewed, but worthy of discussion either way), more than 80% of people preferred options that have higher terpene percentages over high potency, to a certain extent. There were 8 different strains on offer, with 4 grown indoors and 4 outdoors and 2 of each being organic, and the other two hydroponic. Now keep in mind that the samples were supplied as pre-rolls, so the participants didn't actually get their hands on the buds. This was to stop any of the participants from guessing which samples were grown indoors or outdoors, and through which cultivation style.
83% or participants chose the organically grown options over the hydroponic buds, with more than half of this 83% picking the outdoor organic option as their top choice. When tested, the organic options showed to have higher concentrations of terpenes over the hydroponic stuff, while the THC percentages were a little lower.

And this kind of makes perfect sense, right? In this day and age, there are just a ridiculous amount of high-potency strains. Almost every seed you buy, plant, and grow is going to be over, say, 18% THC these days (unless you specifically choose a lower THC option). This level of potency is more than enough for most consumers, so potency becomes a bit of a lot point (to a certain extent, anyway). Sure, the super heavy consumers out there may disagree, but the vast majority of us are looking for a strain that offers the medical and recreation benefits we all know and love - but, for me at least, a huge part of the enjoyment I get from smoking weed comes from the aroma and flavor. So, if you are looking for the best possible end product from your cannabis plants, then organic cultivation may be the way to go. And if you are going organic, you may as well give no-till a try!
6. In Conclusion
This guide will result in an unbelievable harvest, with delicious smelling and tasting flower. We understand that some of the ingredients used may be quite hard to find depending on where you live so we recommend using Build A Soil products which are of an extremely high quality.
If you have experience with no-till cannabis farming and can help fellow growers with some tips and tricks, please leave a comment in the comment section below!
External References
- IMPACTS OF NO TILL FARMING IN AGRICULTURE. - Mukherjee, Bishal. (2019).
- No-Till Farming Systems in Europe. - Stroud, Jacqueline. (2020).
- No-Till Farming. - Kynigos, Nathaniel. (2015).


Comments