


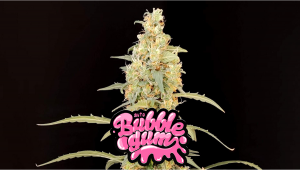
BubbleGum Auto Cannabis Strain Week-by-Week Guide
- 1. History
- 2. Specifications
- 3. Week-by-week guide
- 3. a. Week 1 - germination
- 3. b. Week 2 - vegetative stage
- 3. c. Week 3 - vegetative stage
- 3. d. Week 4 - vegetative stage
- 3. e. Week 5 - pre-flowering stage
- 3. f. Week 6 - flowering stage
- 3. g. Week 7 - flowering stage
- 3. h. Week 8 - flowering stage
- 3. i. Week 9 - harvesting
- 4. What to expect?
- 5. Drying, trimming, and curing your bubblegum auto harvest
- 6. In conclusion
1. History
For many years, Bubblegum was believed to be a Dutch strain but this classic fruity strain was actually created in the U.S., although the Dutch versions are better known amongst growers and cannabis consumers. For many years, The Netherlands has seen an increase in cannabis breeding due to their laws that were completely different from the U.S in the late ’80s, back at that time, everything that was cannabis-related was banned in the U.S.

The history of this strain begins in 1989 in Indiana, where an American home-grower grew a strain that smells exactly like bubblegum, with an aroma so similar to tutti-frutti that it quickly started winning awards and soon reached the East Coast. This award-winning strain became popular all over the world and everyone wanted to put their hands on the prized genetics, which quickly ended up in Amsterdam, released by two famous seed banks. Even though the lineage is unknown up to this day, several breeders tried to achieve the original genetics which resulted in other famous strains such as Bubblelicious and Double Bubble which helped it become one of the most sold genetics in Amsterdam.

2. Specifications
The old-school genetics was redesigned by fast Buds to provide an exceptional plant that delivers a unique aroma and effect and can be grown even by beginners. The BubbleGum Auto from our Originals line grows really well in all types of climates and has a good resistance to harsh climates and dry periods thanks to her Indica and Sativa heritage.

Our auto version of this classic can grow up to 130cm and develops a bushy foliage which makes her end up looking like a huge Christmas tree. You can expect this plant to be ready from start to finish in around 9 weeks, she will produce super dense and extremely resinous buds that are dripping in trichome and reek of an extremely delicious fruity and sweet aroma with a strong strawberry flavor that will leave your mouth watering, and the best of all, with 20% THC. The delicious aroma comes with a really upbeat and joyful high that is an excellent effect for socializing, inspiring creativity, and will keep you motivated throughout the day.

You can use this strain either generally or intentionally. In a general sense, fire up this strain at any time of the day for a hit of euphoria. It elevates your mood, ramps up your appetite, and gives you a spring in your step. In an intentional sense, you can harness the phytochemical profile of this cannabis variety to give you an advantage in different kinds of activities. A THC content of 20% hits occupies the middle ground. It’ll fill you with motivation and focus without rendering you dysfunctional. If you’re a writer or a painter, hit a bong or blunt before diving into your work to let the creative thoughts flow freely. If you like to hit the gym or hike the forest trails, this strain will help you easily enter a flow state and achieve your goals for the session at hand.
3. Week-by-week guide
This article serves as a general guideline on the conditions kept throughout this grow report, our week-by-week serve to give growers an idea of what to expect when growing these wonderful genetics.
| Grow Specifications |
|---|
| Light Fixture: HID |
| Light Cycle: 18/6 |
| Humidity: 40-45% |
| Temperature: 22-27°C |
| Grow Space: Indoor |
| Nutrients: Synthetic |
| PH level: 6.1-6.3 |
| Seed to Harvest: 9 weeks |
Have in mind that this timeline has been written to help you, even though you’ll be able to grow your plants by following these specifications, you should adjust the conditions depending on your growing setup.
Week 1 - Germination
This is the start of this grow journal, the grower started by germinating a couple of BubbleGum Auto seeds in a paper towel, after the radicle grew around 3 cm, the seeds were transferred into a jiffy pellet.
| Height: 4.5cm |
|---|
| pH: 6.1 |
| Humidity: 45% |
| Temperature: 26°C |
| Watering: 300ml |
Even though this is not the germination method we recommend because soaking the seeds in water helps soften the shell so it’s easier for the seedling to come out of it. Despite these seeds being germinated in a different way, as long as you keep the temperature between 18-25°C and a relative humidity around 70% you can germinate them any way you want.

Just remember that as soon as the radicle reaches between 3-5cm you should plant it, this way you prevent problems with your seedlings, and most important of all, don’t risk snapping the stem. When your plant comes out of the soil, the first sign of a healthy seedling is the two tiny round leaves called cotyledons, they should be green, yellow, or deformed cotyledons are a sign of overwatering and it can affect how your plant develops.

As with all strains, Bubblegum Auto remains sensitive to excess moisture and water during the delicate seedling phase. To get the best start possible with this cultivar, you need to stay on top of this variable during the first week. Of course, high levels of moisture are required to germinate seeds. However, you need to let things dry out slightly when the shoot emerges and the seedling starts to develop. Keep this simple rule in mind: Only apply more water after the top of the soil becomes thoroughly dry. This strategy will help to prevent overwatering and the excess moisture that it leads to. Overall, you’ll avoid pushing all of the oxygen out of the pores between the soil particles. This is important because roots need to breathe, and because many types of disease-causing bacteria that affect roots thrive in an oxygenless environment.
Week 2 - Vegetative stage
After your plant has developed the first pair of true leaves, you’re officially in the vegetative stage, this won’t always happen in the second week but don’t worry, if they haven’t grown by now, they will in the following days.
| Height: 7cm |
|---|
| pH: 6.3 |
| Humidity: 40% |
| Temperature: 24°C |
| Watering: 500ml |
In this case, the plants developed the true leaves during the first days of the vegetative stage, so when you see them, make sure you gradually start feeding vegetative nutrients in a 3-1-2 ratio, remember that at this stage, your plants need more nitrogen to grow green matter.
“It was a good week guys, girls didn't give me any problems whatsoever! Will start adding a very light feeding to the watering schedules. Keeping Ph around 6.3."

Remember that depending on the medium and nutrients, you should check the ph of the nutrient solution because the pH level is what determines which nutrients your plant can absorb and it’s an extremely important aspect of cannabis growing if you want to avoid problems. The only method of weed growing where pH is of lesser importance is organic cultivation. You can see an example involving organic nutrients in the feeding chart below.

Week 3 - Vegetative stage
In the third week from germination, your plant should be growing exponentially and, as you may know, when your plant fully develops 3-4 pairs of leaves, they’re ready for plant training, by now, the leaves should already be growing 3-7 fingers, depending on the genetics. In this case, because BubbleGum Auto is a hybrid, it will develop relatively wide leaves and with time, the leaves will start coming out long and thin with 5 apexes (fingers), these leaves are called fan leaves and are used by the plants to perform transpiration, photosynthesis and other vital processes so if you see something odd, like brown or yellow spots, it’s essential you fix it to allow your plants to grow properly. Even though we don’t recommend topping autos, more experienced growers can get away with it and have impressive results like in this case.
| Height: 20cm |
|---|
| pH: 6.3 |
| Humidity: 45% |
| Temperature: 24°C |
| Watering: 750ml |
In this grow guide, our grower topped one of his plants and tied the branches of the other one which ended up looking great, although you can perform other forms of LST like SoG and SCRoG, but remember that if autoflowers get stressed it may affect your harvest so be extremely careful and only do it if you know how to do it.

This grower is very experienced so, as you will see, the plants developed extremely weel despite the plant training, if you’re planning to do it, make sure you always pay attention to the signs your plants give you, they will surely show you something’s wrong if you don’t do it carefully.
“OB1 was trained with LST and some minor de-leafing. I did not top her like her sister, want to see the difference in growth and mixed training techniques. OB2 was topped 2-3 days after week 2. She also had one leaf plucked for more light on bud sites. She looks bigger bit will probably only have 8-9 cola sites, I should have waited for one more node to come out because by the look of it the 2 lowest bud sites don't really develop that well…”
Week 4 - Vegetative stage
By week four, if everything does as it should, your plant should have established and you will see her growing super fast, as said before, you should be feeding a 3-1-2 ratio of Grow nutrients and by now, you should be already giving a full nutrient dose.
| Height: 32cm |
|---|
| pH: 6.3 |
| Humidity: 45% |
| Temperature: 27°C |
| Watering: 750ml |
“Week 4 showed some really nice growth as expected! They are starting to drink a lot more water, so I’m watering with about 10% runoff at a ph of 6.3 each time. I did a lot of lst throughout the week.”
The next week is when your plant should start showing its sex, pollen sacs if it’s a male and pre-flowers if it’s a female, in this case, and all other cases where you’re growing feminized seeds, you don’t have to worry about this because, as the name says, the seeds are feminized.

If you see the flowering sites starting to turn light green, don’t worry, it’s a sign that they’re about to start producing pre-flowers and it’s perfectly normal, also, prepare to gradually start feeding Bloom nutrients, you shouldn’t change the nutrients suddenly, but as soon as you see the first pistils you should gradually start introducing them.

Week 5 - Pre-flowering stage
At this stage, you will have to slowly start feeding your plants Bloom nutrients in a 1-2-3 ratio, this serves to provide your plant the minerals it needs to flower, just remember to start with a lower dose and increase it gradually.
| Height: 35cm |
|---|
| pH: 6.3 |
| Humidity: 45% |
| Temperature: 27°C |
| Watering: 750ml |
Bloom nutrients provide phosphorus and potassium which are the macronutrients cannabis plants need to produce flowers, and with this, you will see the trichomes starting to appear. As you can see in the image above, the flowering sites have started to develop a light green color and with the pre-flowers, comes the cannabis smell so depending on where you’re growing, you should find a way to mask or eliminate the smell, we recommend companion planting if you’re growing outdoors and a carbon filter if you’re growing indoors. As you may know, cannabis thrives in certain conditions, even though you’ll be able to grow in a less-than-ideal environment, the results will be much better if you maintain a relative humidity of around 55% and keep the temperatures around 18-25°C.

Also, if you did any kind of training like tying down the branches, you should stop now; By now you should have achieved the desired size and structure, and as she continues flowering, just let her do their thing. Have in mind that if you’re growing under a Scrog net, you don’t need to remove it, just make sure you don’t bend don’t plant too aggressively so they don’t get stressed, stressing autos during the flowering stage can end up stunting growth and affecting the yields.
Week 6 - Flowering stage
In the sixth week from seed, your plant has officially entered the flowering stage, if you haven’t installed a carbon filter, you will need to do it by now. Even though the strawberry aroma is delicious, if you’re growing in a place where it’s illegal, your neighbors won’t appreciate it as much so make sure you don’t risk it.
| Height: 37cm |
|---|
| pH: 6.3 |
| Humidity: 45% |
| Temperature: 27°C |
| Watering: 750ml |
“Had some good pistil formation on all the bud sites this week.”
At this stage, you will clearly see the buds taking form, there will be an abundance of pistils all over and you will see more and more trichomes overnight. Remember that bugs can appear at any moment so if you weren’t checking your plants, you should start keeping close attention because at this stage it’s not recommended to use pesticides or fungicides so checking on your plants every day is the best way to prevent pests.

If you have grown cannabis in the same growing space and have had problems with pests before, it’s a good idea to spray a little bit of organic pesticide around the grow tent, this will protect your plants, just have in mind that you shouldn’t spray your plants unless you have a bug infestation.
Week 7 - Flowering stage
Week 7 marks the start of the second half of the flowering stage, if you haven’t experienced any problems, the buds should be looking good although they will still fatten up a lot more. By now, you should already be feeding a full dose of Bloom nutrients because your plants definitely need it to form the flowers properly, make sure your plants aren't showing signs of deficiencies because at this stage it could affect how dense your buds end up.
| Height: 37cm |
|---|
| pH: 6.3 |
| Humidity: 45% |
| Temperature: 27°C |
| Watering: 800ml |
Have in mind that this strain can grow up to 130cm but due to the training performed by the grower, this plant, in particular, will end up relatively short although it’s not a bad thing if you have limited space and want to control how tall your plant develops. Also, depending on the type of medium you’re growing in, you should provide Calcium and Magnesium which are micronutrients cannabis plants need in smaller amounts, this isn’t always necessary but when growing soilless like in coco, clay pellets, or hydroponics it usually is.

“The buds are going to start swelling soon, nice trichome production starting.”
As you can see in the images above, the plants are in full-flowering mode and even though the buds aren’t dense yet, you can clearly see the flowers and have an idea of how they’ll end up looking. It won’t take long for this plant to reach harvest time so make sure you keep the good work and in no time you’ll be harvesting delicious tutti-frutti flowers.

Week 8 - Flowering stage
Week 8 marks the week before the last of this grow cycle and although the buds are not 100% ready, they should be quite dense and with a beautiful smell, depending on the strain, the pistils could be already turning brown but don’t chop them just yet, you should only harvest when the trichomes are around 70% cloudy for a more cerebral effect or when they’re 70% amber for a more corporal effect.
| Height: 39cm |
|---|
| pH: 6.3 |
| Humidity: 45% |
| Temperature: 27°C |
| Watering: 1000ml |
To be able to see the state of the trichomes, you will need a jeweler's loupe or something that allows you to clearly see them. Some growers even use their smartphone's macro mode but it won’t be as effective as the other tools. Also, depending on the type of nutrients you’re feeding, you should start thinking about flushing, this will wash the mineral build-up in the soil and roots, resulting in better tasting flowers. Remember that when you’re flushing your plants you should do it with plain pH’d water, and if possible, check the PPM which should be as close to zero as possible.

“Had some great trichome production as well as bud growth this week!”
Even though the buds are already looking good, you can see in the image that there are still a lot of long white hairs despite not being able to see them properly from afar so don’t get anxious, they only need one more week.
Week 9 - Harvesting
Finally, you’re in the last week and in a couple of days you’ll be harvesting your BubbleGum Auto, if you already start flushing, you will see the leaves slowly turning yellow but depending on the genetics, the leaves could turn red, purple, black or blue, either way, it means your plant is running out of nutrients and is a good way to make sure you’re harvesting at the right time.
| Height: 39cm |
|---|
| pH: 6.3 |
| Humidity: 45% |
| Temperature: 27°C |
| Watering: 1000ml |
As specified above, this plant grows up to 130cm but because of the plant training performed, it stayed quite short but that didn’t affect the yields, the grower reported that he got 80g of dry buds so remember that even though autos can easily get stressed, doing it properly is definitely worth it.

Remember that before consuming your buds in any way, smoking, making edibles, vaporizing, etc.. you need to dry and cure them, so before chopping them down, make sure you have your drying room ready, even if it’s just a cardboard box, set it up and leave it ready so you can hang your plant as soon as you cut it. Have in mind that when drying cannabis the smell will also be quite strong so you can dim down your exhaust fan so you can still filter the smell or make your drying space airtight so the smell doesn’t come out.
4. What to expect?
Now that your plants are already drying you’ll only have to wait a couple of weeks before trying them, if you are curious to know what to expect, here are our growers’ reports. As you may have smelled throughout the growing cycle, you will experience a strong earthy tutti-frutti flavor with hints of fresh strawberry and cherry which consists of the following terpenes.

This terpene combination provides a truly mouth-watering flavor that will leave your mouth feeling like you’ve just applied a berry lip balm or drinking a strawberry smoothie.
“Definitely a hybrid. Depends on where you are and what you are doing that's going to give you the effect. If you're out on a daytime trip, works like a champ. If you wanna Netflix and chill, also a great strain. It's the best of both worlds...I tend to like Sativa-dominant strains more. But definitely a great smoke to have with you and has amazing terpene development, smell sooo good.”
The terpene blend results in an 85% Indica and 15% Sativa effect that provides a nice sense of clarity and enhances creativity, growers have reported feeling uplifted, relaxed and creative with the negative effects only being dry eyes and dry mouth.

5. Drying, Trimming, and Curing Your Bubblegum Auto Harvest
So you have finished all the hard work. The crop is out of the ground, and ready to be enjoyed. Yeah right, think again! You are still weeks if not months away from the harvested buds being truly ready to smoke, depending on how picky you are. Sure, there is absolutely nothing stopping you from grabbing a few of the nuggets, setting the oven to as low as it goes, and chucking those bad boys in for an hour or so until they have dried up enough to smoke. No one here is going to judge you, and we would be definitely lying if we said we had not been guilty of this crime against cannabis in our past.
But holy hell does bud dried like that tend to disappoint. Terpenes are sensitive little bastards, so to get the best possible outcome for all those months of hard work you have already endured you are going to have to slow everything down and chill Winston.

If you are going to wet trim then now is the time to hit it, but for most home growing situations (and commercial grows for that matter) we suggest dry trimming. There are some cultivators who swear by wet trimming, but in our opinion, it is too much hassle and reduces the level of control you have over the drying process. The more plant matter, the longer it will take to dry, meaning you can further control drying rates. So from here on in, we are going to assume you will dry trim the harvested buds.
The secret to drying weed correctly…
Is environmental control. Unless you have hit the jackpot and live in the perfect weed drying climate, you are going to have to use some equipment to help the situation out. The required list of kits is:
- A humidifier, or dehumidifier depending on what you are dealing with.
- An AC unit, or possibly some small heaters
- Multiple hygrometers
- A good quality carbon filter and extraction fan. Freshly harvested weed stinks so good.
A drying period of anywhere between 10 to 14 days is perfect. If it runs a little quicker that’s fine, but any longer than 2 weeks and you may find you have some mold issues. To get a nice slow drying period set up you want the dry room to sit at anywhere between 60-70°F (that’s 15-22°C) with a relative humidity level of 55-65%.

Why are these ranges so important?
Well, it all comes down to terpene and cannabinoid degradation and maturation. Big words, let’s simplify it. As mentioned above, terpenes (and cannabinoids to some respect) will degrade easily and at surprisingly low temps. Drying and curing cannabis is all about letting those chemicals mature to their full potential, so slow and low is the name of the game.
Alrighty, 2 weeks have passed and the buds are perfectly dried. What’s the next move?
The time is now to trim those delicious little nuggets of joy. Trimming is, without a doubt, the most tedious and time-consuming part of the entire cultivation process, other than all the waiting that has to be done. If you have never trimmed before then you are probably pretty excited about the idea of getting into it, but trust us when we say that those feelings will quickly pass.

To make the process as pain-free as possible you need to buy some proper trimming scissors and a trim tray. Our favorite trimming scissors are these or these, and the best trim tray on the market is the OG Trim Bin. Make sure you also grab a bottle of isopropyl alcohol to help keep the scissors clean, especially if you are dealing with super resinous buds.
Look, don’t let us get you down with our negative Nancy remarks about trimming. It can actually be a good time if you don’t have too much to deal with. If you are looking at multiple pounds worth of weed that needs processing you can always invite some friends around, roll up some fatties, get the beats pumping, and maybe even shout the boys some beers to say thanks for the help. Doesn’t sound like a bad time at all.

So the trimming is over and done with. We can smoke up that sticky-icky now, right?
Nope. Well, technically yes. Of course, the weed is now in a smoking-ready state, and as long as you grew good stuff the resulting bud should now be pretty banging. But hold your horses for just one second - or should I say 2 weeks to six months… That’s right, curing is a slow process that simply cannot be rushed if you want all of those tasty terps to fully develop and reach their max potential.
Do you know what makes cannabis cup-winning strains stand out from the sh*t you are used to smoking? Well, other than the master growers pouring their heart and soul into the process, and the top-shelf genetics, it’s the curing. Curing weed properly really does make that amount of difference to the final smoke.
Ok, so how do you properly cure cannabis?
Just as with drying, environmental control is the key to success. You want to keep the temp at around 70°F (22°C) with a humidity level of 60-65%. You may need to use the kit from the dry room to force these conditions. Place the buds carefully into airtight mason jars filling them past the 75% point, as the buds need some air to breathe and mature.

Store them in a dark area away from direct sunlight. If you notice the buds becoming a little “damper” in the first few days don’t be alarmed, as this is just the internal moisture leaking out and rehydrating the buds. Remember to burp the jars twice a day for the first week or so, then twice a week for the rest of the curing time.
It’s almost impossible to give you an exact guide on how long the curing will take, but after 2 weeks the buds should be tasting pretty damn good. After 6 months they will be nothing short of amazing.
6. In conclusion
If you’re looking for classic fruity genetics, this strain is a must for everyone! The good blend of Indica and Sativa genetics provides a really nice high that can relieve pain and can be used as a medicinal strain that won’t leave you heavily couch-locked and in auto version, which allows you to harvest even faster.
If you have grown this strain before and want to help fellow growers with tips to improve their growing experience, please leave a comment in the comment section below.
EXTERNAL REFERENCES:
- Cannabis indica. - Nash, Eugene & Wilbrand, Rainer. (2015).
- Cannabis sativa and Cannabis indica versus “Sativa” and “Indica”. - McPartland, John. (2017).


Comments