GG4 Sherbet FF Cannabis Strain Week-by-Week Guide

- 1. Grow specification
- 2. Grow set up
- 3. Germination and seedling stage | week 1
- 4. Early veg | week 2
- 5. Mid veg | weeks 3-6
- 6. Transition (pre-flower) | week 7
- 7. Early flower | weeks 8-9
- 8. Mid flower (bulk phase) | weeks 10-11
- 9. Ripening and harvest | week 12 (and beyond)
- 10. The outcome
- 10. a. Gg4 sherbet ff yield
- 10. b. Gg4 sherbet ff smoke report
- 11. In conclusion
GG4 Sherbet Fastflowering is an exceptional strain, seamlessly blending the potent genetics of Gorilla Glue and Orange Sherbet. Its versatility shines indoors and outdoors, flourishing in various climates. The buds, adorned with dark orange hairs and spade-shaped calyxes, are a sight to behold, coated in a silvery-white layer of trichomes.
This strain is perfect for growers of all levels, offering low-maintenance cultivation without compromising on quality or quantity. GG4 Sherbet FF's resilience, combined with its medium size and bushy structure, ensures a hassle-free cultivation experience, making it an excellent choice for both seasoned cultivators and those new to the art of growing.
This growing guide will show you how easy and straightforward the cultivation process can be both indoors and outdoors. If you lack experience, all you need to do is follow in others' footsteps and achieve the same spectacular results.
1. Grow Specification
GG4 Sherbet Fastflowering is a horticultural marvel, embodying a perfect balance of Sativa and Indica genetics with a composition of 30% Sativa and 70% Indica. Cultivating this XL-sized beauty is a joy for any grower, reaching heights of up to 200cm. The strain's rapid 7-week flowering period is a testament to its efficiency, providing a generous indoor harvest ranging from 450 to 600 gr/m2. Outdoors, each plant yields an impressive 400 to 600 grams. Its resilience and adaptability shine through in various climates, making it a versatile choice for cultivators seeking a bountiful harvest without compromising on quality.
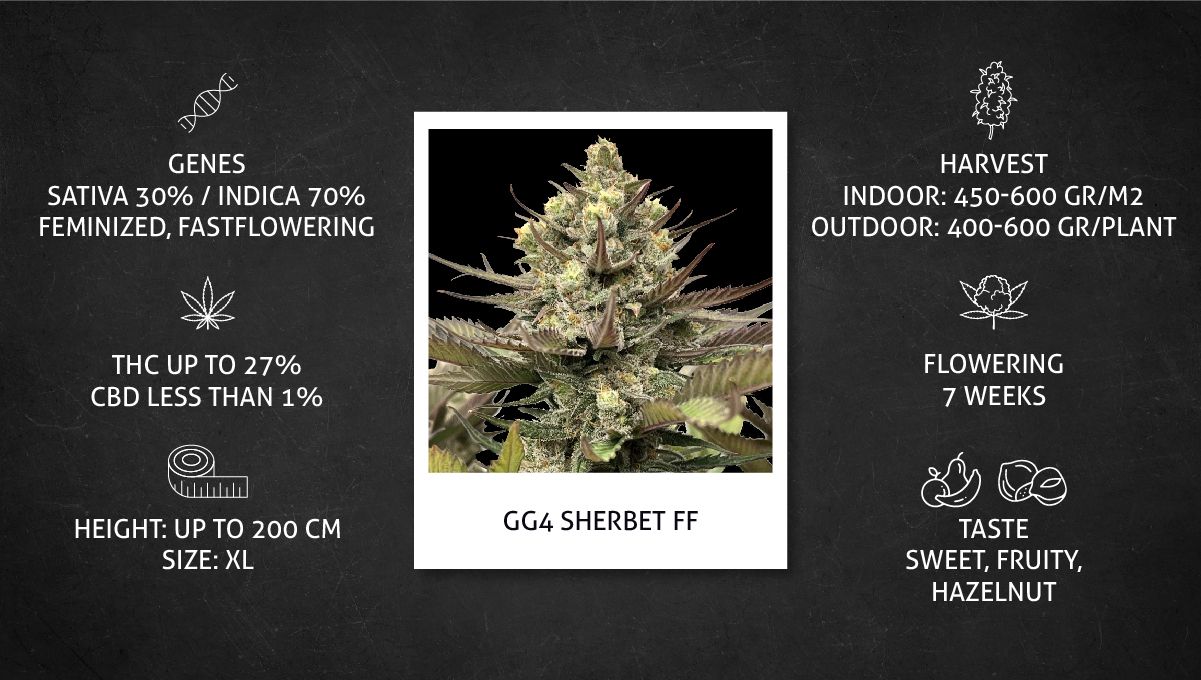
In terms of the final product, GG4 Sherbet FF boasts a THC content of up to 27%, promising a potent and blissful experience for enthusiasts. The taste profile is a delightful medley of sweet, fruity, and hazelnut notes, creating a sensory symphony that captivates the palate. Whether enjoyed alone or shared among friends, the strain's flavorful essence and impressive THC potency make it a must-try for those seeking a truly exceptional cannabis experience.
2. Grow Set Up
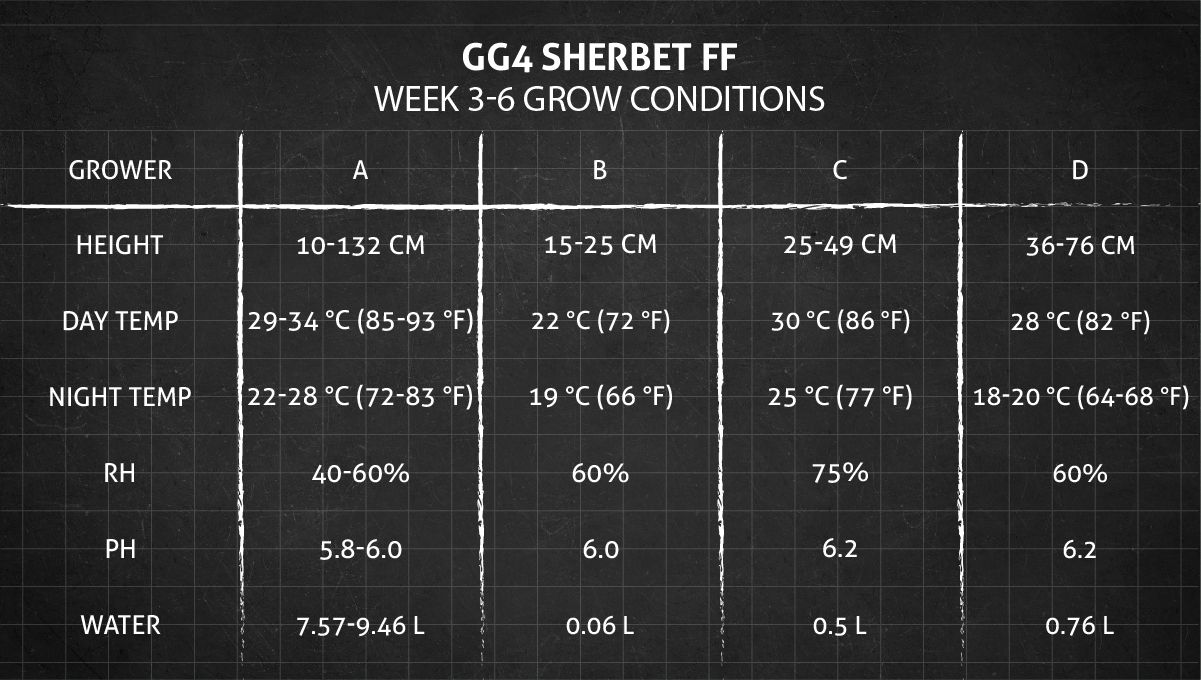
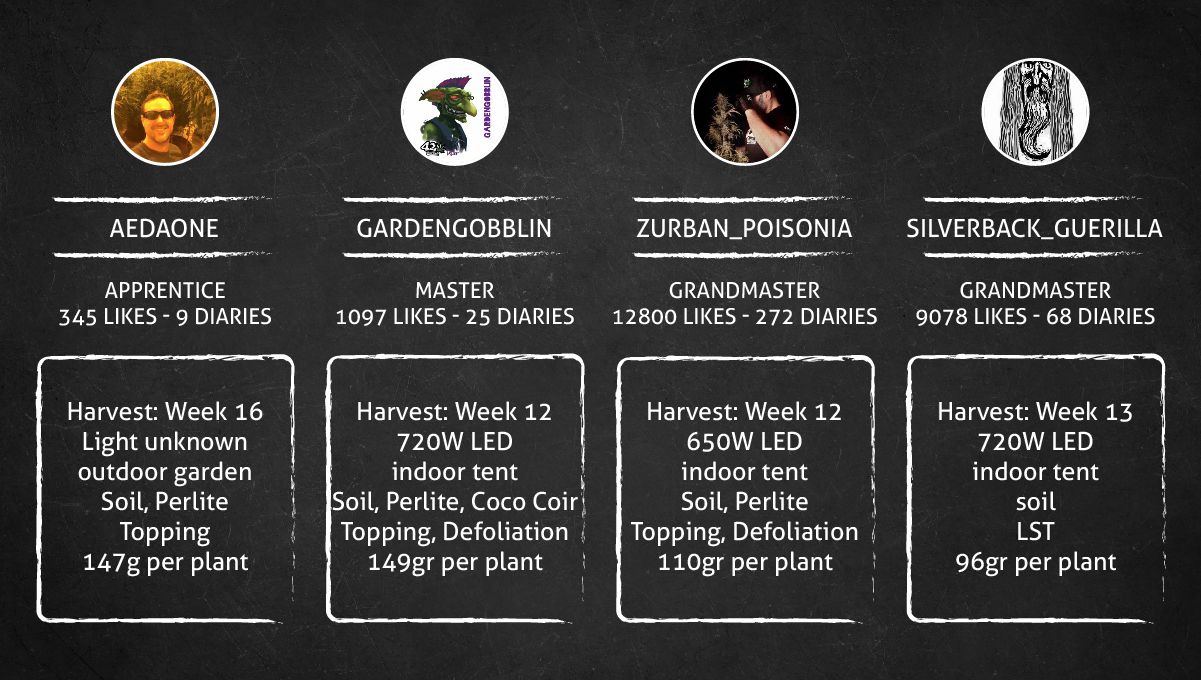
Despite being among Fast Buds' most recent offerings, GG4 Sherbet Fast Flowering has firmly established its place in many growers' gardens, and there are quite a few grow reports showing this plant's progress from seed to harvest. We have chosen 4 grow diaries that are detailed enough and have good-quality photos. In the table below, you can see some specifications of these 4 grow setups.
| Grow Space | Light | Medium | |
|---|---|---|---|
| A | Outdoor Garden | Sun | 65/35 Soil/Perlite |
| B | 1.5 m2 | 720W LED | Soil, Perlite, Coco Coir |
| C | 1.5 m2 | 650W LED | Soil, Perlite |
| D | 1.22 m2 | 720W LED | Soil |
If your steup (it's size, type of light and its wattage, etc.) are nothing like those in the table above, don't worry: GG4 Sherbet Fastflowering easily adapts to any conditions you may create provided that you've followed the main guiding principles of weed cultivation.
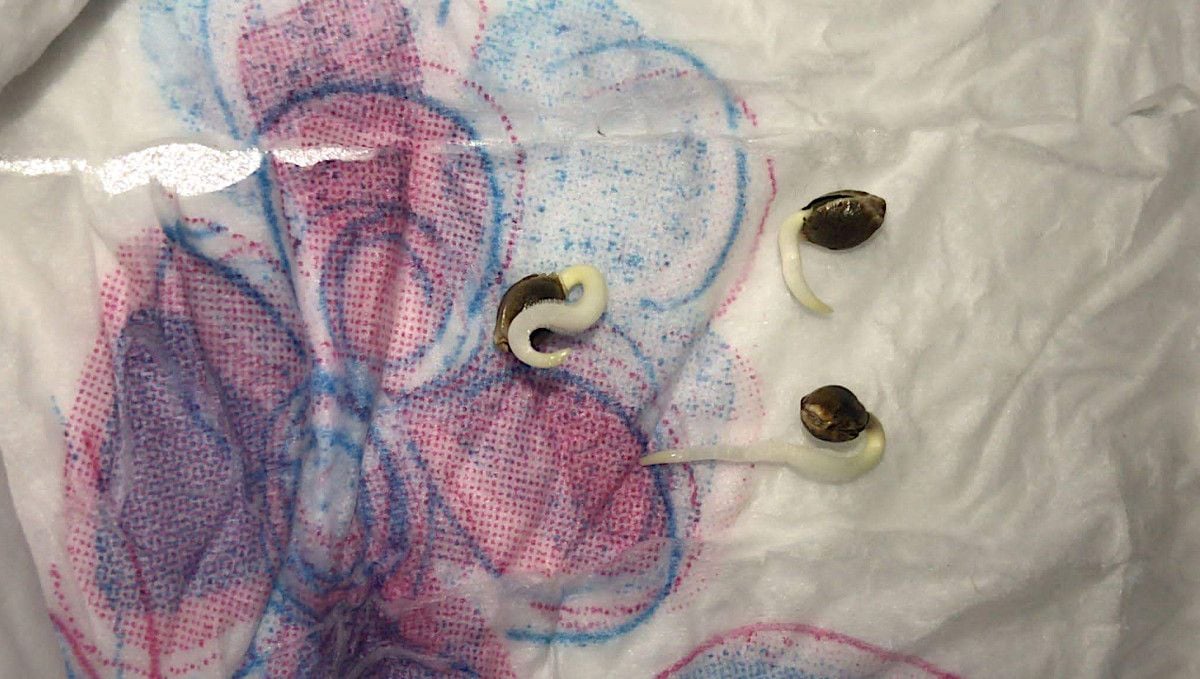
3. Germination And Seedling Stage | Week 1
If you want to create the best conditions for your seedlings, you should keep the day temperatures very warm - around 26-28°C - and not allow the temps drop by more than 5-10 degrees during the night. You can even keep the lights on 24/7 in the first week or two to make sure your young ones are warm and comfortable around the clock. However, if the light generates too much heat, it's best to let your seedlings have a rest from that for a few hours each day. In this case, something like 20/4 or even 18/6 would be a more fitting light schedule.
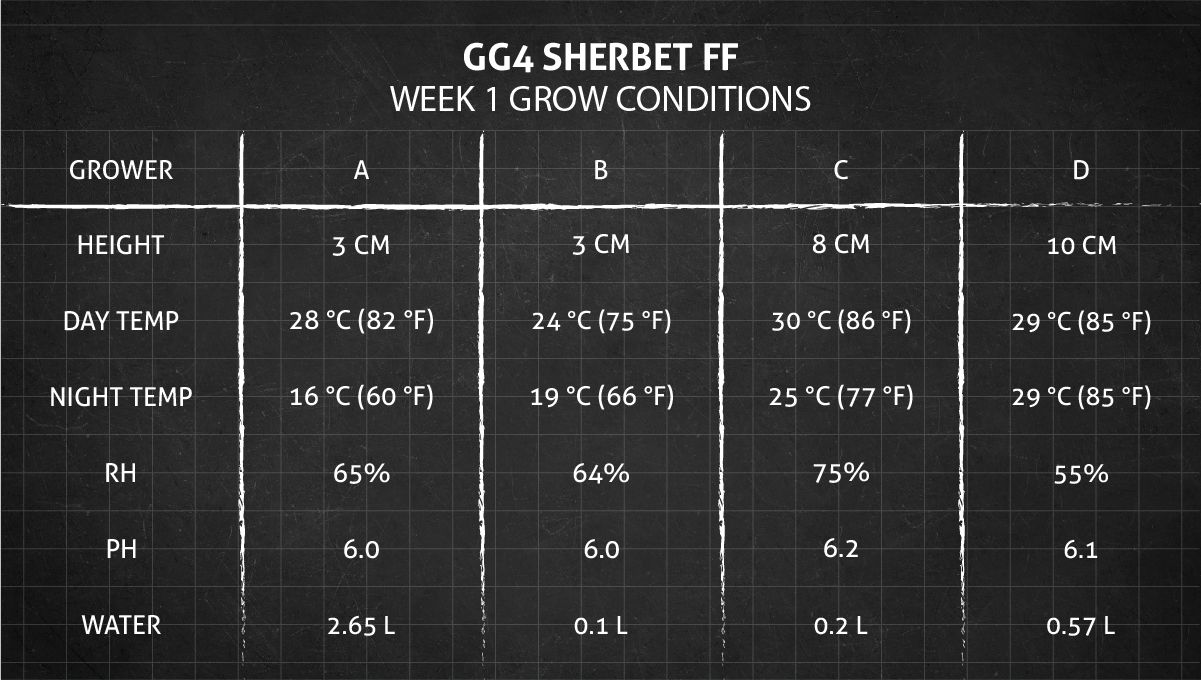
To kickstart the germination process, many growers prefer the simplicity of letting cannabis seeds float in water. Place the seeds in a glass or cup, allowing surface tension to prevent drowning. The absence of nutrients or stimulantss in the water is crucial; just ensure it's dechlorinated and of drinking quality, and you don't even have to worry about pH yet. Keep the seeds in darkness during germination as moisture penetrates the shell, eventually leading to the emergence of the tap root.
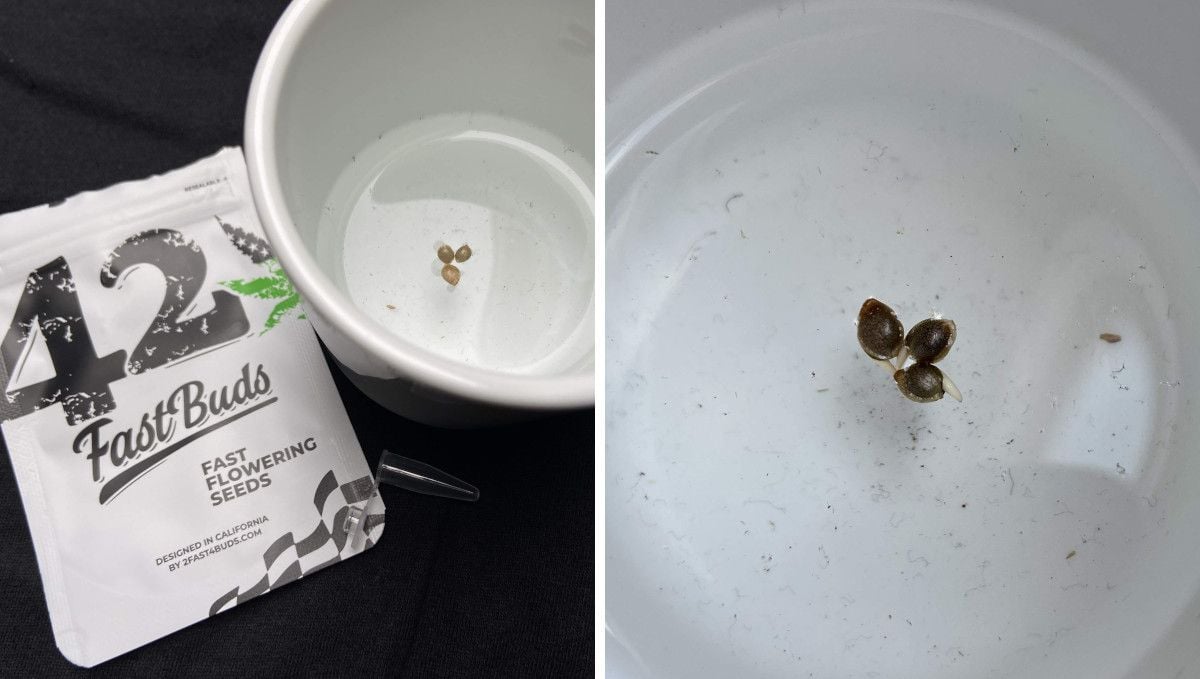
Another effective method embraced by most weed growers involves using wet paper towels. Whether placing seeds directly or after pre-soaking, this method allows constant monitoring of seed progress. However, be cautious as taproots may grow curvy, potentially complicating the planting process. While straightforward, careful attention is essential.
Consider using jiffy plugs/tablets soaked in water as an ideal medium for germinating cannabis seeds. These mediums provide excellent water retention while allowing young roots to breathe. Regardless of the method chosen, ensure the seed emerges without the seed shell attached to its cotyledons to avoid hindering early development.
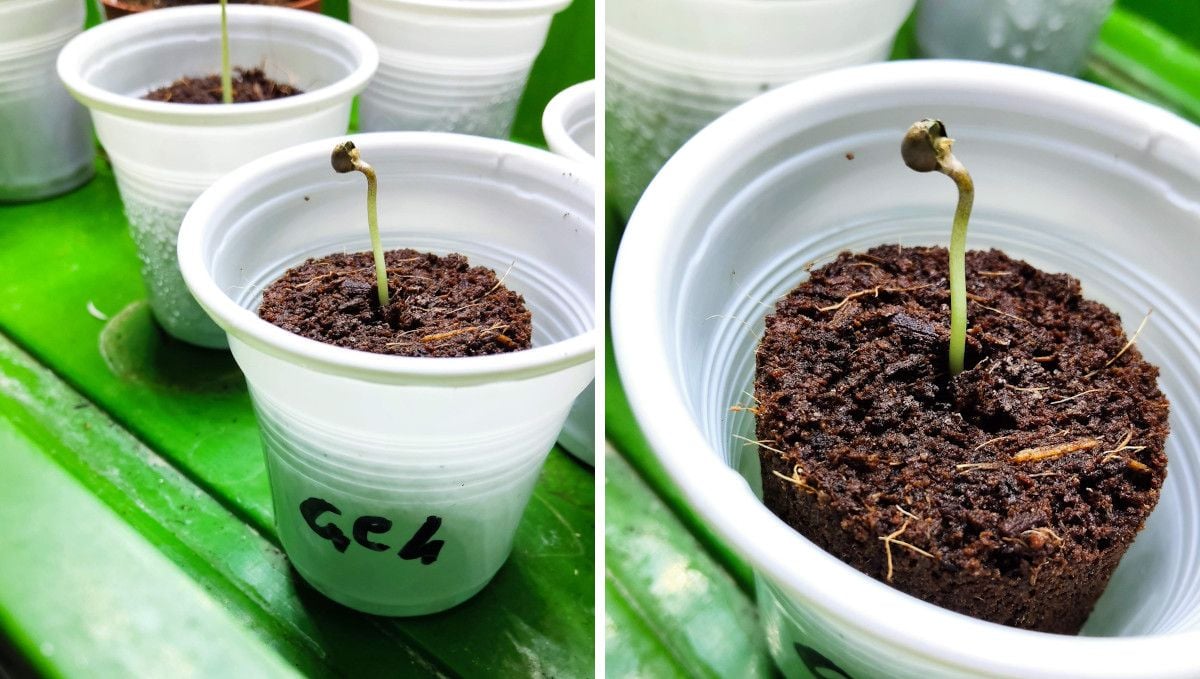
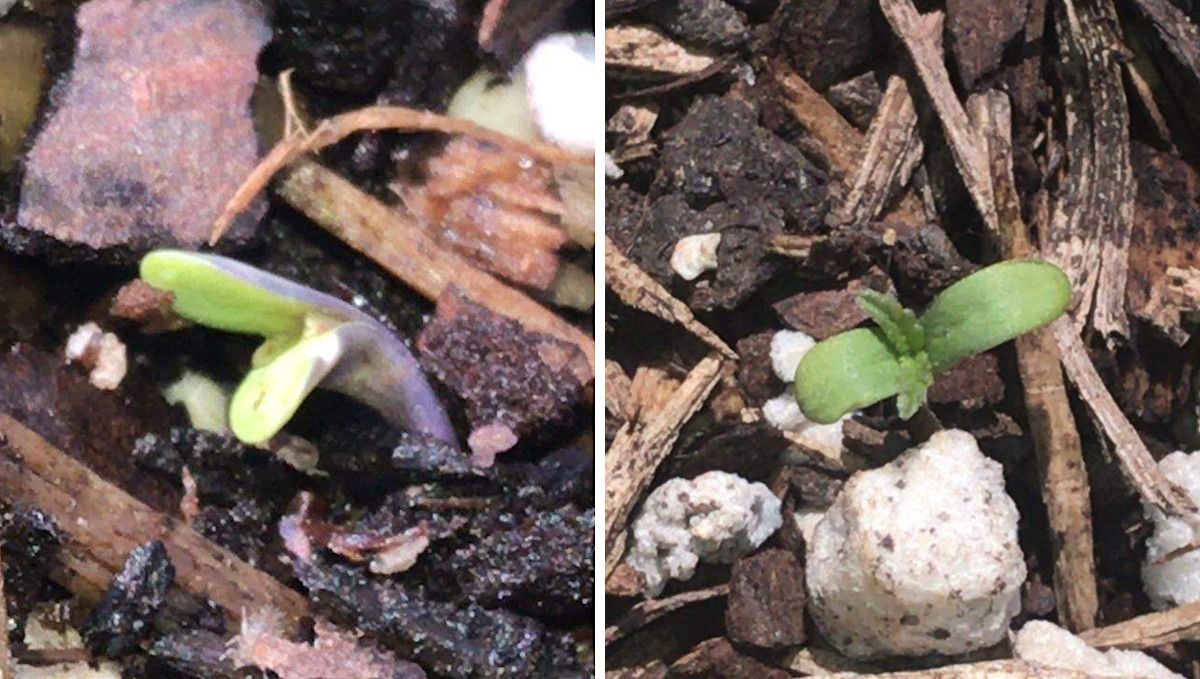
Maintaining moisture on the medium's surface often leads to the shell softening and naturally coming off as the sprout emerges. Immediate exposure to light ensures the seedling turns green from the start, providing a strong foundation for growth.
For those using small plugs like jiffy or rockwool, the need to repot becomes evident when the root ends become visible at the sides. Autoflowers should transition directly into the final container, while photoperiod varieties can use temporary starter pots before subsequent transplants.
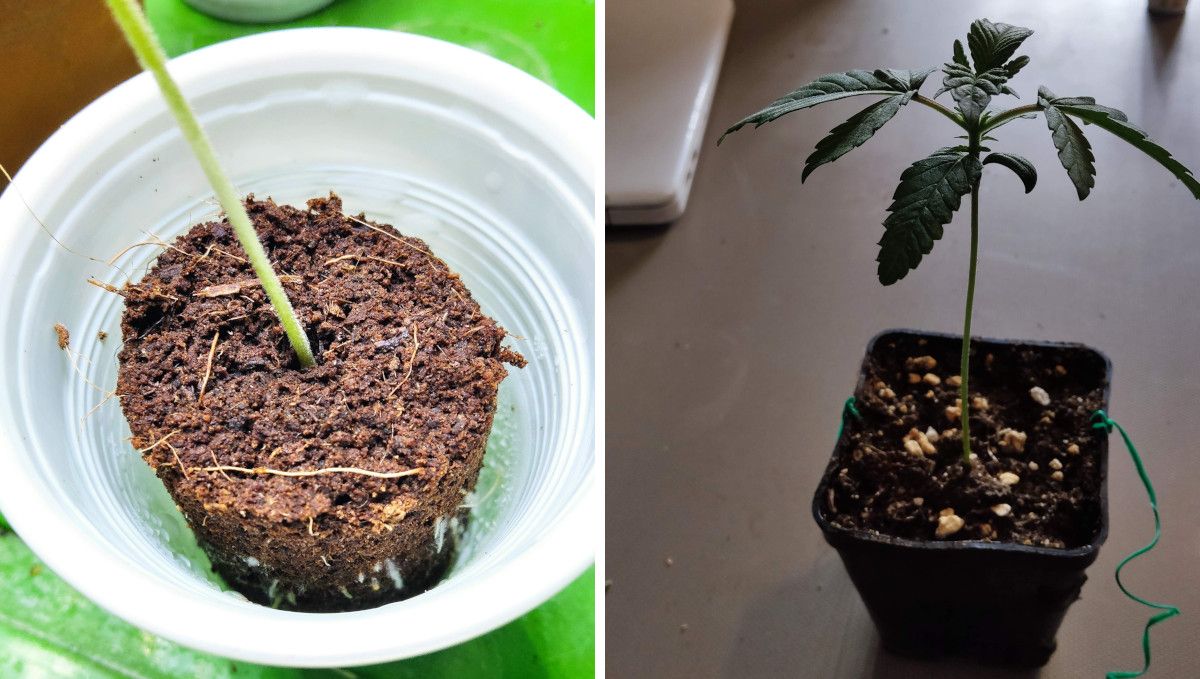
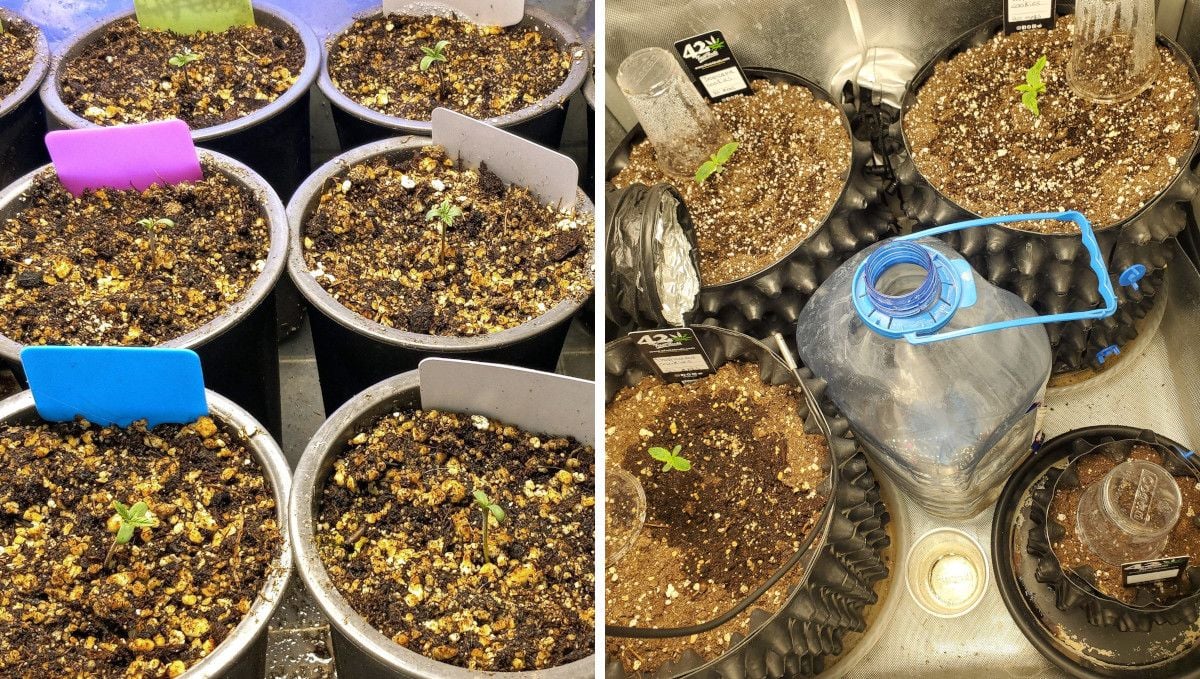
Selecting the right starter pot size can be challenging. While autoflower seedlings are safer in a final container, the choice for photoperiod varieties involves trade-offs. Smaller pots accommodate more plants in a confined space with easier watering but necessitate careful transplanting to avoid growth setbacks. Consider the risks and benefits when deciding between a smaller pot and direct placement for the entire life cycle.
4. Early Veg | Week 2
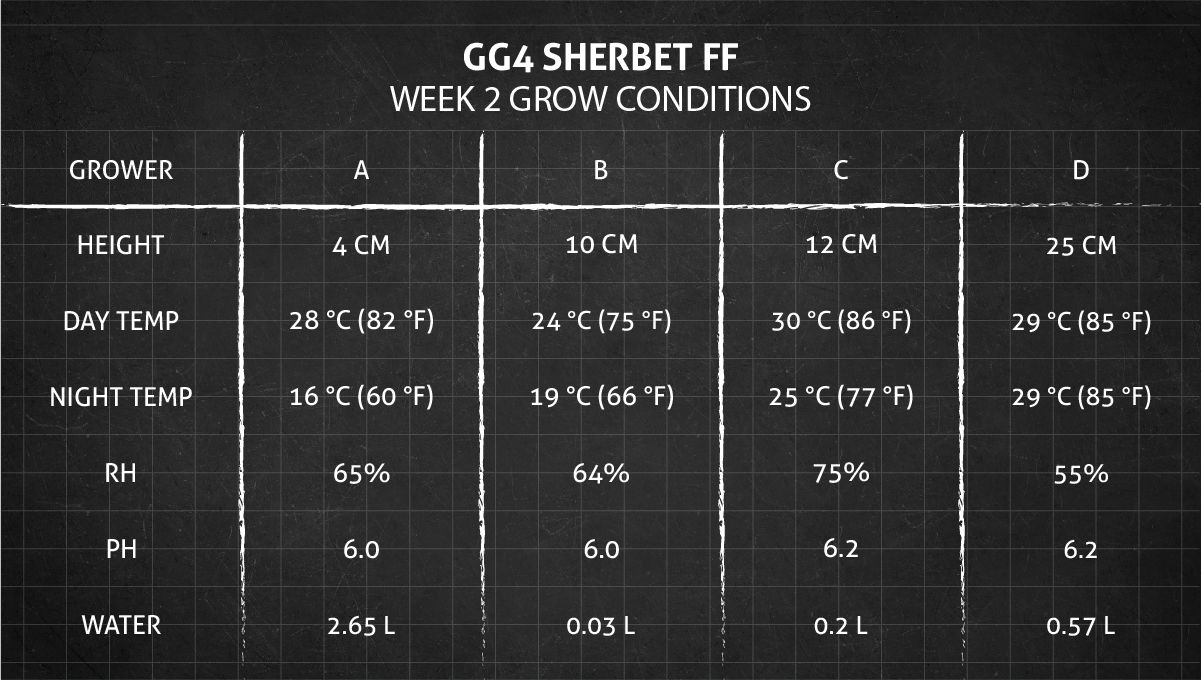
Whether you grow your GG4 Sherbet FF inside or outside, it will most probably spend the first two weeks indoors, and it's your responsibility to create the optimal growing conditions for its health and vigorous growth. One of the most importnat of those conditions is the relative humidity (RH). While you can successfully grow cannabis indoors without ever measuring RH levels, we recommend taking a more pro-active approach: buying a hygrometer and monitoring this parameter, especially during the first weeks and then in the weeks leading up to harvest.
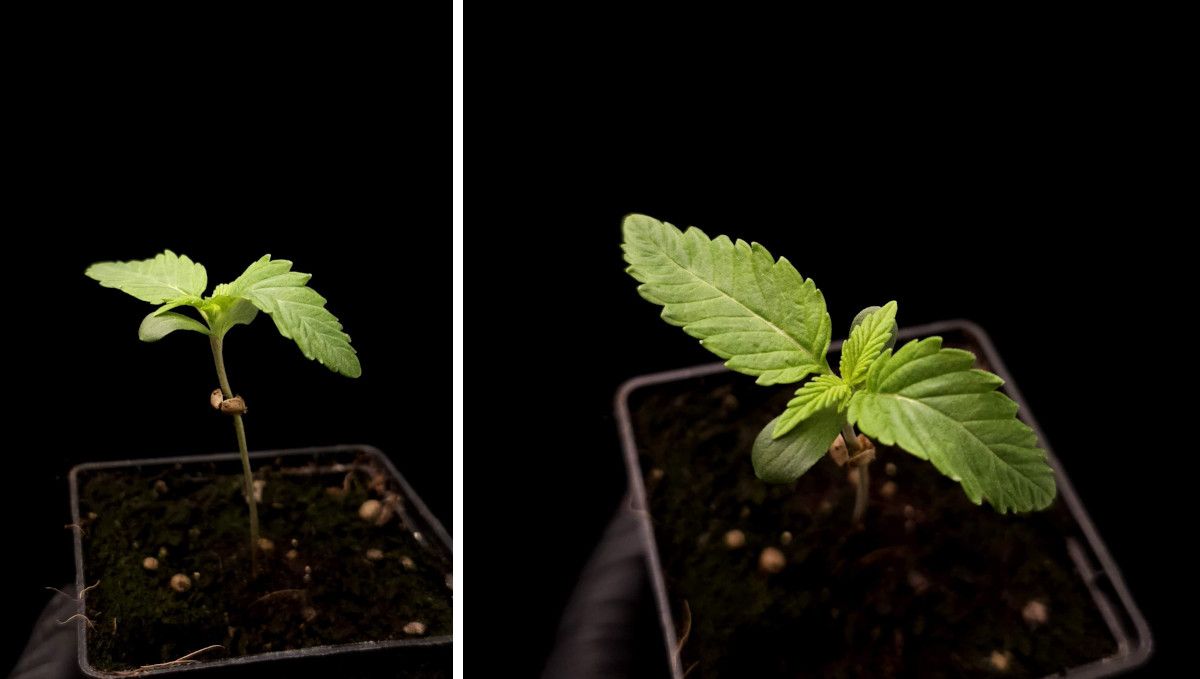
In the second week of the seedling stage, your cannabis plant may seem small, with slow progress. Although serrated-edge true leaves have appeared, their growth is subtle. This doesn't indicate an issue; rather, it signals that most development is occurring underground. Roots are extending throughout the medium, seeking moisture and nutrients. This foundation ensures more rapid progress later in the second week and the weeks to come.
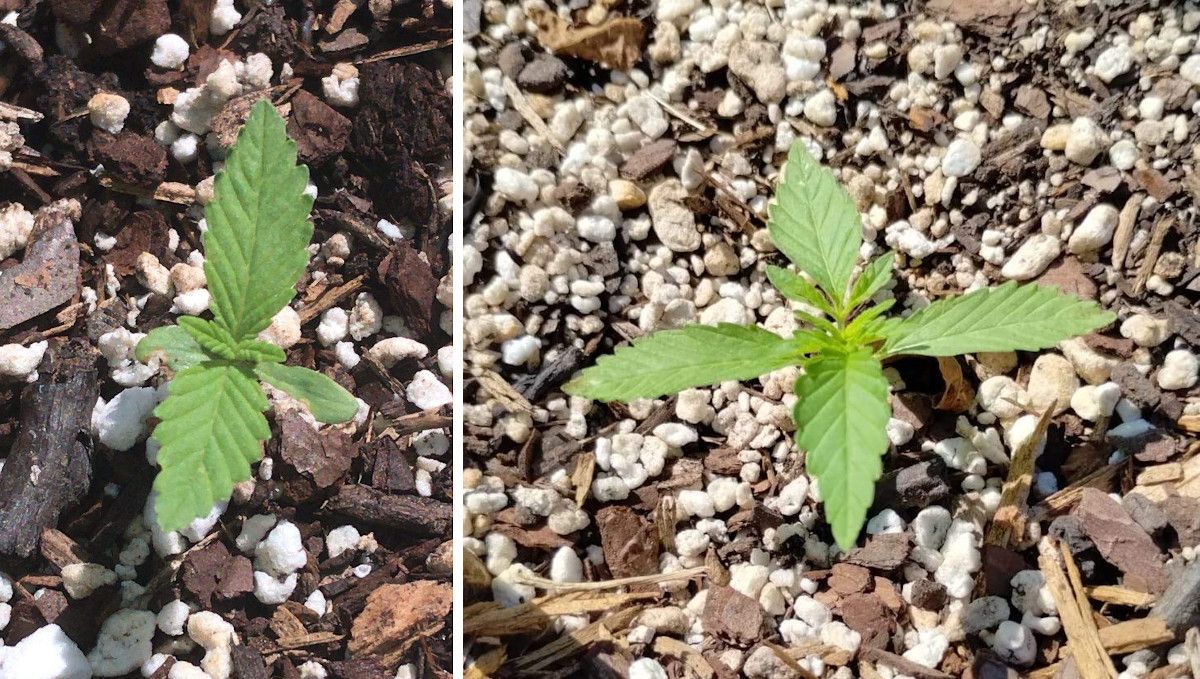
A positive sign of your seedling's well-being is its tendency to produce each successive pair of true leaves larger than the previous one. If you observe this, your young plant is thriving. Consistency in leaf span between the first and second pair by day 10 indicates proper development on schedule.
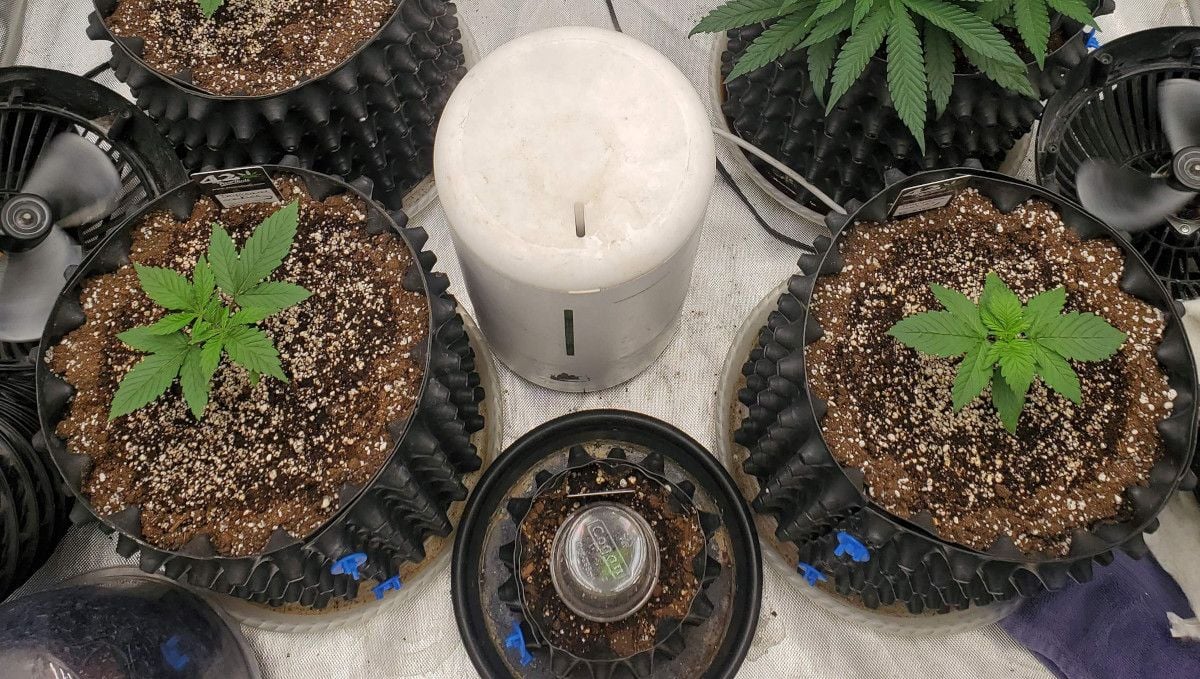
The health of your plant relies on adequate oxygen for its roots. Cannabis dislikes soggy soil, so avoid overwatering. An airy medium with perlite enhances air retention in the root zone. Airpots, with studs providing oxygen through holes in their walls, are a useful tool in maintaining root health.
For soil growers, nutrient supplementation in the early stages may not be a concern. With sufficiently large pots and ample nutrients, plain water suffices until nutrient depletion. Inert mediums like coco coir, rockwool, or expanded clay pebbles, however, require early and consistent feeding.
Considering the future canopy shape is wise in the second week. While some growers tie down the main stem to stimulate side growth, high-stress training techniques like topping or FIMing are better left for later stages when the plant is stronger. Early topping may adversely affect the health of a small plant.
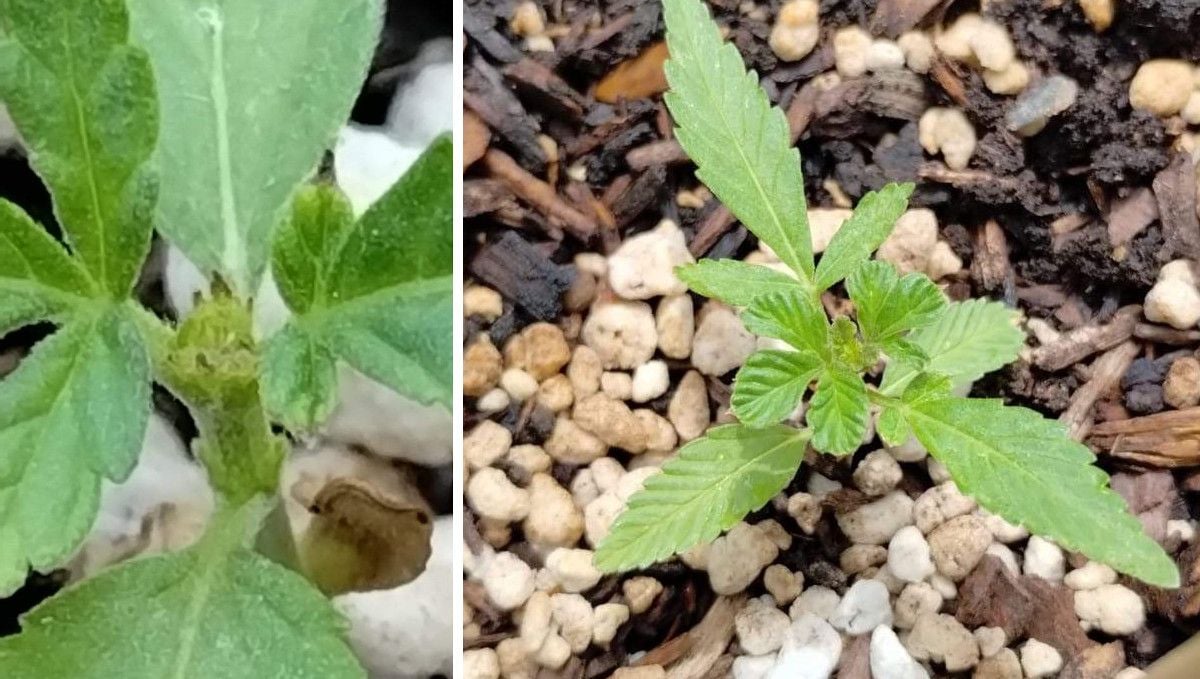
By the end of week 2, a well-treated plant in favorable conditions will boast several strong pairs of true leaves and a robust root system. This solid foundation sets the stage for a successful overall grow.
5. Mid Veg | Weeks 3-6
Once the vigorous growth of the vegetative phase kicks in, the plants will stop depending so much on the enviroment conditions. Nevertheless, it's best to keep them at optimal levels - with day temperatures at around 25°C and relative humidity at 60%. While not as hungry for light as in the flowering stage, your GG4 Sherbet FF will need more of it than in the previous weeks, so gradually dial up your LED light (if it's of the dimmable kind) and/or lower it closer to the plant tops. Make sure they neither stretch too much nor get yellow on tops due to the light burn.
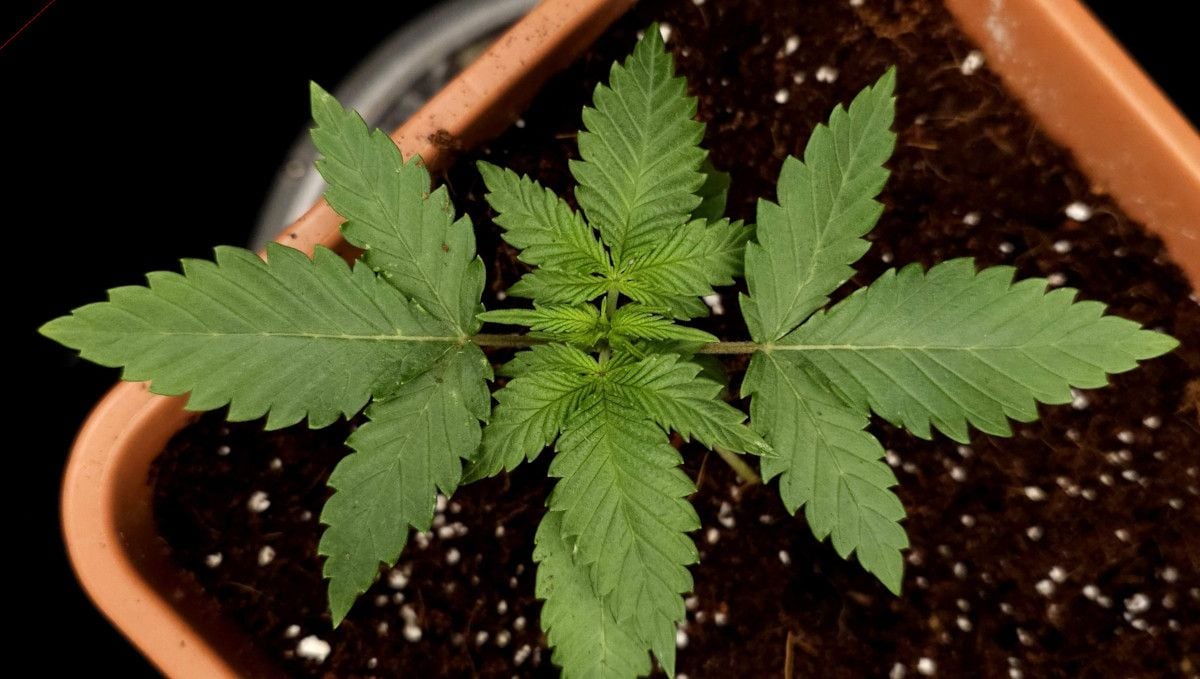
After a couple of weeks marked by gradual progress, the vegetative stage kicks in around week 3 from sprouts, bringing forth vigorous growth. During this phase, weed plants exhibit accelerated production of new pairs of true leaves and the emergence of numerous side branches. In bushier cannabis strains, such as GG4 Sherbet FF, these side branches can grow quite long, sometimes rivaling the main stalk. Some growers enhance this bushy growth by strategically snipping off the main shoot.

The initiation of vegetative growth is an opportune time for topping, as plants are now robust enough to withstand this stress. Removing the main growing shoot redirects the plant's resources to lower branches. It's advisable to use sterilized sharp instruments for the topping procedure to minimize stress and prevent infections.
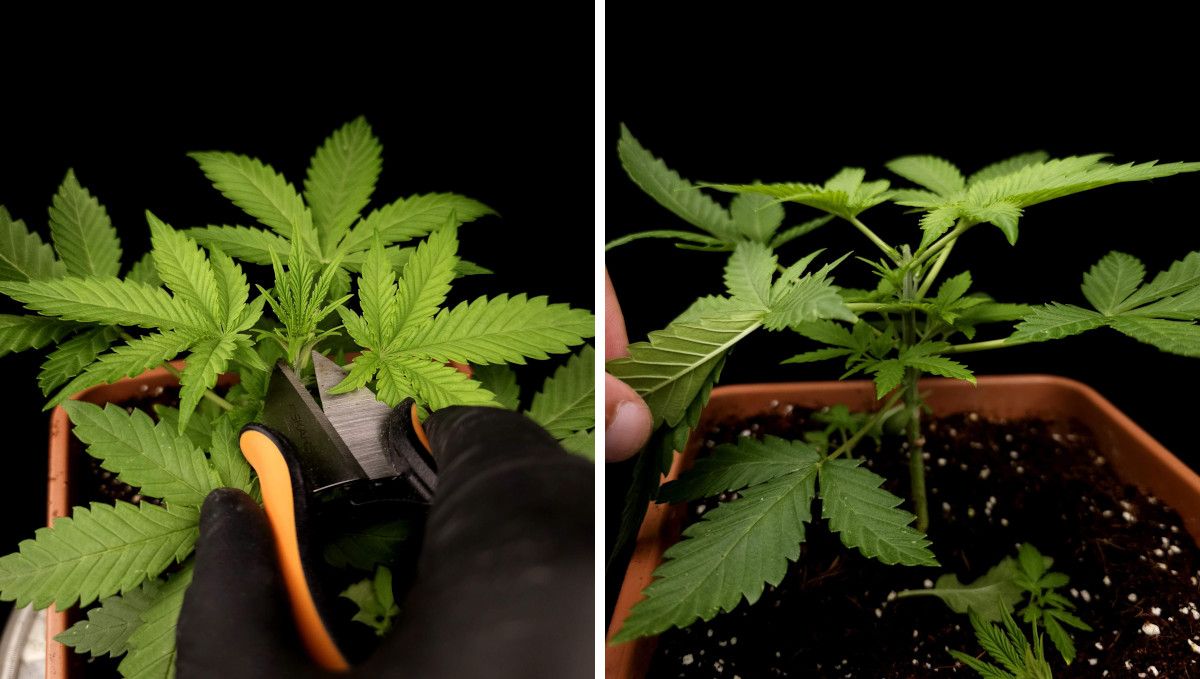
Even autoflowers, despite their compact nature, can grow sizable before entering the flowering phase. For photoperiod varieties, growers have the flexibility to extend the vegetative stage indefinitely by keeping the light on for more than 12 hours a day, potentially allowing plants to reach considerable sizes.
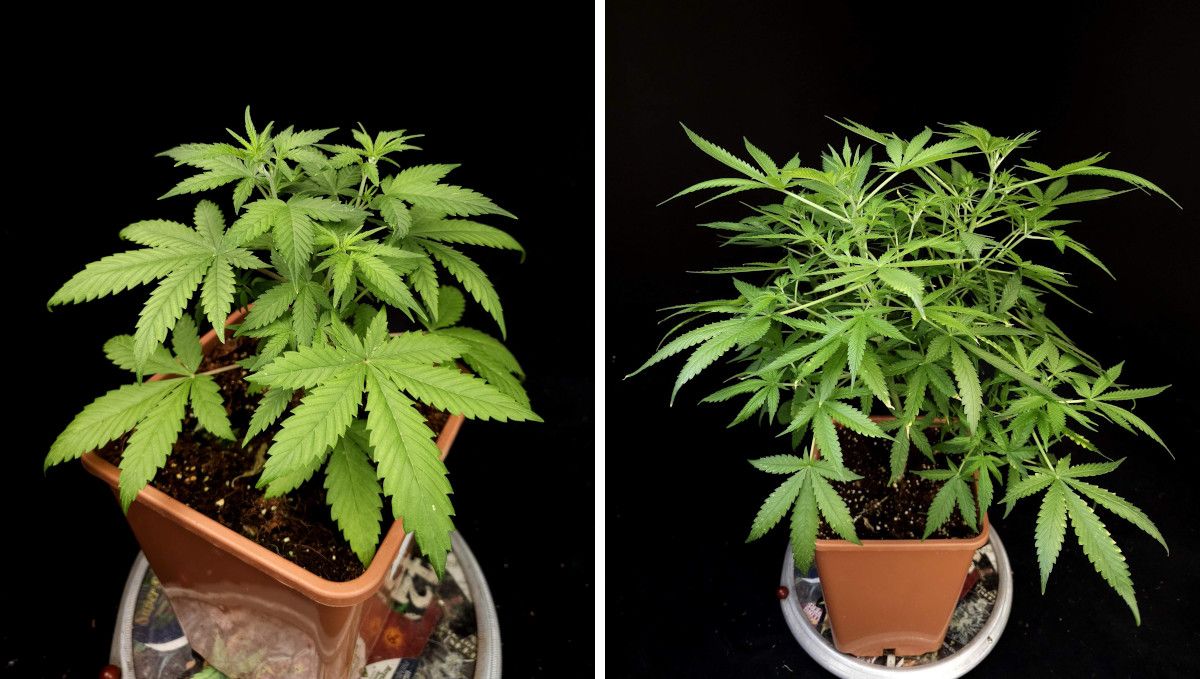
Regardless of growth speed, you have the option to maintain a low-profile appearance by tying down the main stem and side branches, encouraging horizontal canopy spread instead of vertical stretching. Topping the main stem enhances the efficiency of low-stress training, contributing to a flat and short canopy.
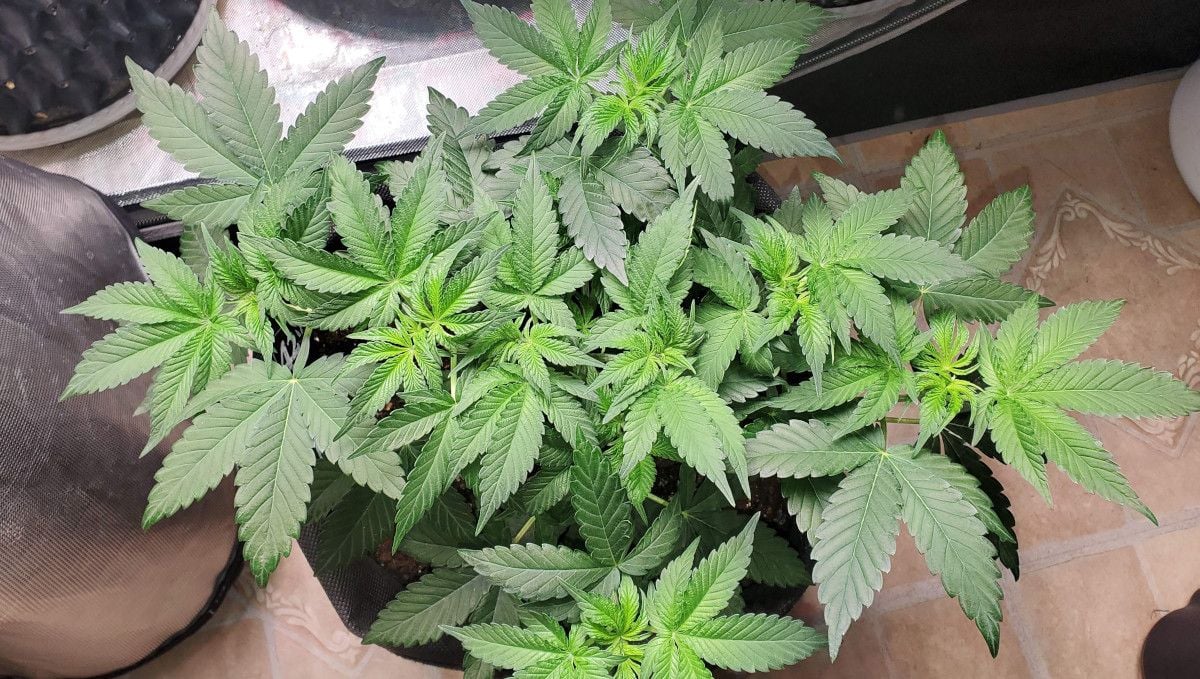
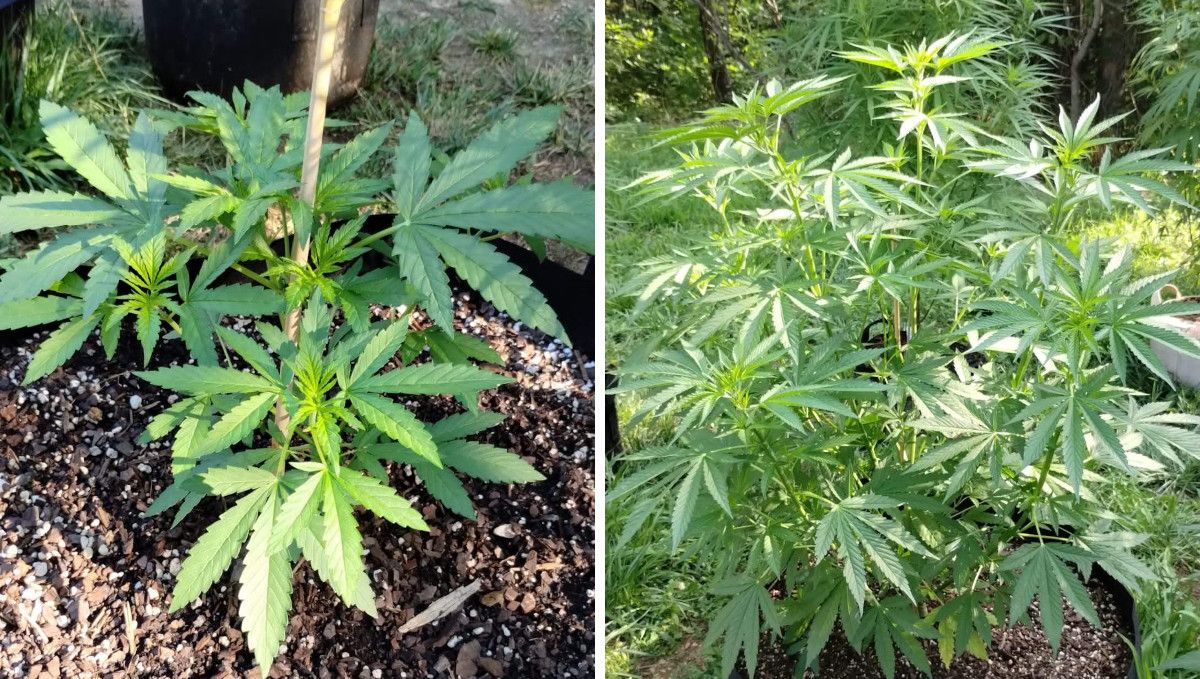
Outdoors, strategic planning can influence the size of your cannabis plants before flowering. If planted early with sufficient time for growth, they can become sizable. To limit size, consider planting in a pot rather than in the ground. Alternatively, if planting later in the season, there will be fewer weeks of growth before shorter days induce flowering.
6. Transition (Pre-Flower) | Week 7
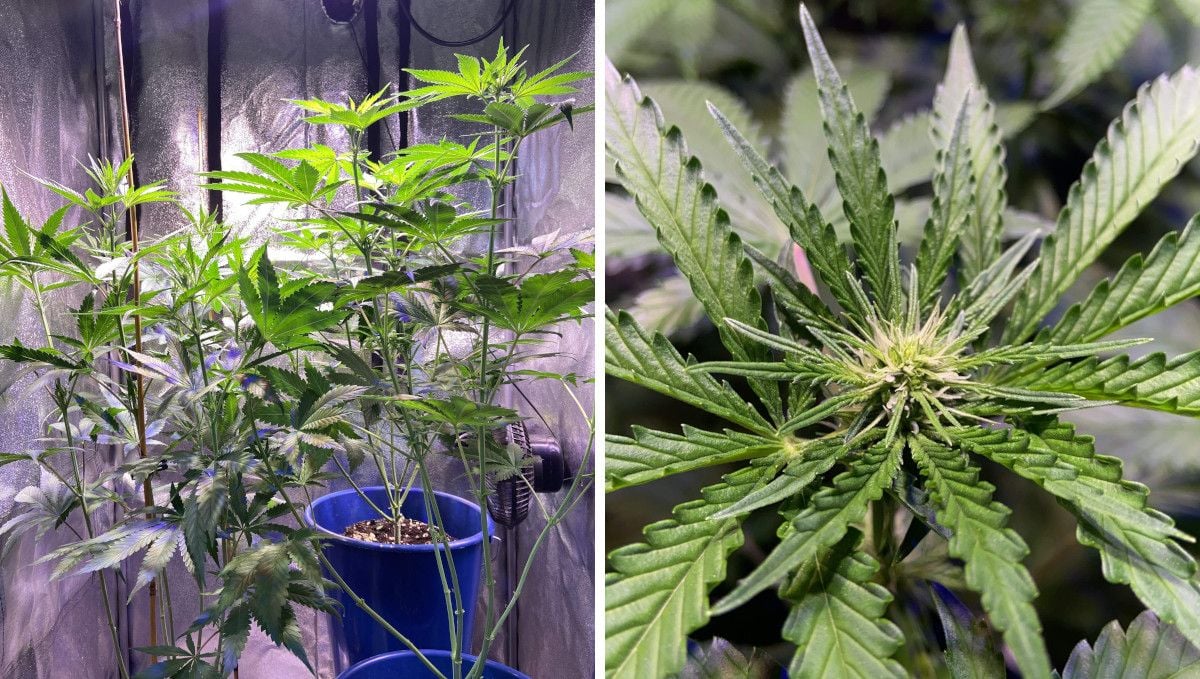
When growing photoperiod varieties, such as GG4 Sherbet FF, you should keep in mind that they won't start flowering unless you change the light cycle to 12/12. Once you do that, the first signs of flowering will appear within 1-2 weeks - the speed here depends on how big and mature the plant was before the flower initiation. You may slightly adjust the conditions in your grow room to make things slightly cooler and drier. Outdoors, it happens naturally as summer draws closer to its end.
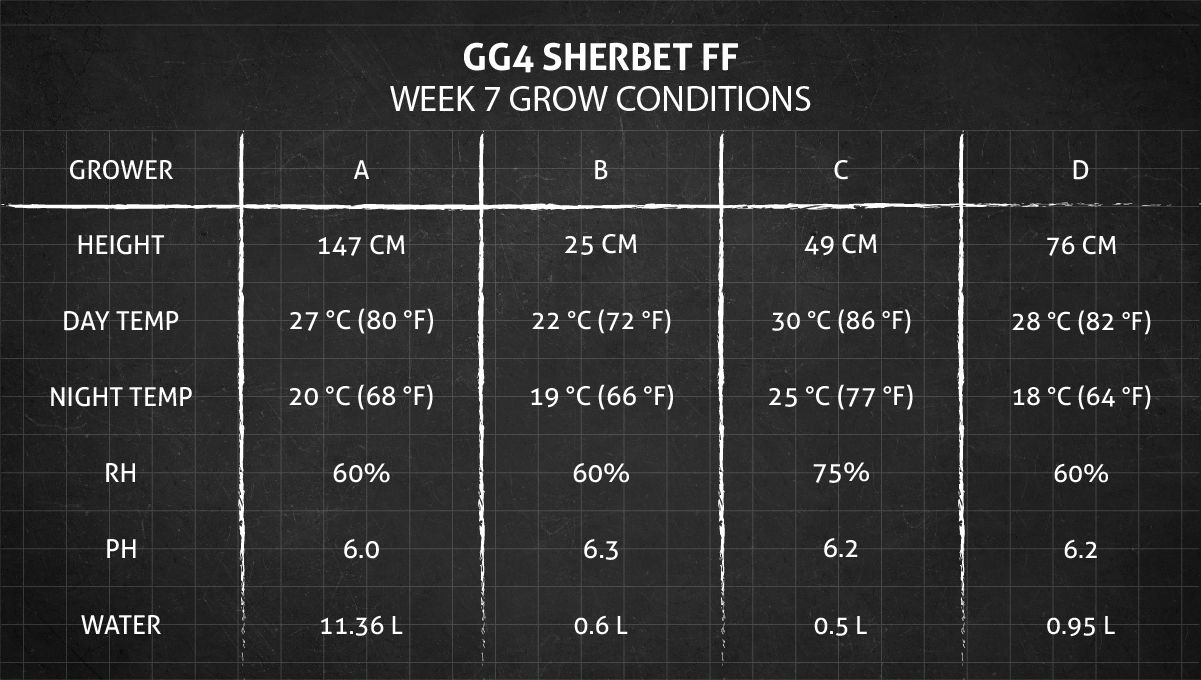
If you delay the initiation of flowering and allow your plants an extended vegetative phase, they will eventually signal their readiness to start budding. The first indication is alternating nodes, where each new leaf appears on a higher position on the branch than the previous one, breaking the pattern of paired growth. Additionally, pre-flowers become evident, showcasing white hairs at the nodes.
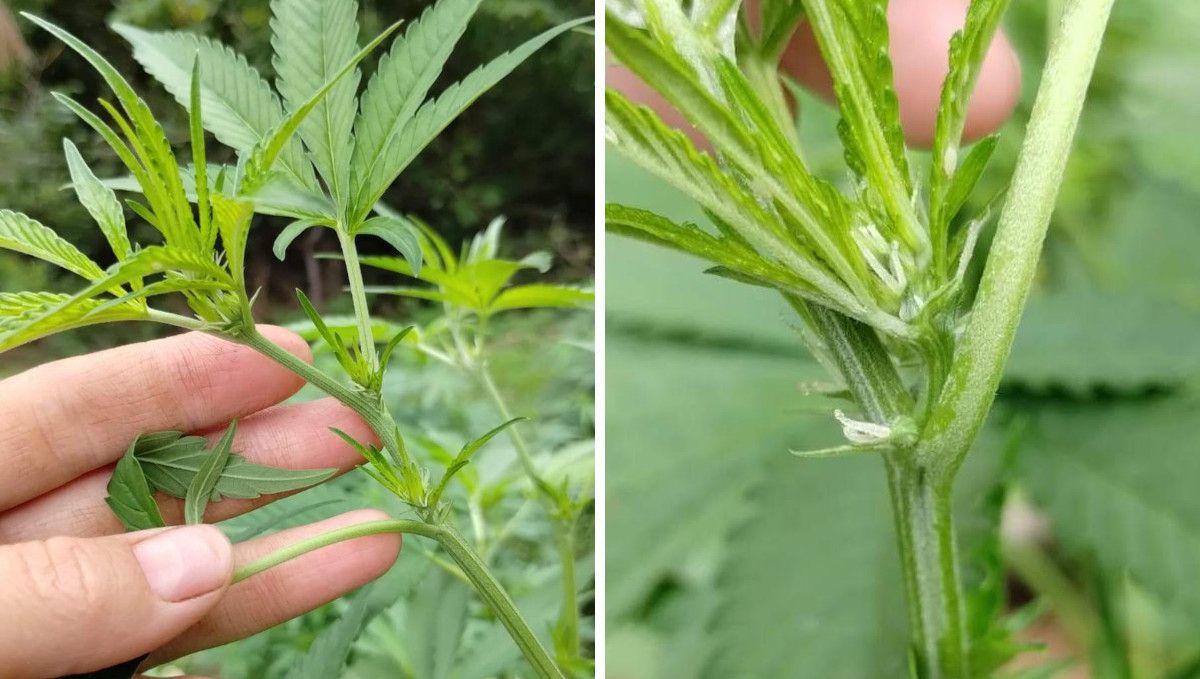
As you await the development of flowers, be prepared for a notable change: branches may start stretching at an accelerated rate. While this is normal, it can pose a challenge if your plant has already grown significantly. After the onset of flowering, the height may double or even triple, necessitating high-stress training methods like super cropping.
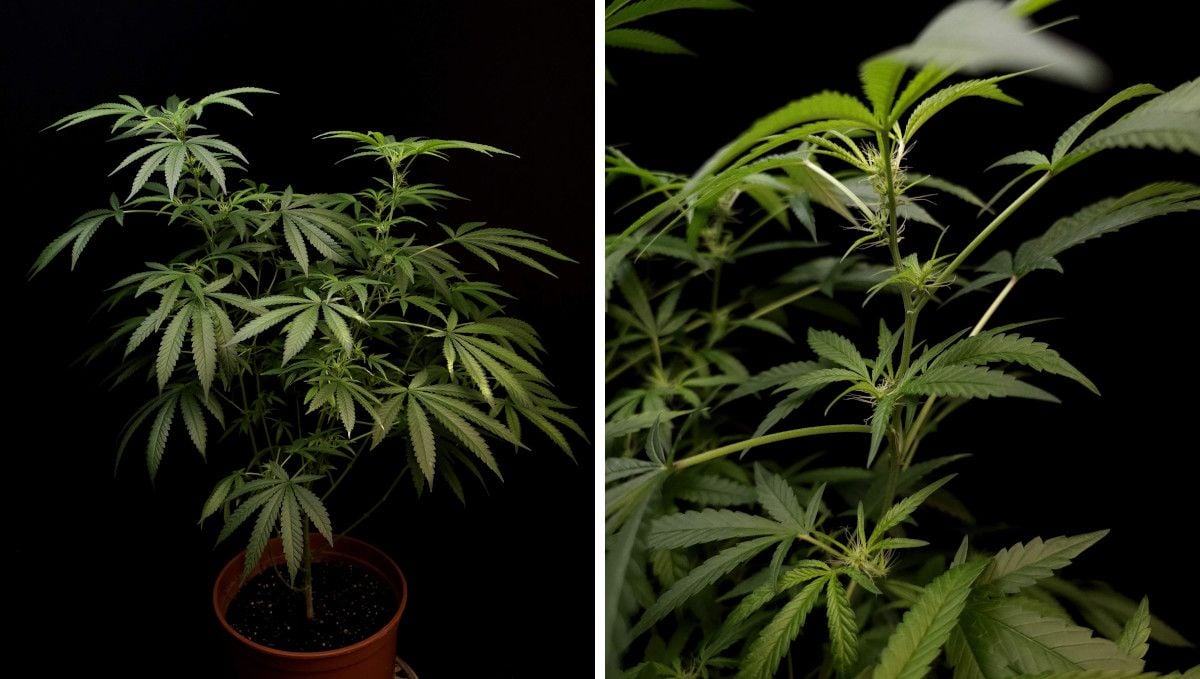
The transition to the flowering stage brings about noticeable changes in plant appearance. The color of new leaves on top shifts to a lighter green, creating a striking contrast against the darker green backdrop. Within a few days, the tops will display the familiar white hairs seen at lower nodes, confirming the start of flowering. It's crucial to note that in photoperiod varieties, the flowering process proceeds as intended only if there are complete and uninterrupted 12 hours of darkness every day.
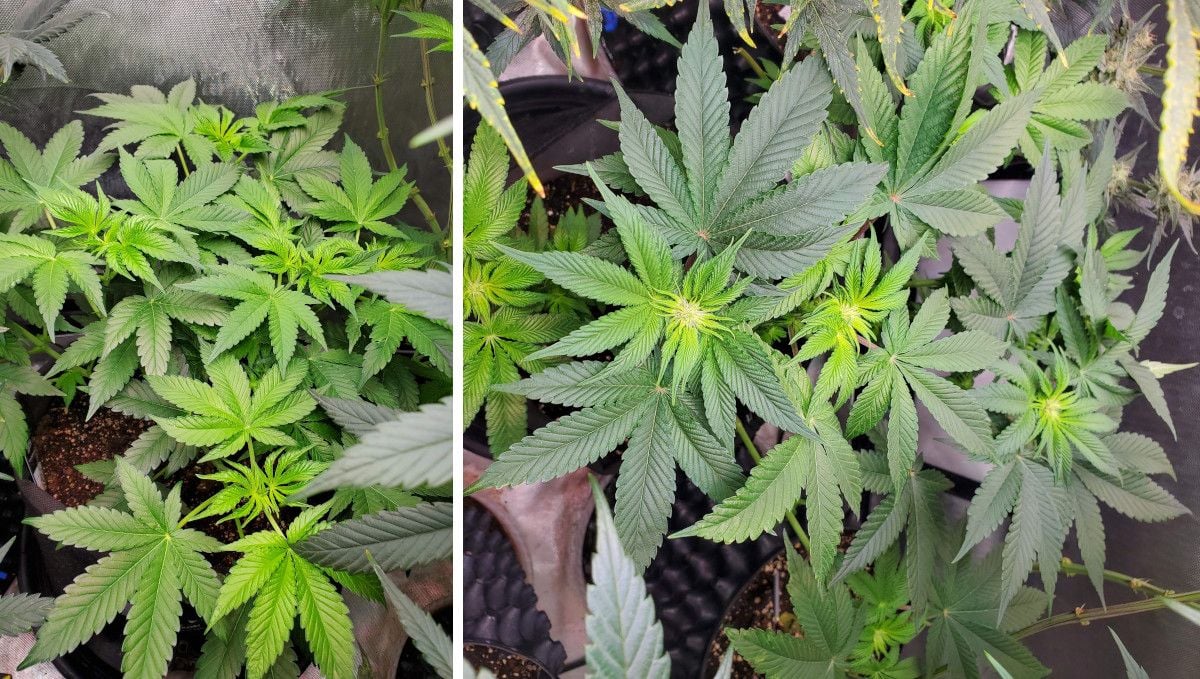
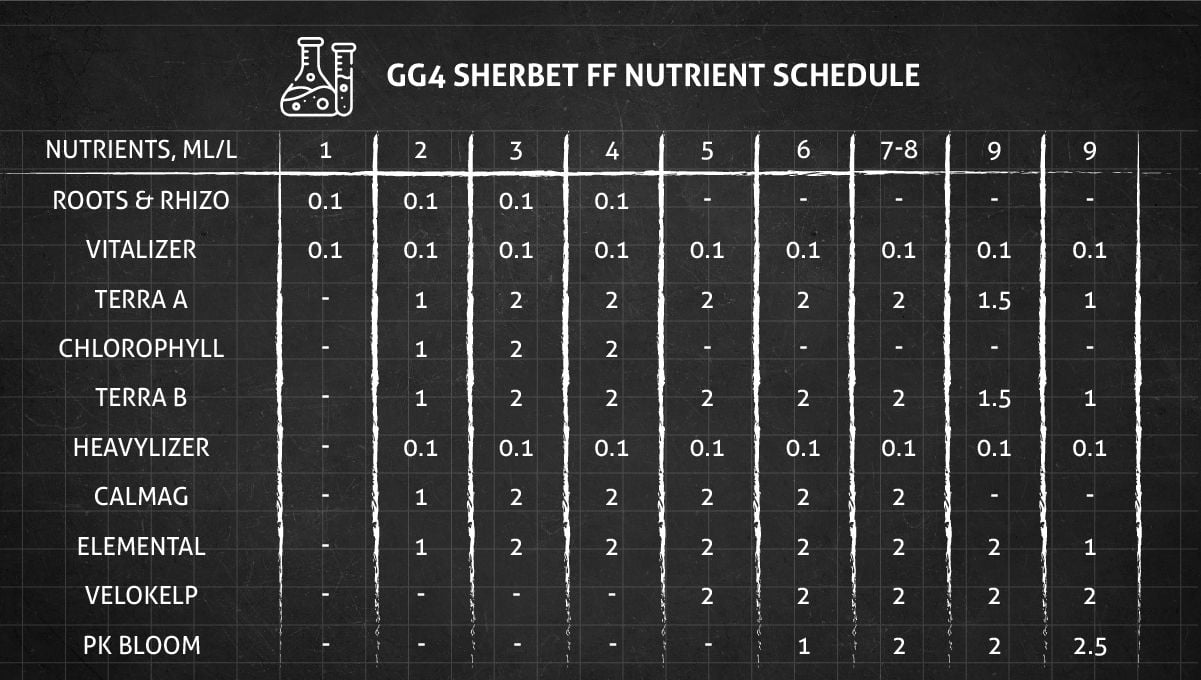
Plants entering the flowering stage exhibit a heightened appetite compared to the previous vegetative growth. Importantly, they require nutrients with a different macronutrient ratio. Switching to a product with less nitrogen and more phosphorus and potassium becomes essential, as these elements play a crucial role in flower formation. Adjusting your nutrient regimen ensures optimal support for the budding phase.
7. Early Flower | Weeks 8-9
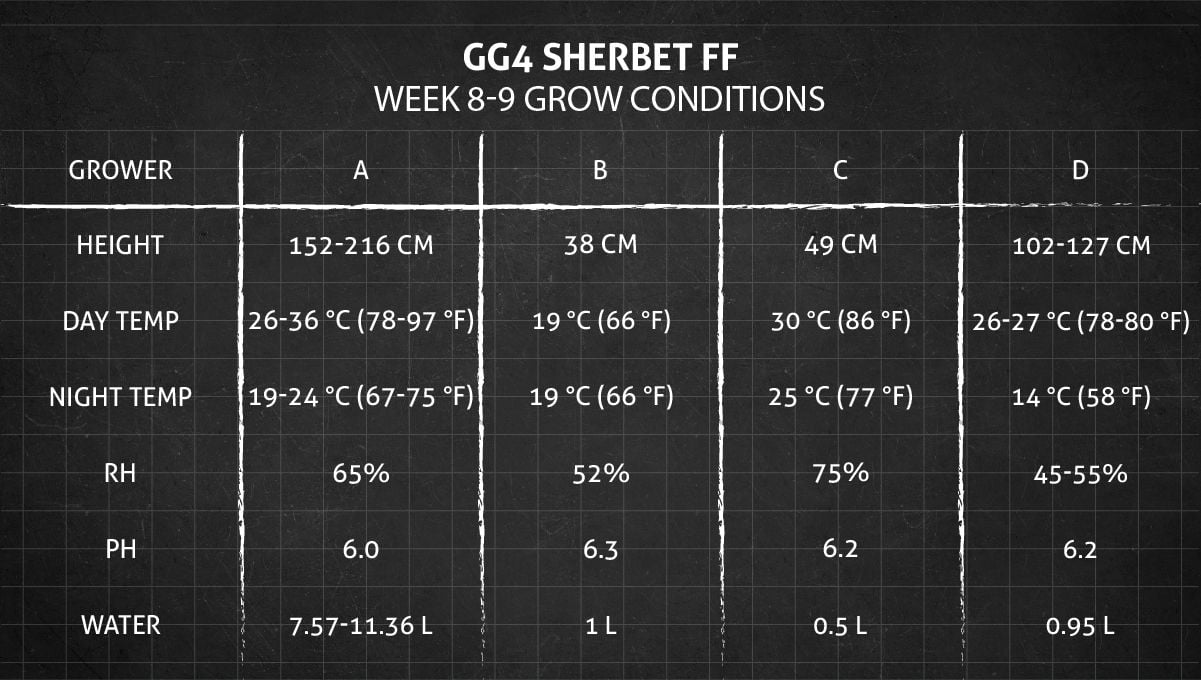
Cannabis plants growing outdoors will experience a natural drop in temperatures, especially at night, and indoor growers should think about doing more or less the same for their indoor gardens. Plants will benefit from day temps around 23-25°C, but don't let night temps drop too much - something like 18°C will be just right.
During the early flowering stage, the stretching phenomenon persists for at least a couple of weeks, leading to daily transformations in the plant's appearance. These changes are more noticeable than the initial formation of flowers as their size remains insignificant. Growers may feel uneasy about the continuous growth, fearing that plants will encroach into indoor lights or become too conspicuous outdoors.
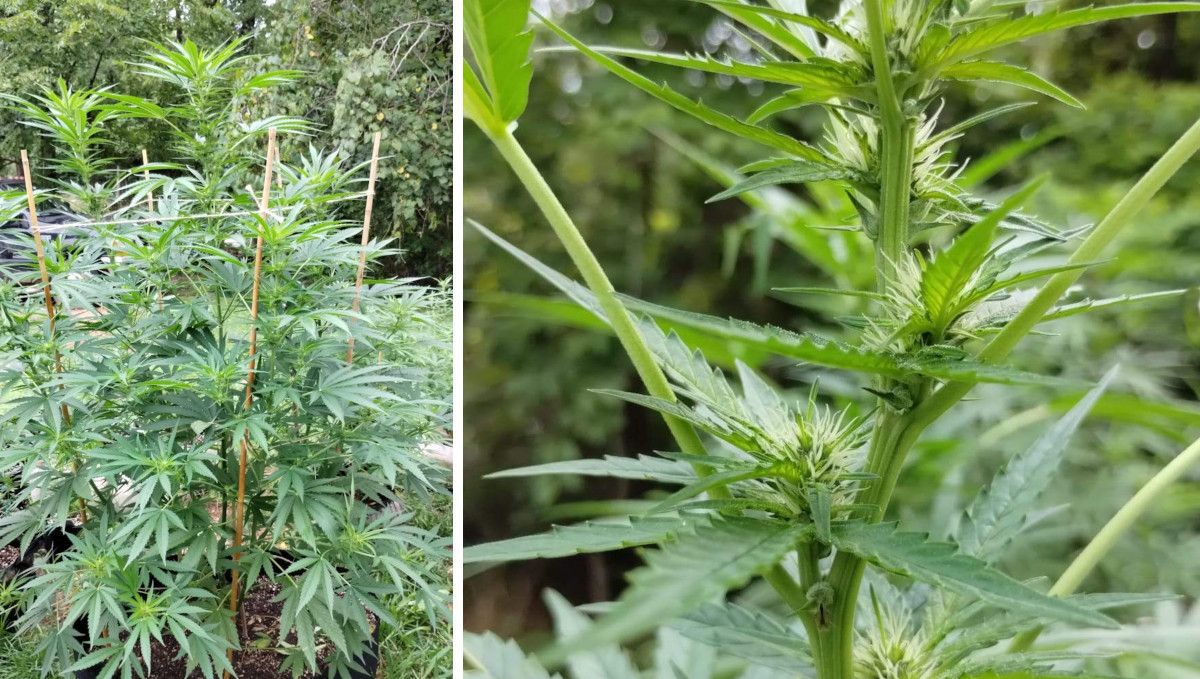
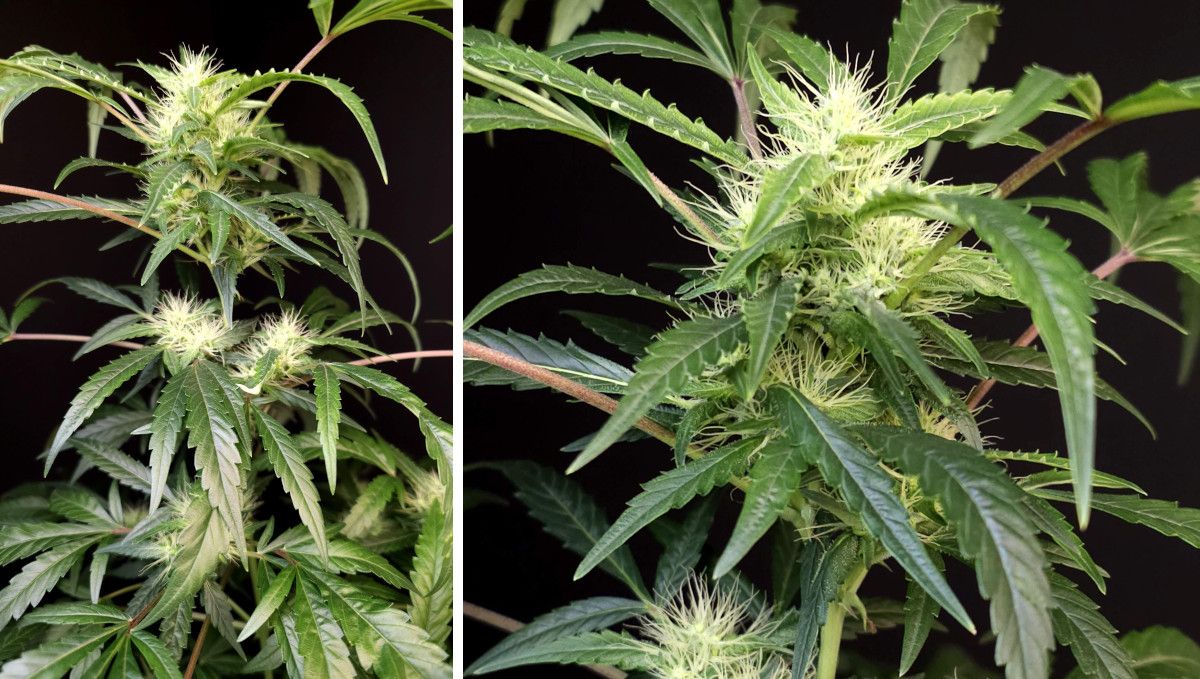
In the initial stages of budding, the size of flowers might disappoint novice growers. It's challenging to envision these small, sparse flowers with fluffy pistils transforming into large, dense, and heavy buds. The plants may seem leggy, with long internodes, raising doubts about the formation of long continuous colas. However, even the most high-yielding strains exhibit this appearance at the beginning.
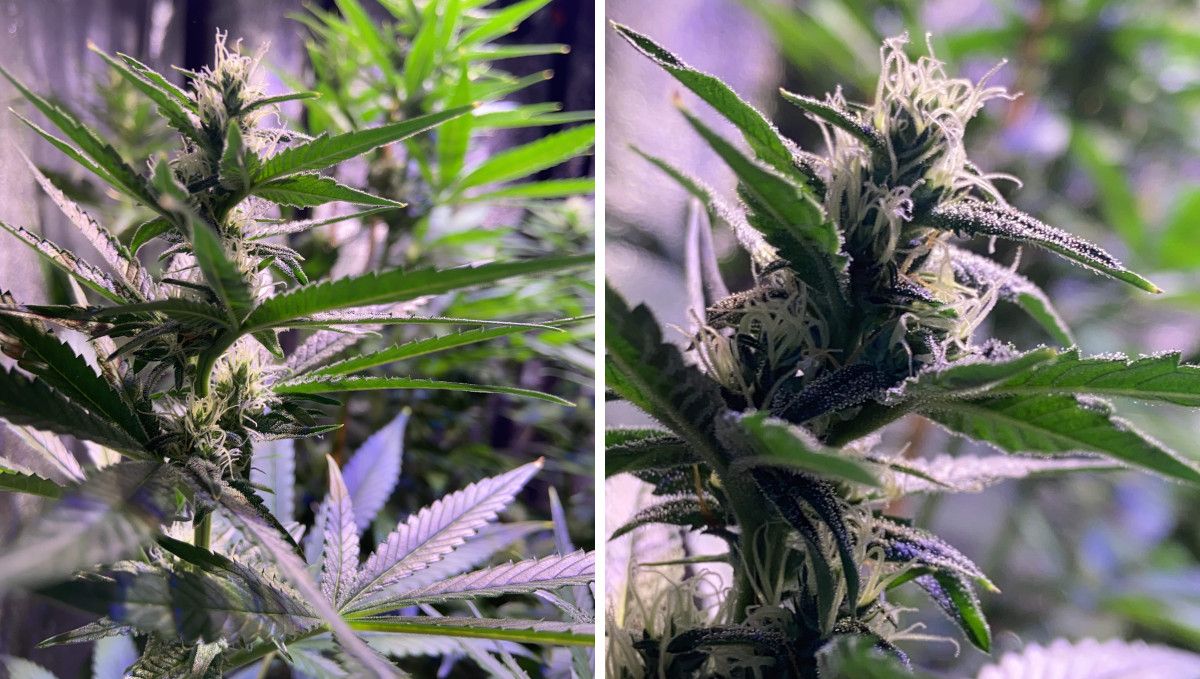
Gradually, as the stretching slows down, flower development gains momentum. The flowers fill in the gaps on the branches, particularly in the top part. Lower nodes tend to form separate nuggets, while at the very bottom, 'popcorn buds', considered less desirable, may remain fluffy and weightless until harvest.
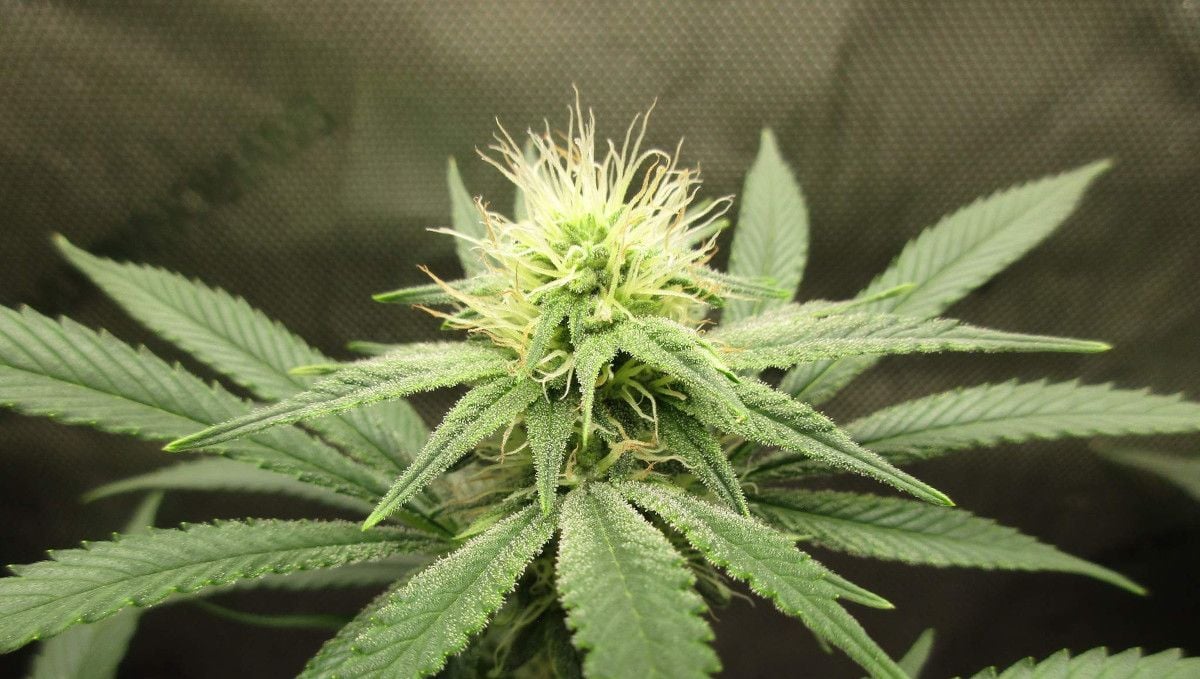
An eagerly awaited development for every grower is the emergence of 'resin crystals' on calyces and the surrounding leaves of the flowers. Properly known as trichomes, these resin glands can appear early, especially in the most resinous strains. They impart a sticky texture to the plant, and the garden starts emitting an aroma, especially if you accidentally brush against the flowers.
At this stage, it remains crucial not to let the plant starve and meet its various demands. While nutrients are vital, it's essential to clarify that they are not precisely plant food, as some might label them. True plant food consists of water, light, and CO2, fueling photosynthesis. Ensuring ample light and a continuous influx of fresh air into the grow room becomes paramount for a thriving garden.
8. Mid Flower (Bulk Phase) | Weeks 10-11
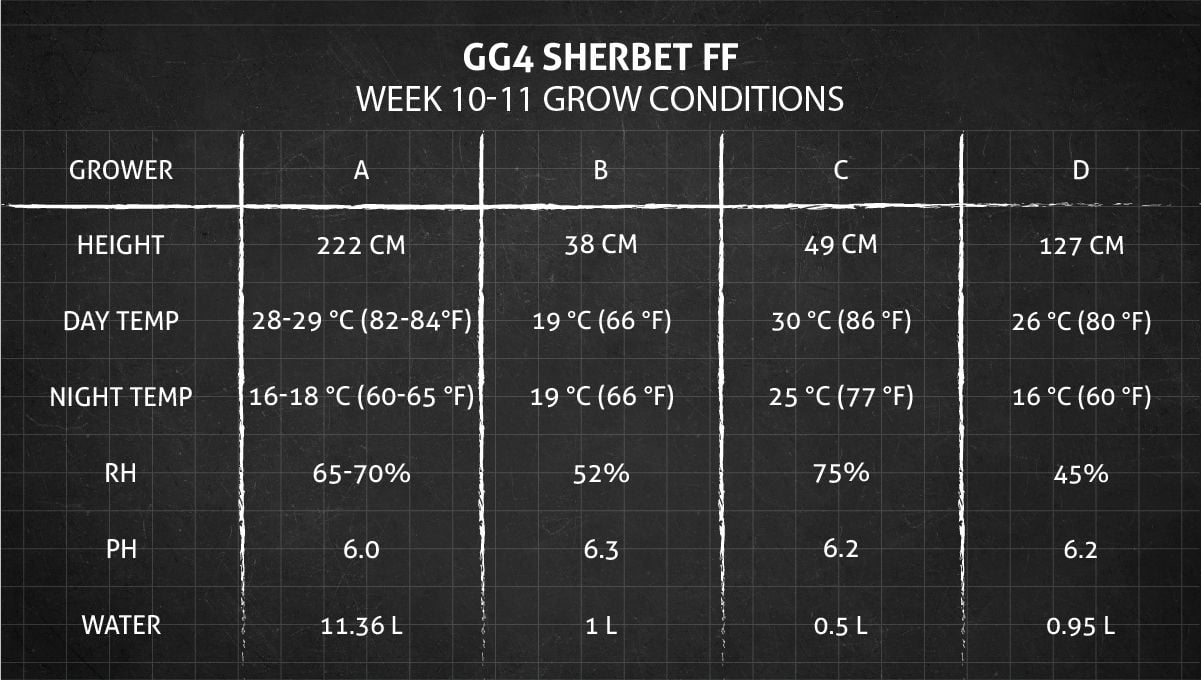
Mature buds are extremelly pleasant to look at, but experienced gardeners also start to worry about fungal infections taking hold inside them. To prevent that, monitor the relative humidity in your grow room and use dehumidifiers if necessary. You need the relative humidity to be around 40% now.
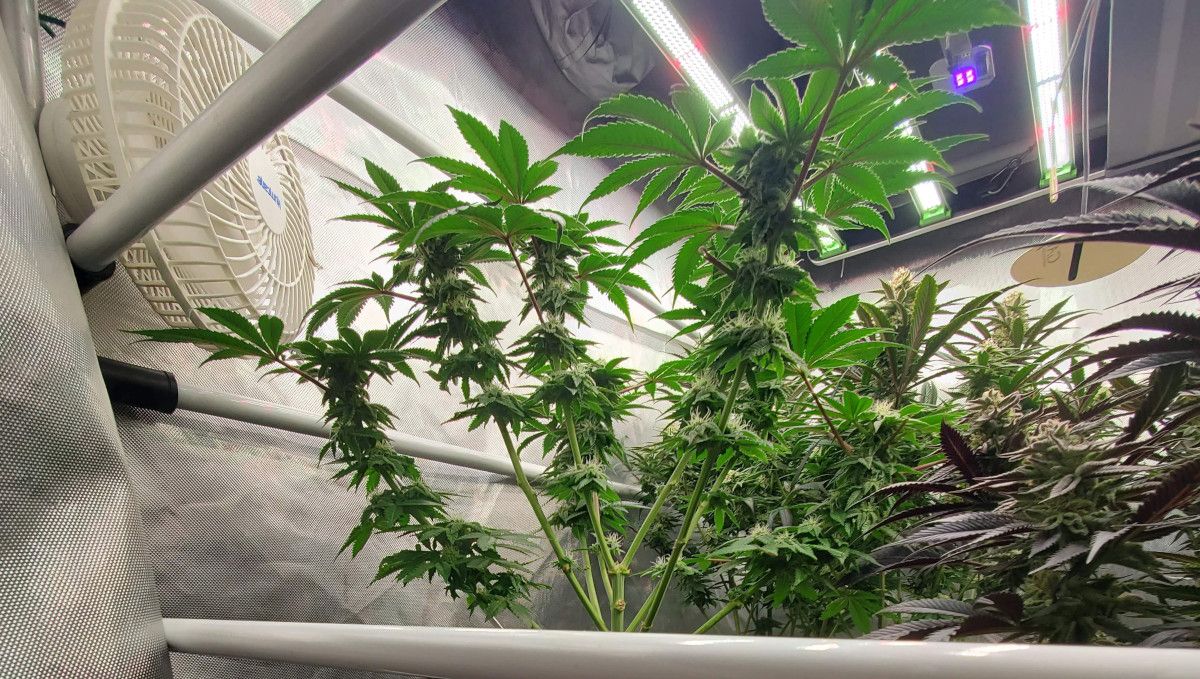
The texture of flowers during this stage is largely influenced by the phenotype. Indica-leaning hybrids tend to produce tight and dense nuggets, while Sativa-dominant ones yield bloated, fluffy, and seemingly weightless flower clusters. Regardless of phenotype, the colas, even as they bulk up, maintain an appearance of immaturity indicated by the white color of the pistils.
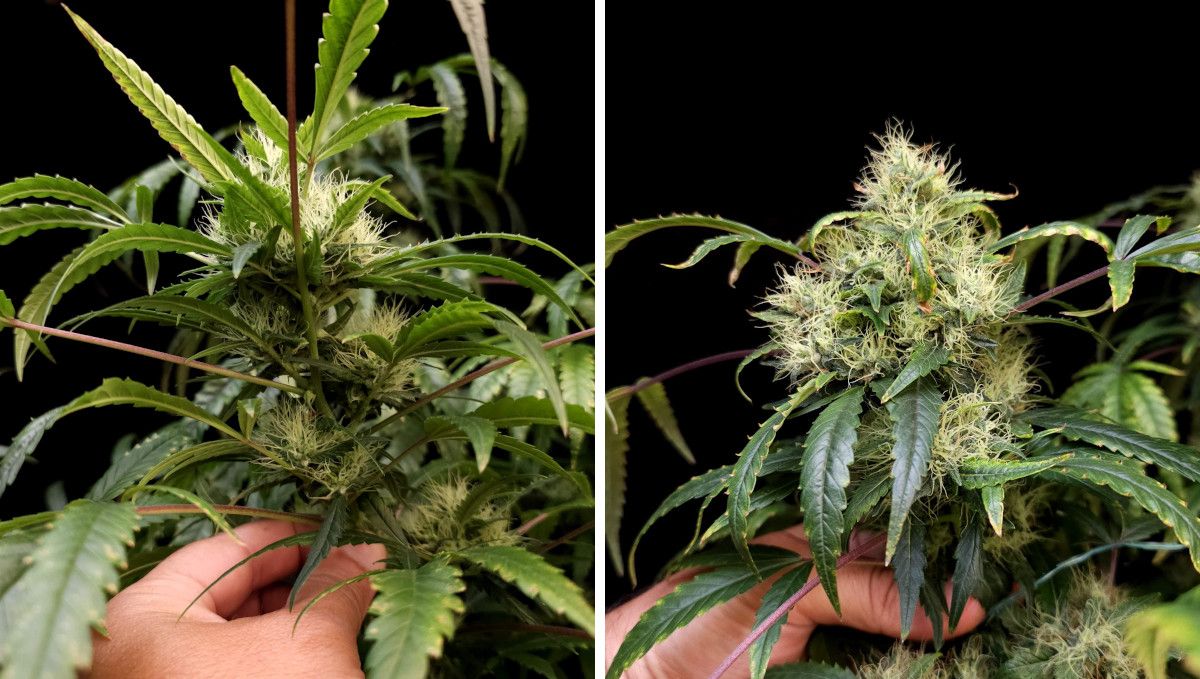
Outdoor cultivation provides plants the potential to form exceptionally long colas, as both the tops and middle nodes receive roughly the same amount of solar energy. In warm and sunny climates, colas can also grow quite fat. However, outdoor-grown weed plants tend to be leafier compared to their indoor counterparts.

As the flower mass increases, the odor of weed in the grow room can become a significant nuisance. No matter how well you seal the grow space, the smell may seep through. A powerful ventilation system, coupled with a carbon filter to scrub the exhaust air, is a straightforward way to counteract the odor. Adequate ventilation not only addresses the odor issue but also supplies plants with fresh CO2 for photosynthesis, while removing excess heat and humidity, creating optimal conditions for growth.
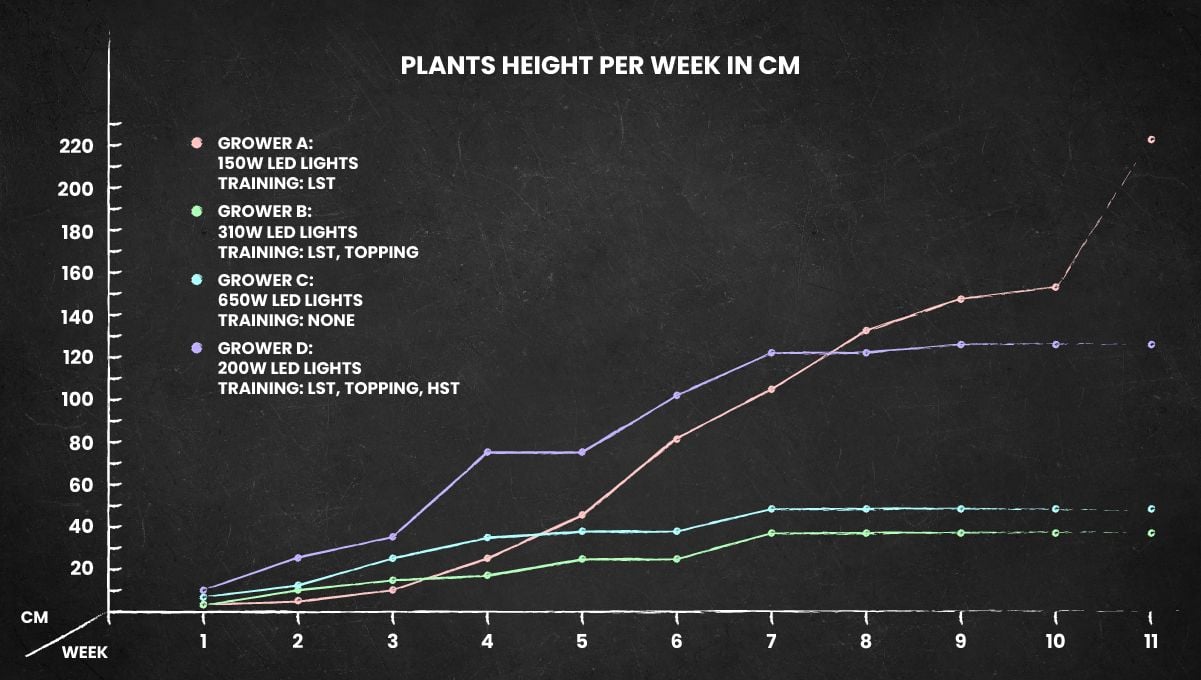
Simultaneously, as buds start to fill out, marijuana plants cease vertical growth and maintain the same height until harvest. This marks a sigh of relief for growers, as a major concern of indoor growing is finally addressed.
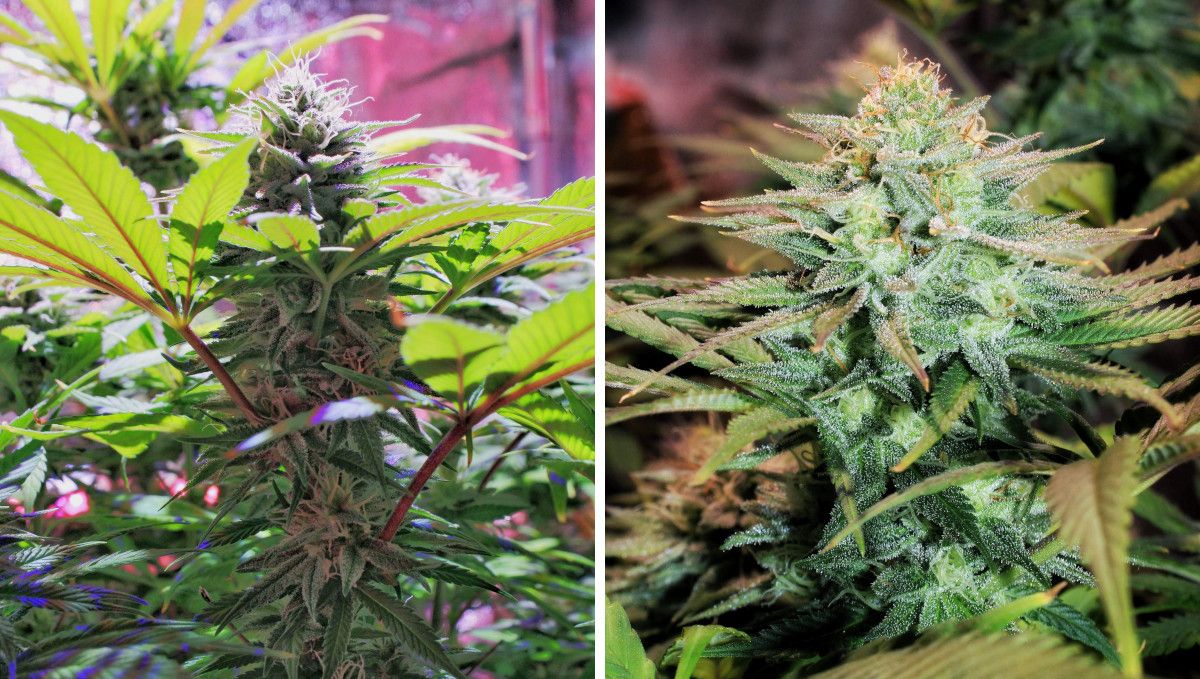
A crucial characteristic of a weed plant is its ability to produce buds with a good flower-to-leaf ratio, and GG4 Sherbet FF is a prime example. Such buds not only have greater bag appeal but also make the trimming process, one of the most tedious tasks in cannabis cultivation, more manageable.

During this period, careful attention to feeding is essential as plants demand greater quantities of nutrients than ever. A PK-booster, one of many available in the market, can be beneficial. Phosphorus (P) and potassium (K) play a pivotal role in flower production, reaching their peak demand during this stage. Proper feeding ensures the plants receive the necessary nutrients for optimal bud development.
9. Ripening And Harvest | Week 12 (And Beyond)
In the final few weeks, you run the highest risk of getting powdery mildew, bud rot, and especially mold in your garden. Huge and dense buds are especially susceptible to them, so you should make sure the RH stays around 35-40% and there's plenty of airflow both around the plant tops and inside the canopy.
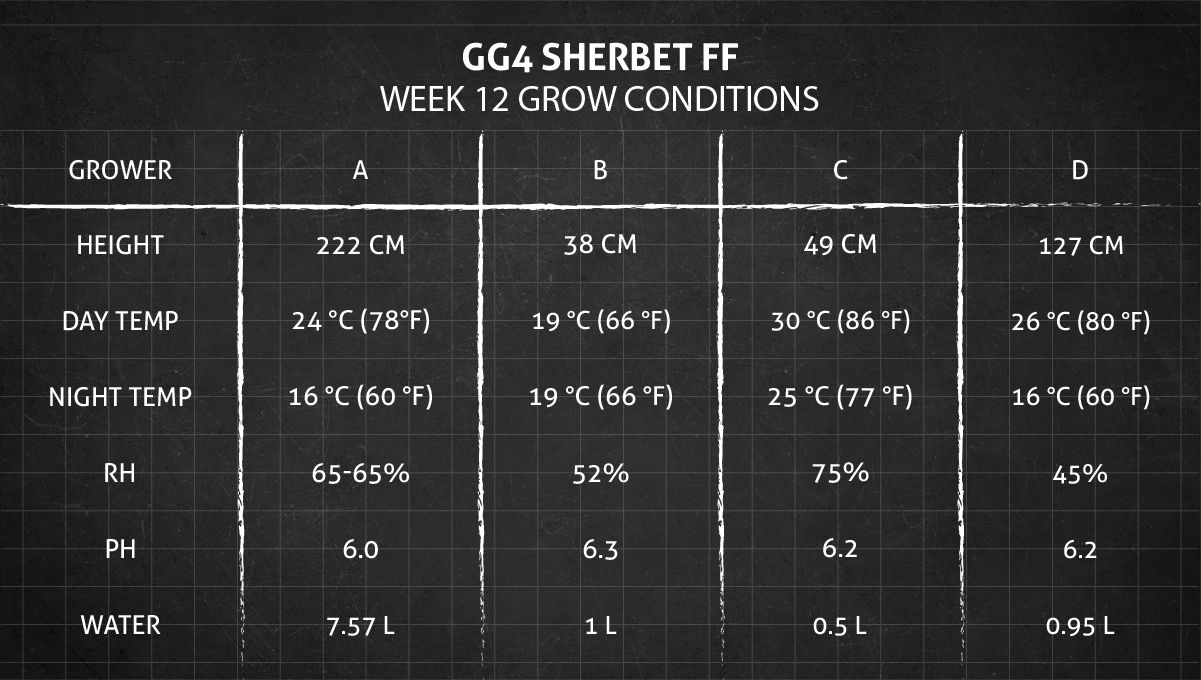
As your plants approach the harvest, the primary challenge is determining the precise moment for harvesting. This can be challenging not only because novice growers are eager to try their first harvest but also because buds may appear perfectly mature when they are not. Even if growth stops and development seems halted, crucial though invisible changes continue.
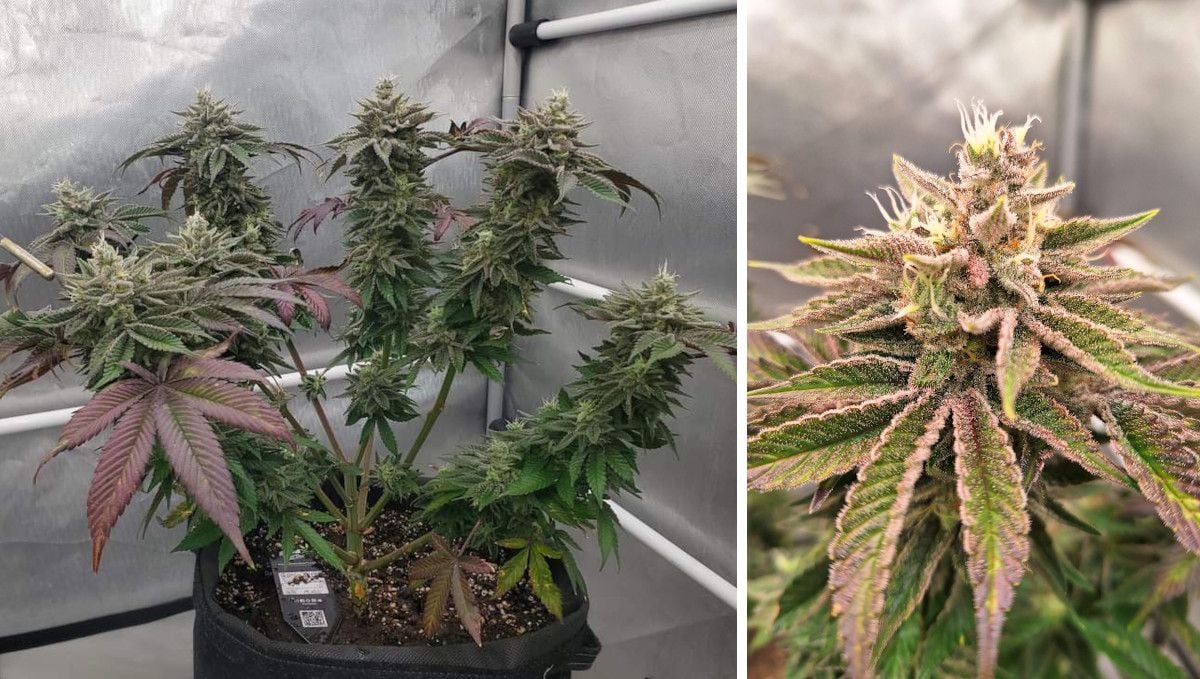
An early sign of impending harvest is the change in the color of pistils, transitioning from greenish white to brown as they mature. However, this sign is unreliable, as some seemingly mature buds may still have a way to go in cannabinoid content, and vice versa.
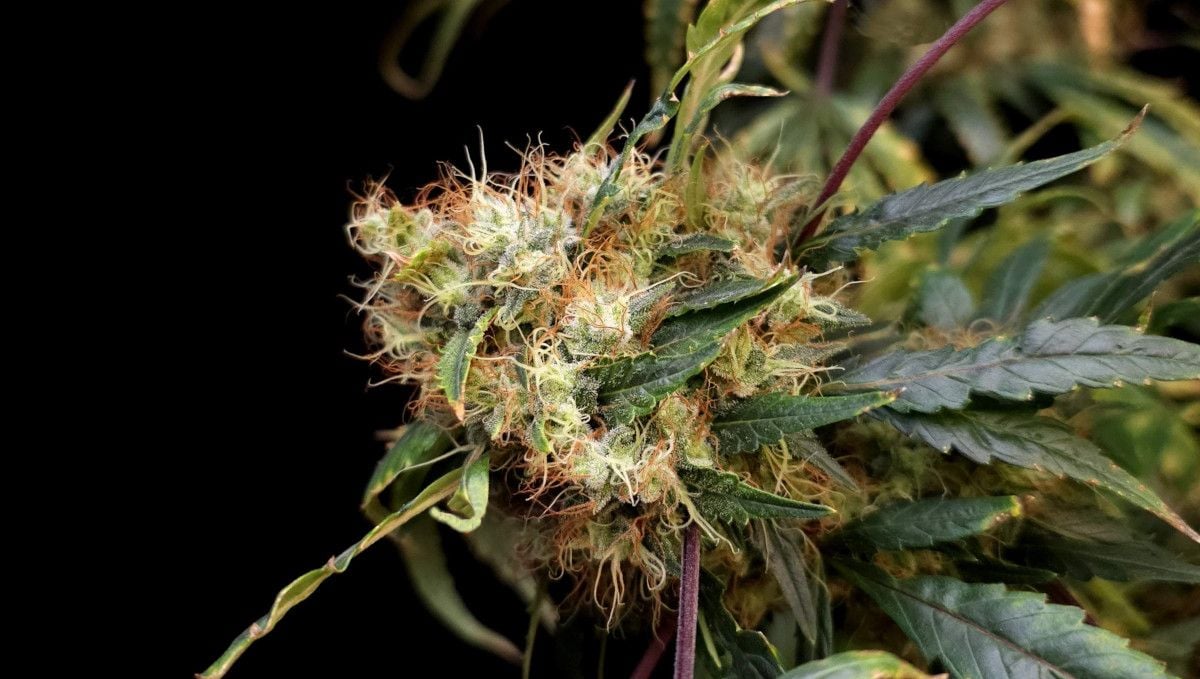
The aging process accelerates in the final weeks, leading to the yellowing and dying off of leaves. Fading leaves serve as another indicator for the gardener to prepare for the approaching harvest.
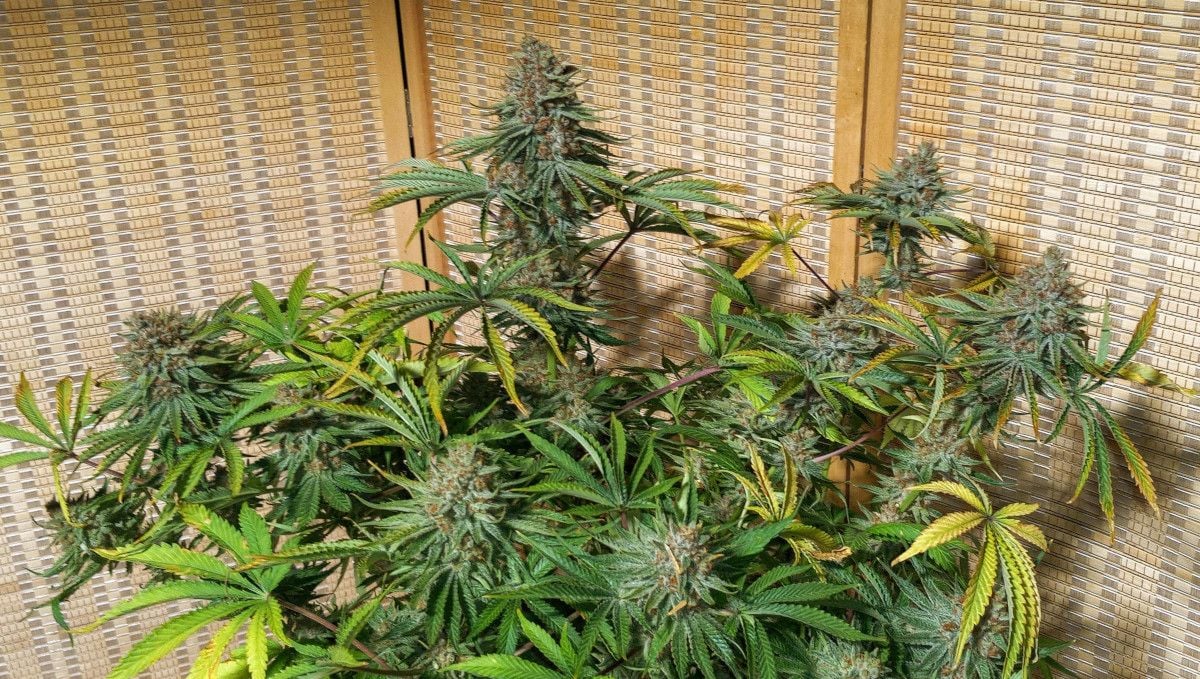
Weed growers have developed a reliable method for determining harvest readiness by closely inspecting trichomes under a hand microscope. Trichomes, housing THC, other cannabinoids, and terpenes (aromatic substances), are too small for the naked eye but clearly reveal their color under a 60x jeweler's loupe. Opaque trichomes indicate that the peak amount of active substances has been stored.
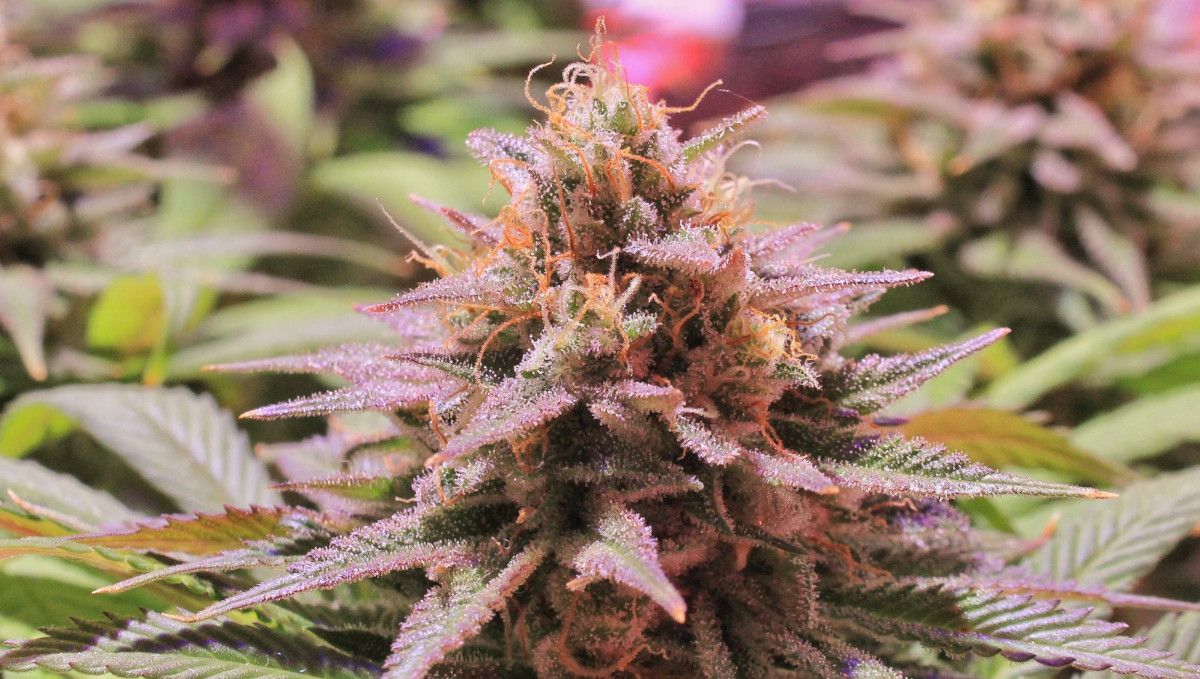
While eagerly awaiting the plants to be harvest-ready, one crucial chore to perform is the final flush. This involves ceasing nutrient supply and providing pure water for the remaining cycle. The final flush, lasting 1-2 weeks depending on the medium used, significantly improves the smoke's flavor. Even in organic or outdoor cultivation, flushing with water is necessary.
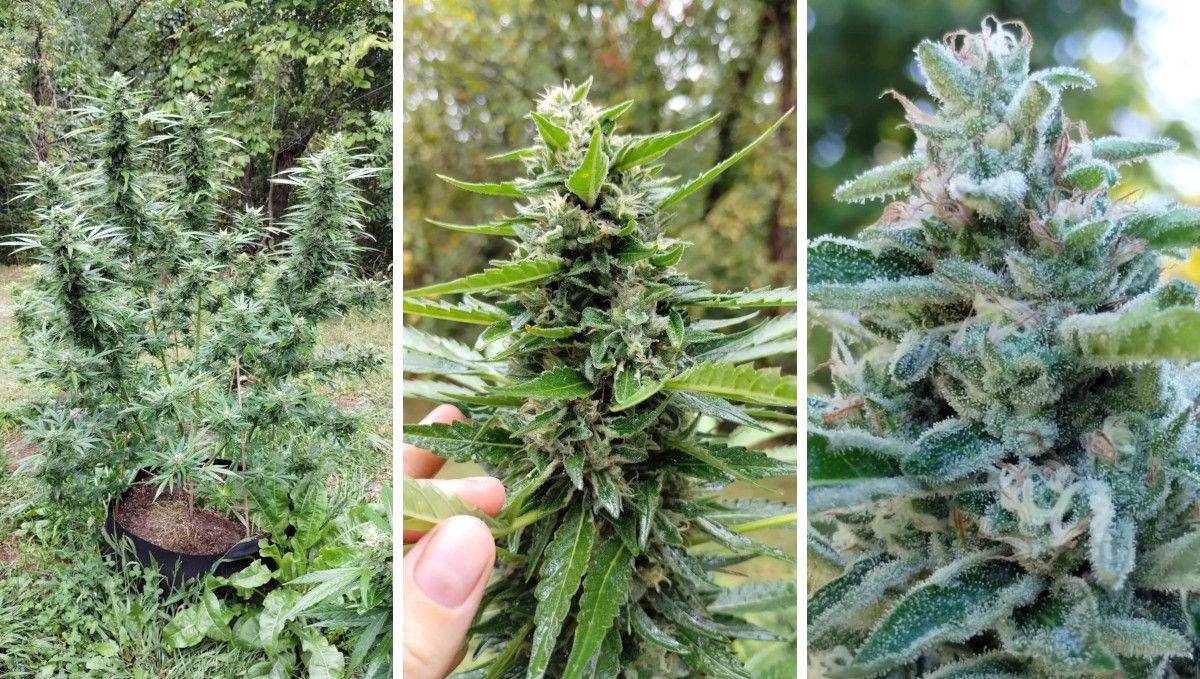
As the plant approaches its final days, pre-trimming some foliage while it's still in its pot can make post-harvest efforts much more manageable. Trimming, a tedious and labor-intensive task, becomes easier with some preparation in advance.
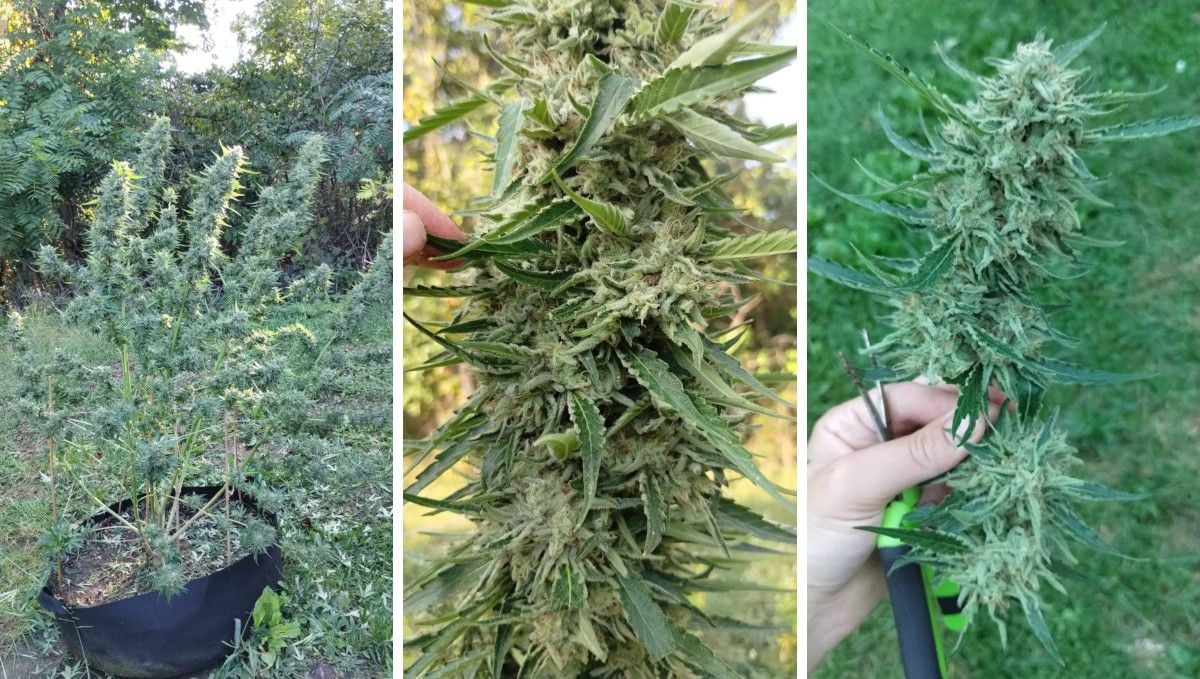
Experienced weed growers refrain from rushing to test their buds immediately after harvest. The finished product requires additional processing to reach its peak potential in terms of potency, aroma, and taste. This involves slow drying of cut branches for around 7 days in a cool, dark, well-ventilated space, followed by cutting off the buds and curing them for at least another 10 weeks in glass jars. A prolonged cure enhances smoke potency and contributes to a more nuanced and unique high.
10. The Outcome
As you can see for yourself in the table below, GG4 Sherbet FF only takes a couple of weeks more on average to mature than an autoflower, while the productivity is compared to the best of autos out there. Of course, the grower has the option of extending veg - either by postponing the 12/12 switch indoors or planting the seeds earlier in the spring outdoors - and thus get a much bigger plant and consequently more generous yields.
GG4 Sherbet FF Yield
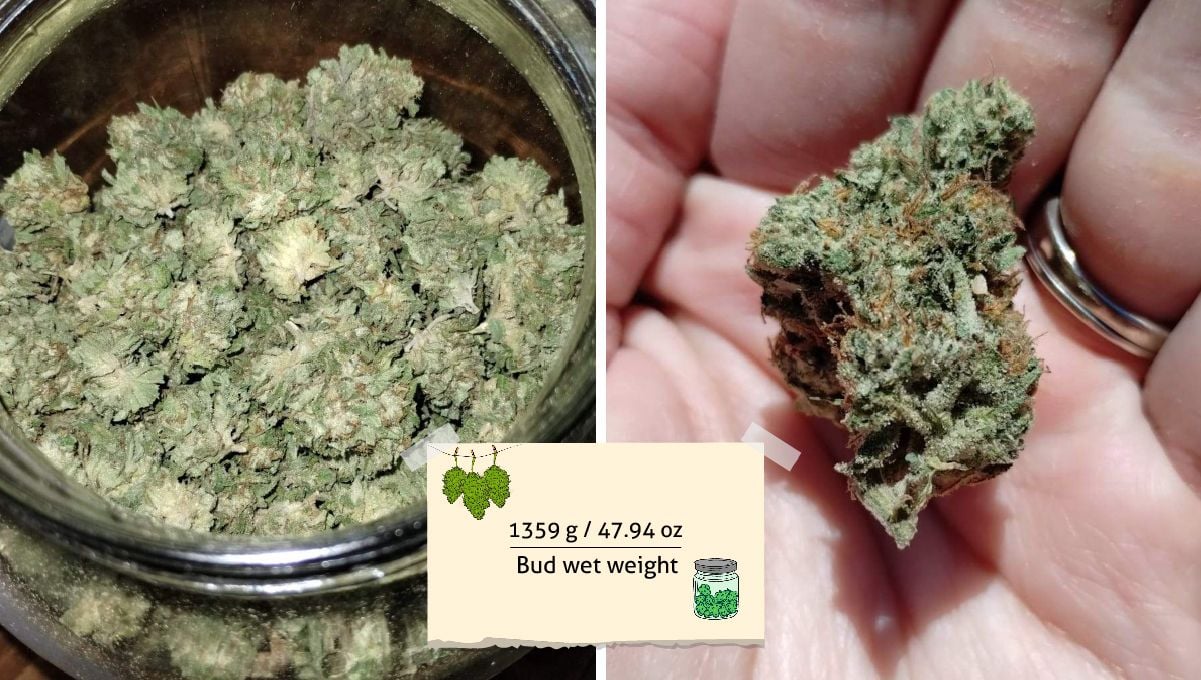
The first grower in our review and the only one who had tried GG4 Sherbet FF outdoors got 1359g (47.94 oz) of bud that could rival indoor-grown product in density and resin production.
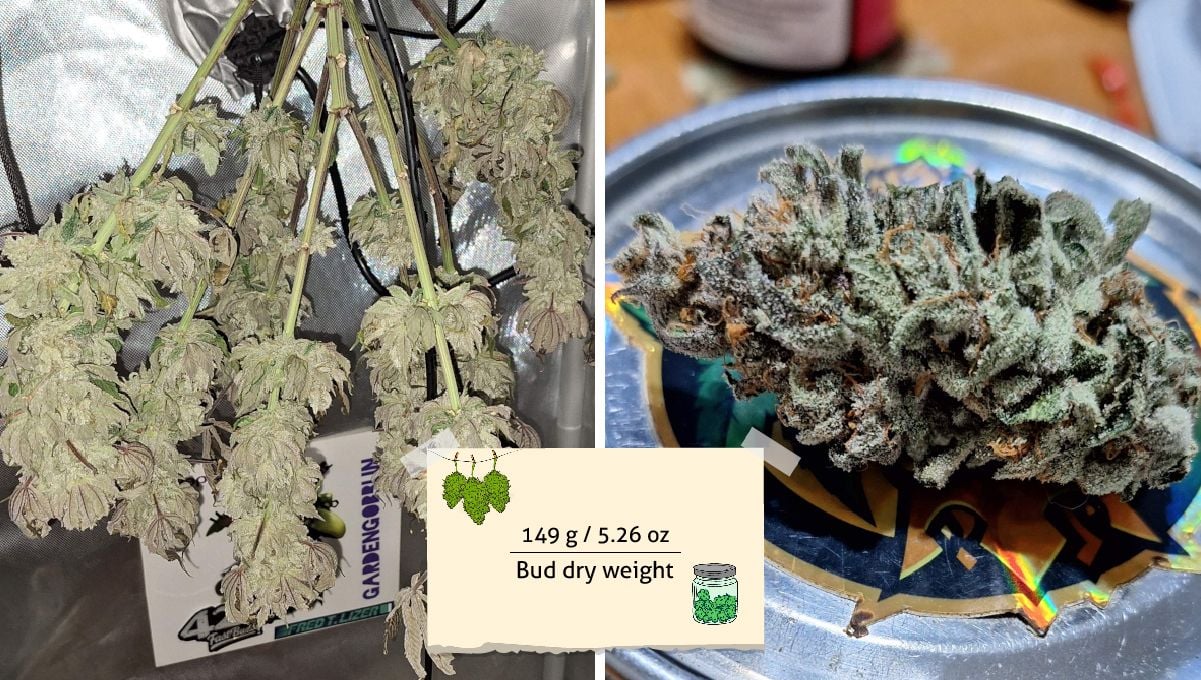
The second grower kept his GG4 Sherbet FF deliberately small but nevertheless, managed to harvest a repsectable 149g (5.26 oz) from his one plant.
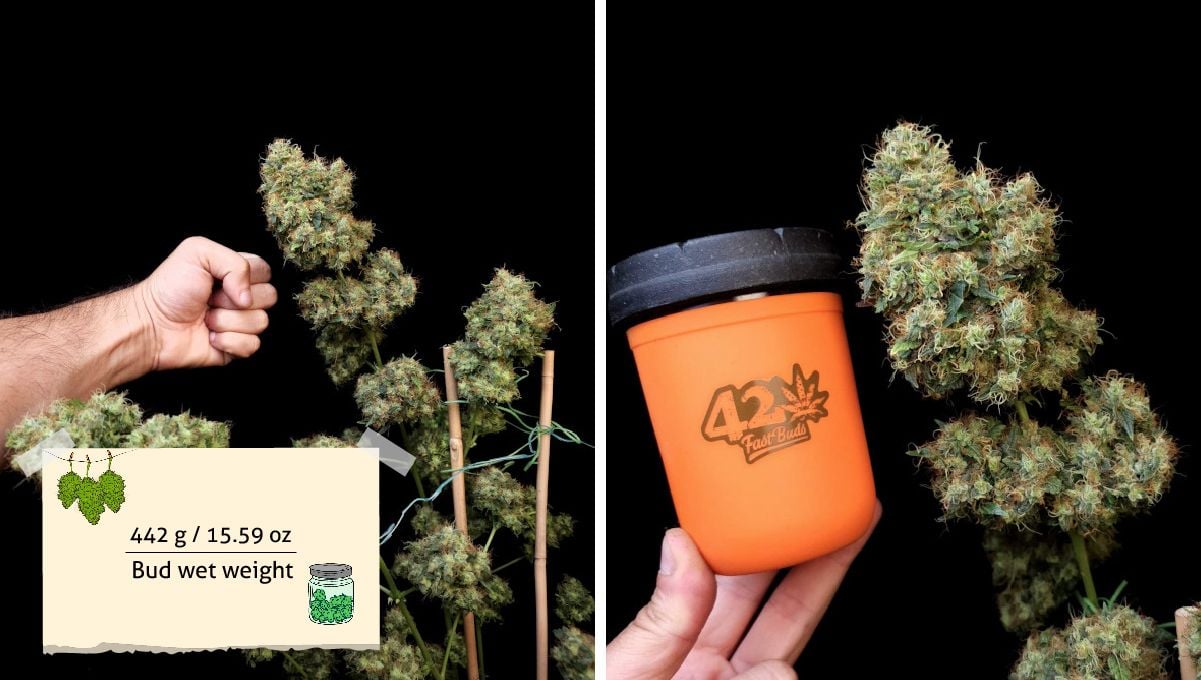
The third grower, with his vast experience in weed cultivation, grew almost fist-size buds on his one GG4 Sherbet FF plant and got as much as 442g (15.59 oz) of closely-trimmed Sativa-like flowers.
The fourth gardener's plant wasn't big but had exceptionally dense flowers that brought him 191g (6.74 oz) of top-notch smoke from two plants.

GG4 Sherbet FF Smoke Report
The smoke reviews for GG4 Sherbet FF consistently emphasize its potency and long-lasting effects. The aroma is often described as strong, with earthy, peppery, gassy, and citrus notes, creating a delightful olfactory experience. The taste profile varies from earthy to sweet, with a tropical flavor mentioned in one review. The effects induce a powerful high that starts with a happy and mood-improving sensation, settling into a relaxing and comfortable state.
Users note that it's suitable for both day and night use, although caution is advised during the day due to its strength. The strain's ability to induce deep contemplation, relaxation, and contentment without causing debilitating effects is highlighted. Overall, GG4 Sherbet FF is celebrated for its impressive scent, taste, and versatile effects, making it a compelling choice for various occasions and times of the day.

10. In Conclusion
Let's recap what we have learned about GG4 Sherbet FF while following these several grow diaries. First of all, this is a truly early-finishing outdoor strain and as such, could become a great addition to the gardens in regions with cooler climates and shorter summers.
Indoor growers seem to eagerly embrace this strain as well and get very respectable results in just a few weeks longer than they would with an autoflower.
GG4 Sherbet FF responds well to such HST techniques as topping, but we recommend to start it only after the vigorous vegetative growth has kicked in, signaling the plant's overall strength and health. If you apply topping too early, you may stunt the plant and then will need to give it some time to recover.
Also, don't expect that topping will automatically result in a more compact plant: you'll just get several side branches instead of one central stem surrounded by shorter branches, but they all will tend to get tall anyway. To control the height, apply LST.
Most plants will produce an above average amount of resin, and this will start early on, promising great potency at harvest but also creating an issue with a pungent and penetrating smell. By all means, install a carbon filter right from the start.
As you can see, these are only minor considerations that will help you achieve better results, but overall, GG4 Sherbet Fast Flowering is a strain that is as easy to grow as it's rewarding and will suit a gardener of any experience level. Happy growing, everyone!



Comments