


Liberty Haze Cannabis Strain Week-by-Week Guide
- 1. Grow specifications
- 2. Grow set up
- 3. Germination and seedling stage | weeks 1-2
- 4. Early veg | weeks 3-5
- 5. Mid veg | weeks 6-7
- 6. Transition (pre-flower) | weeks 8-9
- 7. Early flower | weeks 10-11
- 8. Mid flower (bulk phase) | weeks 12-13
- 9. Ripening and harvest | weeks 14-15
- 10. Yield and smoke report
- 11. In conclusion
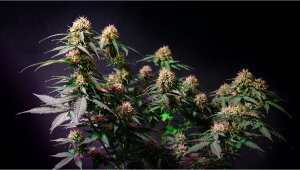
Liberty Haze is one of the most popular cannabis seeds in Barney’s Farm collection. Its name may suggest a strong Sativa heritage, but actually, this plant is a balanced hybrid, and it shows in both the growth characteristics and the effect. This plant is compact and fast-flowering and produces long colas that are easy to trim and smell fruity and fresh. The high THC content makes Liberty Haze a super potent but stimulating smoke, perfect for social occasions.
Our Liberty Haze week-by-week guide is based on one of the many grow reports that can be found online. After a 7-weeks-long vegetative phase full of action – two transplants, topping, and a lot of LST – the gardener induced flowering for his 8 plants and harvested 17 ounces (482 grams) of bud after another 8 trouble-free weeks.
1. Grow Specifications
With G13 and ChemDawg 91 as her parents, Liberty Haze is a hybrid that has only a slight Sativa dominance – 60/40 – and produces medium-size plants both indoors and outdoors. The growth isn’t impressive in veg during which the strain keeps a very short profile. However, once the flowering begins, she starts to stretch, with very thin and long branches that need support. The ultimate height seldom reaches more than 100-110 cm (about 3.5 ft).
You won’t wait long until the buds mature – usually about 60-65 days from the moment you switch to 12/12. Outdoors, the harvest time also comes relatively early – in the 1st or 2nd week of October. Given the high number of branches and their length, it’s no surprise Liberty Haze is very productive and yields up to 600 gr/m2 (2 oz/ft²). These copious amounts are also top quality as the buds are extremely resinous and pack up to 25% THC plus a hefty 2% CBD and a rich mix of terpenes with the dominant notes of citrus, pine, earth, and skunk.

2. Grow Set Up
Thanks to the huge popularity of Liberty Haze, it’s not a problem finding any number of grow journals online. And since the strain is so stable, there are many similarities across different grow cycles. We’ve found one grow report that has enough detail and pics and where the grower used a pretty standard setup and equipment and employed pretty standard growing techniques. We thought that this would make our week-by-week guide the most instructive.
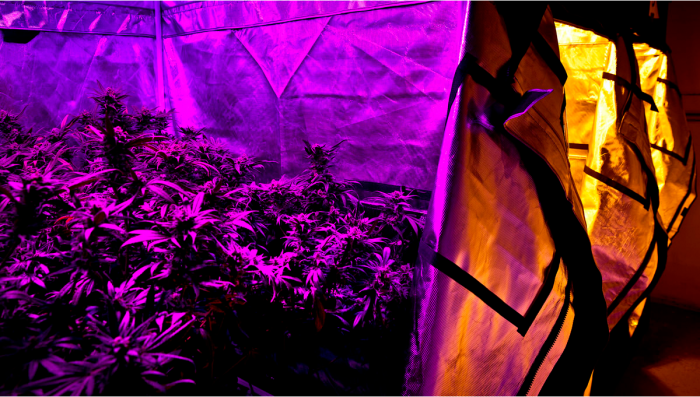
The grower with the nickname TheGreenQueen420 put her eight Liberty Haze plants in a 1.2 m2 (13 ft2) grow tent equipped with an 1100-watt LED light. It’s a lot of watts for this square area and very likely to cause issues with too high temperatures. On the other hand, you can count on a larger-than-average harvest when you use powerful lights. (As was exactly the case here.)
| Grow Space: | 1.2 m2 (13 ft2) | Pot Size: | 19 l (5 gal) |
|---|---|---|---|
| Seed to Harvest: | 15 weeks | Medium: | Soil/perlite |
| Flowering: | 8 weeks | Nutrients: | Organic |
| Light Cycle: | 18/6 → 12/12 | pH Levels: | 6.2 |
| Light Type: | LED | Day Temperature: | 26-28°C (79-82°F) |
| Watts Used: | 1100 | Humidity: | 60% ↘ 45% |
3. Germination And Seedling Stage | Weeks 1-2
It’s best to give your plants a headstart in life by utilizing a good and reliable germination method. And, without doubt, the best one is the easy and straightforward paper towel technique that was employed in this grow. To do this, you pre-soak the seeds for several hours in a glass of water (or skip this step because it’s optional) and then place them between wet paper towels. Provided with moisture, some air to breathe, and warm temps of around 25°C (77°F), a good viable seed will germinate without fail.
| Plant Height: | 2.5-3“ (6-7.5 cm) | Day Temp: | 81°F (27°C) |
|---|---|---|---|
| Distance to Light: | 23.5“ (60 cm) | Night Temp: | 73°F (23°C) |
| pH: | 6.1 | Humidity: | 60% |
It generally takes between 12 and 48 hours for the seed to crack. You may plant it as soon as you see this, but better don’t rush it. Wait till the taproot reaches something like 0.5-1 inch in length (1-2 cm) and THEN plant it. In this case, seedlings seem more vigorous and pop from the ground faster.
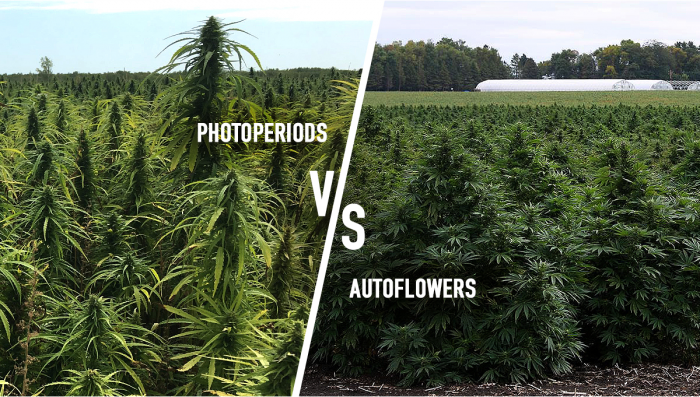
With autoflowering strains, the general recommendation is to avoid transplanting, but photoperiod varieties like Liberty Haze will benefit if you first put the seedling into a starter container and repot her once or twice as she grows. This makes watering much easier as it’s difficult to calculate the volume and the frequency of watering when the plant is small and the container is large.

The nursery bags that you see in the pic above not only help avoid overwatering but provide the roots with enough oxygen to breathe. The other thing that helps oxygenate the medium is the use of perlite. Perlite pieces create air pockets and thus protect the roots from ‘drowning’. Many soilless mixes come pre-amended with perlite.
In this case, the medium was BioBizz All-Mix which the manufacturer describes as ‘heavily pre-amended’ with organics. All you have to do is water it once at the same time as you start the germination process, and in a day or two – that is by the time your beans are ready to be planted – the microbial life in the mix will wake up and start to proliferate. There’ll be enough nutrients to last your young plants for at least the first two weeks. All you need to do is to add water. And the best part is that you don’t even have to worry about pH and EC – that’s the beauty of organic growing.

The grower decided not to add any more perlite to the soil because she didn’t like how extra perlite tended to float to the top when watering (it really does). Instead, she mixed in extended clay pebbles, for the same purpose – to help aerate the medium. She also decided to use not just plain water but add some BioBizz Root-Juice (0.5 ml/l) which is yet another way to populate an organic medium with beneficial microbial life. You can use this amendment both in veg and through the different stages of flowering, but it’ll be especially beneficial in the vegetative phase when the root ball grows the most.

Of course, the products described above are just a drop in the ocean of hundreds of nutrient lines that modern cannabis market offers. The table below shows a totally different (but probably no less effective) feeding schedule.

By week 2, the plants were strong enough for the first transplant to which they reacted quite well, without any pause in their progress.

4. Early Veg | Weeks 3-5
After cannabis has grown a sizeable root ball in the first couple of weeks from seed, it starts growing exponentially – with leaves getting bigger and bigger and new leaves and side shoots appearing every day. This is the time when soil growers usually start to add extra nutrients to the water. However, if you use large containers with a lot of rich medium, it’s not necessary yet, and in the so-called super soil, you can grow a smaller plant, such as an autoflower, from seed to harvest using nothing but plain water.
| Plant Height: | 4-10“ (10-25 cm) | Day Temp: | 82°F (28°C) |
|---|---|---|---|
| Distance to Light: | 20“ (51 cm) | Night Temp: | 73°F (23°C) |
| pH: | 6.5 | Humidity: | 60% |
The 8 Liberty Haze girls perked up really quickly after the transplant and soon had huge leaves and a dense structure. They still received nothing but water and Root-Juice. The gardener thought better of training them at this point because she planned another repotting and didn’t want to add more stress on top of that.

In week 4, the second transplant happened. This time, the girls didn’t react that well to the procedure and looked a bit tired for a while. Maybe because they went into a bigger tent with much more powerful lights at the same time.
When cannabis has just been transplanted, it needs time for the roots to adjust and you should go easy on light intensity and make sure all other conditions are as mild as possible. So dial down the lights (if they’re adjustable) or increase the distance to plant tops for a while.

After all the Liberty Haze ladies recovered and resumed growth, the gardener started training them. She used mainlining technique which only the most optimistic of growers use on autoflowers (because it’s so stressful) but which is perfectly okay for photoperiod varieties.
In the textbook version of mainlining, you only keep one node (usually the 3d) and proceed from there. This particular grower kept two nodes – the third and the fourth – after the plant had grown to about six nodes. When the tops are removed, you start with the LST which simply means bending the branches and tying them down in a horizontal position. Your goal is to make the canopy as flat as possible so that every top receives the exact amount of light.

Around this time, the girls also received their first helping of nutrients – BioBizz Bio-Grow which is an organic formula for the vegetative phase. Out of the three macronutrients (those that are essential for any green plant), cannabis now needs nitrogen (N) the most while phosphorus (P) and potassium (K) are of lesser importance. So, when you choose a veg fertilizer, choose one that is heavy on N. You can easily find this info on the label – just look for N-P-K figures.
Also, it’s not necessary to give nutrients with every watering. You can do it every other time, especially if you use full doses recommended by the manufacturer. However, we recommend starting with something like 1/4 or 1/2 of the recommended dosage and then working your way up while constantly monitoring your plants’ health.
Too high doses may manifest in the symptoms of nute burn (scorched leaf tips) or different lockouts and deficiencies. By going easy on the nutes, on the other hand, you only risk slower growth which is an issue that is easy to remedy – just increase the use of nutrients little by little during subsequent waterings.
Another thing the gardener decided to do this time compared with the previous grows was to heat the water to 21°C (70°F). For most soil growers, this isn’t an issue because room temperature is usually a bit higher anyway. In hydro setups, however, water temperature is very important because when it’s too high, it can hold less dissolved oxygen and it isn’t good. And when it’s too low, the roots experience cold stress. As a rule of thumb, anything between 20-25°C (68-77°F) is good.
5. Mid Veg | Weeks 6-7
The vegetative phase can go on autopilot if you let your cannabis grow naturally. Or it can be a very busy period if you decide to train your plants. Canopy management is a powerful method of increasing yields indoors, but make sure you finish it before the start of cannabis flowering stages.
| Plant Height: | 10“ (25 cm) | Day Temp: | 82°F (28°C) |
|---|---|---|---|
| Distance to Light: | 20“ (51 cm) | Night Temp: | 73°F (23°C) |
| pH: | 6.2-6.3 | Humidity: | 60% |
The gardener continued with the mainlining for another two weeks by spreading the four main shoots of the Liberty Haze plants sideways and pruning secondary shoots around the middle. It didn’t take the girls long to grow almost as much foilage as before after each pruning or defoliation session.

The grower hadn’t increased the dosage of nutrients just yet, knowing how rich the AllMix soil was and consequently how easy it was to overfeed the plants. She just gradually increased the amount of water. Now, the plants were getting their watering every 3 days – sometimes with extra nutrients and sometimes without them.

Another issue that needed addressing was too low night temps. When the lights were out, the grow tent needed heating. Actually, you can avoid this nuisance in veg by running your lights 24/7. And with autoflowers, you can keep the lights on from seed to harvest. Otherwise, make sure that night temperatures don’t drop more than 5-10 degrees compared with the day temps. And in absolute figures, they shouldn’t go lower than 17-20°C (62-68°F).
6. Transition (Pre-Flower) | Weeks 8-9
While autoflowers transition to budding automatically and do it regardless of the light schedule you use, with photoperiod varieties, you need to switch your timer to 12 hours of light and 12 hours of darkness to induce flowering.
The question of when to do it is a tricky one. Generally, look at the size of your plants and imagine how they’ll look like when they grow two or three times bigger. Because that’s the first thing that happens in flower – the plants explode. So, owners of small grow tents induce flowering after only short veg, others have all the space they need and grow their cannabis until it gets tall and branchy.
Still other gardeners wait for the first signs of maturity – which are alternating nodes and the appearance of the first white pistils at the nodes. However, size is the single most important consideration.
| Plant Height: | 22“ (56 cm) | Day Temp: | 82°F (27°C) |
|---|---|---|---|
| Distance to Light: | 20“ (51 cm) | Night Temp: | 73°F (23°C) |
| pH: | 6.3-6.4 | Humidity: | 60% |
During the flowering stage, the need for nutrients changes radically, so have a new bottle of nutes at hand – one that has more P and K than N. It’s debatable when the best time to switch to flowering nutrients is. Some people do it the same week they flip their timer to 12/12, others wait till the pre-flowering stage is over and proper flowers begin to form. There are even those who prepare their cannabis for the flowering time by giving it PK-rich nutrients in advance (however, it’s hardly necessary).
This gardener added the blooming nutrient – BioBizz Bio-Bloom – as soon as she began 12/12. Later, she would add the third essential component in the BioBizz organic three-part formula – Top-Max. Together, all three contain not only all essential macro- and micro-nutrients but also natural hormones, enzymes, and amino acids for vigorous growth. See below the full schedule for this Liberty Haze grow:
| Nutrients, ml/L | 5–6 | 7 | 8 | 9 | 10 | 11 | 12 |
|---|---|---|---|---|---|---|---|
| Bio-Grow | 0.25 | 0.33 | 0.5 | 0.5 | 0.5 | 0.5 | 0.5 |
| Bio-Bloom | 0.25 | 0.5 | 1 | 1.5 | 2 | ||
| Top-Max | 0.5 | 0.5 | 0.75 |
As the breeder notes, Liberty Haze tends to stretch big time in flower, after rather slow veg, and this is exactly what happened in this grow. As a matter of fact, we’ve looked through many grow journals, and the trajectory was more or less the same.

7. Early Flower | Weeks 10-11
The two major developments at this stage are the flowering stretch and the emergence of clusters of pistils (white female hairs) on tops and later at every node below. Be sure that the stretch doesn’t come as a surprise to you and that you have enough vertical space.
If you can, decrease the day temperature now for a couple of degrees compared with the previous stage and start to slowly bring down the relative humidity. For now, high RH isn’t dangerous, but later, when the buds get big and dense, too humid conditions can result in bud rot or mold. By harvest time, the optimal level would be 30-35%.
| Plant Height: | 30“ (76 cm) | Day Temp: | 81°F (27°C) |
|---|---|---|---|
| Distance to Light: | 18“ (46 cm) | Night Temp: | 73°F (23°C) |
| pH: | 6.5 | Humidity: | 40-45% |
In this grow, there was an issue with one out of eight Liberty Hazes – some of the fan leaves became spotty and distorted. It’s not always easy to pinpoint the exact problem, but the gardener diagnosed it as tobacco mosaic virus and we agree that it was probably it.

A virus is a thing that can easily spread through the entire garden, so it’s safest to pull the affected plant. At the very least, sterilize your instruments whenever you prune or defoliate the sick plant so that you don’t infect the others. In this case, the problem didn’t spread any further, though.
Other than that, the buds were developing nicely and the girls only needed occasional defoliation and tucking in of the leaves that were shading the flowers.

8. Mid Flower (Bulk Phase) | Weeks 12-13
This is the point in the timeline when the flowers begin to really stack up and fill out. Remember to keep the heat and humidity in check. Cooler temps – in the 73-77 range (23-25°C) – and 40-45% RH would be ideal.
| Plant Height: | 30“ (76 cm) | Day Temp: | 81°F (27°C) |
|---|---|---|---|
| Distance to Light: | 18“ (46 cm) | Night Temp: | 73°F (23°C) |
| pH: | 6.2 | Humidity: | 45% |
During this period, cannabis is quite thirsty and hungry and can handle a rich diet with lots of phosphorus and potassium (P and K) and not too much nitrogen (N). The author of this grow journal kept mentioning that she was monitoring pH religiously. However, in organics, if you use good drinking-quality water and don’t exceed the recommended nutrient dosages, you can forget about pH. With synthetic nutrients, it’s a different story as their uptake by the roots is very sensitive to pH. In soil, the level should be around 6.0-6.5.

The colas of Liberty Haze kept packing on weight and since the branches were rather thin, they needed stakes for support. The grower also started to watch the state of the trichomes with a hand microscope. This is the only reliable way to know that the perfect harvest window is approaching. Since the trichomes – when seen through the hand loupe – looked cloudy, it meant that the girls had another couple of weeks, so it was about the right time to start the flush.

9. Ripening And Harvest | Weeks 14-15
The last couple of weeks in the life cycle of a cannabis plant should be dedicated to cleansing the medium and the plant itself from the excess nutrients that have been building up. The other important job for you is to watch the state of trichomes daily – when all of them are cloudy, the THC level in the buds has reached its peak values.

Later, THC starts to degrade little by little, turning into the more sedating cannabinol. This process manifests through the trichomes changing their color to amber. There are smokers who prefer to see a lot of amber trichs because they like their smoke to be more sedating and physical. Others love the energizing and clear-headed high. If you’re one of those people, don’t wait for amber.
| Plant Height: | 30“ (76 cm) | Day Temp: | 79°F (26°C) |
|---|---|---|---|
| Distance to Light: | 18“ (46 cm) | Night Temp: | 73°F (23°C) |
| pH: | 6.2 | Humidity: | 45% |
These Liberty Haze plants were receiving only plain water for the last two weeks. It’s not the only way to flush as there are many products on the market that are supposed to facilitate the process. But they’re optional. Provided that the flush is long enough – two weeks in soil and one week in hydro and coco – plain water will do the job just fine.
Please don’t forget that during the flush, plants get hungry and it shows – the leaves start to fade, especially the lower ones. It’s perfectly normal and even desirable. Cannabis that is too green has too much chlorophyll, and chlorophyll has a terrible taste. Long drying and curing take care of that, but a nice long flush helps the matter even more. As you can see in the pic below, the fade on Liberty Haze promises excellent quality.

10. Yield and Smoke Report
After 8 weeks in flower, the grower harvested a respectable 17 ounces (482 grams) of premium bud from her 8 Liberty Haze plants. As you can see in the pic below, this is a LOT of bud for a casual smoker.

The smoke was leaning a bit more to the Sativa side which made it perfect for any time of day. With buds like this, you can smoke a little to feel happy and creative and do your job in a perfectly good mood or smoke more to produce a deeper relaxation fit for late evening. The fruity flavor was also amazing.
Both night and day smoke. Absolutely perfect! Great for depression! Smell is amazing and Can taste a real lime flavour!
TheGreenQueen420

11. In Conclusion
If you’re looking for a satisfying experience growing photoperiod cannabis indoors, Liberty Haze will be the perfect choice for you. This Indica/Sativa hybrid may start slow and unimpressive in veg but show a lot of vigor once the flowering stretch kicks in. Such rapid stretching may present problems in setups with too little headroom, and you may want to think of ways of supporting the plant’s thin and long branches overburdened with thick and heavy colas.
By harvest time, this plant produces not only substantial flower mass but a lot of resin that smells fruity and strong and may require a powerful carbon filter. The flowering time isn’t long but together with unhurried veg, Liberty Haze will take about a month longer than an average autoflower. The yield is worth the wait, though. Happy growing!
External References

Comments